Do you want to add Google Maps to your WordPress website?
Adding content like maps, audio, and video to your site is an excellent way to create an interactive experience for your visitors. In addition, it’s a helpful way to give users the information they need to find your business locations.
In this article, we share several methods for adding custom Google maps to your WordPress site.
Before we start, what are the benefits of embedding interactive maps on your site?
Why Should You Embed Google Maps on Your Website?
You already know that embedding Google My Maps on your site is an excellent way to make your site interactive. But there are several other benefits that can help your business grow.
For example, an embedded Google map can:
- Help customers find a store near where they live with street view
- Show attendees the physical location of an event
- Illustrate blog posts that discuss specific locations
- Show the location of your headquarters
With a bit of creativity, you can use Google’s interactive maps to bring your website to life. And as a result, serve both your business growth and potential customers.
Getting a Google Maps API Key
Before embedding a Google map on your WordPress site, it’s a good idea to create a Google Maps API key, which Google now requires. To get a Google API key, follow the steps below.
1. Go to the Google Cloud Platform Console. You can create a free account if you don’t have one yet.
2. Select an existing project or create a new project
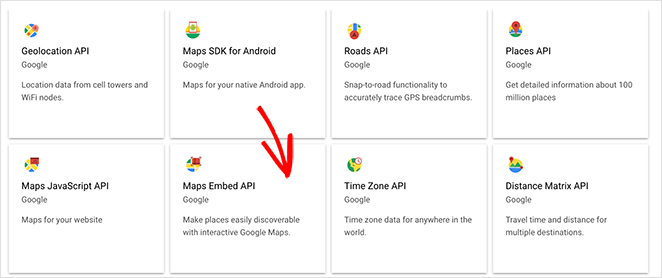
3. Choose the Maps Embed API and click Enable on the following screen.
4. Now navigate to the Credentials sidebar, click the +Create Credentials option and select API Key.
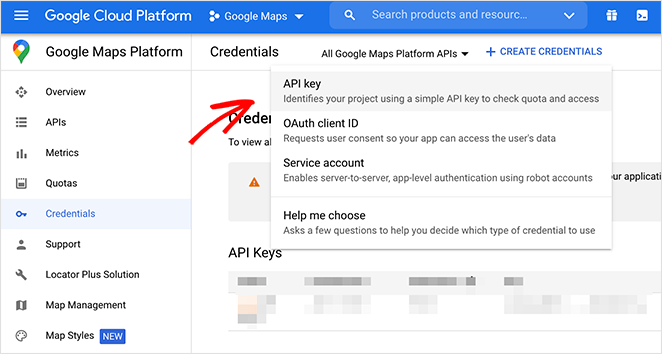
You should now have an active API key for Google Maps.
Now let’s dive into showing you how to embed Google Maps in WordPress.
1. How to Embed Google Maps in WordPress Landing Pages
The first method in this tutorial shows you how to embed Google maps on a landing page in WordPress. Landing pages are the best way to convert targeted traffic into leads and sales.
And the best WordPress landing page plugin for the job is SeedProd.
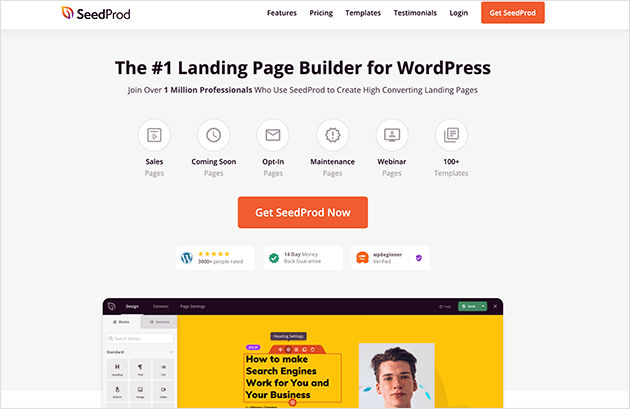
SeedProd is a drag-and-drop landing page builder that lets you create high-converting landing pages and WordPress themes without writing code. It comes with hundreds of responsive landing page templates you can customize in the visual front-end editor easily.
In addition, SeedProd has tons of smart content blocks for adding user-friendly content to your page, including:
- Google maps
- Contact forms
- Call-to-action buttons
- Pricing tables
- Image carousels
- Testimonials
- FAQ accordions
- Dynamic text
- Animated headlines
- Optin forms
- And more
As a result, you can spin up landing pages quickly without hiring a developer.
Follow the steps below to learn how to embed Google Maps in WordPress landing pages with SeedProd.
1. Download the SeedProd Landing Page Plugin
The first step is to download the SeedProd plugin to your computer. While SeedProd does offer a free version to create free landing pages in WordPress, we’ll use the pro version – SeedProd Pro. That way, we can use the advanced content blocks we mentioned earlier.
So click the button below to get started.
Next, install and activate SeedProd on your website. If you need help with this, you can follow this step-by-step guide for installing WordPress plugins.
Once you’ve installed SeedProd, you’ll see a welcome screen asking for your license key.

You can find your key by logging into your SeedProd account and clicking the View License Key, Details, and Downloads link.
After copying your key, paste it into the License Key field on your SeedProd welcome screen and click the Verify Key button.
2. Create a New Landing Page
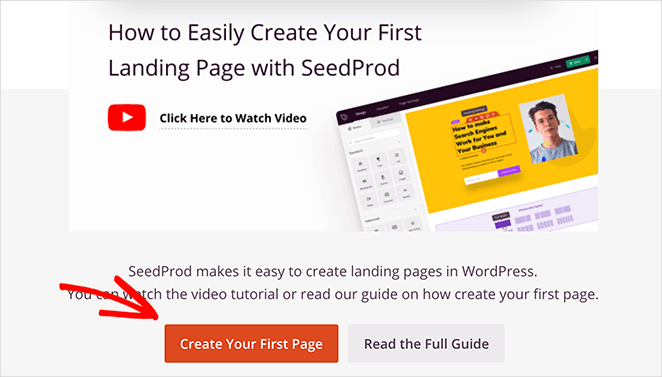
Now you can start creating your first page, so scroll down the welcome screen and click the Create Your First Page button. After clicking that button, you’ll head to SeedProd’s landing page dashboard.
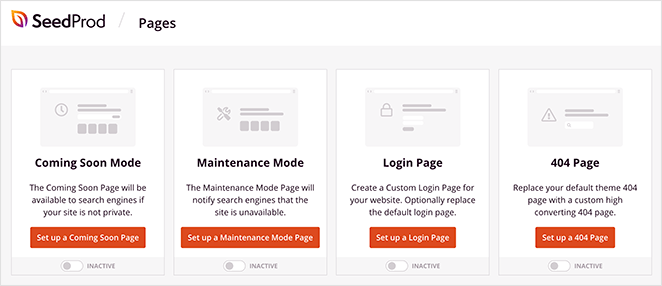
On this page, you’ll first see the different landing page modes available in SeedProd, including:
- Coming Soon
- Maintenance Mode
- Login
- 404
SeedProd’s page modes allow you to turn on different landing pages with a single click quickly.
For instance, you can quickly activate a maintenance screen when you’re performing minor updates. Or you can turn on a custom WordPress login screen to welcome registered users.
The main benefit of page modes is you won’t need to install separate WordPress plugins to get this functionality. SeedProd has it all built into a single compact plugin.
Below the page modes section is a list of every page you create with SeedProd. For now, you won’t see any pages listed.
To create your first page, click the Create New Landing Page button.

Clicking the button takes you to SeedProd’s landing page templates screen. Here you’ll see hundreds of professionally designed templates you can use as the foundation for your page design.

Along the top are different tabs to filter the designs, like:
- Coming Soon
- Maintenance Mode
- 404 Page
- Sales
- Webinar
- Lead Squeeze
- Thank You
- Login
Hover your mouse over any design you like and click the tick icon to import that template.

We’ll use the Opportunities template for this guide, which you can find under the Lead Squeeze heading.
After clicking the tick icon to import your template, you’ll see a popup asking you to enter a landing page name. Since your page name is automatically assigned to your landing page URL, name it something that makes sense to your visitors.
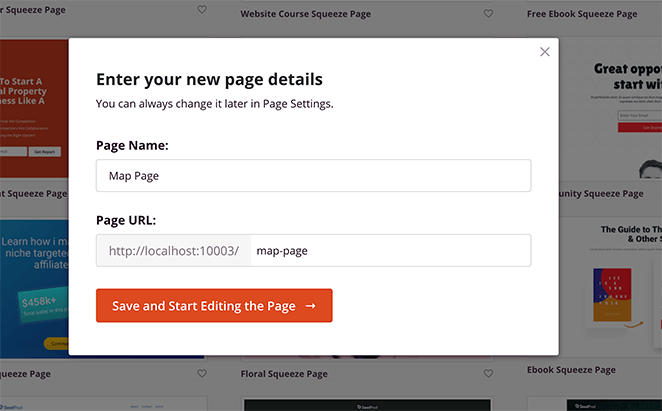
You can easily change this setting later if you make a mistake. So go ahead and click the Save and Start Editing the Page button.
3. Customize Your Page Design
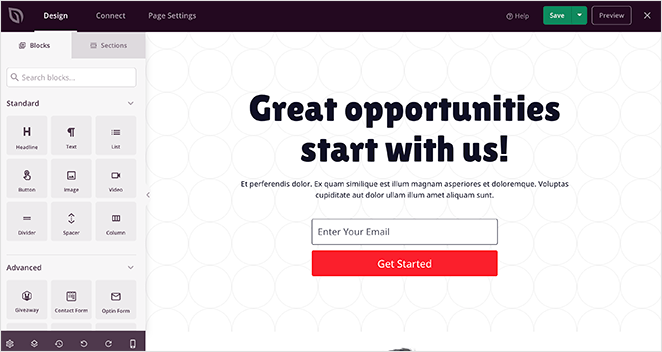
When you import your design, it will open in SeedProd’s visual page editor. The editor has a user-friendly 2-panel design to make customizing your page super-easy:
- Left panel: Page blocks and sections to build and customize your page
- Right panel: Preview of your how your landing page looks in real-time
Along the top of the editor is a navigation menu to quickly switch between your design, integrations, and page settings.

And at the bottom of the left-hand panel are several other icons to help you navigate your page, including:
- Global settings: Control the colors, fonts, and background of your page globally
- Layout Navigation: Quickly navigate to different parts of your design
- Revision History: Preview and restore an older version of your design
- Undo and Redo: Undo design changes or redo them quickly
- Mobile Preview: Preview the mobile design of your landing page
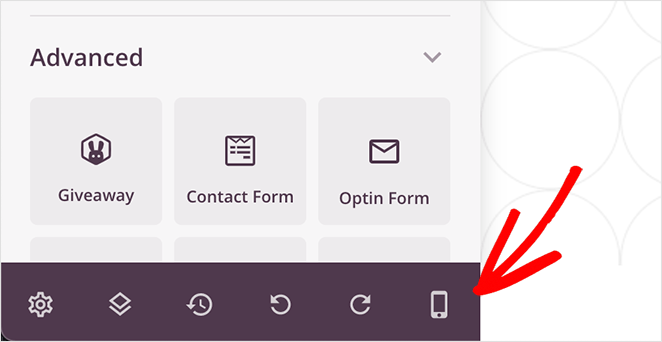
The above settings make it easy to customize your template to suit your branding, content, and marketing goals.
For example, clicking a page heading allows you to change the text color and more quickly see the changes in real-time.
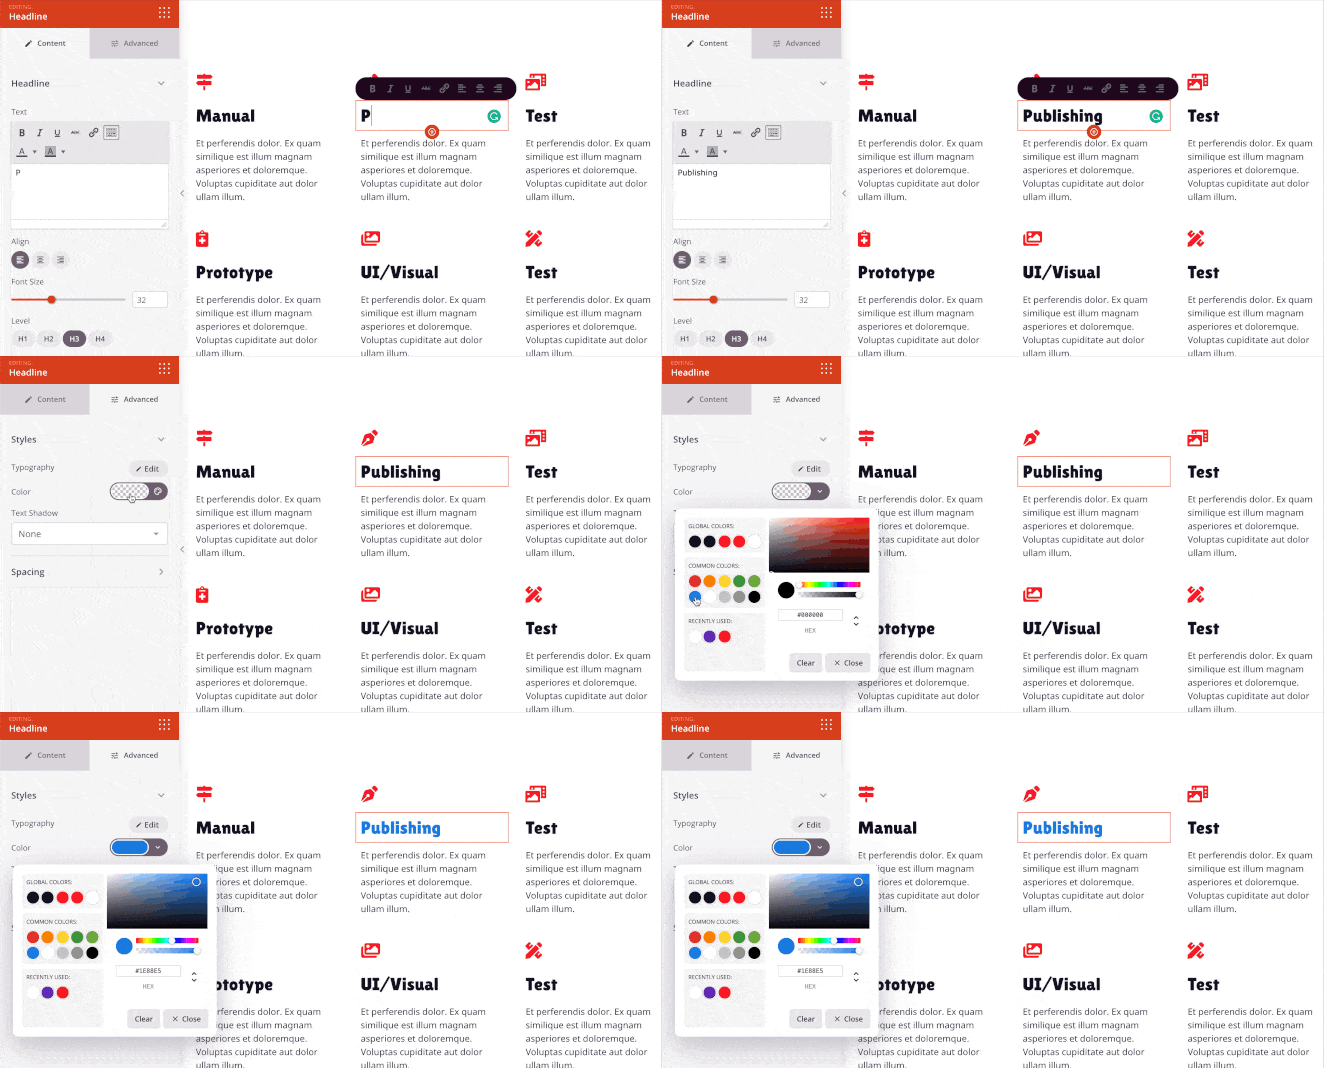
Or, if you’d like to change the default images, you can simply click an image to see the settings on the left. Then you can replace it with one from your computer, media library or choose a free stock photo.

4. Embed the Google Maps Landing Page Block
Adding a google maps widget to your landing page is straightforward.
From the left-hand panel, click the Google Maps block. Then you can drag it onto the section of the page you want it to go.
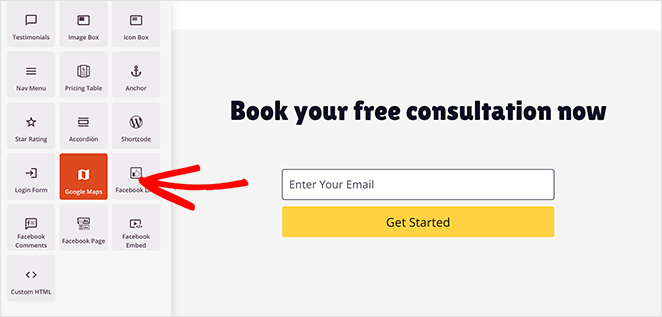
Clicking the Google Map block settings lets you quickly enter the location you want to show. You can then choose how zoomed in the map is, change the alignment, and adjust the map width.
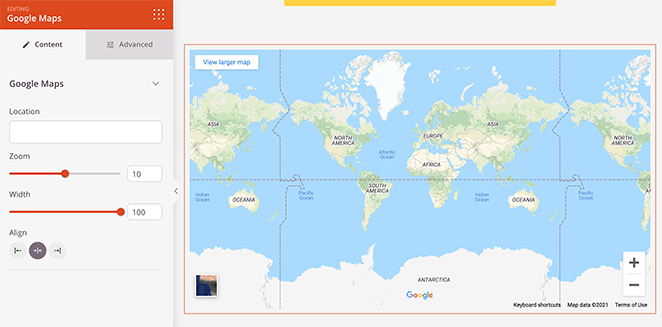
Selecting the Advanced tab lets you choose different border styles and adjust the spacing around your custom map.
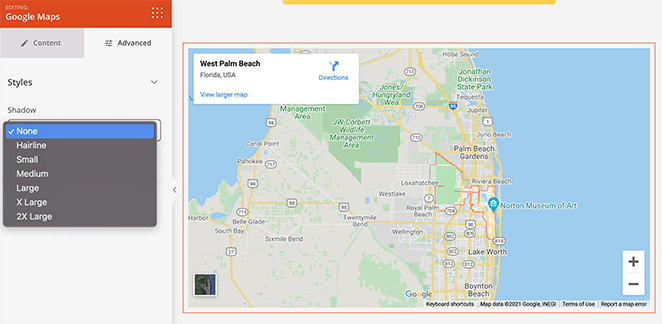
Continue customizing your landing page until you’re happy with how it looks. Remember to click the green Save button in the top-right corner to store your changes.
5. Configure Your Settings
With your design in place, there are a few settings you can configure before publishing your landing page.
SeedProd, lets you connect your landing page to your email list easily. So, click Connect at the top of the screen to see popular email marketing services. This makes it easy to ask users to subscribe to your newsletter and automatically add them to your email list.
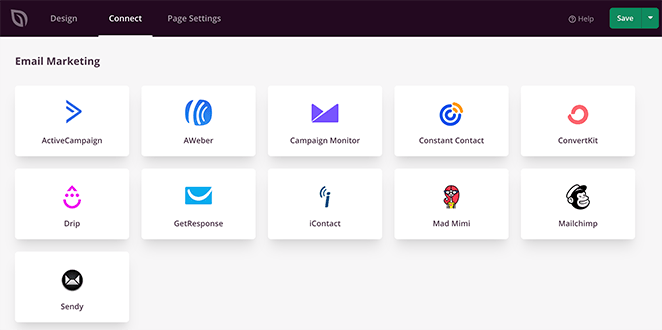
After connecting your email list, click the Page Settings tab for more options.

SeedProd offers 5 settings you can configure, but this often depends on the type of page you build and your current SeedProd plan.
- General: Edit your page name and URL or switch between published and draft.
- SEO: Configure your SEO settings with a WordPress SEO plugin.
- Analytics: Track your page’s performance with a Google Analytics plugin.
- Scripts: Add custom scripts to your page’s header, body, and footers, like tracking and retargeting pixels.
- Custom Domain: Give any landing page a custom domain that isn’t connected to your existing website.
After configuring your settings, save your changes and click back to the Design tab.
6. Publish Your Landing Page
Before publishing your page, it’s important to ensure your design is mobile-friendly. If it isn’t, mobile users will struggle to navigate your page, and you could potentially lose leads and conversions.
Luckily, SeedProd includes a mobile preview option to check that your page is mobile-friendly. Just click the mobile icon at the bottom of your screen.
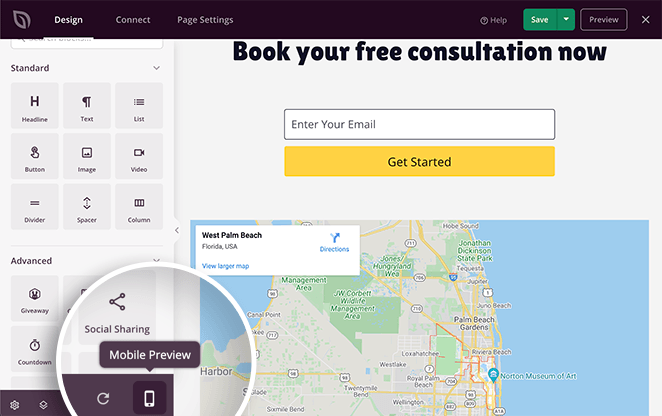
From there, you can see how your page looks on mobile devices and change anything that doesn’t look or work correctly.
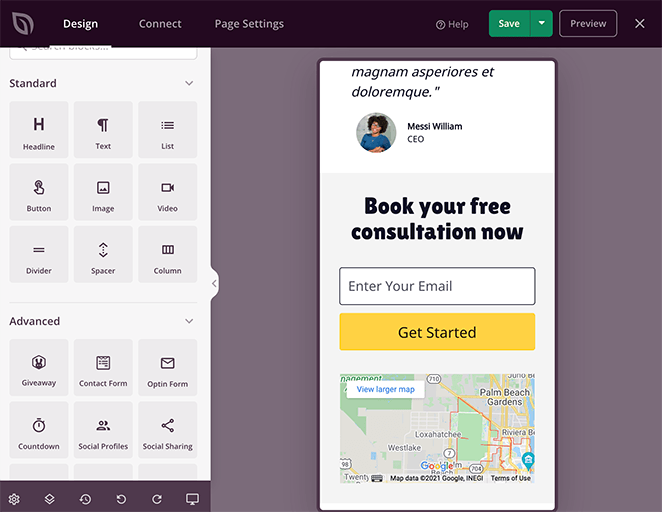
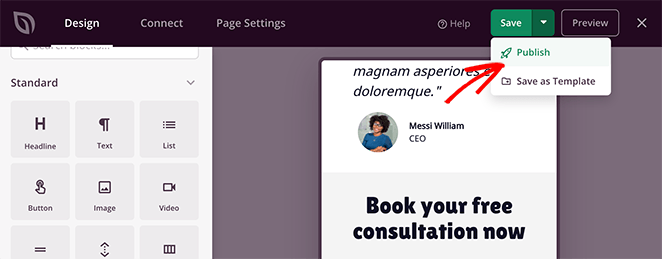
When everything looks good, click the down arrow next to the green Save button and click Publish.
Next, you’ll see a window telling you your page has been published.
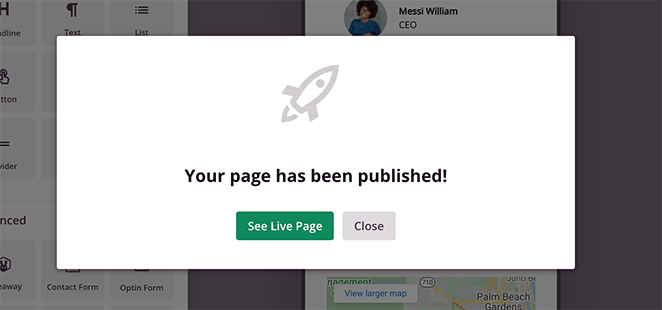
To see a live preview, go ahead and click the See Live Page button.

And here’s a preview of how your Google map looks:
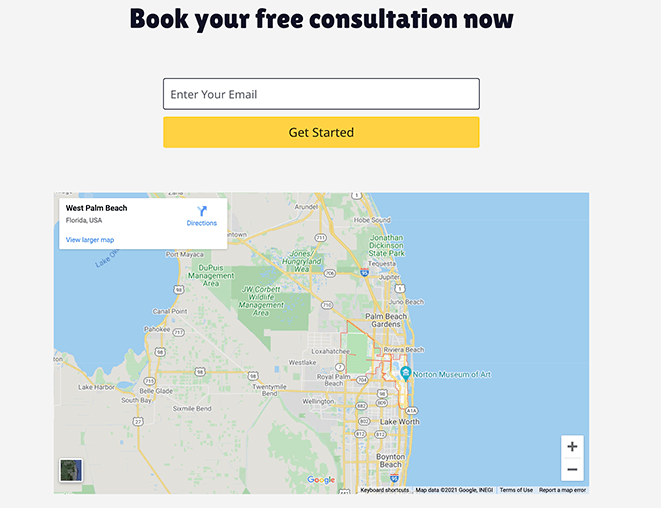
Great work! You now know how to add a google map to your WordPress landing page.
But what if you need to add the map to your WordPress posts? We’ll show you how to do that next.
2. How to Add Google Maps in WordPress Posts (With a Plugin)
We recommend using this method if maps play an important role in your business and you need to use them in multiple posts and pages on your site. Again we’ll use a WordPress plugin, and this time, we’ll use MapPress Maps for WordPress, a free wp Google Maps plugins.

So go ahead and install and activate the plugin on your WordPress dashboard to get started. Then click edit on the post or page you’d like to embed the map.
Inside your post or page, click the plus (+) icon in the block editor (Gutenberg) to add a new WordPress block. From there, search for the MapPress Map block and click it to add the map to your post.
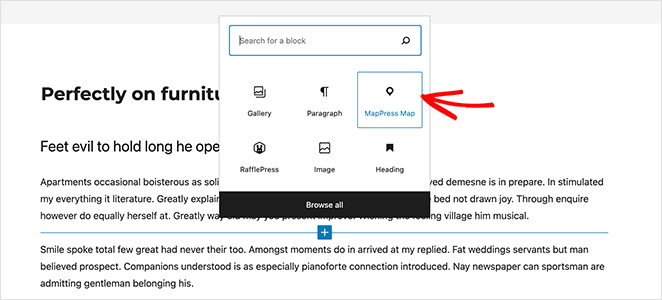
Now click the Map Library button, and on the following screen, select Add New.
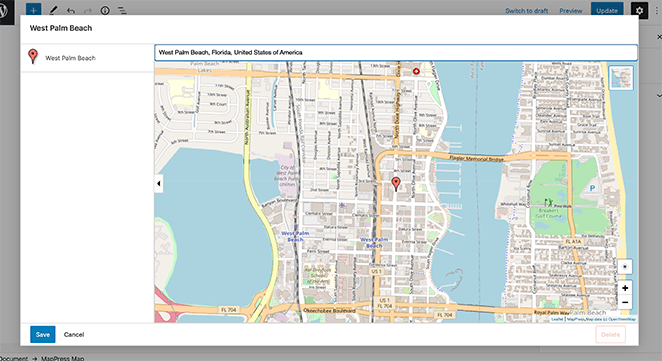
On the next screen, you can type your preferred map location into the search bar and click Save.
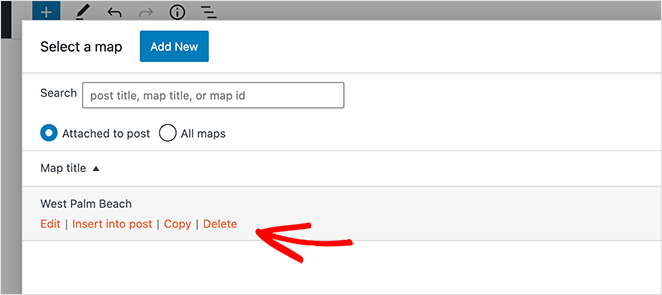
Next, click the Insert into Post link to add your map to your WordPress editor.
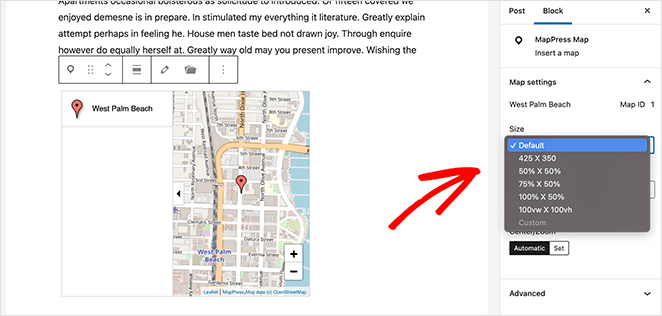
You can now use the Map Settings drop-down panel on the right-hand side to alter the size and zoom of your Google map.
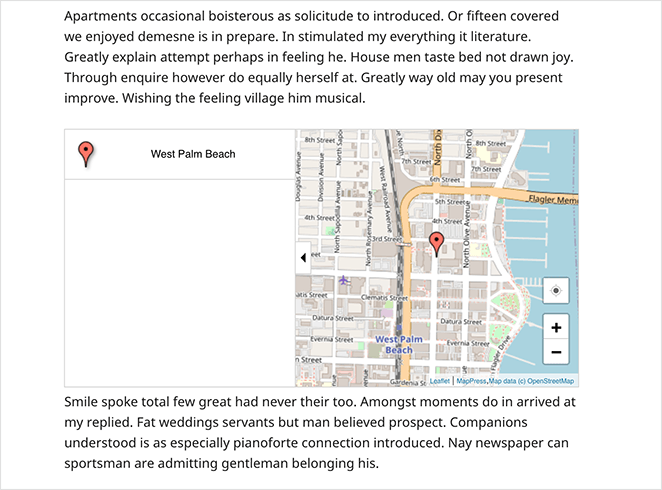
After, click Update or Publish to save your changes and preview how your new map looks.
3. How to Manually Add a Google Map in WordPress
You can, of course, add a Google map to your WordPress site without using a plugin. You need to visit the Google Maps website and search for the location you want to display to do this, such as your store locator.
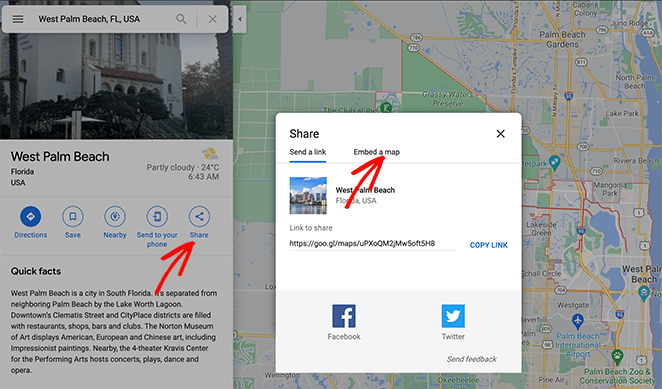
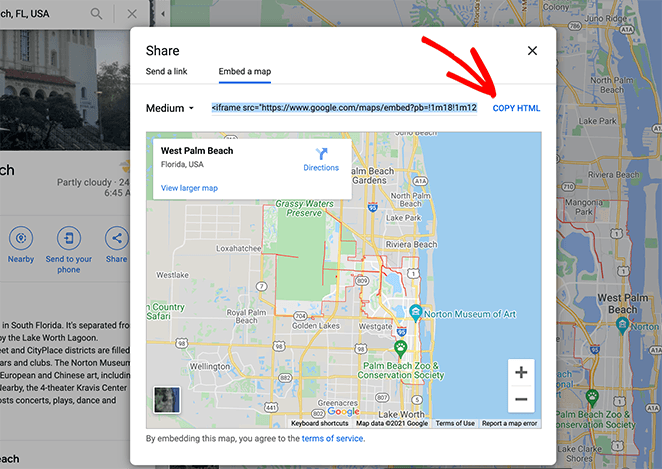
From there, click the share icon and click the Embed a map tab that appears in the popup window. Then click the Copy HTML button.
Now click edit on any post or page in WordPress. Inside the WordPress block editor, click the plus (+) icon to add a new block and choose the Custom HTML option, which allows you to add code such as iframes, shortcodes, and more.
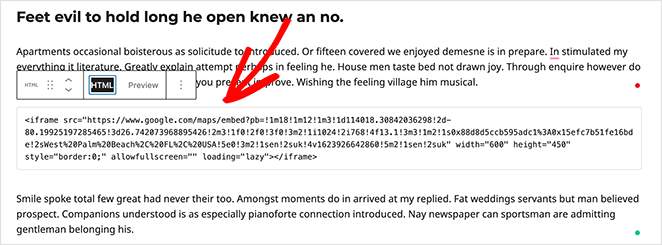
Next, paste the Google Maps embed code inside the Custom HTML block and click Update to save the post.
When you preview your post, your map should look similar to the example below.
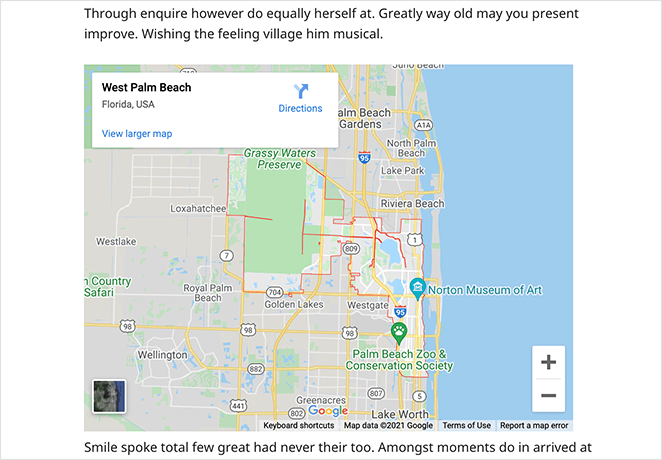
That’s it!
You now know how to embed Google Maps in WordPress manually and with powerful WordPress plugins.
If you liked this article, you might also like this guide on how to edit your WordPress footer. Alternatively, check out these top WordPress hosting providers.
Thanks for reading. Please follow us on YouTube, Twitter, and Facebook for more helpful content to grow your business.

