Do you want to add multiple Google Maps on one page in WordPress?
Adding more than one map on a page gives visitors a snapshot of all your physical locations. That way, they can choose the closest location when visiting your business.
In this article, we’ll show you how to add multiple Google Maps on one page in WordPress easily.
Why Add Multiple Google Maps on One Page in WordPress?
There are many reasons for adding multiple maps to your WordPress site.
The most obvious reason is to list multiple locations, such as store locations in different regions. Or, if you host multiple events, you can create maps for each event location and show them on the same page.
You may think it’s difficult to embed more than one map on a WordPress page. But the truth is, there are several methods that make the process easier.
Below we’ll share 2 methods even beginners can do easily. So let’s jump in with the first option.
Method 1. Add Multiple Google Maps On One Page With SeedProd
The first method in this tutorial shows you how to add multiple Google maps on a landing page in WordPress.
Landing pages are the best way to convert targeted traffic into leads and sales. So if you’re promoting an event or discounts at local stores, a landing page with multiple maps is the ideal way to get people through the door.
And the best WordPress landing page plugin for the job is SeedProd.

SeedProd is a visual WordPress landing page builder that lets you create high-converting pages without writing code. It comes with hundreds of responsive landing page templates you can customize in the drag-and-drop editor.
In addition, SeedProd has tons of smart content blocks for adding user-friendly content to your page, including:
- Google maps
- Call-to-action buttons
- Pricing tables
- Image carousels
- Testimonials
- Dynamic text
- Animated headlines
- Optin forms
- And more
That means you can create any page quickly without hiring a developer.
Follow the steps below to learn how to add Google Maps on one page in WordPress with SeedProd.
Video Tutorial
Step 1. Download the SeedProd Landing Page Plugin
First, visit SeedProd’s website and download the SeedProd plugin to your computer.
While SeedProd does have a free version, we’ll use SeedProd Pro for this tutorial. That way, we can use the Google Maps block.
After downloading the plugin, install and activate it on your website. If you need help with this step, follow this step-by-step guide for installing WordPress plugins.
Once you’ve installed SeedProd, you’ll see a welcome screen asking for your license key. Enter your key and click the Verify Key button to activate your license.
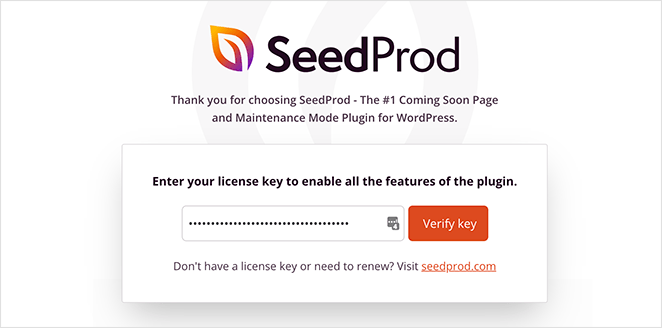
Note: you can find your key by logging into your SeedProd account and clicking the View License Key, Details, and Downloads link.
Step 2. Create a New Landing Page
After activating your license key, scroll down the welcome screen and click the Create Your First Page button.
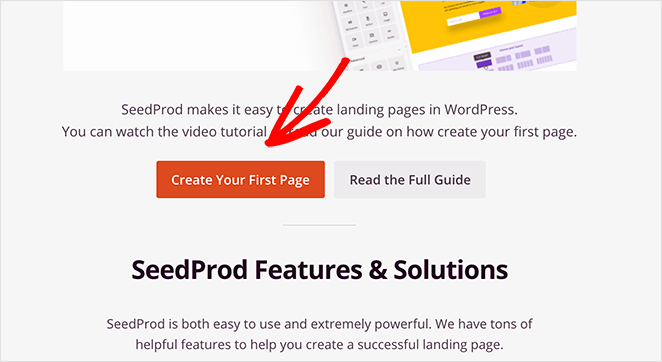
From there, you’ll head to SeedProd’s landing page dashboard.
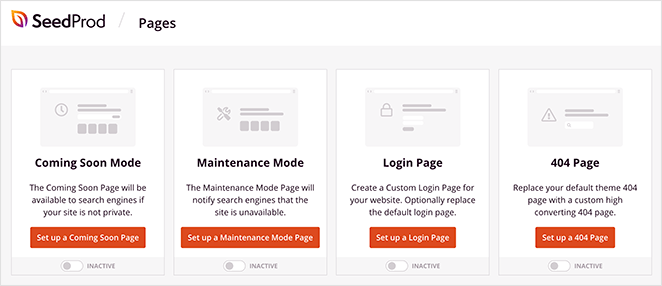
On this page, there are several landing page modes, including:
- Coming Soon
- Maintenance Mode
- Login
- 404
And with those page modes, you can turn on different landing pages with a single click. For example, you can enable maintenance mode when you’re performing minor updates.
Below the page modes section, click the Create New Landing Page button to create your first page.
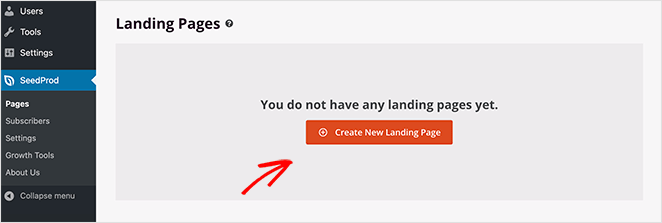
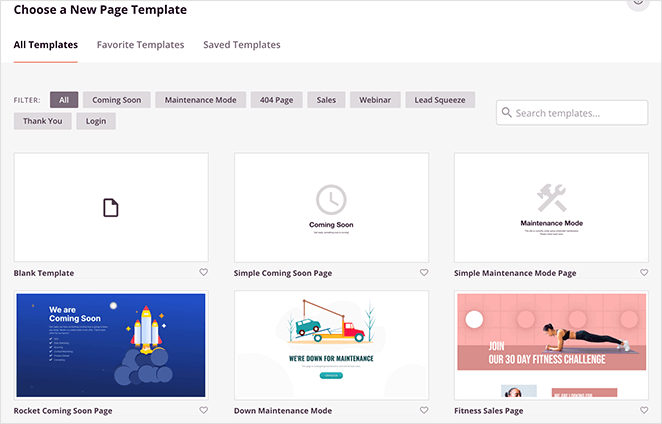
On the next screen, you can choose from hundreds of pre-made landing page templates. Simply click to select a template to use it as a starting point.
After choosing a template, a popup opens, asking you to name your page and enter the URL.
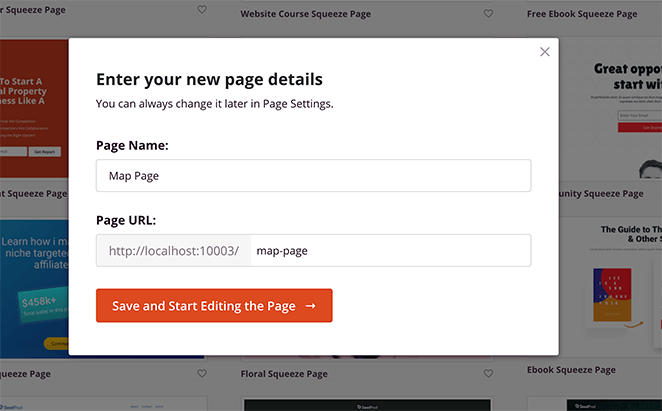
From there, click the Save and Start Editing the Page button to launch your template.
Step 3. Customize Your Landing Page
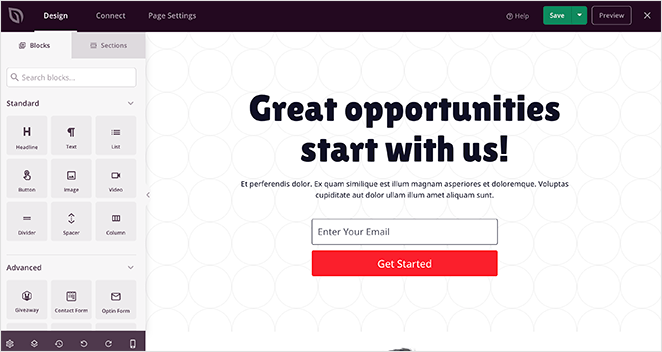
When you launch your design, it will open in SeedProd’s page builder. The editor has a user-friendly 2-panel design to make it easy to customize your page:
- Left panel: Blocks and sections to build and customize your page
- Right panel: Live preview of your landing page in real-time
At the top of the editor is a navigation menu to switch between your design, integrations, and settings quickly.

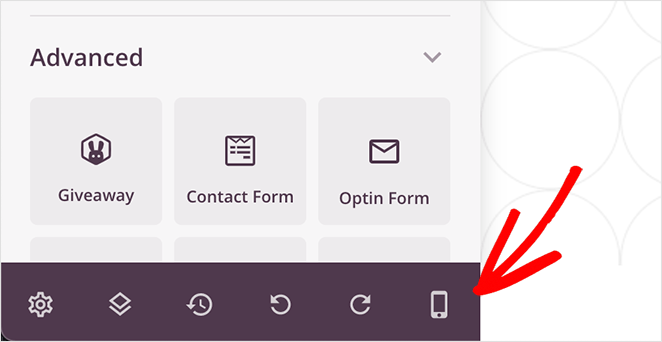
And at the bottom of the left-hand panel are several other icons to undo and redo changes, switch to mobile preview, and more.
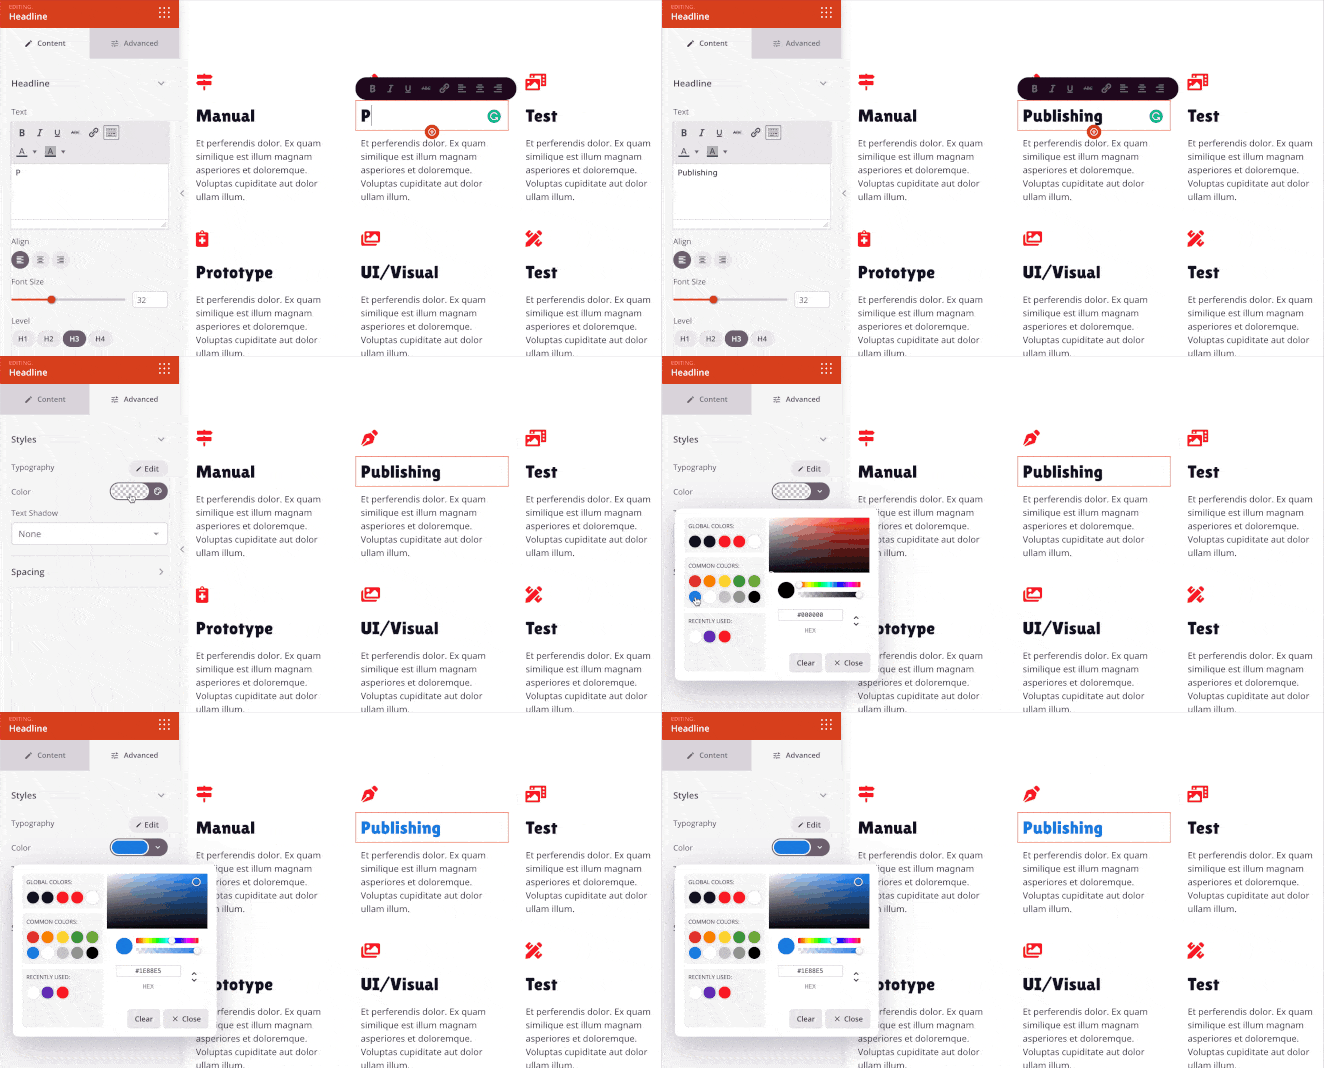
These settings make it easier to customize your design to reach your landing page goals. For example, clicking a page heading lets you change the content, color and see the changes in real-time.
Or, to replace the default template images, you can click any image and replace it with one from your computer, media library or choose a free stock photo.

Continue customizing your design until you’re happy with how everything looks. And don’t forget to click the Save button in the top-right corner.
Step 4. Add Multiple Google Maps to Your Landing Page
Adding multiple Google Maps to your landing page is easy with SeedProd’s built-in Google Maps block.
First, let’s add some columns to house each map. From the left-hand panel, click the Column block and drag it to a section on your page.
Now choose how many columns you want to display. For this guide, we chose the 3-column layout.
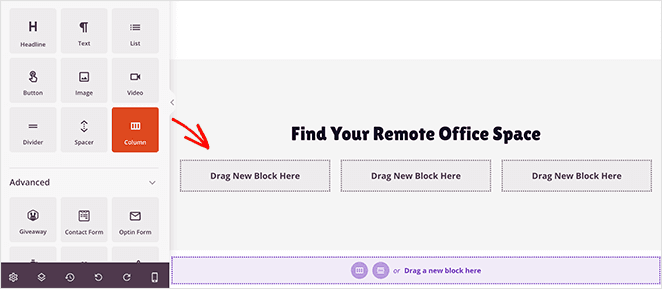
Now you’re ready to add Google Maps to each column.
To do that, click the Google Maps block and drag it to the first column.
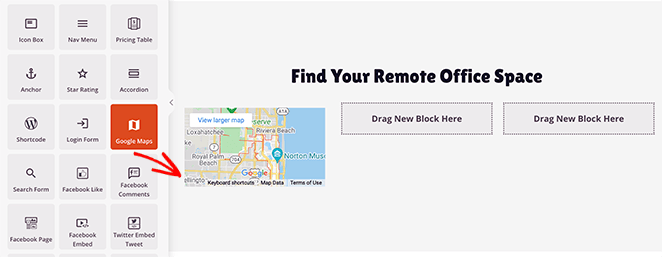
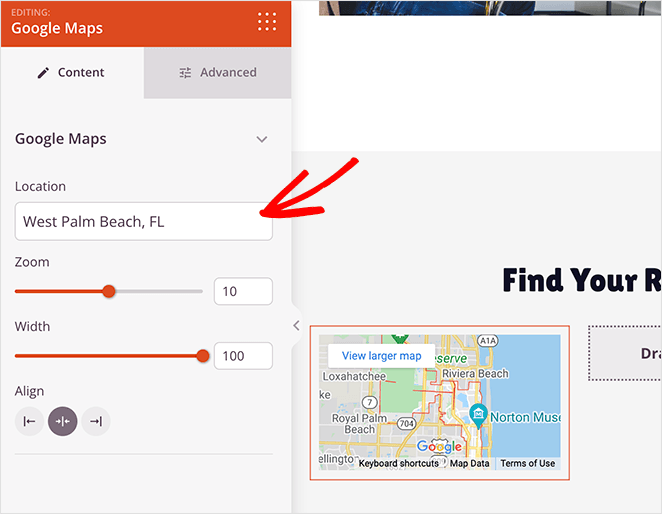
Clicking the block settings opens a panel where you can enter your chosen location. You can then choose the map’s zoom, change the alignment, and adjust the width.
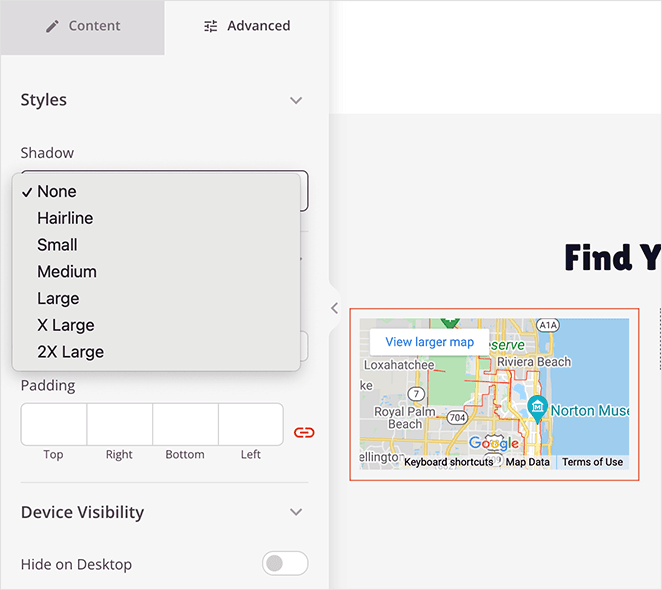
Additionally, you can choose different border styles and adjust the spacing around your custom map in the Advanced tab.
Now repeat this step for every map you wish to add to your landing page.
Step 5. Publish Your Google Maps Landing Page
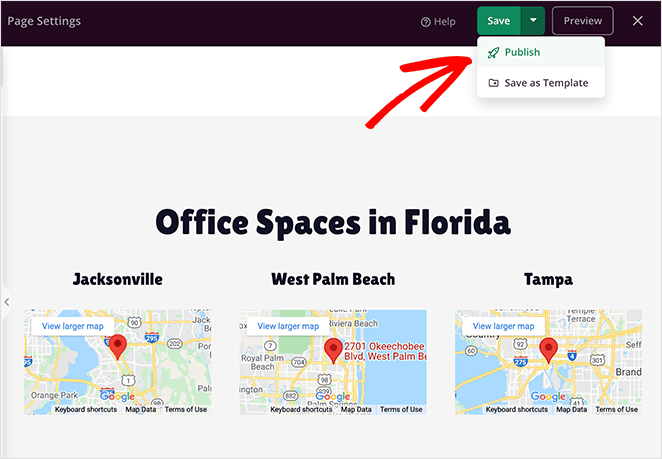
When you’re happy with how your landing page looks, click the down arrow next to the green Save button and click Publish.
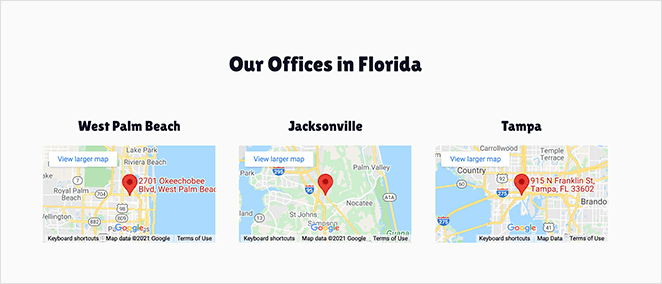
Next, you’ll see a window telling you your page is published. To see a live preview, click the See Live Page button.
Method 2. Manually Add Multiple Google Maps on One Page in WordPress
The second method in this guide involves copying and pasting the Google Maps API embed code and pasting it on a WordPress post or page instead of using a maps plugin.
The downside to this method is you’ll need to find the embed code for each map you want to display. It also requires you to switch from your WordPress site to Google maps and back again.
Additionally, embedding maps directly in WordPress limits the customization options. So you won’t have the advanced layout control you get with a WordPress page builder like SeedProd.
Here are the steps to embed multiple google maps manually with the embed code.
Step 1. Find and Share Your Location in Google Maps
First, head to Google Maps and type in the first address you want to embed.
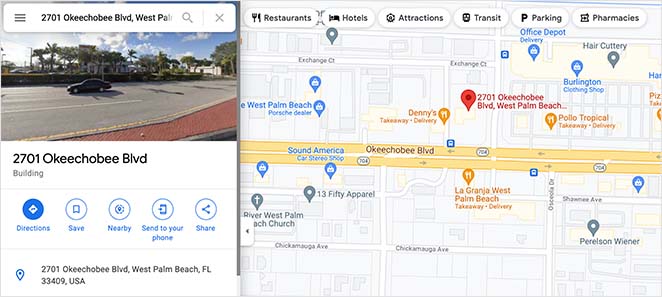
After finding your location, click the Share icon to show the Google Maps sharing settings.
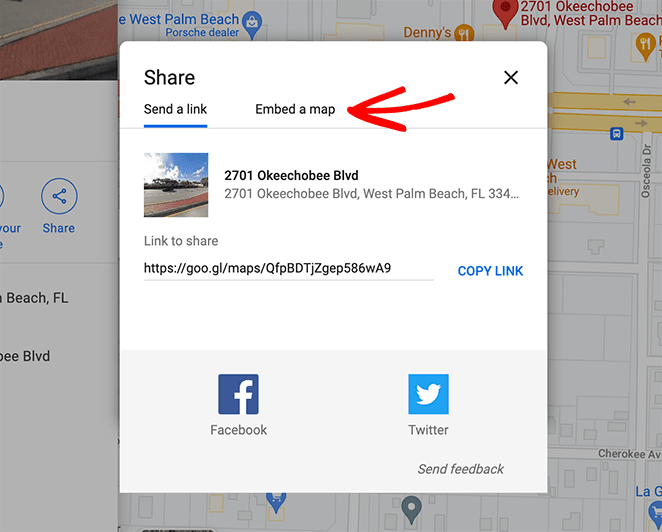
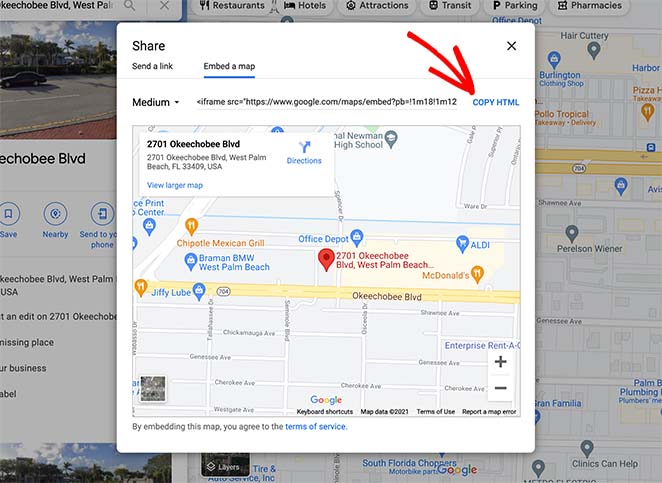
Now click the Embed tab, choose a map size from the drop-down menu, and click the ‘Copy HTML’ link.
Step 2. Add The Embed Code in WordPress
Next, go to your WordPress dashboard and create a new page.
Inside the WordPress editor, click the Plus (+) icon to add a new WordPress block, and click the Custom HTML block.
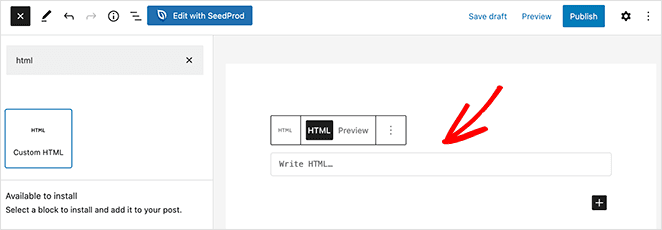
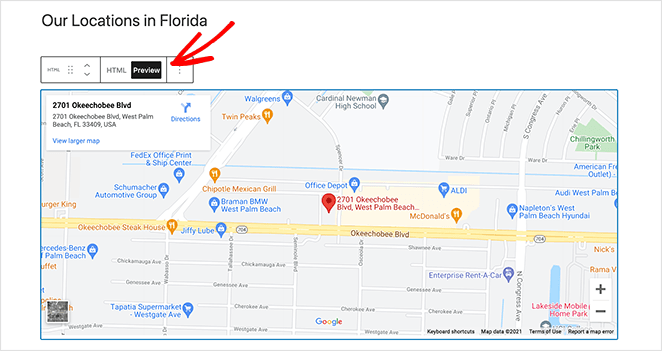
Now paste the embed code from Google Maps into the HTML block. And if you click the Preview button, you can see how your map looks.
Step 3. Embed More Google Maps
Now that you know how to add one map, add more by following the same steps. Simply choose a different map location, copy the embed code and add it in a new HTML block on your WordPress page.
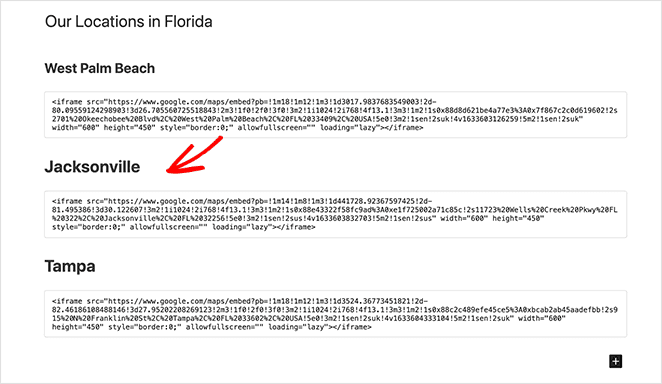
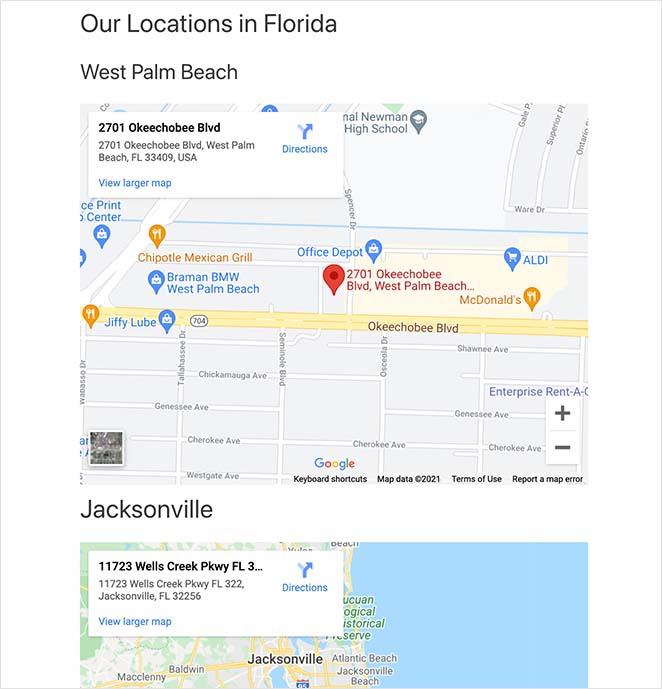
After adding all of your maps to the page, click Publish. Then when you preview the page, you’ll see each map embedded on a single screen.
How Do I Add Multiple Locations to a Map in WordPress?
By now, you know how to add multiple Google Maps on one page in WordPress. But what if you want to add multiple pins on a single map and embed it on your WordPress site?
Luckily, you can do this with the map embed method we mentioned earlier. However, there are a few more steps that we highlight below.
Step 1. Create a Custom Google Map
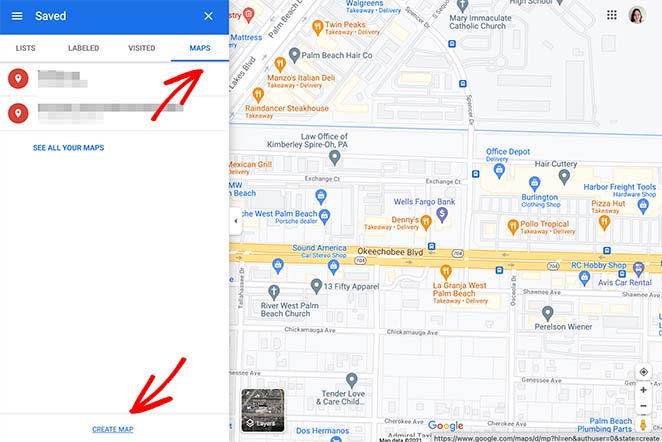
First, go to Google Maps, open the menu, and click the ‘Your places’ link.
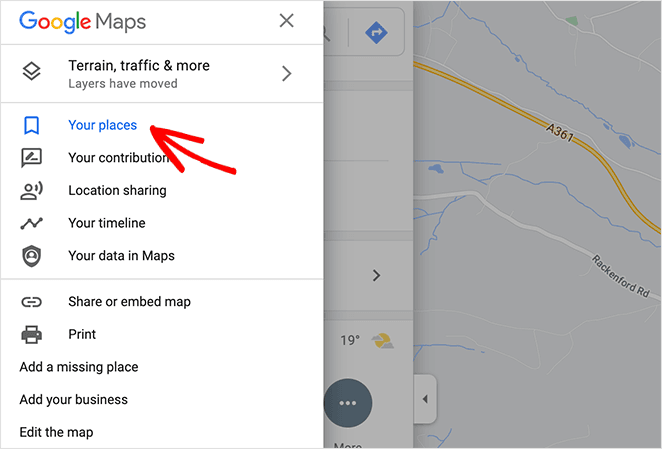
From there, click the Maps tab and click ‘Create Map’ at the bottom of the page.
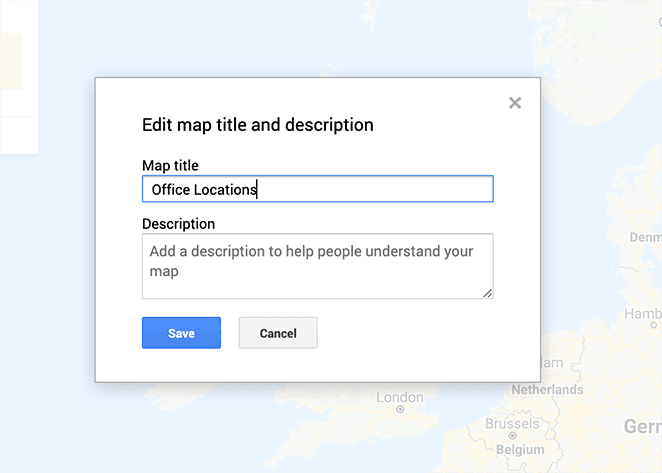
Click the label called ‘Untitled Map’ and give your map a sensible name. Repeat this step for the ‘Untitled layer’ heading.
Step 2. Pin Your Map Locations
Now you can enter your location in the search bar to search for it on the map. And once you’ve found it, click the + Add to map link to place a marker in that spot.
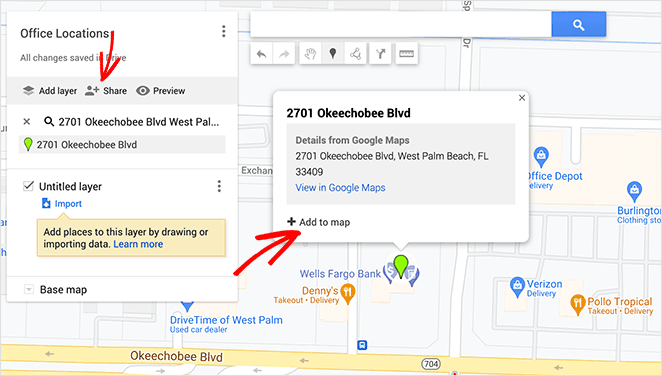
Repeat this step for every location you wish to add to your map.
Step 3. Share Your Map
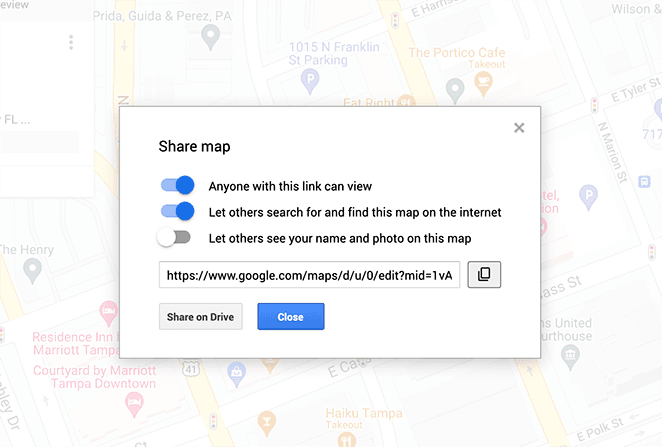
To embed your map in WordPress, you first need to make it public; otherwise, you can’t access the embed code. So go ahead and click the ‘Share’ icon.
Now toggle the following settings to the on position:
- Anyone with this link can view
- Let others search for and find this map on the internet
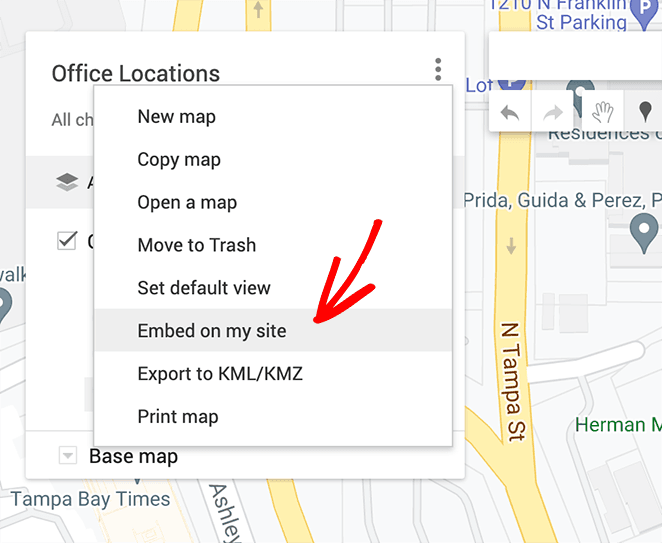
After sharing your map, click the 3 dots in the top right corner, and select the “Embed on my site” option.
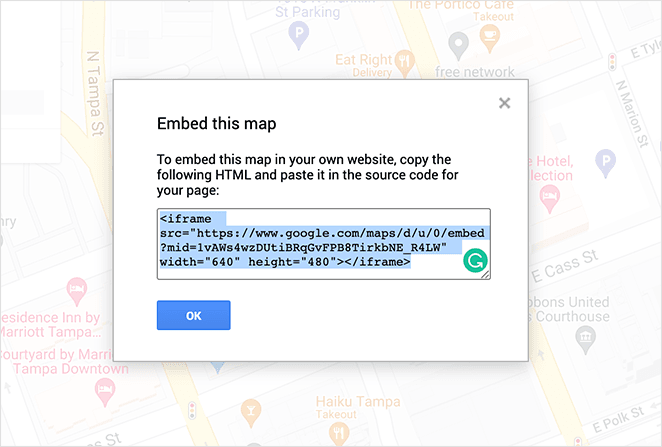
From there, you can copy the custom Google Maps embed code.
Step 4. Embed your Map in WordPress
The final step is to add your map with multiple locations to a new WordPress page. So create a new page, choose the Custom HTML block, and paste your embed code.

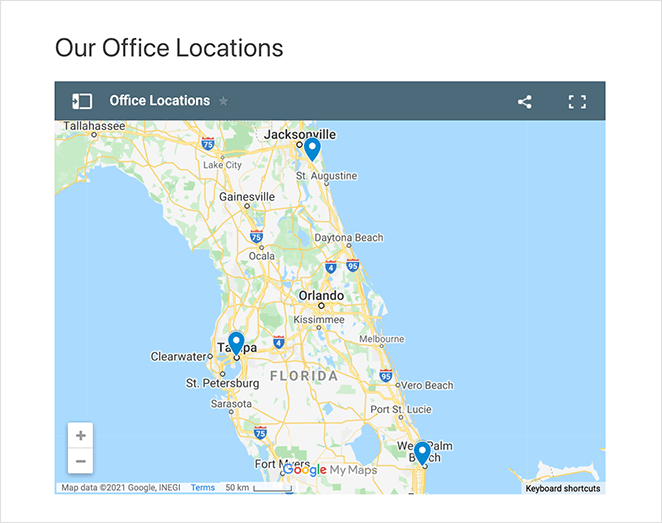
Now when you click Publish and preview your page, you’ll see only 1 map with multiple custom markers.
And that’s it!
We hope this tutorial helped you learn how to add multiple Google Maps on one page in WordPress. You might also like this guide on creating a vertical pricing table in WordPress.
Thanks for reading. Please follow us on Twitter, Facebook, and YouTube for more helpful content to grow your business.

