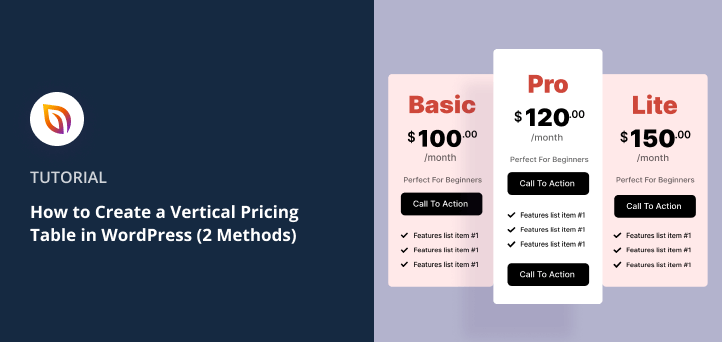
Do you want to create a vertical pricing table in WordPress?
Pricing tables are an excellent way to encourage users to make a purchase decision. So adding skimmable pricing tables to your WordPress site helps people choose the right product and ultimately boosts your conversions and sales.
In this article, we’ll show you how to create a vertical pricing table in WordPress without writing any code.
Coding a Pricing Table vs. Pricing Table Plugins
When adding any new feature to your WordPress website, there are typically 2 options:
- Creating tables manually with code
- Using a WordPress pricing table plugin
If you’re a WordPress user with HTML and CSS experience, creating a vertical pricing table manually isn’t too tricky. It means you’ll have complete control over your pricing table design, and it doesn’t require advanced development knowledge.
That said, there are still some downsides to coding pricing tables manually:
- Your design needs to be responsive from the ground up
- Coding and testing your design takes time
- Your design should be cross-browser compatible
But if you have zero design or coding experience, using a WordPress plugin is a quicker and easier option.
Most plugins include pricing table templates to kickstart your design. From there, it’s as simple as configuring a few settings and clicking publish.
How to Create a Vertical Pricing Table in WordPress: 2 Easy Methods
Since creating a vertical pricing table in WordPress manually is a little too technical for beginners, today we’ll share 2 methods to create pricing tables with a WordPress plugin.
The first method shows you how to make a pricing table for general WordPress posts and pages. And the second method explains how to use a visual drag-and-drop builder to add pricing tables to custom landing pages.
Method 1: Easy Pricing Tables for WordPress Posts and Pages
For our first method, we’ll use the Easy Pricing Tables plugin for WordPress. This plugin allows you to build, customize and publish pricing tables in just a few minutes, straight from the post editor, with no coding required.
First, download your copy of Easy Pricing Tables and install and activate it on your WordPress website.
For help with this step, see this guide on how to install a WordPress plugin.
Once the plugin is active on your WordPress site, you’re ready to start creating your pricing table.
Step 1. Create a Vertical Pricing Table
To create a vertical pricing table in WordPress, navigate to Pricing Tables » Add New from your WordPress admin area.
On the following screen, you’ll see several pricing table templates to choose from. The table styles range from simple free layouts to more complex templates available with the premium pricing plan.
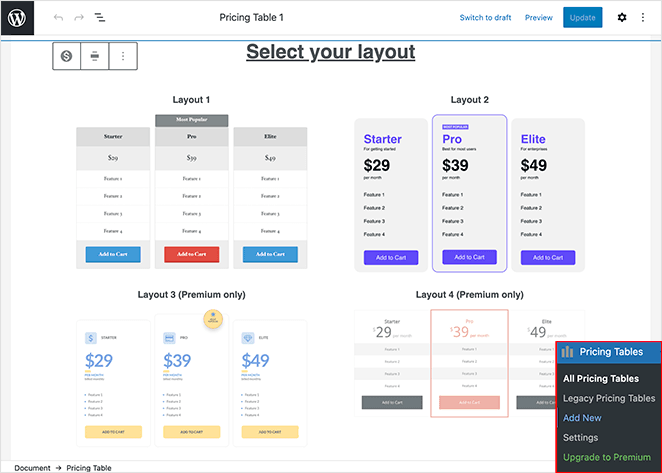
Click any template to choose your design. Now your template will open in WordPress’s editor for you to customize.
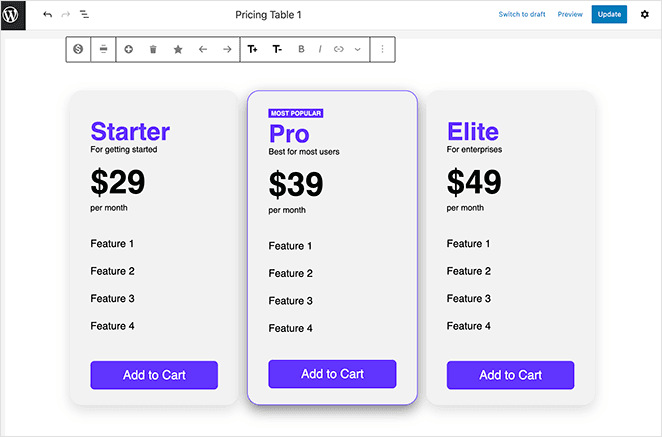
Step 2. Customize Your Pricing Table
Customizing your template is easy with the visual editor. You can click anywhere on the table to edit the table headings, subheadings, pricing, features, and more.
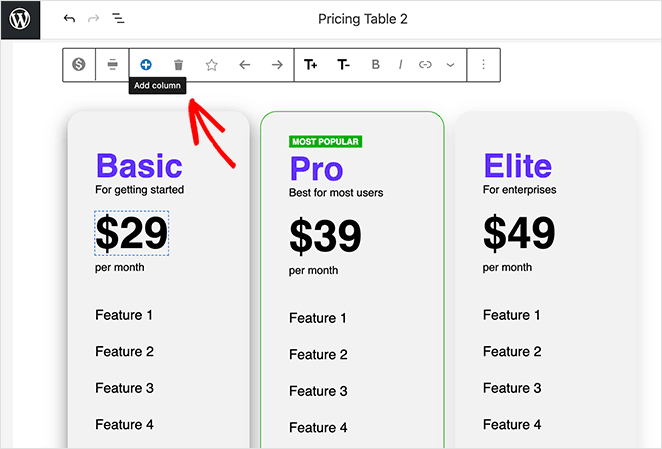
And in the settings bar along the top of the screen, you can:
- Change the alignment for rows and columns
- Add a new column
- Set which column is most popular
- Move columns to the left or right
- Change column font sizes
- And more
Additionally, you can customize the background colors, buttons, and accent colors in the pricing table settings panel on the right.
For example, you can change the accent color to highlight your best pricing plan. And in the Misc Settings section, you can show or hide your pricing table buttons.
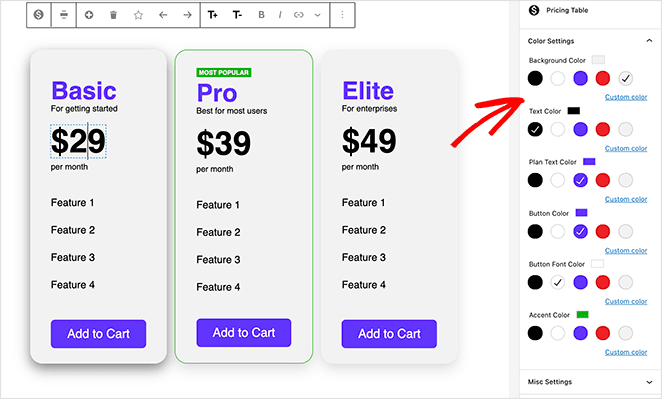
When you’re happy with how your pricing table looks, click the Update button in the top-right corner of your screen to save your changes.
Step 3. Publish Your Pricing Table
There are 2 ways to publish your responsive pricing table with this plugin.
You can either:
- Copy and paste the pricing table shortcode
- Use the Easy Pricing Tables WordPress block
To add your pricing table with the WordPress block editor, simply create or edit a WordPress post or page. Then click the plus (+) icon to add a new WordPress block.
In the search field, type ‘pricing’ to filter your block results. You should see the pricing table you made earlier converted into a block automatically.
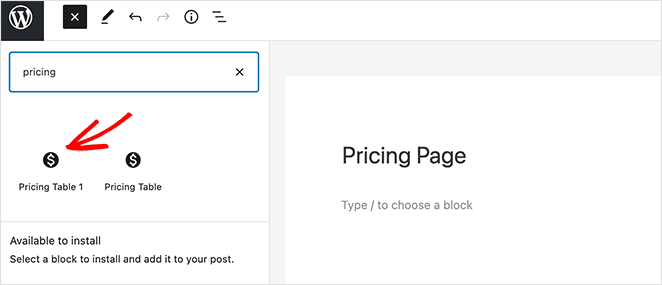
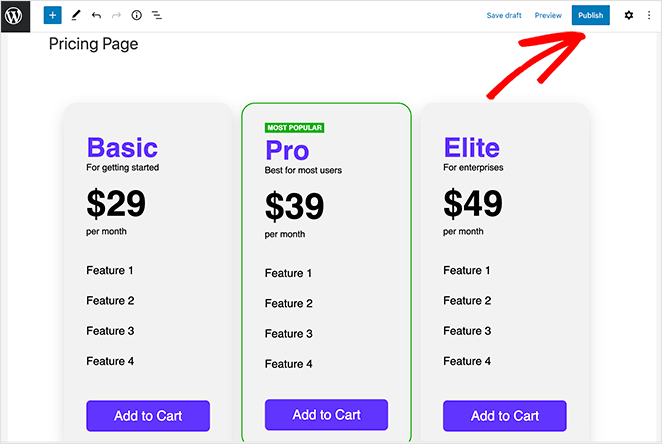
Go ahead and click your pricing table to add it to your page and see a preview of how it looks. Now you can click the Publish button to make your page live.
Alternatively, if you use the classic WordPress editor, go to Pricing Tables » All Tables from your WordPress dashboard. Then copy the shortcode next to the pricing table you made in the previous step.

From there, create or edit the post or page where you want to add your pricing table. Then paste your shortcode into the WordPress editor.
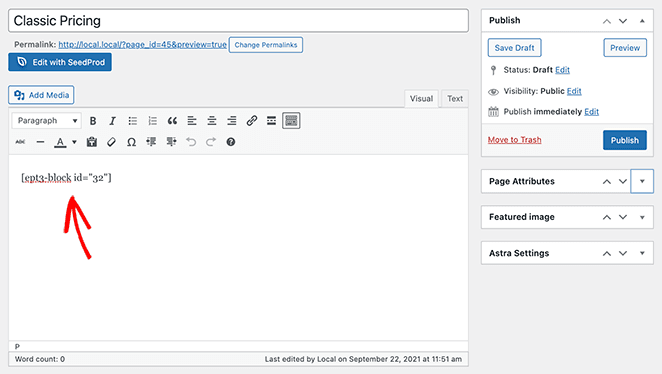
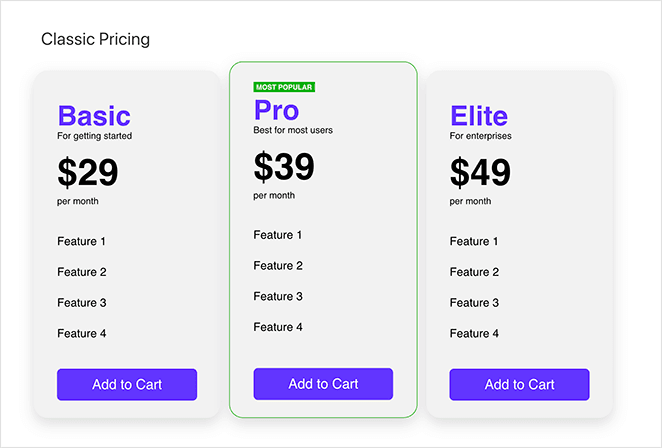
Now, go ahead and publish or update your page to see the results.
Method 2: SeedProd Page Builder for WordPress Landing Pages
For the second vertical pricing table WordPress method, we’ll use SeedProd.

SeedProd is the best WordPress page builder and works with any WordPress theme. With this plugin, you can completely customize any WordPress page visually in its drag-and-drop builder.
SeedProd is the best choice for creating high-converting pricing pages. Not only is it super easy to use, but it offers tons of visual building blocks designed to generate leads for your business.
For instance, it includes:
- Customizable pricing tables for easy price comparison
- Countdown timers to create urgency
- WooCommerce add-to-cart buttons
- Testimonials and star ratings for social proof
- Featured product grids for product upsells
- And more
All of these things can turn your pricing page into a conversion powerhouse. And because SeedProd offers hundreds of responsive landing page templates, you won’t need to start from scratch, and your page will always look good on any mobile device.
To get started, download and install SeedProd on your WordPress website.
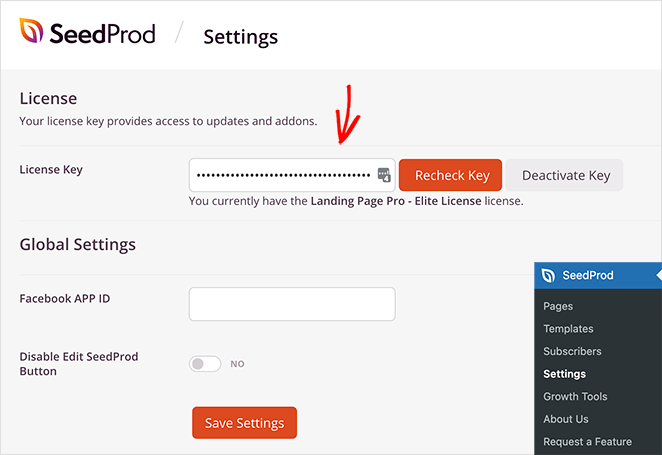
Then, navigate to SeedProd » Settings and enter your license key.
Step 1. Create a New Landing Page
After installing and activating SeedProd, head to SeedProd » Pages and create a new landing page.
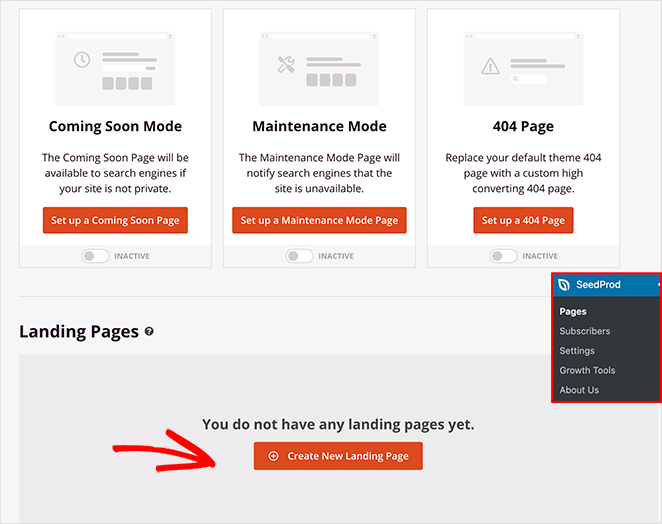
For complete instructions, check out this step-by-step guide on creating a landing page with SeedProd.
The guide explains all the steps, including how to choose a landing page template, all of SeedProd’s settings, and more. When you’ve created a page, come back here to learn about SeedProd’s pricing tables block.
Step 2. Add a Vertical Pricing Table Block
After creating your pricing page with SeedProd, you can use the Pricing Table block to add customizable price comparison columns to your design.
We chose a premade template for this example and added a row with 3 columns to house our pricing table.
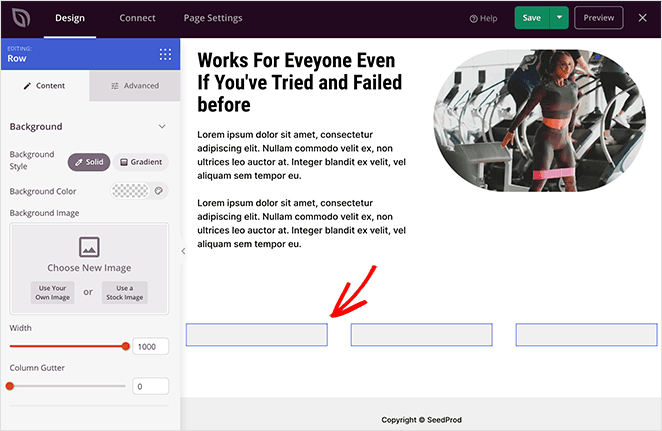
To add a pricing table to your page, choose the Pricing Table block and drag it over to your design. If you’d like a 3 column vertical pricing table, repeat that step 2 more times.
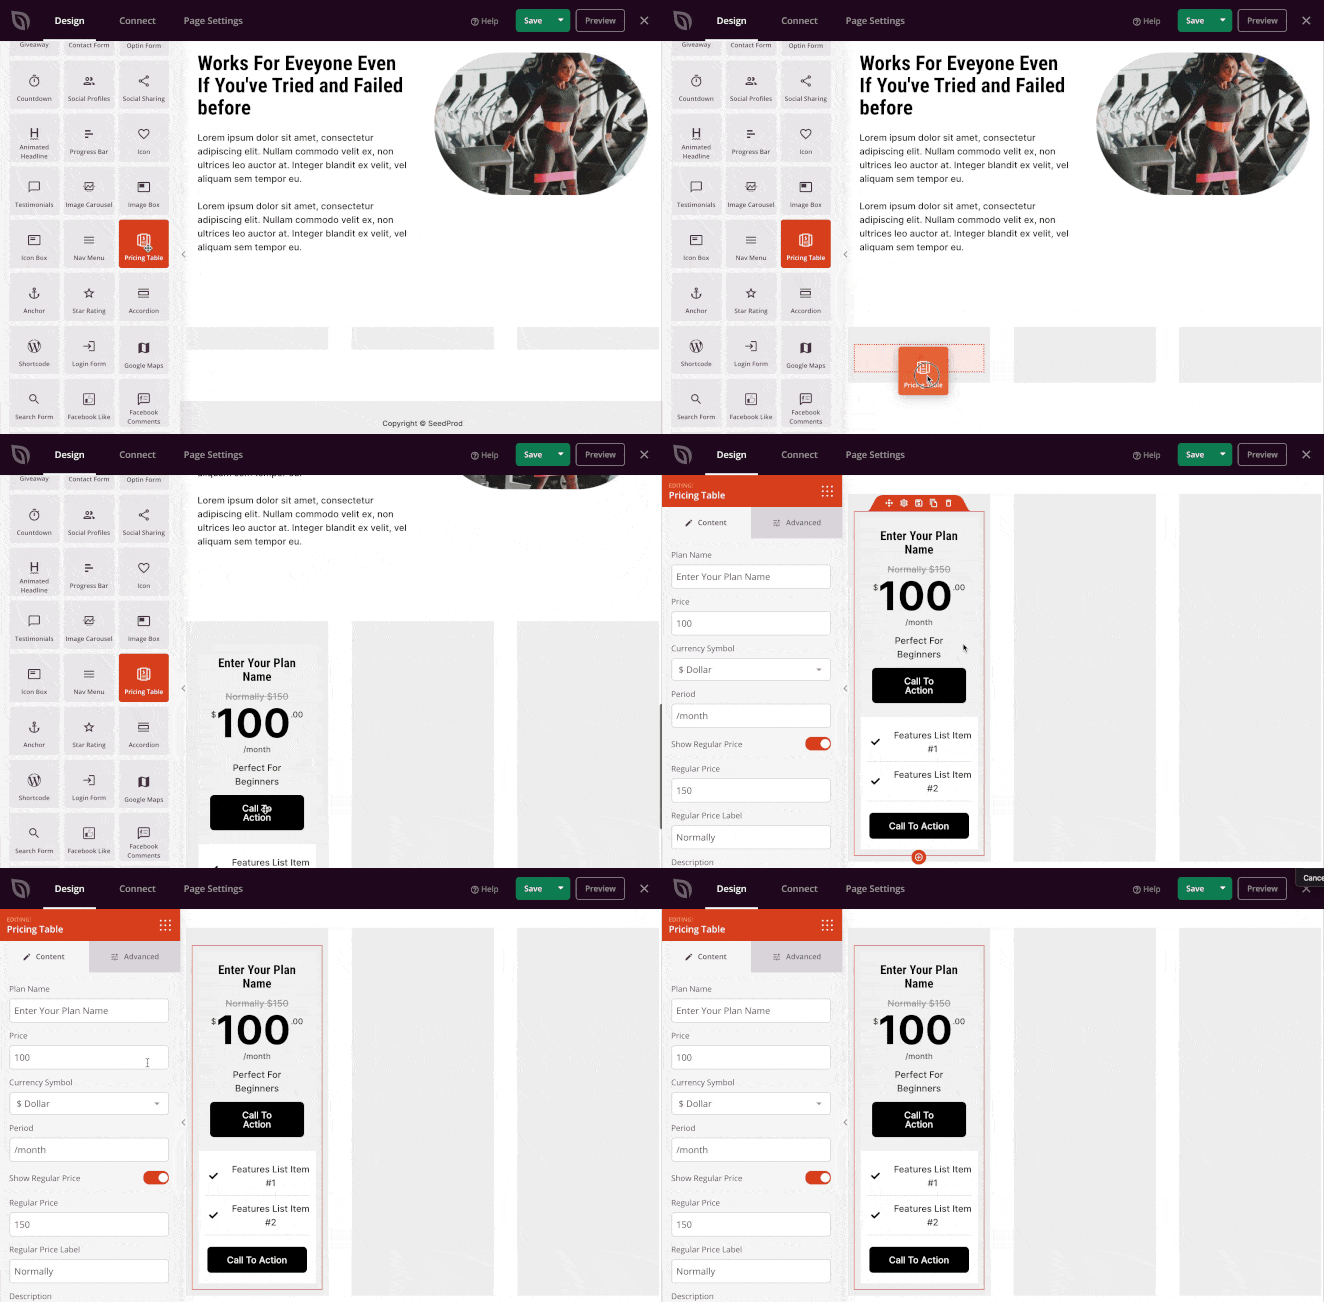
Now you can click the settings icon on each table block to customize your pricing table content.
For example, you can:
- Edit the plan name
- Change the price
- Choose a currency
- Add a regular price
- Include a description
- Add a features list
- Show multiple CTA buttons
Plus, in the Advanced tab, you can customize each table’s color, font, icons, spacing, buttons, hover effects, and more. This is an excellent way to make one pricing tier stand out more than the others, encouraging shoppers to choose that option.
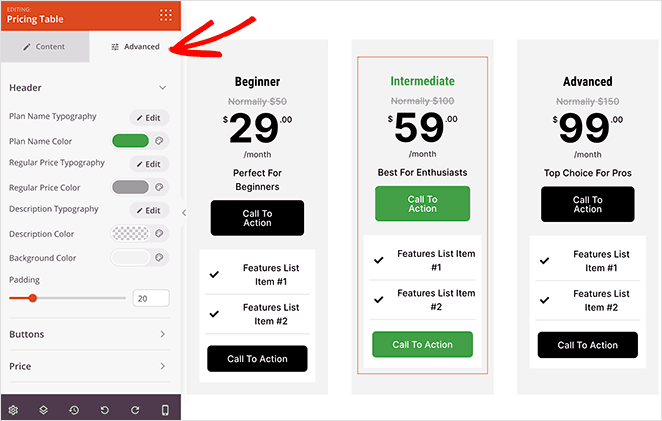
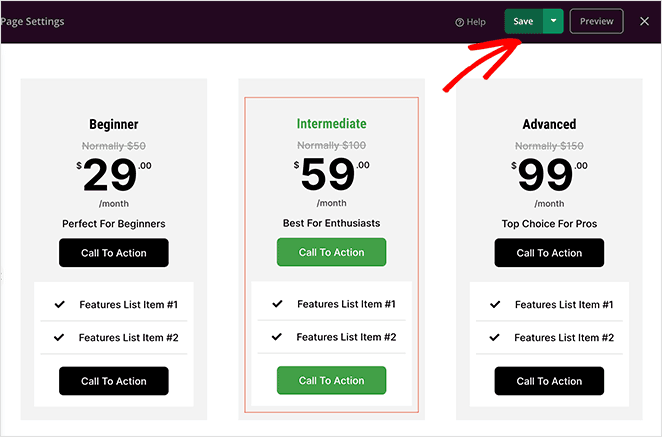
Keep editing your pricing tables until you’re happy with how they look. Then, click the Save button to save your changes.
Step 3. Publish Your Pricing Page
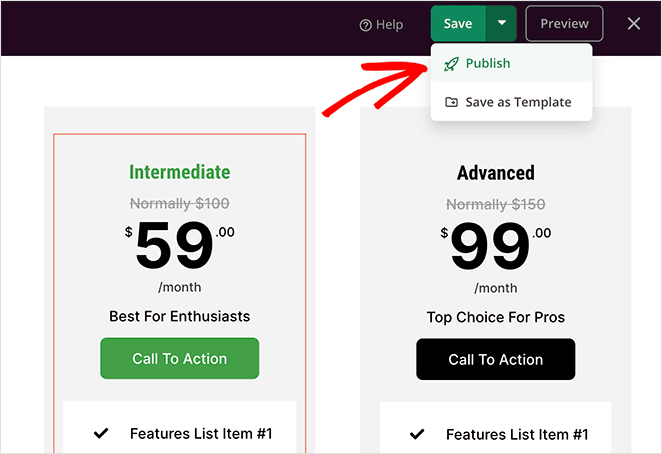
Publishing your pricing page with SeedProd is super easy. When you’re happy with your design, click the dropdown arrow on the Save button and click Publish.
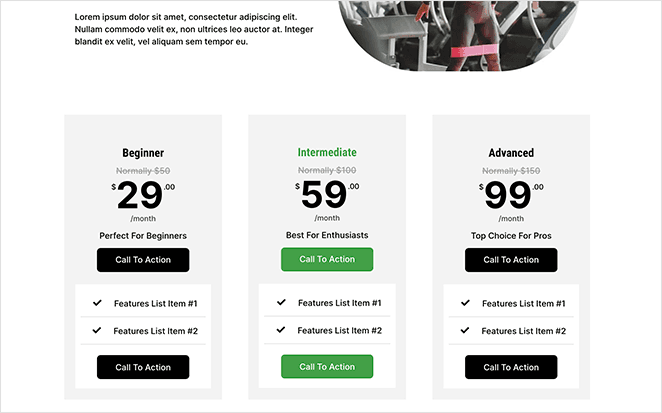
You can now click the See Live Page button to see how your new WordPress pricing page looks.
Vertical Pricing Table FAQs
A vertical pricing table is a graphical representation that displays different price tiers for a product or service in a vertical format. Each row or section typically includes features, benefits, and costs associated with each pricing tier.
There is no one-size-fits-all answer to this question. The number of tiers depends on your business model and offerings. However, three to five tiers are common in most pricing tables.
The most important information to include is the cost of each tier, what is included in each tier, and the differences between the tiers. You can also include terms of the service, such as billing cycle (monthly, annually, etc.), refund policies, and any special features or bonuses.
Yes, it’s often a good idea to highlight a recommended tier. This can help guide customers towards a decision, especially if that tier offers the best value for most users.
The main difference is the orientation. In a vertical pricing table, the different pricing tiers are presented vertically from top to bottom. In a horizontal pricing table, they are presented side by side.
There you have it!
You now know how to create a vertical pricing table in WordPress without writing a single line of code. We hope this article helped you find the best pricing table solution for your business.
While you’re here, you might like to learn how to embed Facebook events on WordPress.
Thanks for reading. Please follow us on YouTube, Twitter, and Facebook for more helpful content to grow your business if you liked this article.

