

TL;DR:
You can add a countdown timer to any WordPress landing page with SeedProd (Basic or higher) in about 10 minutes, no code required.
- Install SeedProd Basic or higher: The Countdown block is included on Basic plans ($79/yr) and above.
- Create a landing page: Go to SeedProd » Landing Pages, click Add New Landing Page, and choose a template.
- Add the Countdown block: In the visual editor, find the Countdown block under Advanced blocks and drag it onto your page.
- Choose your timer type and expiry action: Pick fixed-date (counts to a real deadline), evergreen (resets per visitor), or daily (resets at a set time each day). Set what happens when it hits zero.
- Publish: Click the Save dropdown and select Publish. Your countdown goes live immediately.
Most countdown solutions either look dated or require embedding third-party scripts that break on mobile. This guide shows you how to add a timer that matches your page design, built directly in WordPress without code.
One thing worth knowing upfront: fake urgency timers that silently reset on every refresh do get noticed, and they erode trust. This guide covers both how to set up the timer and when to use it so it actually works.
- Why Add a Countdown Timer to Your Landing Page?
- How to Create a Landing Page with Countdown Timer
- FAQs on Creating a Landing Page with Countdown
Why Add a Countdown Timer to Your Landing Page?
A countdown timer gives visitors a reason to act now instead of later. By showing exactly how much time is left, you hold attention and reduce hesitation. According to SaleCycle research, countdown timers can lift conversions measurably, with some campaigns showing double-digit improvements in click-through rates.
Timers work best in three situations: a product launch with a real deadline, a webinar registration window that closes on a specific date, or a limited-time discount with genuine scarcity. If you want more context on what moves the conversion needle on landing pages, this landing page conversion rates guide covers the benchmarks worth knowing.
One caveat before we dive in, is timers only work when the urgency is real. An evergreen timer that silently resets every time someone revisits the page with the same “deal” still running destroys trust the moment a visitor notices.
Fixed-date timers with real deadlines are more credible. For evergreen offers, acknowledge that the offer cycles or renews, rather than pretending each visitor gets a unique window.
How to Create a Landing Page with Countdown Timer
Creating a landing page with countdown timer functionality might sound complicated at first. Won’t you need to write HTML code or hire a developer?
You won’t need either if you choose a visual website builder like SeedProd.

SeedProd is a drag-and-drop website builder for WordPress. It lets you build professional landing pages with timers, opt-in forms, and conversion elements without touching code. Over 1 million website owners use it to create custom WordPress themes, landing pages, and flexible website layouts.
You can get started with a pre-made template and build a professional page without code. The front-end visual editor is straightforward, even for beginners, and comes with blocks for the features you actually need for a high-converting landing page:
- Countdown timers
- Opt-in forms
- CTA buttons
Follow the steps below to create a landing page with a countdown timer using SeedProd.
Step 1. Install and Activate SeedProd
The first step is to get a copy of SeedProd.
Note: There is a free version of SeedProd available, but we’ll use SeedProd Basic or higher, which includes the Countdown Timer block and all Advanced blocks. Basic starts at $79/yr.
After downloading the SeedProd zip file, you’ll need to install and activate it on your WordPress website. You can follow this guide on installing a WordPress plugin if you need help.
Next, go to SeedProd » Settings and enter your license key.
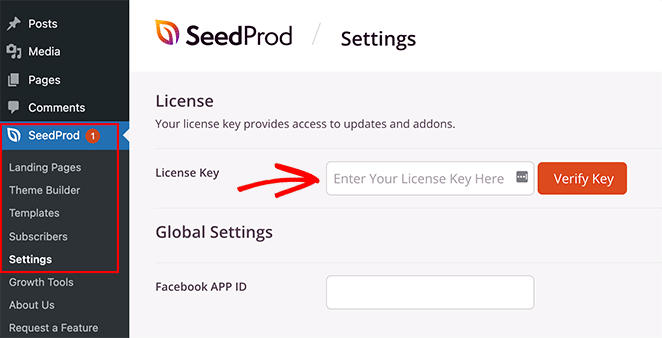
You can find your license key by logging into the SeedProd website and clicking the “Downloads” tab in your account dashboard.
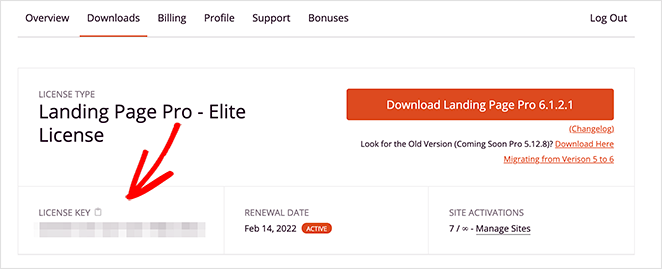
Click the Verify Key button to confirm your license and move on to the next step.
Step 2. Create a Landing Page
Next, go to SeedProd » Landing Pages.
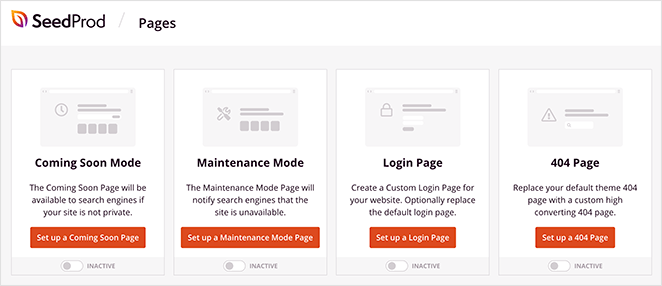
This is where you can turn on any of SeedProd’s page modes, including:
- Coming soon
- Maintenance mode
- Login page
- 404 page
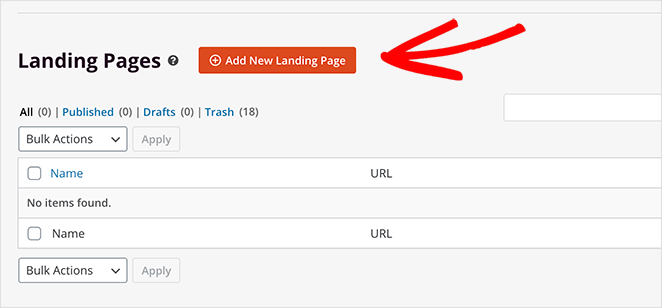
Under that section, you can create a custom landing page visually with the drag-and-drop website builder.
Click the Add New Landing Page button to create a landing page in WordPress.
You’ll see hundreds of landing page templates you can import with a single click on the next screen. You can choose any template you like and customize it easily in the next step.
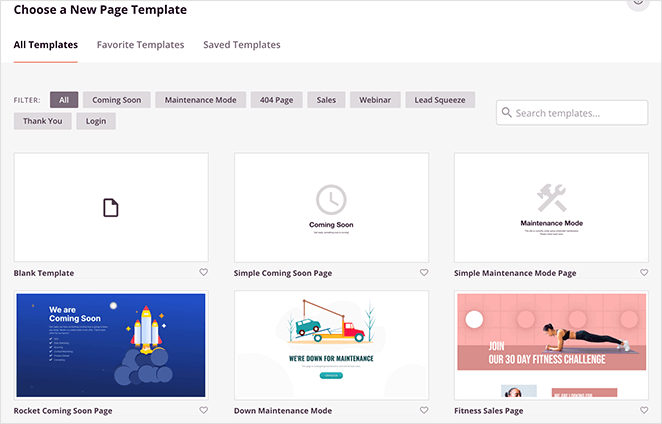
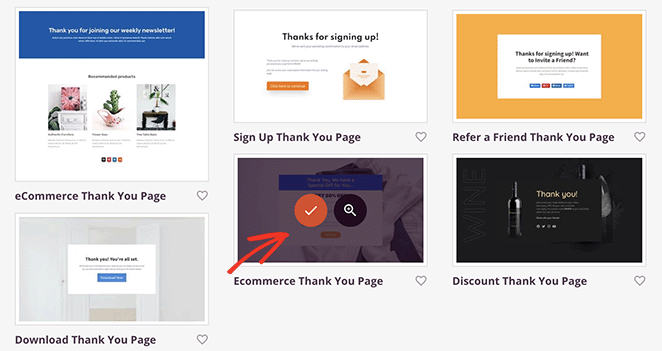
For this guide, we’re using the Ecommerce Thank You Page template. Hover your mouse over the template and click the checkmark icon to import it to your WordPress site.
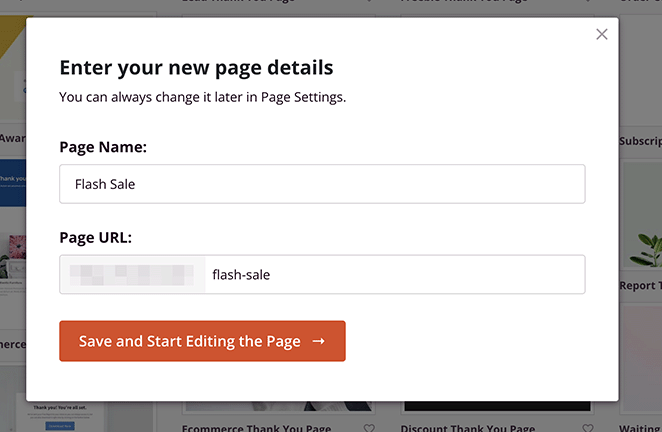
You can enter a name and URL for your landing page next. When you’re ready to start customizing, click the Save and Start Editing the Page button.
Step 3. Add Content and Customizations
You’ll see your template in SeedProd’s visual editor on the next page.
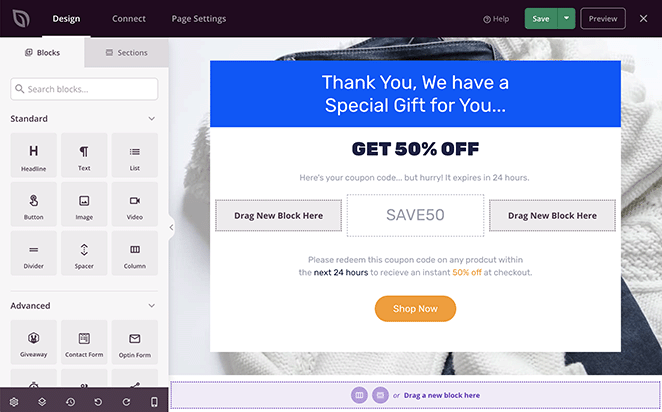
You can customize every part of your page by using the blocks and sections on the left. You can also click any element on the right and edit your page in real-time.
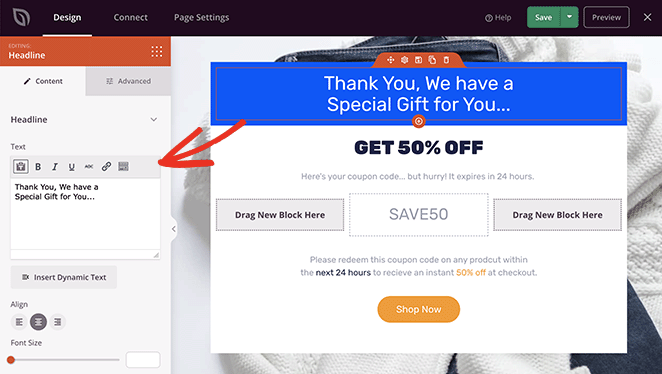
For example, changing your landing page heading involves clicking the heading element and entering custom content in the settings panel.
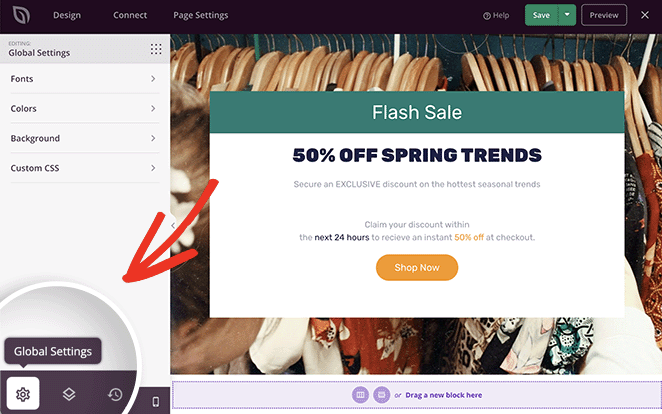
You can also change your background image by clicking the Global Settings icon.
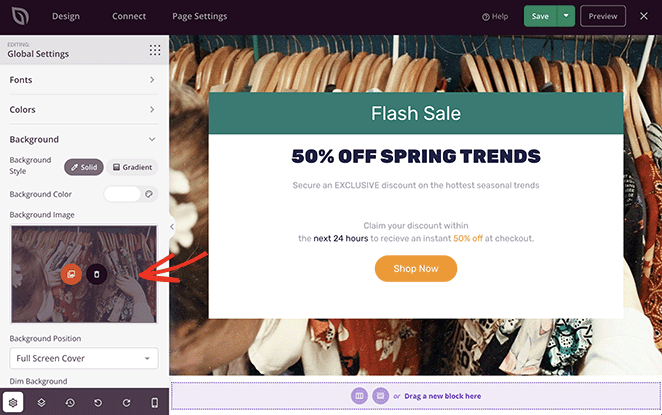
Then you can click the background tab and upload a new image from your computer or WordPress media library.
Adding the Countdown Timer Block
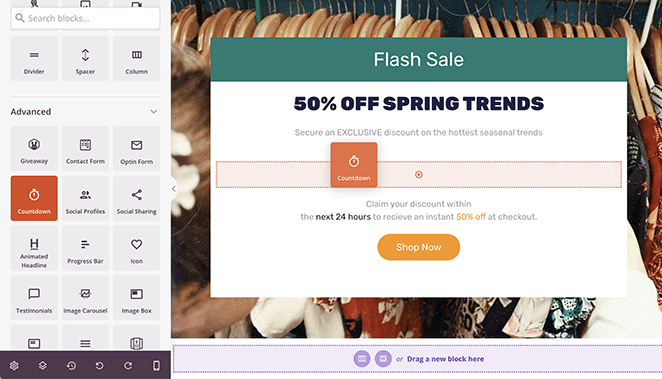
Adding a countdown timer to your landing page is just as easy. Find the Advanced blocks section in the left-hand panel, then drag and drop the Countdown block onto your landing page preview.
Clicking the Countdown element opens the content settings panel on the left, where you can:
- Choose a countdown type
- Set the timer duration
- Choose a time zone
- Adjust the size and alignment
Understanding Your Timer Type Options
SeedProd offers three countdown timer types. Choosing the right one makes a real difference in how credible your offer feels.
- Fixed-date: Counts down to a specific date and time. Use this for launches, event registration deadlines, or genuine limited-time sales with a real end date.
- Evergreen: Resets per visitor session. Use this for perpetual offers where the urgency is about the visitor’s own decision window, not a shared deadline. A 24-48 hour evergreen timer works well for digital products; anything longer starts to feel unconvincing.
- Daily: Resets at the same time each day. Best for same-day shipping cutoffs or flash offers that genuinely run on a daily cycle.
If you’re using an evergreen timer, acknowledge in your copy that the offer renews or cycles. Visitors who notice the timer reset without any explanation lose trust in the whole page.
Timer Duration and Placement
For fixed-date timers, 7 days or less is the effective window. Longer than that and the urgency dissolves. For evergreen timers on product sales, 24-48 hours is the right range. For lead magnet offers, 5-10 minutes can work well for free downloads.
Where you place the timer matters as much as the duration. Position it above the fold and near your CTA.
I put mine directly above the opt-in form or CTA button section so the clock and the conversion action are in the same visual area. Visitors who see the timer only after scrolling past your headline often miss it before they leave.
For more on what affects conversion rates, this guide on landing page optimization tips covers placement alongside the other variables worth testing.
You can also enter a message to show automatically when the timer expires. Or you can redirect visitors to another URL when the timer ends.
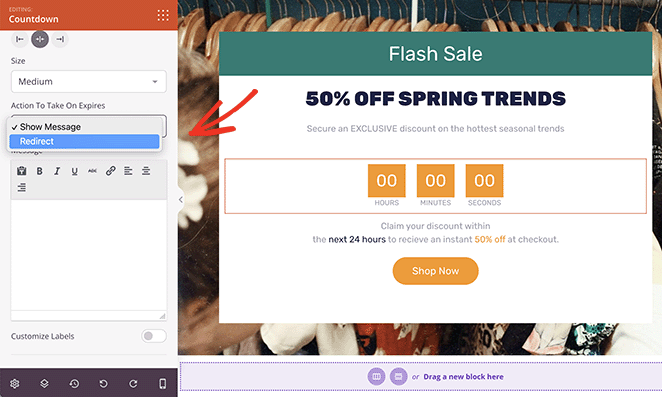
What to Do When the Timer Hits Zero
What happens at zero is a strategic decision, not just a technical one. You have a few options:
- Redirect to a “deal closed” page: Best for sales pages. It validates the urgency because the offer actually goes away. For the redirect URL, publish a simple page that confirms the sale ended and offers an alternative CTA, like joining a waitlist or seeing similar products.
- Show an expiry message: Keeps the page live for SEO while communicating the offer has ended. Good for evergreen offers that cycle on a known schedule.
- Redirect to a new offer: Preserves conversion momentum. A visitor who missed the first deal can still be converted if the redirect leads somewhere useful, not a 404 or your homepage.
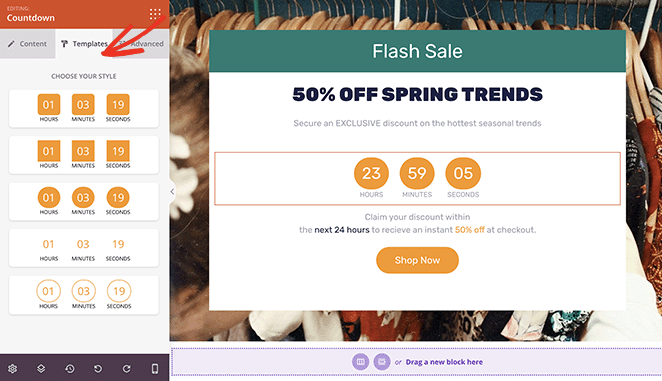
The Templates tab offers several premade countdown timer designs. Click any design to add the styling to your countdown clock automatically.
You can also adjust more settings in the Advanced tab, including:
- Fonts
- Colors
- Shadows
- Spacing
- Attributes
- Device Visibility
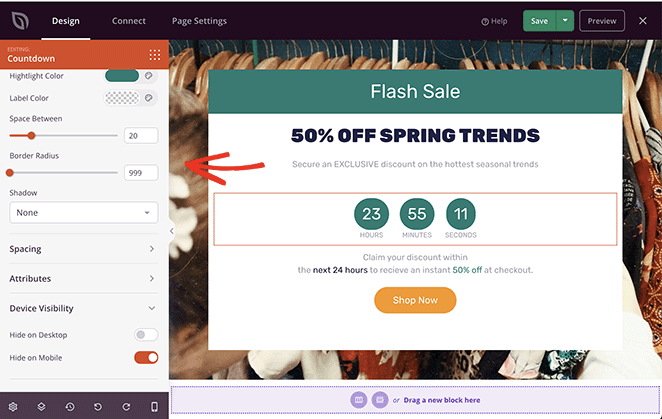
The Device Visibility option lets you hide the element on mobile or desktop devices. It’s an excellent way to tailor your landing page to different target audiences.
When you’re happy with how your landing page looks, click the Save button in the top-right corner.

Now you can move on to adjusting your page’s settings.
Step 4. Configure Your Landing Page Settings
SeedProd offers several features to help you optimize your landing page and generate leads and conversions. The most notable is the ability to integrate with various popular email marketing services.
You can connect your email provider by clicking the Connect tab at the top of your screen. Then, find your preferred service and follow the instructions to verify the connection.
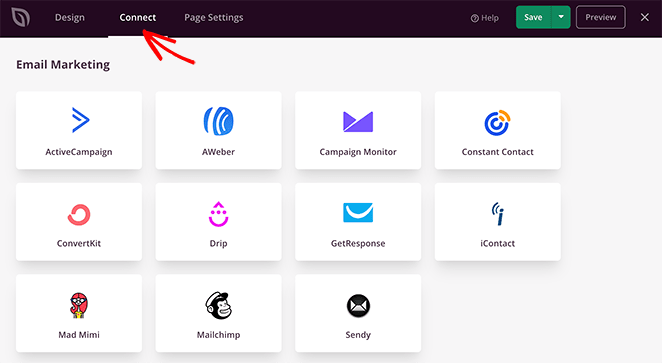
In our email documentation, you can learn how to connect to specific email marketing services.
Next, click the Page Settings tab.
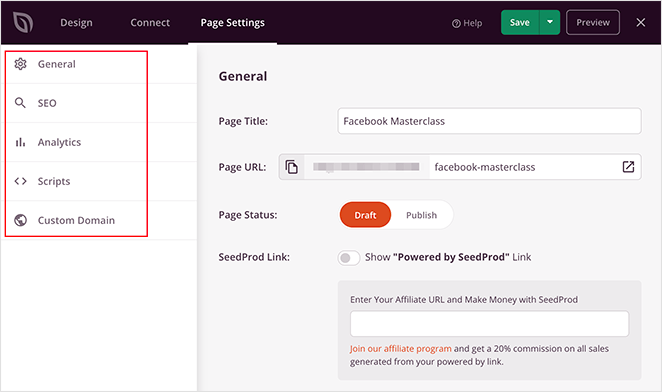
You can configure various settings on this page, including:
- General: change your landing page name and URL, publish or revert to draft, and enter your Facebook App ID.
- SEO: configure your on-page SEO settings with the All In One SEO plugin.
- Analytics: install MonsterInsights to track your landing page metrics with Google Analytics.
- Scripts: add custom scripts to your landing page’s header, body, and footer.
- Custom Domain: point your landing page to a different domain name without installing WordPress on another website.
Step 5. Publish Your Landing Page
When you’re happy with your landing page and countdown timer design, you can make the page live.
Click the Save button’s dropdown arrow and select the Publish option.

You can now preview your landing page and see your countdown timer in action.

The same Countdown block works on SeedProd’s coming soon pages too, not just standalone landing pages. If you’re running a pre-launch landing page, you can add a countdown to build anticipation before you go live. The setup process is identical.
Adding a countdown timer can be particularly exciting for special events. Learn how to make a wedding website in WordPress and see how a countdown can enhance the anticipation for the big day.
FAQs on Creating a Landing Page with Countdown
What types of countdown timers can I add to a landing page?
SeedProd offers three types: fixed-date (counts to a specific deadline), evergreen (resets per visitor session), and daily (resets at the same time each day).
Fixed-date works best for launches and events with real deadlines. Evergreen suits perpetual offers. Daily is ideal for same-day shipping cutoffs or flash deals that genuinely run on a daily cycle.
How long should a landing page countdown timer last?
For fixed-date timers, 7 days or less keeps the urgency felt. Anything longer and visitors assume they have plenty of time and come back later, but they rarely do.
For evergreen timers on product sales, 24-48 hours is the sweet spot. For lead magnet offers, 5-10 minutes works well for free downloads. A timer that runs for 30 days on an “evergreen” offer looks fake.
Does a countdown timer actually improve conversions?
Yes, when the urgency is genuine. SaleCycle research shows countdown timers can produce measurable uplift in click-through rates and conversions across campaigns.
The caveat is credibility. A timer that resets on every page refresh while the same “deal” runs indefinitely erodes trust. Timers backed by real deadlines or genuinely cycling offers consistently outperform fake urgency in the long run.
What happens when the countdown timer reaches zero?
You choose. SeedProd lets you show an expiry message (keeps the page live for SEO while communicating the offer ended), redirect to a “deal closed” page (validates the urgency), or redirect to a new offer (preserves conversion momentum).
For sales pages, redirect to a “closed” page with an alternative CTA, not a 404 or your homepage. Visitors who arrive after the timer ends deserve a useful next step, not a dead end.
Do countdown timers display correctly on mobile?
SeedProd countdown timers are responsive by default. They adjust automatically to smaller screens without any extra configuration on your part.
If you want to hide the timer on mobile specifically (for instance, if you have a different mobile layout), use the Device Visibility option in the Advanced tab of the block settings.
Add a Countdown Timer to Your Landing Page Today
You started here because you wanted urgency on your page without it looking fake or requiring a developer. That’s exactly what this setup gives you: a real countdown that matches your design, with the option to redirect visitors or show a message when time runs out.
SeedProd makes the whole thing possible without touching code. Over 1 million WordPress site owners use it to build landing pages that convert. If you’re ready to build yours, get started with SeedProd today.
You might also like this guide on creating a sales page in WordPress while you’re here.
Thanks for reading! We’d love to hear your thoughts, so please feel free to join the conversation on YouTube, X and Facebook for more helpful advice and content to grow your business.


