Do you want to create a landing page with countdown timer functionality?
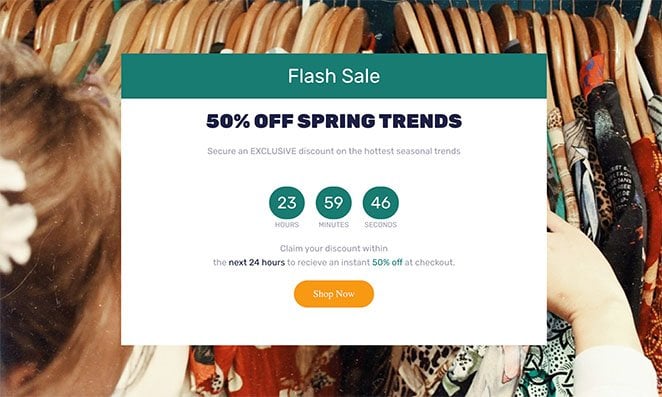
Countdown timers allow you to show landing page visitors the amount of time they have to claim an offer or discount. You can also use countdown timers to count down to a product launch or sales period like Black Friday.
This article will show you how to create a landing page with countdown timers to create a sense of urgency.
Why Add a Countdown Timer to Your Landing Page?
Adding a countdown timer to your landing page is an excellent way to engage your audience. Because attention spans are fleeting, a countdown timer can hold it long enough to convince visitors to take action.
Countdown timers are also ideal for building excitement and urgency. Users are more likely to act if they know they have limited time left; they won’t want to miss the chance to save money.
Bottom line: Adding a countdown timer to your landing page can build excitement and urgency and increase conversion rates.
カウントダウンタイマー付きランディングページの作り方
Creating a landing page with countdown timer functionality might sound complicated at first. Won’t you need to write HTML code or hire a developer?
Luckily, you won’t need either if you choose a powerful, drag-and-drop page builder like SeedProd.
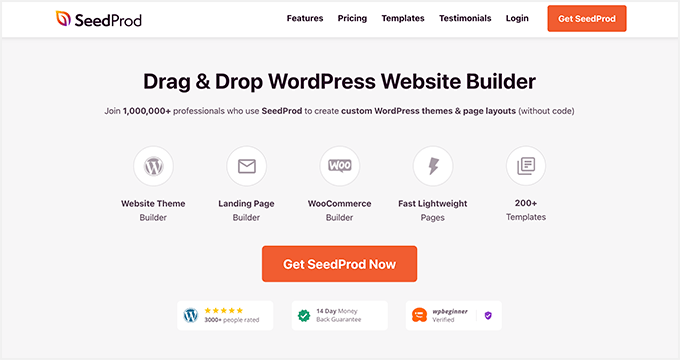
SeedProd is the best website builder for WordPress. Over 1 million website owners use this plugin to create custom WordPress themes, landing pages, and flexible website layouts.
You can get started with a pre-made template and build a professional website or landing page without code. The front-end visual editor is super-easy to use, even for beginners, and it comes with many blocks and sections for adding lead-generating features to your site, including:
- カウントダウン・タイマー
- Reviews and testimonials
- グーグルマップ
- ソーシャルメディアへの埋め込み
- Add to cart buttons and CTAs
- 価格表
- アニメーション見出し
- その他いろいろ
You can also put your site in maintenance mode or create a coming soon page with SeedProd’s powerful page modes. Check out SeedProd’s features page for a complete overview.
Follow the steps below to create a landing page with a countdown timer using SeedProd.
ステップ1.SeedProdのインストールとアクティベート
The first step is to get a copy of SeedProd.
Note: There is a free version of SeedProd available, but we’ll use SeedProd Pro for the advanced features.
After downloading the SeedProd zip file, you’ll need to install and activate it on your WordPress website. You can follow this guide on installing a WordPress plugin if you need help.
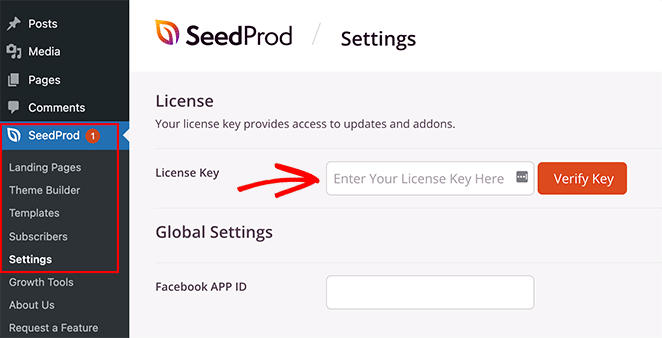
Next, go to SeedProd » Settings and enter your license key.
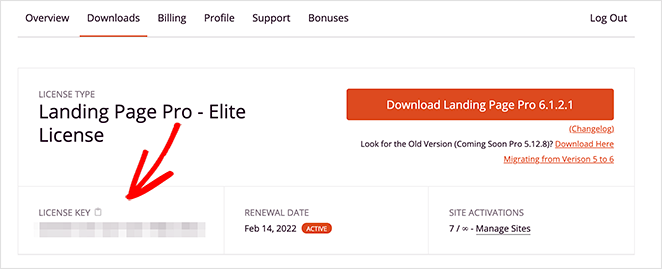
You can find your license key by logging into the SeedProd website and clicking the “Downloads” tab in your account dashboard.
Click the Verify Key button to confirm your license and move on to the next step.
Step 2. Create a Landing Page
Next, go to SeedProd » Landing Pages.
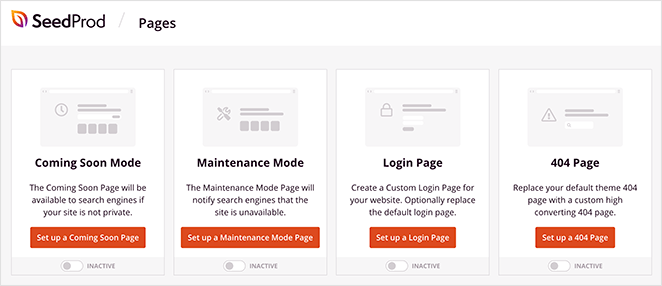
This is where you can turn on any of SeedProd’s page modes, including:
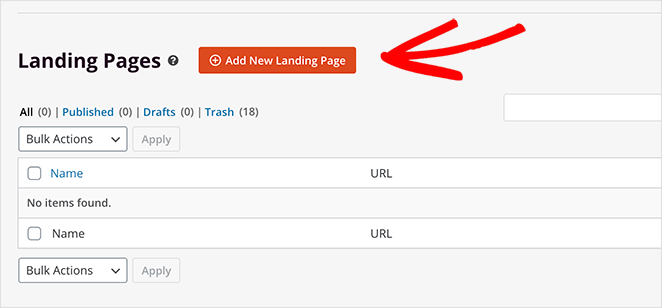
Under that section, you can create a custom landing page visually with the drag-and-drop page builder.
Click the Add New Landing Page button to create a landing page in WordPress.
You’ll see hundreds of landing page templates you can import with a single click on the next screen. You can choose any template you like and customize it easily in the next step.
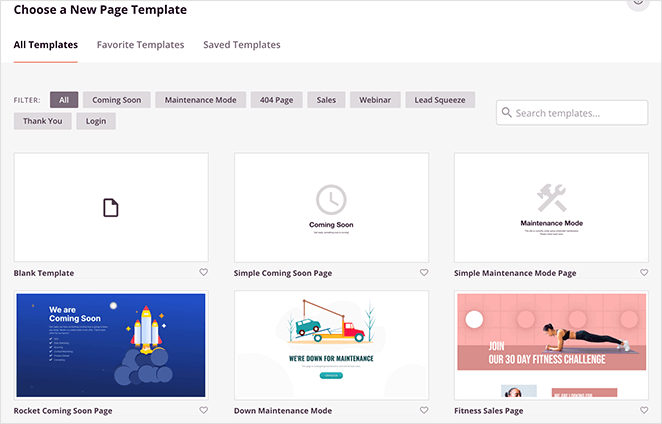
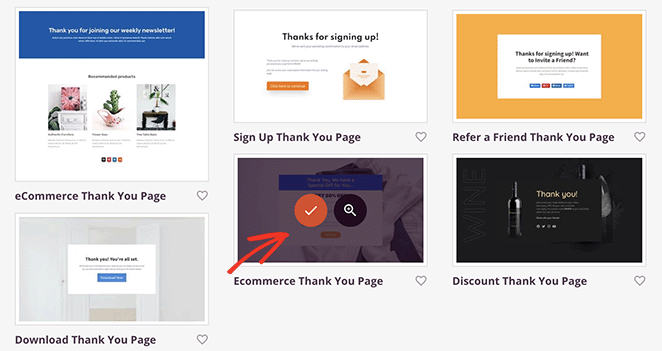
For this guide, we’re using the Ecommerce Thank You Page template. Hover your mouse over the template and click the checkmark icon to import it to your WordPress site.
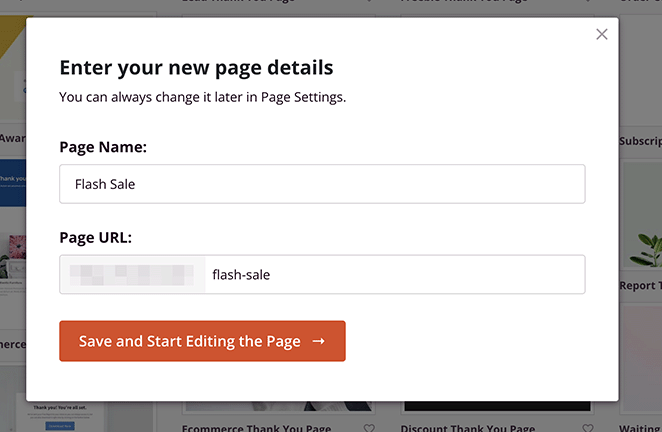
You can enter a name and URL for your landing page next. When you’re ready to start customizing, click the Save and Start Editing the Page button.
Step 3. Add Content and Customizations
You’ll see your template in SeedProd’s visual editor on the next page.
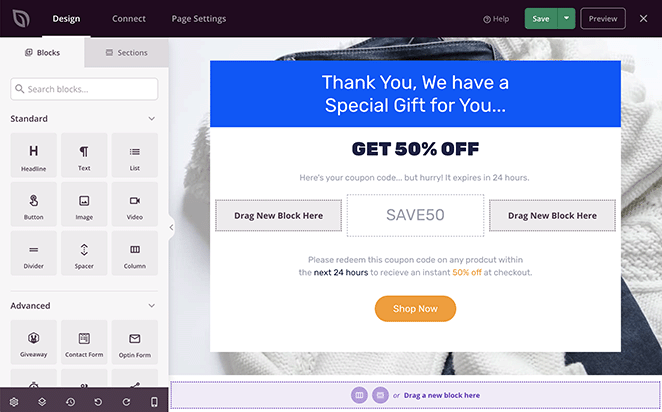
You can customize every part of your page by using the blocks and sections on the left. You can also click any element on the right and edit your page in real-time.
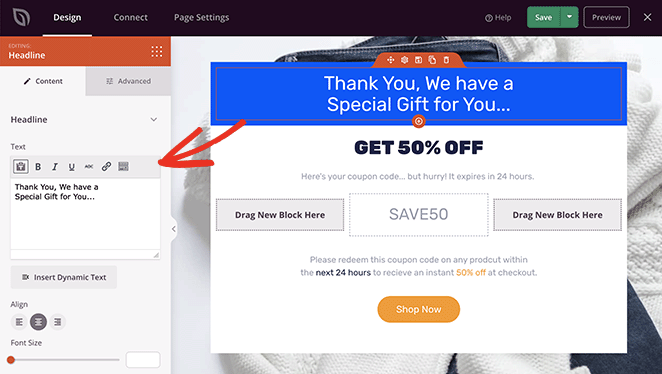
For example, changing your landing page heading involves clicking the heading element and entering custom content in the settings panel.
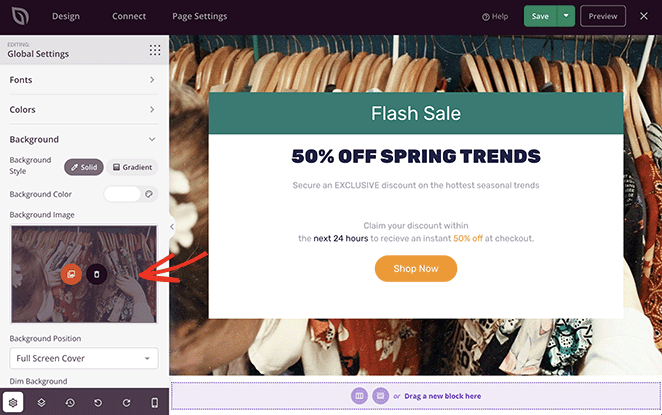
You can also change your background image by clicking the Global Settings icon.
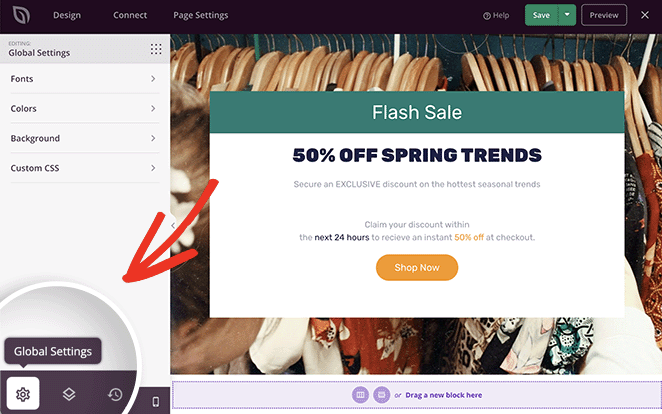
Then you can click the background tab and upload a new image from your computer or WordPress media library.
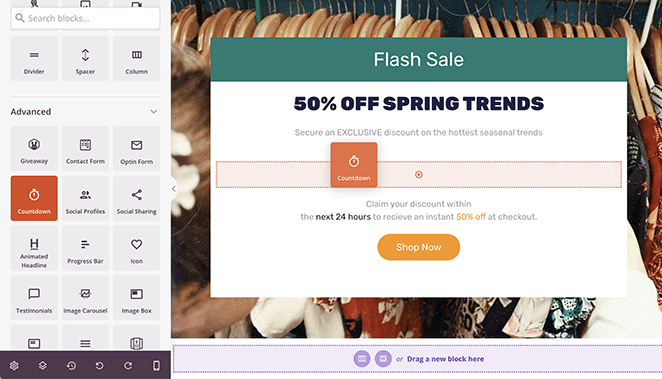
Adding a countdown timer to your landing page is just as easy. Find the Advanced blocks section in the left-hand panel, then drag and drop the Countdown block onto your landing page preview.
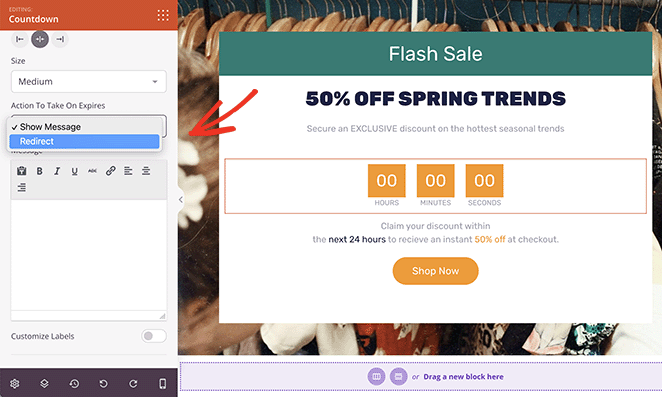
Clicking the Countdown element opens the content settings panel on the left, where you can:
- Choose a countdown type
- Set the timer duration
- Choose a time zone
- Adjust the size and alignment
You can also enter a message to show automatically when the timer expires. Or you can redirect visitors to another URL when the timer ends.
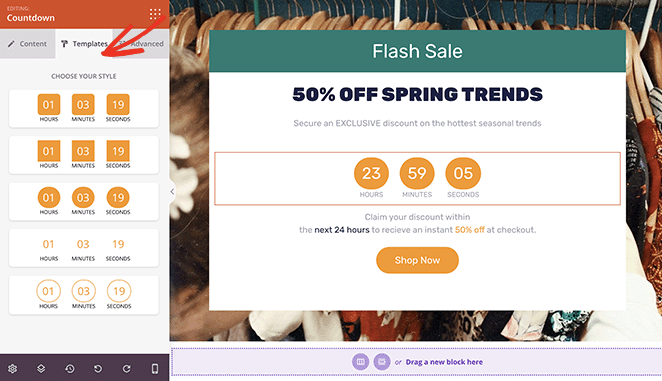
The Templates tab offers several premade countdown timer designs. Click any design to add the styling to your countdown clock automatically.
You can also adjust more settings in the Advanced tab, including:
- フォント
- カラー
- Shadows
- Spacing
- 属性
- デバイスの可視性
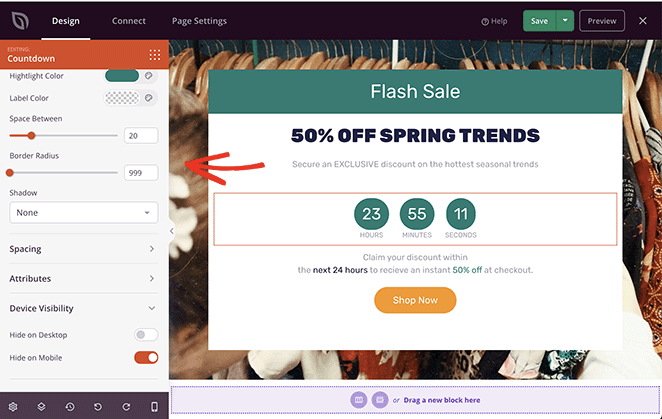
The Device Visibility option lets you hide the element on mobile or desktop devices. It’s an excellent way to tailor your landing page to different target audiences.
When you’re happy with how your landing page looks, click the Save button in the top-right corner.
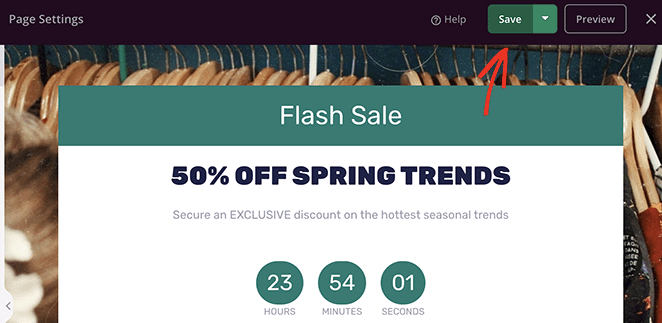
Now you can move on to adjusting your page’s settings.
ステップ4.ランディングページの設定
SeedProd offers several features to help you optimize your landing page and generate leads and conversions. The most notable is the ability to integrate with various popular email marketing services.
You can connect your email provider by clicking the Connect tab at the top of your screen. Then, find your preferred service and follow the instructions to verify the connection.
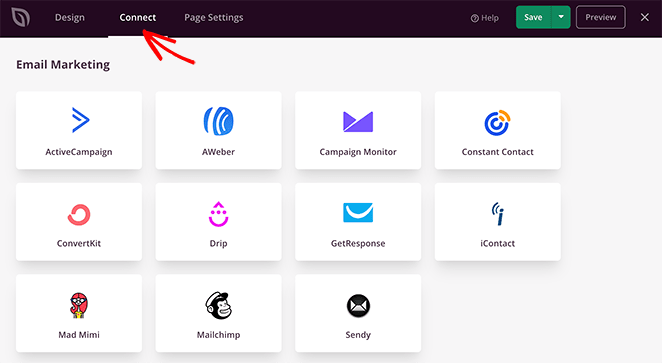
In our email documentation, you can learn how to connect to specific email marketing services.
Next, click the Page Settings tab.

You can configure various settings on this page, including:
- General: change your landing page name and URL, publish or revert to draft, and enter your Facebook App ID.
- SEO: configure your on-page SEO settings with the All In One SEO plugin.
- Analytics: install MonsterInsights to track your landing page metrics with Google Analytics.
- Scripts: add custom scripts to your landing page’s header, body, and footer.
- Custom Domain: point your landing page to a different domain name without installing WordPress on another website.
Step 5. Publish Your Landing page
When you’re happy with your landing page and countdown timer design, you can make the page live.
Click the Save button’s dropdown arrow and select the Publish option.
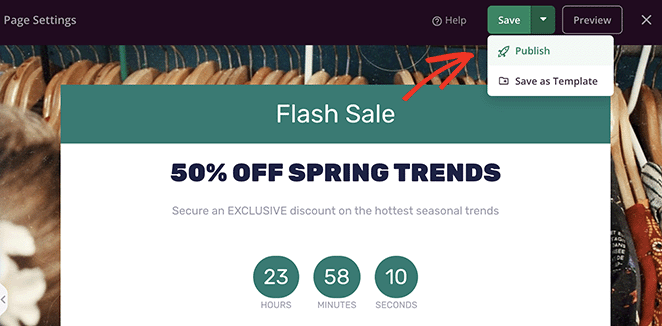
You can now preview your landing page and see your countdown timer in action.
Adding a countdown timer can be particularly exciting for special events. Learn how to make a wedding website in WordPress and see how a countdown can enhance the anticipation for the big day.
よくある質問
A landing page with a countdown timer is a specific type of webpage designed to capture visitors’ attention and increase their sense of urgency. The countdown timer is a dynamic element that shows the remaining time until an event starts or a deal expires. This can boost conversions by inducing a sense of scarcity or urgency.
A countdown timer can create a sense of urgency, which encourages visitors to take action immediately rather than putting it off. This can lead to increased conversions, whether that means making a purchase, signing up for a newsletter, registering for an event, or any other action you want your visitors to take.
Countdown timers should be designed to work on all devices, including desktop computers, laptops, tablets, and smartphones. However, it’s always a good idea to test your landing page on various devices to ensure the countdown timer displays correctly and functions as intended.
Yes, some countdown timer tools allow you to set up a recurring timer. This can be useful if you have regular events or recurring promotions, as you won’t have to manually reset the timer each time.
We hope this article helped you learn how to create a landing page with countdown timer functionality. Ready to jump in and create one for your site?
You might also like this guide on creating a sales page in WordPress while you’re here.
お読みいただきありがとうございました!ご質問やご意見がありましたら、お気軽にコメントをお寄せください。
また、YouTube、X(旧Twitter)、Facebookでも、ビジネスの発展に役立つコンテンツを配信しています。

