For a long time, I added testimonials wherever I could. I used text blocks, quotes, or bolded snippets in the middle of a page. It looked okay, but it didn’t feel trustworthy.
Once I started using proper testimonial sections with visual blocks, sliders, and real social proof, the results were better. Pages looked more polished, the reviews stood out, and conversions started to climb.
In this guide, I’ll show you how to add testimonials to WordPress pages using three simple methods I’ve tried myself. No code, no theme edits, and no confusion.
Quick Summary: How to Add Testimonials to WordPress
- Use SeedProd to Add Custom Testimonials
- Embed Facebook Reviews with Smash Balloon
- Use WP Testimonials Rotator for a Free Slider
Why Add Testimonials to a WordPress Page?
Showing a customer testimonials section on your WordPress site is an effective way of adding social proof, which can help you win more customers and boost sales. Plus, if you run an online store, testimonials can even boost your conversion rates.
For instance, when people see positive customer feedback about your products or services, it increases their trust in your brand. And if you display a number of testimonials on a product or checkout page, they can encourage users to go through with their purchase.
Another effective way to use testimonials is on squeeze pages. That way, you can encourage people to download an ebook or subscribe to your email newsletter.
As you can see, when you add testimonials to WordPress pages, you significantly increase the chance of boosting leads and sales.
Add Testimonials to WordPress Pages with SeedProd
For the first method, we’ll use SeedProd to add testimonials to WordPress pages.

SeedProd is one of the best WordPress page builders with drag-and-drop functionality. Used by over 1 million websites, it lets you create custom pages in WordPress quickly.
With hundreds of responsive landing page templates to choose from, getting started is easy. With the front-end visual editor, you can customize your page with easy testimonials, star ratings, and other lead-generation tools without writing code.
So follow the steps below to add testimonials to WordPress with SeedProd for beginners.
ビデオ・チュートリアル
ステップ1.SeedProdのインストールとアクティベート
最初のステップは、SeedProdプラグインのコピーをダウンロードすることです。
Note: There is a free version of SeedProd available, but we’ll use the Pro version since it has the testimonial block we need.
After downloading SeedProd, install and activate it on your WordPress site. If you need help, you can follow this guide for installing WordPress plugins.
Upon activating SeedProd, go to SeedProd » Settings and enter your license key.
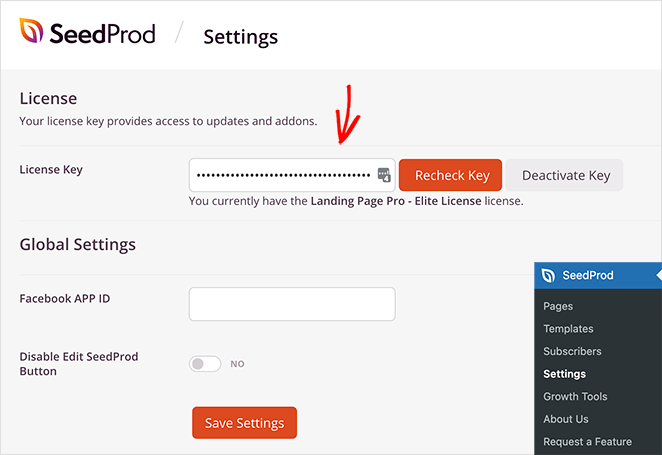
You can find your license key in your account dashboard on the SeedProd website.
Step 2. Create a New WordPress Page
After entering your key, head over to SeedProd » Pages and click the ‘Add New Landing Page’ button.
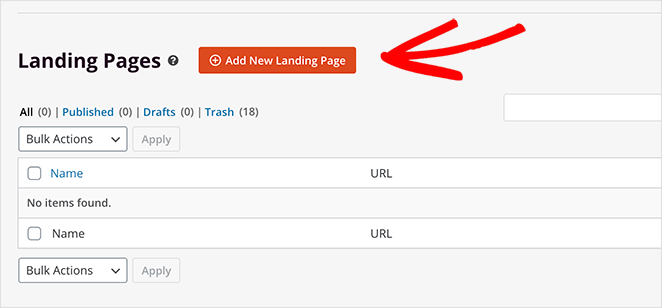
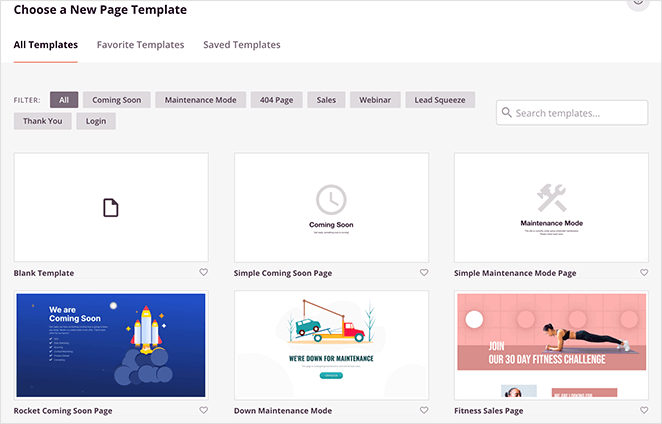
From there, you can choose from hundreds of professionally designed landing page templates.
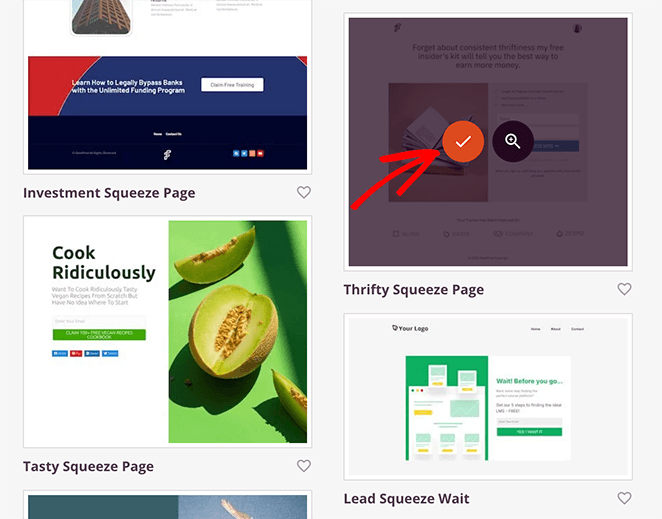
Once you find a template you like, hover over the thumbnail and click the checkmark icon.
From there, you’re asked to enter your landing page name and URL. After entering those details, click the Save and Start Editing the Page button.
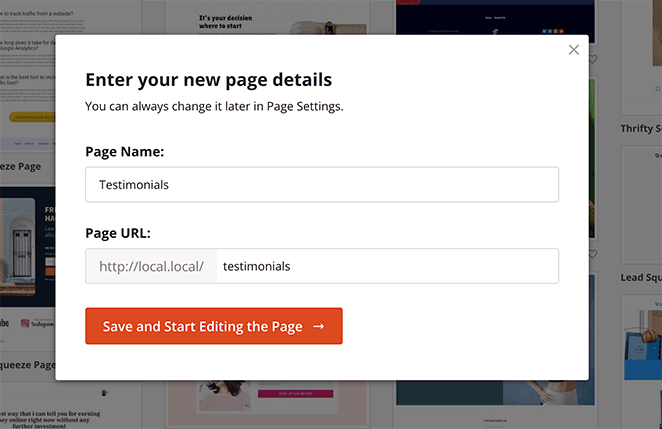
SeedProd will now launch your template in the drag-and-drop visual editor. And it’s where you can design and customize your page.
Navigating the builder is super easy; simply click to select and edit any of your template elements. You can also show customer reviews on WordPress using built-in testimonial or review blocks.

Step 3. Use the Testimonial Page Block
The first block that we’ll add is the customer testimonial block. So drag the ‘Testimonials’ block from the Advanced blocks section and drop it onto your page.
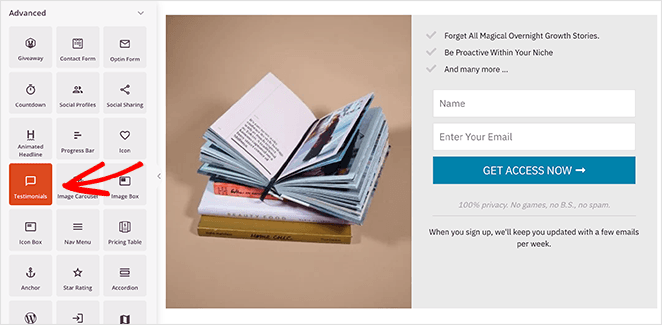
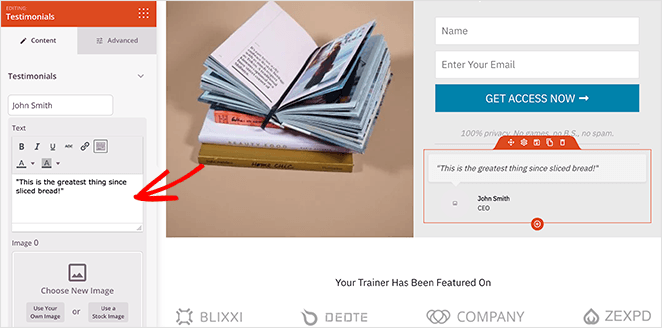
From there, customizing the testimonial block is just as easy. For example, you can click the Content tab to change the testimonial title, text and even add a featured image for the client or customer.
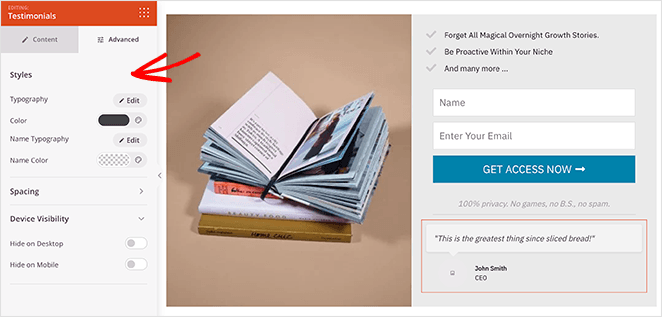
If you click the Advanced tab, you can change the typography, colors, spacing, and even control testimonial views for mobile and desktop devices.
To add multiple testimonials, click the ‘Add Testimonial’ button in the left-hand menu. This will automatically create a rotating block of customer testimonials.
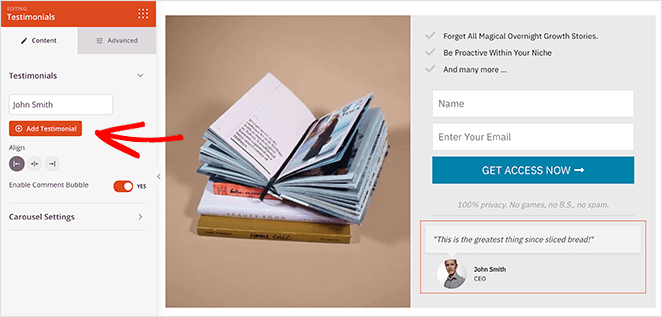
Then, under the Carousel Settings heading, you can change the navigation color mode, turn auto-play on or off, and control the carousel slideshow speed.
You can also use SeedProd’s Business Reviews block to display customer reviews from Google and Yelp, which is great if you sell products or services with WooCommerce. To do that, you can follow this easy guide on how to embed Google and Yelp reviews in WordPress.
Step 4. Customize Your Page
After adding testimonials to your WordPress page, you can continue customizing your design with SeedProd. For example, to change the default template image, click the image block and select the trash can icon to remove it.
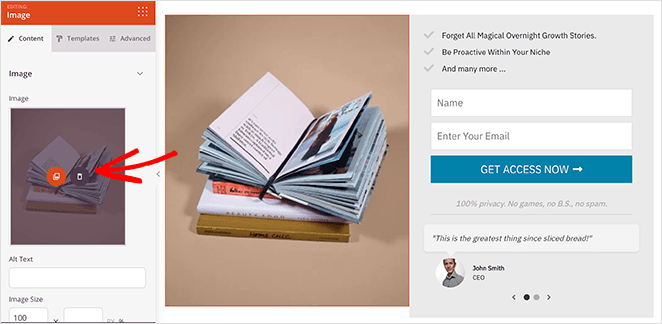
From there, you can upload a new image from your computer, WordPress media library, or SeedProd’s library of free stock images.
And if you want to change your fonts, colors, and custom CSS globally, simply click the gear icon in the bottom left corner.
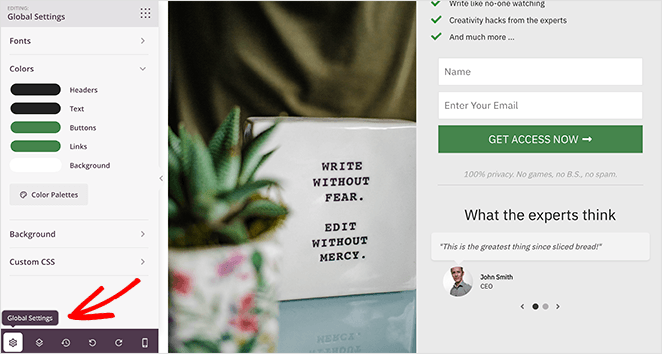
Any settings you change in this panel are added to your entire page. That means you won’t need to edit the fonts or colors of each block individually.
Additionally, you can connect your email list with your landing page easily. So, if you’re collecting email addresses, you can update your list automatically.
To do that, click the Connect tab at the top of your screen. From there, you can see the various email marketing services that integrate with SeedProd.
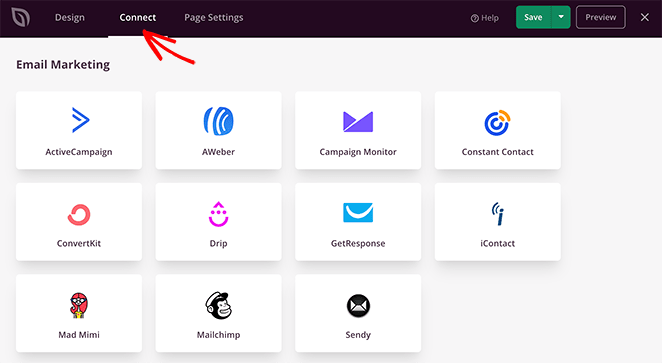
So click your preferred service and follow the instructions to connect your email list with SeedProd.
Remember to click the Save button to store your settings.
Step 5. Publish Your Page in WordPress
When you’re happy with your landing page design, click the dropdown arrow next to the green save button and select Publish.
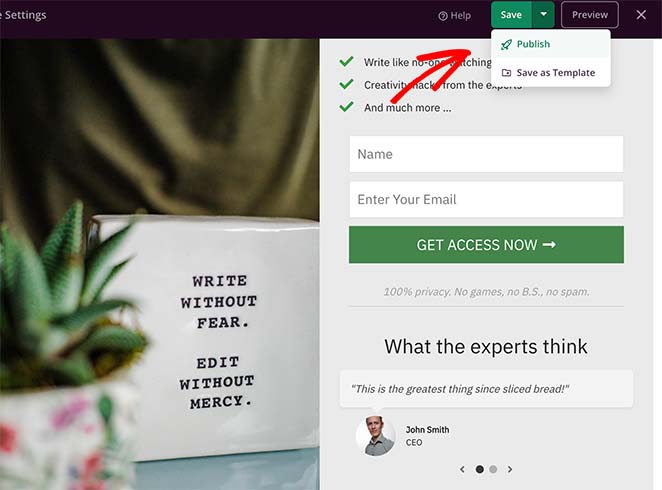
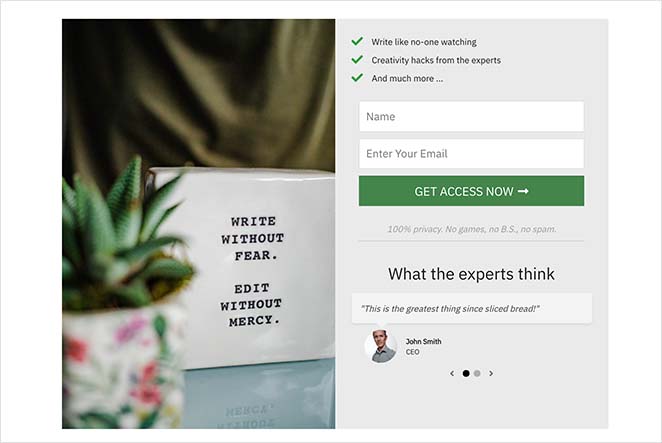
From there, you can preview your design and see the testimonials live on your WordPress page.
Add Facebook Testimonials to WordPress Pages with Smash Balloon
For the second method, we’ll use Smash Balloon to add Facebook testimonials to WordPress pages.
Smash Balloon offers the best suite of social media feed plugins for WordPress. If you’re wondering how to display reviews on WordPress from Facebook, this tool does it. Their Facebook Feed Pro plugin includes a handy extension that allows you to show Facebook reviews on any post or page in WordPress.
Once you activate, set up, and connect your Facebook account, your testimonials will automatically update when new reviews are posted. Plus, there are plenty of options for filtering and moderating which reviews show up on your site, so you have complete control.
So, if you want to add Facebook testimonials to WordPress pages with Smash Balloon, follow the steps below.
Step 1. Install and Activate Facebook Feed Pro
First, download a copy of Smash Balloon’s Facebook Feed Pro plugin.
Then, install and activate the plugin on your WordPress website.
Next, navigate to the Facebook Feed » Extensions menu from your WordPress dashboard, where you’ll see the Reviews extension. From there, click on the Activate button next to it.
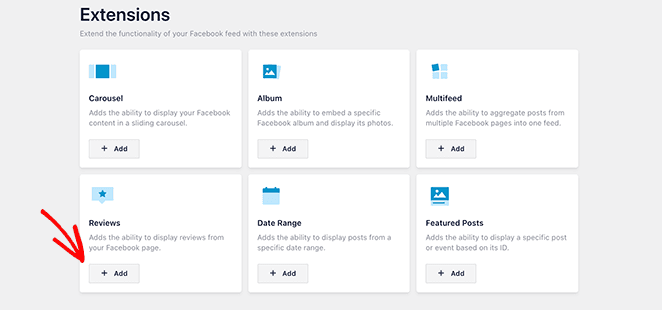
Now you’re ready to start adding testimonials to your WordPress page.
Step 2. Make Your Facebook Testimonials Widget
To create your first testimonials feed, go to the Facebook Feed » All Feeds menu from your WordPress dashboard. Then, click the Add New button to create a new Facebook feed.
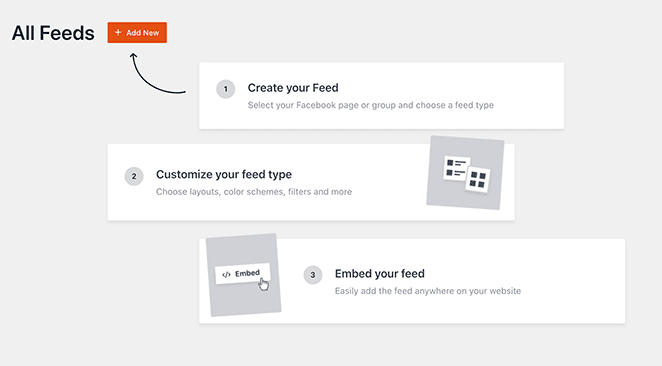
From there, you’ll see several different feeds you can add to your website. To add a reviews feed, click the Reviews option and click Next.
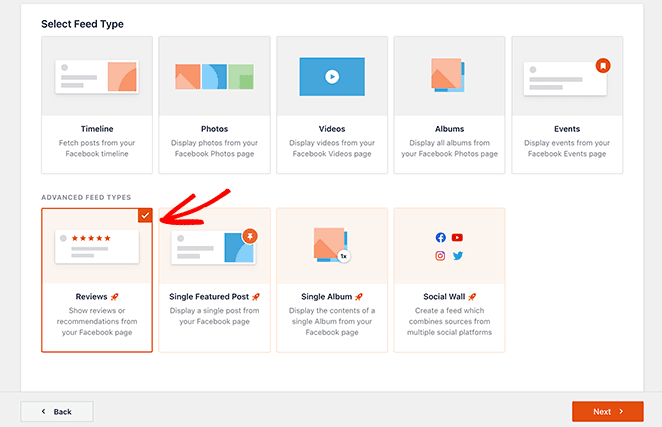
Step 3. Connect to Your Facebook Reviews
To embed your Facebook reviews on your website, you need to connect your feed to a Facebook page first. To do that, click the Add New button under the Select a Source heading.
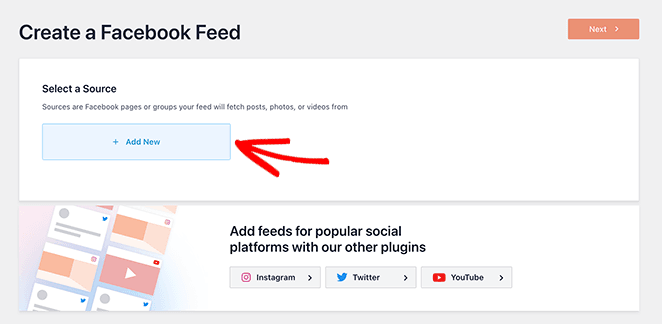
Now, you’ll see a popup asking you to choose between a Facebook page source or a Facebook group. To add testimonials, you’ll need to select the Page option and click Connect.
On the next screen, you’ll need to log in to Facebook and choose which Facebook page you want to connect to. Just select the page you want, click Next, grant Smash Balloon’s permissions, and click Done.
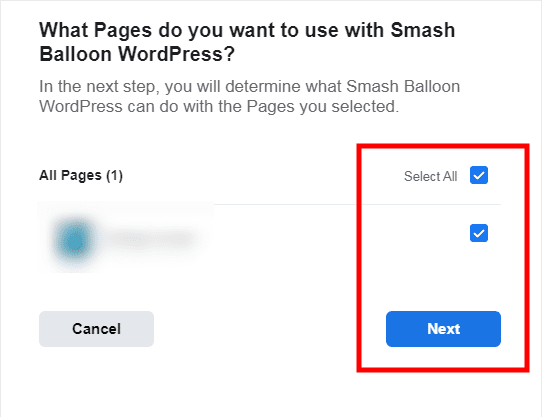
Now, you’ll head back to your WordPress dashboard. From there, simply select your Facebook page and click Add.
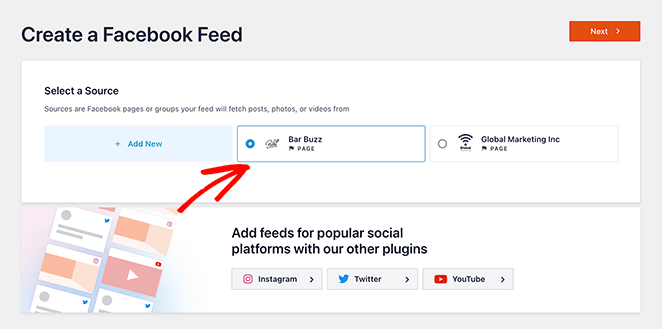
Step 4. Customize Your Facebook Testimonials Feed
The next step is to personalize your Facebook testimonials feed. In the live editor, you can see the customization settings on the left, with different:
- Feed types
- Feed layouts
- Color options
- Post layouts
- Header styles
- Like box
- 他にもいろいろある。
On the right side, you can see any customization changes you apply in real time.
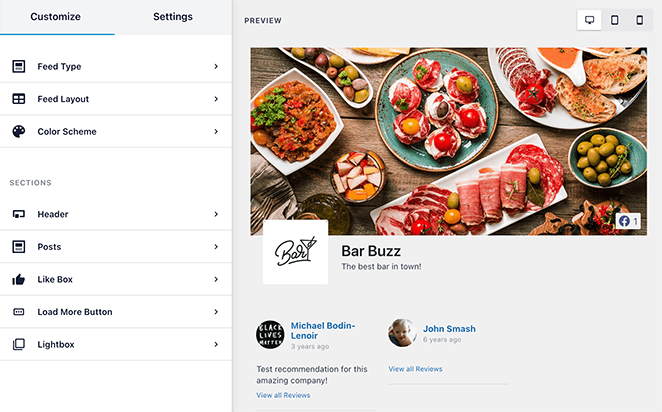
To start customizing your feed, click the Feed Layout option. You can choose from 3 different testimonial layouts on that screen: list, masonry, and carousel.
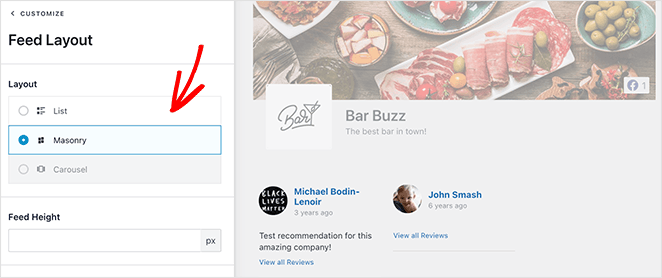
Click any layout you prefer and click the Save button.
Now, let’s customize your feed’s color scheme by clicking the Color Scheme option. On that screen, you can match your WordPress theme’s color scheme, use a light or dark theme, or create a custom theme of your choosing.
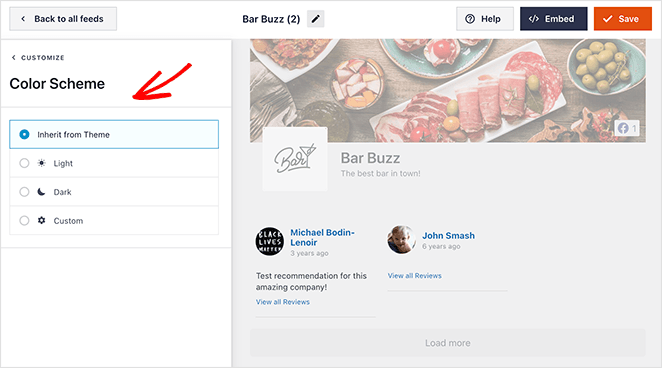
When you’re happy with how your testimonial feed looks, click Save.
Step 5. Embed Your Testimonials Feed in WordPress
There are several ways to add your Facebook reviews feed to WordPress, including:
- In any WordPress post
- In widget-ready areas like your sidebar
- On any WordPress page
For this guide, we’ll show you how to add testimonials to WordPress pages. So click the Embed button at the top of your screen.
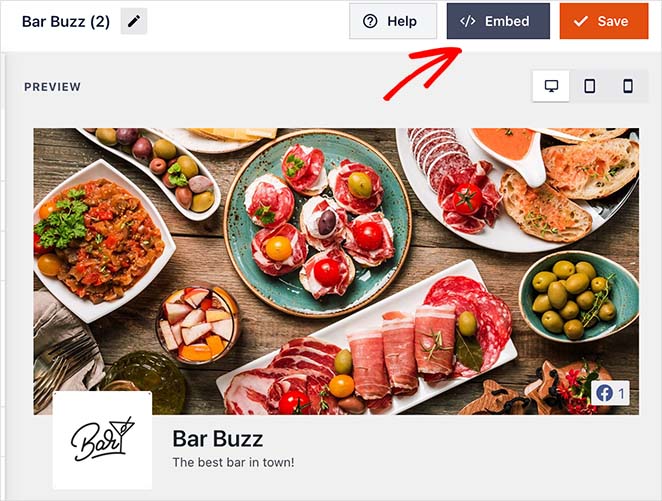
From there, click the Add to a Page button.
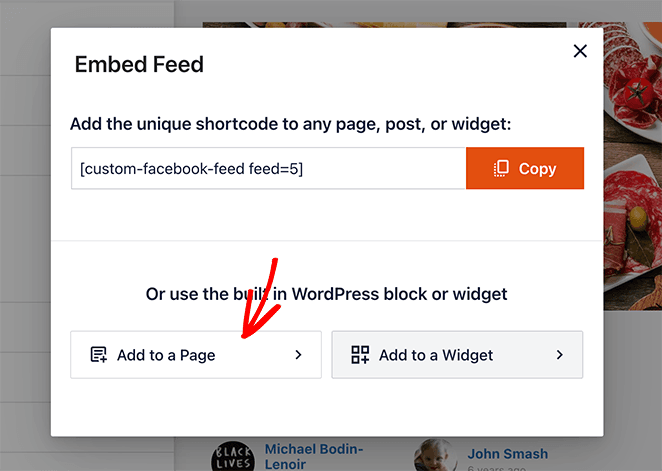
On the next screen, choose the page where you want to add your testimonials and click Add.
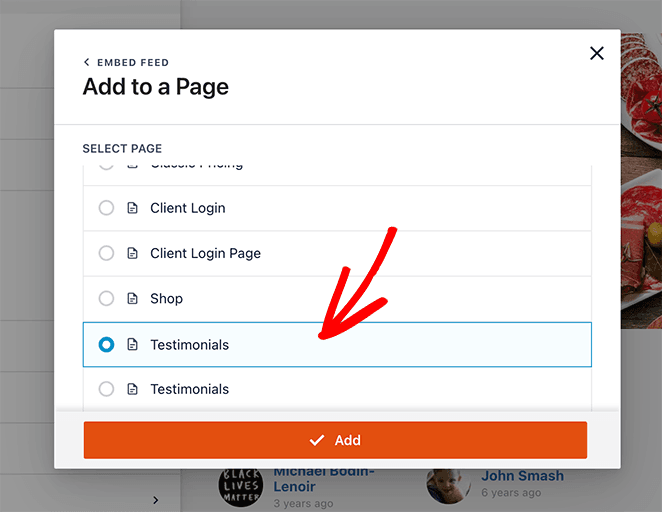
After clicking the button, you’ll head to your chosen page’s WordPress block editor.
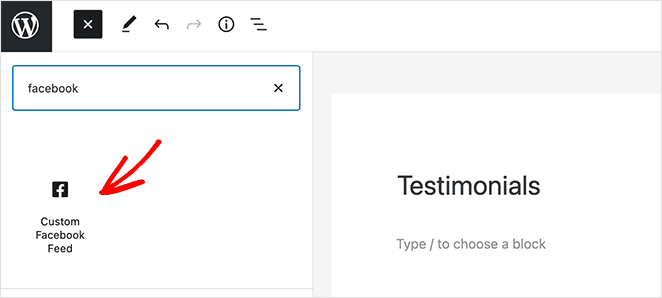
From there, click the plus (+) icon to add a new WordPress block and choose the Custom Facebook Feed widget to add your Facebook reviews feed to your page.
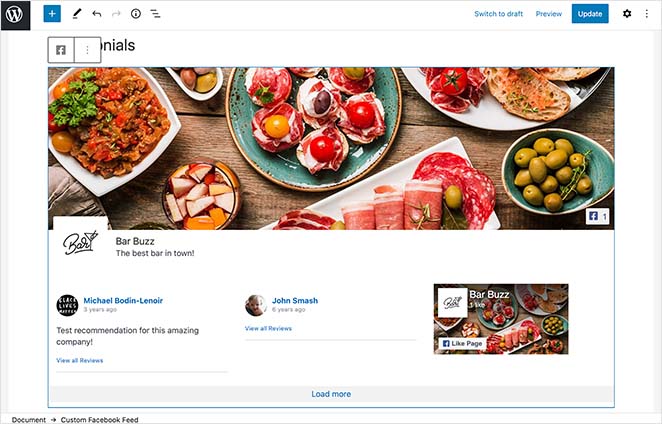
When you’re happy with how everything looks, click Publish. Now, when your customers visit your site, they’ll see your Facebook reviews right on your page.

Use WP Testimonials Rotator Testimonial Plugin for WordPress (Free)
For the last method, we’ll use one of the best WordPress testimonials plugins called WP Testimonials Rotator. This plugin is free in the WordPress plugin directory and lets you add simple rotating testimonials to pages in WordPress.
So if you need a simple and free solution, follow these steps to add testimonials to WordPress pages for free.
Step 1. Install and Activate WP Testimonials Rotator

First, download the WP Testimonials Rotator plugin and install and activate it on your website.
Step 2. Create Your Testimonials
Next, go to WP Testimonials » Add New from your WordPress dashboard.
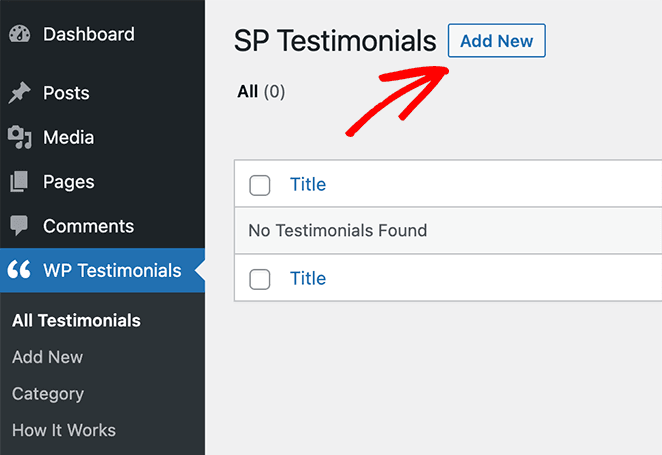
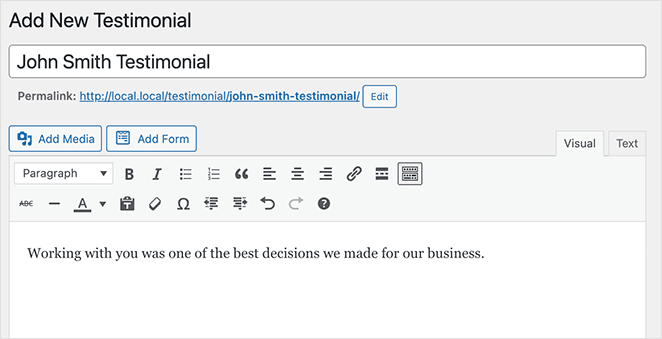
From there, you can add your testimonial details using the WordPress page editor.
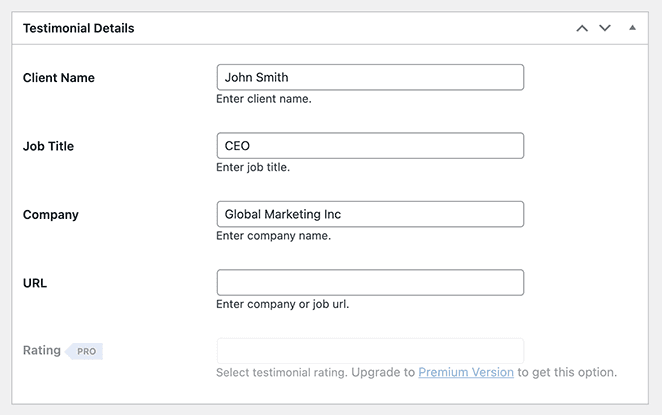
After adding your testimonial quote, you can scroll down and add other details in the custom fields, including:
- Client Name
- Job Title
- 会社概要
- URL
From there, simply click Publish to publish the testimonial on your website. And if you want your testimonials to rotate, you just need to collect testimonials and add them to your site using the same steps.
Step 3. Publish Your Testimonials in WordPress
Publishing your testimonials on a page is straightforward. Just create a new WordPress page and click the plus (+) icon to add a new WordPress block.
For this method, you’ll need to search for the Shortcode block and then click it to embed it on your page.
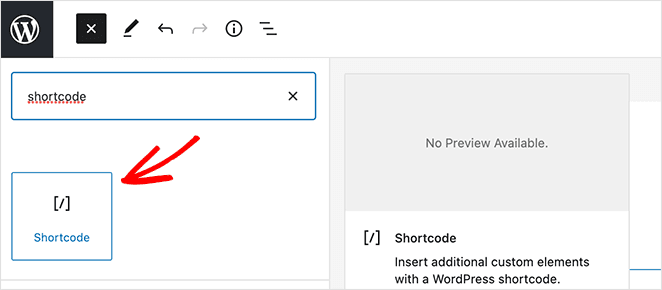
Next, just paste the following shortcode into the block:
[sp_testimonials_slider]
The shortcode creates a rotating WordPress testimonial slider.
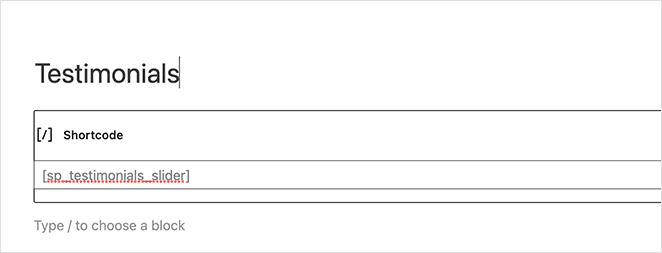
Now, all that’s left is to click Publish. Then, when you preview or visit your page, you’ll see your testimonials live on your WordPress page, having used this strong testimonials plugin.

FAQs About Adding Testimonials to WordPress
[sp_testimonials_slider] and you’re set.それだけだ!
I hope this article helped you learn how to add testimonials to WordPress pages easily. You might also like to learn how to embed Facebook events in WordPress too.
お読みいただきありがとうございました。ツイッター、フェイスブック、ユーチューブで、あなたのビジネスの成長に役立つコンテンツをもっとご覧ください。


