

Una página de destino gratuita de WordPress es una página web simple e independiente creada para recopilar clientes potenciales, promocionar ofertas o realizar ventas sin pagar a un diseñador.
En resumen: Cómo crear una página de destino gratuita en WordPress
La forma más rápida de crear una página de destino gratuita de WordPress es con el plugin gratuito de SeedProd. Así es como se ve el proceso:
- Instala SeedProd gratis: Descárgalo de WordPress.org y activa el plugin en minutos
- Elige una plantilla gratuita: Elige entre más de 16 plantillas gratuitas para categorías de ventas, próximamente y clientes potenciales
- Añade tu contenido: Arrastra texto, imágenes y botones a su lugar con el editor visual
- Personaliza estilos: Establece fuentes, colores y fondo desde el panel de configuración global
- Comprueba la vista móvil: Previsualiza en el móvil y ajusta antes de publicar
- Publica: Haz clic en Publicar y tu página de destino se publicará en tu sitio de WordPress
Cómo crear una página de destino gratuita de WordPress (en 30 minutos)
Para este tutorial, usaré SeedProd, un popular plugin de WordPress de arrastrar y soltar con más de 1 millón de instalaciones activas. Te permite crear páginas de destino totalmente personalizadas sin escribir ningún código.
Está diseñado tanto para principiantes como para profesionales, por lo que puedes lanzar páginas rápidamente y centrarte en hacer crecer tu audiencia.

A diferencia de otros constructores de páginas, SeedProd es muy rápido y no ralentizará tu sitio web. Utiliza un código mínimo y las mejores prácticas de diseño para garantizar que tu sitio sea lo más rápido posible.
Tutorial en vídeo
¿Prefieres ver en lugar de leer? Este rápido vídeo te guía a través de cada paso para crear una página de destino gratuita en WordPress.
Si prefieres leer el tutorial escrito, sigue los pasos a continuación.
1. Instala el creador de páginas de destino gratuitas de SeedProd
El primer paso es instalar el plugin gratuito de páginas de destino de WordPress de SeedProd. Puedes hacerlo navegando a Plugins » Añadir nuevo desde tu panel de WordPress.
Luego, escribe “SeedProd” en el cuadro de búsqueda de la derecha. Esto te mostrará los siguientes resultados:
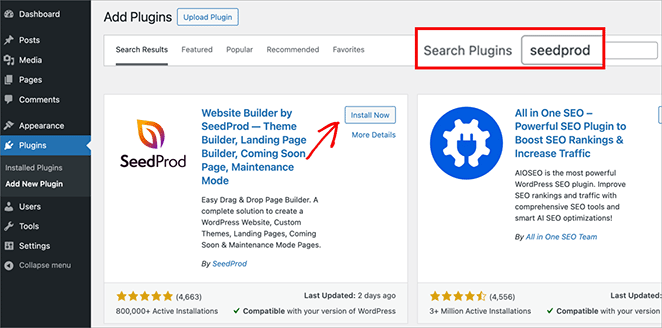
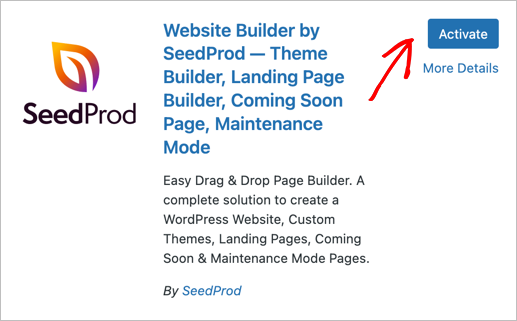
Haz clic en Instalar junto a la opción Website Builder by SeedProd. Luego, haz clic en Activar.
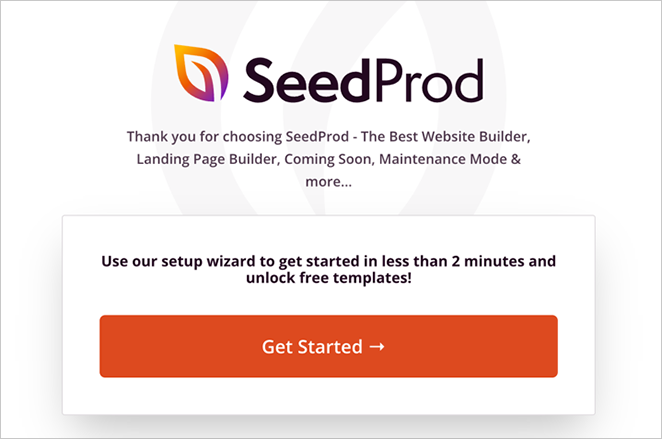
Después de activar el plugin, verás el asistente de configuración de SeedProd, que te ayuda a empezar a crear una página de destino en 2 minutos. Haz clic en “Empezar”.
Para el primer paso del asistente, deberás introducir una dirección de correo electrónico para crear tu cuenta gratuita de SeedProd. Luego, decide qué tipo de página de destino quieres crear.
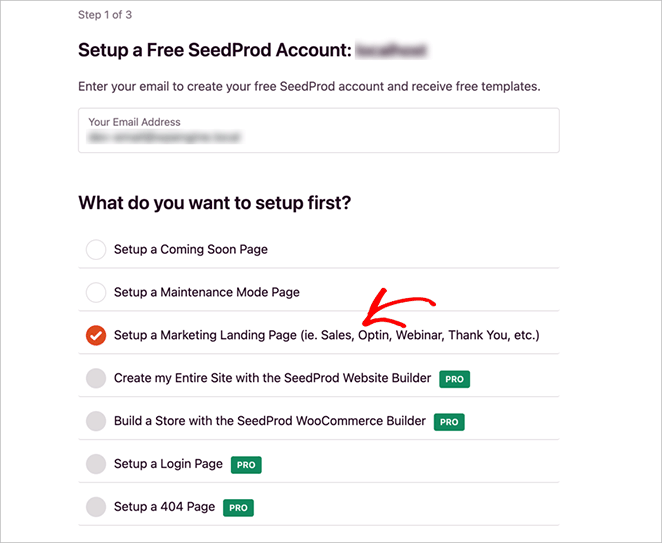
Hay 3 opciones gratuitas para elegir:
- Configurar una página Próximamente
- Configurar una página de modo de mantenimiento
- Configurar una página de marketing (es decir, Ventas, Captación, Seminario web, Gracias, etc.)
También verás varias opciones Pro que te permiten configurar páginas de inicio de sesión, páginas 404, tiendas en línea e incluso un tema personalizado de WordPress.
Para esta guía, centrémonos en las opciones gratuitas y seleccionemos "Página de destino de marketing", luego hagamos clic en "Guardar y continuar".
2. Selecciona una plantilla de página de destino gratuita
El siguiente paso en el asistente de configuración te permite elegir una plantilla de página de destino gratuita.
Puedes filtrar las plantillas haciendo clic en las diferentes categorías en la parte superior de la pantalla:
- Próximamente
- Modo de Mantenimiento
- Página 404
- Ventas
- Seminario web
- Captación de Leads
- Gracias
- Iniciar sesión
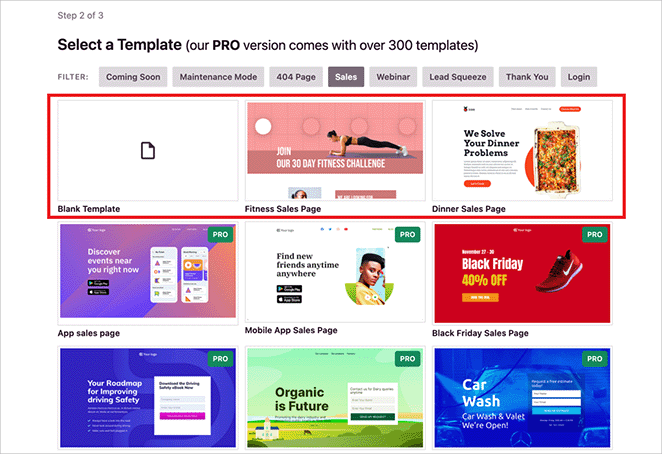
SeedProd ofrece una gran selección de plantillas de páginas de destino gratuitas en diferentes categorías. También puedes desbloquear aún más plantillas gratuitas suscribiéndote a la lista de correo.
Para acceder a la biblioteca completa de más de 300 plantillas premium, puedes actualizar a SeedProd Pro.
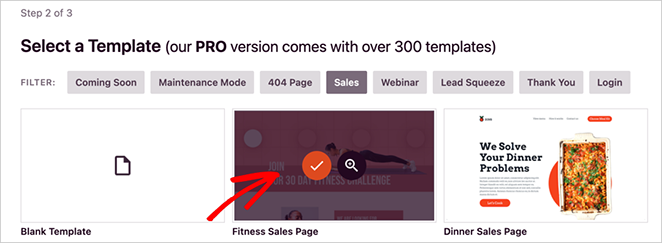
Para este tutorial, usaremos la plantilla gratuita de Página de ventas de fitness. Coloca el cursor sobre el icono de la plantilla y haz clic en el icono de la marca de verificación.
Después de elegir tu plantilla, pasarás automáticamente al último paso del asistente de configuración. Aquí, puedes aprovechar un descuento para actualizar a SeedProd Pro.
También puedes optar por instalar otros complementos gratuitos opcionales de WordPress.
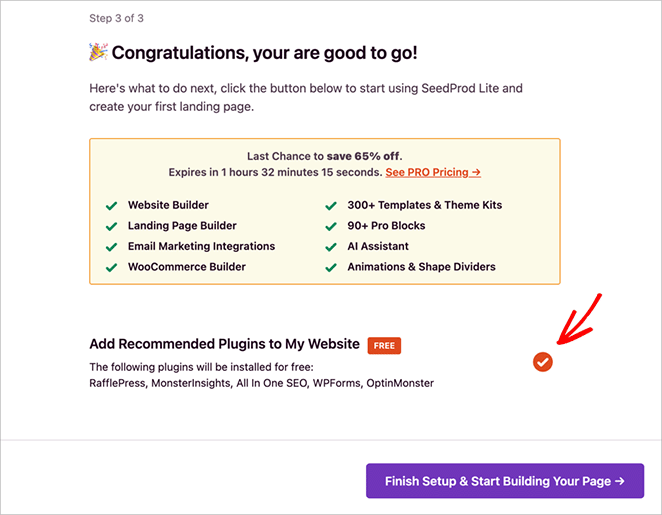
Si prefieres no instalar estos complementos, desactiva el interruptor. Luego, haz clic en "Finalizar configuración y empezar a crear tu página".
Ahora saldrás del asistente de configuración a la página de configuración de SeedProd. Aquí verás que la opción "Configurar una página de destino" está tachada, lo que significa que has completado esta tarea.
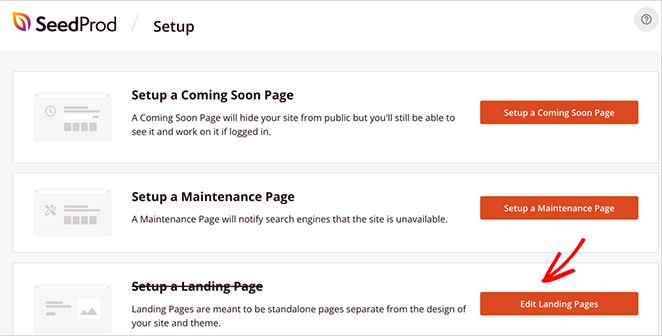
También notarás la opción "Editar páginas de destino". Haz clic en este botón.
Ahora, SeedProd te llevará al panel de control de páginas de destino. Aquí, puedes ver la página de destino gratuita que creaste bajo el encabezado "Páginas de destino".
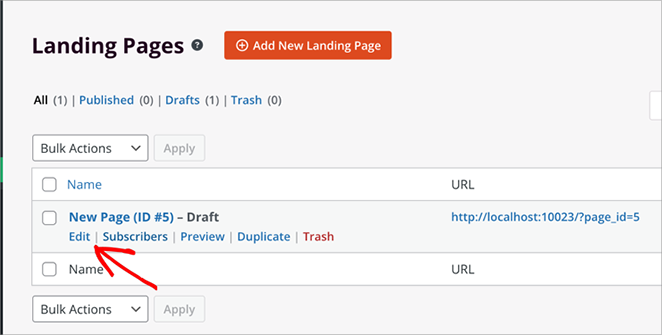
Coloca el cursor sobre el enlace de la página de destino y luego haz clic en la opción Editar para abrir y comenzar a personalizar tu página.
3. Añade el contenido único de tu página de destino
El creador visual de páginas de SeedProd está dividido en 2 secciones distintas. En el lado izquierdo se encuentran los diferentes bloques utilizados para diseñar tu página, mientras que en el derecho hay una vista previa en vivo de tu página de destino.
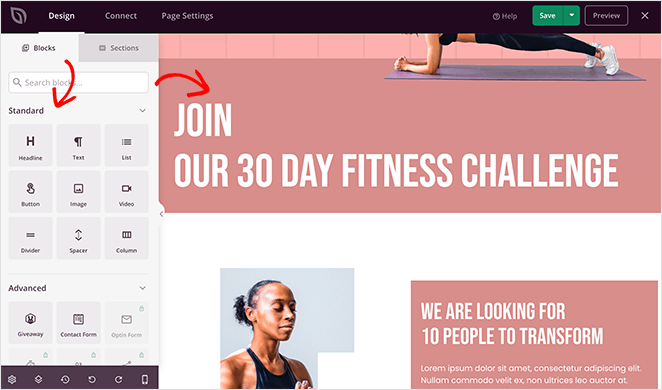
Para añadir contenido, arrastra un bloque desde el panel izquierdo y suéltalo en tu vista previa en vivo. Verás los cambios en tiempo real.
Hay varios bloques de página de destino para elegir, que incluyen:
- Encabezado
- Texto
- Lista
- Botón
- Imagen
- Vídeo
- Divisor
- Espaciador
- Columna
También puedes usar gratis 5 de los bloques Avanzados de páginas de SeedProd: Sorteo, Botón de pago, Formulario de contacto, Galería Envira y HTML personalizado.
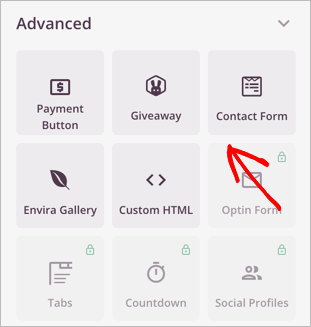
Con estos bloques, puedes:
- Crear un concurso en línea y mostrarlo en tu página
- Crear e incrustar formularios personalizados de WordPress
- Crear impresionantes deslizadores de imágenes para tu página
- Añadir HTML personalizado que funcione a la perfección con tu diseño
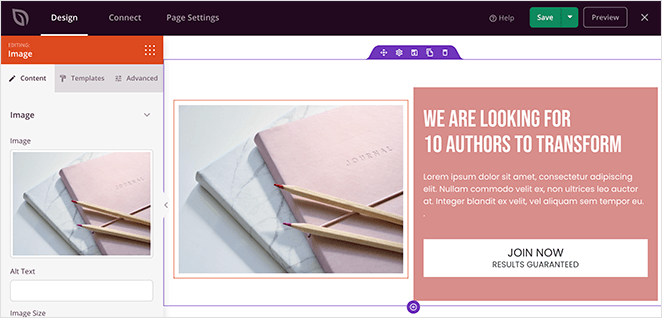
Empieza a añadir tu contenido único haciendo clic en cualquier bloque de tu vista previa en vivo. Esto mostrará un panel de configuración en el lado izquierdo, donde puedes reemplazar el contenido predeterminado con el tuyo.
Alternativamente, puedes editar el contenido directamente en tu vista previa con la función de edición de texto en línea de SeedProd.
Reemplazar las imágenes predeterminadas es igual de fácil. Haz clic en cualquier imagen de tu vista previa en vivo y luego haz clic en el icono de la papelera en el panel de configuración de la derecha.
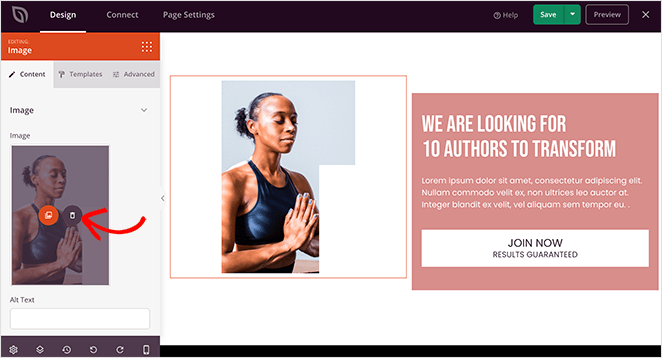
A continuación, haz clic en el botón Usar tu propia imagen para subir una foto de tu ordenador o de tu biblioteca de medios de WordPress.
SeedProd también incluye herramientas de IA para acelerar la creación de contenido. Utiliza el asistente de escritura de IA integrado para generar el texto de tu página de destino o el generador de imágenes de IA para crear elementos visuales personalizados.
Sigue añadiendo contenido hasta que estés satisfecho con el aspecto general. Luego, haz clic en el botón verde Guardar en la esquina superior derecha de tu pantalla.
4. Personaliza los estilos de tu página de destino
Después de añadir tu contenido único a tu página de destino gratuita, querrás asegurarte de que el estilo sea coherente con tu marca.
Puedes hacerlo fácilmente haciendo clic en el icono del engranaje en la esquina inferior izquierda para ver la configuración global de tu página.
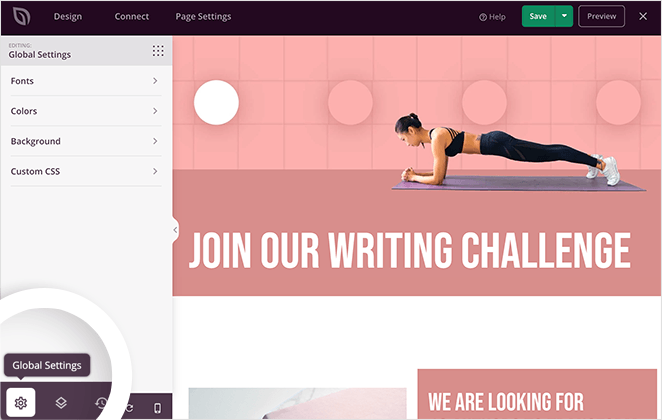
Esta configuración te permite personalizar tu página de destino:
- Fondo
- Colores
- Fuentes
- CSS personalizado
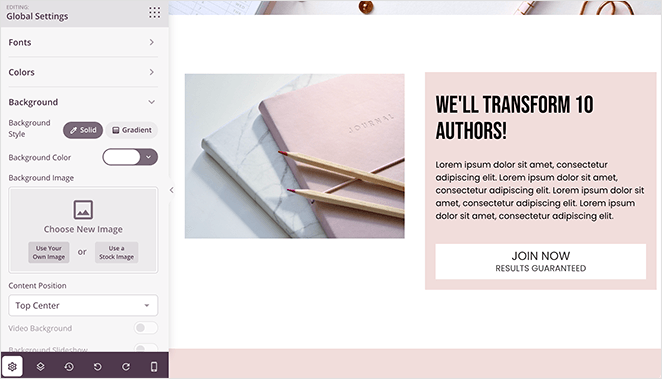
Empecemos haciendo clic en la opción Fondo para personalizar el fondo de tu página de destino. En esta área, puedes cambiar el color de fondo, añadir un degradado de color o subir una imagen de fondo personalizada.
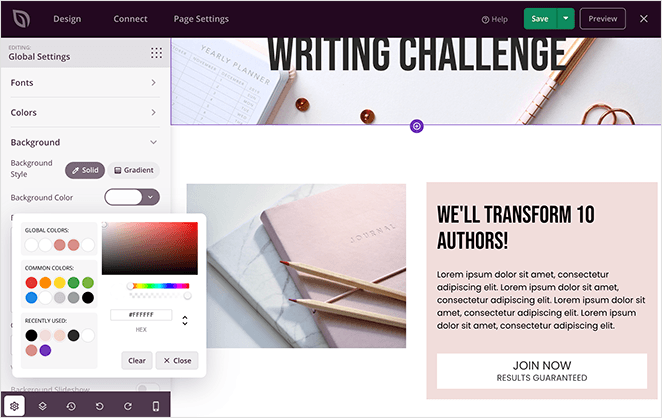
Para añadir una imagen de fondo personalizada, haz clic en el botón Usar tu propia imagen.
En la sección Fuentes, puedes elegir entre una gran biblioteca de fuentes web gratuitas de Google para los encabezados, enlaces y texto del cuerpo de tu página de destino.

Haz clic en cualquiera de los menús desplegables para elegir tus fuentes preferidas.
La sección Colores tiene configuraciones similares de apuntar y hacer clic donde puedes seleccionar colores personalizados para encabezados, texto, enlaces, botones y más.
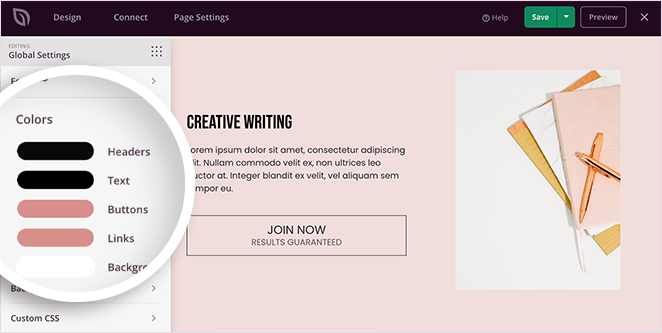
Haz clic en cualquier opción y utiliza el selector de color para elegir uno que coincida con tu marca y el diseño general de la página. Esto editará esos colores para toda tu página de destino.
Cuando estés satisfecho con el diseño de tu página de destino, haz clic en el botón Guardar para almacenar tu configuración.
5. Comprueba que tu página de destino funciona correctamente
Con el diseño de tu página de destino gratuita en su lugar, querrás asegurarte de que todo funciona correctamente antes de publicarla en tu sitio web. Revisa tu diseño y comprueba que los enlaces de los botones de llamada a la acción funcionan y que no hay erratas ni errores gramaticales.
También necesitarás asegurarte de que tu página de destino se vea bien en dispositivos móviles. SeedProd lo hace fácil con su opción de vista previa móvil integrada.
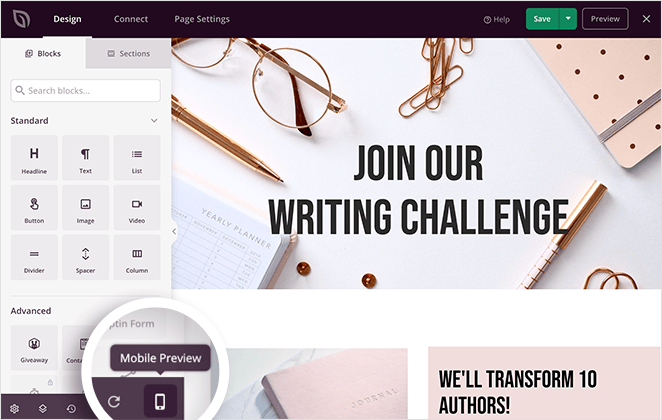
Haz clic en el icono del móvil en la parte inferior de tu pantalla para previsualizar tu página de destino en móvil, tableta y escritorio.
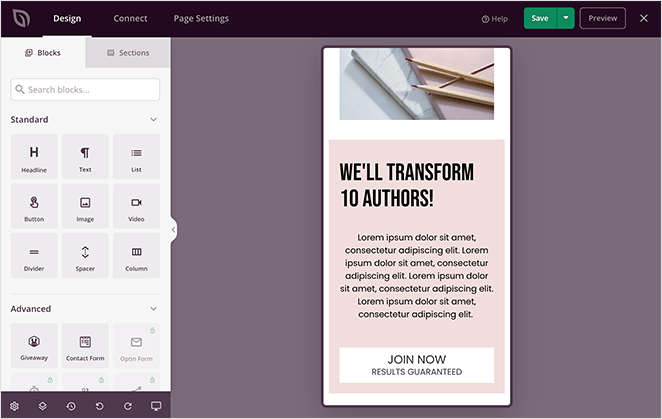
Desde allí, puedes mover elementos hasta que tu página se vea genial en todas las pantallas. Mientras que los estilos globales se mantienen consistentes, también puedes hacer ajustes solo para móviles para afinar la experiencia en dispositivos más pequeños.
6. Configura los ajustes de tu página de destino
Después de comprobar que tu página de destino funciona correctamente y es fácil de ver en dispositivos móviles, es hora de configurar algunos ajustes.
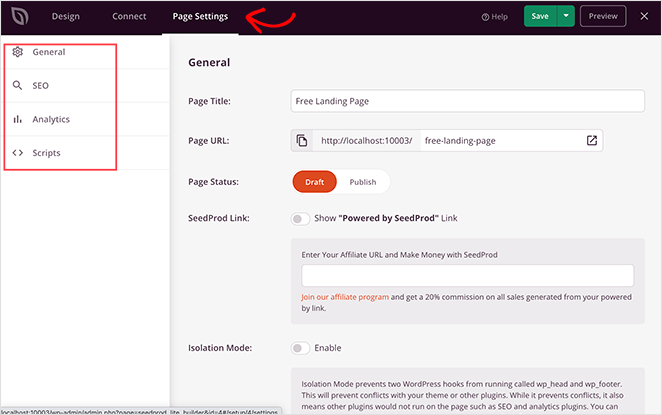
Haz clic en la pestaña Ajustes de página en la parte superior de tu pantalla para ver los diversos ajustes de página de SeedProd, que incluyen:
- Ajustes generales: Cambia el nombre y la URL de tu página de destino gratuita, y haz que la página sea un borrador o publícala.
- SEO: Configura el título SEO de tu página, la meta descripción y más con el plugin de WordPress All in One SEO.
- Analíticas: Monitoriza el rendimiento de tu página de destino con MonsterInsights, el mejor plugin de Google Analytics para WordPress.
- Scripts: Añade scripts de seguimiento personalizados a tu página de destino, como tu píxel de seguimiento de Facebook.
Cuando hayas terminado de editar la configuración de tu página, recuerda hacer clic en el botón Guardar.
7. Publica tu página de destino con WordPress
Después de darle los últimos retoques a tu página de destino gratuita, es hora de publicarla en tu sitio web de WordPress.
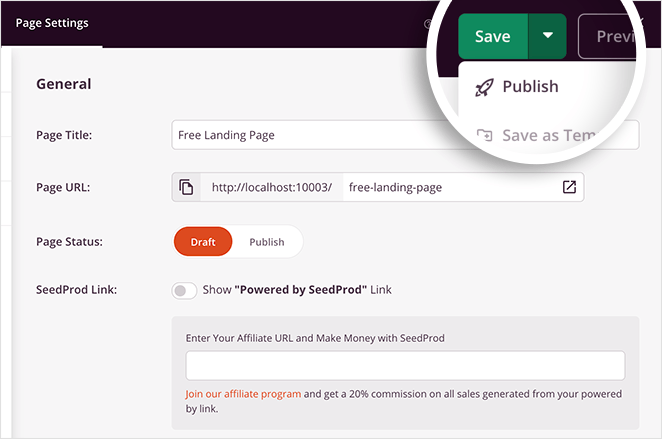
Para ello, haz clic en la flecha hacia abajo junto al botón verde Guardar en la esquina superior derecha de tu pantalla y haz clic en Publicar.
A continuación, verás una ventana emergente confirmando que tu página está activa.
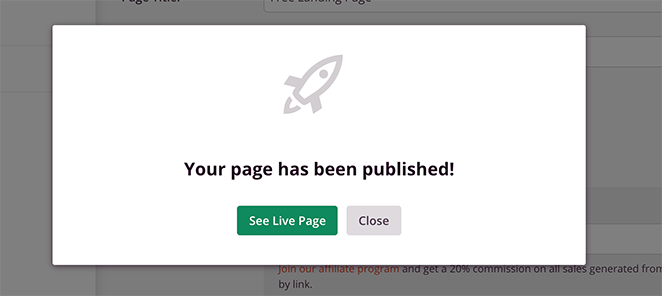
Haz clic en el botón Ver página activa para previsualizar tu página de destino gratuita.

¿Qué hace que una página de destino de WordPress sea buena?
Antes de empezar a crear tu página de destino en WordPress, hay algunas cosas que debes tener en cuenta, como:
- Define un objetivo claro: Debes saber exactamente qué quieres que logre tu página de destino y mantener ese objetivo coherente en todo tu diseño.
- Utiliza una estructura visual clara: Decide qué elementos de la página son más importantes y haz que destaquen para animar a los visitantes a actuar.
- Escribe una llamada a la acción (CTA) sólida: Indica a los visitantes exactamente qué hacer y facilítales la realización de esa acción.
- Utiliza un diseño atractivo: Mantén tu diseño limpio y atractivo, y coloca el contenido más importante "por encima del pliegue" para que sea visible sin necesidad de desplazarse.
- Escribe texto conciso: Utiliza frases cortas y claras que hagan que los lectores quieran seguir bajando por la página.
- Incluye imágenes de alta calidad: Utiliza elementos visuales que respalden tu mensaje principal e intenta evitar las fotos de stock genéricas.
- Céntrate en la propuesta de valor: Explica claramente cómo tu oferta ayuda al visitante y por qué merece la pena hacer clic en tu llamada a la acción.
Una página de destino bien construida suele convertir entre un 2 y un 5 %. Consulta qué objetivo alcanzar en nuestra guía de tasas de conversión de páginas de destino.
Qué hacer después de publicar tu página de destino
¡Enhorabuena! Has creado tu página de destino gratuita en WordPress.
Pero tu trabajo aún no ha terminado. Esto es lo que deberías hacer a continuación:
Promociona tu página de destino
Conseguir tráfico a tu nueva página de destino es clave. Aquí tienes algunas formas sencillas de promocionarla:
- Compártela en redes sociales: Informa a tus amigos y seguidores sobre tu nueva página de destino. Comparte el enlace en Facebook, Twitter, Instagram y cualquier otra plataforma de redes sociales que utilices.
- Añádela a tu firma de correo electrónico: Incluye un enlace a tu página de destino en tu firma de correo electrónico para que todo el que reciba tus correos pueda encontrarla fácilmente.
- Organiza un concurso o sorteo: Un concurso puede ser una forma divertida de entusiasmar a la gente con tu página de destino y lo que ofreces.
Analiza tus resultados
Una vez que empieces a recibir tráfico, es importante hacer un seguimiento del rendimiento de tu página de destino.
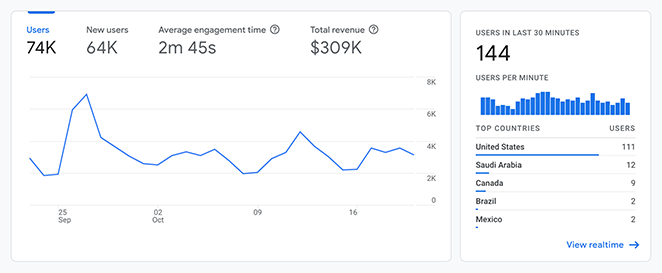
Puedes usar una herramienta gratuita como Google Analytics para rastrear visitantes, la duración de las sesiones y las acciones en tu página. Esta información te ayudará a entender qué funciona y qué no.
Para una guía sencilla sobre cómo configurarlo, consulta nuestro tutorial sobre cómo añadir Google Analytics a WordPress.
Prueba A/B para mejorar
Las pruebas A/B consisten en crear dos versiones ligeramente diferentes de tu página de destino y ver cuál funciona mejor.
Ten en cuenta que las pruebas A/B son una herramienta potente que normalmente se encuentra en plugins premium de optimización de conversiones.
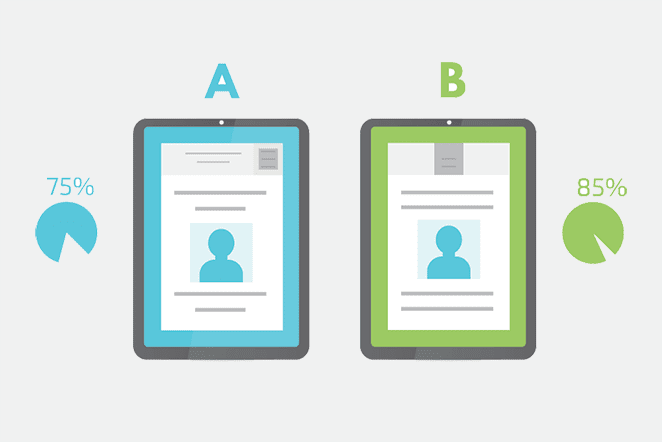
Por ejemplo, podrías probar diferentes titulares, imágenes o botones de llamada a la acción. Esto te ayuda a ajustar tu página de destino para obtener la máxima conversión.
Consulta nuestra guía sobre pruebas A/B para páginas de destino para empezar.
Siguiendo estos pasos, puedes asegurarte de que tu página de destino gratuita está trabajando duro para ti y ayudándote a alcanzar tus objetivos.
Alternativas gratuitas de páginas de destino para WordPress
Ahora que sabes cómo crear una página de destino gratuita con SeedProd, quizás te preguntes cómo se compara con otras opciones gratuitas. WordPress tiene algunas formas diferentes de crear páginas de destino, pero no todas son igual de sencillas o efectivas.
Comparemos SeedProd con Elementor y el editor de bloques integrado para que puedas ver qué herramienta se adapta mejor a tus necesidades.
| Plugin / Herramienta | Facilidad de uso | Plantillas gratuitas | Limitaciones |
|---|---|---|---|
| SeedProd (Gratis) | Arrastrar y soltar fácil para principiantes | Más de 16 plantillas gratuitas | Los bloques avanzados e integraciones requieren la versión Pro |
| Elementor (Gratis) | Más flexible pero más pesado | Docenas de plantillas de inicio | Algunas funciones (formularios, bloques de marketing) bloqueadas en la versión Pro |
| Editor de bloques de WordPress (Gutenberg) | Ya integrado en WordPress | Diseños de página básicos | Sin modo real de página de destino (todavía muestra la cabecera/pie de página del tema) |
En mis pruebas de GTmetrix, SeedProd cargó en 556 ms en comparación con los 1.882 ms de Elementor, lo que es más de 3 veces más rápido. Esa diferencia de velocidad importa si tu página de destino está recibiendo tráfico de pago.
Basado en la comparación, SeedProd es la solución más directa para crear páginas de destino sin distracciones utilizando plantillas predefinidas. Elementor ofrece más flexibilidad de diseño, mientras que el editor de bloques predeterminado es adecuado para la creación de páginas básicas pero carece de funciones clave específicas para páginas de destino.
¿Deberías usar WordPress o una herramienta separada para páginas de destino?
Si ya usas WordPress, no hay razón para añadir una herramienta separada como Wix o HubSpot para las páginas de destino. SeedProd funciona dentro de tu sitio existente, por lo que tu página comparte tu dominio, tu seguimiento de Google Analytics y tu trabajo de SEO existente.
He visto a gente configurar una página de destino de Wix para capturar leads y luego preguntarse por qué sus análisis parecían desconectados de su sitio principal. Las herramientas externas crean páginas independientes que no benefician en absoluto a tu sitio de WordPress.
Utilizo SeedProd en mi propio sitio por esta misma razón. Cada visitante llega a una página que forma parte de mi dominio, contribuyendo a la misma propiedad de Google Analytics y a la misma huella SEO.
Preguntas sobre páginas de destino gratuitas de WordPress
¿Puede la IA crearme una página de destino?
SeedProd no genera un diseño de página completo a partir de una indicación. Incluye herramientas de IA para escribir el texto de la página de destino y generar imágenes. Por lo tanto, no obtendrás una página completa con un solo clic, pero las herramientas de escritura e imagen de IA te ayudarán a crear tu contenido más rápido una vez que hayas elegido una plantilla.
¿Cuál es el mejor plugin gratuito para páginas de destino en WordPress?
El mejor plugin gratuito para páginas de destino de WordPress es SeedProd. Viene con más de 16 plantillas gratuitas, un editor de arrastrar y soltar, y publica páginas que funcionan independientemente de tu tema, sin necesidad de código.
¿Puedo crear una página de destino en WordPress sin pagar por un tema?
Sí. SeedProd crea páginas de destino que funcionan independientemente de tu tema de WordPress. Incluso la versión gratuita te permite crear y publicar páginas completamente personalizadas sin instalar ni comprar un tema aparte.
¿Funcionan las páginas de destino gratuitas de WordPress en dispositivos móviles?
Absolutamente. La mayoría de los constructores gratuitos como SeedProd incluyen plantillas adaptables a dispositivos móviles y una vista previa móvil en vivo para que puedas ajustar el diseño para todos los dispositivos.
¿Cómo conecto una página de destino gratuita a mi lista de correo?
Las integraciones directas de correo electrónico son una función premium en la mayoría de los constructores de páginas de destino. Sin embargo, aún puedes conectar tu lista de correo de forma gratuita utilizando un plugin de formularios como WPForms. Crea tu formulario de registro y añádelo a tu página de destino con el bloque WPForms.
¿Es mejor usar un plugin de página de destino o simplemente una página normal de WordPress?
Los plugins de página de destino te dan más control y eliminan distracciones como encabezados y pies de página. Esto los hace mejores para la generación de leads y las conversiones.
Extra: Más páginas de destino que puedes crear
En esta guía, te he mostrado cómo crear una página de destino sencilla de forma gratuita. Pero, si quieres algo más específico, consulta mis guías sobre cómo crear diferentes tipos de páginas de destino en WordPress:
- Crear una página de destino para eventos
- Crear una página de destino para un embudo de ventas
- Crear una página de destino para encuestas
- Crear una página de destino para membresías
- Crear una página de destino para lista de espera
- Crear una página de destino para cursos en línea
- Crear una página de destino para marketing de afiliados
- Crear una página de destino para Google Ads
- Crear una página de destino para podcasts
- Crear una página de destino para Instagram
- Crear una página de destino para Facebook
- Crear una página de destino para aplicaciones
- Crear una página de destino para vídeos
- Crear una página de destino para libros
A continuación, aprende sobre páginas de destino
Ahora sabes cómo crear una página de destino gratuita en WordPress. Lo mejor de todo es que lo has hecho sin necesidad de conocimientos técnicos ni de gastar un céntimo.
Para una descripción más detallada de las funciones premium de SeedProd en acción, consulta este tutorial: Cómo crear una página de destino en WordPress
O empieza directamente y…
Empieza hoy mismo con SeedProd
Si buscas aprender más sobre páginas de destino, echa un vistazo a estos recursos sobre páginas de destino:
- Página de destino vs. Página de ventas
- Las mejores fórmulas de titulares para páginas de destino
- Página de destino frente a micrositio
- Ejemplos y mejores prácticas de URL de páginas de destino
- Página de destino frente a página de inicio
- ¿Cuál es una buena tasa de conversión de página de destino?
- Anatomía de una página de destino
¡Gracias por leer! Nos encantaría conocer tu opinión, así que no dudes en unirte a la conversación en YouTube, X y Facebook para obtener más consejos y contenido útil para hacer crecer tu negocio.
¡Gracias por leer! Nos encantaría conocer tu opinión, así que únete a la conversación en YouTube, X y Facebook para obtener más consejos y contenido útil para hacer crecer tu negocio.


