Want a fast way to see if your idea is worth building? Make a landing page to test an idea and get real feedback in hours, not weeks.
A simple test page lets you check demand, refine your message, and track signups or clicks so you know what to do next.
In this guide, I’ll show you how to create a quick validation landing page and the key elements to optimize for clear results.
Steps to create a quick landing page to test ideas:
Why Make a Landing Page to Test Ideas?
A landing page lets you validate an idea before you spend weeks building a full website. You can test your message, gauge interest, and track real actions from visitors without wasting time or money.
For example, imagine you’re thinking of launching a new product but aren’t sure if your audience will buy it. Instead of creating a full eCommerce site, you can publish a single page with a headline, value proposition, and a call-to-action to see how people respond.
This approach is faster and safer than building everything first. If people show interest, you know you’re on the right track. If not, you can adjust your idea without losing months of work.
Some other big reasons to test with a landing page include:
- Refining your messaging for new audiences
- Collecting valuable data and feedback for future projects
- Testing page elements to boost conversions
Once you see the value in testing with a landing page, the next step is planning your experiment.
Planning a Landing Page to Test Your Ideas
Before creating your validation landing page, you’ll need to research a few things to keep you on track. Here’s a breakdown of what to include in your plan.
Set Your Landing Page Goals
Your landing page should have one clear purpose: decide if your idea is worth moving forward. To do that, you need a measurable goal that shows real interest from your audience.
For some, that might mean pre-selling 25 units of a new product. For others, it could be getting a set number of signups or downloads. The exact number doesn’t matter as much as making sure your goal is realistic, trackable, and tied to action.
Start by checking the size of your audience—like your email list, website visitors, or social media following. Then decide what percentage of that group needs to respond before you feel confident in your idea.
Here are a few simple ways to measure interest on your landing page:
- Signing up with an email address
- Submitting a contact form
- Completing a short survey
- Downloading a free lead magnet
- Clicking a link in your email
Once you’ve set a goal, you’ll be ready to focus on who your ideal audience is for the test.
Understand Your Target Audience
For your landing page test to work, you need to know exactly who you want to reach. The clearer your picture of your audience, the easier it is to write headlines, offers, and calls to action that connect.
Start by outlining basic details about your ideal visitor, such as:
- Gender
- Age
- Location
- Education
- Interests
- Income
- Life stage
Then go deeper into what drives them—things like motivations, goals, and challenges. These insights help you shape a message that speaks directly to what they want.
If you’re not sure where to start, creating a simple customer persona can make this process easier. Here’s a helpful guide on building a buyer persona with examples you can follow.
Outline the Idea You Want to Test
Once you know who you’re targeting, the next step is to outline your idea. You don’t need a finished product yet—just a clear picture of what you’re testing.
A simple way to do this is by answering these questions:
- What problem are you solving?
- What solution are you offering?
- How does your solution work?
- What benefits will it deliver?
- Why is it better than the alternatives?
Here’s an example of how this framework looks when applied to SeedProd:
- Problem: Beginners find it hard to build custom WordPress pages without coding or hiring expensive developers.
- Solution: A drag-and-drop WordPress page builder anyone can use.
- Features: Visual editor, no coding, faster setup, and affordable pricing.
- Differentiator: Unlike bloated builders, SeedProd is lightweight, easy to use, and focused on essentials.
Go ahead and map out your own answers. This outline will guide the landing page you create in the next step.
How to Create a Landing Page to Validate Ideas
Now that you’ve defined your goals, researched your audience, and outlined your idea, you can make your landing page. You’ve done all the hard work already, so this process should be super easy.
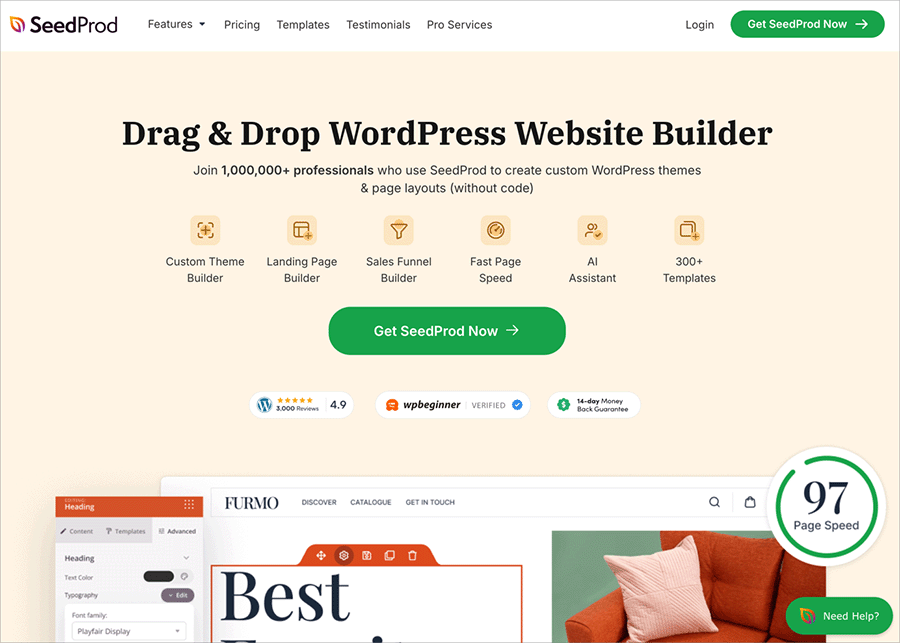
In the steps below, we’ll show you how to create a landing page to test ideas with SeedProd, the best WordPress landing page builder. And the good news is you can get up and running in under 30 minutes.
Step 1. Install and Activate SeedProd
First, visit the SeedProd website and download the plugin to your computer. Then install and activate the plugin zip file on your WordPress website.
If you’re new, you can follow this guide on how to install a WordPress plugin.
After activating the plugin, navigate to the SeedProd » Settings page and enter your license key. This information is easy to find in your account on the SeedProd website.
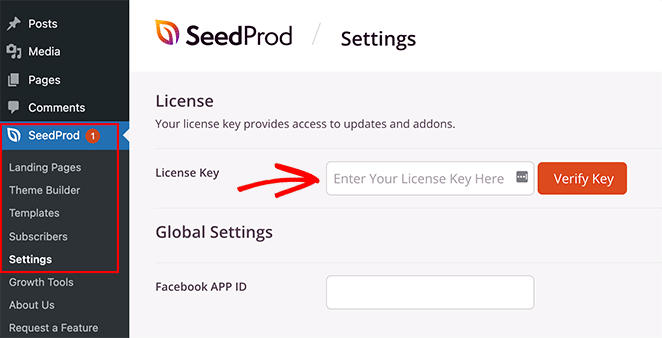
Once you’ve entered your license key, click the Verify Key button.
Step 2. Choose a Landing Page Template
Next, navigate to SeedProd » Landing Pages and click the Add New Landing Page button.
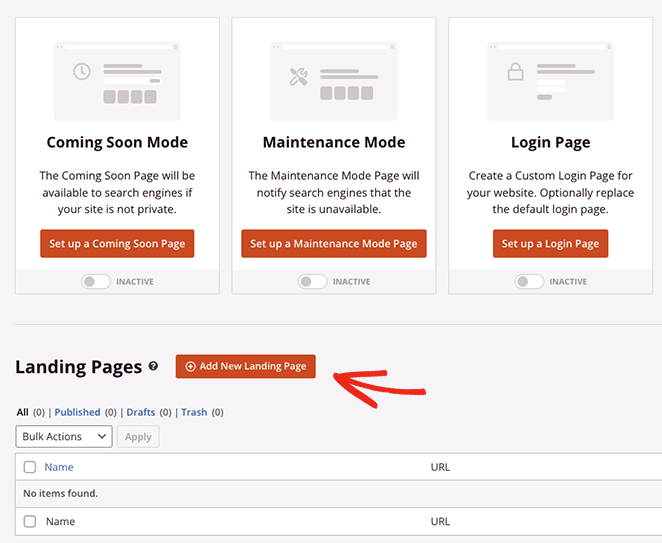
On the next screen, you can pick a landing page template to use as the starting point for your page design.
There are hundreds of templates to choose from, organized by campaign type, such as Sales, Lead Squeeze, and Coming Soon. Simply click any of the filters at the top to see templates for specific campaigns.
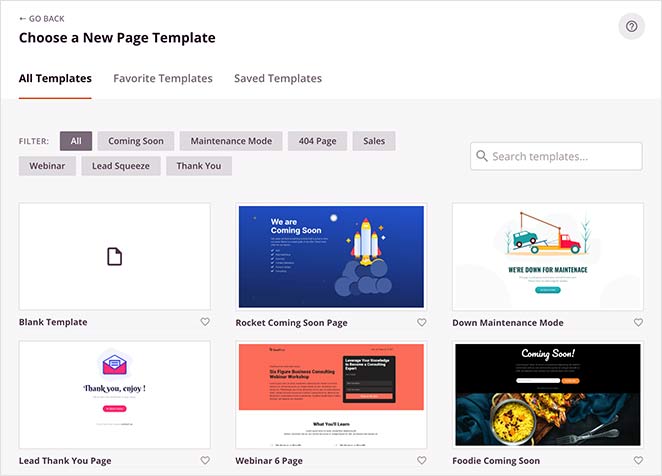
To preview a design, hover your mouse over a template thumbnail and click the magnifying glass.
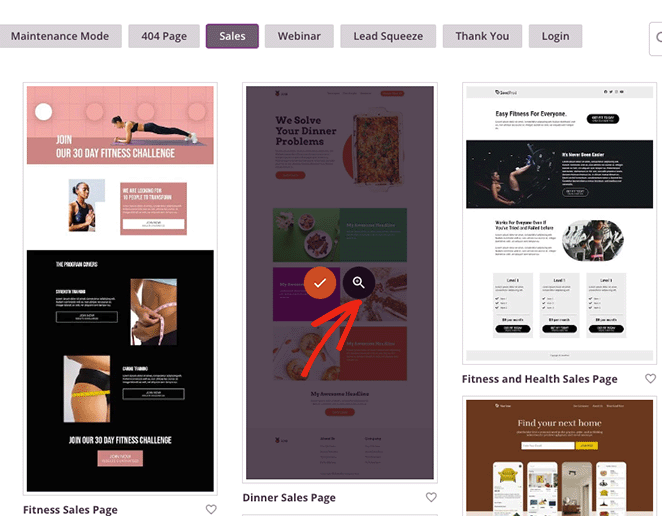
Choosing a landing page design that resembles the page you want to create will make launching your idea much faster. However, you can change every part of the template and customize it to suit your tastes.
Once you’ve found a template you like, click the Choose This Template button from the preview or click the checkmark icon from the thumbnail.
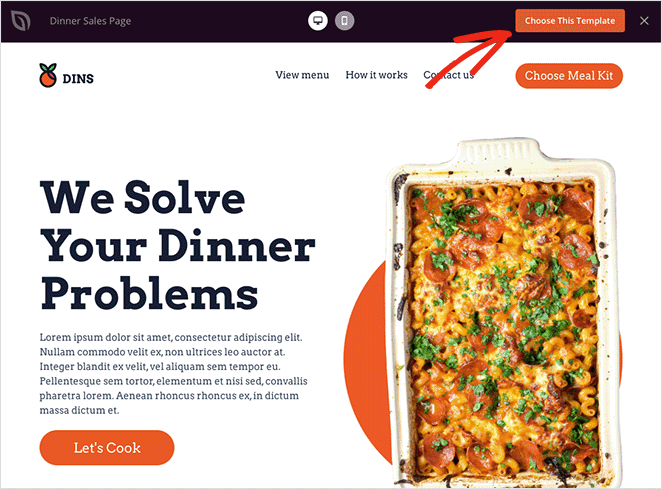
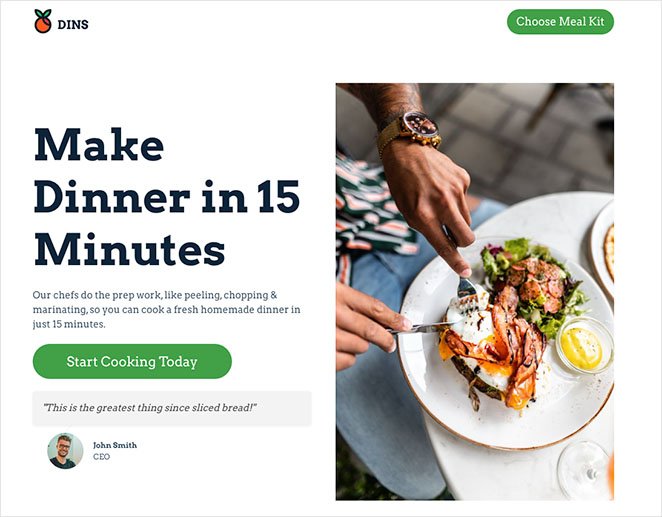
We’re using the Dinner Sales Page template for this guide, but you can choose any design you like.
Step 3. Create Your Landing Page
Next, enter a name for your landing page. SeedProd will create a landing page URL based on your title, but you can change it by entering your own custom text.
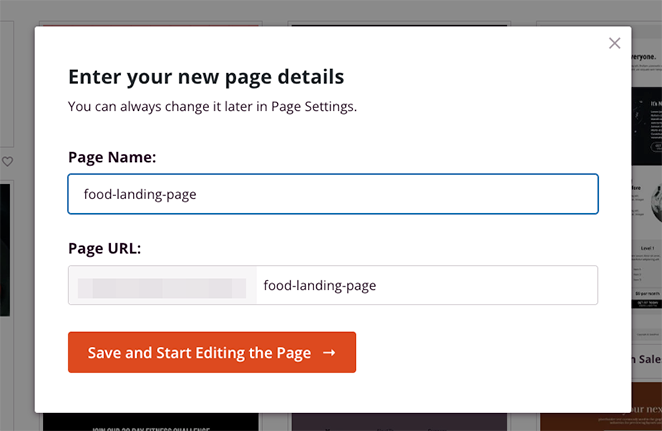
When you’re happy with this information, go ahead and click the Save and Start Editing the Page button.
On the next screen, you’ll see a drag-and-drop editor where you can build and customize your landing page. The live editor shows a preview of your template to the right and blocks and sections on the left.
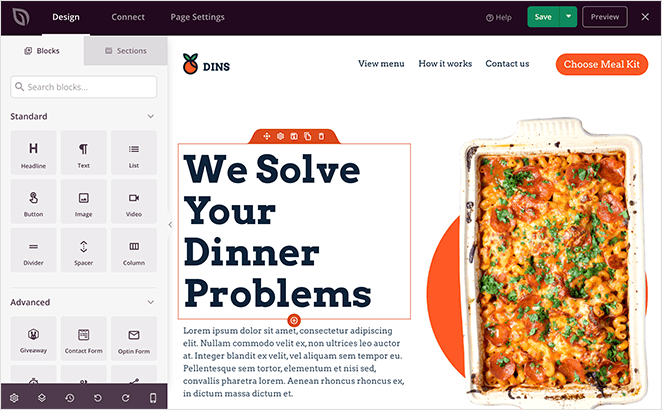
WordPress Blocks are a key part of SeedProd, allowing you to create any landing page, no matter how complicated your idea is. Most of SeedProd’s templates have blocks built into the design.
You can customize any block in your template by clicking it in the page preview and making changes in the left-hand menu. It’s also easy to add new blocks to your design by dragging them from the left-hand menu and dropping them onto your preview.
Step 4. Customize the Landing Page with Your Idea
With your template in place, you can customize it to reflect the idea you want to test. Let’s look at some key landing page elements you should optimize to gauge visitor interest.
Headline
Your header and headline should be simple and speak directly to your target audience’s problem. Visit your outline from earlier and brainstorm several headline ideas you can test on your template.
Ensure your headline clearly explains your value proposition and inspires visitors to take action.
To customize your headline in SeedProd, click the Headline landing page element and type your custom text in the text box on the left.
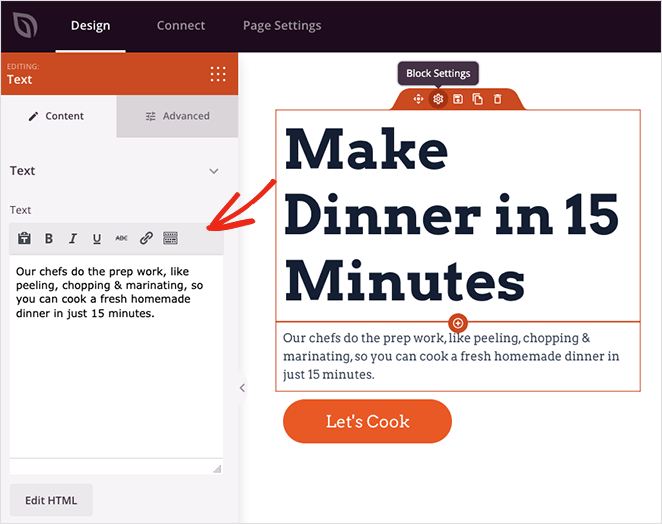
In the same panel, you can adjust the headline alignment, size, heading level, and access spacing, and font options in the Advanced tab.
Copy
Now you’ll want to customize the landing page copy to explain your offering or the idea you’re planning to launch. Any copywriting should explain the how and why behind your initial headline. Remember to address and answer page visitors’ pain points in this step.
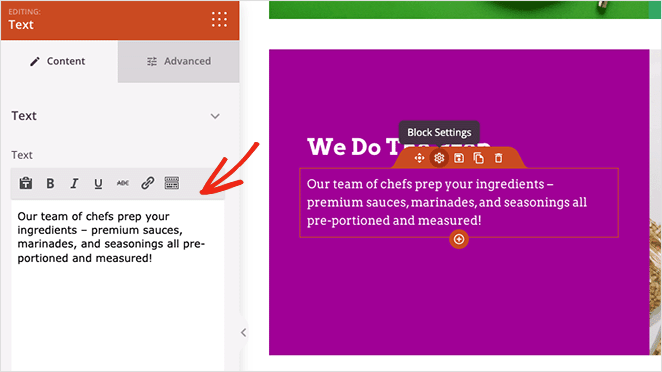
Customizing your copy in SeedProd works similarly to the headline. Simply click anywhere on your page that includes text and replace it in the left-hand content box.
Imagery
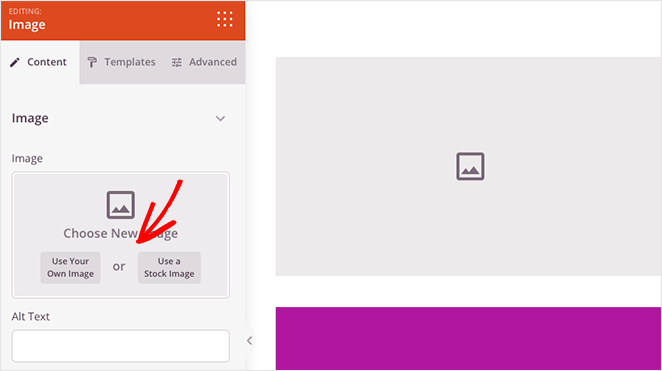
Including eye-catching visual content on your landing page can help illustrate your idea and provide more context. You can use custom-made graphics or high-quality stock photos to bring your page to life.
Replacing visual content in SeedProd is straightforward. Just click any image and select the trashcan icon to remove it.

From there, you can upload a new image from your computer or media library or choose from one of SeedProd’s free stock photos.
Call to Action (CTA)
Your CTA button is one of the most crucial elements of your landing page. It’s the deciding factor on whether your audience will opt in for more information.
Ensure your CTA button is a color that contrasts with your page background so users can see it easily. It’s also an excellent idea to use action words in the button copy to encourage conversions.
Here are some action words for your to consider:
- Build
- Get
- Access
- Discover
- Start
- Try
- Today
- Now
- Immediately
- Proven
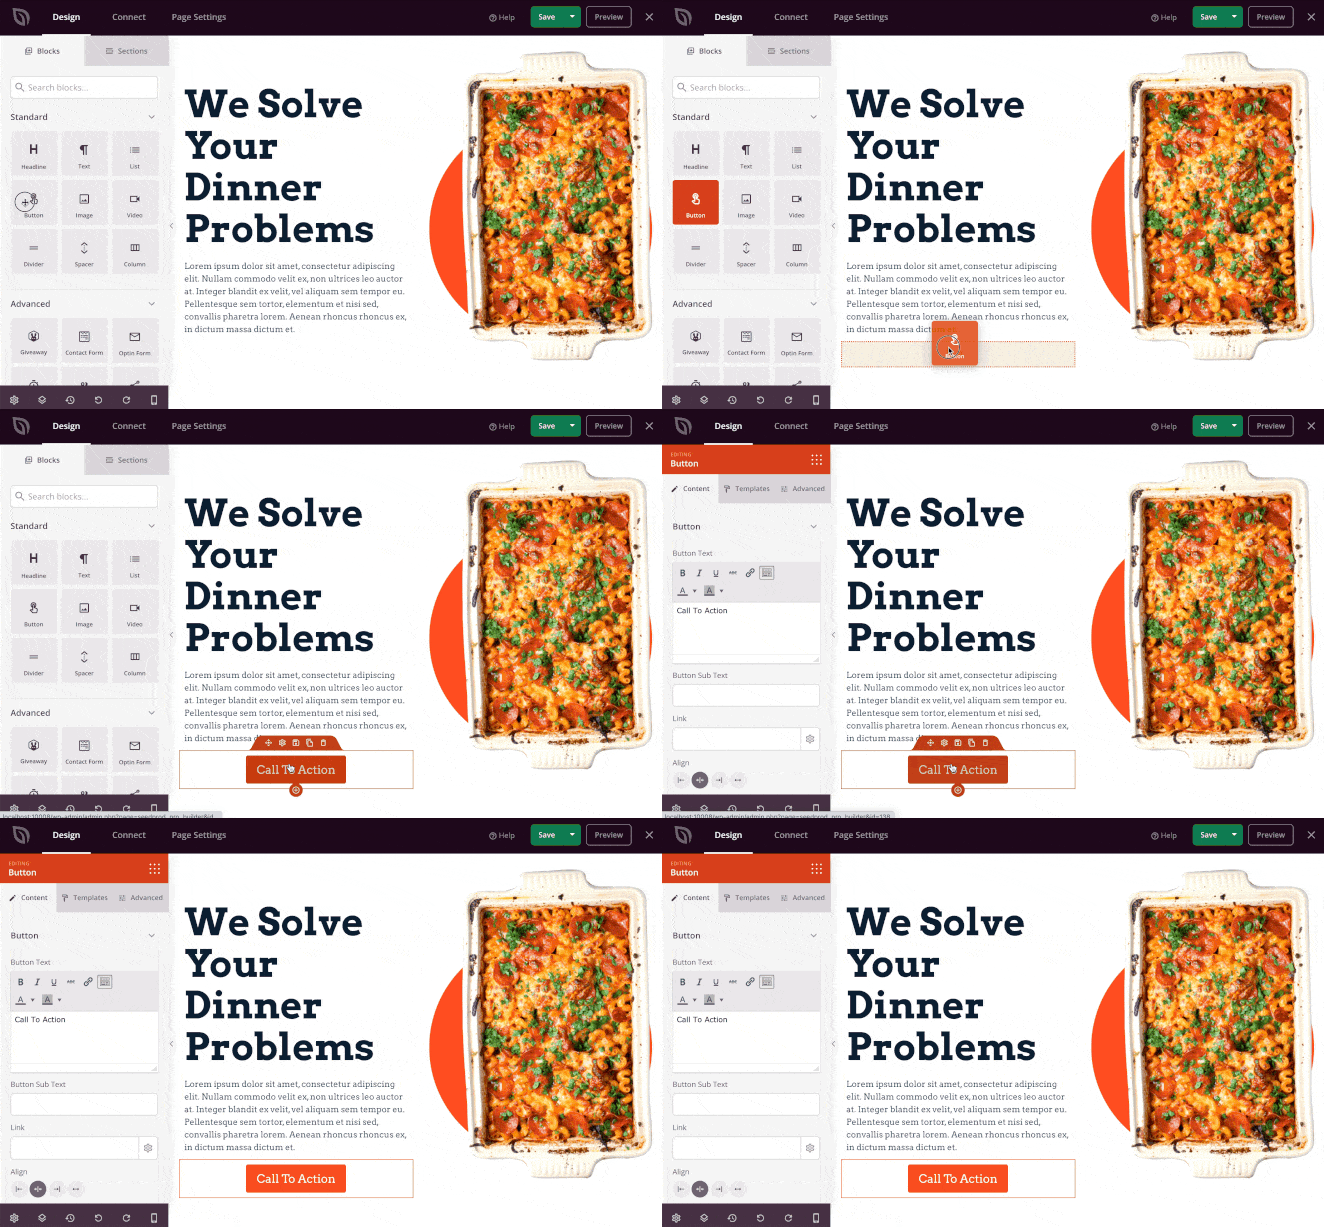
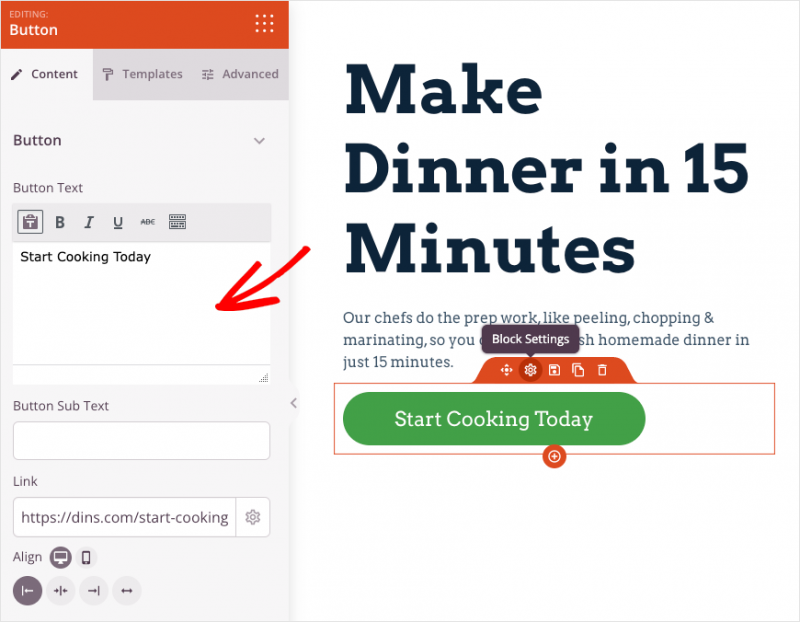
SeedProd makes customizing your CTA effortless. Simply click on your button preview and change the content and destination link in the left-hand panel.
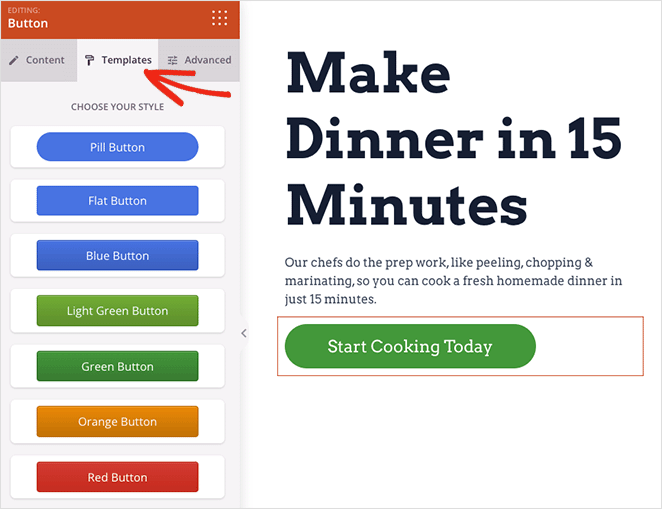
You can also click the Templates tab to change the button style quickly without manually editing the advanced options.
Since we’re making a quick landing page to test ideas, we’ll keep our page simple. But if your idea requires more customization, SeedProd has plenty of additional features.
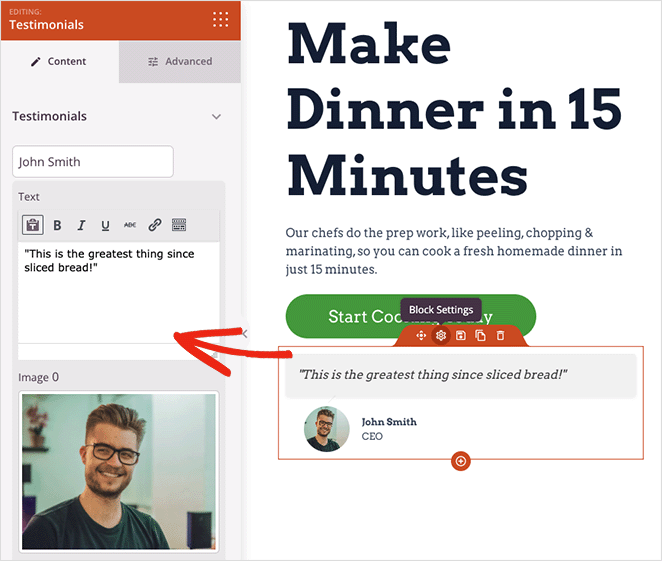
For example, you can drag over the Countdown timer block to increase urgency and spur users to act fast, add a payment button for users to checkout instantly with Stripe, or even add testimonials to display social proof.
When you’re happy with your landing page design, click the Save button.

Step 5. Configure Your Landing Page Settings
Before publishing your idea validation landing page, you’ll want to look at a few settings. For instance, if you’re using a sign-up form with a form field to collect email addresses, you’ll need a way to add new contacts to your email list.
Luckily SeedProd integrates directly with leading email marketing services to keep your list up-to-date. To find it, click the Connect tab at the top of the page builder, and find your provider in the list.
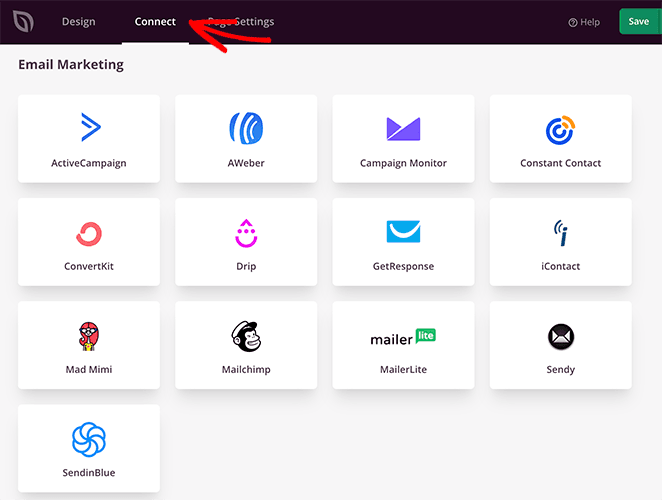
From there, follow the on-screen instructions to verify the connection and sync your email list with SeedProd.
Next, click the Page Settings tab to adjust other settings.

First, you’ll notice the General tab, where you can change your page name and URL and add your Facebook app ID.
Now click the SEO section to optimize your landing page for search engines with an SEO plugin like All in One SEO.
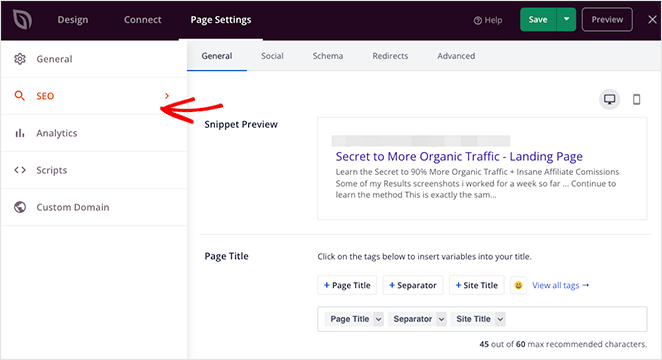
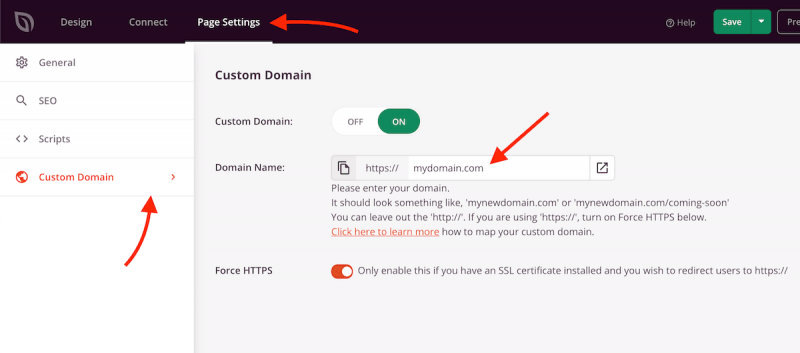
Other settings include Analytics (with a Google Analytics plugin), your header, footer, and body scripts, and your custom domain settings.
The Custom Domain feature is handy if you want to give your landing page a completely different domain name than your main website. This option allows you to do it all on one site without creating multiple WordPress installations.
Note: Domain mapping is only available with an Elite SeedProd license.
Step 6. Publish Your Landing Page to Test Your Idea
When you’ve configured your landing page settings, you’re ready to launch it and start testing your ideas.
Simply click the dropdown arrow on the Save button and click Publish.
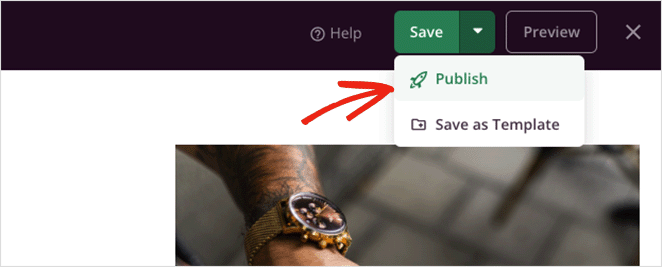
Now you can preview your idea validation landing page to see how it looks.
FAQs on Creating a Landing Page to Test Ideas
Next Steps: A/B Testing
When testing the waters with a new business idea, you’ll want to experiment with different versions of your landing page to compare the test results. One of the best ways to do this is to use a testing tool like Google Optimize.
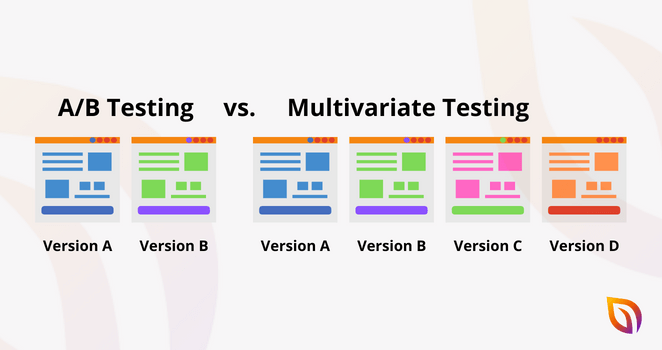
Google Optimize lets you perform A/B split testing and multivariate testing. If this sounds complicated, here’s a quick overview:
- A/B Split Testing: enables you to compare one landing page variant with another.
- Multivariate Testing: lets you test multiple iterations at the same time.
Optimizing your landing page this way will ensure your target audience sees the most effective version, giving you more accurate test results to validate your idea in the long term.
If you need help, you can check out this guide on A/B testing landing pages.
There you have it!
You’re now well on your way to making a landing page to test ideas for your business website, and with SeedProd, it takes less than 30 minutes to make it happen.
Ready to validate your next business idea?
You might also find this guide helpful if your landing page is not converting.
Thanks for reading! We’d love to hear your thoughts, so please feel free to join the conversation on YouTube, X and Facebook for more helpful advice and content to grow your business.

