If you’ve ever uploaded a video to YouTube only to watch ads take over and revenue trickle in, you know the frustration. I wanted a way to sell my videos online, keep 100% of the profit, and control how they’re delivered.
In this guide, I’ll walk you through the exact WordPress setup I use to sell videos, from choosing a monetization model to protecting your files and promoting them for more sales.
What Are the Benefits of Selling Videos Online?
Selling videos from your own site gives you control, higher margins, and a setup that can grow with you.
- Higher Profit: Keep more of each sale by avoiding platform fees and revenue sharing.
- Full Ownership: Control pricing, packaging, and presentation without third‑party rules.
- Flexible Models: Offer one‑time purchases, rentals, subscriptions, or bundles to fit your audience.
- Global Reach: Digital products are location‑agnostic, so you can sell worldwide from day one.
- No Inventory: Skip storage and shipping, deliver files instantly after checkout.
- Automated Sales: Use secure, expiring links and automated receipts to reduce manual work.
- Brand and SEO: Build authority on your own domain, not someone else’s platform.
- Audience Growth: Capture emails at checkout and re‑market with launches, updates, and promos.
- Clear Licensing: Set usage terms for personal, commercial, or educational rights.
Which Platform Is Best for Selling Videos Online?
The right platform can make selling videos easier, more profitable, and better for your brand. Here’s a side-by-side look at the top options so you can choose the best fit.
| Platform | Best For | Pros | Cons |
| WordPress + Easy Digital Downloads | Creators who want full control | Highly customizable, large plugin library, no revenue share | Requires hosting, small learning curve |
| Vimeo OTT | Filmmakers who prioritize quality | High-quality streaming, analytics, subscription options | Higher cost, limited customization |
| Uscreen | Turnkey setup with built-in tools | Hosting included, marketing features, multiple monetization models | Less flexibility, monthly fees |
| Teachable | Course and training content | Fast setup, built-in student tools, simple checkout | Limited design control, transaction fees |
| Kajabi | All-in-one business solution | Email marketing, analytics, course hosting | Expensive, may be more than you need |
| Podia | Mixed digital products | No transaction fees, easy to use, supports multiple formats | Basic design options, monthly cost |
My pick: WordPress. It’s flexible, easy to manage, and grows with your business. You can sell any type of video content, use themes that match your brand, and set it up without coding.
For a smooth start, combine Easy Digital Downloads for secure file sales with SeedProd to design a store that looks professional and converts visitors into buyers.
How to Sell Videos Online in WordPress
Learning how to sell videos online in WordPress may seem daunting, but it’s easier than you think. Just follow these straightforward steps, and you’ll be up and running with your own video website in no time.
- Step 1: Choose the Best Video Monetization Model
- Step 2: Set Up WordPress, Hosting, and SSL
- Step 3: Create Your Video Store with Easy Digital Downloads (EDD)
- Step 4: Upload and Sell Video Files as Digital Products
- Step 5: Customize Your Store Design with SeedProd
- Step 6: How to Promote and Market Your Videos Online
Let’s dive in!
Step 1: Choose the Best Video Monetization Model
First, you’ll want to decide how to make money from your videos. There are several ways to do this, which we’ll outline below:
AVOD (Advertising Video on Demand): The AVOD model is primarily ad-based, which means viewers can watch your videos for free. That said, they’ll have to sit through advertisements like they would on video hosting platforms like YouTube.
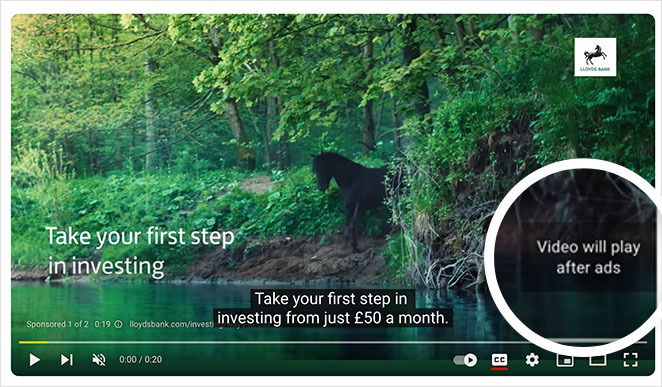
This model is attractive due to its free access but may require high traffic to generate enough revenue.
TVOD (Transactional Video on Demand): The TVOD model or pay-per-view model allows viewers to pay a one-time purchase for the videos they want to watch.
It’s a great option if your videos are exclusive, high-quality, or unavailable elsewhere. That said, it may limit your audience reach, as the pay-per-view model may deter some viewers.
SVOD (Subscription Video on Demand): The SVOD model offers unlimited access to a video library for a recurring fee. It’s similar to video streaming platforms and streaming services like Amazon Prime, Disney+, Apple TV, and Netflix.
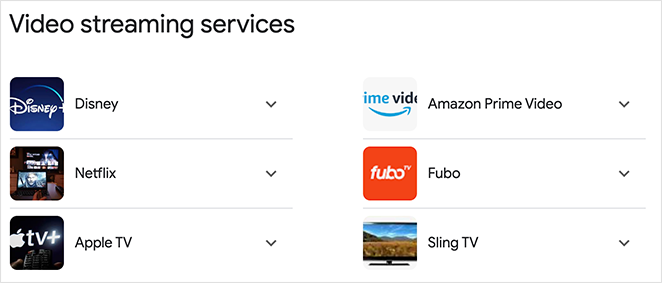
This model works for web series, online courses, or documentaries but requires regular content to keep subscribers paying.
Live Streaming: Live streaming is another popular video-selling model. You can monetize live video streams through advertising, donations, or subscription access.
This model is excellent for real-time interaction with your audience and can create a sense of exclusivity. Remember, it requires more technical prep and real-time engagement.
We’ll keep things simple for this guide and show you how to sell your videos on demand (VOD) using the transactional method.
Step 2: Set Up WordPress, Hosting, and SSL
Next, you’ll need to set up a website for your video business. For this, you’ll need three essentials: web hosting, a domain name, and an SSL certificate.
- A domain name is your website’s unique address, like myvideosite.com, which helps users find you online.
- Web hosting is the digital space where your site’s data, like images, videos, and text, is stored and accessed when someone visits your site.
- An SSL Certificate enhances your site’s security by encrypting the connection between your website and visitors, safeguarding sensitive data like credit card information.

For beginners, we recommend SiteGround, one of the best platforms for web hosting. SiteGround offers specialized WordPress hosting for Easy Digital Downloads (EDD), and their plans include a free SSL certificate.
Plus, SiteGround comes with EDD pre-installed and additional features for website optimization, ensuring a fast and smooth user experience.
Here’s how to get set up with SiteGround:
- Create a Managed EDD Hosting account with SiteGround by visiting their website and choosing a hosting plan that fits your needs.
- After completing your purchase, you’ll receive an email with login details for your hosting control panel, where you’ll manage your new site.
- Log in to SiteGround, and you’ll find WordPress and Easy Digital Downloads already installed. Simply click the WordPress Admin button to access your new WordPress site.
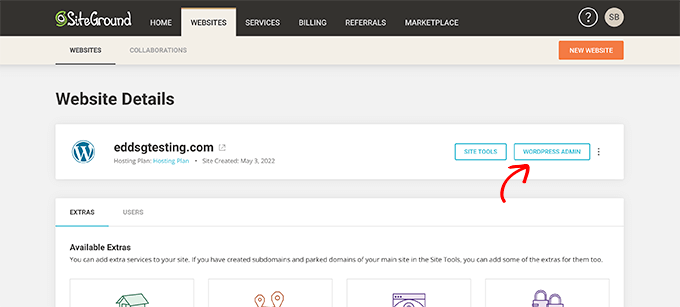
That said, you can use a different hosting provider and there are plenty of popular options that make installing WordPress just as simple as SiteGround. Check out our list of the best WordPress hosting providers.
You can also follow this guide to create a WordPress website for beginners.
Step 3: Create Your Video Store with Easy Digital Downloads (EDD)
If you’ve followed the previous steps to create your video website, you’re all set to build your online store with EDD’s eCommerce platform pre-installed for you.
If you decide on a different hosting provider, you’ll need to install and activate the EDD plugin manually.
To do this, navigate to Plugins » Add New from your WordPress admin and type ‘Easy Digital Downloads’ into the search box.
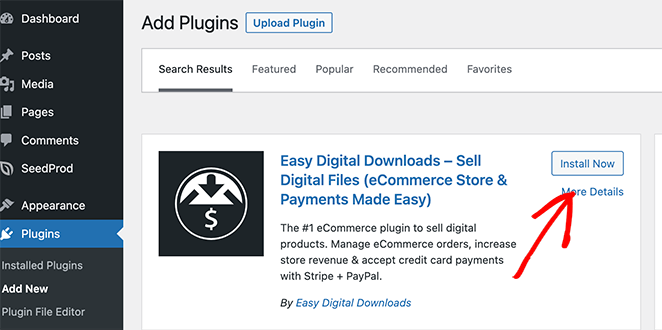
When the plugin appears, click Install, then Activate.
Enter Your Business Info
After activating EDD, head to Downloads » Settings from your dashboard to launch the setup wizard.
First, it will ask you to enter your business name and location. EDD uses this information to auto-fill fields during checkout and calculate sales tax.
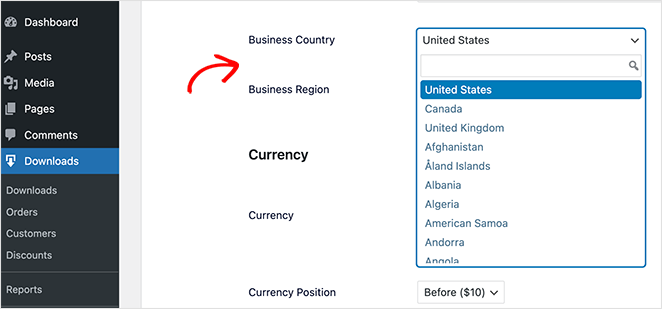
Select your country and state or province from the dropdown menus.
By default, your prices will be in US dollars. To change this, select your preferred currency from the dropdown.
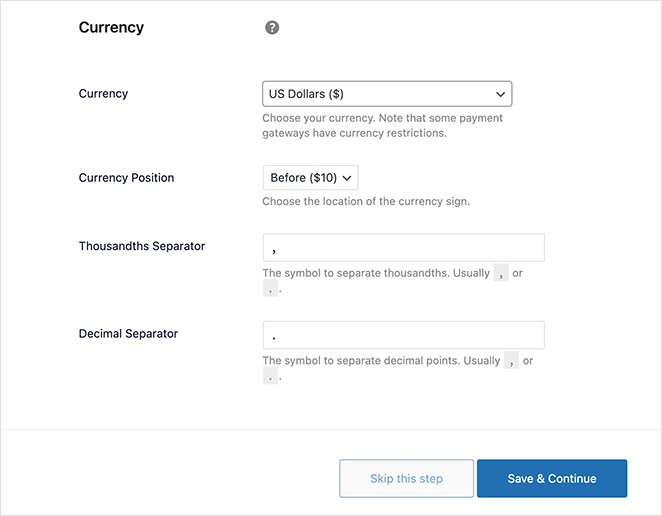
Note: Not all payment gateways support all currencies, so double-check compatibility.
Click Save & Continue to move on to setting up your payment methods.
Configure Payment Methods
To process payments, we recommend using Stripe, a leading online payment solution. Simply click ‘Connect with Stripe,’ and a setup wizard will guide you through linking your site.
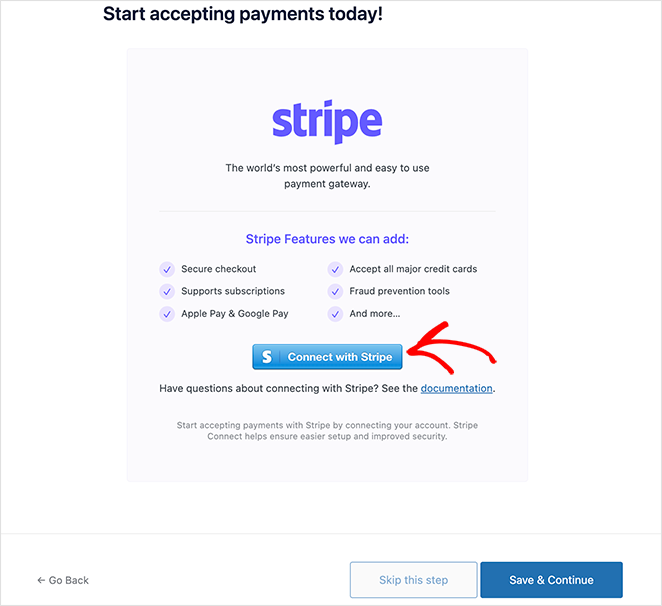
If you want more payment options later, EDD offers extensions for PayPal, Braintree, and Authorize.net.
Once you’re done, click ‘Save & Continue.’
Customize Purchase Receipts
Now, the setup wizard will let you customize the purchase receipts users receive after buying one of your products. It will include information about the purchase and a link to download the file.
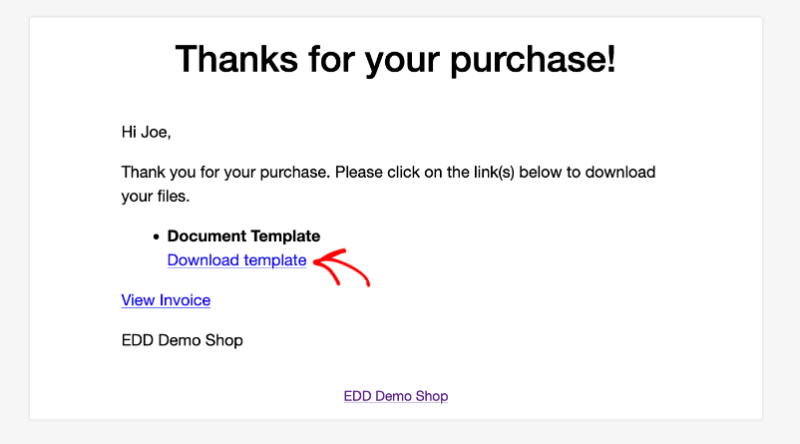
You can change the purchase receipt email by adding your logo and information.
It’s a good idea to ensure the ‘From Name’ is recognizable, like your website’s name. You can also set a ‘From Email’ that you regularly check so customers can reply to them.
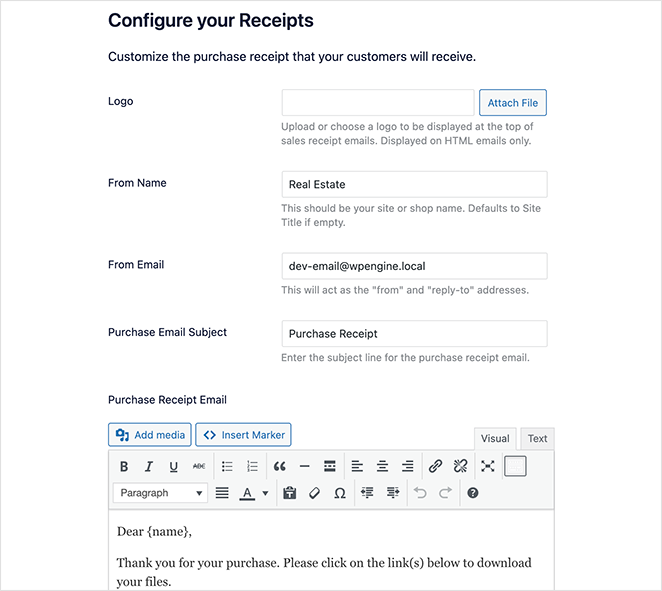
Fortunately, the default email content works for most, but you can tweak it if you like. When you’re ready to move on, click Save & Continue.
Optimize Your Store
The setup wizard will now suggest free tools to optimize your store:
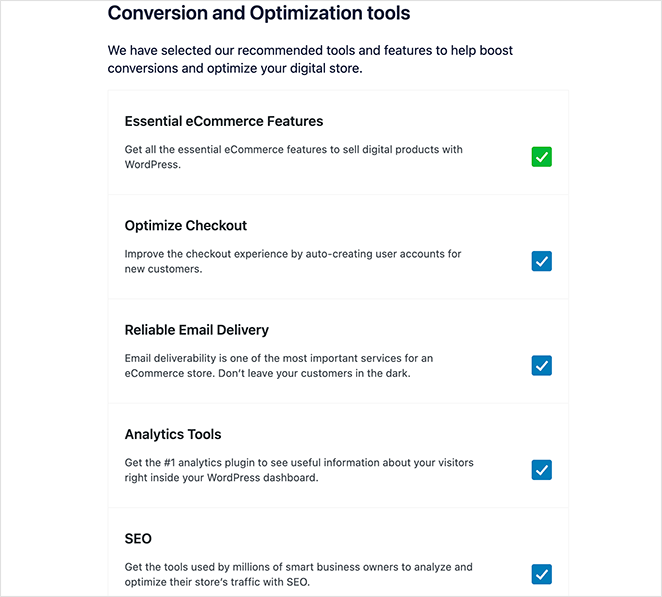
- Auto Register: An EDD extension that creates accounts for new customers during checkout.
- WP Mail SMTP: Ensures your emails reach customers and aren’t marked as spam.
- MonsterInsights: The best WordPress analytics plugin, which helps you understand visitor behavior.
- All in One SEO: The best WordPress SEO plugin that helps optimize your site for search engines to boost traffic and sales.
We recommend installing all these tools. However, you can uncheck any that you don’t wish to install. There’s also an option to share usage data anonymously with EDD to help improve the system.
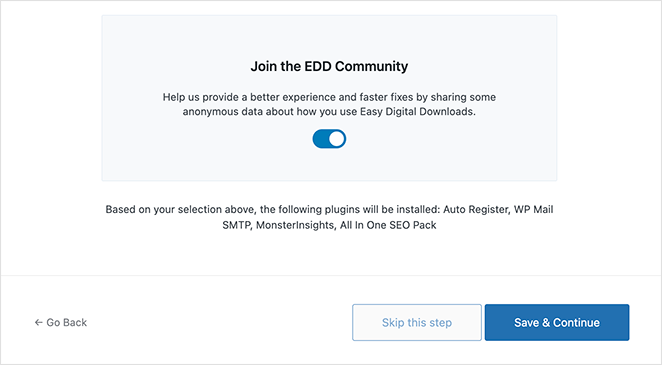
Click Save & Continue to finalize.
Add Your First Product
You’ve reached the final step in the wizard. Now, it’s time to add your first digital product.
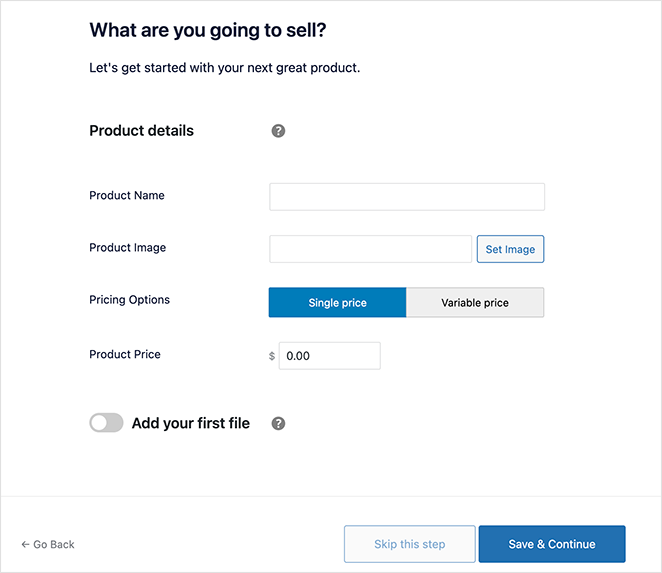
Fill in the details and click Save & Continue. If you’re not ready, click ‘Skip this step.’
Congratulations, your online store is now up and running!
Step 4: Upload and Sell Video Files as Digital Products
After setting up your store, you can add your video content. In EDD, these are known as ‘downloads.’
To add a new video, go to your WordPress admin menu, select Downloads, and click the Add New button.
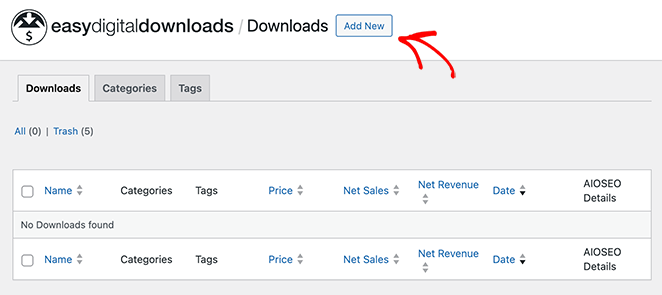
Adding Your Video Details
You’ll be taken to a page where you can fill in your video’s title, description, price, and other key details. Using the WordPress content editor to create a new video product is as straightforward as writing a blog post.
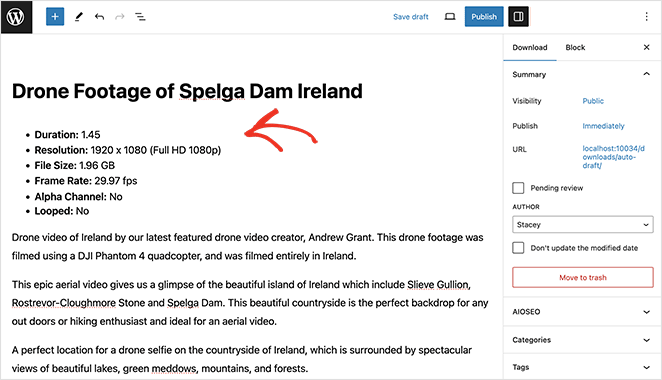
Remember to include essential information like video length, file size, and licensing terms to help customers decide which product is right.
Beneath this, you can add your pricing information. For a fixed price, simply enter the amount in the designated field. If you’re offering the video for free, leave the amount as ‘0.00.’
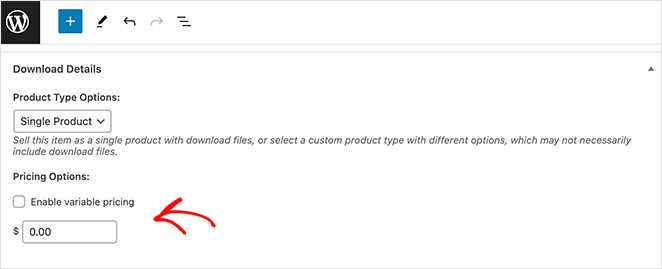
EDD also supports variable pricing, allowing you to charge more for premium features like higher resolution.
To enable this, tick the ‘Enable variable pricing’ checkbox. Then, you can add different pricing options by entering a name and price. To add more variations, click the ‘Add New Price’ button.
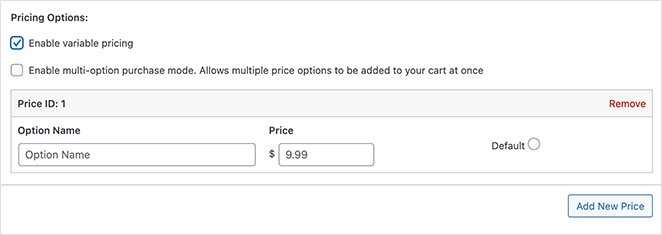
After you’ve done that, set the default variation, which is the first option customers will see on the product page. To set this, click the ‘Default’ radio button next to your chosen variation.
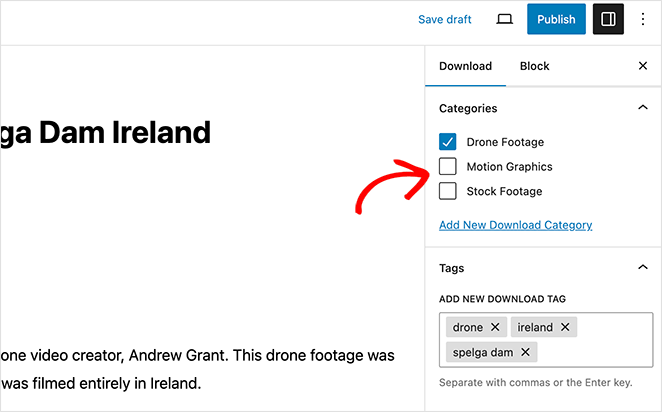
Consider organizing your content with categories and tags to help customers easily find the videos they’re interested in.
Adding these is simple. Head to the Download Categories and Download Tags sections and add the relevant information.
A thumbnail image can give buyers a quick preview of your video content. Adding one is straightforward.
Scroll down to the Download Image section on the right side of your screen and click Set Download Image.
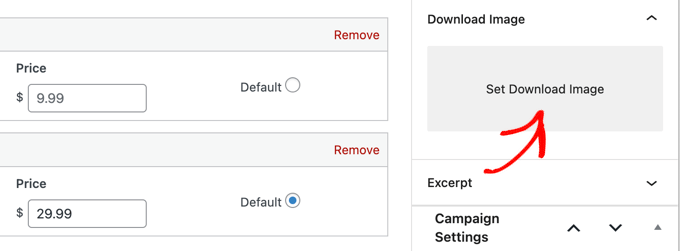
This will open your WordPress media library, where you can pick an existing image or upload a new one directly from your computer.
Uploading Your Video Files
Next up is uploading the actual videos. Before doing so, think about compressing them into .zip files. This saves storage space and speeds up the download process for customers. Plus, it’s a handy way to offer bundled videos.
To allow your WordPress site to handle .zip files, you can follow this guide on how to add additional file types to be uploaded in WordPress.
Once you’re set, navigate to the Download Files section in the product editor. For single, fixed-price videos, upload the .zip file via the File URL field in the WordPress Media Library.
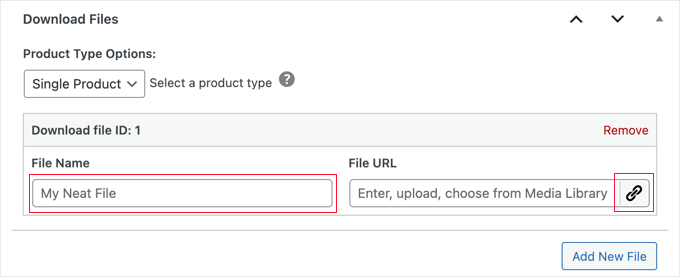
You can even customize the automatically generated download link to something more engaging, like ‘Download the HD version.’
After a successful purchase, customers receive a time-limited, secure download link on their confirmation page and via email. This minimizes the risk of unauthorized sharing.
With that done, you can click the Publish button and view your product to see how it looks.

Step 5: Customize Your Store Design with SeedProd
If you want to fine-tune your online store’s look and functionality, you can change your WordPress theme. WordPress themes allow you to customize everything from text styles to the overall layout of your website.
The Vendd theme is an excellent choice for selling digital goods. It works seamlessly with EDD and offers plenty of customization options.
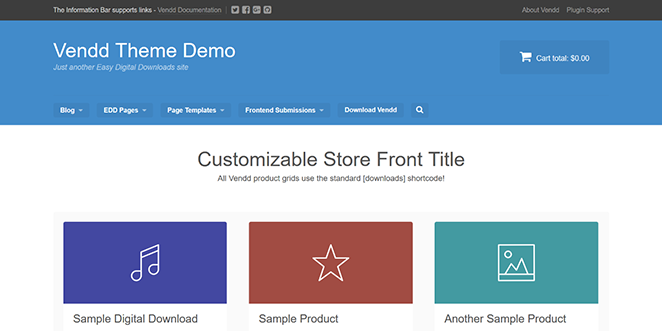
You can also check out these best WordPress themes for alternatives.
If you’d prefer a custom theme, you can always create a WordPress theme from scratch.
For this, we recommend using SeedProd, the best WordPress website builder plugin. Trusted by over a million websites, it lets you craft unique layouts optimized for sales and conversions.

SeedProd offers a range of pre-designed templates, ideal for selling digital products like videos or eBooks but the customization doesn’t stop there.
With SeedProd’s EDD blocks, you can customize every aspect of your online store, from the product details page to the shopping cart and checkout pages.
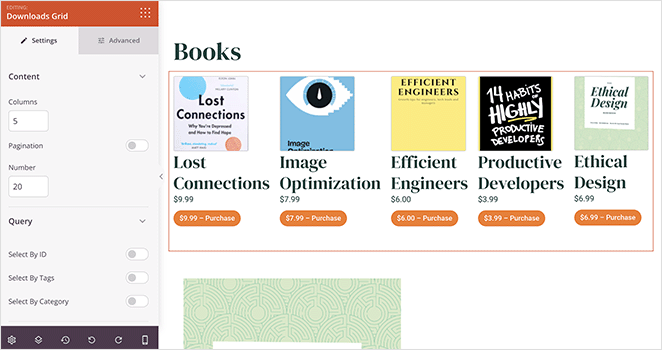
You can also add icons for social media platforms, opt-in forms, pricing tables, and much more. For more information, see our guide on customizing your EDD store with SeedProd.
Step 6: How to Promote and Market Your Videos Online
After setting up your store and customizing your design, you’re ready to promote your videos. That way, the right people can find your videos and buy them.
Here are some video promotion ideas to help:
- Leverage Social Media: Platforms like Facebook, LinkedIn, Instagram, and YouTube Channel are excellent for raising awareness about your video products.
- Engage in Email Marketing: Start building an email list and engage with subscribers by sharing new products, updates, and special offers.
- Focus on SEO: Enhance your website’s SEO to improve its search engine rankings, thereby boosting your video sales.
- Expand Your Network: Partnering with bloggers or influencers in your niche can be a game-changer. They already have loyal followers who trust their recommendations, providing a ripe opportunity to increase sales.
- Utilize Content Marketing: Create valuable blog posts, tutorials, or webinars related to your video content to drive organic traffic to your site.
- Run Promotions and Discounts: Limited-time offers and discounts can create a sense of urgency and attract more customers.
- Leverage Affiliate Marketing: Create an affiliate program to incentivize others to promote your videos.
- Run a giveaway: An online contest is a great way to go viral and increase brand awareness.
- Monitor and Analyze: Use analytics tools to track the performance of your efforts.
By adding these additional strategies to your marketing mix, you’ll be better able to maximize your video sales.
FAQs About How to Sell Videos Online
Educational: Tutorials and how-to guides for students and professionals.
Fitness: Workout routines and wellness tips.
Entertainment: Short films and comedy sketches.
Documentaries: Investigative or historical videos.
Stock Footage: Generic clips for filmmakers.
Webinars: Expert talks and Q&A sessions.
Music: Artist performances and concerts.
Crafts: DIY and art tutorials.
Cooking: Recipe and cooking guides.
Travel: Travel vlogs and adventure tips.
News: Commentary and analyses.
Reviews: Product reviews and unboxings.
Subscriptions not only foster customer loyalty but also offer a steady revenue stream. Just make sure to add new videos to keep your members engaged consistently.
AVI and MOV are also commonly used for their high-quality output. For the best user experience, consider offering your video in multiple formats to ensure it’s accessible to everyone.
Start Selling Videos Online Today
I hope this guide has helped you learn how to sell videos online. By following our easy guide, you’ll have a successful video store in no time at all.
You may also find these additional resources helpful with your video website:
- Create a Video Landing Page in WordPress Step-by-Step
- How to Embed Facebook Videos in WordPress (3 Easy Ways)
- How to Create a Coming Soon Page in WordPress
- 9 Best WordPress Security Plugins: Top Picks for Site Safety
- How to Speed Up Your WordPress Website
Thanks for reading! We’d love to hear your thoughts, so please feel free to join the conversation on YouTube, X and Facebook for more helpful advice and content to grow your business.

