

TL;DR: How to Create a Facebook Landing Page
Most people send Facebook ad traffic to their homepage and lose the conversion before the page loads. A dedicated landing page fixes that. Here’s how to build one in WordPress:
- Install SeedProd: Download from the SeedProd pricing page, install on WordPress, and verify your license key.
- Create a new landing page: Click “Create New Landing Page,” pick a template from the Sales tab, and set your page name and URL.
- Customize for Facebook: Edit the template in SeedProd’s drag-and-drop builder, match your ad’s headline and offer, and add social proof.
- Configure settings: Connect your email provider, add your Facebook pixel code under Scripts, and set your page URL.
- Publish: Preview on mobile, then click the arrow next to Save and select Publish to make it live.
Sending Facebook ad clicks to your homepage is like paying for a billboard that points people to the wrong store. You pay for every click, and a homepage full of navigation links and competing offers bleeds that spend. Most visitors bounce in seconds.
A dedicated Facebook landing page keeps everything focused on the one action your ad promised. In this guide, I’ll show you how to build one in WordPress that matches your ad, loads fast on mobile, and gives visitors exactly one thing to do.
By the end, you’ll have a fully published page ready to connect to your Meta Ads campaign.
What Is a Facebook Landing Page?
A Facebook landing page is a dedicated page on your website designed to convert visitors who click your Facebook ads—removing distractions and focusing on one clear action like signing up, claiming an offer, or starting a free trial.
These pages work hand-in-hand with your PPC ad campaigns by matching the message and visuals in your Facebook ads. That consistency builds trust and makes people far more likely to convert.
For example, a regular business page might talk broadly about your brand. A Facebook ad landing page, however, is focused on one offer created just for ad traffic.
Take this example from Craftsy. Their Facebook ad uses a bold call-to-action (CTA) button that leads directly to a coupon and product details.

Clicking that ad takes users to a dedicated landing page where visitors see the same offer they clicked, which reduces bounce.

Why Should I Make a Facebook Landing Page?
Because sending Facebook ad traffic to your homepage wastes clicks. You pay for every visitor, and landing them on a page with ten navigation links and no clear offer is like handing someone a map with no destination marked. A dedicated Facebook landing page keeps visitors focused on one action.
- No homepage distractions, just one clear offer
- Optimized for mobile users, who make up the vast majority of Facebook traffic
- Easier to track and measure ad campaign results
- Consistent design and messaging builds trust
Bottom line: A Facebook landing page turns casual scrollers into leads and customers.
What Makes a High-Converting Facebook Landing Page?
After reviewing hundreds of landing pages over 13 years of writing about WordPress, the ones that convert all share the same five elements. Get these right and you give every ad click its best shot.
- Message match between ad and page: Your landing page headline should use the exact same language as your Facebook ad. Visitors who see a disconnect immediately second-guess whether they clicked the right thing.
- Single clear CTA: One action per page. Giving visitors two or three options splits their attention and reduces conversions across the board.
- Strong headline above the fold: The first thing visitors read should confirm the offer and tell them why it’s worth their time, before they scroll.
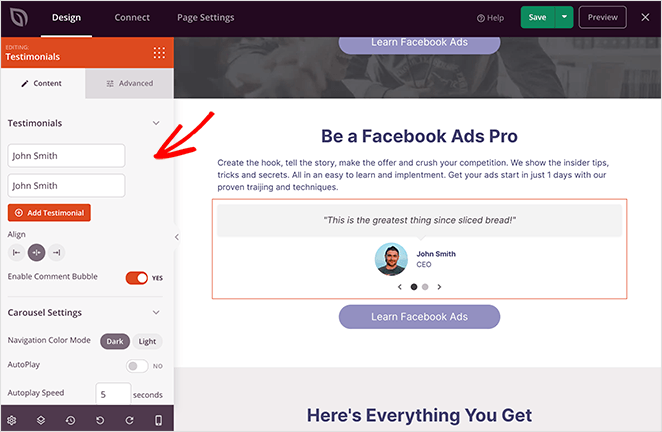
- Social proof: Testimonials, reviews, star ratings, or trust badges give visitors a reason to act. A testimonial section added above the CTA can lift conversions noticeably.
- Mobile-optimized layout: Most Facebook users browse on their phones. A page that breaks or loads slowly on mobile costs you conversions before visitors read a single word.
How to Create a Facebook Landing Page in WordPress
With SeedProd, you can build a complete Facebook landing page—custom design, email integration, and mobile preview—in under 30 minutes, without writing a single line of code.

SeedProd is a drag-and-drop WordPress landing page builder with 300+ templates you can customize for Facebook ads. It’s the same tool I use to build pages for SeedProd, because it’s fast, mobile-friendly, and built for marketers.
Beyond landing pages, SeedProd handles coming soon notices, maintenance pages, custom logins, and 404s. But for this guide, we’ll focus on using it to build your Facebook landing page step-by-step.
If you’re weighing WordPress against standalone tools like Leadpages or Unbounce: a WordPress-based landing page lives on your own domain (which carries better trust signals for ad visitors), requires no extra subscription, and integrates directly with your site’s analytics and email setup.
If you’re using Meta Ads Manager (formerly Facebook Ads Manager), these same steps apply—the platform rebranded in 2021 but the landing page process is identical.
Step 1. Install and Activate SeedProd
To start, go to the SeedProd pricing page, download the plugin, and install it on your WordPress site.
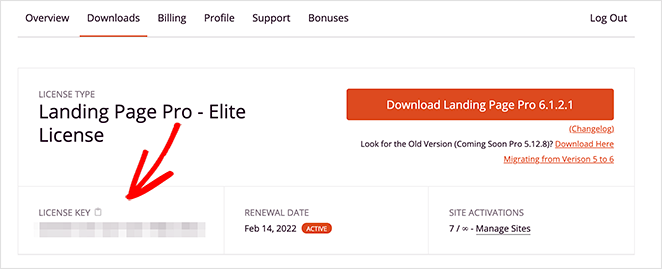
Once activated, you’ll see a welcome screen asking for your license key.
Copy your license key from your SeedProd account, paste it into the field, and click Verify Key. After that, click Create Your First Page to open the landing page dashboard.

This is where you’ll manage all your landing pages. SeedProd also lets you set global page modes (like Coming Soon or Maintenance), but for now we’ll focus on creating your Facebook landing page.
Step 2. Create a New WordPress Landing Page
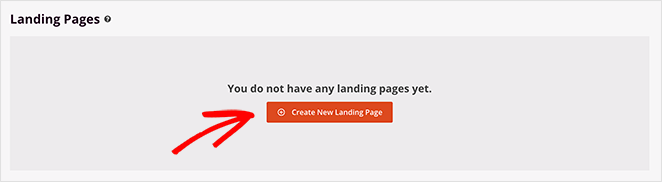
To start creating your landing page, click the Create New Landing Page button under the Landing Pages section.
Clicking the button directs you to SeedProd’s selection of versatile landing page templates, including options ideal for a Facebook landing page.
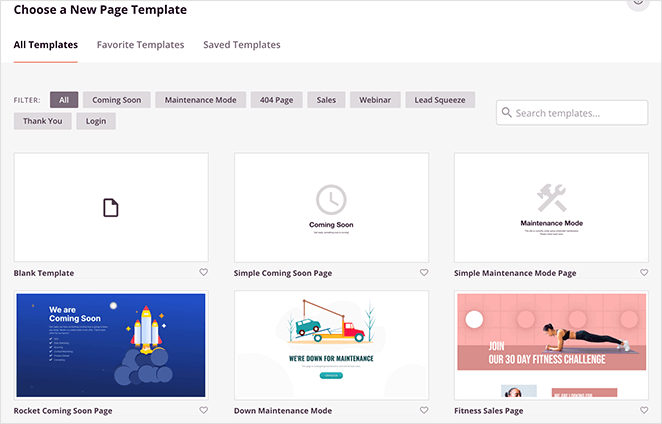
You can filter templates by clicking the tabs along the top of the screen.
While SeedProd may not have any specific Facebook landing page templates, you can customize any design to match the look you want to achieve.
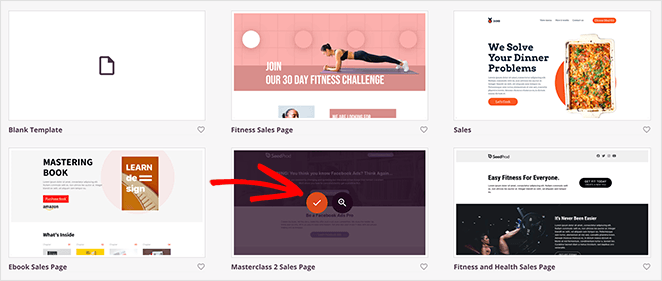
For this guide, we’ll use the Masterclass 2 Sales Page, which you can find under the Sales tab. Hover your mouse over the template thumbnail and click the tick icon to choose a template.
After, you’ll see a popup asking you to enter your landing page name and URL. Once you enter this information, click the Save and Start Editing the Page button.
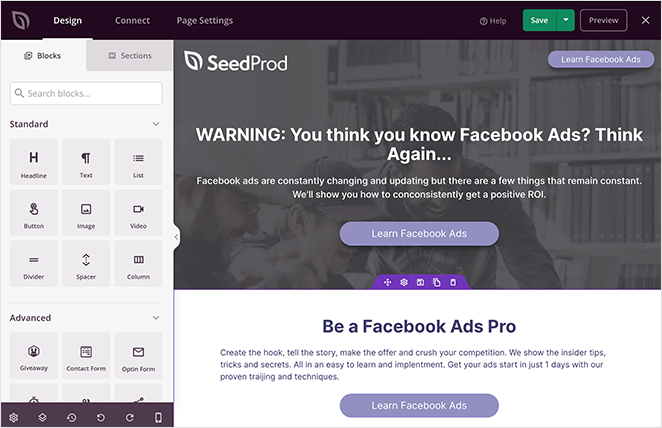
Step 3. Customize Your Landing Page for Facebook
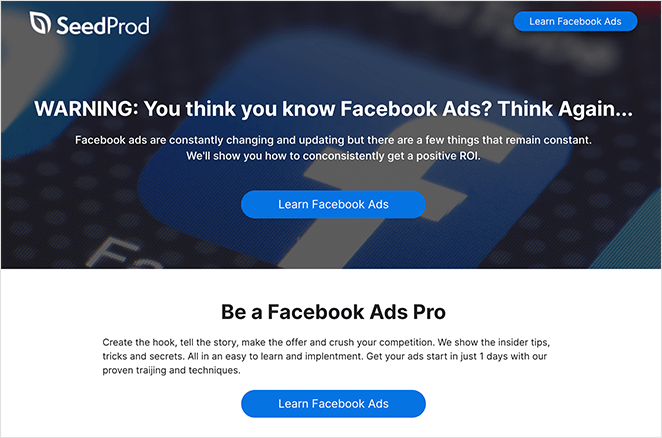
Once you launch a template, it opens in SeedProd’s drag-and-drop builder. On the left are your blocks and sections. On the right is the live preview where you can click and edit anything instantly.
What to Include on Your Facebook Landing Page
Your landing page should make a strong first impression and push visitors toward one action. Include:
- A short brand or offer introduction
- A clear call-to-action (sign up, claim, buy)
- Social proof like reviews or testimonials
- Key product or service benefits
- Easy contact info or links to your socials
Using SeedProd Blocks and Sections
SeedProd includes ready-made blocks for buttons, forms, testimonials, and more. You can also drop in full sections like headers, heroes, CTAs, or FAQs with one click.
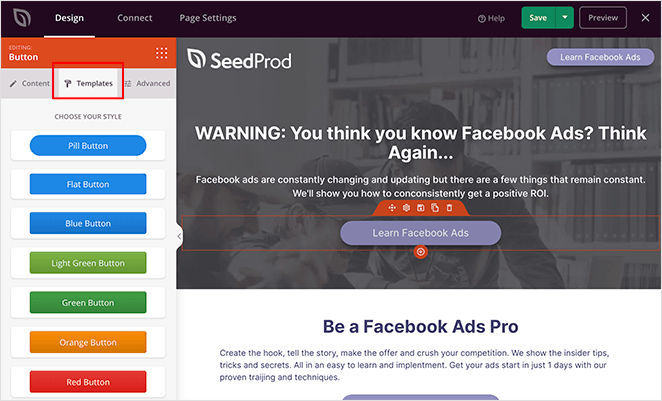
Want to grow your list? Use the Optin Form block. Need trust signals? Add a testimonial section in seconds.
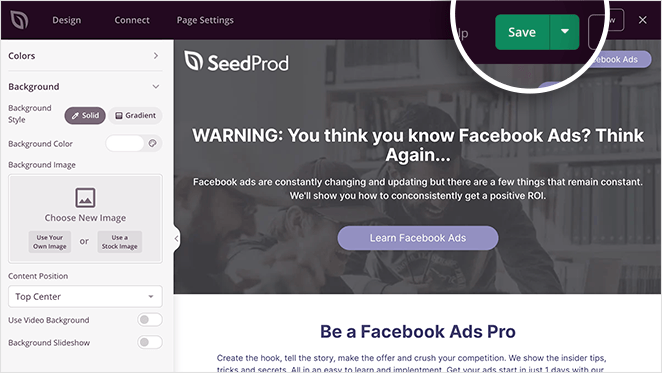
When you’re happy with the design, click the green Save button in the top-right corner.
Step 4. Configure Your Landing Page Settings
If part of your marketing strategy is to collect email addresses, you’ll need to link your landing page to your email marketing and automation service. This makes it easier to manage all the new leads joining your email list.
Integrating your email marketing provider with SeedProd is straightforward. Just click the Connect tab at the top of your screen.
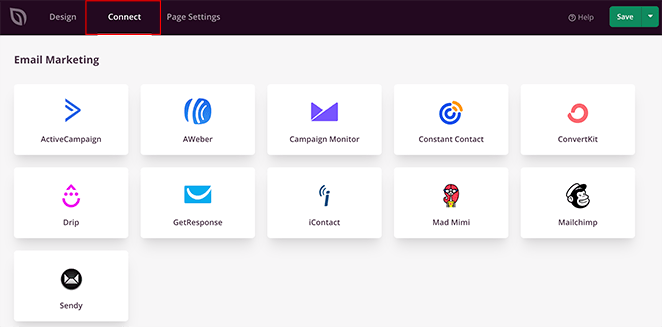
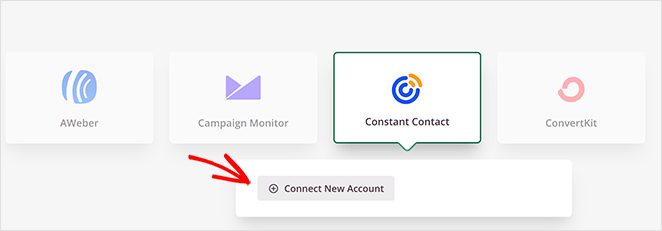
On this page, you’ll see all the popular email marketing services that integrate with SeedProd. Go ahead and choose your preferred service, click Connect, and follow the steps to authorize your account.
You can find instructions for each email marketing provider in SeedProd’s email integration documentation.
Besides connecting your email provider, you can also collect emails right inside SeedProd. The details of anyone who signs up on your landing page are shown in SeedProd’s subscriber overview.
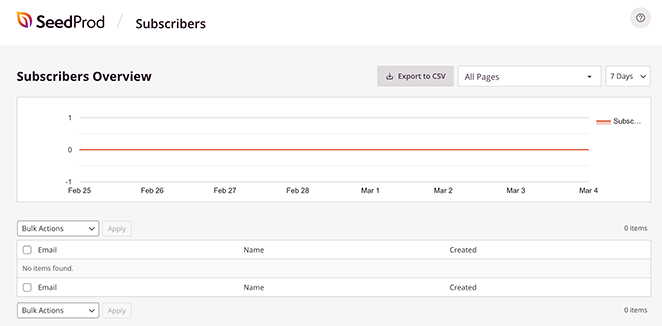
You can view this dashboard by navigating to SeedProd » Subscribers from your WordPress admin area.
After connecting your email service to SeedProd, there are a few more settings to configure before publishing your page. To find them, click the Page Settings tab along the top of your screen.
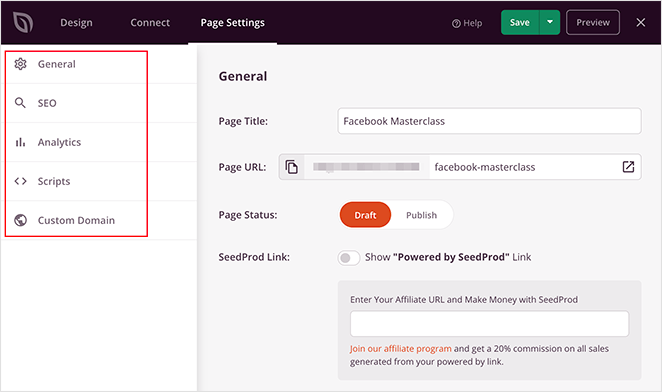
On this page, you can edit the following settings:
- General: Change your page name and URL, publish or set your page to draft, and put your landing page in isolation mode.
- SEO: Click to see the SEO settings of your landing page in a WordPress SEO plugin like All in One SEO.
- Analytics: View the Google Analytics metrics of your landing page in an analytics plugin like MonsterInsights.
- Scripts: Enter crucial scripts to your landing pages. This is where you add your Facebook pixel code—it lets you track who visits your landing page from your ad, build retargeting audiences, and optimize campaigns for conversions. Get the pixel base code from Meta Ads Manager » Events Manager.
- Custom Domain: Give your landing page a different domain name from your existing website.
You can learn more about each of these in the Page Settings documentation.
One feature worth highlighting for Facebook ad campaigns is SeedProd’s Dynamic Text Personalization. It lets you set up your landing page to automatically swap the headline based on the ad keyword.
If someone clicks an ad for “summer sale,” your page headline shows “summer sale” dynamically. That kind of message match is a direct conversion-depth differentiator that most standalone tools don’t offer.
Step 5. Publish Your Landing Page in WordPress
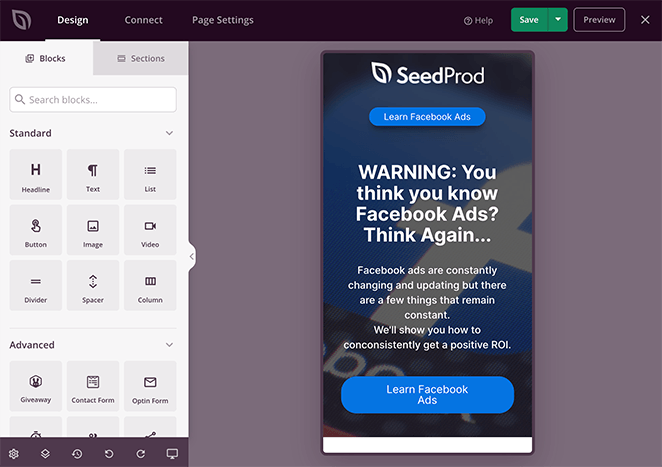
Before publishing, make sure your Facebook landing page is mobile-friendly. About 98% of Facebook users access it via mobile (Statista), so a page that breaks on small screens costs you most of your clicks.
To check mobile display before publishing, click the mobile icon at the bottom of the SeedProd builder.
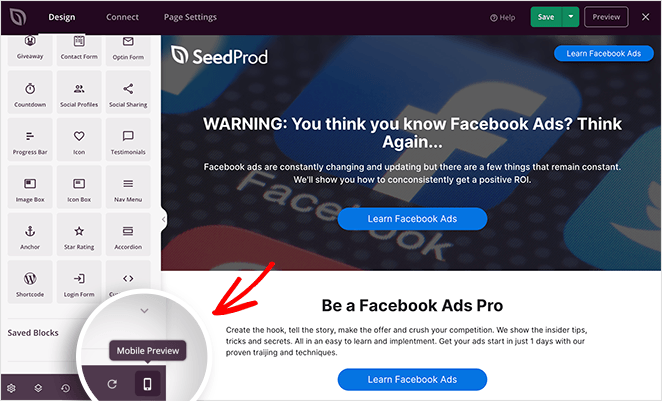
This opens your landing page in a mobile preview so you can check that every element displays correctly.
Scroll through your mobile preview and click to edit any page block that doesn’t look right. When you’re happy with how your page looks, you’re ready to make it live.
To do that, click the down arrow next to the green Save button and click Publish.
Once your page is live, consider running an A/B test. Create two versions with different headlines or CTAs, publish both in SeedProd, then run them as separate ad sets in Meta Ads Manager to see which converts better. Even a small lift on a consistently-run ad compounds fast.
Setting Up Redirects for Your Facebook Landing Page
Redirects let you control where visitors go after they complete an action on your landing page, such as showing a thank-you page, sending them to a product offer, or moving them into a sales funnel.
In SeedProd, setting up a redirect is simple:
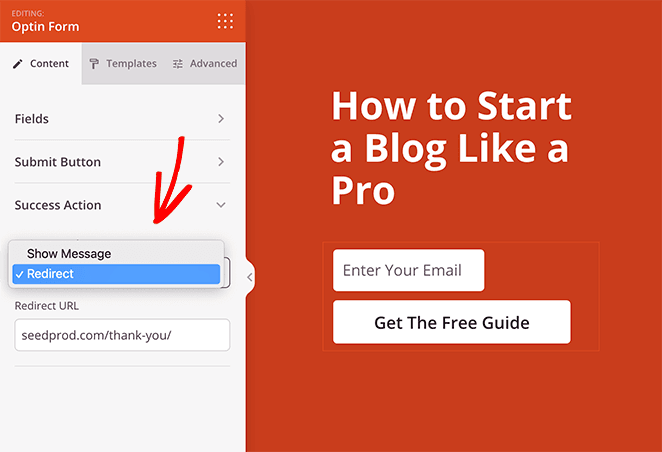
- Edit your landing page and select the action element (for example, the opt-in form block).
- Open the block settings, expand Success Action, and choose Redirect.
- Enter the URL you want users to visit after they complete the form.
What Are the Rules for Facebook Landing Pages?
Facebook reviews every landing page connected to an ad before approving it. These are the five rules your page must follow:
- Match the ad message and offer: Your landing page must reflect what the ad promised. Sending visitors to a page that promotes a different product or offer will get your ad rejected.
- Comply with Facebook’s advertising policies: Your page content must follow Facebook’s advertising policies on prohibited content, restricted content, and targeting restrictions.
- Be fully functional: A broken page, missing images, or error messages will result in ad rejection. Test your page on multiple devices before connecting it to a campaign.
- No auto-redirects or auto-downloads: Your landing page cannot automatically send visitors to a different site or trigger a file download. Visitors must choose to proceed.
- Include a privacy policy if collecting personal data: If your page has a form that collects names, emails, or any personal information, you must display a visible privacy policy. This is also a legal requirement under GDPR and CCPA for many audiences.
What Does a High-Converting Facebook Landing Page Look Like?
Looking for inspiration? Here are three Facebook landing page examples that stand out for their design, consistency, and conversion strategy.
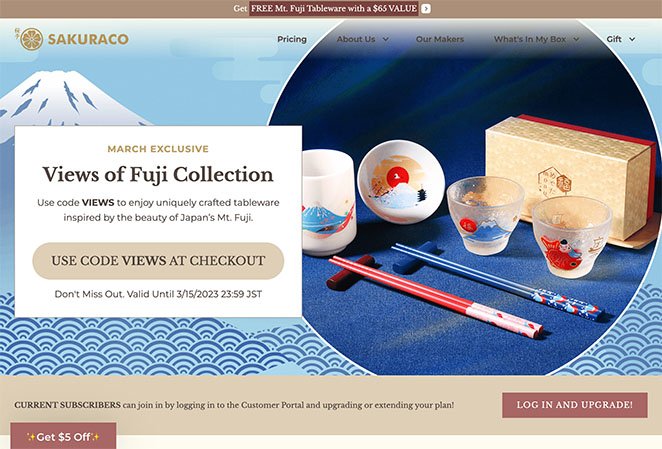
Sakuraco
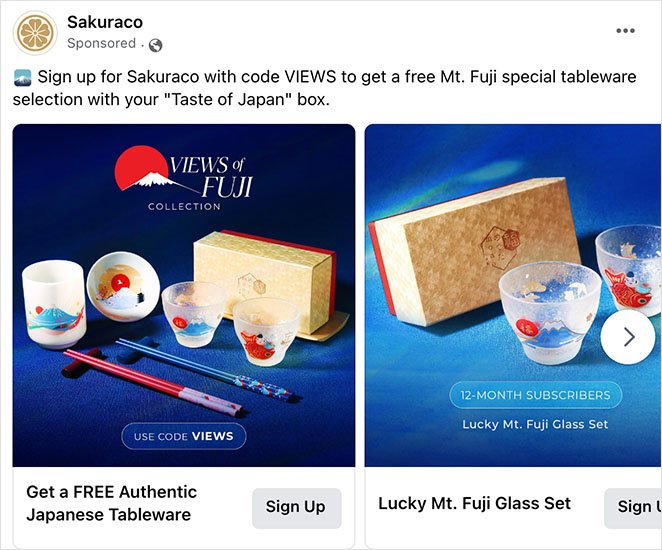
Sakuraco keeps ad and landing page design perfectly aligned. The consistent visuals reassure visitors they’re in the right place and reduce bounce.
To seal the deal, the page includes a discount code for a free gift—an instant incentive to convert.
Craft Gin Club

Craft Gin Club uses video to capture attention in the ad, then continues the story on a bold, simple landing page.
Offering 50% off the first box is a strong conversion hook, while clear buttons make it easy for users to claim the deal.

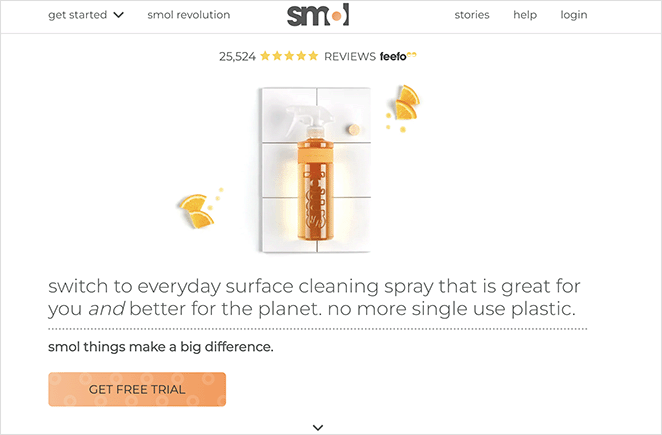
Smol
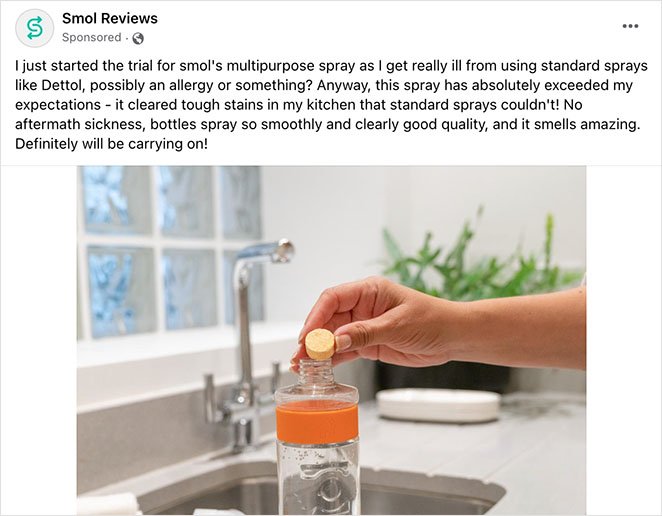
Smol relies on user-generated content and testimonials to build trust before the click. The landing page doubles down with star ratings and a free trial offer—making it almost risk-free for new customers to try.
Want to build a lead capture page that follows these same principles? SeedProd’s templates make it straightforward to replicate any of these approaches on your own domain.
Facebook Landing Page FAQs
How do I connect my landing page URL to a Facebook ad campaign?
In Meta Ads Manager, go to the ad creative level and paste your landing page URL into the “Website URL” field. That’s the page users will land on after clicking your ad.
Before connecting it, make sure your URL uses HTTPS and your page loads in under 3 seconds. Slow or insecure pages can cause ad delivery issues and get your ad flagged for review.
What should a Facebook landing page include to get more conversions?
Focus on five elements: a headline that mirrors your ad copy (message match), a single clear CTA, social proof like testimonials or trust badges, key benefits above the fold, and a mobile-optimized layout.
Anything that distracts from the one action you want visitors to take—navigation menus, multiple offers, unrelated content—will reduce conversions.
Do I need a separate landing page for each Facebook ad?
Not necessarily for each ad, but you should have a separate page for each distinct offer or audience. If you’re running ads for two different products or targeting two very different customer segments, each should have its own landing page.
Running the same ad copy to different audiences? You can often use the same landing page, as long as the message still matches what each audience clicked.
Does my Facebook landing page need a Facebook pixel?
Not strictly required, but highly recommended. Without the pixel, you’re flying blind—you won’t know which ads drove conversions, you can’t build retargeting audiences from page visitors, and you lose the ability to optimize campaigns for conversion events rather than just clicks.
Add your pixel base code to SeedProd’s Scripts setting (in Page Settings) and you get all of that tracking automatically.
Every Facebook ad click you paid for now has somewhere worth going.
The pages that convert best all do one thing—they pick up exactly where the ad left off. Same offer, same language, one clear action.
With SeedProd, you can design a professional, mobile-friendly Facebook landing page in minutes, connect it to your campaign, and start getting more leads from every ad you run.
You may also find the following guides helpful:
- How to Add a Facebook Page to WordPress
- How to Embed Facebook Videos in WordPress
- How to Add a Facebook Like Button to Your WordPress Site
- How to Embed Facebook Events on WordPress
Thanks for reading! We’d love to hear your thoughts, so please feel free to join the conversation on YouTube, X and Facebook for more helpful advice and content to grow your business.


