If you want more people to join your email list or register for your offers, the fastest way is with a dedicated sign up page. It gives visitors a clear path to subscribe without distractions, which almost always leads to higher conversions.
I use sign up pages on my own sites because they’re simple to create and consistently outperform sidebar forms or popups. In this tutorial, I’ll show you exactly how to design one in WordPress step by step.
Quick steps to create a sign up page:
What Is a Sign Up Page?
A sign up page is a dedicated web page where visitors can quickly enter their details to join your email list, register for an event, or access an offer. It’s sometimes called a “registration page,” but the goal is always the same, to capture new leads for your business.
Unlike generic forms placed in sidebars or footers, a sign up page removes distractions and gives people a single action to take. That’s why it often converts better than other methods.
Most sign up pages appear after an ad click, social post, or link in your site’s menu. At this point, visitors already know what they want, so your design should focus on making the process fast and easy.
The best sign up pages keep form fields to a minimum, use clear calls to action, and highlight the value of subscribing. A simple design usually delivers the highest conversion rates.
Sign Up Page Examples
Looking for inspiration before you design your own? Check out these high-converting sign up page examples I’ve collected. You’ll find coming soon pages, coupon sign ups, webinar registration pages, and more.
Once you’ve seen what’s possible, come back here to follow the steps below and create your own page.
How to Design a Sign Up Page in WordPress
Using the default WordPress editor to create your signup page isn’t always the best choice. Even with the block editor, getting your page looking the way you want can be hard without help from a professional.
That’s why I suggest using a page builder plugin like SeedProd to design your sign up page.

SeedProd is the best WordPress landing page builder. It comes with a library of multipurpose landing page templates and a drop and drop builder, allowing you to create a landing page without hiring a developer.
With tons of customization options, you can design your page without writing a single line of code. You can also put your site in maintenance mode, launch a coming soon page, and more with its 1-click landing page modes.
Alongside all the features needed to create high-converting landing pages, SeedProd is lightning-fast and bloat-free. This means it won’t slow down your website, which can impact your SEO and conversion rates.
Let’s look at how to design a sign up page in WordPress with SeedProd.
1. Install and Activate SeedProd
First, click here to get started with SeedProd and download the plugin to your computer. You then need to install and activate the plugin on your WordPress website.
If you need help with this, follow these step-by-step instructions for installing SeedProd.
Once you’ve installed the plugin, and entered your SeedProd license key, click the Create Your First Page button.
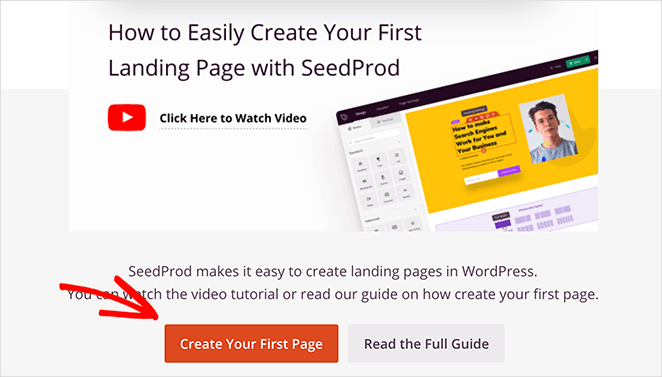
This takes you to SeedProd’s landing page overview.
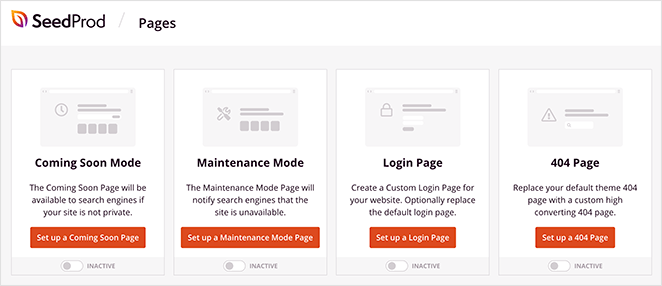
At the top of the page are the different landing page modes you can activate, including:
- Coming Soon Mode – Create a coming soon page and hide the rest of your site from the public.
- Maintenance Mode – Show a user-friendly message telling users your page is temporarily down for maintenance while hiding the update process.
- Login Page – Create a custom WordPress login page for your website users.
- 404 Page – Show a custom 404 error page on broken page links.
2. Create a New Landing Page
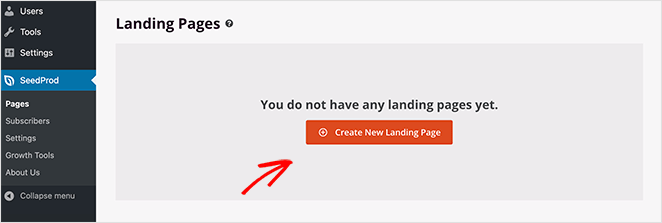
Under the landing page modes section is where you’ll see all the pages you create with SeedProd.
To create your first page, click the Create New Landing Page button.
3. Choose a Sign Up Page Template
On the next screen, you can choose a template for your sign up page.
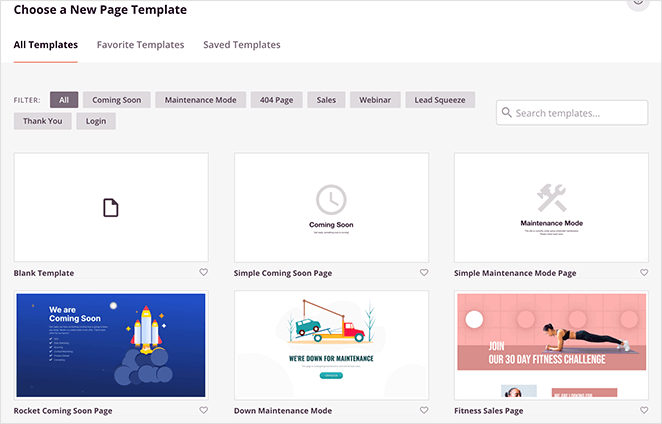
SeedProd comes with a variety of customizable landing page templates, including:
- Coming Soon page templates
- Maintenance Mode templates
- 404 page templates
- Sales page templates
- Squeeze page templates
- Webinar page templates
- Thank you page templates
- Login page templates
And because you can customize them in the visual editor, each template is multipurpose. This means you can customize any template to suit your specific landing page needs.
So go ahead and pick a template that resembles how you want your sign up page to look. For this guide, we’ll use the Hustle Squeeze Page template.

Just hover your mouse over the template thumbnail and click the tick icon to select your design.

A popup then appears, asking you to enter your page name and URL. You can change these settings later if needed.
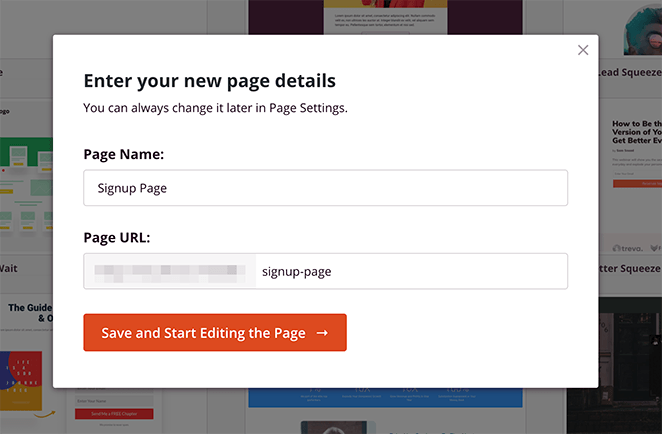
Now click the Save and Start Editing the Page button to launch your template in the drag and drop page builder.
4. Customize Your Sign Up Landing Page
The SeedProd editor makes customizing your page simple. On the left, you’ll find blocks and sections you can drag into place. On the right, you’ll see a live preview of your design.
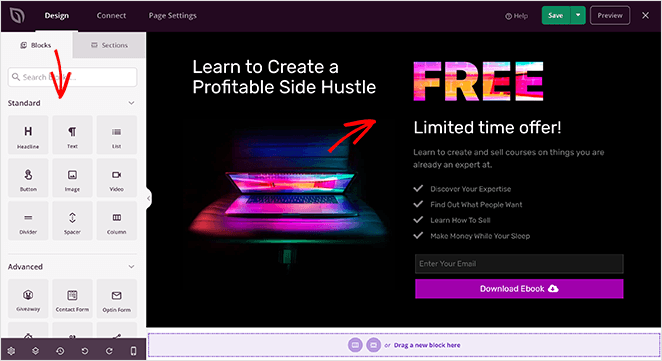
Blocks and Sections
To add content, just drag a block — like a form, countdown timer, or social buttons — into your layout. You can also drop in ready-made sections (hero, call-to-action, features, etc.) to speed things up.
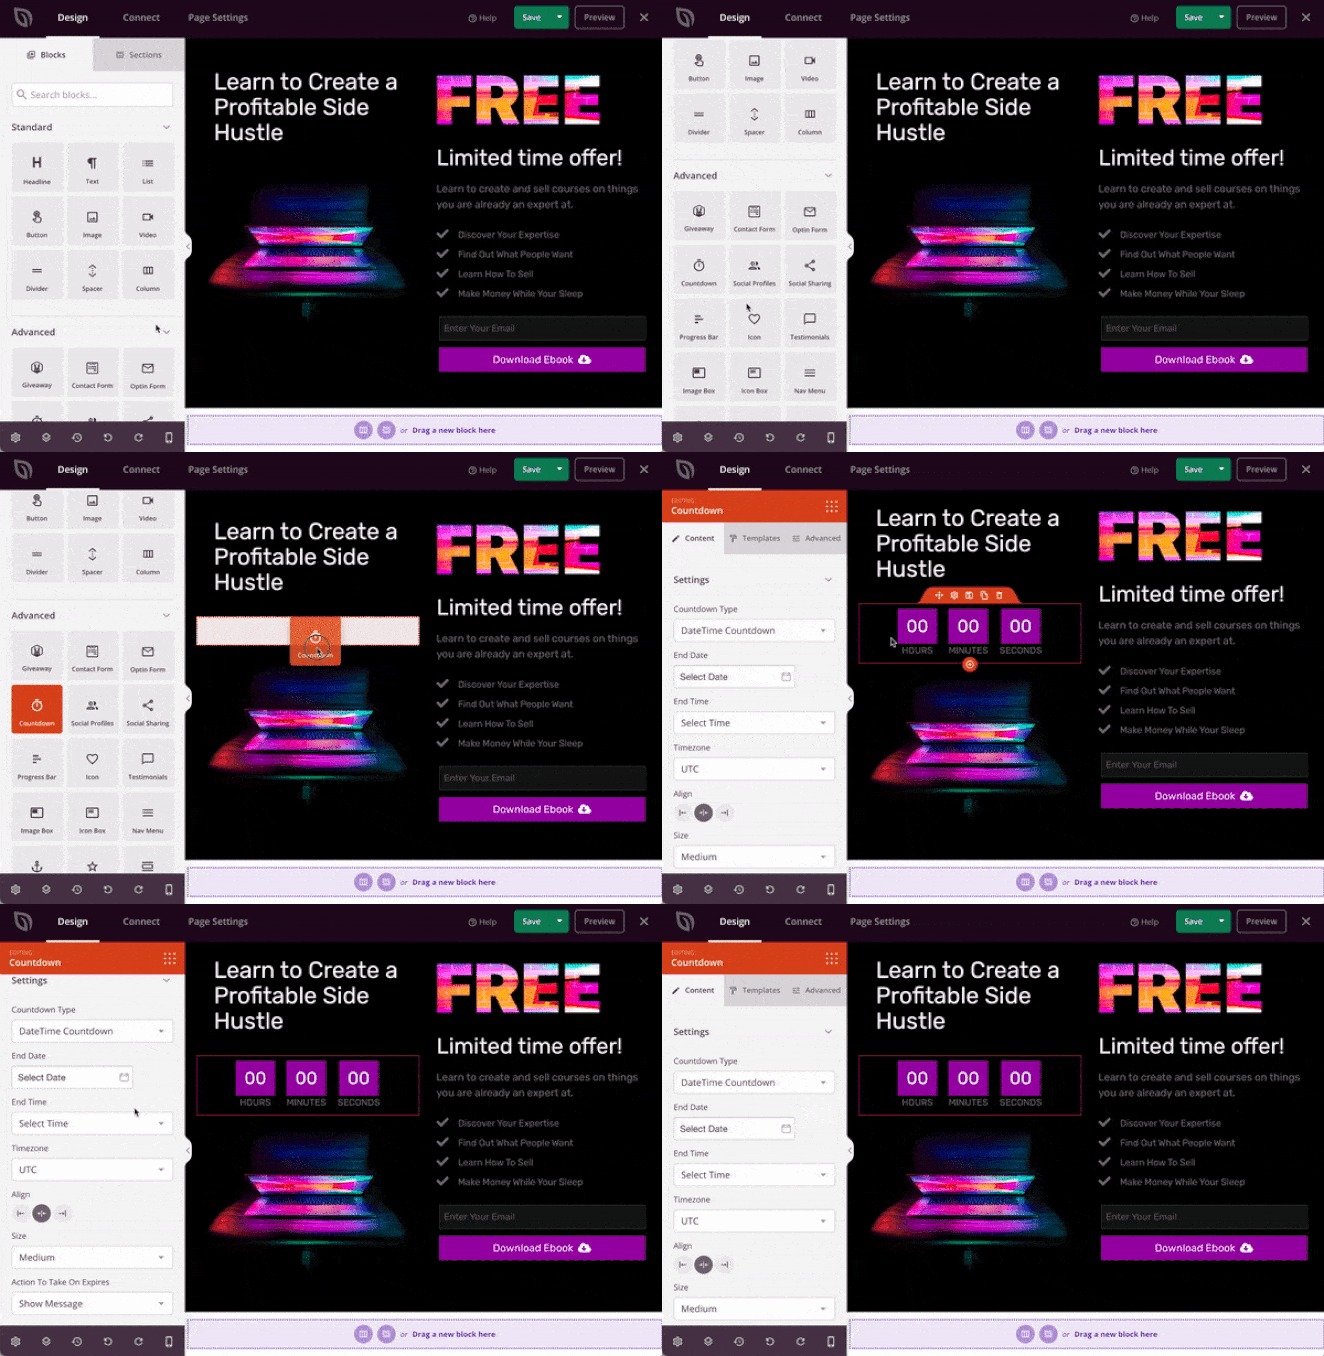
Clicking any block opens its settings, where you can edit text, colors, spacing, or choose from built-in style templates.
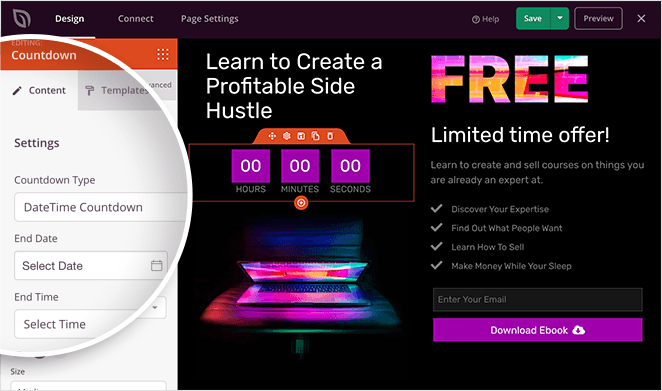
Popular blocks include opt-in forms, giveaways, testimonials, progress bars, and more — all designed for lead generation.
Global Settings
Use the Global Settings panel (gear icon) to change fonts, colors, or backgrounds across your entire page at once. You can pick from curated font themes and color palettes or upload your own branding.
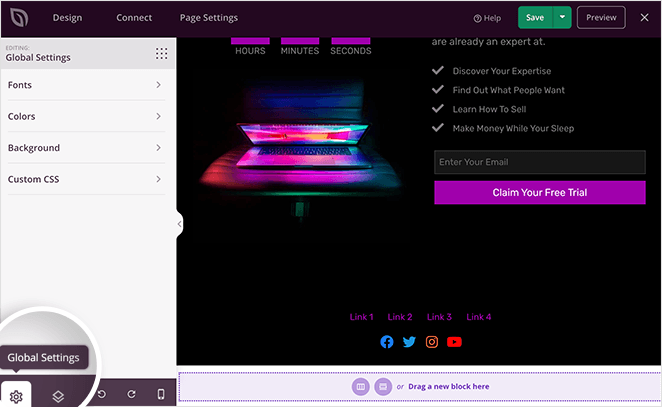
When you’re happy with the design, click the green Save button to keep your changes.

5. Connect Your Email Marketing Service
The next step in learning how to design a sign up page is to configure your email collection settings. This means connecting SeedProd to your email marketing provider.
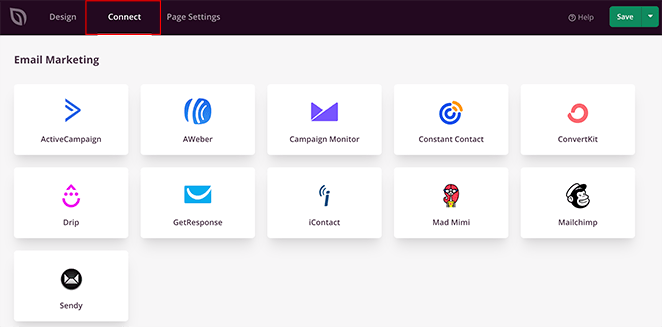
Click the Connect tab at the top of the screen to see the popular email marketing services that integrate with SeedProd, including:
- Drip
- Constant Contact
- AWeber
- GetResponse
- ConvertKit
- Campaign Monitor
- Mailchimp
- And more
You can even connect to tons of other services by using the Zapier integration.
To connect your email list, just choose your preferred email service, click Connect, and follow the instructions.
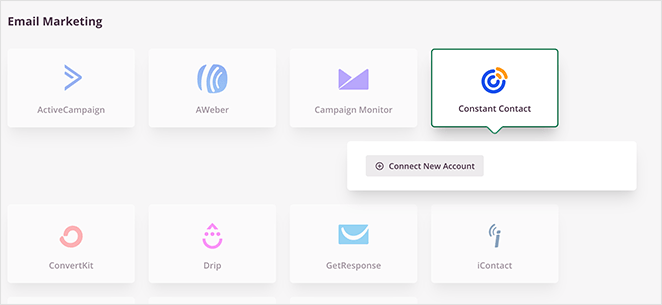
For specific instructions on integrating each email marketing service, see our email integration documentation.
It’s also possible to see who subscribes to your email list by navigating to SeedProd » Subscribers from your WordPress admin area.
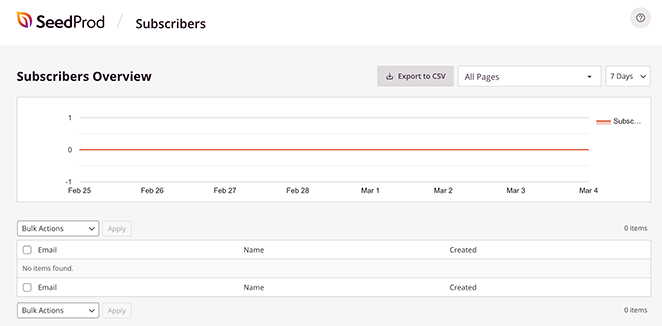
This takes you to SeedProd’s subscriber overview, where you’ll see the details of your new subscribers.
6. Configure Your Sign Up Page Settings
After connecting your email list to your registration page, you can configure a few more settings. To see them, click the Page Settings tab at the top of your screen.

On this page, you can edit your General settings by giving your page a new name, URL, or even set it to draft or publish.
In the Analytics section, you can view your signup page performance settings in Google Analytics plugins like MonsterInsights. You can do the same in the SEO section and set your page’s SEO metadata using WordPress SEO plugins like All in One SEO.
The Scripts area allows you to add custom scripts and code snippets, such as cookies and tracking pixels.
And lastly, the Custom Domain section lets you connect your landing page to any domain name you like without installing WordPress on it.
You can learn all about domain mapping for landing pages in our step-by-step guide: How to Point a WordPress Landing Page to a Different Domain.
When you’ve customized your sign up page settings, remember to click the Save button.
7. Publish Your Sign Up Page in WordPress
Before publishing your registration page, it’s good practice to see if it shows up correctly on mobile devices. If it doesn’t, you could lose leads and miss out on tons of potential customers.
Luckily, you can preview your page on mobile with SeedProd. Just click the Design tab and select the mobile icon at the bottom of your screen.
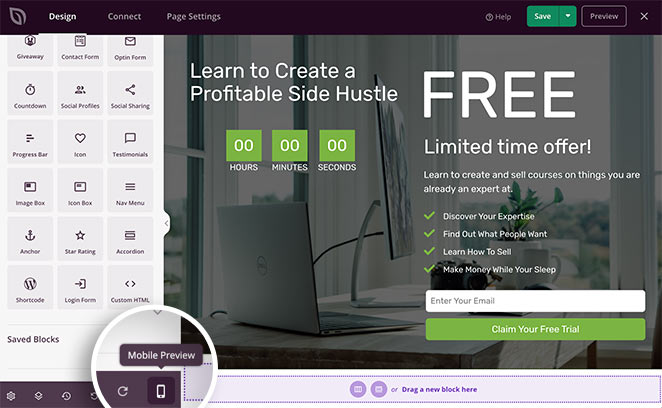
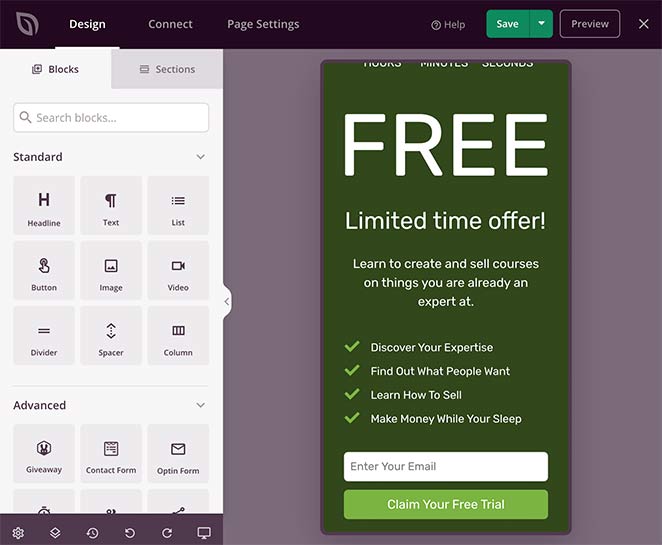
This shows a mobile preview of your landing page. If anything doesn’t look right, click anywhere on the page to adjust your design.
Any changes you make are automatically applied to BOTH the desktop and mobile layout of your page.
With all your customizations in place, it’s time to publish your sign up page. To do that, click the down arrow next to the Save button and select Publish.
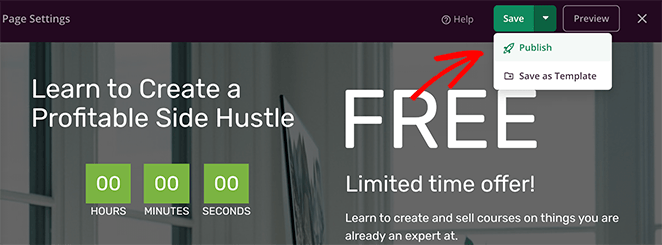
A window appears saying that your page is now live.
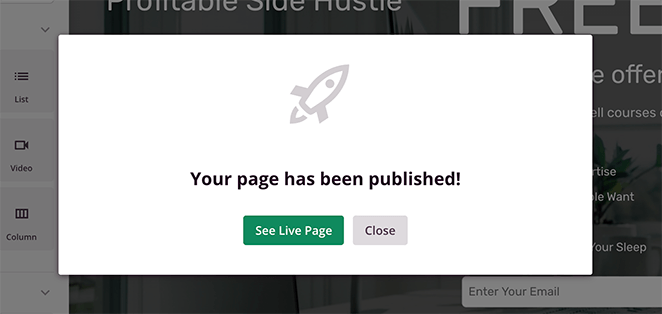
Go ahead and click the See Live Page button to see how it looks.

FAQs on Designing a Sign Up Page in WordPress
I hope this guide has helped you learn how to design a sign up page in WordPress and build it without a developer’s help.
Now all that’s left is for you to create one and start generating leads and conversions for your business.
You may also find the following guides helpful:
- Best WordPress Email Subscription Popup Plugins
- Best SMTP Plugins For Successful Email Delivery
- How to Build an Email List From Scratch
- How to Set Up a Free Business Email Address
If you liked this article, then please follow us on YouTube, Twitter, and Facebook for more useful content to help grow your business.

