

TL;DR: How to Create a Facebook Group Landing Page. Build a high-converting community landing page in WordPress with SeedProd in under 30 minutes, no coding needed.
- Install SeedProd – Download the plugin, upload it to WordPress, and activate your license key.
- Choose a template – Pick from hundreds of landing page templates and give your page a name.
- Customize your page – Add a join button, Facebook Embed, and testimonials, then set global styles.
- Configure settings – Add SEO options, connect analytics, and enter your Facebook Pixel.
- Publish – Click Publish and share your new group promotion page.
Want to grow your Facebook group with more of the right members? A Facebook group landing page gives you a professional home base where you can showcase your community, highlight its benefits, and encourage people to click “Join.”
Instead of relying on Facebook’s plain layout and a bare link, you’ll have a polished page that attracts and converts. In this guide, I’ll walk you step by step through creating your own landing page so you can build your community faster.
The tool I use is SeedProd, a drag-and-drop WordPress website builder that lets you build a complete page in under 30 minutes, no code needed.
Quick steps to create a Facebook Group landing page in WordPress:
- Step 1. Install and Activate SeedProd
- Step 2. Choose a Landing Page Template
- Step 3. Customize Your Page
- Step 4. Configure Your Settings
- Step 5. Publish Your Facebook Group Landing Page
What Is a Facebook Group Landing Page?
A Facebook group landing page is a dedicated web page designed to promote your group and get more people to join. Unlike Facebook’s standard layout, it gives you full control over design, messaging, and conversion elements.
A strong landing page usually includes:
- Eye-catching visuals
- Reviews or testimonials for social proof
- A clear call-to-action button to join your group
- Embedded Facebook content
You can also use a landing page in your Facebook ad campaigns. For example, run ads to your business page fans or custom audiences, and send clicks to your landing page.
Once there, the page layout and messaging help convince visitors to join your group.
How Do You Create a Landing Page for a Facebook Group?
The easiest way to build a Facebook group landing page is with SeedProd, a drag-and-drop WordPress website builder. Most users finish in under 30 minutes, no coding required.

It comes with hundreds of pre-made landing page templates and a drag-and-drop builder that makes the whole process straightforward.
SeedProd’s block editor works like a drag-and-drop canvas. Click any element to edit it directly, no menu-diving required.
Ready to make your Facebook group landing page with SeedProd? Follow the steps below to get started.
Step 1. Install and Activate SeedProd
First, you’ll need to visit the SeedProd website and choose your pricing plan. For this guide, we’ll be using SeedProd Pro; however, there are several plans to choose from, plus they all come with a 14-day trial.
After choosing your plan, log into your SeedProd account and download the plugin files. It’s also a good idea to copy your license key at this stage because you’ll need it shortly.
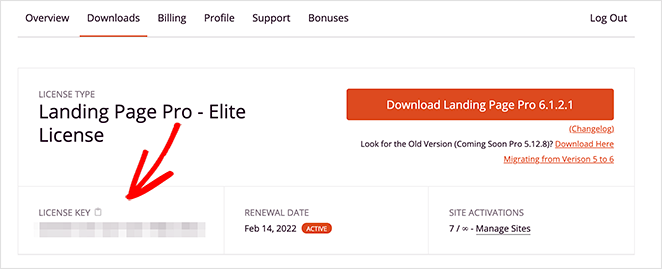
Now, go to your WordPress website and upload your plugin .zip file. If you’ve never done this before, you can follow this helpful guide on installing and activating a WordPress plugin.
Next, navigate to the SeedProd » Settings page and paste the license key you saved earlier.
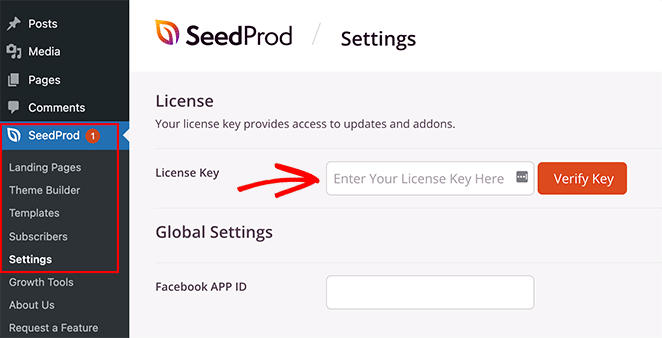
Once you’ve done that, click the Verify Key button.
Step 2. Choose a Landing Page Template
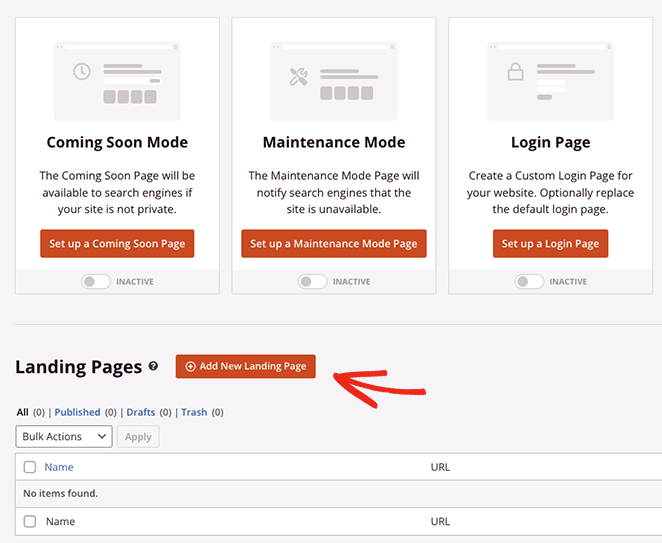
For the next step, head over to SeedProd » Landing Pages and click on the Add New Landing Page button.
On the following screen, you’ll see a library of hundreds of templates you can customize to suit the needs of your marketing campaigns. Simply click the filters to narrow down your search.
For example, you can find landing page examples designed to generate leads in the Lead Squeeze tab.
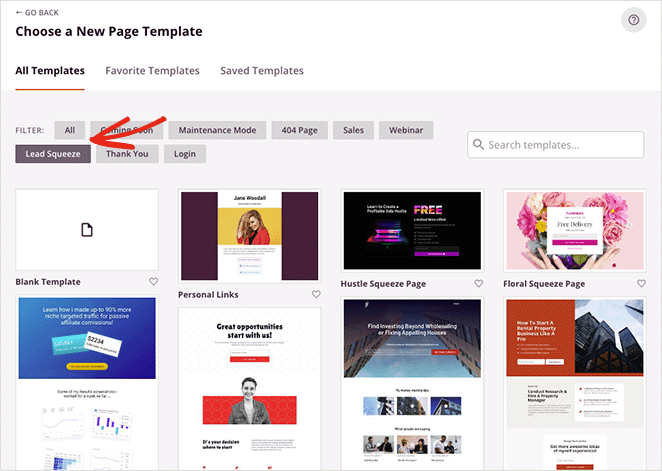
When you’ve found a design you like, hover over the preview and click the check mark icon.
Now you’ll see a popup window asking you to enter a name for your landing page. You can change this later, but it’s best to enter something you’ll easily recognize.
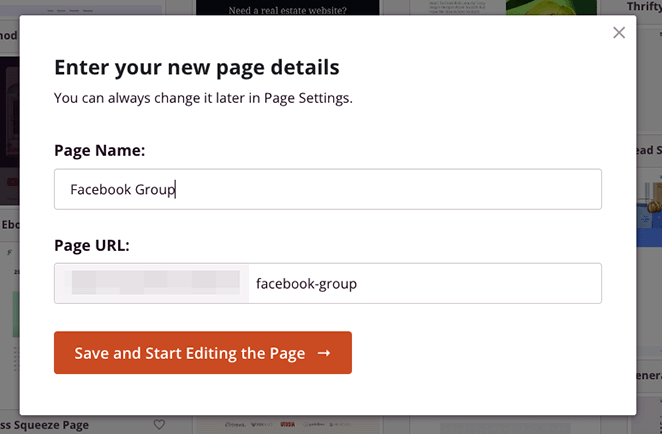
After entering your page name and URL, click Save and Start Editing the Page.
Step 3. Customize Your Page
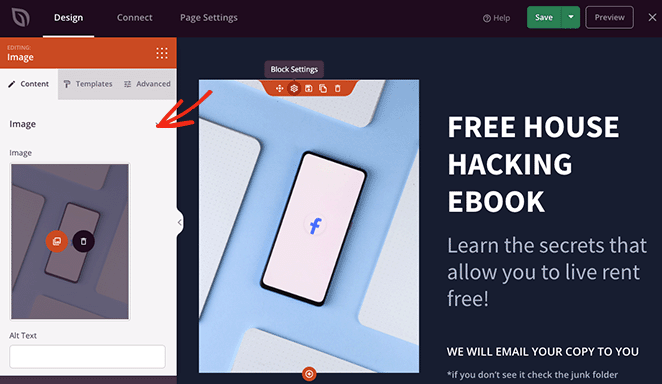
On the next screen, you’ll see a layout similar to the design below:

It will have a live preview of your landing page template on the right and blocks you can drag and drop onto the page on the left.
Customizing any part of your landing page template is quick. Click anywhere on the design to change that element’s contents.
For example, clicking an image will open its settings and allow you to upload a replacement better suited to your Facebook Group.
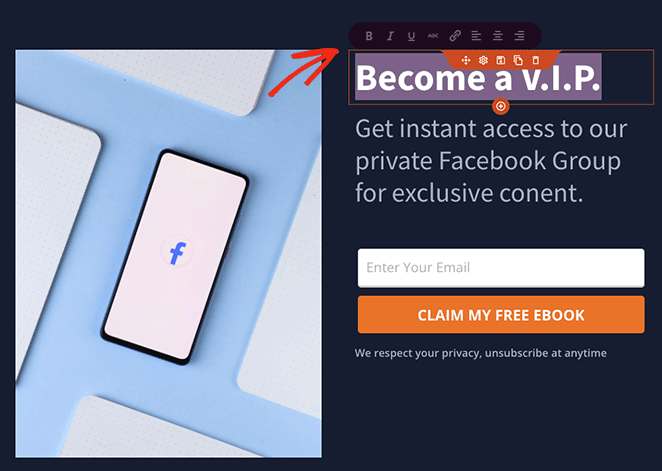
You can even type directly into any text element, including headings and text blocks, to change the copywriting on your page.
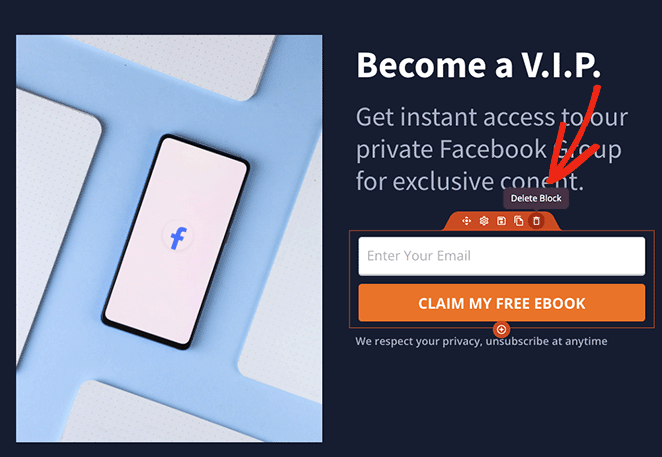
Since we want to encourage people to join the group, let’s get rid of the opt-in form. To do that, hover over the form and click the trashcan icon to delete it.
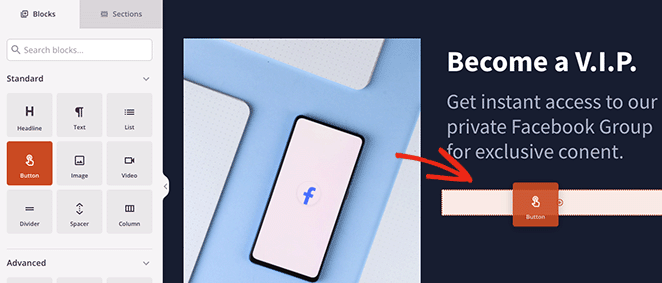
We will replace the signup form with a CTA button to join our Facebook group next. So from the left-hand sidebar, find the Button block and drag it onto your design.
Now, you can change the button text, subtext, alignment, and size and add your Facebook Group link.
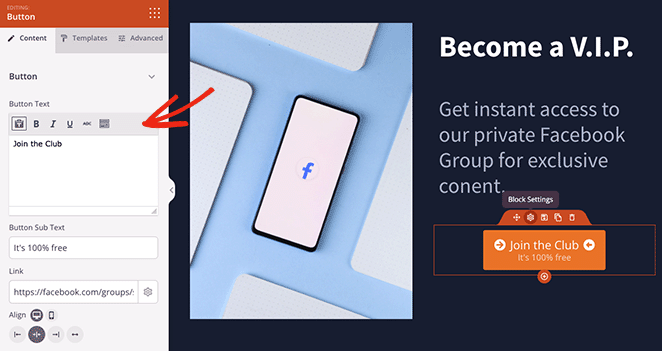
You can even add icons to the button with a few clicks by searching through the Font Awesome library.
If you want to add credibility to your landing page, you can use the Facebook Embed blocks to display public Facebook content and give users a preview of the content you create.
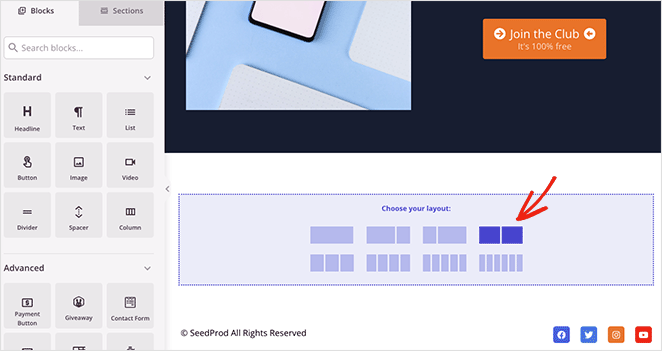
We’ll do that by first deleting the row of images from the default template, then choosing a 2-column layout.
Next, look for the Facebook Embed block and drag it to one of the columns.
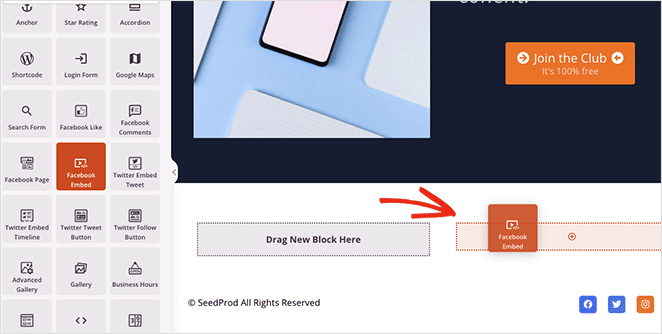
In the block settings, you can choose between displaying a post, video, or comment. Then you can paste the post URL and change the alignment settings.
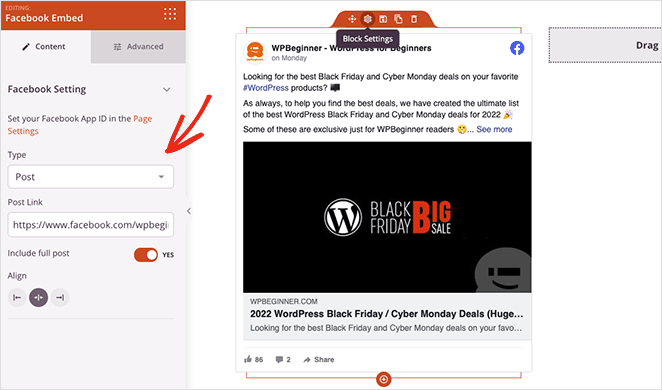
If you need more styling settings, simply click the Advanced tab.
Now let’s add some social proof to your landing page. Reviews and testimonials from existing group members will help potential members decide if it’s a group they want to join.
It’s easy to add social proof with SeedProd’s Testimonials block. Simply drag it onto your page and enter as many reviews as you like in the settings.
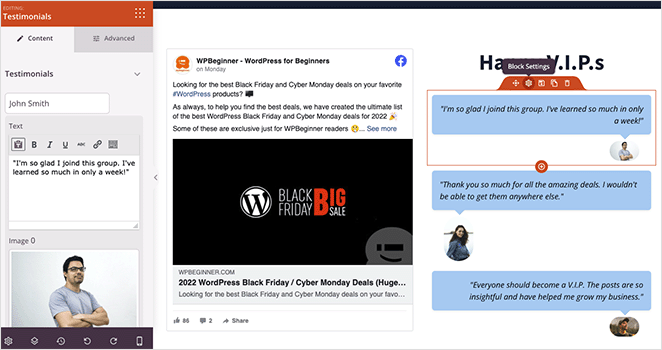
If you want, you can enable the carousel setting to show multiple comments in a testimonials slider. Or you can add multiple testimonial blocks to display stacked reviews in a single column.
Once you’re happy with the content on your page, you can customize the styling to suit your branding. To do that, click the Global Settings icon, then expand any of the tabs to choose your design options.
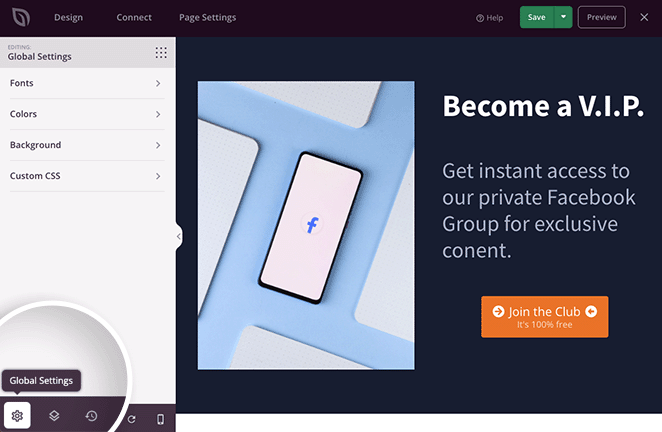
For example, in the Background tab, you can change your page’s background color, add a background photo, or even choose a gradient.
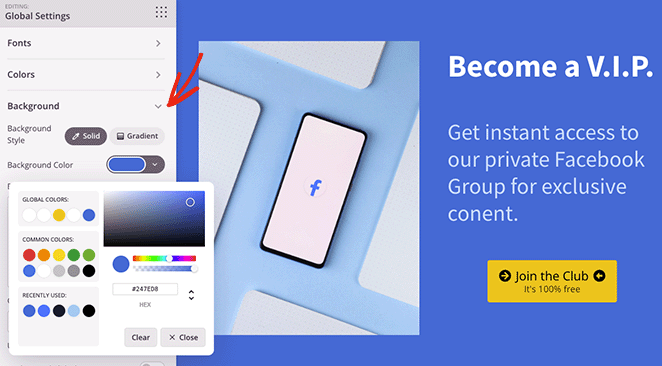
Additionally, the Color and Fonts tabs let you choose color schemes and typography settings that apply to your entire page. This saves you from having to customize every block individually.
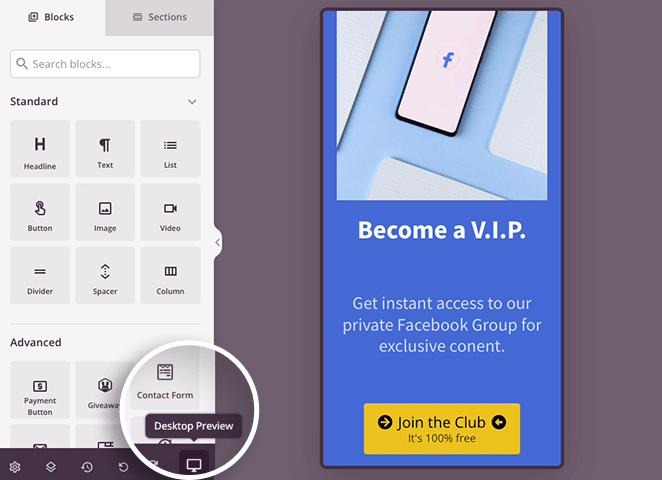
You can also click the mobile icon in the bottom toolbar to see if everything looks good on mobile devices.
When you’re happy with your WordPress landing page for your Facebook group, go ahead and click the Save button.
Step 4. Configure Your Settings
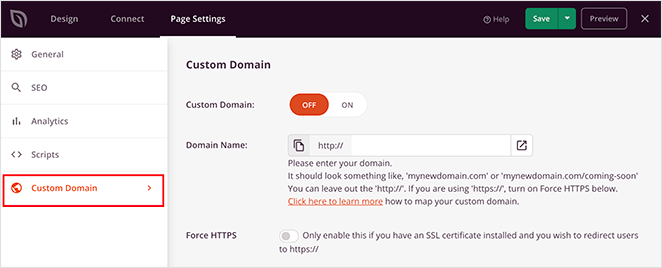
Now, let’s look at some settings that you can configure, so click on the Page Settings tab. On this page, you can change your page name and URL and enter your Facebook App ID.
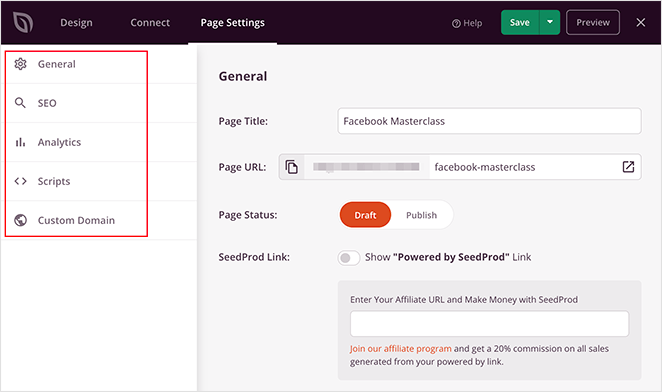
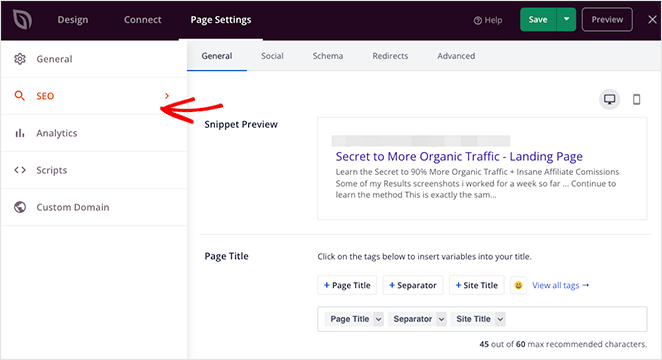
You can also edit your search engine optimization settings if you have an SEO plugin installed and monitor your page’s performance with an analytics plugin.
The Scripts area lets you enter tracking scripts and other codes, such as your Facebook pixel and ads manager scripts.
If you’re using the Elite version of SeedProd, you’ll see the Custom Domain setting, which lets you give your page a custom domain name separate from your main website.
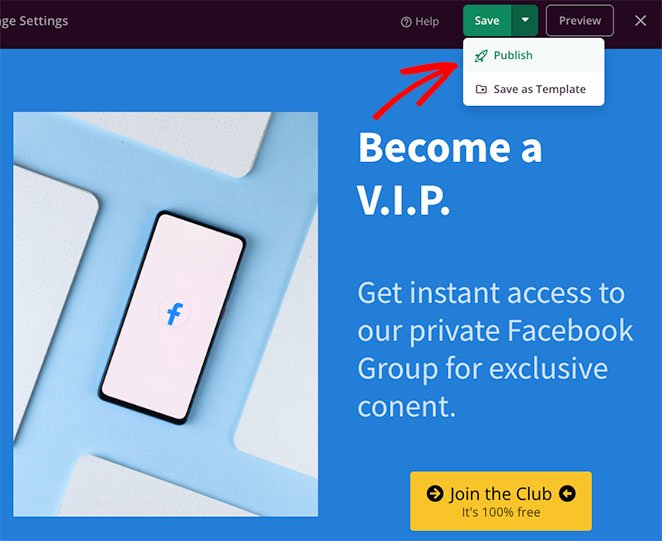
Step 5. Publish Your Facebook Group Landing Page
After customizing your page and tweaking the settings, you’re ready to go live. Publishing your page is as easy as clicking the Save button and hitting Publish.
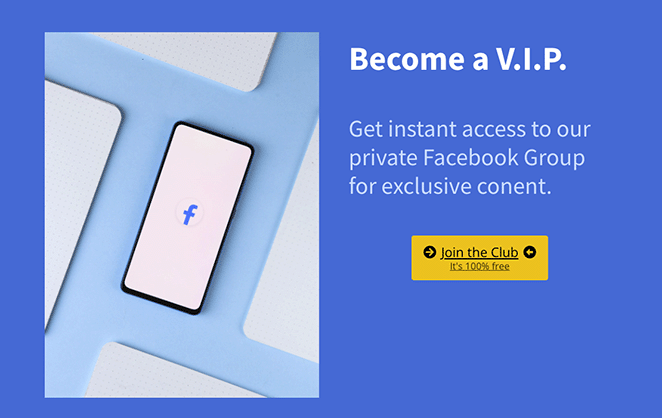
Now you can head to the published version and see your Facebook group landing page in action.
What Makes a Facebook Group Landing Page Convert?
Building the page is only half the work. The elements you include on your community landing page determine whether visitors click “Join” or leave.
- Benefit-driven headline above the fold. Visitors need to know immediately what they get from joining. Skip “Welcome to My Group” and lead with the outcome, like “Get Weekly Tips on Growing Your Etsy Shop.”
- A single join CTA. One button, front and center. Multiple options split attention and hurt conversions. In Step 3, you deleted the form and replaced it with one button for exactly this reason. If you want to apply call-to-action best practices, keep it to one clear action.
- Testimonials from existing members. Real quotes remove the “is this worth it?” hesitation. I added a Testimonials block in SeedProd and found it one of the most-read sections on the page. Even three short reviews make a difference.
- Facebook Embed block. Showing a real post from your group gives visitors a preview of your content. It’s more convincing than a written description, and SeedProd includes a dedicated block for it.
- Mobile speed. Most Facebook traffic comes from mobile. A slow page loses conversions before anyone reads your headline. In my GTmetrix testing, SeedProd pages loaded in 556ms, and the mobile preview in the editor lets you check your layout before you publish. For inspiration, see these mobile landing page examples that convert well.
How to Drive Traffic to Your Facebook Group Landing Page
Publishing the page is just the start. Here’s how to get people there.
- Run Facebook ads to it. In Step 4, you added your Facebook Pixel in the Scripts section. Use that data to build a custom audience from your Page followers or website visitors. Keep your ad’s headline and visuals consistent with the landing page to maintain message continuity.
- Add it to your Facebook bio and profile. Both your personal profile and business Page have a website field. It’s the simplest free traffic source. Anyone who checks your profile can find it immediately.
- Share in relevant groups. If a group’s rules allow promotional posts, share your member acquisition page with a genuine explanation of what people will get. A clear value statement performs better than a generic invite link.
- Pin it to your other social profiles. Add the landing page URL to your Instagram bio link, pin a post on X, or feature it in your LinkedIn profile. Each placement extends your reach without ongoing effort.
FAQs About Facebook Group Landing Pages
Can you create a landing page on Facebook?
Facebook doesn’t let you build custom landing pages natively. The closest option is your Facebook Page, but you have no control over design or messaging. A dedicated WordPress landing page for your Facebook group gives you full control over layout, copy, and conversion elements.
What should a high-converting Facebook group landing page include?
A benefit-driven headline above the fold, a single join CTA button, testimonials from current members, and a Facebook Embed block showing real content from the group. Mobile speed matters too since most Facebook traffic comes from mobile devices.
Can I send Facebook ads to my Facebook group landing page?
Yes. Enter your Facebook Pixel ID in SeedProd’s Page Settings under Scripts. This lets you track conversions and build retargeting audiences from people who visit the page. Message consistency between your ad and your landing page is key to getting good results.
How long does it take to build a Facebook group landing page with SeedProd?
Most people finish in under 30 minutes. Choosing a template takes around 5 minutes, customizing the content and adding your join button takes about 15 minutes, and configuring settings and publishing takes another 5 to 10 minutes.
With the help of this tutorial, you now know how to create a Facebook group landing page without hiring a developer.
Ready to start? Get SeedProd Now
Here are some other helpful tutorials you might like:
- How to Run Google Optimize A/B Testing
- Landing Page vs Microsite: Which One Is Best
- 17 Best WordPress Themes for Business
Thanks for reading! We’d love to hear your thoughts, so please feel free to join the conversation on YouTube, X and Facebook for more helpful advice and content to grow your business.


