


TL;DR: How to Add a WordPress Alert Message Without Code
Two no-code tools let you add a WordPress alert message to any page in minutes. Here’s what you need to know:
- WordPress alert messages are styled notification boxes that show visitors updates, errors, or promotions at the right moment.
- SeedProd’s Alert block lets you add info, success, warning, or danger messages to any page or theme template without touching code.
- OptinMonster creates floating notification bars that stick to the top or bottom of your site for site-wide announcements.
- Both tools work without any code, with drag-and-drop editors and pre-built templates.
- The Alert block is available on all SeedProd plans, including Basic.
I’ve used alert messages in WordPress to warn customers about low stock, confirm successful checkouts, and even highlight new blog features. They’re those small, styled boxes that show up on your site to share updates, errors, or notices, right when your visitors need to see them.
WordPress shows some alerts by default, like when a form fails or a login succeeds. But they’re limited, and customizing them usually means messing with code.
In this guide, I’ll show you two simple ways to create your own alert messages using tools that don’t need custom code. Just drag, drop, and go.
What Is an Alert Message in WordPress?
An alert message is a styled notification box that appears on your WordPress site to show visitors important updates, errors, or confirmations. You can show them in various locations on your site, such as the header, footer, sidebar, or inside blog posts and pages.
WordPress provides default alert messages for various events, such as when a user successfully logs in or when there is an error submitting a contact form. These default alert messages are designed to be informative and user-friendly but may not always be sufficient for your website’s specific needs.
Why Add an Alert Message to Your WordPress Site?
Your visitor is about to leave the checkout page without completing their order. A single warning alert, “Only 2 items left in stock,” can be the nudge that closes the sale.
For example, you may want to inform users about a new feature on your website or provide them with a discount code for an eCommerce product. Similarly, you may want to warn users about items still in their shopping carts and show a success message after successfully checking out.
Studies show the best-performing notification popups convert at over 9%, a significant lift compared to standard page elements. By adding a custom alert message, you can communicate important information to your audience and increase urgency.
Types of Alert Messages You Can Use in WordPress
There are several types of alert messages in WordPress, sometimes called WordPress alert boxes, that you can add depending on what you want visitors to do or know. Each one serves a different purpose, and the message style helps users recognize what’s going on at a glance.
- Info Messages: Use these for general tips, reminders, or updates, like letting users know about new features or blog posts.
- Success Messages: These confirm when something worked, like a form submission, account creation, or a completed purchase.
- Warning or Error Messages: Great for alerts that need urgent attention, such as low stock, failed actions, or system errors.
Here’s a quick guide to matching each type with the right moment:
- Info: New features, announcements, or helpful tips that don’t require action.
- Success: Order confirmations, form submissions, or any completed action.
- Warning: Low stock notices, expiring offers, or items left in a cart.
- Danger: System errors, security alerts, or critical issues that need immediate attention.
How to Add a Custom Alert Message in WordPress (2 Easy Methods)
There are several ways to add a custom alert message to WordPress. You can manually code the functionality, install a WordPress notification bar plugin, use a popup plugin, or try notification software. Today, I’ll show you how to use 2 of the easiest methods: using a WordPress drag-and-drop website builder and powerful popup software.
Both solutions are easy, don’t require technical knowledge, and you won’t need to use custom CSS, HTML, PHP, Javascript, or any other code.
If you’re comfortable editing PHP and CSS, you can also add an alert bar with a few lines of code. But these no-code methods are faster and don’t require a developer.
Method 1: Show a WordPress Alert Message Using SeedProd
For the first method, we’ll use SeedProd. It’s a drag-and-drop website builder for WordPress with over 1 million users.

SeedProd makes it easy to add alert boxes anywhere on your WordPress site without touching any code. You pick the type, customize the style, and it’s live.
So, if you’re ready to get started, follow the steps below to create a custom alert message in WordPress with SeedProd.
Step 1: Install and Activate SeedProd Plugin
The first thing you’ll need to do is visit SeedProd’s pricing page and download the plugin. If you need help with this, you can follow our documentation on installing SeedProd.
Note: SeedProd has a free version, and we’ll use SeedProd (the Alert block is available on all plans, including Basic).
After activating the plugin, go to SeedProd » Settings and paste your license key into the license box.
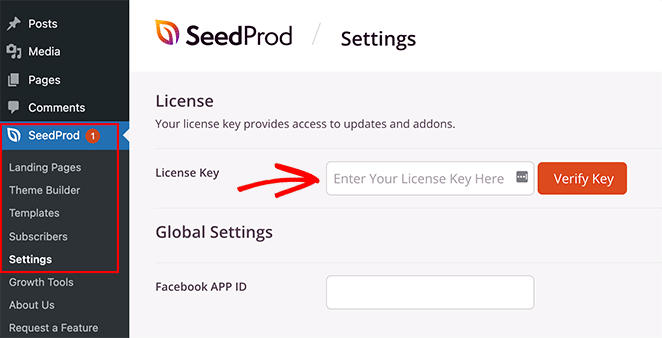
The license key is on the SeedProd website in your account dashboard. After entering your key, click the Verify Key button.
Next, you’ll need to decide on the type of layout you want to create. With SeedProd, you can either create individual WordPress pages with the Landing Page Builder or make custom WordPress themes with the Theme Builder.
If you want to continue using your current WordPress theme, we recommend the Landing Page Builder option. However, if you want to replace your theme and add Alert boxes to your header, footer, sidebar, and other theme templates, the Theme Builder is the best choice.
For this tutorial, we’ll use the Theme Builder option. But if you want to make a landing page, you can follow this guide on how to create a landing page in WordPress.
Pro tip: You can use the Alert Box feature with both options.
Step 2: Pick a WordPress Template Kit
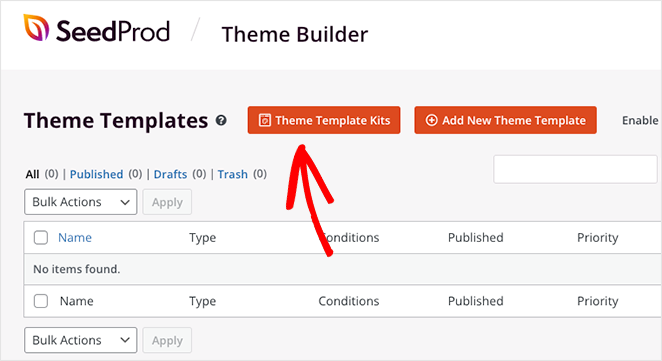
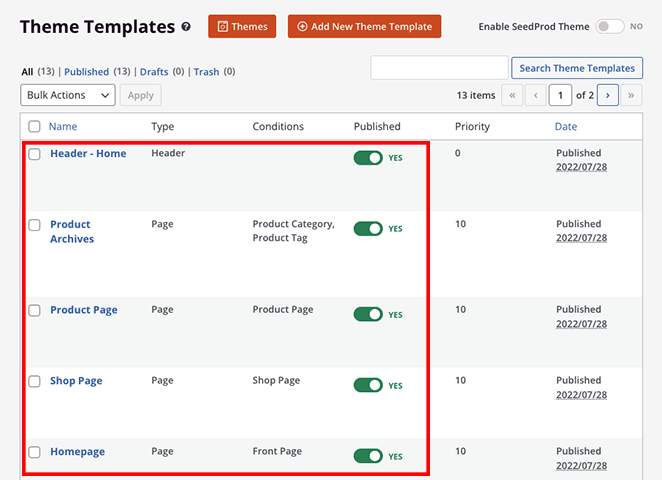
Since we’re going with the Theme Builder option, the next step is to visit the SeedProd » Theme Builder page. On that page, you’ll need to click the Theme Template Kits button to choose a pre-made website layout.
You’ll immediately see a library of website kits you can add to your site with a single click. Using the top bar filters, you can sort the templates by popularity, newness, WooCommerce, and more.
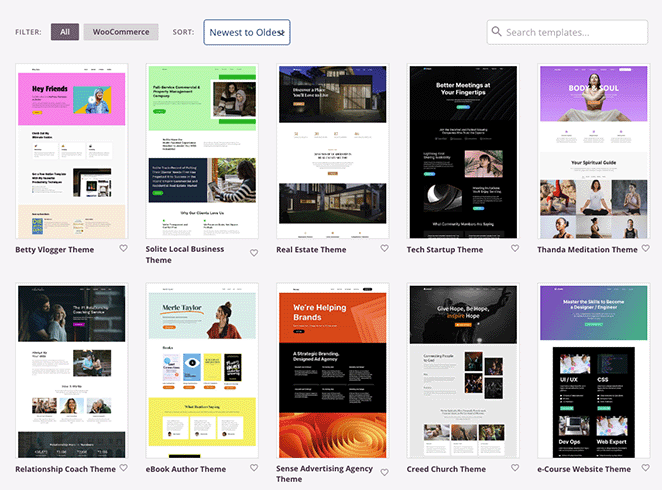
When you find a template you like, hover over it and select the checkmark icon to add it to your WordPress site. In a few seconds, SeedProd will import the whole template, including specific pages and content from the demo.

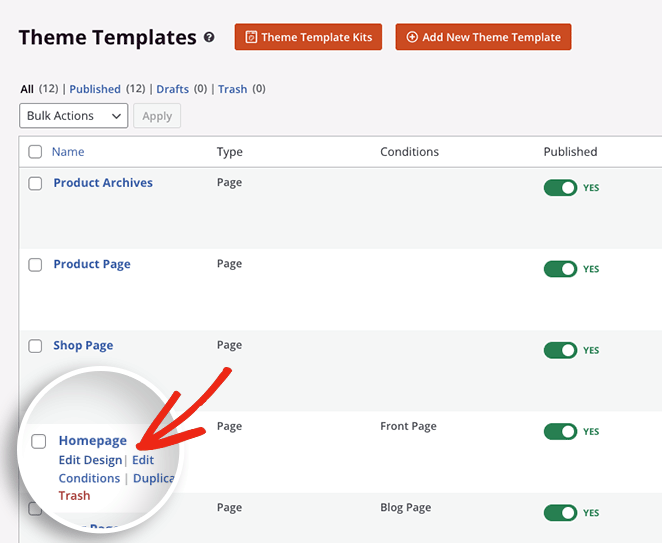
From there, you’ll see the individual parts that make up your theme in your WordPress dashboard. You can customize any theme part by hovering over it and clicking the Edit Design link.
For example, with the help of the tutorials below, you can:
- Create a custom blog page
- Build a custom single post template
- Edit your WordPress homepage
- Customize your WordPress header
- Edit your WordPress footer
- Make a custom sidebar
- And more.
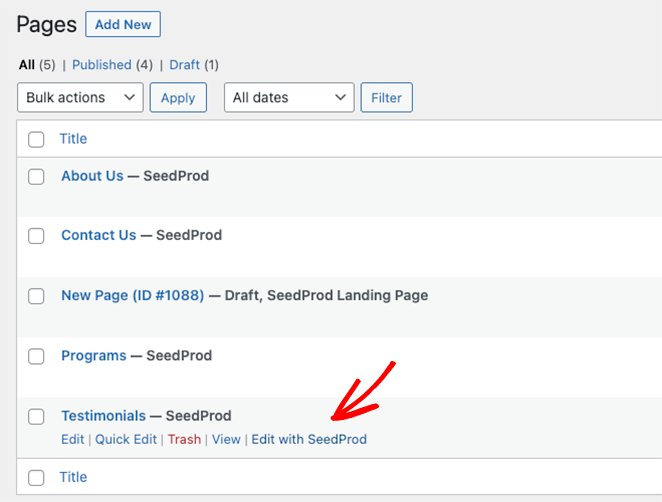
Moreover, you can customize individual pages, such as your About, Contact, and Services page. Simply visit Pages » All Pages and click the Edit with SeedProd link beside the page you want to customize.
To get started, we’ll show you how to add an alert message to your WordPress homepage. So go ahead and hover over the Homepage template and click the Edit Design link.
Step 3: Add and Customize the Alert Message Block
When you open the template, you’ll see SeedProd’s drag-and-drop website builder. It will have WordPress blocks and settings on the left and a live preview of your homepage on the right.
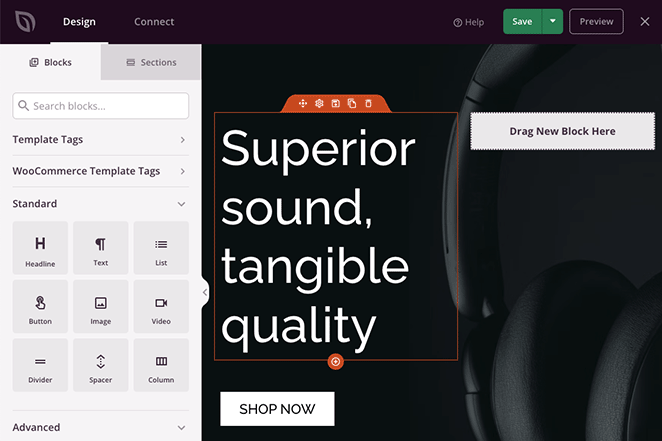
You can click anywhere on the preview to customize the template content and see the changes in real time. Additionally, you can drag new WordPress blocks from the left-hand panel onto your page to add more features and functionality.
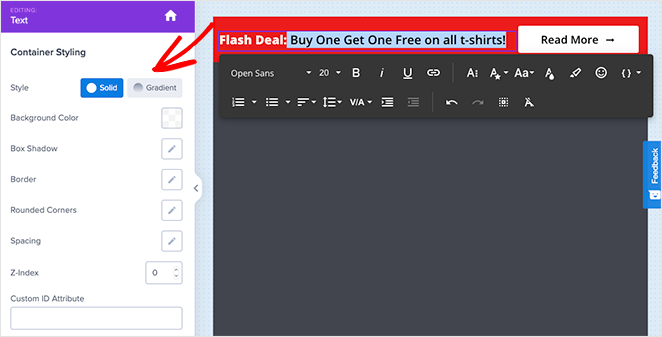
That’s how we’ll add an alert message to the homepage. Find the Alert block in the Advanced blocks panel and drag it wherever you want to display it.
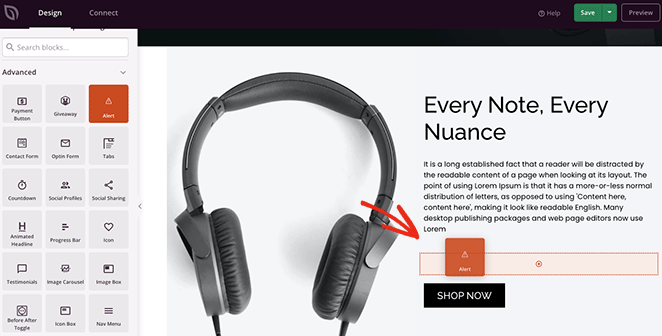
Once the block is in place, you can customize its appearance and the message it displays to your website visitors.
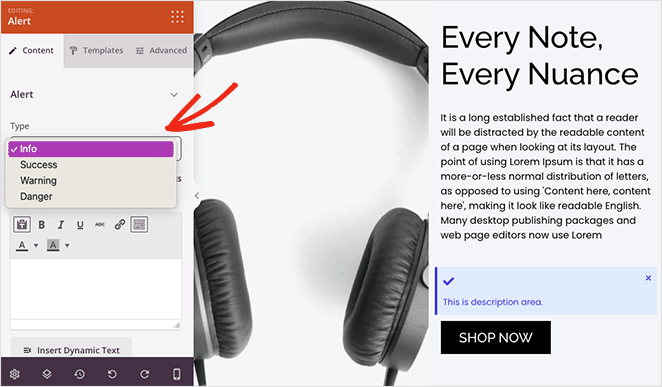
First, click the ‘Type’ dropdown menu and choose an alert type, such as Info, Success, Warning, or Danger.
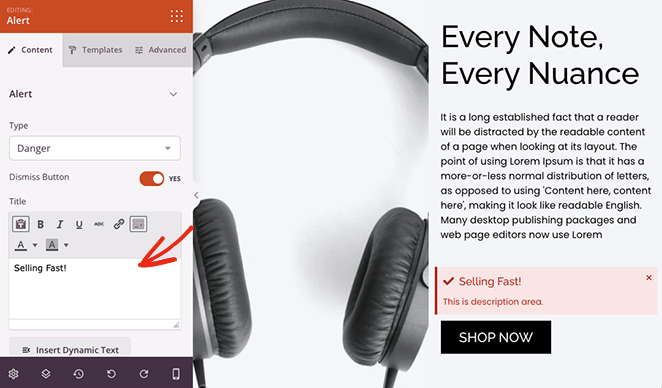
Next, give your alert a title. You can also enable or disable the close button, which lets users dismiss the message.
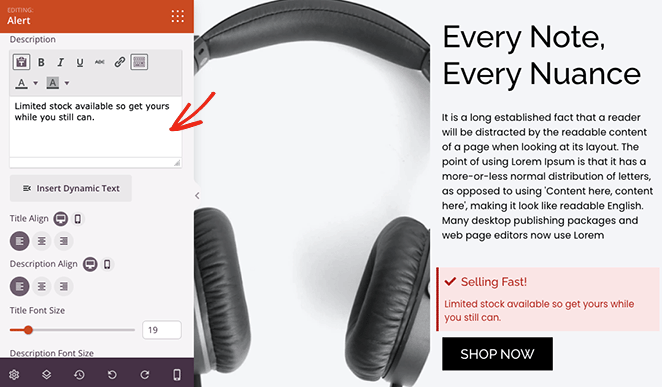
Now, enter a description for your alert to give users more information. Below that, you can change the title and description, size, alignment, and heading level.
To make the alert stand out, you can add a custom icon. SeedProd has hundreds of Font Awesome icons, so plenty of options exist.
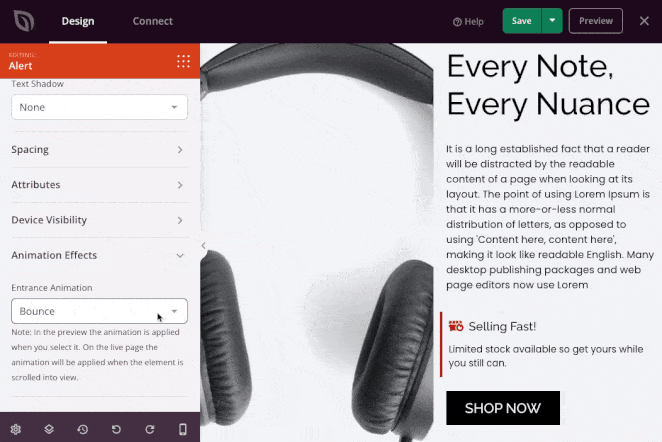
If you want to use custom colors for your alert message, click the Advanced tab in the block settings. Here, you can edit the typography, change the colors for the description, title, and background, and select a text shadow.
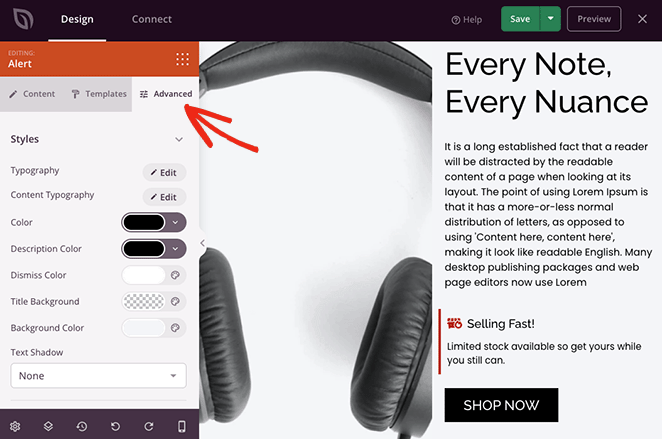
In the same panel, you can edit the block spacing, visibility and even add an animation to make it more eye-catching.
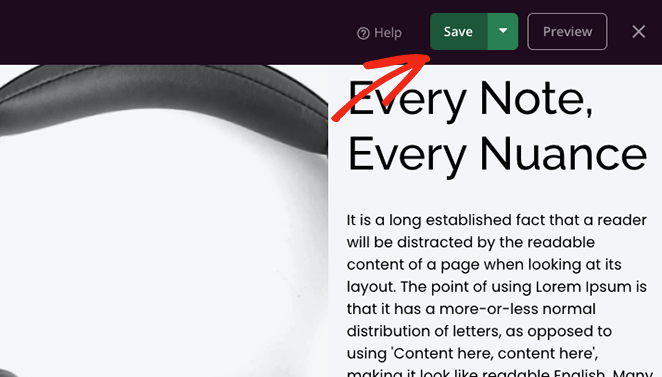
Make sure you click the Save button before you customize any other pages.
Alert messages are a great way to draw attention to other areas of your site. In the screenshot below, we added a success message to an online store’s order confirmation page.
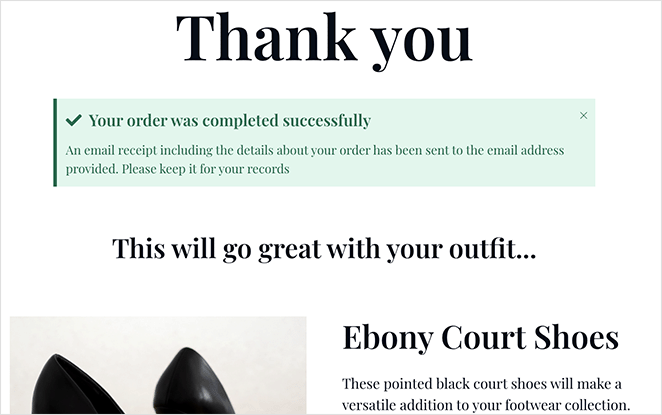
So get creative with custom notifications, then follow the final step to make them live on your website.
Step 4: Publish the Alert Message to Your WordPress Site
After editing any SeedProd theme template, you’ll need to enable the theme to show the changes on your live website. To do this, exit the page builder and head back to the Theme Builder dashboard.
From there, find the Enable SeedProd Theme toggle and switch it to the green ‘Yes’ position.
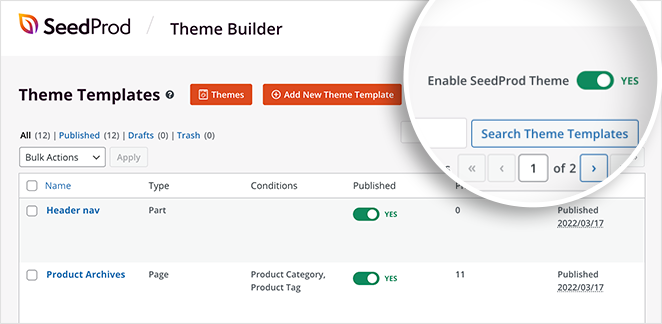
Now, you can visit your website and see your alert message in action!

Using Alert Messages on WooCommerce Pages
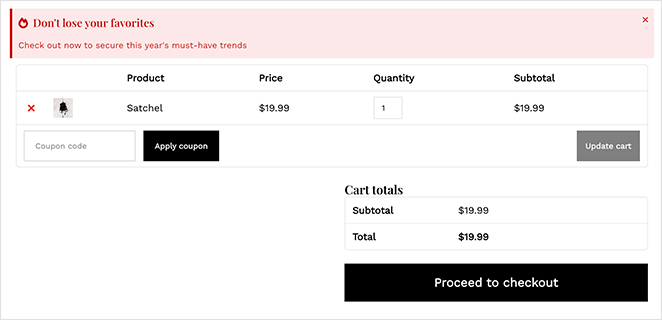
If you run a WooCommerce store, alert messages become even more useful at the moments that matter most: low stock warnings on product pages, checkout confirmations, or abandoned cart nudges.
SeedProd’s Theme Builder gives you full control over WooCommerce page templates. You can add the Alert block directly to your cart, checkout, or product page templates using the same drag-and-drop workflow from Method 1.
Here are a few use cases I’d start with:
- Low stock: Add a Warning alert to product page templates, such as “Only 3 left, order before they’re gone.”
- Checkout success: Add a Success alert to your thank you page template to confirm the order went through.
- Abandoned cart: Add a Warning alert to the cart page, such as “You have items in your cart. Complete your order to lock in today’s price.”
To do this, go to SeedProd » Theme Builder and open the WooCommerce template (Cart, Checkout, or Single Product) you want to edit. Then follow the same steps in Method 1 to add and configure the Alert block.
Method 2: Display a Notification Bar in WordPress with OptinMonster
Another way to add an alert message to your WordPress site is by creating a floating notification bar. The alert bar will sit at the top or bottom of your website and display a custom message to visitors.
For this method, we’ll use OptinMonster, a conversion optimization tool that’s part of the Awesome Motive family.
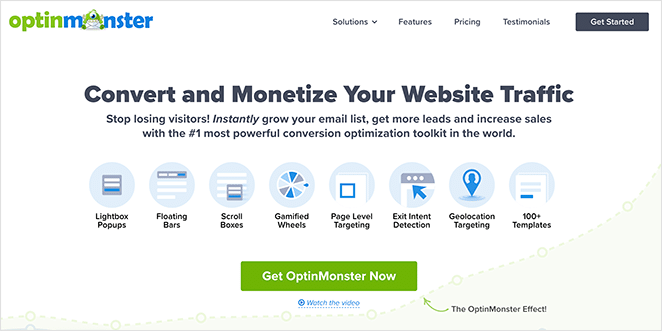
OptinMonster lets you add floating alert bars that stick to the top or bottom of your site. You can use them for limited-time offers, product warnings, or site-wide announcements, all without code.
Here’s the one we’ll make in this tutorial:

Let’s get started!
Step 1: Install OptinMonster and Connect Your Site
First, head over to the OptinMonster website and sign up for your account.
Next, install and activate the OptinMonster WordPress plugin. For help with this, you can visit this guide on how to install a WordPress plugin.
The OptinMonster plugin lets you easily connect your website to the software with a few clicks.
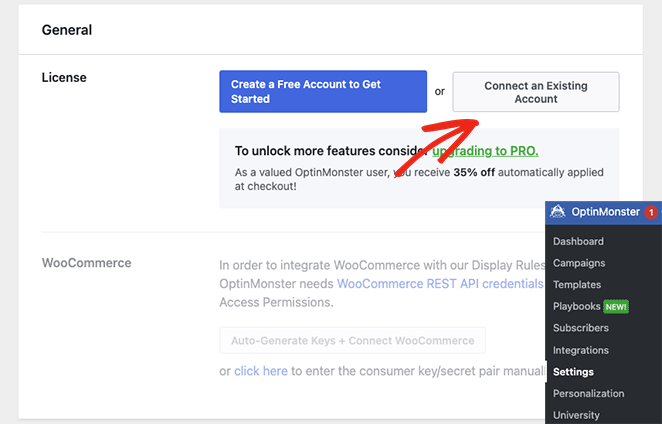
After activating the plugin, you’ll need to connect your account. To do this, go to OptinMonster » Settings from your WordPress admin.
From there, click the Connect an Existing Account button.
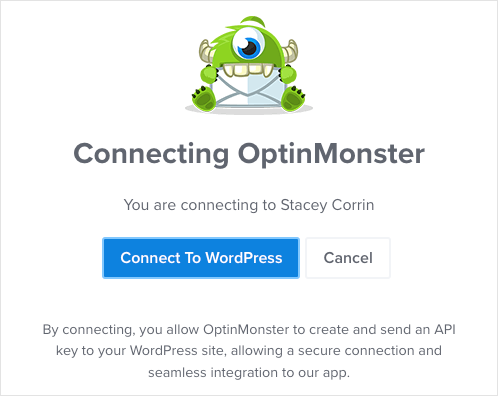
A window will pop up asking for you to enter your email address. Once you’ve added your email, click the Connect to WordPress button.
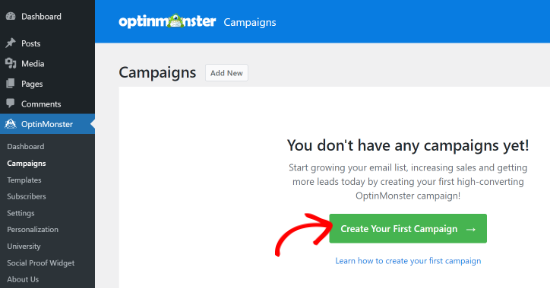
Step 2: Select a Floating Alert Bar Template
After connecting your OptinMonster account, head to OptinMonster » Campaigns from your WordPress dashboard. Now, you can click the Create Your First Campaign button.
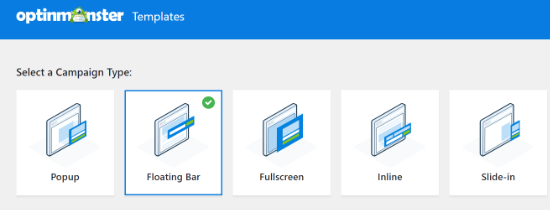
OptinMonster offers the choice of a premade template or using its playbooks, which replicate successful campaigns from genuine brands. For this guide, we’ll select the Templates option.

On this page, choose the Floating Bar as the Campaign Type to create your alert bar.
Next, you’ll see a selection of different campaign templates. To choose a template, hover over it and click the Use Template button.
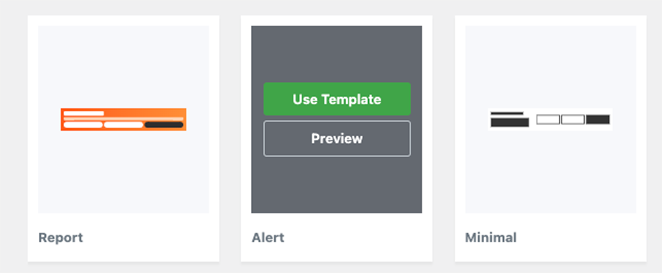
We’ll use the ‘Alert’ template for our alert bar.
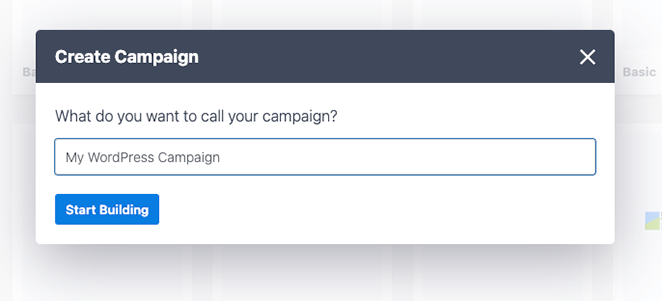
After selecting the template, you’ll see a prompt asking you to name your campaign. Once you’ve entered your name, click the Start Building button.
Step 3: Edit the Text and Design of Your Alert Bar
On the next screen, you’ll see OptinMonster’s campaign editor. This is where you can design and customize your alert message.
You’ll see the alert bar appear at the top of your screen by default. To change the text on the floating bar, click on the area you want to edit and type your custom message.
You can also change the font, font size, color, and more.
If you want to increase the urgency of your alert bar, you can drag the Countdown block over and drop it onto the floating bar.

From there, you can select the template’s timer, customize its settings, and enter your desired end date and time.
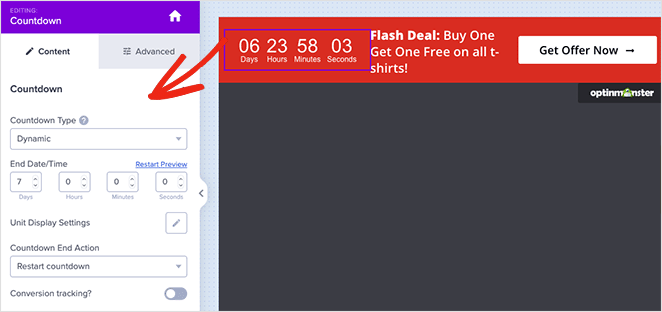
You can also set the timer as an evergreen countdown. An evergreen countdown is set separately for each visitor to your website.
Once you’re happy with your alert bar, click the Save button at the top of your screen.
Step 4: Set Display Rules and Trigger Settings
The next step is to go to the ‘Display Rules’ tab and select when and where to display your bar. The default rule displays the bar after a visitor has been on the page for 5 seconds.
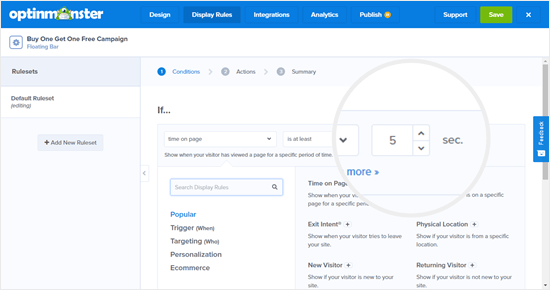
We’ll change this to 0 seconds so an alert message appears instantly. To do that, just change the ‘sec’ countdown to 0.
Once you’ve done that, click the Next Step button to change the Action settings. You can leave the ‘show the campaign view’ dropdown set to Optin and select if you want to play a sound effect when the alert bar appears.

After making those changes, click the Next Step button. On the following page, you’ll see a summary of your campaign.
If you’re happy with the settings, click the Save button.
Step 5: Publish the Alert Bar on Your WordPress Site
The next step is to switch to the Publish tab and change the publish status to Publish.
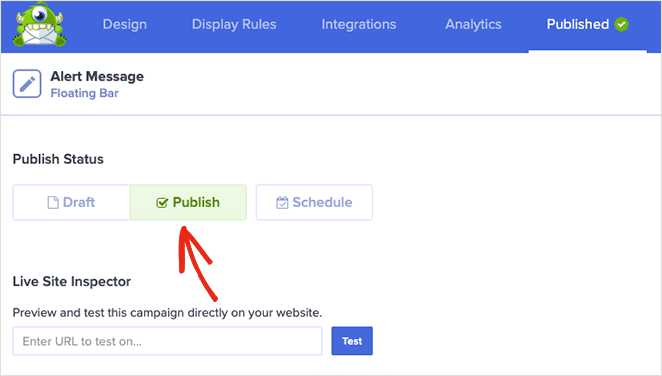
The last step is to activate the campaign on your WordPress site.
To do that, close the campaign editor and go to OptinMonster » Campaigns. You’ll see your campaign in the list, and the Status will be Pending.
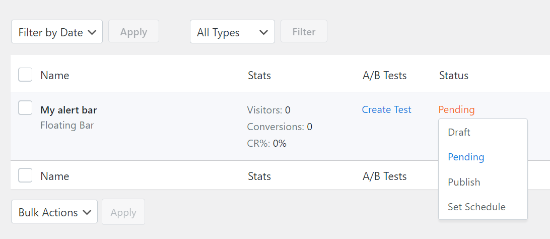
To change it, click the Pending status and select Publish from the dropdown menu.
Now, you can visit any page on your website and see your alert bar in action.
Frequently Asked Questions
Do I need SeedProd Pro to add alert messages in WordPress?
No. The Alert block is available on all SeedProd plans, including the free Basic plan. You can add info, success, warning, or danger messages to any page without upgrading.
What is the difference between an alert bar and an alert box in WordPress?
An alert box is an inline message block placed within a page or post; it sits inside your content where you place it. An alert bar is a floating strip that sticks to the top or bottom of your site and stays visible as visitors scroll.
SeedProd’s Alert block creates inline alert boxes. OptinMonster’s Floating Bar creates site-wide alert bars.
Can I show a WordPress alert message only on specific pages?
Yes. With SeedProd, you add the Alert block to individual page or theme templates, so it only appears where you place it. With OptinMonster, use the Page-Level Targeting display rule to restrict your alert bar to specific URLs or page types.
How do I add a WooCommerce alert message for low stock or checkout?
Use SeedProd’s Theme Builder to edit your WooCommerce cart, checkout, or product page templates. Drag the Alert block into the template, set the type to Warning or Success, and add your message.
For example, a Warning alert on the cart page (“Only 2 left in stock”) can reduce checkout abandonment without any custom code.
Can I add an alert message to WordPress without a plugin?
Yes, you can add a WordPress message box with custom HTML and CSS directly in a page or post, or by adding PHP to your theme’s functions.php file. But this approach requires coding knowledge and can break if your theme updates.
Using a plugin like SeedProd is faster, safer, and doesn’t require a developer.
Start Adding WordPress Alert Messages Today
Alert messages are one of the fastest ways to communicate with visitors at the right moment: low stock warnings, checkout confirmations, or site-wide announcements.
SeedProd’s Alert block makes it easy to add them anywhere on your site without code. Get SeedProd and start building.
Thanks for reading! We’d love to hear your thoughts, so please feel free to join the conversation on YouTube, X and Facebook for more helpful advice and content to grow your business.


