

I ran into this when I wanted to feature a long-form tutorial on my blog. The theme I was using forced every post into the same narrow layout, sidebar, author box, comments, the whole thing. It just didn’t work for what I needed.
If you’re dealing with something similar, this guide will show you how to create a custom WordPress post template so you can change the layout for specific posts. You’ll see four ways to do it, from no-code to the Site Editor.
Not sure which method fits? Here’s a quick way to choose:
- You want full design control without code: use SeedProd (Method 1).
- You’re on a block theme and happy editing in WordPress: use the Site Editor (Method 2).
- You just want to reuse one saved layout across posts: use Synced Patterns (Method 3).
- You’re comfortable with PHP: code your own template (Method 4).
Why Create a Custom WordPress Post Template?
A WordPress post template is a saved layout that controls how single blog posts display. It sets where the title, featured image, content, and extras like comments or related posts appear.
I’ve needed this more than once, especially when writing long tutorials or blog posts that don’t fit the default layout. Most WordPress themes only give you one single post design, and it’s usually built for short, basic content.
A custom post template gives you more control over how individual blog posts look and feel. You can adjust the layout based on content, category, or purpose. Here’s what that makes possible:
- Use different layouts for different content types: like full-width for tutorials and sidebar layouts for news posts
- Highlight featured or evergreen content by adding custom banners, lead magnets, or calls to action
- Remove distractions such as sidebars or author boxes that don’t add value to the post
- Match your layout to the post’s category, like “Guides,” “Recipes,” or “Reviews”
- Test layout changes without editing your theme files or writing custom code
If you’re blogging, building tutorials, or running a business site, a custom post template makes your content easier to read and more tailored to your goals.
4 Ways to Create a Custom WordPress Post Template
Now that you know what a custom WordPress post template is, let’s look at how to create one. We’ll cover four methods so you can pick the one that works best for you.
- Method 1: Use SeedProd to Create a Custom Post Template
- Method 2: Edit the Single Post Template in the WordPress Site Editor
- Method 3: Save a Custom Post Layout as a Synced Pattern
- Method 4: Manually Code a WordPress Post Template
- FAQs About WordPress Post Templates
Method 1: Use SeedProd to Create a Custom Post Template
The easiest way to build a custom single post template is with SeedProd, the best WordPress theme builder plugin on the market. You can design and apply a template visually, with no code and no editing your theme folders.

Here’s how the process works: install SeedProd and add your license key, open the Theme Builder and pick a theme, edit the Single Post template, then enable the theme.
Step 1: Install SeedProd and Add Your License Key
First, install and activate the SeedProd plugin. If you need help, see this step-by-step guide on installing a WordPress plugin.
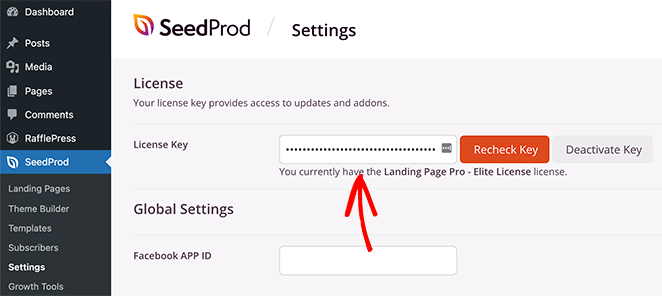
Next, go to SeedProd » Settings and enter your license key. You’ll find it under your account on the SeedProd website.
Step 2: Open the Theme Builder and Pick a Theme
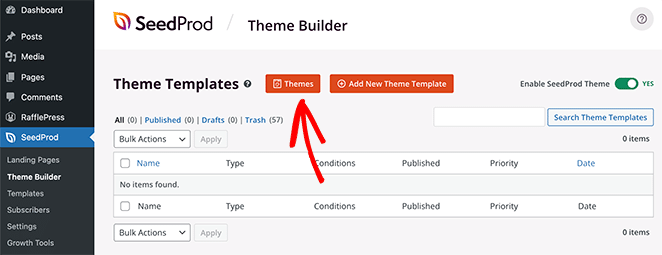
SeedProd replaces the theme you currently use and lets you customize every inch of your site with its visual drag-and-drop builder. Go to SeedProd » Theme Builder and click the Themes button to get started.
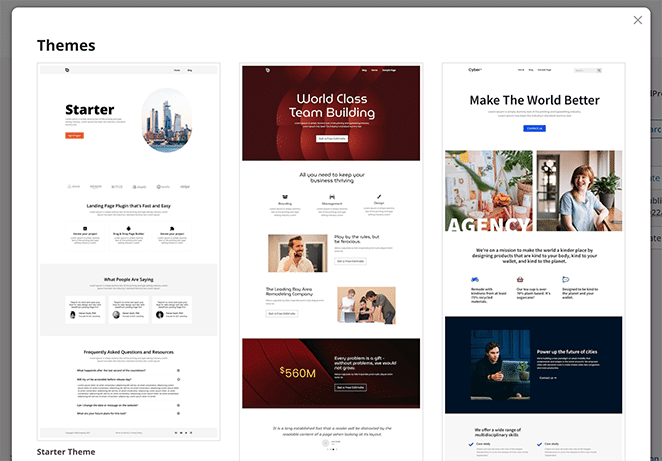
You’ll see a variety of premade WordPress theme templates. To choose one, hover over the thumbnail and click the checkmark icon.
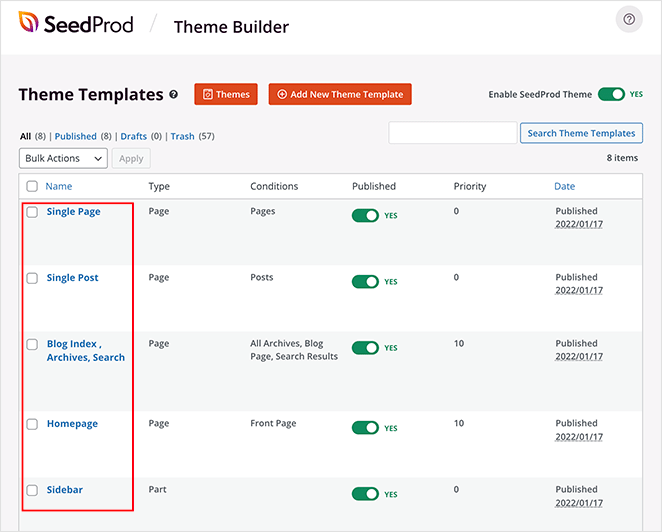
After choosing a theme, you’ll see a list of template parts:
- Single Page
- Single Post
- Blog and Archive page
- Homepage
- Sidebar
- Footer
- Header
These are the elements that make up a complete WordPress theme. Normally you can only reach them by editing theme files, but SeedProd shows them all in one visual interface.
Step 3: Edit the Single Post Template
SeedProd includes a custom single post template by default, and you can customize it visually. Find the Single Post section and click the Edit Design link to open it in the editor.

The editor has a two-column layout. Blocks and sections sit on the left, and a live preview sits on the right so you see changes in real time.
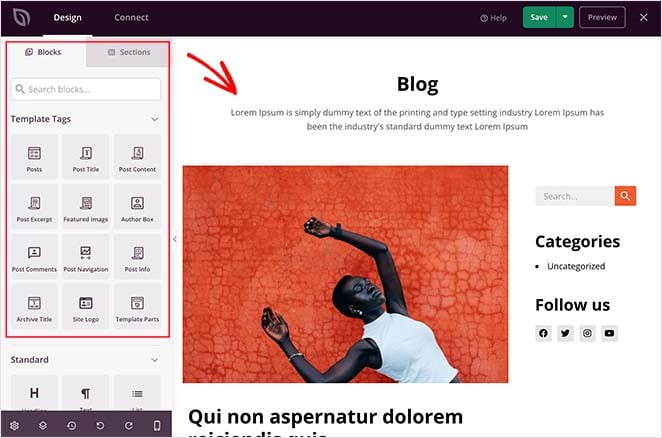
Click anywhere on the template to customize the layout. Click the post title, for example, and its settings appear in the left-hand panel.
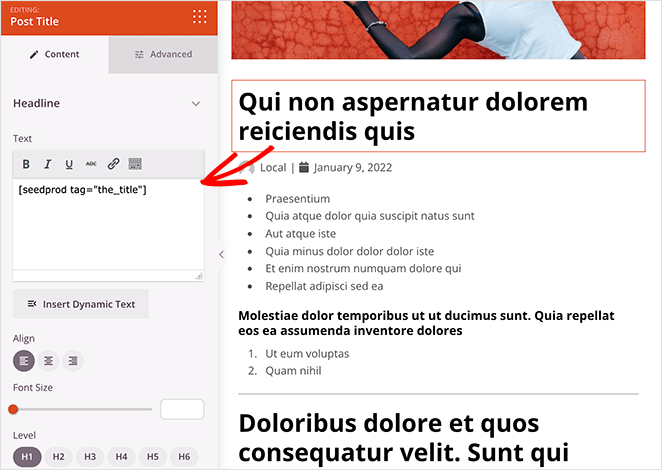
From there you can change the heading tag, alignment, level, and font size. The Advanced tab lets you change font colors, spacing, and other styles.
SeedProd uses template tags to pull in dynamic WordPress content like post titles, featured images, and comments. So you can show all sorts of content without editing your single post file directly.
For example, you can drag the Posts block to the end of your post content, then set it to show posts from specific categories.
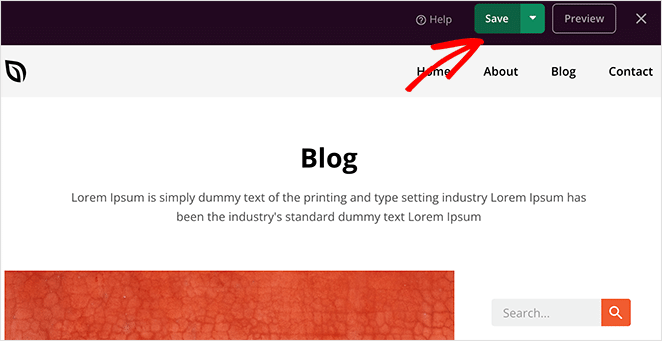
When you’re happy with the layout, save it by clicking the green Save button in the top-right corner.
You can customize the rest of your theme the same way. If you need help, here’s a guide on how to create a custom WordPress theme with SeedProd.
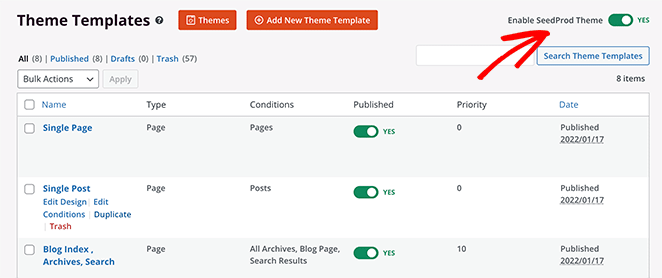
Step 4: Enable Your SeedProd Theme
When everything looks right, click the Enable SeedProd Theme toggle in the top-right corner.
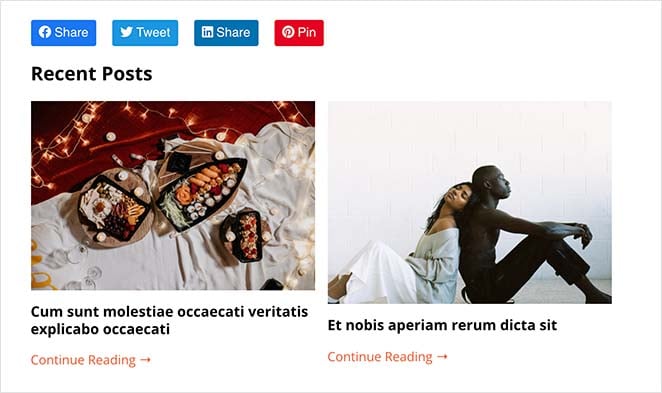
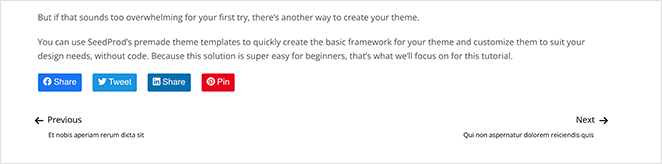
Here’s how our new custom single post template looks. We removed the author box and added related posts and social media share buttons.
Set a Different Layout for One Category
With SeedProd, you can add as many custom post templates as you like, so each post category can have its own layout. I use this on my own blog to give long tutorials a full-width design while news posts keep the sidebar.
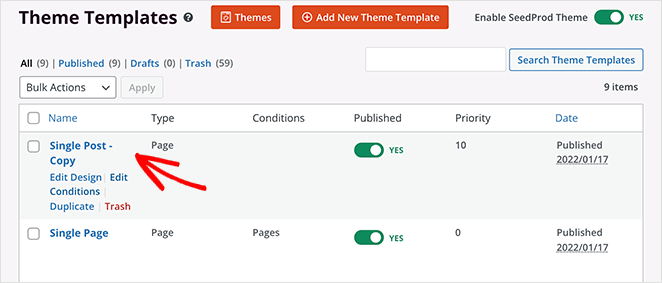
To set up a category-specific layout, click the Duplicate link under your single post template, then restyle the copy and set its conditions.
On the copy, click the Edit Conditions link to choose where the template displays. Give it a name, then under the Conditions heading pick the content type.
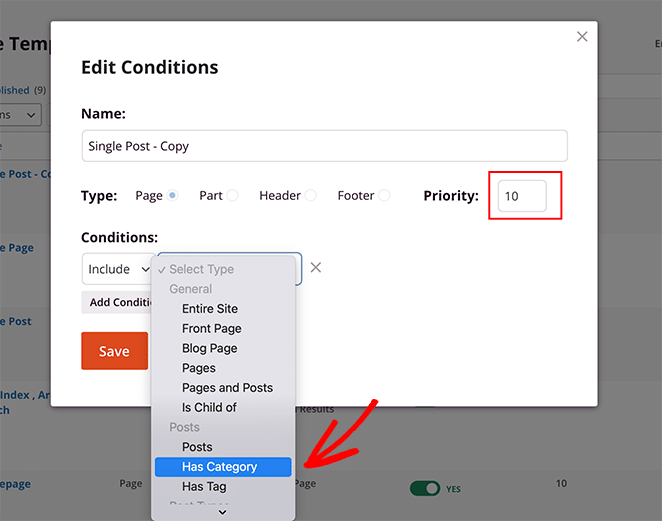
For our Tutorials example, we chose “Has Category” under the Posts section, entered the Tutorials category, set the priority to 10, and clicked Save. Now every post in that category shows the new layout.
Here’s the finished Tutorials template. We removed the sidebar to make it full-width, and dropped the related posts and comments section to keep the focus on the tutorial itself.
This is the easiest way to create multiple custom post templates. It requires no code, won’t touch your theme files, and needs no technical experience.
Method 2: Edit the Single Post Template in the WordPress Site Editor
If you run a block theme, you can edit the single post template directly in the WordPress Site Editor, no plugin needed. It’s the native method, and the one I reach for when a site already uses a block theme and I only need small changes.
From your dashboard, go to Appearance » Editor to open the Site Editor. Then select Templates and click Single Posts to open the template that controls all your single blog posts.

Open the List View to see the template’s structure, including blocks like the featured image, post title, post content, and comments.

From here you can add or remove blocks to reshape the layout. Delete the comments block to clean up the bottom of your posts, or drop in a Query Loop block to show related posts.
When you’re done, click Save.
For the full reference on what you can do here, the official WordPress Template Editor documentation walks through every option. The trade-off is that the Site Editor changes your single post template globally, so for category-specific layouts you’ll still want SeedProd’s conditions.
Method 3: Save a Custom Post Layout as a Synced Pattern
This method uses the WordPress block editor. Strictly speaking, it doesn’t create a post template, but it does give you an easy way to save and reuse a single post layout.
The trick is the Group block, which lets you bundle several blocks into one layout. You then save that group as a Synced Pattern and drop it into any post.
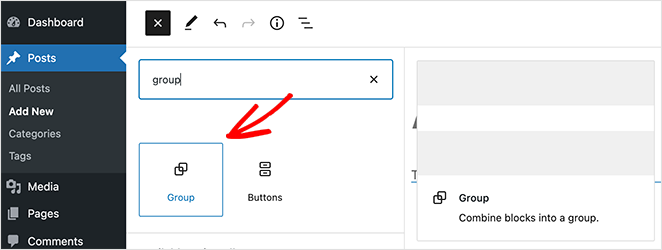
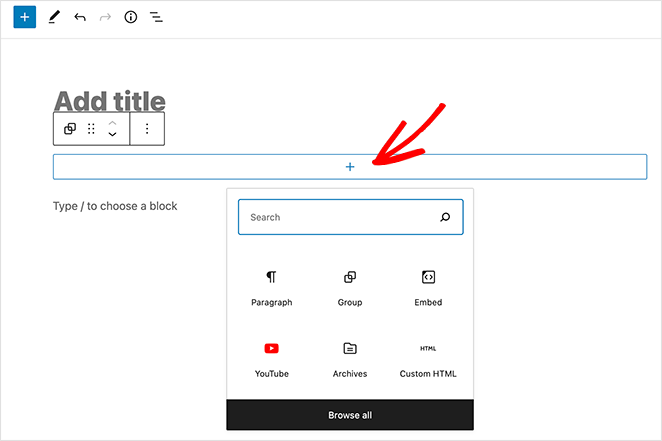
First, go to Posts » Add New and create a new post. Click the plus (+) icon and add a Group block to your content area.
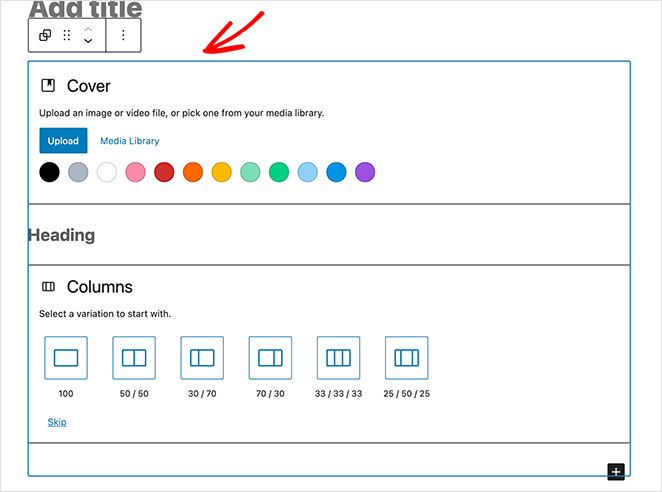
Add blocks inside the Group to build your single post layout. You can use columns, text, media, images, and more.
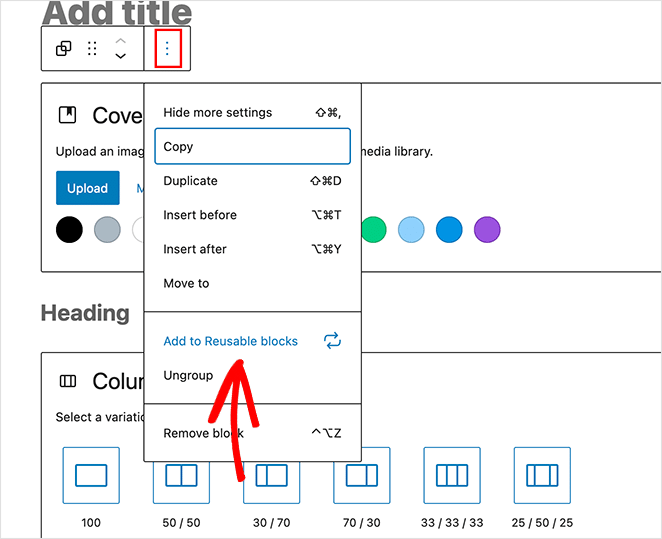
When the layout looks right, select the Group block so it has an outline.
Click the three dots to expand the block’s options, then choose Create pattern. Give the pattern a name and make sure Synced is turned on, so edits to one copy update them all.
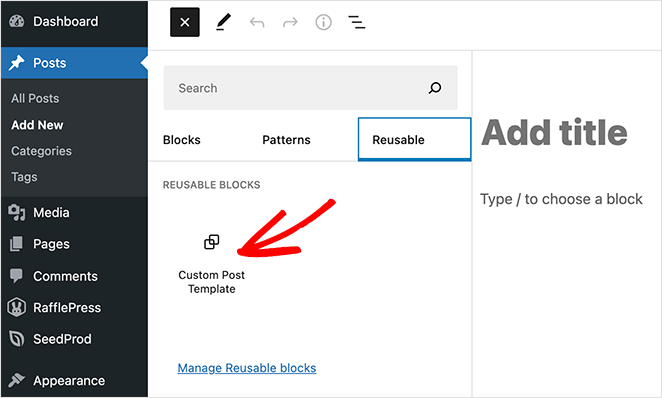
Now, whenever you write a new post, open the block inserter, head to the Patterns tab, and find your saved pattern under My Patterns. Click it to drop the full layout into your post.
This saves custom layouts for blog posts, but it doesn’t change how your theme handles single posts. For more flexibility, keep reading.
Method 4: Manually Code a WordPress Post Template
This method is advanced. It involves editing theme files, pasting code, and writing custom CSS, so only use it if you’re confident with PHP.
First, open a plain text editor like Notepad. Then paste in the following code:
<?php
/*
 * Template Name: Featured Article
 * Template Post Type: post, page, product
 */
?>
This code defines a new post template called “Featured Article” and makes it available for posts, pages, and product content types.
After copying the code, save the file as sp_single_post.php on your desktop. Then upload it to your current WordPress theme folder using an FTP client.
Once the file is in place, log in to your WordPress admin area and edit a post. Scroll down to the Post Attributes meta box, where you’ll see an option to choose a template.
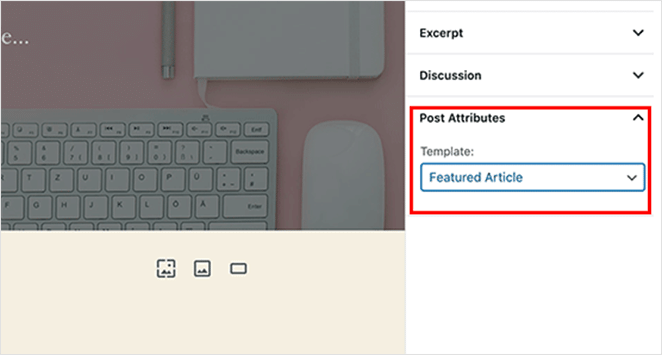
You’ll see your new Featured Article template here. For now, selecting it shows a white screen because the file is empty.
To fix that, copy the code from your theme’s single.php file as a starting point. Open single.php, copy everything after the get_header() line, and paste it at the end of your sp_single_post.php file.
Then save the file and upload it back to your server. At this point the template matches your old single post layout.
From there, customize it by adding CSS classes, removing sidebars, or making any other changes you want.
FAQs About WordPress Post Templates
How do I set a custom template as the default for all posts?
It depends on your method. In the Site Editor, the Single Posts template is already the default for every post, so any change you save there applies site-wide. With SeedProd, set a template’s conditions to your post type with no category filter, which makes it the fallback layout. The code method only applies per post through Post Attributes, so it can’t act as a global default on its own.
Do I need a block theme to edit the single post template in the Site Editor?
Yes. The Site Editor only appears when your site runs a block theme like Twenty Twenty-Four. Classic themes don’t include it. If you’re on a classic theme, use SeedProd or the manual code method instead, since both work regardless of your theme type.
How do I apply a custom template to just one specific post?
For a single post, use the code method and choose your template under Post Attributes » Template on that post’s edit screen. That applies it to that one post only. If you’d rather target a whole category instead of one post, SeedProd’s Edit Conditions option is the faster route.
Can I create a custom post template in WordPress without code?
Yes. The easiest way is a visual builder like SeedProd, which lets you design and apply custom post templates without editing your theme or writing code. On a block theme, the Site Editor is a no-code option too.
What’s the difference between a post template and a page template?
WordPress uses page templates for static pages and post templates for blog content. A custom post template changes how your blog posts look, while a page template changes layouts for pages like About or Contact.
Will changing the post template affect all my blog posts?
Not unless you want it to. You can create multiple templates and choose where each one displays. That gives you flexibility without touching your existing posts.
We’ve shared four ways to create a custom post template in WordPress. Pick the method you’re most comfortable with and start displaying your blog posts the way you want.
While you’re here, you might also like this post on the anatomy of a successful landing page.
Thanks for reading! We’d love to hear your thoughts, so please feel free to join the conversation on YouTube, X and Facebook for more helpful advice and content to grow your business.


