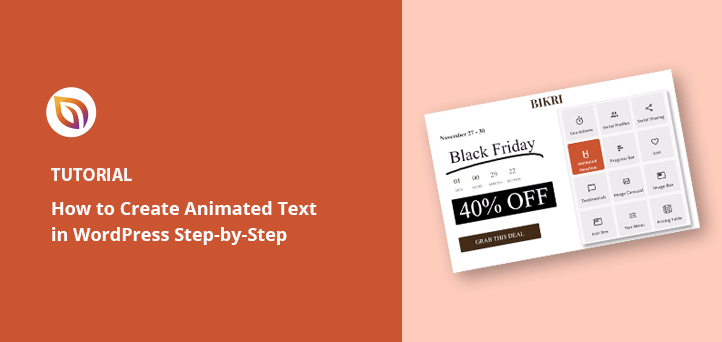
Do you want to add animations in WordPress?
Animations are an excellent way to grab your audience’s attention, directing them to helpful content and essential elements, like call-to-action buttons, testimonials, and sign-up forms.
In this article, we’ll show you how to create text animations on your WordPress website step-by-step.
Video Tutorial
What Are Animated Text Effects and Why Use Them?
Animated text effects are CSS animations for your website’s headlines and other text-based content. They let you add transition effects and animation styles, such as bouncing, scrolling, and sliding, drawing attention to essential information on your site.
You can use text animations in WordPress to:
- Highlight offers on your pricing table
- Animate product features
- Create attention-grabbing headlines
- Draw attention to call-to-action buttons (CTA)
- And more.
Many websites use page animations and transitions for page scrolls. For example, you can animate text widgets to “pop” as users scroll down the page.
Because CSS3 animations are faster than flash or videos, they load quickly and are supported by most modern web browsers. They’re also much easier to add to your site with a WordPress animation plugin.
With that in mind, let’s explore how to create animated text effects in WordPress.
How to Add Animated Text Effects in WordPress: 2 Ways
There are several ways to add animations to WordPress. You can use a WordPress plugin or manually add CSS effects.
Because manually creating text effects is challenging for beginners, we’ll show you how to create text animations with a WordPress page builder and a free WordPress animation plugin.
Method 1. Create Animated Headlines with SeedProd

For the first method, we’ll use SeedProd, the best website builder for WordPress. With its visual drag-and-drop page builder and Animated Headline block, you can add exciting transition effects with a few clicks.
SeedProd lets you create custom WordPress themes and responsive layouts without writing code or hiring a developer. It includes powerful content blocks for customizing pages, WooCommerce support for eCommerce stores, and integrates seamlessly with popular WordPress plugins.
Moreover, this plugin is lightweight and bloat-free, ensuring your page load times are fast and user-friendly.
Follow the steps below to create text animations in WordPress with SeedProd.
Step 1. Install and Activate SeedProd Plugin
First, head to the SeedProd pricing page and choose a license. We recommend SeedProd Pro for its advanced features.
After that, log into your SeedProd account area and download the plugin. You can copy your license key under the “Downloads” tab at the same time.
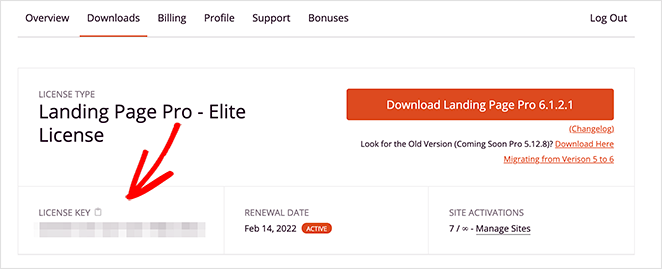
Next, install the plugin and activate it on your WordPress site. If you need help, you can follow these steps to install a WordPress plugin.
After activating SeedProd, navigate to SeedProd » Settings, enter your license key, and click the Verify Key button.
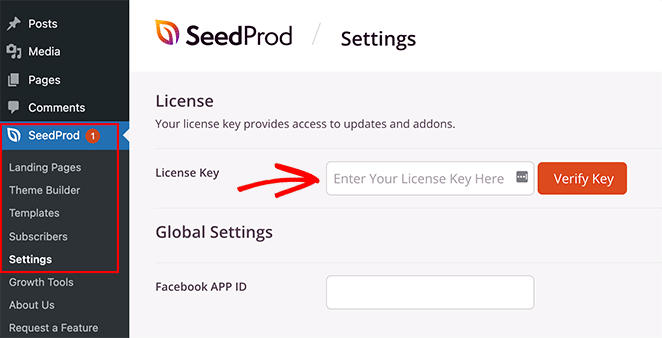
You’re now ready to start building a page with animation effects.
Step 2. Choose a Landing Page Template
You can use SeedProd to create a single WordPress page, a WordPress theme, or a landing page with its visual editor. For this guide, we’ll add text animations to a sales landing page.
First, you’ll need to go to SeedProd » Landing Pages and click the Add New Landing Page button.
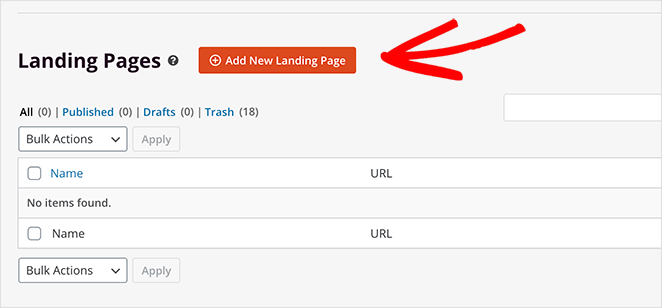
Here you can choose from over 180+ mobile-responsive landing page templates.
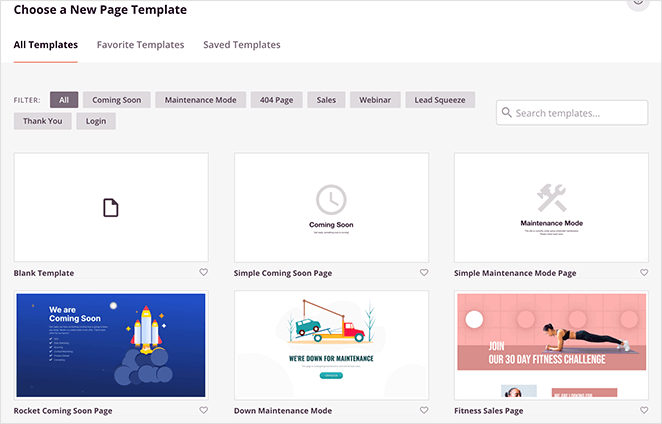
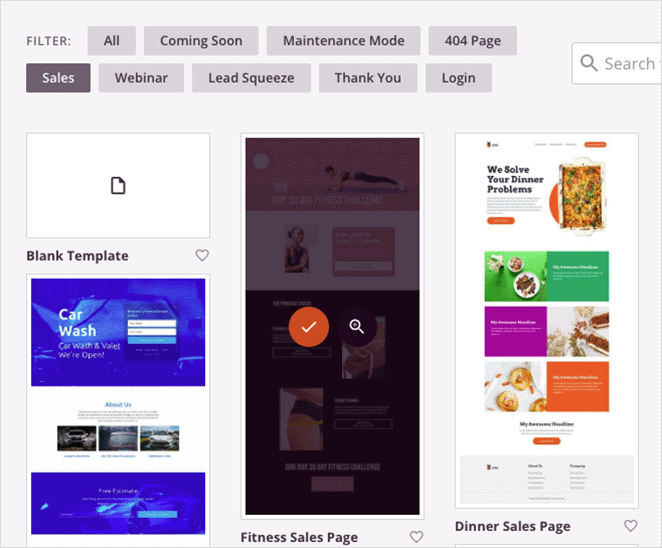
Since we’re making a sales page, click the Sales tab to view the different sales page templates. When you find a template you like, move your cursor until you see the image hover effect and click the orange checkmark icon.
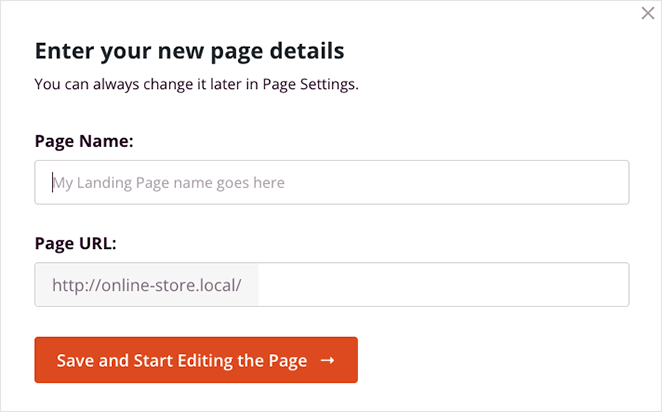
Next, you will see a popup window where you can add your landing page name and URL information. After that, click the Save and Start Editing the Page button.
Step 3. Customize Your Landing Page Content
Your landing page template will now open in SeedProd’s drag-and-drop visual editor. This is where you can customize its content and styling and add more page elements.

For instance, you can add your custom logo by clicking the current image block and uploading a file from your WordPress media library or computer.
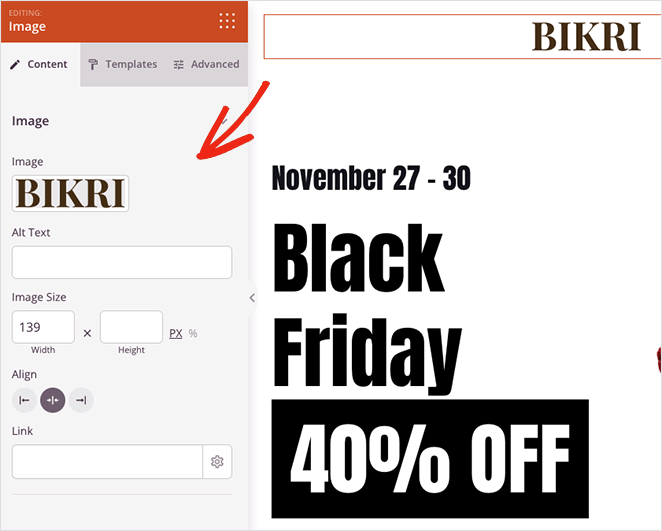
You can also edit your CTA buttons with different colors, text, and styling by clicking it and visiting the Advanced settings panel on the left.

Adding new elements is just as easy. You can drag a block from the blocks panel on the left and drop it onto your design. A countdown timer, for example, can add urgency to your page, encouraging users to act for fear of missing out.

With your customizations in place, let’s look at how to animate your headline text next.
Step 4. Add the Animated Headlines Block
Let’s say you want to animate the main headline on your landing page. To do that, you’ll need to find the Animated Headline block and drag it onto your page design.
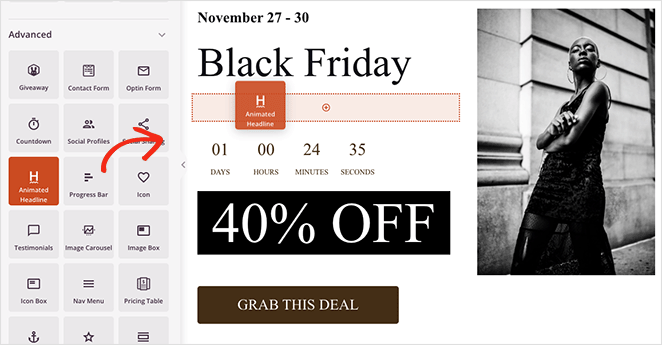
When you click the block to view its settings, you’ll see 2 ways to animate your headline:
- Highlighted
- Rotating
The Highlighted style adds a shape animation to your text, with shapes including:
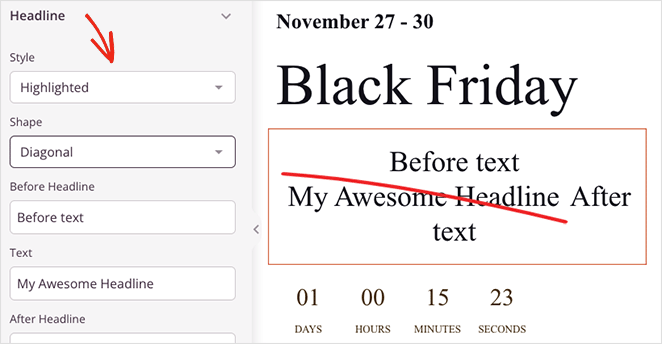
- Circle
- Curly
- Underline
- Double
- Double Underline
- Underline ZipZag
- Diagonal
- Strikethrough
- X
In contrast, the Rotating style adds transition effects to your headline, which include:
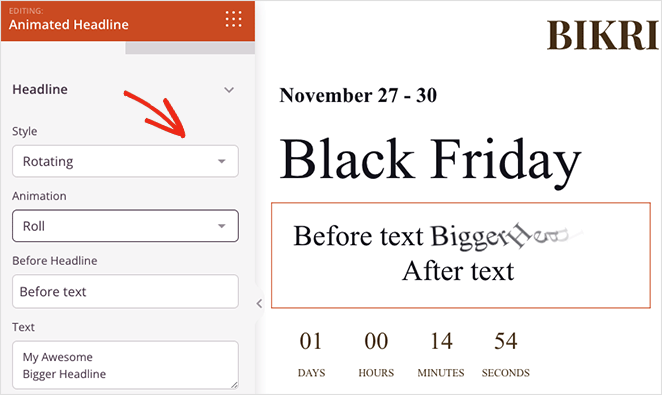
- Typing
- Clip
- Flip
- Bounce
- Roll
- Zoom
- Fade
- Light Speed
- Slide Down
Additionally, you can add text before and after your animated text, enable infinite looping, change the animation duration, and adjust the alignment, fonts, and heading level.
In our example, we use the “Underline” shape from the highlighted drop-down menu.
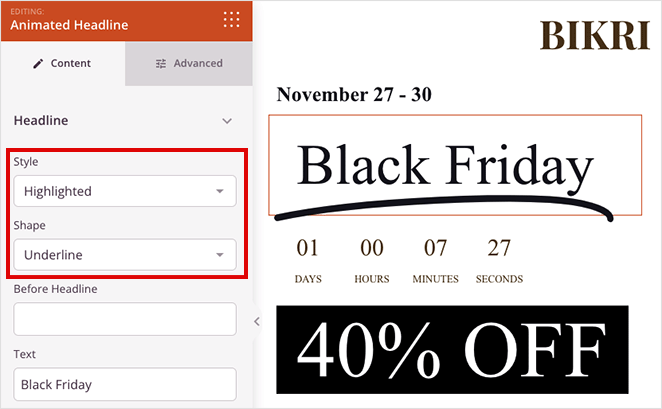
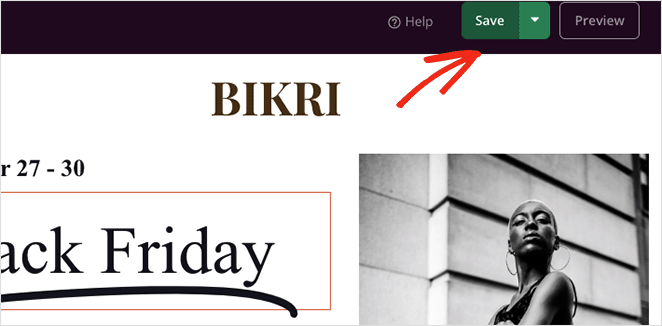
When you’re happy with your animated text effects, click the Save button in the top-right corner.
Step 5. Configure Your Settings
The next step is to connect your email marketing service and configure your landing page settings.
SeedProd offers direct integrations with many popular email providers, including Constant Contact, Mailchimp, and more. You can choose one by clicking the Connect tab at the top of your screen.
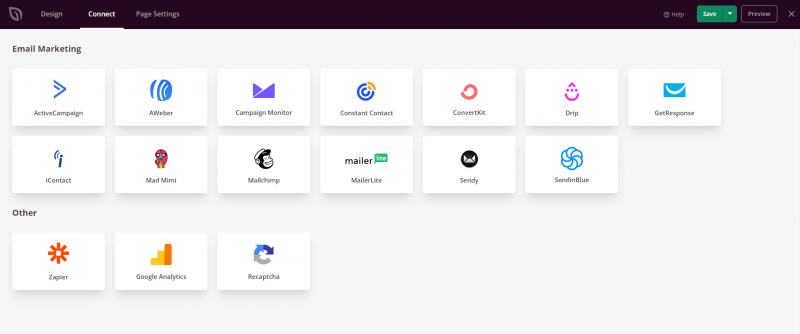
Check out the email integration documentation for help connecting to your specific provider.
Next, click the Page Settings tab, where you can edit settings like your page name, URL, and on-page SEO, and connect to a Google Analytics plugin.

You can also use SeedProd’s Domain Mapping feature to give your landing page a custom domain name. This is an excellent way to have multiple landing pages with unique domains on a single WordPress installation.
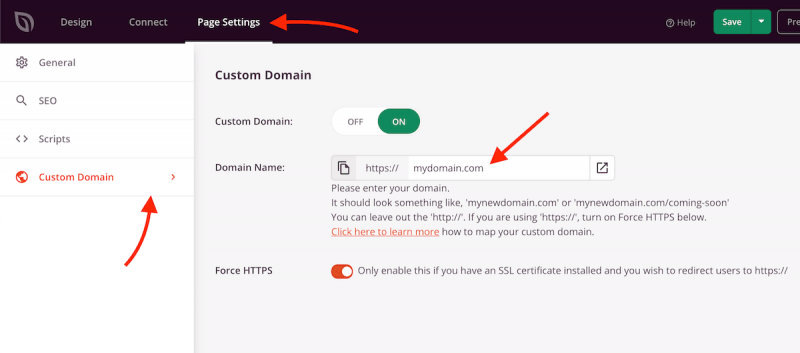
Don’t forget to click Save before moving to the next step.
Step 6. Publish Your Landing Page
When you’re satisfied with your design, click the drop-down menu on the Save button and select Publish.
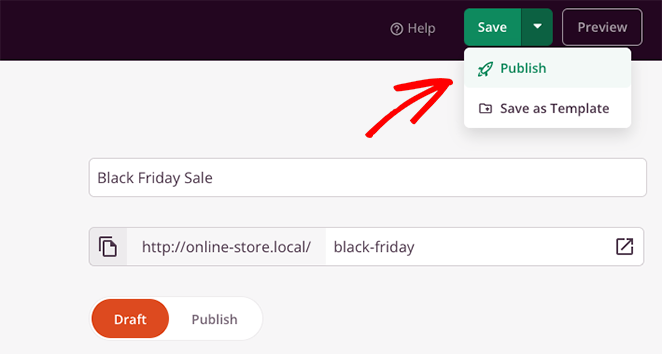
You can now view your page and see your text animations in action.

Method 2. Add Text Animations with Animate It! CSS Plugin
For the following method, we’ll use a free WordPress animation plugin to add animated text effects to your website. This is a good solution if you use the classic WordPress WYSIWYG editor instead of a page builder or the WordPress block editor.

First, install and activate the Animate It! plugin on your WordPress website. It should work out of the box with no settings for you to configure.
Next, create a new page, and you’ll see a new button inside the WordPress editor: Animate It!
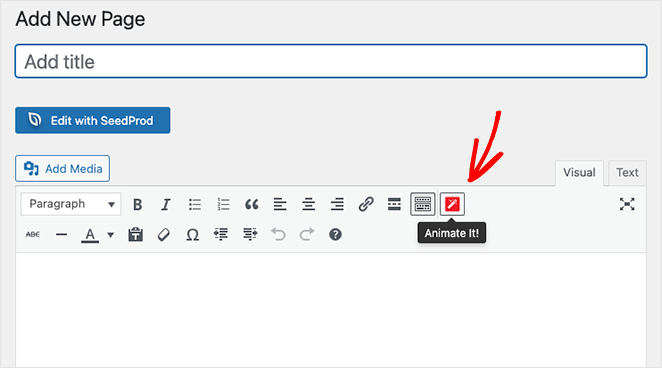
Clicking the button opens a popup window where you can choose an animation style. There are many animation styles to choose, so find one you like in the drop-down menu.
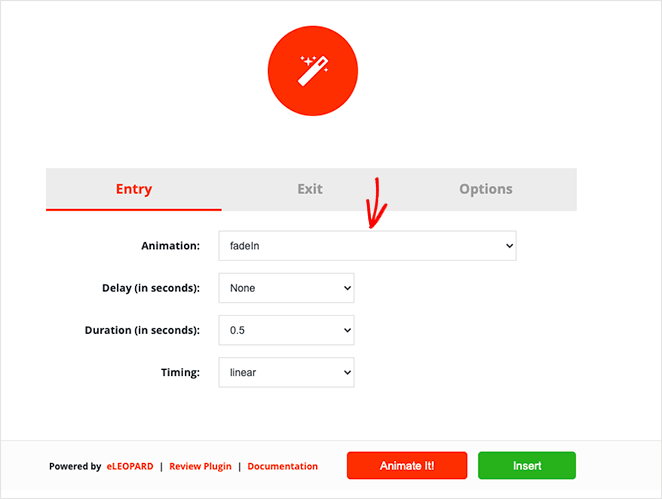
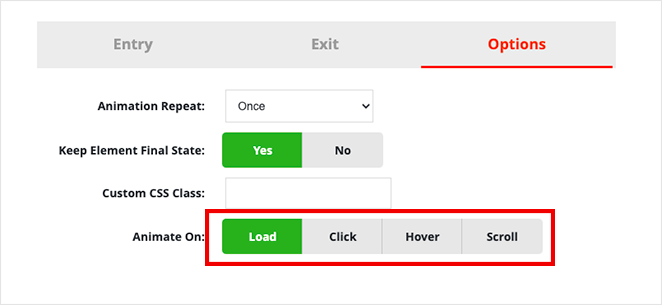
After that, you can choose the delay and duration time and when you want the animation to appear. You can also run the animation on load, click, hover, or scroll offset.
When you’re happy with the settings, click the Animate It button to see a preview of the animation.
Next, click the Insert button to add the animation to your post or page. The plugin will add a shortcode with some dummy content into the post editor.
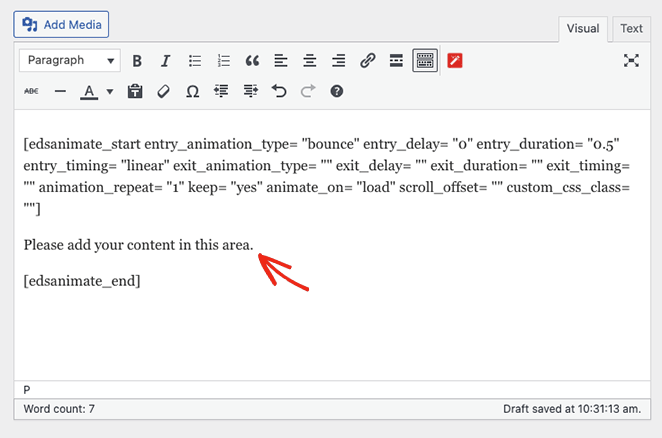
You can customize and replace that content with your headlines, images, and custom text.
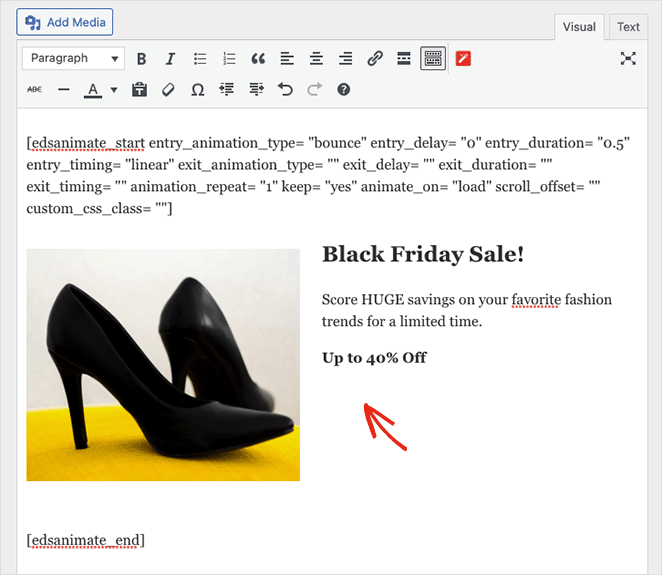
Now you can publish your changes and preview your animated text live on your WordPress site.
That’s all for now.
We hope you found this tutorial on creating text animations in WordPress helpful. You might also like this guide on creating a dynamic landing page in WordPress.
Thanks for reading! We’d love to hear your thoughts, so please feel free to leave a comment with any questions and feedback.
You can also follow us on YouTube, X (formerly Twitter), and Facebook for more helpful content to grow your business.

