Do you want to know how to create a membership site in WordPress?
Membership sites allow you to charge users for premium content to boost your website’s revenue. In this tutorial, we’ll show you how easy it is to create a membership website in WordPress.
Before we start…
What Is a WordPress Membership Site?
A membership site is a website where members have to pay to access certain content or site areas. It allows you to restrict access to some of your website’s content, online courses, downloads, and more.
There are several reasons why you might want to have a members area on your site. Here are some of the benefits of building a membership site:
- Increased Income. Membership sites often include recurring subscriptions. This means you can generate a regular stream of income that steadily grows as more people register as members.
- Reduce Workload. Many membership site owners create premium content once and add to it over time. This means there’s less work needed to continue to grow your site. Instead, your content does the work for you.
- Offer Value. Successful member sites are all about value exchange. In other words, making paid members feel like you’ve gone above and beyond the call of duty for them. If you create value for your members, treat them well, and provide more than they expect, you create loyal followers who will spread the word about your site.
- Build Authority. By restricting content to members only, you show visitors that you’re an expert on the subject, so it’s worth paying for your expertise.
- Grow your Email List. When you add registered members to your email list, they’re already familiar with your website. This means they’re more likely to open and click your emails, improving your email marketing efforts.
Now that you know what a WordPress membership site is and the benefits of building one, which WordPress plugin is the best tool for the job?
What Is the Best Membership Plugin for WordPress?
There are many excellent membership plugins for WordPress with lots of different features. If you need a comprehensive WordPress membership plugin, MemberPress is the best choice.
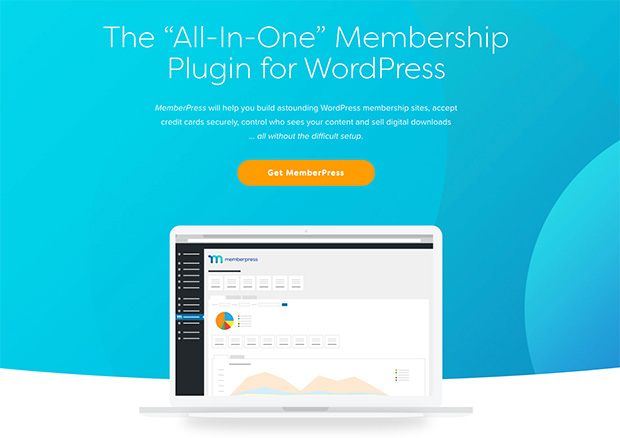
MemberPress is super easy to use, works seamlessly with other WordPress plugins, and is the most popular membership plugin on the market.
How to Create a Membership Site with WordPress
By now, you’re probably asking, how do I create a membership site?
Let’s jump in and look at how to create a WordPress membership site with MemberPress.
1. Set Up the MemberPress Plugin
The first step is to install and activate the MemberPress plugin on your WordPress website. Here’s a step-by-step guide on how to install a WordPress plugin if you need help.
After installing and activating MemberPress, you’ll see a dashboard notification. Click the options page link to start setting up the plugin.

On the Options screen, you’ll see various settings for your:
- Thank you page
- Account page
- Login page
- Page slugs
- And more
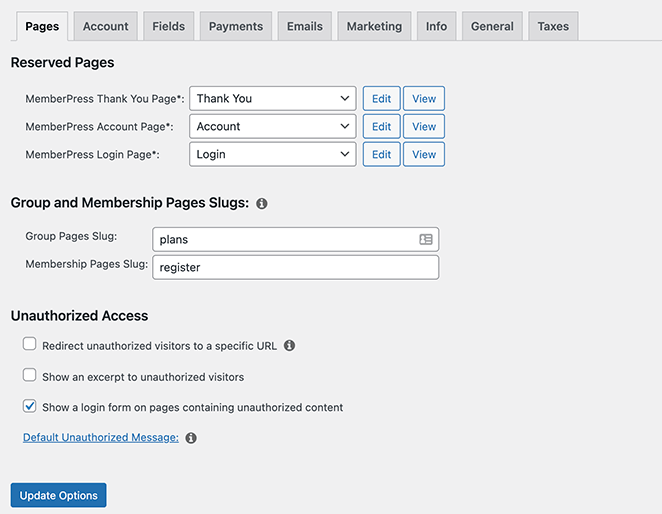
Configure all of these settings in any way you like. If you don’t already have the reserved pages on your website, MemberPress will create them for you automatically.
Click the Update Options button to store your settings.
2. Add Your Payment Methods
Next, click the Payments tab on the same page to set up the different payment gateways you want to use on your membership site.
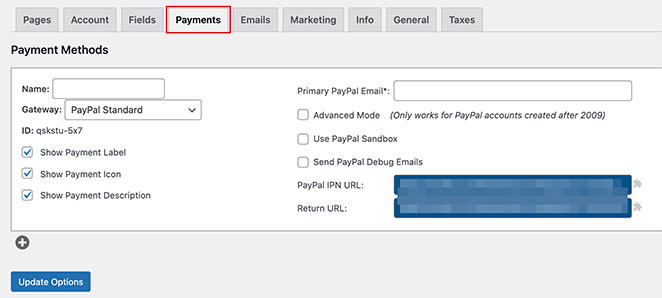
MemberPress allows you to accept payments with Stripe, PayPal, Authorize.net, and Offline Payments. You can set up multiple payment gateways or just stick with one payment option.
3. Add Different Membership Levels
Once you’ve configured your MemberPress settings, you can create membership options for website visitors to buy.
You can make as many membership levels as you like, with different pricing, content, and features. Plus, you can create unlimited membership levels with MemberPress.
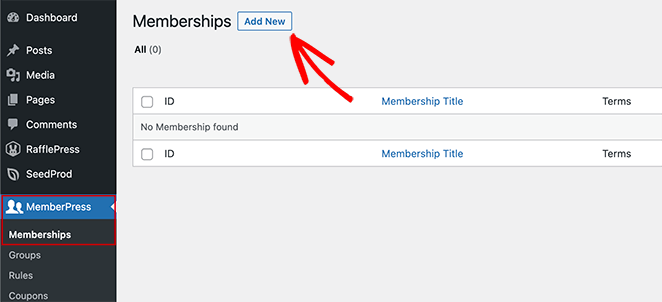
To set up membership levels, navigate to MemberPress » Memberships from the left-hand WordPress admin menu. Then, click the Add New button.
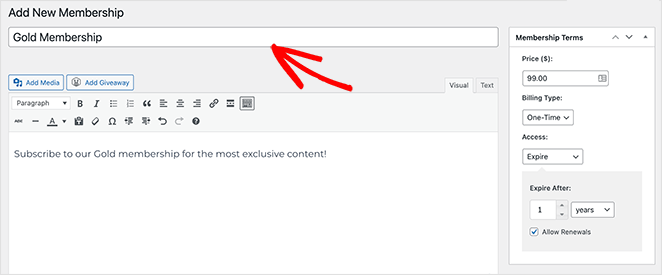
Next, you’ll see the traditional WordPress editor, where you can add a title and description for your membership level. You can also set a price, billing type, and access time in the Membership Terms panel on the right-hand side.
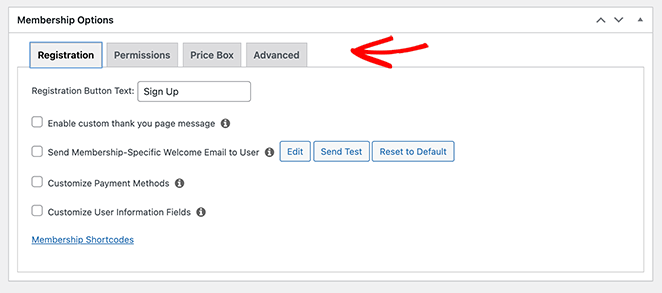
After, scroll down to the Membership Options section and customize it to suit your paid membership needs. Make sure you click the Permissions, Price Box, and Advanced tabs to configure those settings too.
When you’re happy with your settings, click the Publish button.
4. Set Up Access Rules for Membership Plans
With any membership platform, it’s crucial to define where you want to restrict access to your membership website and who can access it. This means you’ll need to create access rules for your gated content.
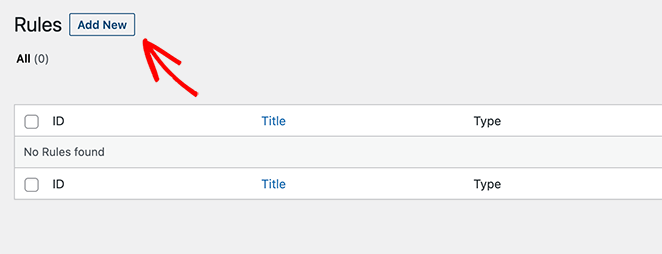
To do this, go to MemberPress » Rules from your WordPress admin panel and click Add New.
On the next screen, create a new rule linking your content to the membership levels you just made.
For example, you can choose all content under a specific tag and allow access to only users with the most expensive membership plan. In this example, we selected the Advanced Email Marketing Guide tag.
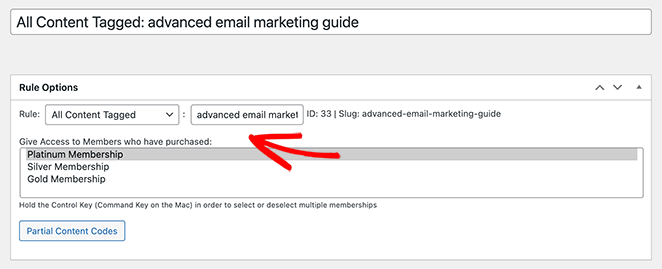
Once you’ve done that, scroll down to the Drip/Expiration panel.
Here you can enable the Drip option, which allows you to release content to your members gradually. You can also enable the Expiration option and choose when the content is no longer available.

When everything looks how you want, click the Save Rule button. You can then repeat this step to add more rules to your member site.
5. Create Member Only Content
The next step involves creating members-online content, so there’s premium content offered to your website members once they register. The easiest option is to add content as either a WordPress post or page.
For this example, we’ll make content that links to the access rule we set up earlier.
So, go ahead and create a new WordPress post and add your premium content. Then, add the appropriate tag in the right-hand panel.
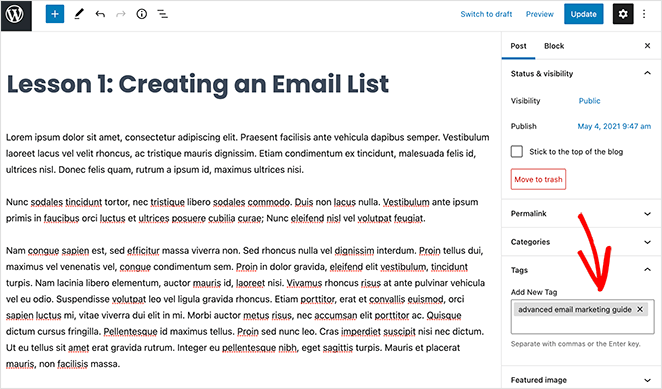
For instance, to link the content to our Advanced Email Marketing rule, we’ll need to enter that tag.
Next, scroll down to the MemberPress Unauthorized Access panel towards the bottom of your screen. In this area, you choose what non-registered users see when they try to view this content.
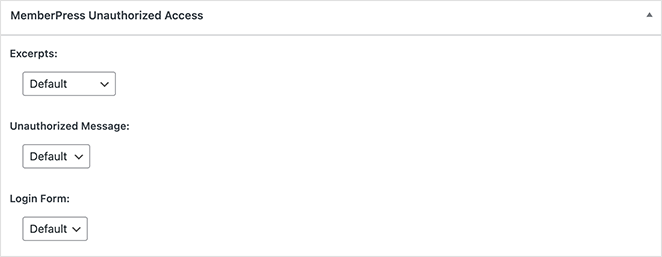
After configuring the settings, go ahead and publish your content.
Now when you head to Posts » All Posts, you can see which content is restricted to paying members.

Besides standard content, you can also create online courses with MemberPress’s built-in Courses addon. You can use a visual builder to create your course curriculum. And the best thing is, It’s built on the WordPress block editor, so the process is similar to the steps above.
6. Create a Pricing Page
For visitors to see your different membership plans and to subscribe, you’ll need to create a pricing page. You can do this easily in MemberPress’s Group settings.
Just click MemberPress » Groups from your WordPress admin panel and select the Add New button.
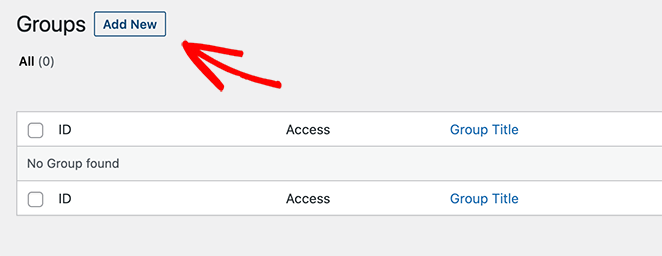
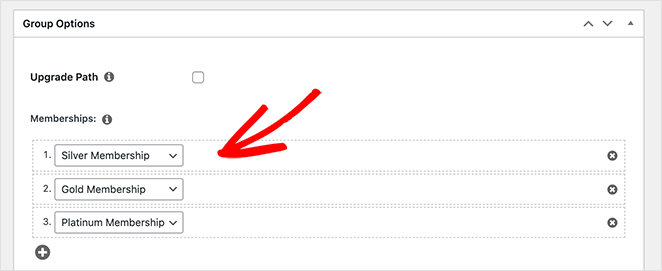
On the next screen, give your group a name like “Pricing Plans” so visitors know what the page is about. Then scroll down to the Group Options panel to select the memberships you want to add to your pricing page.
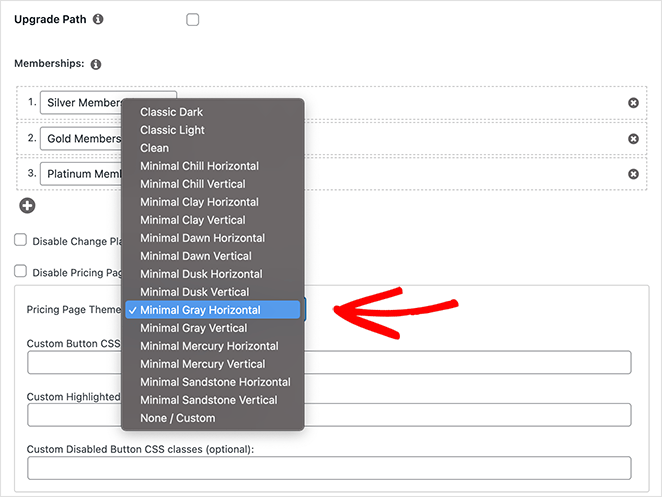
You can also change the pricing page theme on the same page. Just choose a theme from the drop-down menu.
Click Publish when you’re happy with your pricing page. To preview the page, click the View Group link.

When someone tries to access your premium content and is not a member, it’s crucial to send them to your pricing page. That way, you can encourage them to sign up.
To do this, go back to MemberPress » Groups and copy the group’s URL.

Then navigate to MemberPress » Options and scroll down to the Unauthorized Access section. In this area, check the box next to “Redirect unauthorized visitors to a specific URL” and paste the URL in the box beneath it.
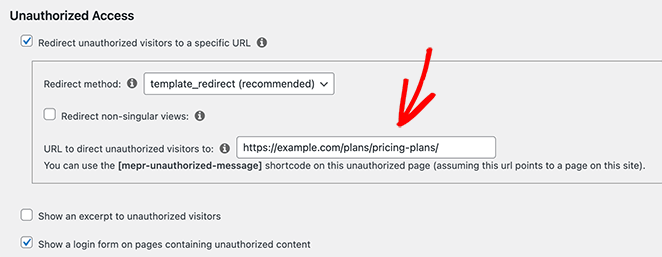
Now click the Update Options button.
7. Add Sign Up and Login Forms
The last step is to add sign-up and login forms to your membership site so users can access their member profiles.
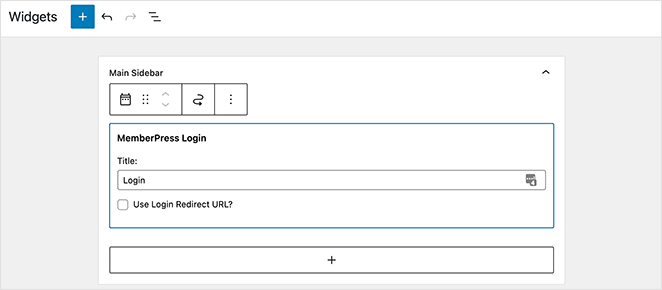
To do this with a WordPress widget, navigate to Appearance » Widgets from the left-hand admin panel and add the MemberPress login widget to a widget-ready area or sidebar.
Once you’ve done that, you’ll need to add your pricing page to your navigation menu, so it’s easy for users to access. To do this, go to Appearance » Menus and create a new menu or choose an existing menu.
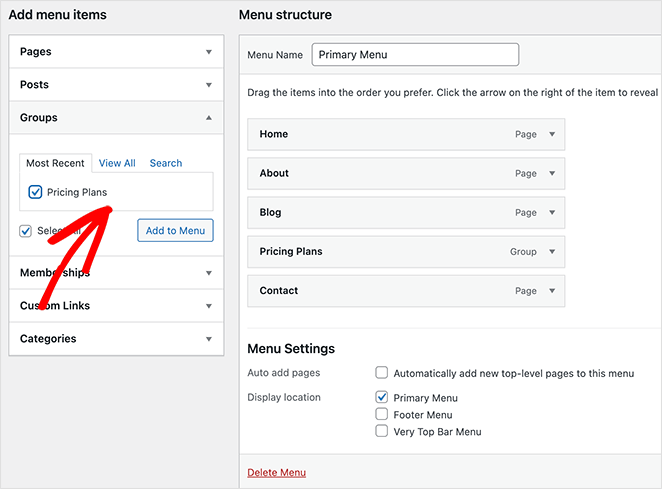
Then select Pricing Plans from under the Groups panel and click the Add to Menu button. Once your page appears in the menu, you can drag and drop it to organize it and click Save.
That’s it! You’ve successfully made a membership site in WordPress!
How to Get Member Analytics
Now that you have a membership website, you’ll have a thriving and growing community to nurture and care for.
With that in mind, it’s a good idea to optimize your membership site to get more traffic and more registrations. You can use MonsterInsights to take a look at the stats of your membership site.
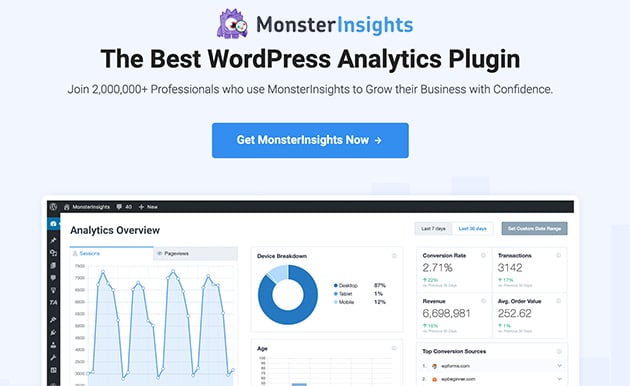
MonsterInsights is the best WordPress Google Analytics plugin on the market. You can use it to get detailed information on what registered users are doing on your website, your transactions, and more.
How to Boost Signups for Your Membership Site
It’s also important to focus on growing your membership signups on your website. With OptinMonster it’s super easy. OptinMonster is the best software to grow your email list and tell people all about your membership site.

Take a look at this case study where one business used OptinMonster to grow their online community by 30,000 members per month!
Another option is to run a WordPress giveaway and award the winner with a free basic membership or free trial to attract more traffic to your membership site from social media. Additionally, you can create a membership landing page to promote your program.
There you have it! You now know how to create a membership site in WordPress using the easiest membership plugin on the market.
Want to make things even easier for potential members? Why not check out these best live chat plugins for WordPress so you can answer questions right away and improve user experience?
If you found this article useful, follow us on Facebook and Twitter for more helpful tips and tutorials.

