Do you want to create a checkout page for your online store?
Your checkout process can make or break your business’s success. So ensuring it’s fully optimized can help you increase sales and combat shopping cart abandonment.
In this article, we’ll show you how to create a checkout page in WordPress – no coding required.
Why Do You Need a Custom WordPress Checkout Page?
One of the easiest ways to create a checkout page is with the WooCommerce plugin. It’s the most powerful eCommerce plugin for WordPress, with many ways to make your WooCommerce store a success.
For instance, you can add multiple payment gateways, product pages, credit card support, add-ons, and more.
In fact, WooCommerce creates a WooCommerce cart and WooCommerce checkout page automatically, removing the need to build one from scratch. But the problem is the WooCommerce checkout experience isn’t optimized for conversions, leaving a lot of revenue on the table.
Moreover, studies show that between 70 – 85% of all shopping carts are abandoned. For you, it means tons of users leaving your cart and checkout page before entering payment methods and making a purchase.
The best way to combat that is to create a custom WordPress checkout page. With a custom page, you can add:
- Testimonials and social proof to increase trust
- Related products and services to boost revenue
- Custom checkout forms to reduce buyer hesitation
- Additional payment options
- Custom WooCommerce checkout fields
Even better, you can optimize the entire page and layout to improve your conversion rates on your WordPress site. As a result, you can boost sales and make it more likely that shoppers will place orders and become long-term customers.
Now that you know the benefits of creating a custom checkout page in WordPress, let’s move on to finding out how to do it.
How to Create a Checkout Page in WordPress (No Code)
For this tutorial, we’ll use SeedProd to create a WordPress checkout page. SeedProd is the best drag-and-drop WordPress page builder used by over 1 million websites.
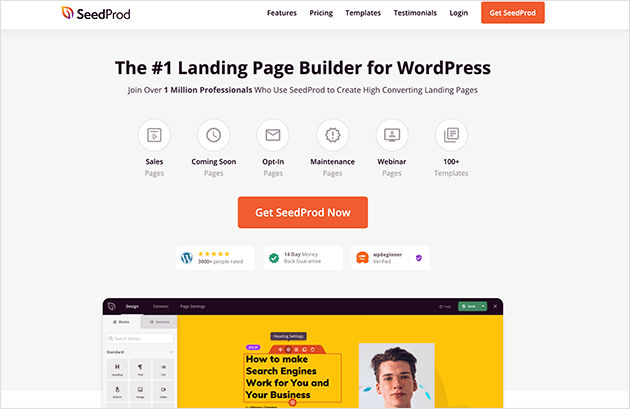
With SeedProd, you can easily create any WordPress landing page without writing a single line of code. And because of its powerful WooCommerce integration, you can create custom checkout pages and other WooCommerce pages and link them to your WooCommerce store.
This means that instead of using the default WooCommerce one page checkout, you can create a fully customized page optimized for conversions. And before you launch, you can create a WooCommerce coming soon page to generate leads.
So if you want to create a checkout page in WordPress for beginners, here’s how to do it with SeedProd.
Video Tutorial
Step 1: Install and Activate SeedProd
The first step is to install and activate the SeedProd plugin.
Note: There’s a free version of SeedProd available. However, we’ll use SeedProd Pro for the advanced WooCommerce blocks.
If you need help with this step, follow this step-by-step guide on installing a WordPress plugin.
After activating SeedProd, go to SeedProd » Settings and enter your license key.
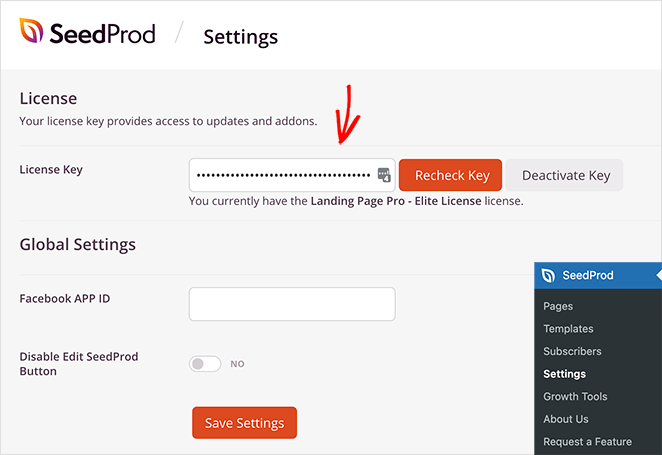
This information is easy to find under the Downloads section of your account on the SeedProd website.
Step 2: Create a New Page
After activating your license key, navigate to SeedProd » Pages from your WordPress dashboard. On this page, you’ll see an overview of SeedProd’s different page modes and an area to add new landing pages.
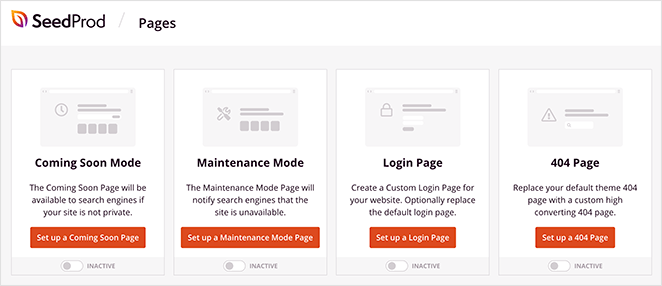
With the page modes, you can instantly:
- Create and activate a coming soon page
- Activate maintenance mode
- Make a custom 404 page
- Set up a custom WordPress login page
- Create a standalone WordPress landing page
The great thing about this is that it gives your site extra functionality without installing multiple WordPress plugins.
For this guide, we want to create a standalone WordPress checkout page. To do that, click the Add New Landing Page button.
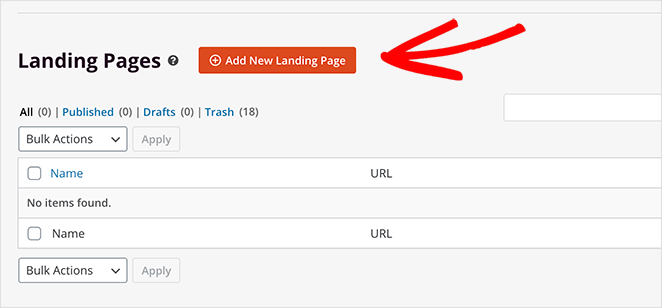
On the next screen, you can pick from hundreds of responsive landing page templates.
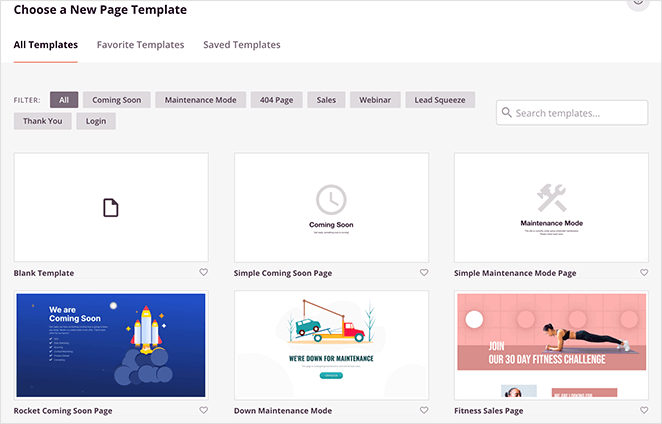
You can filter designs by clicking the tab placeholders along the top:
- All
- Coming Soon
- Maintenance Mode
- 404 Page
- Sales
- Webinar
- Lead Squeeze
- Webinar
- Login
The best approach is to look for a template that closely matches the design you want. And if it isn’t a perfect fit, you can easily customize it in the next step without PHP, CSS, or shortcodes.
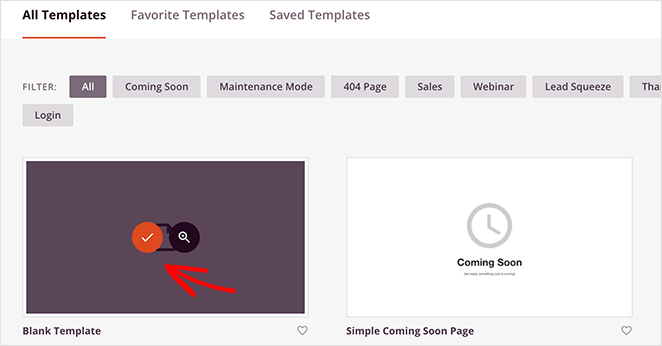
For this tutorial, we’ll use the Blank template to show you how easy it is to create your WordPress checkout page without hiring a developer.
To choose the template, hover your mouse over the thumbnail and click the orange checkmark icon.
After, a popup appears asking you to enter a name and URL for your page.
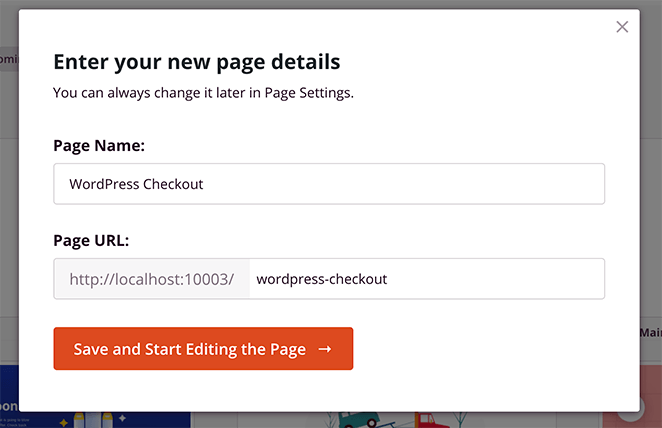
You can then go ahead and click the Save and Start Editing the Page button.
Step 3: Add Content to Your Checkout Page
After importing your template, it will open in SeedProd’s visual page builder and look similar to the example below. This is where you can create your WordPress checkout page and optimize it for conversions.
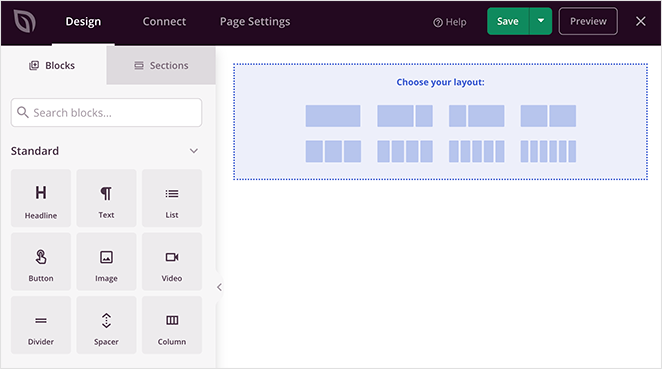
You’ll see a live preview of your page on the right. And on the left is an options panel where you can choose different blocks, sections and customize your design.
Checkout Page Header
First, we’ll add a header to your checkout page so that you can keep your branding consistent across your website.
To do this, click the Sections tab in the left-hand panel and click the Header category. From there, hover your mouse over any header section and click the plus icon to add it to your page.
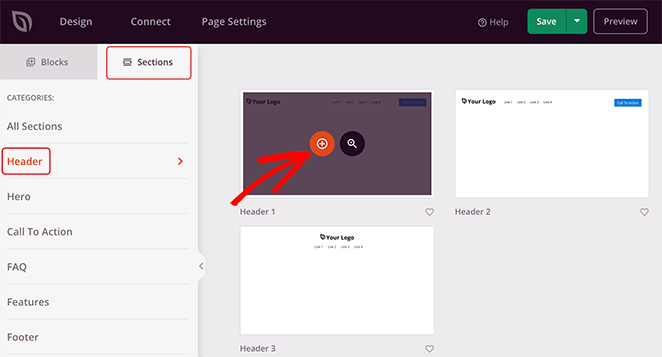
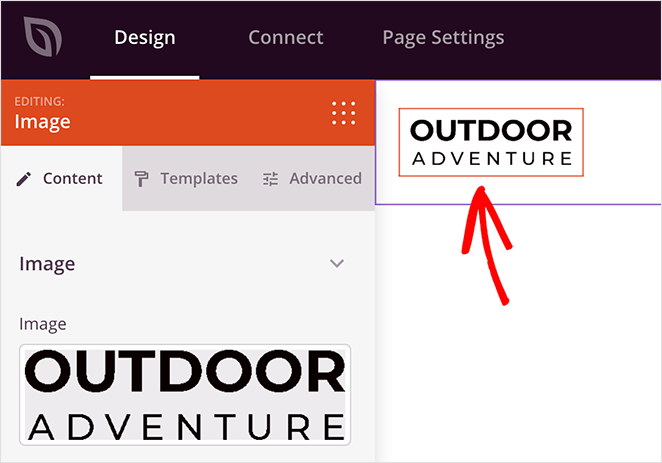
Next, click the image area of your new header section. Here you can upload an image from your computer or WordPress media library to use as your site’s logo.
We also recommend removing the navigation menu from your checkout page. This will reduce the number of people leaving the page and encourage users to complete the checkout process.
To delete the navigation menu, just hover your mouse over the navigation block, and click the trashcan icon.

Now let’s customize the call-to-action button (CTA). Instead of sending users away from the page, you can use this button to remind users about the contents of their shopping cart.
So click the CTA button to open the settings on the left and replace the default text. In our case, we changed it to ‘View Cart.’
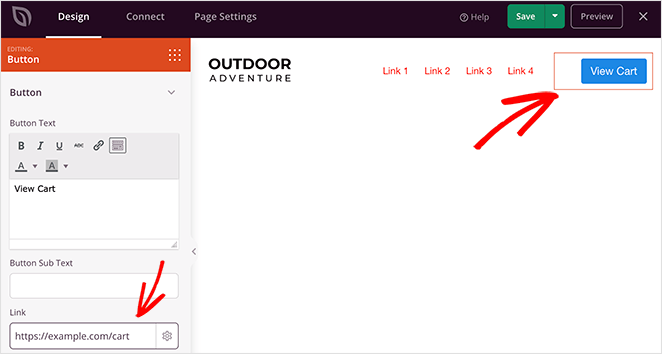
Then you can add the URL for your WooCommerce cart page in the Link field. If you like, you can make the link nofollow or open it in a new tab by selecting the checkbox.
WooCommerce Checkout Block
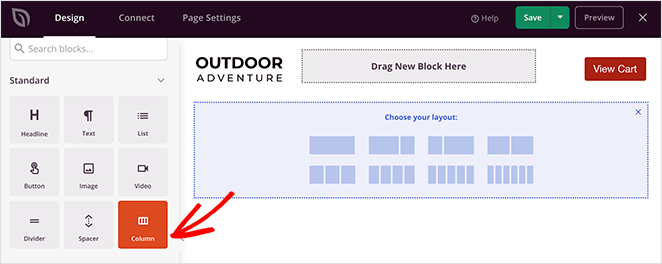
With your site’s branding in place, let’s move on to adding checkout functionality with form fields to your page. First, drag a new Column block onto your page.
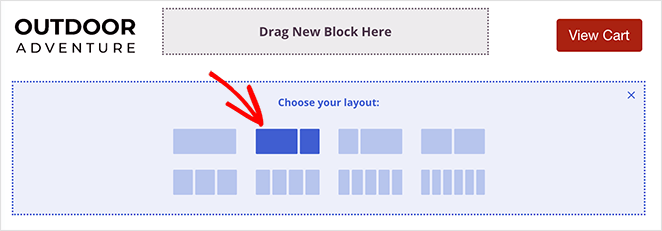
Then, go ahead and choose your preferred layout.
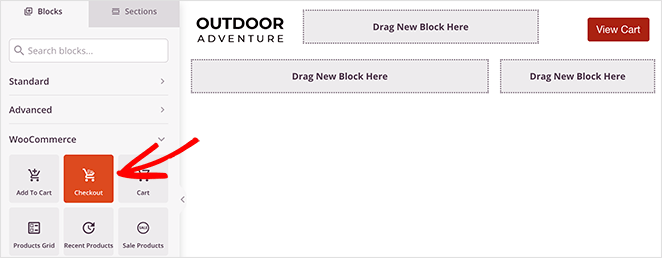
Next, scroll down the left-hand panel to the WooCommerce area, which offers the best WooCommerce blocks. From there, choose the Checkout block and drag it onto your page.
Click anywhere on the Checkout block to customize the settings, including:
- 1 or 2 column checkout layout
- Checkout header fonts and colors
- Custom field styling
- Button styles
- Alert highlight colors
- Cart borders, backgrounds, and styling
- Payment section customizations
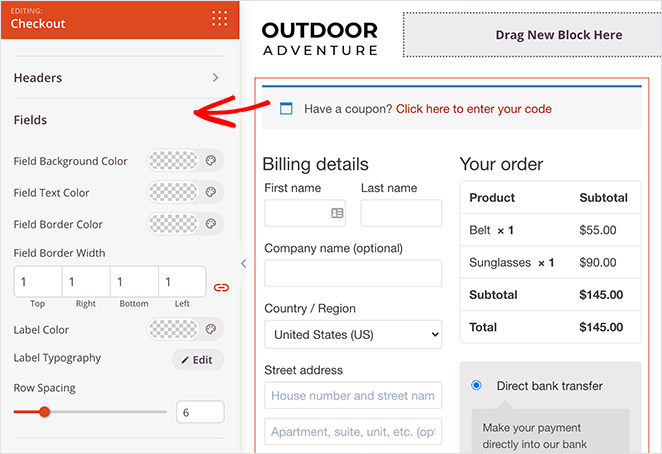
Remember to click Save to store your checkout field editor settings.
WooCommerce Popular Products
If you want to improve sales, you can add popular products to your WordPress checkout page next. This can encourage shoppers to add more items to their cart before paying.
To add popular products, choose the Best Selling Products block from the WooCommerce section and drag it onto your page.
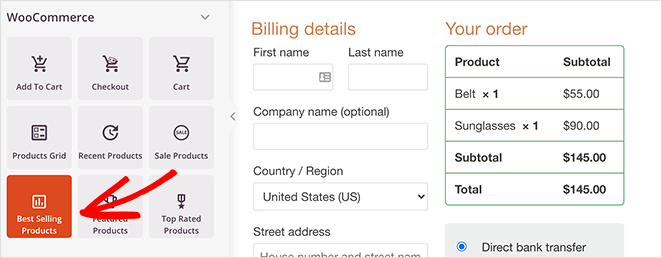
From there, you can edit the number of columns, add pagination and adjust other settings from the drop-down menus.
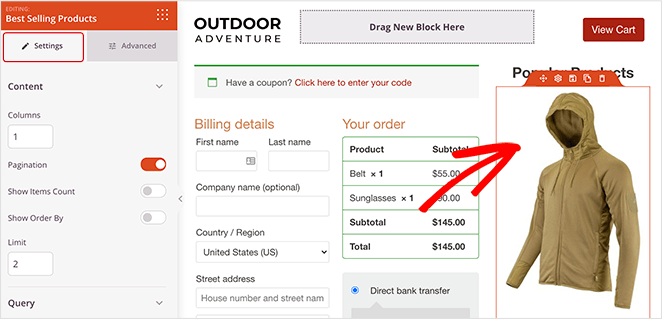
It’s a good idea at this point to drag over the headline block and change it to something like “Popular Products”. That way, people know exactly what they’re looking at.
Reviews & Testimonials
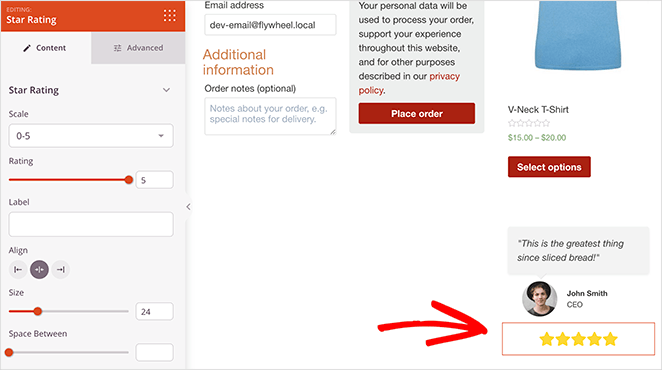
When it comes to social proof, reviews, and testimonials, they all add up to increasing the chances of shoppers buying your WooCommerce products. The reason for this is it reassures people that other people trust your products and that they’re making the right decision.
So why not include some reviews, testimonials, and star ratings on your checkout page?
You can do this easily with SeedProd. Just head to the Advanced blocks and drag the Testimonials block over to your checkout page.
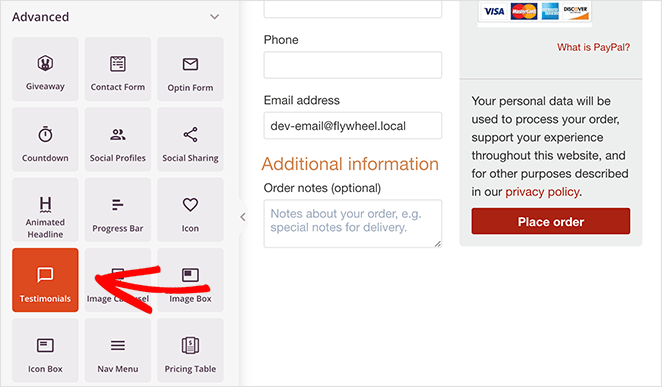
In the settings, you can completely customize the block. For instance, you can add a testimonial photo or job title and even turn it into a scrolling carousel with multiple testimonials.
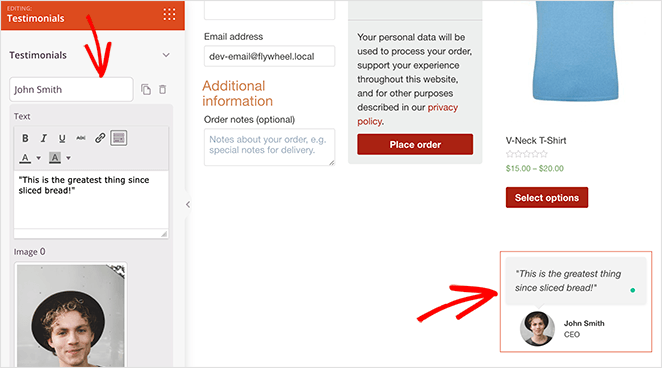
In addition, you can add even more social proof by using the Star Rating block beneath the testimonial.
Step 4: Publish Your WordPress Checkout Page
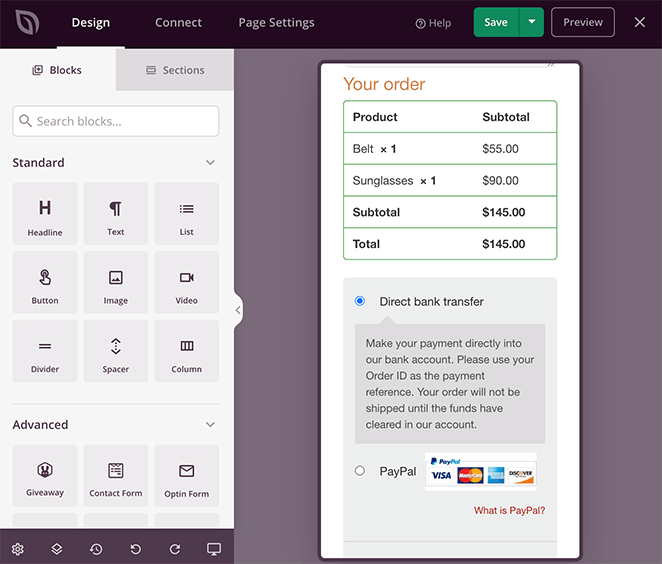
Once you’re happy with your page, let’s see how it looks on mobile. After all, many people shop from their mobile devices nowadays, so ensuring everything is optimized for mobile users is crucial to increasing sales.
Luckily, SeedProd has a feature that allows you to preview your WordPress checkout on mobile easily. Just click the mobile icon in the bottom navigation bar.
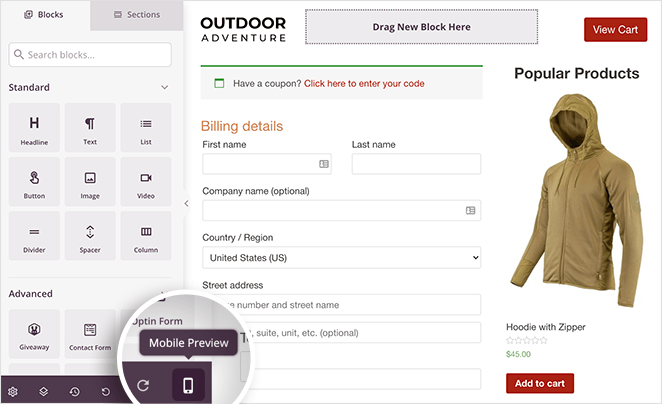
Then you can see your page setup as any mobile user would. From there, you can make adjustments to improve the user experience.
When you’re happy with how everything looks, click the dropdown arrow next to the green Save button and click Publish to make your checkout page live.
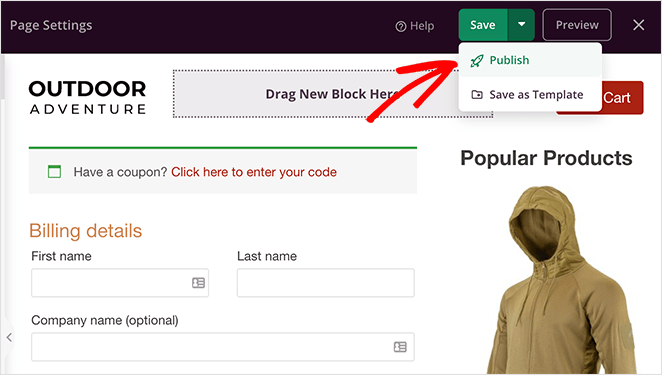
Instead of the default WooCommerce checkout page, you now have a high-converting WordPress checkout page tailored to your audience.
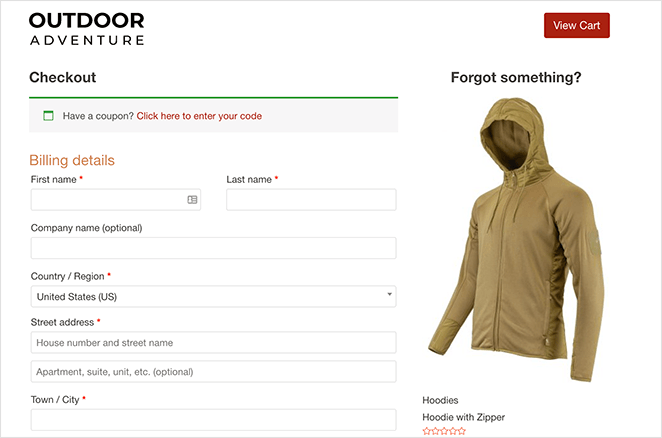
Step 5: Assign Your Checkout Page to WooCommerce
The final step in this guide is to assign your new WordPress checkout page to WooCommerce. This involves changing the default WooCommerce settings and adding the URL for your new page.
Changing the URL makes it, so your customers will automatically go to your new WordPress checkout page instead of the default option.
To configure this setting, go to WooCommerce » Settings and click on the Advanced tab. Then next to the Checkout Page heading, search for the page you just made.
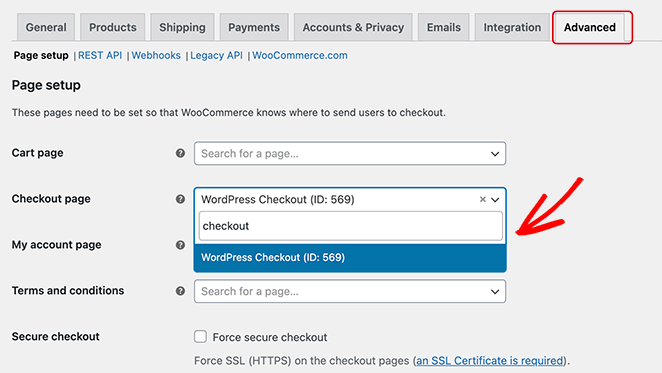
When you find it in the dropdown list, click it to assign it as your official checkout page. Make sure you click Save Changes at the bottom of the screen to preserve your settings.
Now, when a visitor clicks ‘Proceed to checkout,’ they’ll go to your new, high-converting checkout screen you just made.
There you have it!
We hope this article helped you learn how to create a checkout page in WordPress. You can create almost any page for your online store with SeedProd, and you won’t need to hire a developer.
So what are you waiting for?
If you’re looking for more WooCommerce tips, check out these posts:
- How to Enable Maintenance Mode for WooCommerce Shop Pages
- How to Speed Up Your WooCommerce Store (In 7 Easy Steps)
- How to Set Up WooCommerce Conversion Tracking for Your Store
While you’re here, don’t forget to follow us on Twitter, YouTube, and Facebook for more helpful content to grow your business.

