A reader recently asked me how to create a custom client login page in WordPress. They wanted something more professional and branded than the standard WordPress login.
If you run a business or manage client services, creating your own client login page helps your site look professional and secure. It’s also a great way to reinforce your brand and build client trust every time someone signs in.
In this guide, I’ll show you two simple ways to create a client login page in WordPress with no coding required.
What is a client login page? A client login page is a private area on your WordPress site where users can securely log in to view documents, dashboards, or other protected content.
Quick Summary
Want a fast overview? Here’s what this guide covers:
- Why Add a Client Login Page to WordPress?
- Choosing the Right Client Login Page Plugin
- Method 1: Create a Client Login Page with SeedProd
- Method 2: Build a Login Form with WPForms
- Frequently Asked Questions
Why Add A Client Login Page to WordPress?
Key Takeaway: A custom client login page helps you protect sensitive content and present a more professional, branded experience.
A client login page is a secure area on a website where users enter a username and password to access their accounts or private information. It keeps sensitive data safe and only lets authorized users in.
The default WordPress login screen is an excellent solution for personal websites, but it looks generic and boring. Client-facing WordPress sites need a login page that looks more professional and gives your clients a good impression of your business.
With a custom WordPress customer login page, you can personalize it to suit your clients. You can also hide the default login screen, reducing login spam and keeping your WordPress site secure.
Check out these login page examples for more inspiration.
Choosing the Right Client Login Page WordPress Plugin
WordPress’s official plugin repository offers tons of plugins to help you create a client login page. But today, I’ll focus on 2 of the best WordPress plugins on the market: SeedProd and WPForms.
Use SeedProd if you need a user-friendly WordPress page builder to create any page in real time without writing code.
SeedProd’s standout features include:
- Drag-and-drop visual page builder with live real-time preview
- Professionally designed login page templates to get you started
- Customize every element of your client login page with powerful page elements
- Add a login form to any page in WordPress
Use WPForms if you need a beginner-friendly WordPress form plugin that lets you create any form with its drag-and-drop form builder.
WPForms’ standout features include:
- Premade templates for any type of form
- Customize your login form without code or restrictions
- Publish your client login form on any WordPress post or page
- Embed your client login form in your WordPress sidebar with a custom login widget
Want more options? Check out our best WordPress login plugins roundup.
Method 1: Using SeedProd to Create a Client Login Page
Key Takeaway: With SeedProd, you can build a completely custom, secure login page using a drag-and-drop builder, with no coding needed.
Video Tutorial
I’ll use SeedProd to show you how to create a client login page in WordPress for the first method. Follow the steps below to dive in.
Step 1. Install and Activate SeedProd
The first step is to download the SeedProd plugin and upload and activate it on your WordPress website.
For detailed instructions, follow this guide on how to install a WordPress plugin.
After activating the plugin, you’ll see a welcome screen where you can enter your SeedProd license key. You can find the license key in your SeedProd account under the Downloads heading.
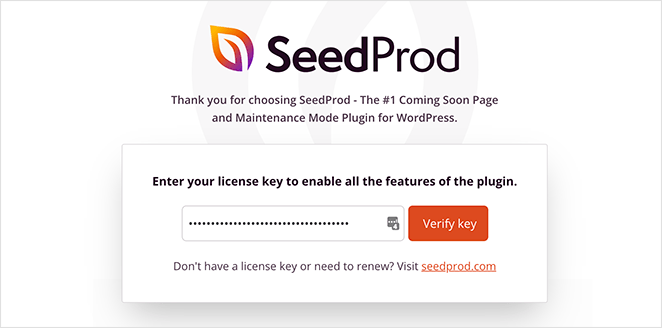
After verifying your license key, scroll down and click the Create Your First Page button.

On the next screen, you’ll see SeedProd’s landing page dashboard, where you can create different types of landing pages. Click the Set Up a Login Page button to get started.
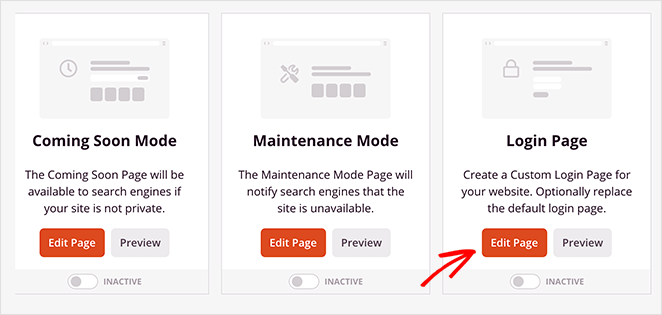
Step 2. Choose a Login Page Template
SeedProd now asks you to choose a template for your client login page. There are tons of templates you can choose from, and even a blank template if you prefer to start from scratch.
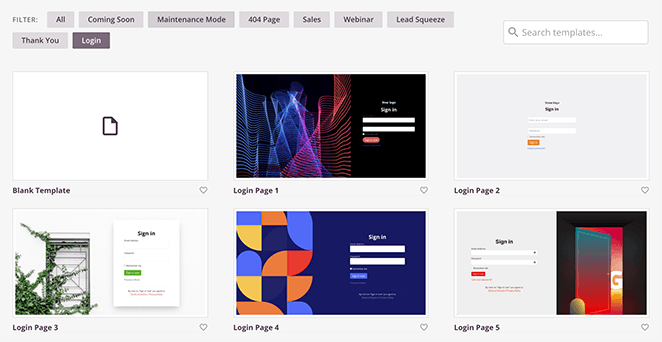
To choose a login page template, hover your mouse over its thumbnail and click the checkmark icon.
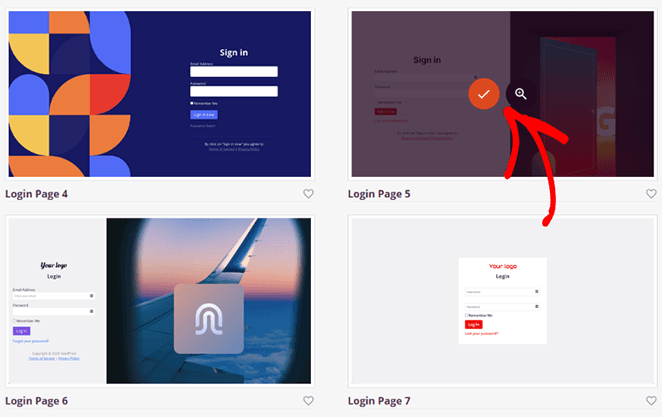
Your template will now open in SeedProd’s visual page builder.
Step 3. Customize Your Client Login Page Template
One of the best things about SeedProd is you can customize your client login portal in the drag-and-drop builder without hiring a developer. It’s easy to customize any template element by pointing and clicking on it with your cursor.
For instance, clicking the ‘sign in’ heading opens a panel on the left where you can change the heading content, text size, alignment, font, and more.
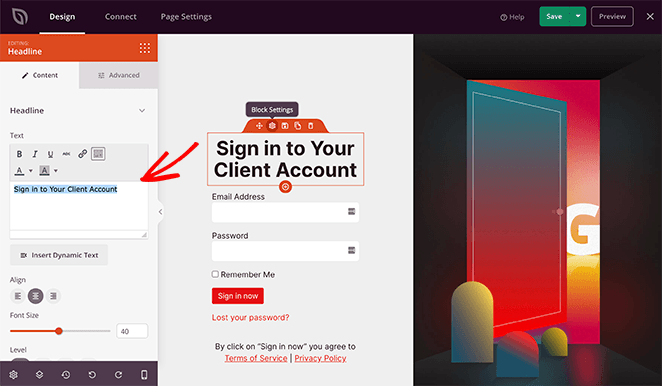
Adding new content to your client login screen is just as easy with SeedProd’s landing page blocks. All you need to do is choose a block from the left side of the screen and drag and drop it into place on the right.
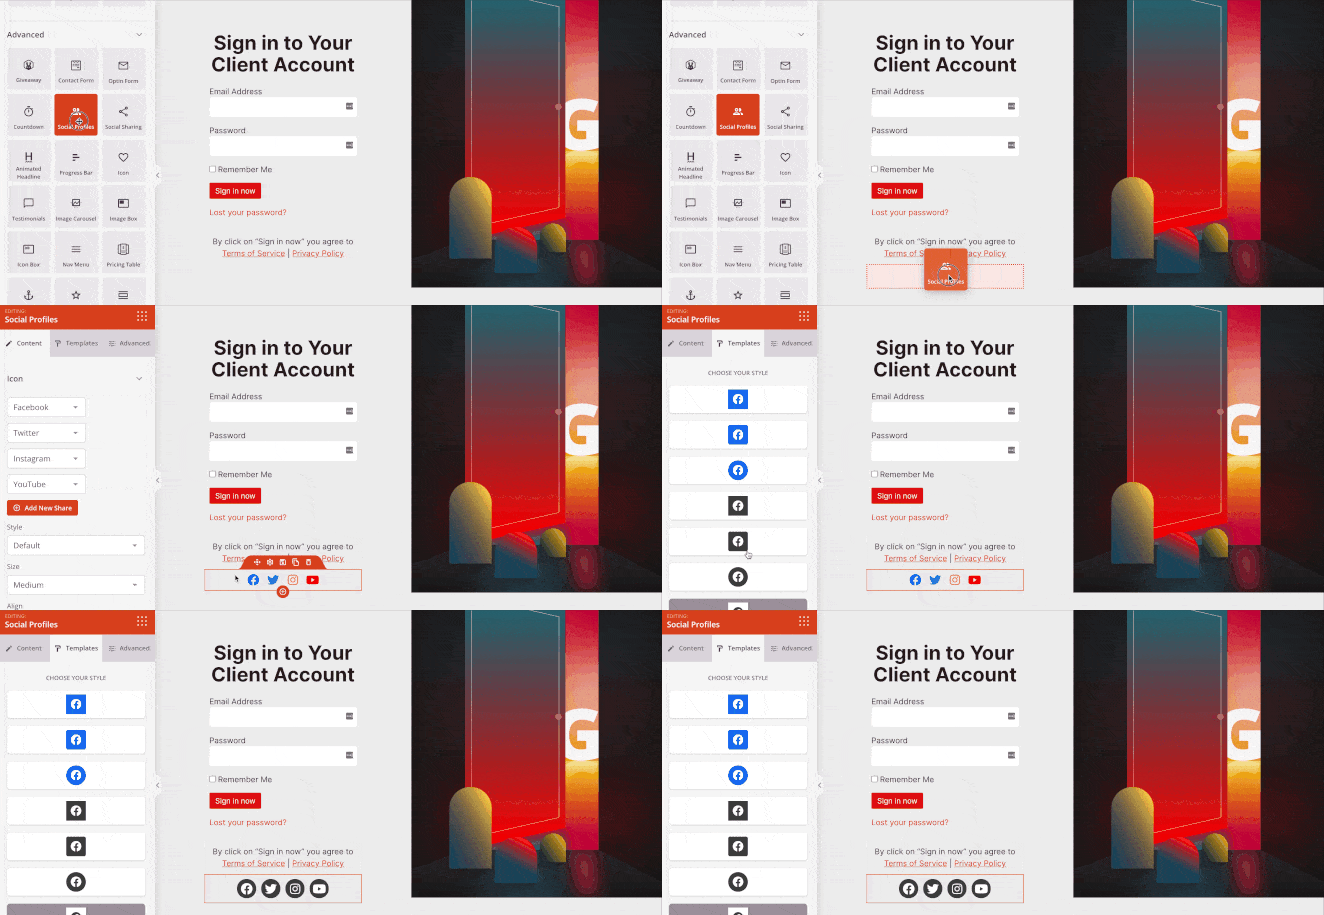
There are various blocks to choose from, including:
- Images
- Buttons
- Social profile buttons
- Countdown timers
- Progress bars
- And many more
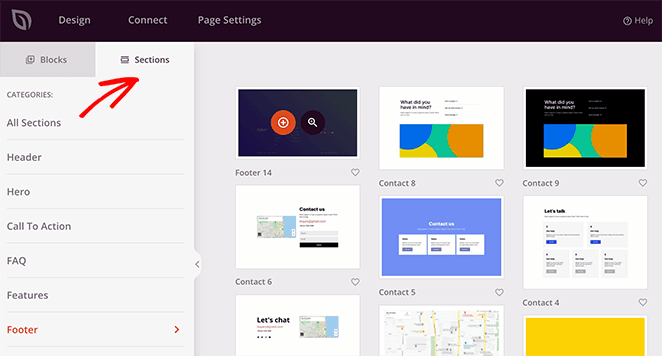
Like blocks, SeedProd also offers a variety of premade sections, such as headers, footers, features, and FAQs. Adding them to your page is just as easy as hovering over a section and clicking the plus (+) icon.
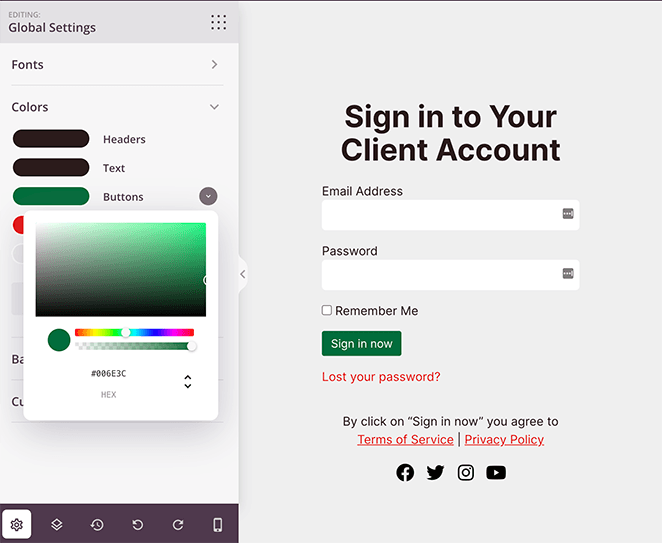
If you want more control over your client login screen’s look and feel, you can head to the Global Settings panel. Just click the cog icon in the bottom left corner of your screen.
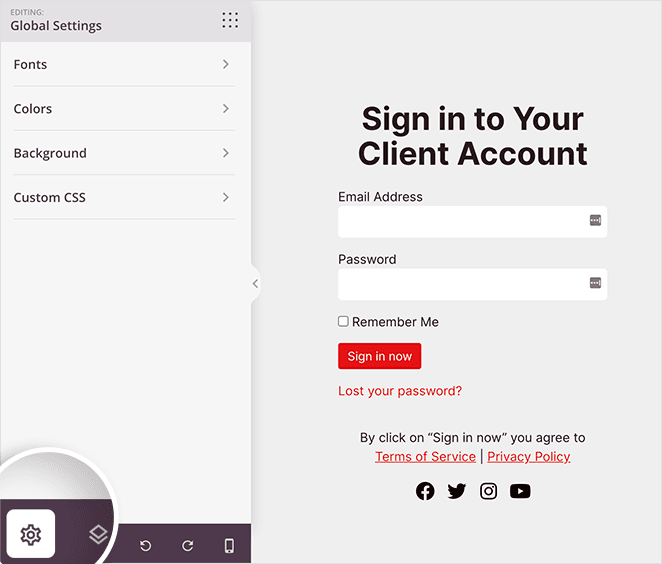
In the Global Settings panel, you can change your page’s background, typography, and color scheme without changing the settings of each element individually.
For example, you can change your global color scheme by clicking the Colors heading. From there, you can choose custom colors or click the Color Palette button to choose from 20+ pre-made color palettes.
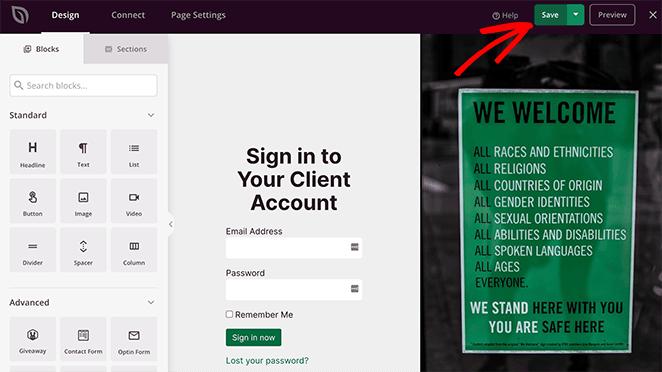
When you’re happy with how your client login page looks, click the Save button in the top-right corner of your screen.
Step 4. Configure Your Page Settings
If you plan to collect email addresses on your client login screen, you can connect your optin form to your email marketing service by clicking the Connect tab at the top of your screen.
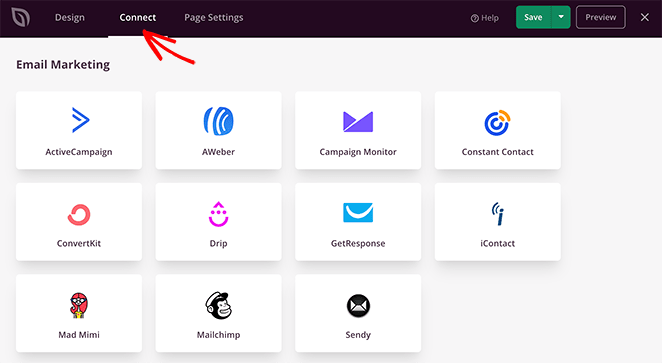
From there, choose your email marketing provider from the list, and follow the instructions to connect and authorize your account. Now, whenever a client subscribes via your optin form, they’re added to your email list automatically.
Additionally, you can head to the Page Settings tab to configure several other settings.
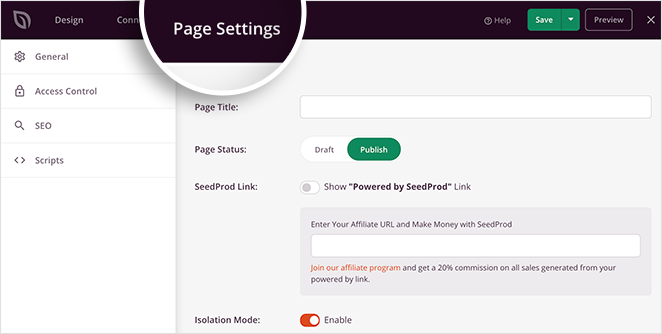
Here are some of the settings you can edit on this screen:
- General – Change your login page name and URL, display a SeedProd affiliate link, and more.
- SEO – If you’re using a WordPress SEO plugin, you can set your page SEO title, meta description, etc.
- Analytics – Track the performance of your login page using an analytics plugin like MonsterInsights.
- Scripts – Paste tracking codes and retargeting scripts like cookies or Facebook tracking pixels.
Remember: click the Save button periodically to save your changes.
Step 5. Publish Your Client Login Page
Once you’re happy with your client login screen, you’re ready to publish it and make it live on your website. To do that, click the dropdown arrow next to the Save button and click Publish.
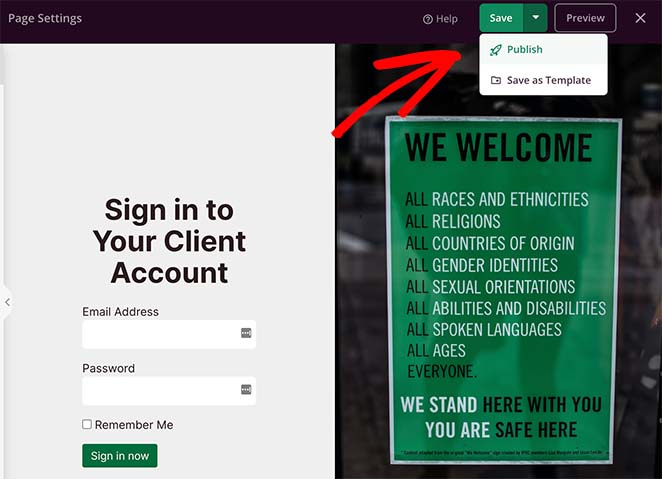
After that, you’ll see a message telling you your page is now live.
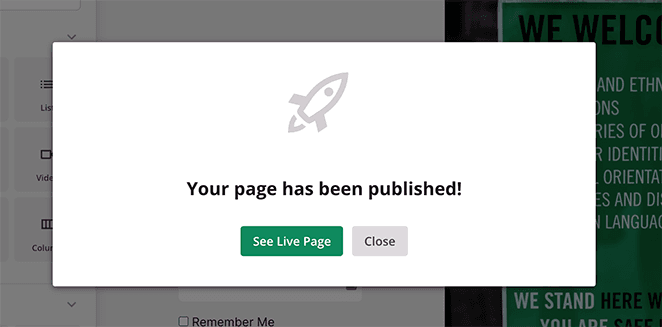
Click the See Live Page button to preview your new client login page.
Here’s the page I created on our test website:
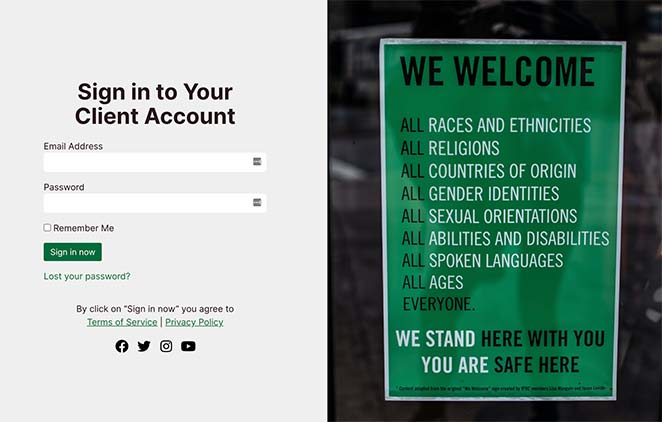
Now, all that’s left is to enable the login page mode in your WordPress admin area, and it’s super easy to do.
Just exit the SeedProd builder, and go back to the main SeedProd dashboard. Then under the Login Page mode, click the toggle from Inactive to Active.
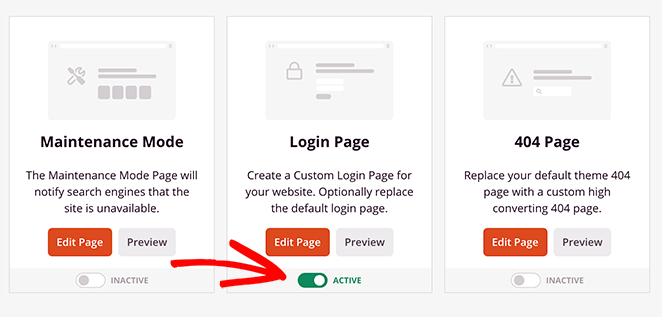
That’s It! Your client login page now has a custom design.
Method 2: Using WPForms to Create a Client Login Page
Now let’s look at method 2, creating a client login page with WPForms.
Key Takeaway: WPForms lets you add a custom login form anywhere on your site, making it easy to control access to private content.
Step 1: Install WPForms
First, download the WPForms plugin and install and activate it on your WordPress website. From there, enter your WPForms license key by heading to WPForms » Settings.
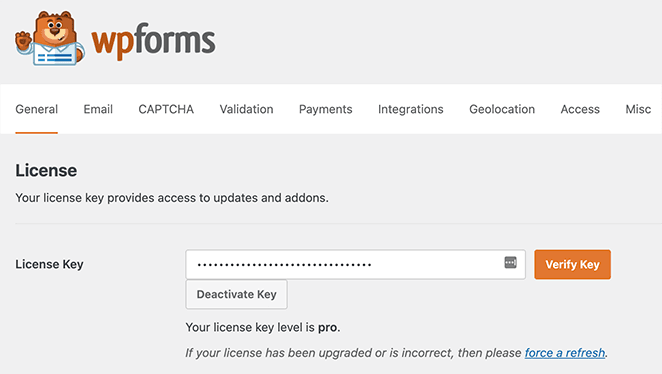
You can find your license key on the WPForms website in your account area.
To create a client login form with WPForms, you’ll need the User Registration addon.
You can find the addon by going to WPForms » Addons. Then, click Install Addon next to User Registration Addon and click Activate.
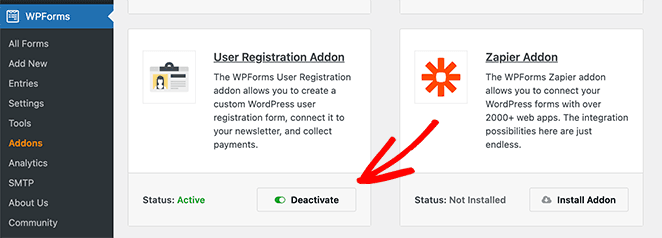
After activating the addon, you’re ready to start creating your custom client login form.
Step 2: Create a Custom Client Login Form
WPForms powerful drag-and-drop form builder makes it easy to create any form without writing code in just a few minutes.
To create your client login form, go to WPForms » Add New. From there, click the Addon Templates filter and select the User Login Form template.
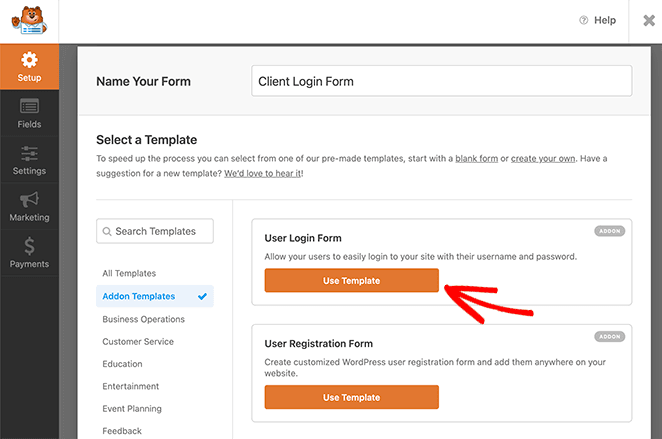
You’ll see the beginner-friendly form builder on the following screen, where you can add, remove, and customize your form fields. The default form fields are simply the username and password fields.
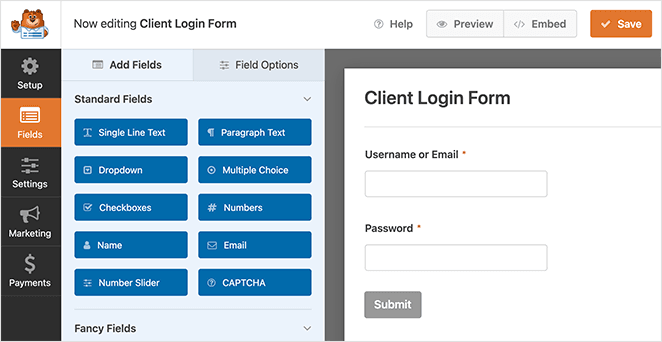
Customizing your form fields is easy. Just click any field on the form builder, and make your changes in the fields panel on the left-hand side.
After customizing your form, click the Settings tab to configure your form settings.
Step 3: Configure Your Form Settings
WPForms offers several form settings. For example, you can customize your form’s name, description, submit button, and more in the General settings.
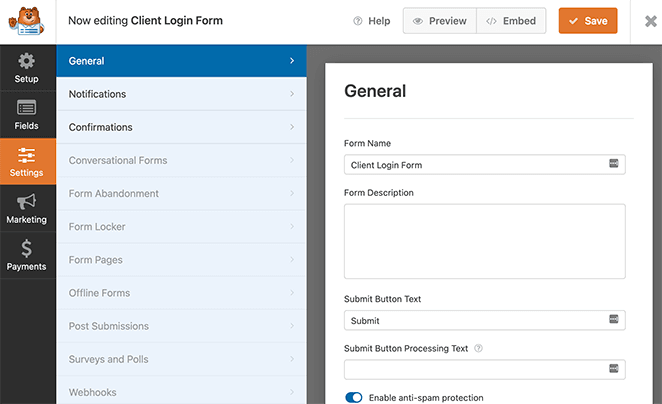
You won’t need to worry about the Notifications tab for this type of form because notifications are turned off by default. That means you won’t get an email whenever a client logs in to your website.
Typically when clients log into your site through your login form, they’ll land on your homepage. Click the Confirmation tab if you’d like to change that to a custom welcome screen or a thank you page.
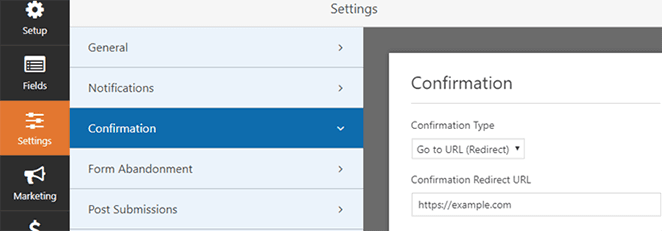
Then, choose the ‘Go to URL’ confirmation type from the drop-down menu and enter your preferred page in the Confirmation redirect URL field.
Remember to click Save to store your settings.
Step 4: Publish Your Client Login Form
When you’re happy with how your client login form looks, you can publish it on your WordPress website. WPForms lets you publish your form on a post, page, or even as a WordPress sidebar widget.
First, let’s look at how to publish your form on a post or page.
Go ahead and create a new post or page in WordPress, then click the plus (+) icon in the block editor. From there, you can search for WPForms and click the WPForms block to add it to your page.
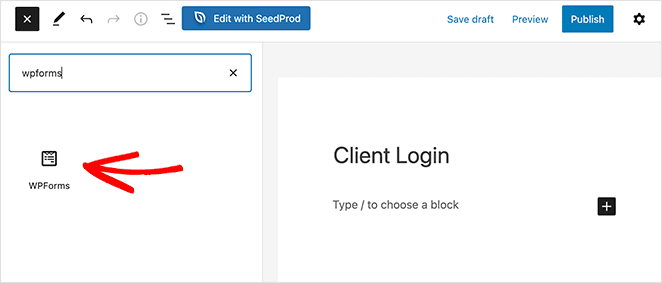
Next, click the dropdown menu inside the WPForms block and choose your client login form. WPForms will add the form to your page automatically.
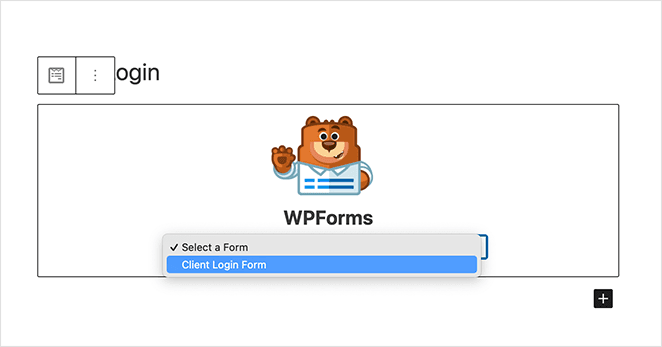
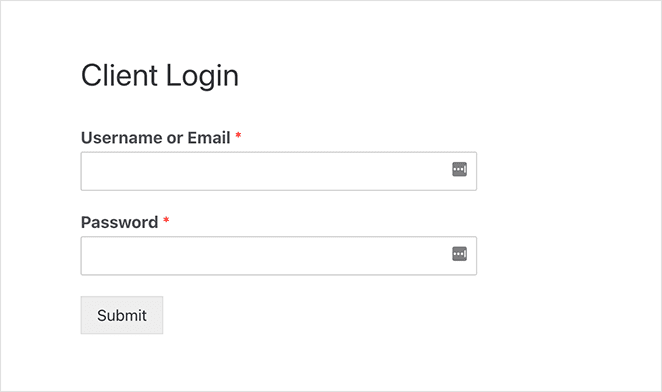
Now you can click Publish and make the page live on your website.
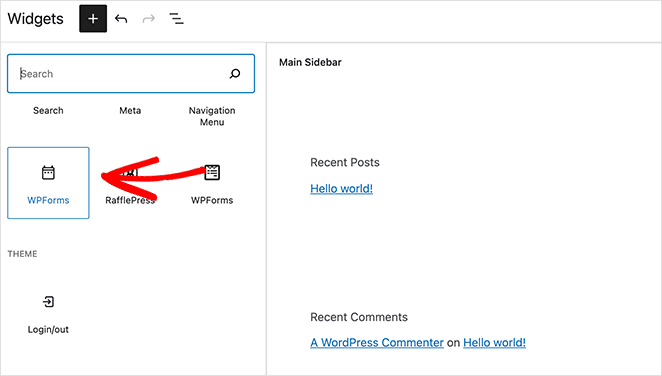
You can also add your login form to the WordPress sidebar. To do that, go to Appearance » Widgets and add the WPForms widget to your sidebar.
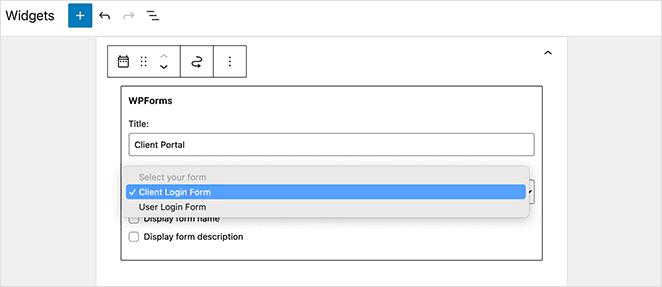
Now, select your client login form in the widget’s settings and click on the Update button to save your changes.
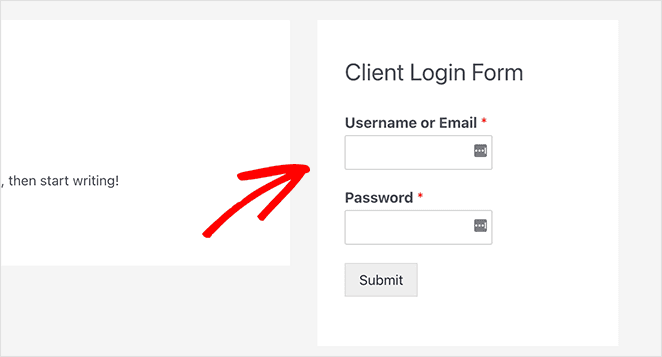
Great work! Your client login form is now live in your WordPress sidebar.
Popular Use Cases for Client Login Pages
Not sure how to use a client login page? Here are some common ways businesses use them on WordPress websites:
- 📁 Share documents like invoices, contracts, or reports securely
- 🎓 Give students or coaching clients access to training materials
- 📸 Let photography clients view proofs and download images
- 🛒 Create a private area for wholesale customer pricing and orders
- 💼 Set up internal tools or dashboards for clients and team members
Frequently Asked Questions
That’s it!
I hope this article helped you learn how to create a WordPress customer login page for your site. While you’re here, you might also enjoy the following guides:
- How to Create a Gated Content Landing Page in WordPress
- How to Create a Service Page Design in WordPress
- How to Make a 404 Page in WordPress That Generates Leads
- How to Password Protect a WordPress Site: The Ultimate Guide
Thanks for reading! We’d love to hear your thoughts, so please feel free to leave a comment with any questions and feedback.
You can also follow us on YouTube, X (formerly Twitter), and Facebook for more helpful content to grow your business.


