


TL;DR: How to Create a Custom 404 Page in WordPress
A 404 page appears when a visitor lands on a missing or broken URL. A custom 404 error template keeps them on your site instead of sending them away for good.
- What a 404 page is: The page not found page your server shows when a URL doesn’t exist. Without customization, it’s a dead end.
- Why customize it: A branded error page reduces bounce rate, protects your reputation, and can generate leads instead of losing visitors.
- The plugin method: SeedProd is a drag-and-drop website builder for WordPress with 404 page templates you can customize without touching code.
- Key steps: Install SeedProd, choose a 404 error template, customize your design in the visual builder, then enable it from the SeedProd dashboard.
- Lead magnet angle: Add CTAs, product showcases, exit popups, or an email opt-in to turn the broken link page into a conversion opportunity.
- Monitor errors: Use AIOSEO’s broken link checker or the Redirection plugin to find and fix the broken links causing 404s in the first place.
If you’ve ever landed on a 404 page, you know how frustrating it can be. I used to think they were just dead ends, but now I use them to keep people on my site and guide them back to something useful.
In this guide, I’ll show you how to create a custom 404 page in WordPress that’s not just functional, but helpful. You’ll learn how to design one that fits your brand, points people in the right direction, and can even help you collect leads.
Table of Contents
- What Is a 404 Error Page?
- What Are the Benefits of a Custom 404 Page in WordPress?
- How to Make a 404 Page in WordPress
- Ways to Turn Your WordPress 404 Page into a Lead Magnet
- Frequently Asked Questions About Custom 404 Pages
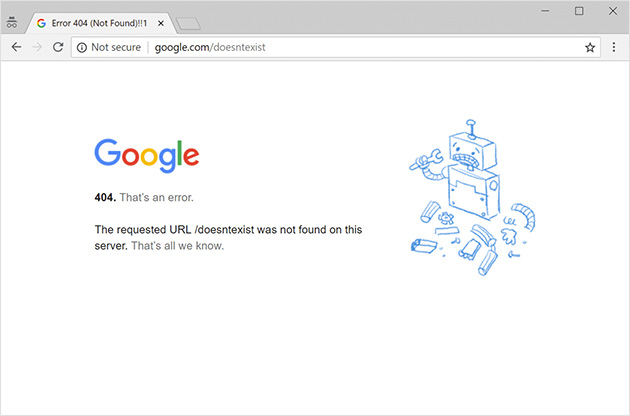
What Is a 404 Error Page?
A 404 error page is the missing page your server returns when a visitor requests a URL that doesn’t exist. The HTTP status code 404 is the web’s way of saying “I looked, and this page isn’t here.”
Your site can trigger this custom error page when a user’s connection is broken, a domain no longer exists, someone types the wrong URL, or you change a permalink without setting up a redirect.
What Are the Benefits of a Custom 404 Page in WordPress?
A broken link page is a moment when you can either lose a visitor permanently or redirect them somewhere useful. Here’s what’s at stake when you leave the default error page in place:
- Crawl budget and SEO: A high 404 rate can hurt your crawl budget and user experience, which affects rankings over time.
- Slower Growth: You might lose a potential customer who landed on your site to make a purchase. Loss of potential clients means lower conversions, which in turn means slow growth.
- Poor Brand Image: By offering a bad user experience to visitors, you’re affecting your brand image. When that happens, people will stop trusting your brand and avoid buying from you.
Typically, if people have a good experience with your website, they’ll want to return. But a default 404 error page doesn’t offer much.
You can avoid losing leads and potential customers by designing a custom 404 error template that helps visitors find what they need. It’s an effective way to retain visitors and maintain your brand reputation.
How to Make a 404 Page in WordPress
There are a few ways to create a custom 404 page in WordPress. You can edit the 404.php file directly in your theme directory, but that requires comfort with PHP and theme files. For most site owners, a plugin is faster and doesn’t risk breaking your theme.
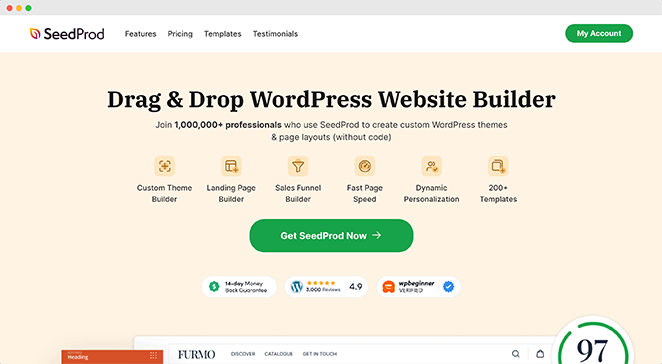
The plugin I’ll use for this guide is SeedProd, the best drag-and-drop website builder for WordPress. SeedProd is a drag-and-drop website builder for WordPress with over 1 million active installs. You get a visual editor where every change shows up live, and the 404 page templates are ready to customize without touching a line of code.
With SeedProd, you can design a custom 404 page with a message, an image, and a CTA to encourage visitors to stay on your site. Follow the steps below to build yours without code or CSS.
Step 1. Install and Activate SeedProd
First, head over to the SeedProd website and download the plugin. Even though there is a free version of SeedProd, you’ll need the premium plugin because it lets you replace your theme’s built-in 404 error template.
If you need help with this, see our documentation on installing and activating SeedProd. It covers installing the plugin and activating your license key.
Step 2. Choose a 404 Page Template
Once you’ve activated the plugin, navigate to SeedProd » Landing Pages from your WordPress dashboard. Then, in the ‘404 Page’ section, click the ‘Set up a 404 Page’ button.

On the next screen, you can choose a pre-made 404 page template. SeedProd will automatically filter the templates to show all the 404 page designs available.
You can click the magnifying glass to preview a design or click the checkmark icon to choose a specific template.
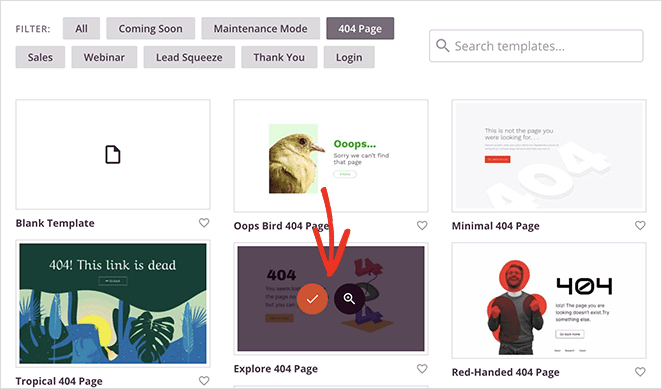
We’re using the ‘Fist Bump’ 404 page template, but you can choose any design or create templates from scratch.
Step 3. Customize Your WordPress 404 Page
After choosing your template, you’ll see the drag-and-drop page builder where you can customize your 404 page. On the left side, you’ll see blocks and sections you can add to your design. On the right is a live preview of your page.
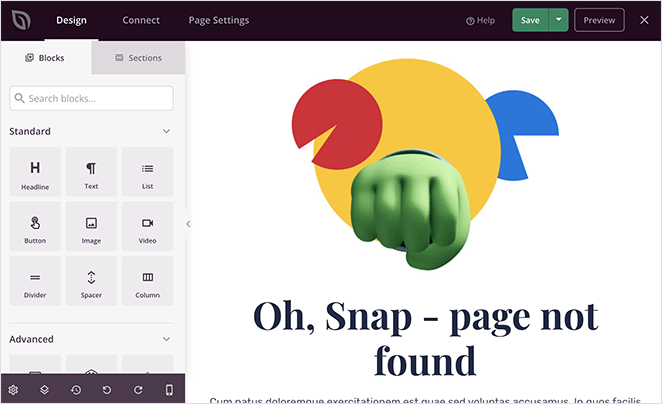
Most of SeedProd’s 404 templates already have several WordPress blocks forming the design’s core. To customize them, click to highlight a block in your layout and make changes using the settings in the left-hand panel.
To add new blocks to your design, find the block in the left-hand menu and drag it onto your page.
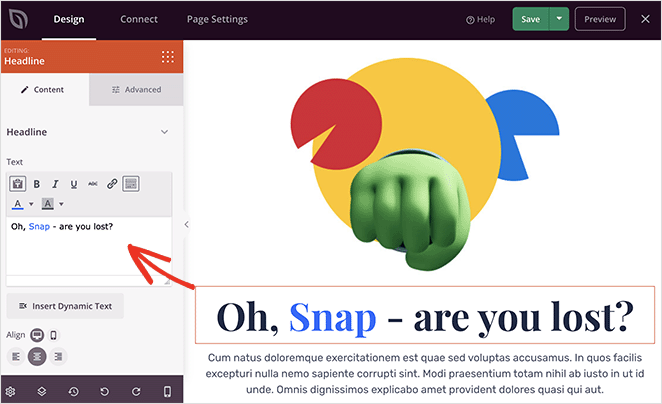
When visitors land on your 404 page, they may need help understanding how they got there and what to do next. It’s a good idea to add text explaining that what they’re looking for can’t be found and suggesting several actions to take next.
Since our template already has a Headline and Text block, click them to update the content with your custom message.
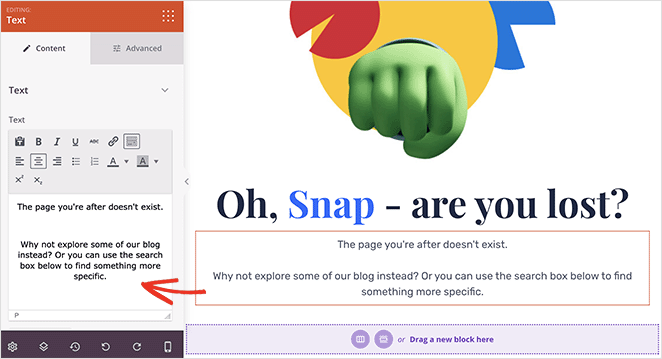
In the following image, we added a message that suggests visiting the blog or using the search box to find something more specific.
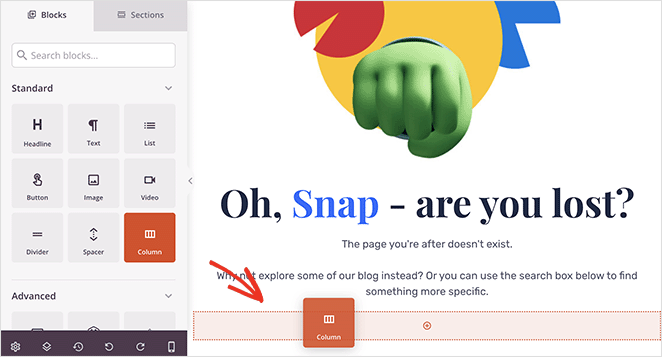
Now let’s look at how to add a button to visit the blog and a search bar. First, find the Column block in the left-hand panel and drag it onto your layout.
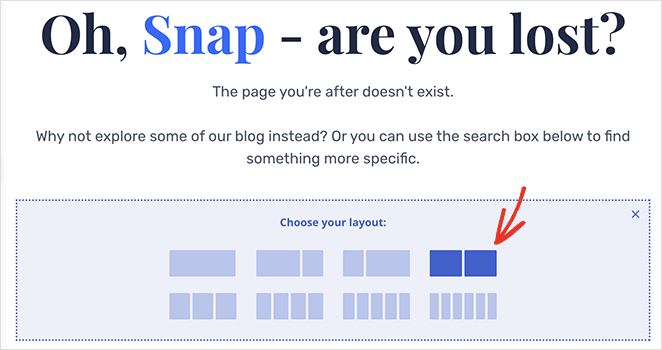
Choose the 2-column layout option. This is where you’ll place new elements side-by-side on the page.
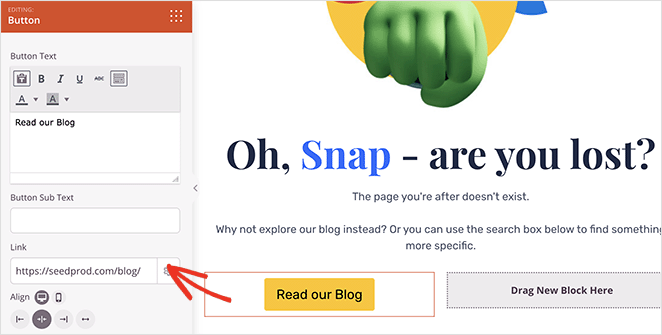
Drag the Button block to your first column. In the block settings, you can change the button text and add the URL for your blog page.
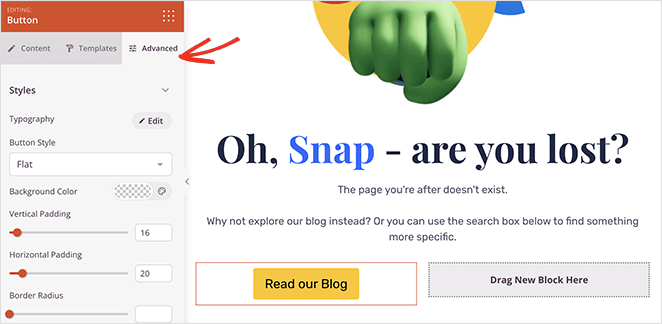
Click the Advanced tab to change further settings, including the button color, style, spacing, and more.
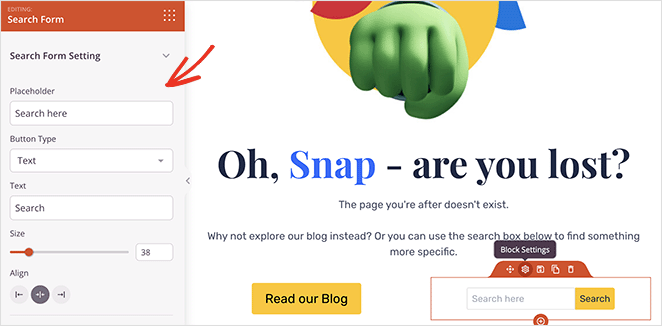
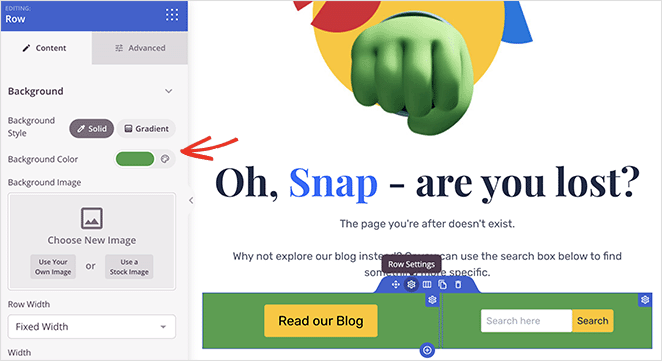
To add a search box in the second column, look for the Search Form block and follow the same process. You can even change the row background color to make your action items stand out.
Here are some other ways to improve your 404 page content:
- Use MonsterInsights and SeedProd’s Shortcode block to display popular posts on your 404 page automatically.
- Display popular WooCommerce products to boost eCommerce sales. If you’re running a WooCommerce store, SeedProd’s 404 template lets you add product recommendations directly to your error page, so a visitor who hits a missing product URL can see related items instead.
- Use the Contact Form block to collect feedback from 404 page visitors.
When you’re happy with how your new page looks, click the Save button in the top-right corner, and in the dropdown, select the ‘Save as Template’ option.
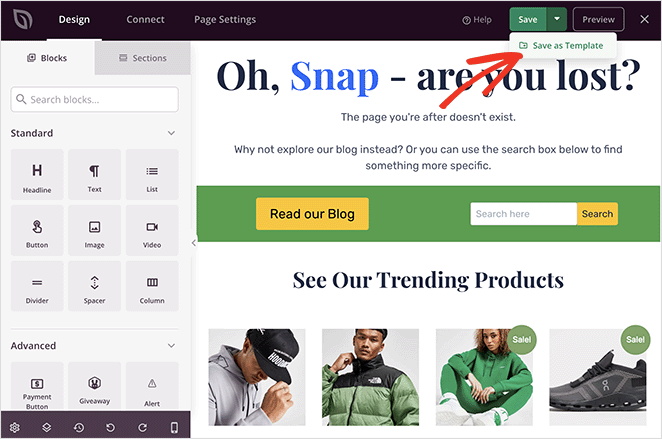
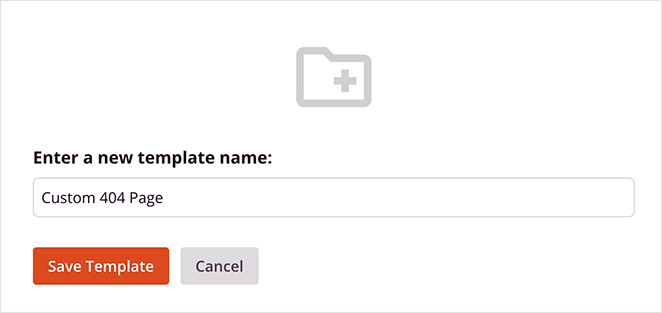
Give your custom 404 page template a name, click the Save Template button, and return to the editor.
Step 4. Enable Your WordPress 404 Page
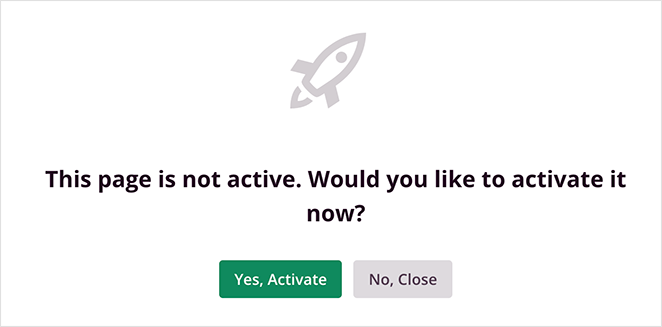
With your custom 404 page design in place, click the X icon in the editor to return to your WordPress admin dashboard. You’ll see a popup asking if you’d like to activate the page right away. Go ahead and click the ‘Yes, Activate’ button.
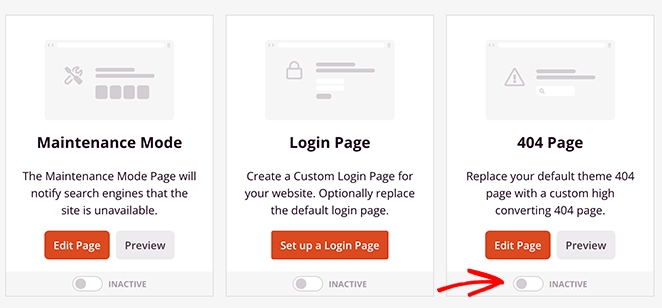
After clicking this button, you’ll head back to the landing page dashboard and see that your 404 Page Mode is active.
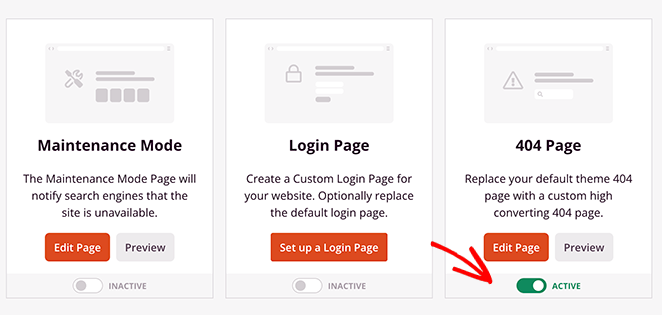
If you ever want to deactivate your custom 404 page, switch the toggle to the inactive position.
One quick note: SeedProd’s custom 404 pages still return the correct 404 HTTP status code. You’re not accidentally sending a 200 OK response, which matters for SEO crawlers.
To test your new page, navigate to yoursite.com/this-page-does-not-exist in your browser. Your custom 404 page should appear instead of the default WordPress error message.
Here’s a final look at our custom WordPress 404 error template:

Ways to Turn Your WordPress 404 Page into a Lead Magnet
Some developers say to keep it simple: slap your branding on a 404 and move on. That works fine if your only goal is to acknowledge the error. But if you’re running a business site, a 404 is real exit risk, and you can do a lot more than just acknowledge it.
The difference between a generic page not found page and an optimized one isn’t just user experience. It’s whether you recover a potential customer or lose them permanently. Here’s how to make yours work.
1. Display Your Product
One of the most effective ways to make your 404 error page generate more leads is to showcase your products. Instead of telling your visitors the page they’re looking for doesn’t exist, use it to show them what you offer.
Add high-quality images of your products and link to them.
Steve Madden uses this technique to convert their 404 error page into a design that actively boosts conversions.
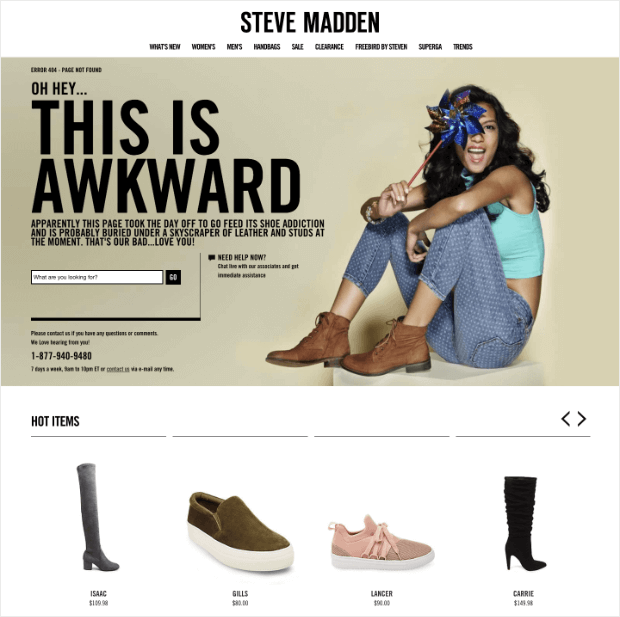
Using this technique, you can encourage visitors to explore your website more, even if they can’t find exactly what they came for.
2. Write Helpful Content for Visitors
Your missing page is a communication opportunity. Write a clear, human error message that tells visitors what happened and what they can do next. Keep it brief and friendly.
Include navigation links with descriptive anchor text pointing to your most useful pages: your homepage, blog, or product category. A search form is even better, as it lets visitors look for exactly what they wanted without leaving your site.
3. Add Information About Your Business
Another effective way to transform your 404 page is to add your business information. Your visitors might land on a 404 error, but you don’t want to lose them with a disappointing message. Adding your business information is an excellent way to rekindle their interest.
Fashion brand Myntra uses this technique effectively:
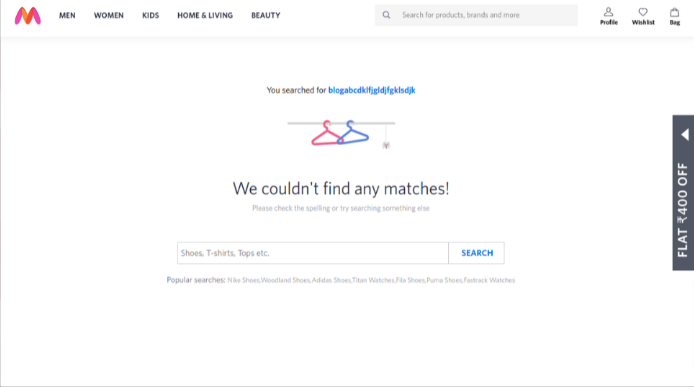
Aside from displaying the error message, it also helps users explore different site sections. As a visitor, you can check out its collection under defined categories in the menu bar, visit your profile, or search for products. It even displays a discount bar, so instead of a dead end, visitors can check out the collection.
4. Add Relevant CTA Buttons
Adding relevant call-to-action (CTA) buttons to your 404 page is a smart way to ask customers to reach out and solve their problems. This can be a customer support button, a contact form, an inquiry button, a call button, or anything that can be helpful.
Your visitors can use these buttons to raise a complaint, ask questions, follow you on social media, or do anything to make the situation less frustrating.
5. Add Exit Intent Popups
Exit intent popups are another effective way to prevent visitors from having a bad experience on your website. Design an exit popup that appears on your visitors’ screen just before they leave.
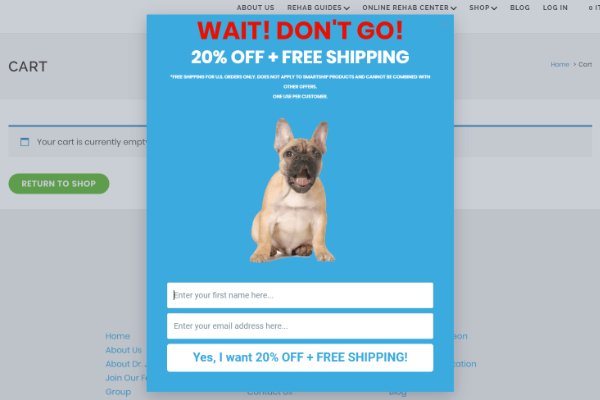
Use it to display discount codes, offer prices, or announce new arrivals. People love discounts and offers, so displaying them on exit popups can re-engage visitors, generate leads, and boost sales.
6. Make It Interesting
Landing on a 404 error page is frustrating enough. It’s even worse if the page is dull. Transform the experience into something more memorable by using humor to make visitors smile.
Another way of making your 404 page enjoyable is to add an on-screen game. It’s a smart way to capture attention and keep users on your site longer.
Frequently Asked Questions About Custom 404 Pages
Can I create a 404 page in WordPress without a plugin?
Yes. You can customize your 404 page by editing the 404.php template file in your theme directory. This requires comfort with PHP and theme file structure, and any updates to your theme may overwrite your changes.
For most site owners, a plugin like SeedProd is the better path. You get a visual editor, pre-made templates, and no risk of breaking your theme.
Does a custom 404 page still return a 404 HTTP status code in WordPress?
Yes. When you use SeedProd to create a custom 404 page, WordPress still serves the correct 404 HTTP status code to browsers and search engine crawlers. Your custom design replaces the visual layout only, not the server response.
This matters for SEO: a page that returns 200 OK instead of 404 can confuse crawlers and lead to soft-404 errors in Google Search Console.
How do I find and track 404 errors on my WordPress site?
Google Search Console shows 404 errors under Coverage » Not Found. You can also use AIOSEO’s built-in broken link checker or install the Redirection plugin (free, 2M+ active installs) to monitor all broken URLs and manage redirects from one place.
A custom 404 page handles errors gracefully, but the real fix for known broken links is a 301 redirect. Use the Redirection plugin to send broken URLs to the correct page and remove them from your 404 count. I check my 404 report in Google Search Console about once a month and redirect anything that still gets traffic.
What should I put on a 404 page?
A good custom 404 page includes a clear, friendly error message, links to your most useful pages (homepage, blog, or product categories), and a search form so visitors can find what they were looking for. Your branding and logo should be visible so they know they’re still on your site.
For business sites, consider adding a lead magnet, CTA button, or featured product. A 404 vs. redirect distinction worth knowing: if the content has permanently moved, a 301 redirect is better than relying on your 404 page. Save the 404 for truly missing pages.
Do 404 errors hurt my SEO?
One or two 404 errors won’t hurt your search rankings. They’re a normal part of running a website. But a high 404 rate can hurt your crawl budget and user experience, which affects rankings over time.
If search engines keep running into missing pages, it can slow down crawling and indexing of your good content. The best approach is a two-part fix: a well-designed custom 404 page as a fallback, and a regular audit to redirect known broken links so they stop showing up as 404s.
Get Started With Your Custom 404 Page
A custom 404 page is one of those things that takes less than an hour to set up and pays off every time someone hits a broken link on your site. You’ve seen how to build one with SeedProd, how to add lead generation elements, and how to monitor the errors causing 404s in the first place.
That “generates leads” angle from the start of this guide is real, and now you have the tools to make it happen. Get Started with SeedProd Today and turn your page not found page into something that actually works for your business.
Before you go, you might also enjoy this guide on creating a WordPress theme from scratch without installing a child theme.
Thanks for reading! We’d love to hear your thoughts, so please feel free to join the conversation on YouTube, X and Facebook for more helpful advice and content to grow your business.


