

TL;DR: How to Add Business Hours to Your WordPress Site Adding business hours takes under 10 minutes with either method below. Here’s the full process at a glance.
- Choose your method: Use SeedProd’s Business Hours block for visual control, or AIOSEO’s Local SEO module if you’re focused on schema and search.
- Install SeedProd (Method 1): Download the Pro plugin, activate it, and enter your license key in SeedProd Settings.
- Add the Business Hours block: Open any page in the SeedProd editor, drag in the Business Hours block, and set your days and times.
- Save as a Saved Block: Store your hours block once and reuse it on your sidebar, footer, or any other page without rebuilding.
- Or use AIOSEO (Method 2): Go to All in One SEO » Local SEO, enable Multiple Locations, set your hours in the Opening Hours tab, and embed the AIOSEO Local Open Hours block on your contact page.
- Sync with Google Business Profile: Update your GBP hours separately to keep your local presence consistent.
If a customer shows up at your closed shop or calls outside your hours, you’ve probably lost that sale. It happens more than most business owners realize, and it’s almost always avoidable.
The fix is simple: add your business hours to your WordPress site. You don’t need a dedicated business hours plugin or any code to do it. SeedProd’s built-in block handles the display, and AIOSEO handles the schema markup.
In this guide, I’ll walk you through both methods step-by-step so your customers always know when you’re open.
Why Add Your Business Hours to WordPress
Adding business hours to WordPress tells visitors exactly when you’re available, builds trust, and can improve your visibility in Google search.
Clear opening and closing times help customers know the best time to visit your store, contact support, or chat about sales. This avoids wasted trips and sets clear expectations.
For example, a WooCommerce store can use business hours to show when phone support is available and when orders placed after hours ship the next day. It’s one of the clearest ways to set customer expectations before they reach out.
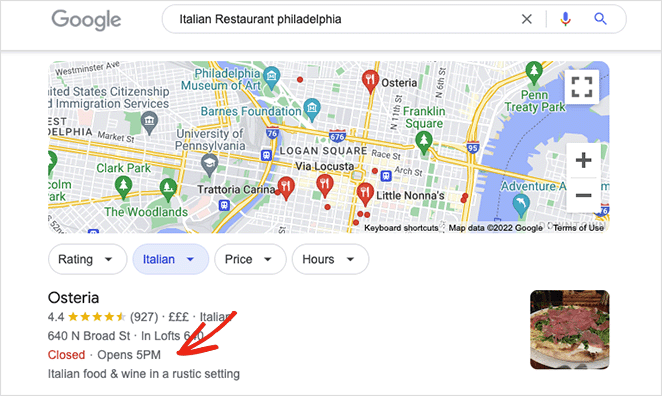
Adding schema markup for your hours also strengthens your local SEO. Accurate hours increase your chance of appearing in Google’s knowledge panel and local search results, which is where customers check before they visit.
One important thing to know: your WordPress site and your Google Business Profile are separate systems. Updating your hours on your website doesn’t automatically update your GBP listing. You’ll need to update both independently to keep your local presence consistent.
Method 1: Add Business Hours to WordPress Using SeedProd
Your first instinct may be to look for a WordPress opening hours plugin. While these plugins can help, they often only do one thing, which is a hassle if you don’t like installing many plugins on your site. Many plugins also use shortcodes which, if you uninstall the plugin, leave junk code behind that you’ll have to clean up.
A better solution is a plugin that handles multiple tasks at once. That’s why for the first method, I’ll be using SeedProd to display business hours.

SeedProd is a drag-and-drop website builder that lets you add and style business hours directly in a visual editor, no code needed. You can start with a pre-made website kit or landing page template, customize your design in the front-end editor, and see changes in real-time.
With SeedProd’s Business Hours block, you can set your hours, customize the colors, and publish. It takes about 5 minutes.
SeedProd Pro is required for the Theme Builder features used in this tutorial. Here’s what else you can do with it beyond business hours:
- Build a coming soon page
- Create a custom WordPress theme
- Build high-converting landing pages
Follow the steps below to add business hours to your WordPress site with SeedProd:
Step 1. Install and Activate SeedProd
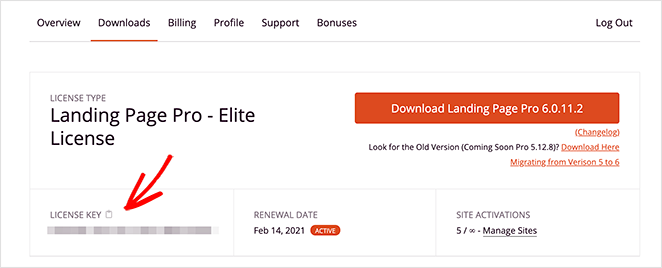
First, click this link to get started with SeedProd and download the plugin to your computer. You should also visit your SeedProd account and click the downloads tab to copy your plugin license key.
Next, upload the plugin .zip file to your WordPress dashboard and activate it. If you need help getting started, you can follow these instructions on installing a WordPress plugin.
After installing and activating the plugin, navigate to the SeedProd » Settings page and paste the license key you copied earlier.
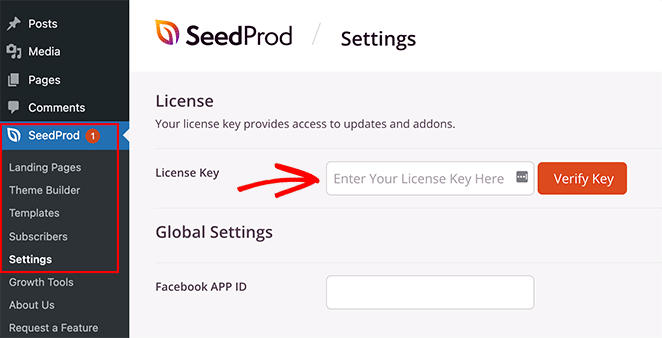
Now click the Verify Key button and move on to step 2.
Step 2. Create a WordPress Theme or Landing Page
SeedProd gives you two ways to add business hours: the Theme Builder (replaces your active theme with fully customizable templates) or the Landing Page Builder (creates a standalone page that works with your existing theme). Both give you access to the Business Hours block.
Pick whichever fits your situation, then follow the relevant guide: how to create a custom WordPress theme or create a landing page in WordPress. Once you’ve chosen a website kit or landing page template and are ready to customize, move on to step 3. For this guide, we’ll use the Theme Builder.
Step 3. Add the Business Hours WordPress Block
Now that the foundation of your WordPress design is in place, you’re ready to customize it with your business hours. With SeedProd’s theme builder, you can add business hours to WordPress pages, header, footer, and even your WordPress sidebar.
Let’s start with a page to show you how easy it is.
Adding Business Hours to WordPress Page
First, edit any page with SeedProd to see the visual page builder interface. We’ll edit the contact page for this guide.
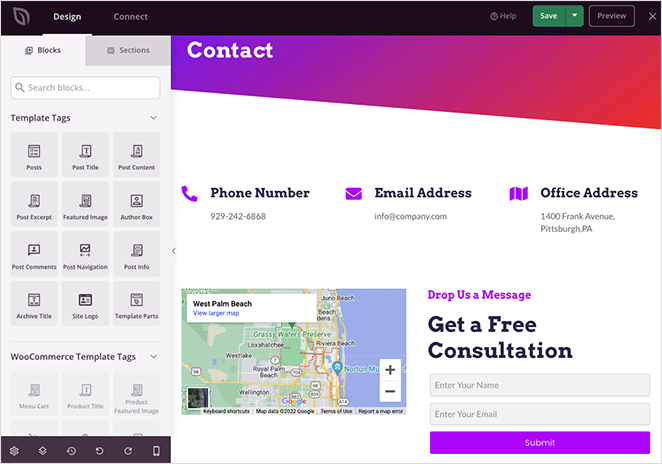
You’ll see a 2-column interface with customizable blocks on the left and a live preview of your page on the right. Clicking anywhere on the preview lets you edit any element.
For example, clicking the Icon Box opens the block settings panel, where you can edit the icon, title, description, and more.
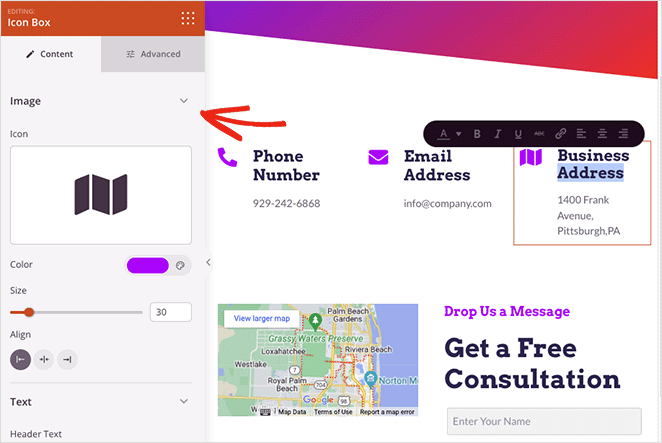
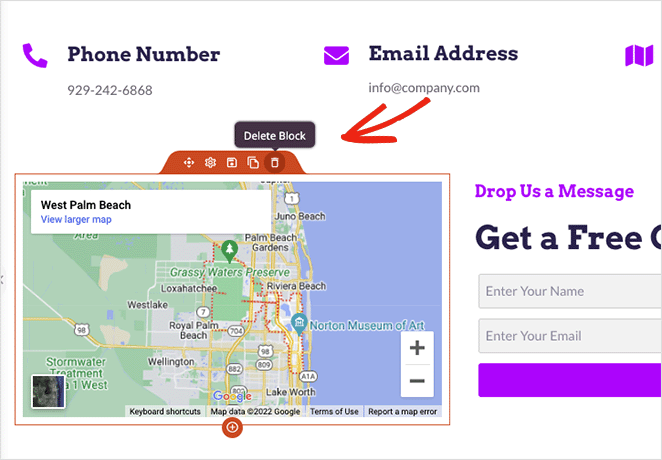
You can also remove elements you don’t need by hovering over them and clicking the trash can icon. A tooltip will pop up to remind you of what each option means.
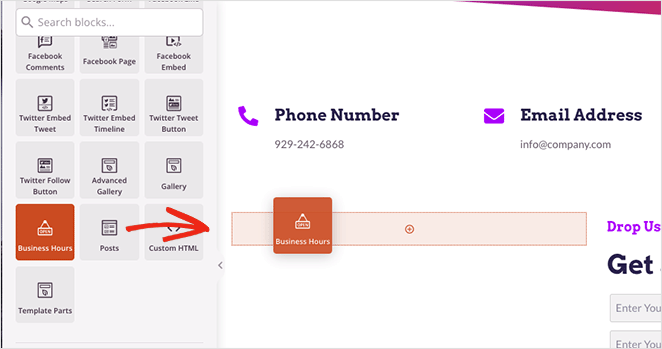
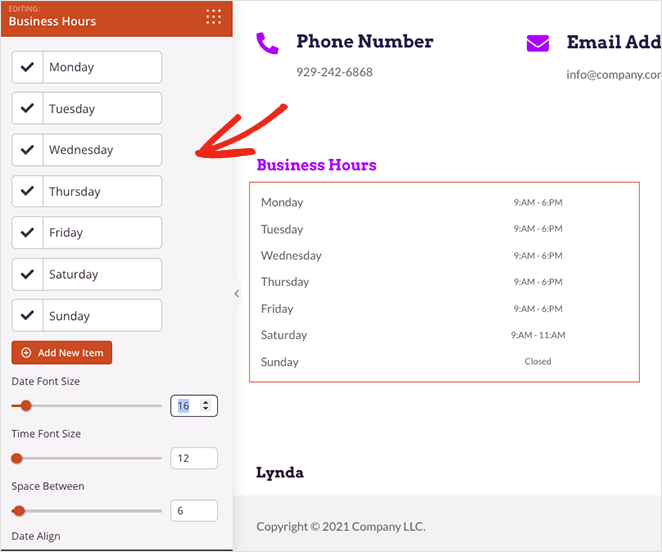
To add your business hours, look for the Business Hours block in the left-hand panel and drag it onto your page.
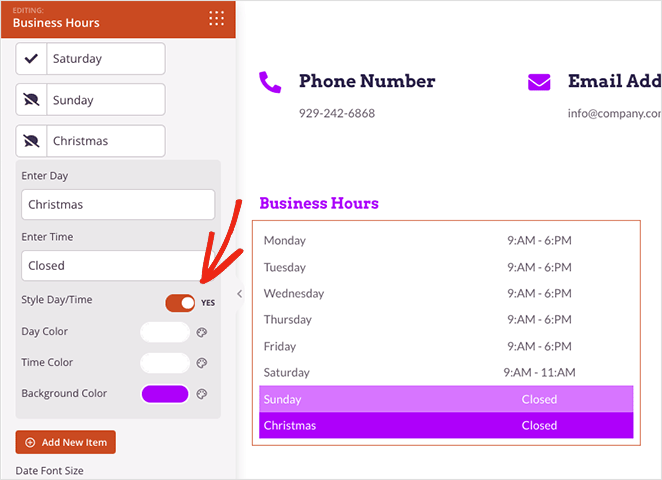
From there, you can customize the block to suit the weekdays and times your business is open. You can also adjust the font size, spacing, and alignment and add new times for special dates, such as holiday opening times.
Inside each date and time is a toggle you can enable that lets you customize each entry individually. This lets you choose custom colors for the font text and add background colors to make your working hours stand out.
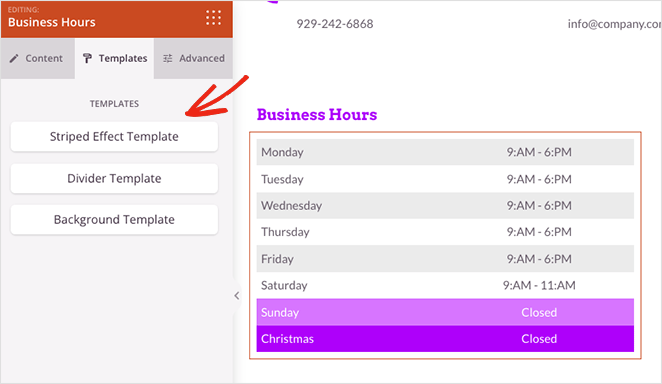
If you’re struggling to find a good design, click the Templates tab in the block settings. Doing so gives you several pre-made templates you can apply with 1 click.
The Advanced tab offers further customization options for typography, separators, spacing, visibility, and more.
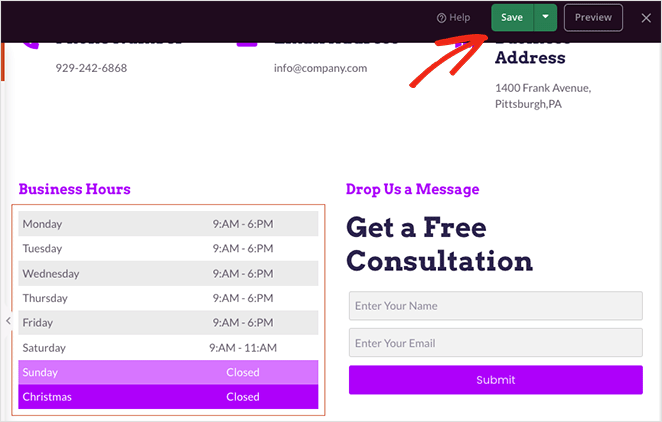
Click the Save button in the top right corner of your screen when you’re happy with your business hours design.
Here’s one thing about SeedProd that saves time when you have multiple pages. You only have to build your business hours once.
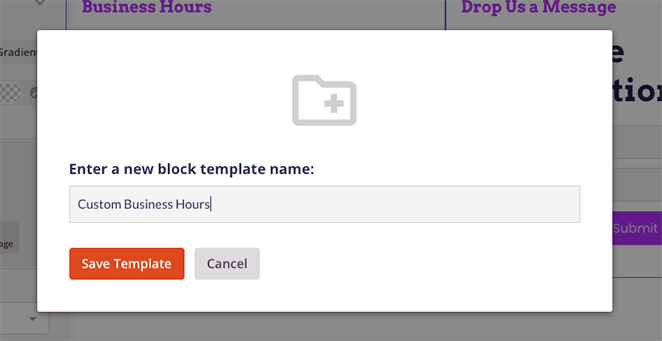
Hover over your business hours and click the Save icon.

A popup will appear where you can give your block a name. Name it something easy to recognize, such as “Custom Business Hours,” then click the Save Template button.
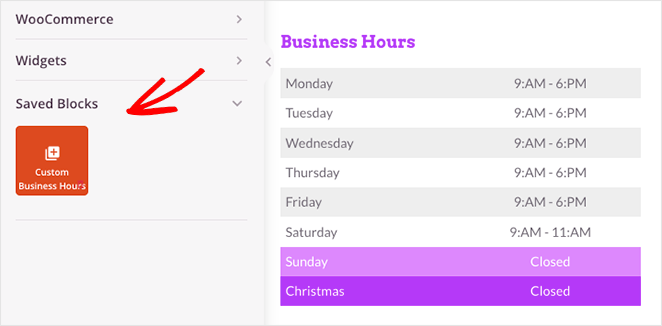
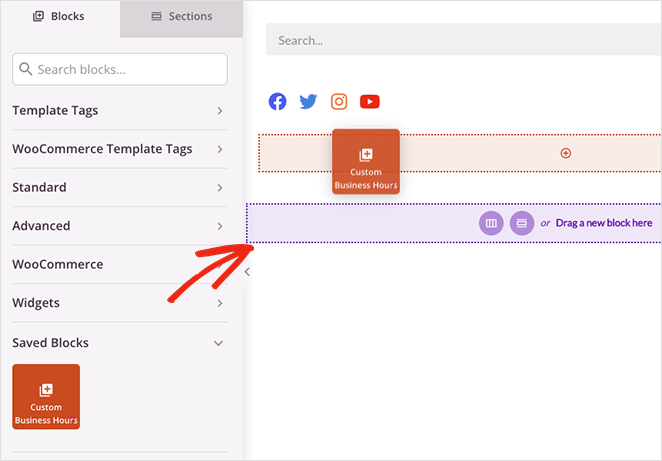
Next, scroll to the bottom of your blocks panel and open the Saved Blocks tab. You’ll see your saved custom business hours widget, ready to use on other pages of your WordPress site.
We’ll show you how to use that saved block next.
Adding Business Hours to WordPress Sidebar
To add your opening hours to a custom sidebar with SeedProd, first ensure you’ve created a sidebar template, then open your design in the drag-and-drop page builder.
Note: you can check out this step-by-step guide to create a custom sidebar template.
Once you’re inside the page builder, open your Saved Blocks tab and drag your custom Business Hours block onto your sidebar.
Instead of re-building your business hours from scratch, the block carries all the customization you set in the previous step. This saves a lot of time during the design process.
Remember to save your changes before moving on to step 4.
Step 4. Publish Your Business Hours on Your Website
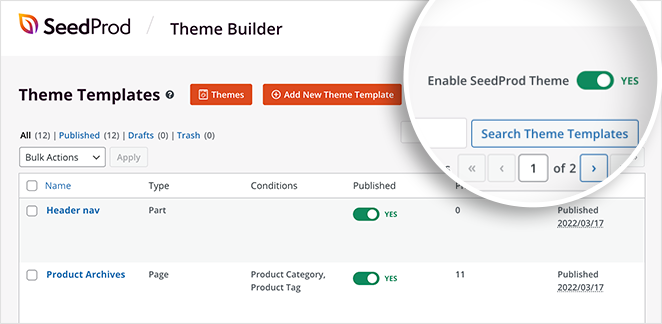
When you’re ready to make your opening times live, navigate to the backend of your site and click through to the SeedProd Theme Builder dashboard.
Even if you’ve published your pages in the page builder, you’ll need to turn your SeedProd theme on to make it live. Find the Enable SeedProd Theme toggle and turn it to the “Yes” position.
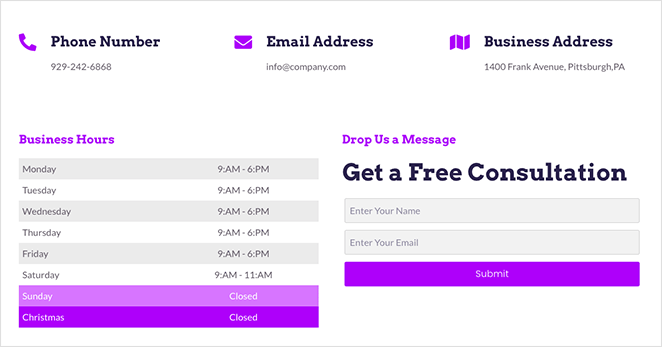
Now you can preview your website to see your business hours. Here are some examples from the pages in this tutorial. If you can’t see your changes, clear your browser’s cache and refresh the page.
Contact Page:
Blog Sidebar:

That’s it!
Method 2: Add Opening Hours to WordPress Using All in One SEO
This method works well if you don’t want to use a visual builder like SeedProd or a dedicated business hours indicator plugin. It’s also a strong choice if your main goal is local SEO and structured data.

We’ll be using All in One SEO, a leading WordPress SEO plugin. Its Local SEO feature lets you add business hours to your website and generate the schema markup search engines use to display your hours in local results.
Note: you’ll need at least the Plus pricing plan to access the Local SEO module.
Step 1. Install and Activate All in One SEO (AIOSEO)
First, install and activate the All in One SEO for WordPress plugin.
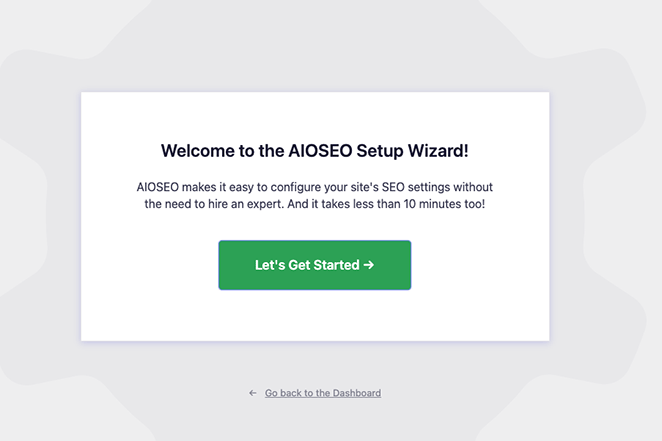
After activating the plugin, it will run a setup wizard that helps you configure your site for SEO. If you need more help, follow the steps in this guide to set up All in One SEO for WordPress.
Step 2. Add Your Business Hours
After configuring your website details, go to the All in One SEO » Local SEO page to enter your business information.
First, turn the Multiple Locations toggle to the “Yes” position. Even if you only have one location to add, you can still enable this feature.
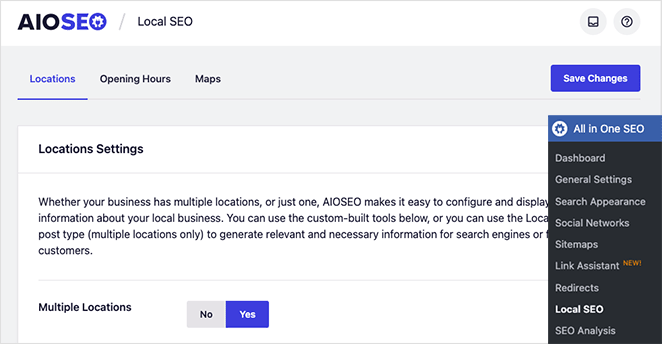
Next, click the Opening Hours tab at the top of your screen.
This is where you can add your business hours and time formats, which AIOSEO will use as your default locations. If needed, you can set business hours for each location. Make sure the time zone matches your business location, not your server location, to avoid showing incorrect hours.
You’ll need to scroll down the page to find individual times for each day of the week and enable the 24/7 and 24-hour formats. Beside each weekday, you can also click the checkbox to set your time to 24 hours or closed.
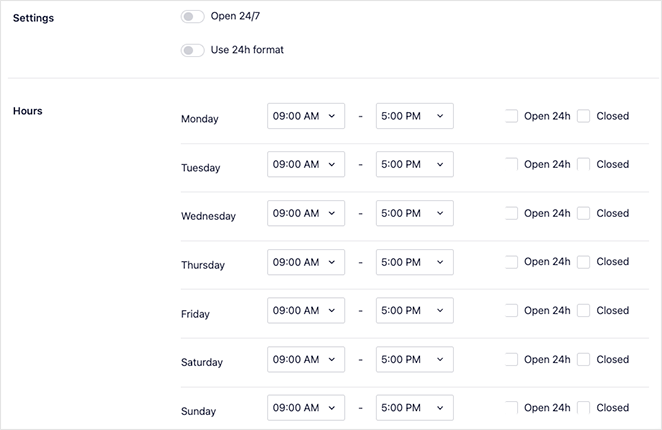
Remember to click the Save Changes button to store your settings.
After setting up local SEO, you can move on to adding your business information and location.
Step 3. Create Your Business Locations
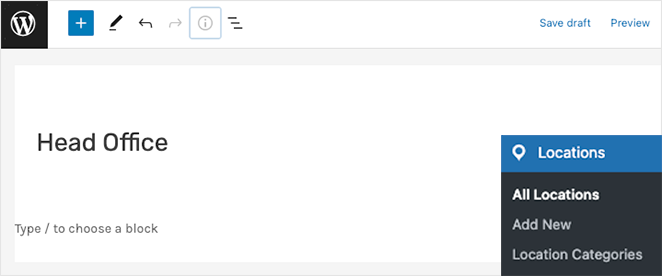
To do that, navigate to Locations » Add New and give your location a title.
After that, scroll down to the AIOSEO Local Business section and add your business information under the Business Info tab.
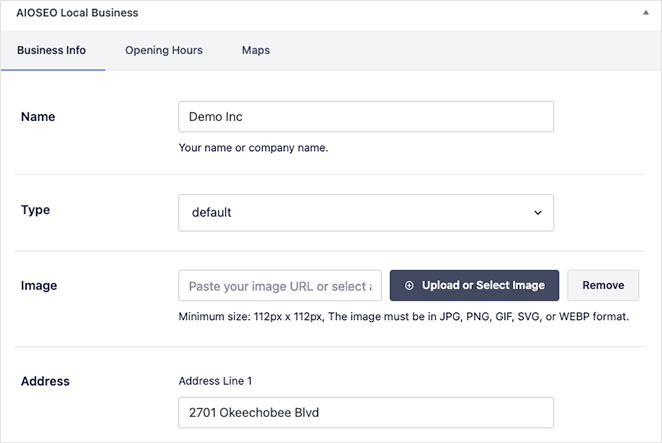
This section lets you enter your business name, type, image, address, contact details, phone number, payment information, and the geographic area you serve.
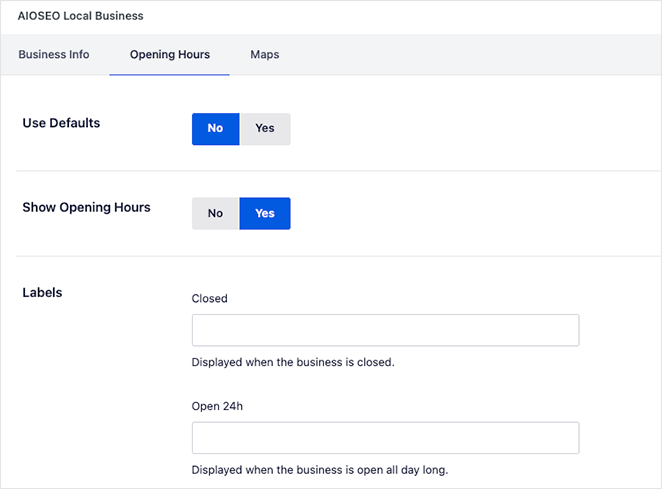
With your details in place, switch to the Opening Hours tab. In this panel, you can add new business hours or use the default opening times you set earlier.
When you’re finished, click the Publish button to store your location. You can repeat this process for each business location you need working hours for.
Step 4. Display Your Business Hours
Like SeedProd, All in One SEO lets you show your business hours anywhere on your website. Its premade WordPress blocks let you add business hours to any post or page with a few clicks.
Edit a post or page and look for the AIOSEO blocks. There are blocks for:
- AIOSEO Local Open Hours
- AIOSEO Local Business Info
- AIOSEO Local Locations
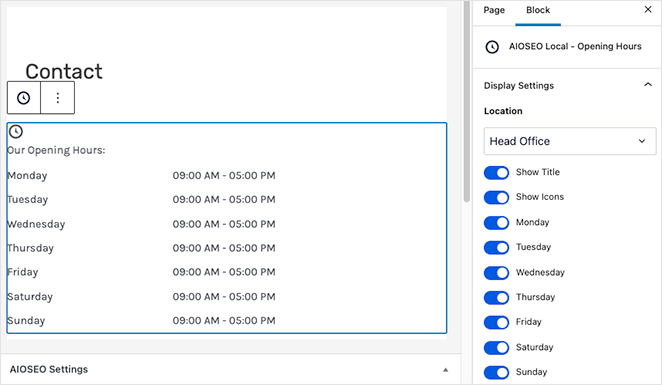
You’ll need the ‘AIOSEO Local Open Hours’ block to show your business hours.
After embedding the block, you can choose the location you want to display from the block settings panel.
Remember to click the Publish or Update button to make your page live.
Afterward, you can visit your website and see your business hours in action.
Once your hours are live on your site, there are a few quick follow-up tasks worth doing:
- Update your Google Business Profile hours to match your website
- Add your hours to your contact page if you haven’t already
- Consider adding a business hours widget to your footer so hours are visible on every page
FAQs on Adding Business Hours to WordPress
How do I set different hours for different days in WordPress?
With SeedProd’s Business Hours block, you can set unique opening and closing times for each day of the week individually. Each day has its own row in the block settings, and you can toggle any day on or off.
In AIOSEO Local SEO, the Opening Hours tab also lets you configure per-day times under the default locations settings. Both methods give you full day-by-day control.
Can I add holiday or temporary closure hours to my WordPress site?
Yes. In SeedProd’s Business Hours block, you can add a custom date entry with specific holiday hours or mark a day as closed. The block settings include an option to add new time entries for special dates.
For AIOSEO, you can update your default hours temporarily or use the per-location Opening Hours tab to set different hours for a specific location during a holiday period.
How do I sync my Google Business Profile hours with my WordPress website?
There’s no automatic sync between your WordPress site and your Google Business Profile. They’re separate systems, so you’ll need to update both manually whenever your hours change.
To update your GBP hours, go to your Google Business Profile dashboard, select your location, and edit the hours under the Info tab. Keeping both in sync improves your local SEO consistency.
Can I show an “open now” or “closed” status on my WordPress site?
SeedProd’s Business Hours block displays your set hours, but a dynamic open/closed indicator (one that changes based on the current time) requires additional configuration or a plugin designed specifically for that feature.
For a simple open/closed status, check the best business hours plugins for WordPress, some of which include real-time open/closed indicators alongside a standard hours display.
Do I need a plugin to add business hours to WordPress?
You don’t need a dedicated business hours plugin. SeedProd’s built-in Business Hours block handles the display, and AIOSEO’s Local SEO module handles the schema markup that search engines read.
Both are multi-purpose plugins you’d likely already use on your site, which means no extra plugin just for business hours.
Get Your Business Hours in Front of Every Customer
Your business hours are now one of the first things customers will see when they search for you, which means no more missed visits and no more wasted calls outside your hours.
Get started with SeedProd to build your contact page with business hours in minutes, then add it to your sidebar with a single saved block.
You might also like these other WordPress tutorials and guides:
- How to Add a Contact Form to WordPress
- Elementor Review: Is It the Best Page Builder?
- Landing Page vs Microsite: Which One Is Best for Your Brand
Thanks for reading! We’d love to hear your thoughts, so please feel free to join the conversation on YouTube, X and Facebook for more helpful advice and content to grow your business.


