Do you want to add your business hours to your WordPress website?
Displaying your opening times can help customers decide the best time to visit your physical store. It’s also an excellent way to indicate when potential customers can call your customer support team for help and advice.
In this article, we’ll show you how to easily add business hours to your website with 2 powerful WordPress plugins.
Why Add Your Business Hours to WordPress
There are many reasons to display business hours on your website. The most obvious reason is to tell customers and clients when you’re “open for business.”
Whether you have physical stores in multiple locations or an online eCommerce site, your business opening hours inform people of the best time to visit or get in touch across different time zones.
For example, a WooCommerce website might use a business hours widget to tell you when you can access live chat for help with sales questions. Alternatively, a business with irregular opening hours can clarify its working hours on its website so that clients can avoid a wasted journey.
Adding opening and closing hours to your website can also help your business appear in local search results. If you add the correct schema.org markup to your business information, your company can appear in Google’s knowledge graph.
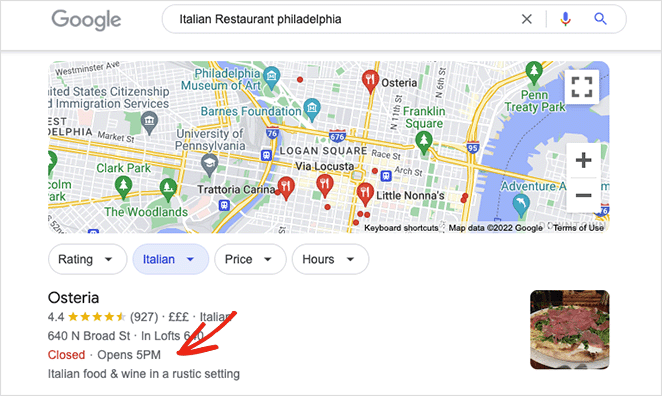
Given that almost 46% of Google searches are local, having your business in local search can draw valuable organic traffic to your website and physical stores.
So how do you add business hours to WordPress? Below we’ll share 2 methods that help you add business hours to your website step-by-step.
Method 1: Add Business Hours to WordPress Using SeedProd
Your first instinct may be to look for a WordPress opening hours plugin. While these plugins can help, they often only do one thing, which is a hassle if you don’t like installing many plugins on your site. Moreover, many plugins use shortcodes which, if you uninstall the plugin, can leave junk code behind that you’ll have to remove.
A better solution is to find a useful plugin that offers the functionality of many plugins and addons all in one. That’s why for the first method, we’ll be using SeedProd to display business hours.

SeedProd is the best WordPress website builder with drag-and-drop functionality. Its powerful page builder lets you create flexible WordPress layouts without writing PHP, CSS, HTML, and other coding languages.
You can start with a pre-made website kit or landing page template, customize your design with the front-end editor and see the changes in real-time. Displaying your opening and closing times with SeedProd is super easy with its Business Hours block, which takes a few clicks to customize.
Here’s what else you can do with SeedProd:
- Build a coming soon page
- WordPressをメンテナンスモードにする
- Design a custom WordPress login page
- Make and customize a 404 page
- Restrict access to pages by user role
- カスタムWordPressテーマの作成
- Build high-converting landing pages
- Collect email addresses with email integrations
- Promote products with WooCommerce support
- Create urgency with countdown timers
- その他いろいろ
Follow the steps below to add business hours to your WordPress site with SeedProd:
ビデオ・チュートリアル
ステップ1.SeedProdのインストールとアクティベート
First, click this link to get started with SeedProd and download the plugin to your computer. You should also visit your SeedProd account and click the downloads tab to copy your plugin license key.
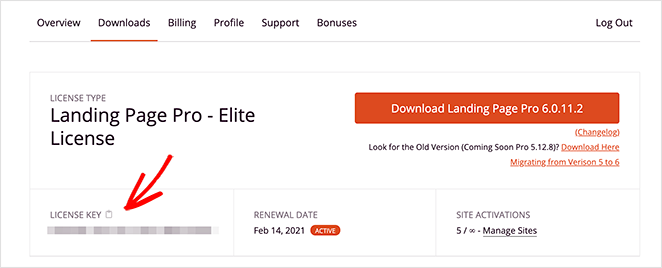
Note: we’ll use the Pro version of SeedProd for this tutorial for its theme builder features.
Next, upload the plugin .zip file to your WordPress dashboard and activate it. If you need help getting started, you can follow these instructions on installing a WordPress plugin.
After installing and activating the plugin, navigate to the SeedProd » Settings page and paste the license key you copied earlier.
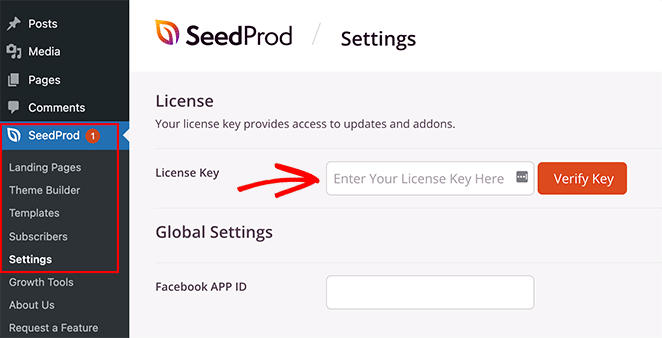
Now click the Verify Key button and move on to step 2.
ステップ2.WordPressテーマまたはランディングページを作成する
There are 2 ways to use SeedProd’s visual editor and customizable blocks:
- Theme Builder: create a custom WordPress theme, replacing your existing theme with fully customizable template parts.
- Landing Page Builder: create a standalone landing page that works seamlessly with your current WordPress theme.
Both solutions will let you use SeedProd’s drag-and-drop editor and Business Hours block to show your working hours. So pick the option that best fits your business needs.
To help you out, here is a step-by-step guide on how to create a custom WordPress theme with SeedProd. Alternatively, you can follow these instructions to create a landing page in WordPress.
Once you’ve chosen a website kit or landing page template and are ready to add your business hours to WordPress, move on to step 3 of this tutorial. For the sake of this guide, we’ll choose the Theme Builder option.
Step 3. Add the Business Hours WordPress Block
Now that the foundation of your WordPress design is in place, you’re ready to customize it with your business hours. With SeedProd’s theme builder, you can add business hours to WordPress pages, header, footer, and even your WordPress sidebar.
Let’s start with a page to show you how easy it is.
Adding Business Hours to WordPress Page
First, edit any page with SeedProd to see the visual page builder interface. We’ll edit the contact page for this guide.
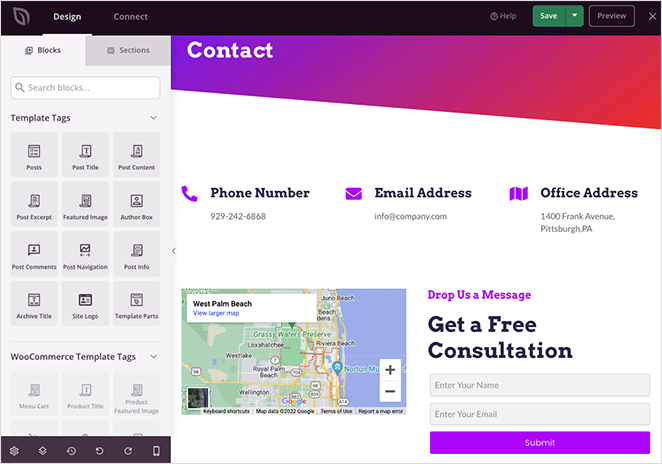
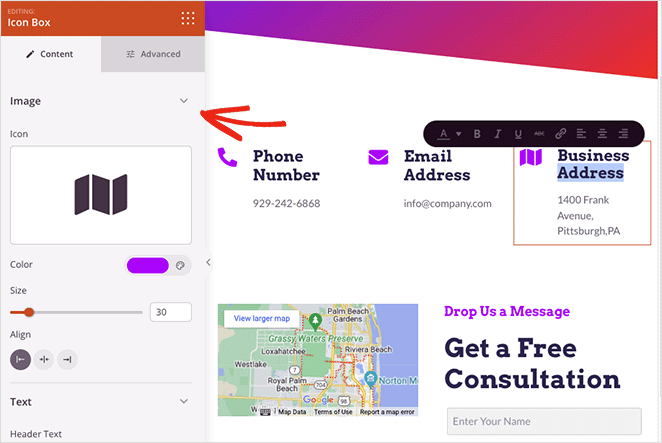
You’ll see a 2-column interface with customizable blocks on the left and a live preview of your page on the right. Clicking anywhere on the preview will let you edit any element.
For example, clicking the Icon Box will open the block settings panel, where you can edit the icon, title, description, and more.
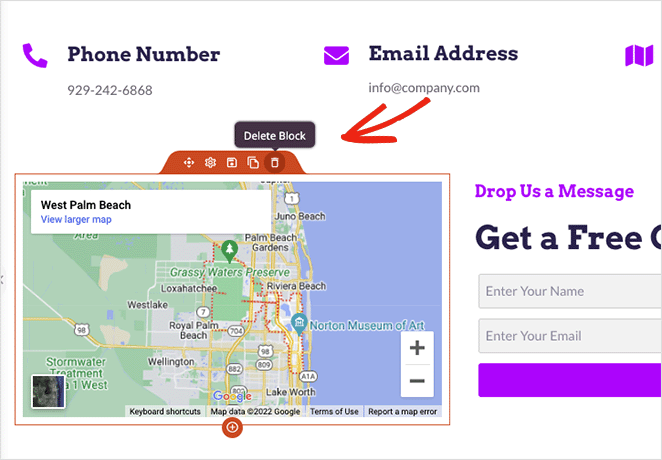
You can also remove elements you don’t need by hovering over them and clicking the trash can icon. A tooltip will pop up to remind you of what each option means.
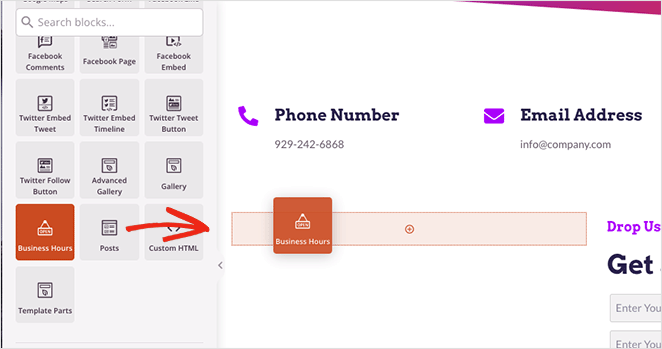
To add your business hours, look for the Business Hours block in the left-hand panel and drag it onto your page.
From there, you can customize the block to suit the weekdays and times your business is open. You can also adjust the font size, spacing, and alignment and add new times for special dates, such as holiday opening times.
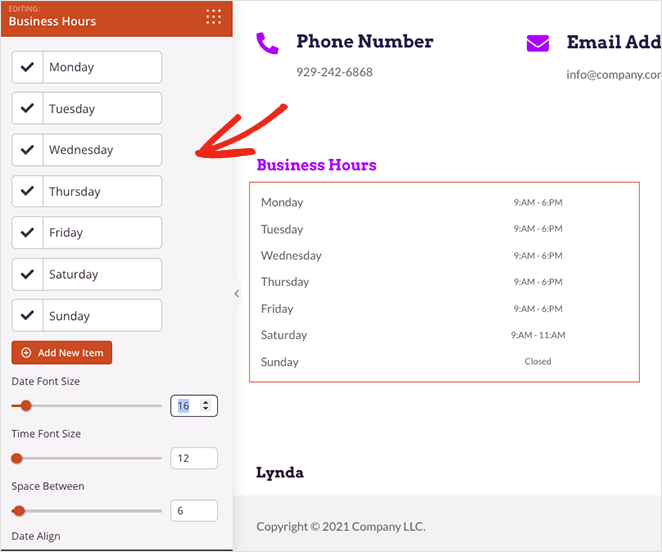
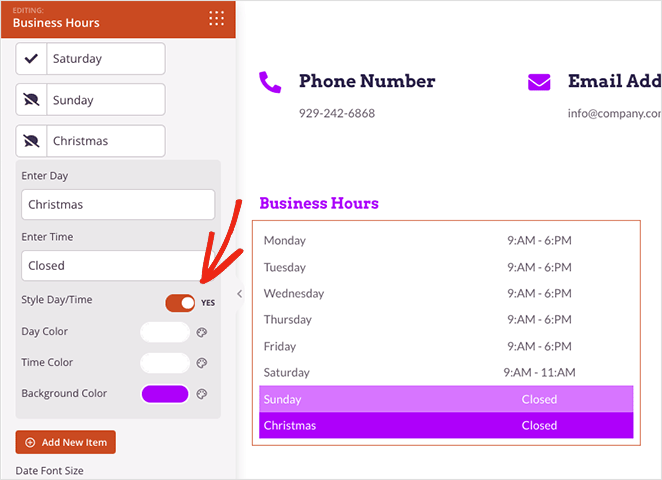
Inside each date and time is a toggle you can enable that lets you customize each entry individually. This will allow you to choose custom colors for the font text and add background colors to make your working hours stand out.
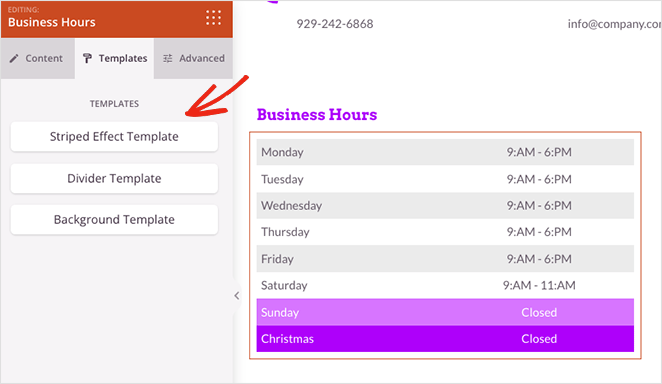
If you’re struggling to find a good design, click the Templates tab in the block settings. Doing so will give you several pre-made templates you can apply with 1 click.
Moreover, the Advanced tab offers further customization options for typography, separators, spacing, visibility, and more.
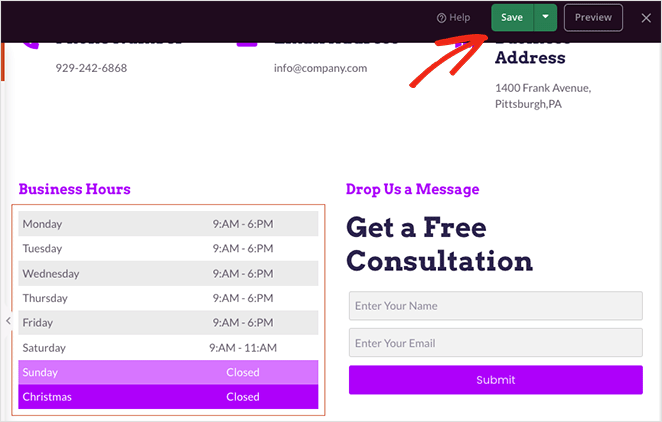
Click the Save button in the top right corner of your screen when you’re happy with your business hours design.
Now we’ll show you a helpful trick that lets you re-use this block elsewhere on your site without customizing it from scratch again.
Hover over your business hours and click the Save icon.
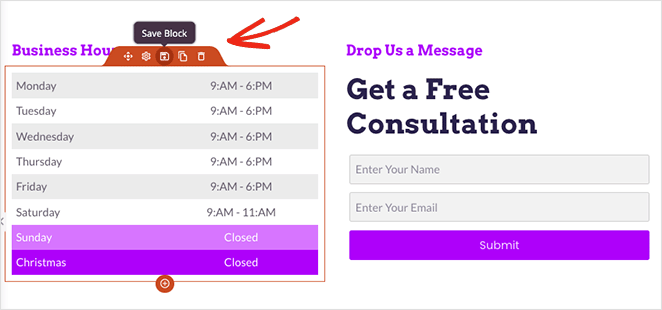
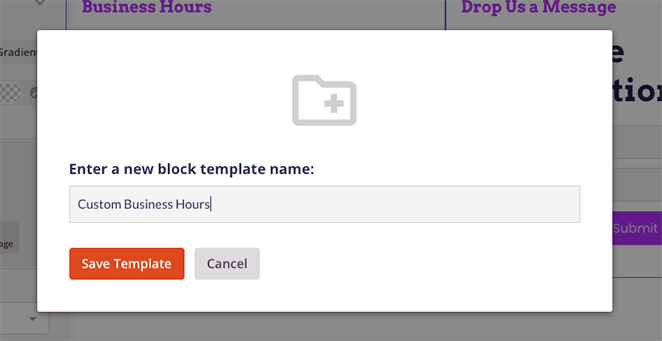
A popup will appear where you can give your block a name. Name the block something easy to recognize, such as “Custom Business Hours,” then click the Save Template button.
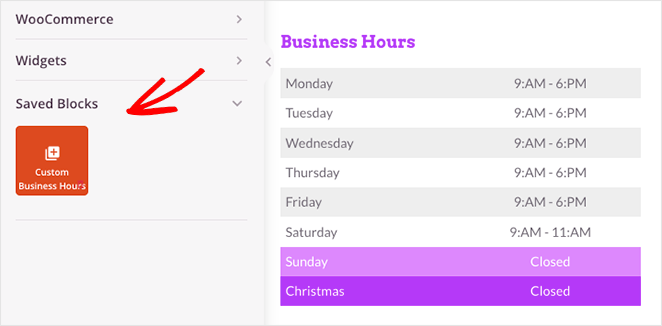
Next, scroll to the bottom of your blocks panel and open the Saved Blocks tab. Now you’ll see your saved custom business hours widget, which you can use on other pages of your WordPress site.
次はその方法を紹介しよう。
Adding Business Hours to WordPress Sidebar
To add your opening hours to a custom sidebar with SeedProd, first ensure you’ve created a sidebar template, then open your design in the drag-and-drop page builder.
Note: you can check out this step-by-step guide to create a custom sidebar template.
Once you’re inside the page builder, open your Saved Blocks tab and drag your custom Business Hours block onto your sidebar.
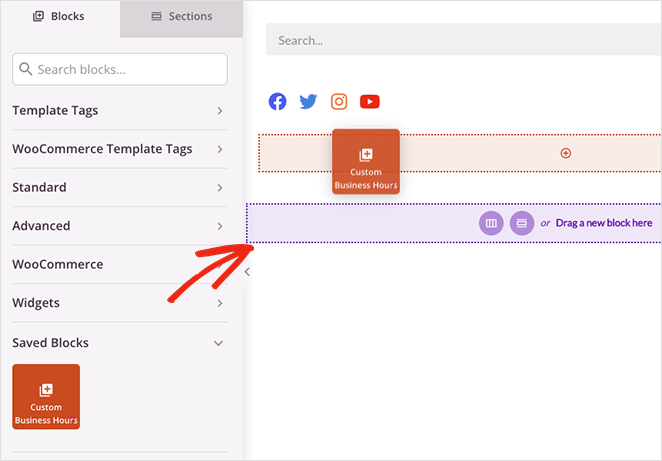
Instead of re-building your business hours from scratch, the block will have all the customization options you set in the previous step. This can save a lot of time during the design process.
Remember to save your changes before moving on to step 4.
Step 4. Publish Your Business Hours on Your Website
When you’re ready to make your opening times live, navigate to the backend of your site and click through to the SeedProd Theme Builder dashboard.
Even if you’ve published your pages in the page builder, you’ll need to turn your SeedProd theme on to make it live. To do that, find the Enable SeedProd Theme toggle and turn it to the “Yes” position.

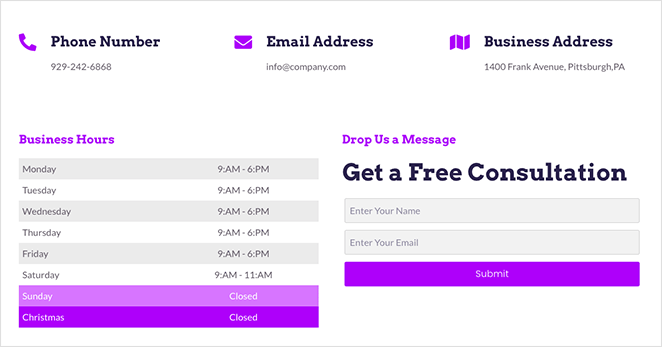
Now you can preview your website to see your business hours. Here are some examples from the pages in this tutorial. If you can’t see your changes, clear your browser’s caching and refresh the page.
Contact Page:
Blog Sidebar:

それだけだ!
Method 2: Add Opening Hours to WordPress Using All in One SEO
The next method is an easy way to add opening hours to WordPress if you don’t want to use a page builder or a business hours indicator plugin.

We’ll be using All in One SEO, the best WordPress SEO plugin on the market. It lets you optimize your website for search engines, and with its Local SEO feature, you can add business hours to your website.
Note: you’ll need at least the Plus pricing plan to access the Local SEO module.
Step 1. Install and Activate All in One SEO (AIOSEO)
First, install and activate the All in One SEO for WordPress plugin.
After activating the plugin, it will run a setup wizard that helps you configure your site for SEO. If you need more help, follow the steps in this guide to set up All in One SEO for WordPress.

Step 2. Add Your Business Hours
After configuring your website details, go to the All in One SEO » Local SEO page to enter your business information.
First, turn the Multiple Locations toggle to the “Yes” position. Even if you only have one location to add, you can still enable this feature.
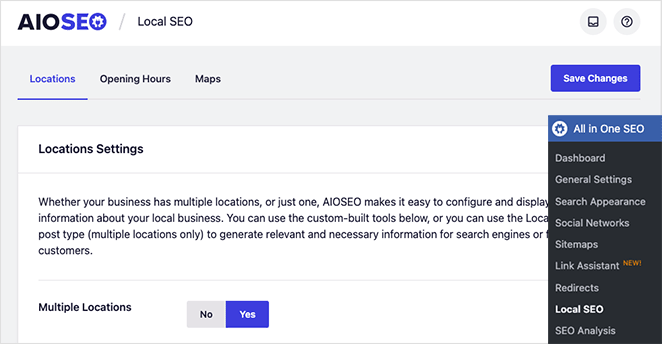
Next, click the Opening Hours tab at the top of your screen.
This is where you can add your business hours and time formats, which AIOSEO will use as your default locations. If needed, you can set business hours for each location.
You’ll need to scroll down the page to find individual times for each day of the week and enable the 24/7 and 24-hour formats. Beside each weekday, you can also click the checkbox to set your time to 24 hours or closed.
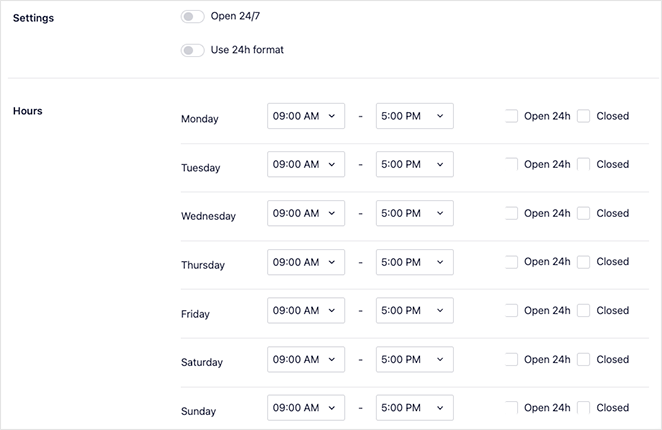
Remember to click the Save Changes button to store your settings.
After setting up local SEO, you can move on to adding your business information and location.
Step 3. Create Your Business Locations
To do that, navigate to Locations » Add New and give your location a title.
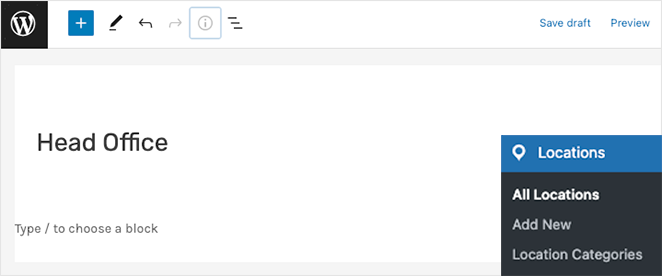
After that, scroll down to the AIOSEO Local Business section and add your business information under the Business Info tab.
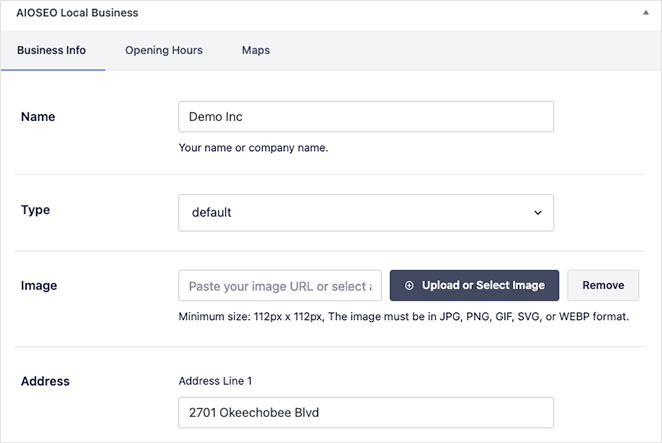
This section will let you enter your business name, type, image, address, contact details, phone number, payment information, and the geographic area you serve.
With your details in place, switch to the Opening Hours tab. In this panel, you can add new business hours or use the default opening times you set earlier.
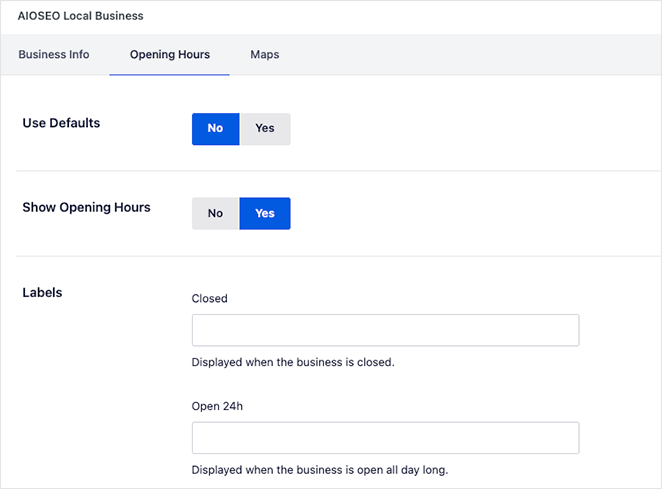
When you’re finished, click the Publish button to store your location. You can repeat this process for each business location you need working hours for.
Step 4. Display Your Business Hours
Like SeedProd, All in One SEO lets you show your business hours anywhere on your website. Its premade WordPress blocks allow you to add business hours to any post or page with a few clicks.
All you need to do is edit a post or page and look for the AIOSEO blocks. There are blocks for:
- AIOSEO Local Open Hours
- AIOSEO Local Business Info
- AIOSEO Local Locations blocks.
You’ll need the ‘AIOSEO Local Open Hours’ block to show your business hours.
After embedding the block, you can choose the location you want to display from the block settings panel.
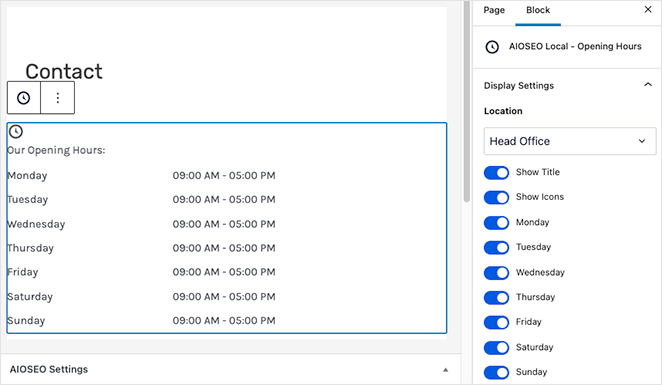
Remember to click the Publish or Update button to make your page live.
Afterward, you can visit your website and see your business hours in action.
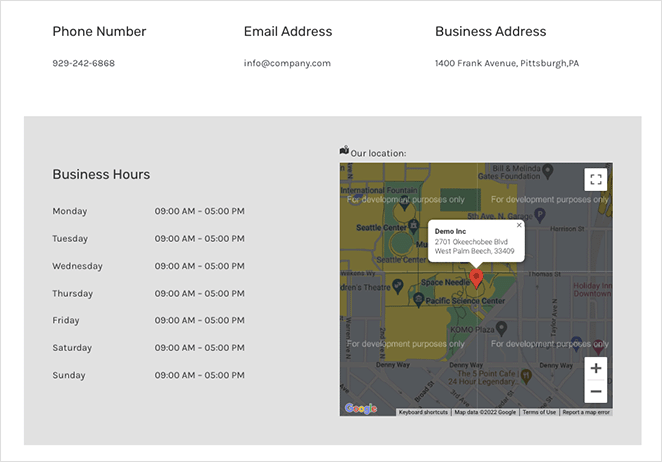
そうだ!
You now know how to add business hours to WordPress. Ready to dive in with custom business hours?
You might also like these other WordPress tutorials and guides:
- How to Add a Contact Form to WordPress
- Elementor Review: Is It the Best Page Builder?
- ランディングページとマイクロサイト:ブランドにとって最適なのはどちらか
お読みいただきありがとうございました!ご質問やご意見がありましたら、お気軽にコメントをお寄せください。
また、YouTube、X(旧Twitter)、Facebookでも、ビジネスの発展に役立つコンテンツを配信しています。

