Want to create an online course landing page that actually gets sign-ups? A good course page ifocuses your visitor’s attention, answers their questions, and guides them to click “Enroll.”
In this step-by-step guide, I’ll show you how to build a high-converting landing page for your course in WordPress. You’ll see the key elements every page needs and how to set it up quickly with SeedProd.
What Is an Online Course Landing Page?
An online course landing page is a standalone page designed to convince people to join your course. Unlike a homepage or blog post, it has a single focus: guide visitors toward signing up or enrolling.
The best course landing pages highlight the benefits of your course, explain who it’s for, and remove distractions that might pull people away. Every element, from the headline to the call-to-action, works together to answer “Why should I take this course?”
Many creators use course landing pages with ads or email campaigns, so when someone clicks a link, they land on a page built just to convert that interest into registrations.
How to Build an Online Course Landing Page in WordPress
To build an online course landing page, you need a tool that makes it easy to showcase your course content, add trust signals, and drive people to enroll. That’s exactly what SeedProd does best.

SeedProd is a drag-and-drop WordPress page builder with everything course creators need in one place. You can highlight your course modules, add video previews, display student testimonials, and connect your favorite email marketing service, without touching code.
It’s also fast and lightweight, so your landing page won’t slow down. And with hundreds of mobile-ready templates built for sales and sign-ups, you can launch a professional-looking course page in minutes.
Here’s how to build your online course landing page step by step using SeedProd.
Step 1. Install and Activate SeedProd
The first step is to download the SeedProd WordPress plugin to your computer.
Note: there is a free version of SeedProd available. But we’ll use SeedProd Pro because it has the advanced features we need.
Next, you need to upload SeedProd to your WordPress website and install and activate the plugin. If you need help with this stage, follow these steps for installing a WordPress plugin.
After installing and activating the plugin, you’ll automatically see a welcome page asking for your license key. You can find your key in the ‘Downloads’ section in your SeedProd account dashboard.
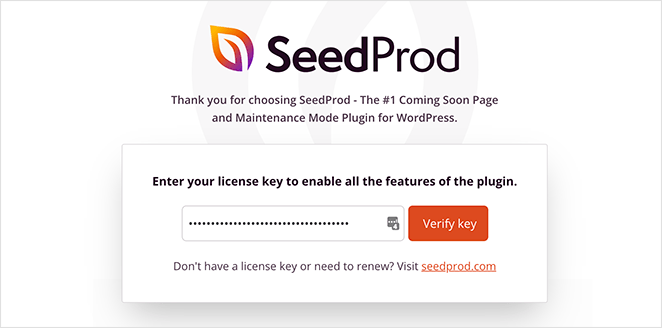
So copy your key, paste it into the license key field, and click the Verify Key button.
From there, scroll a short way down the page and click the Create Your First Page button.

Step 2. Create a New Landing Page
On the next screen is SeedProd’s landing page dashboard, where you can activate different page modes and create standalone pages.
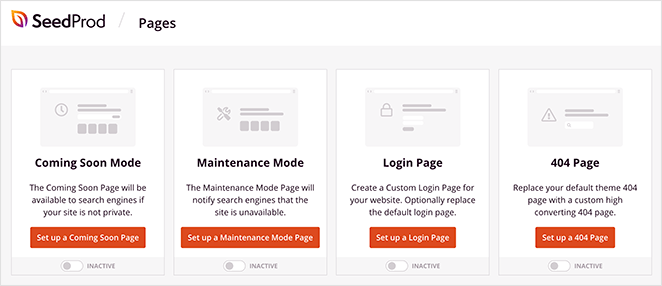
For instance, along the top of the page are modes that allow you to:
- Create a WordPress coming soon page
- Put your WordPress site in maintenance mode
- Make a custom WordPress login page
- Build and customize a 404 error page
The great thing about SeedProd’s page modes is you can extend your site’s functionality without installing extra WordPress plugins for each feature. All the important features are right there in SeedProd, and you can turn them on and off with a single click.
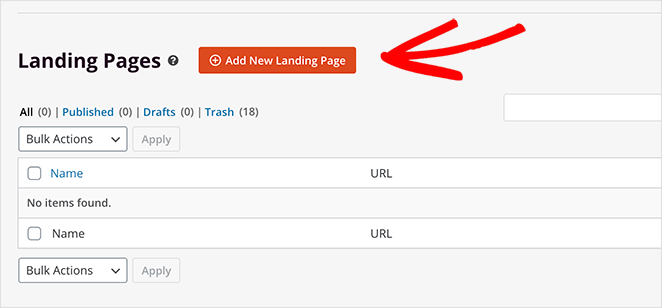
Below that section, you can create individual pages for any purpose. So go ahead and click the Add New Landing Page button to create your first page.
Now you can choose one of SeedProd’s mobile-responsive templates for your course page. Simply use the tabs along the top to filter the templates by goal.
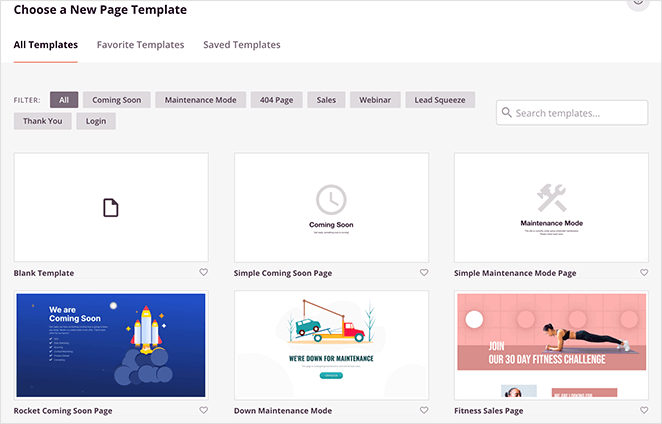
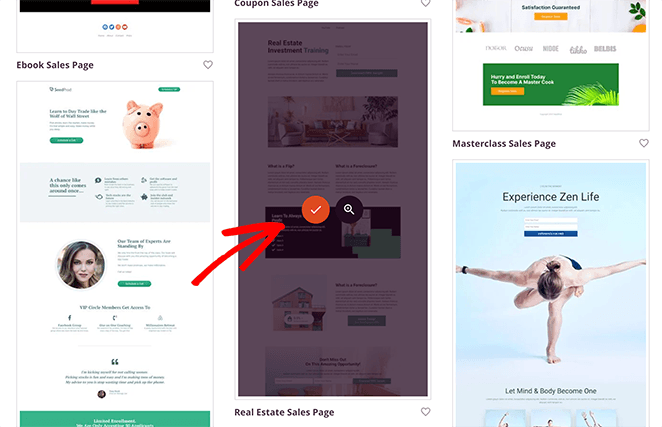
For example, if you click the Sales Page tab, you’ll see a variety of templates that already cater to online courses. From there, just hover over any design and click the checkmark icon to load it.
We chose the Real Estate Sales Page for this guide.
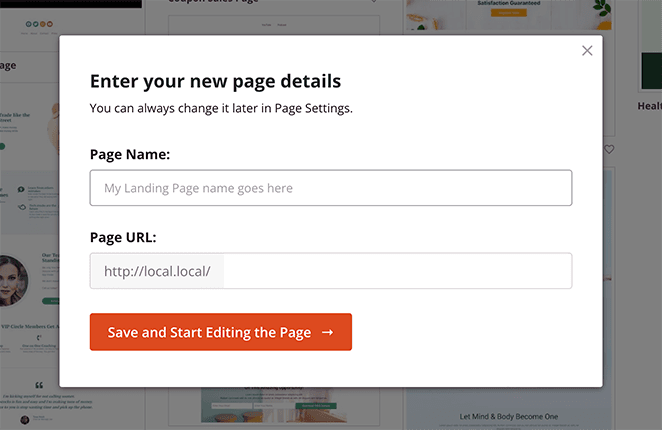
After picking a template, you’ll see a popup window where you can enter your page name and URL. Then click the Save and Start Editing the Page button to launch the design in SeedProd’s page builder.
Step 3. Add Course Details to Your Landing Page
Now you’ll see your chosen template in SeedProd’s visual editor. On this screen, you can see blocks and sections on the left and your page preview on the right.
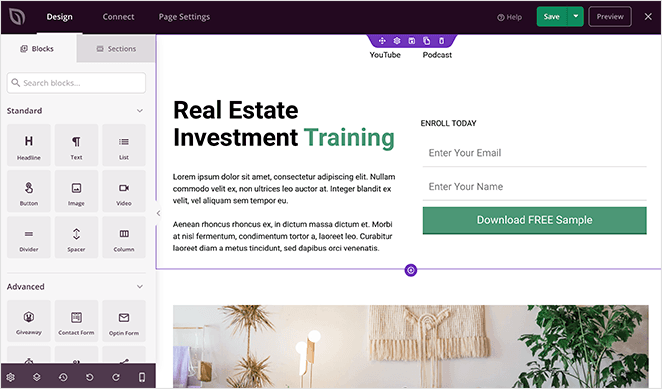
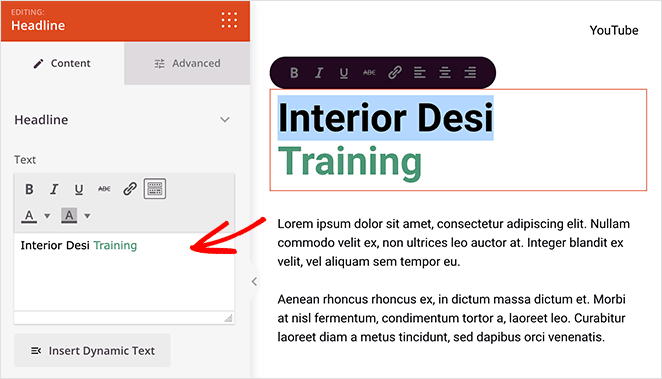
And editing any page element is as easy as pointing and clicking. For example, click on any heading to see the content settings panel and change what it says.
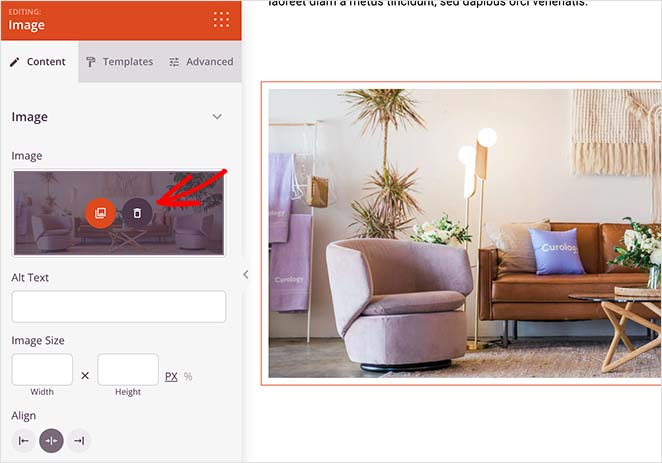
Similarly, you can change any existing image by clicking the image and selecting the trash can icon in the content settings panel.
From there, you can upload a new image from your computer or WordPress media library or use one of SeedProd’s free stock images.
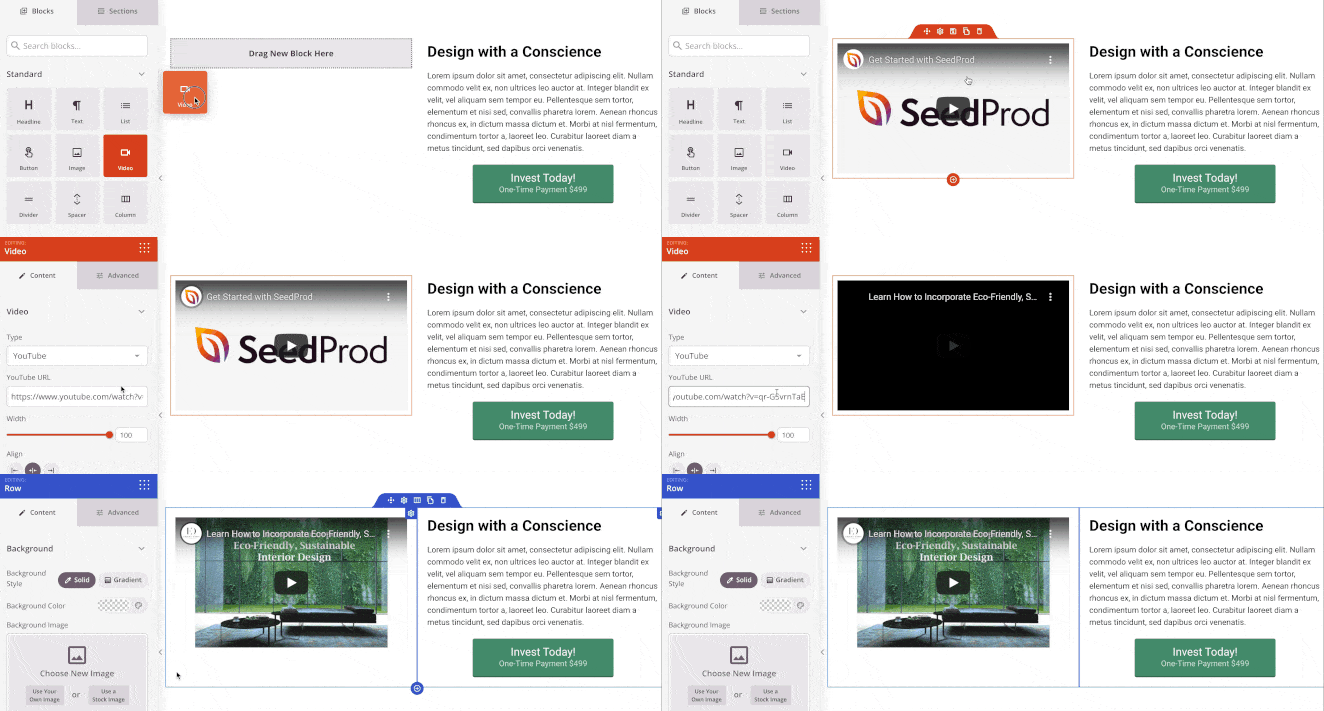
Adding extra content to your course page is just as easy. Simply drag any block from the left and drop it onto your design.
For example, you can drag the video block onto your page and paste a YouTube link to show that video on your design. Given that video is highly engaging, it can keep people on your page long enough to convince them to get your course.
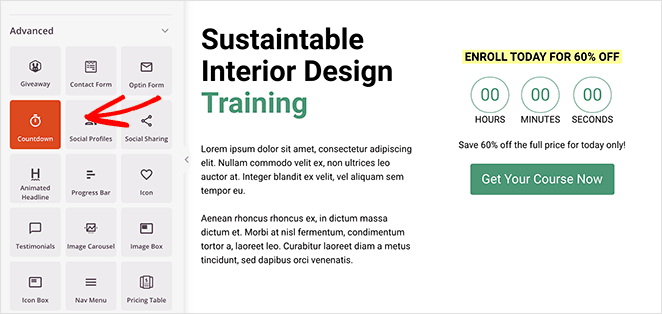
And if you really want to get people signing up for your course, you can use SeedProd’s built-in countdown timer. Using a timer creates a sense of urgency that persuades people to act right away.
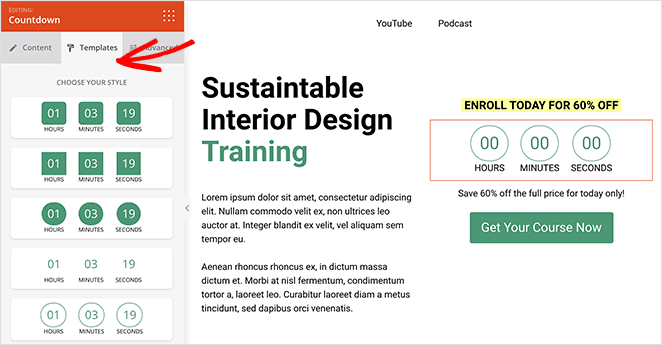
Plus, clicking the Templates tab for that block shows several styles you can apply to your timer with 1 click.
Keep adding content to your course sales page until you’re happy with the design. And don’t forget to click the Save button to store your settings.
Step 4. Customize Your Page
There’s a good chance you want to change other parts of your course page template, like the background color, button colors, fonts, and more. The good news is SeedProd offers an entire panel where you can make those changes and apply them to every part of your page at once.
You can find that panel by clicking the gear icon in the bottom left corner of the screen, which opens the Global Settings panel. And as we just said, you can customize many areas of your page there without adjusting each setting block by block.
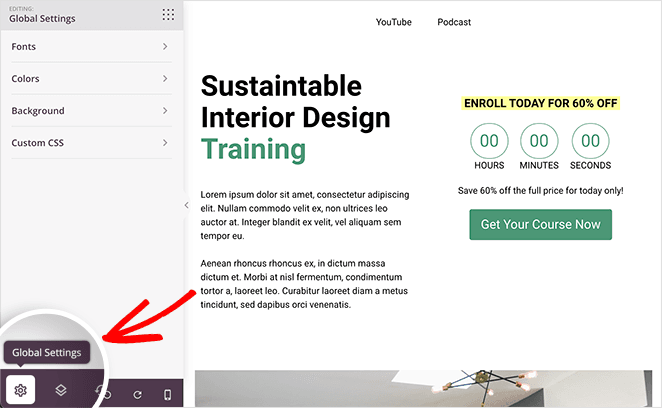
For example, you may want to change all the button colors for your page. In that case, you’d click the Colors heading and use the color picker to assign a different color to your CTA buttons.
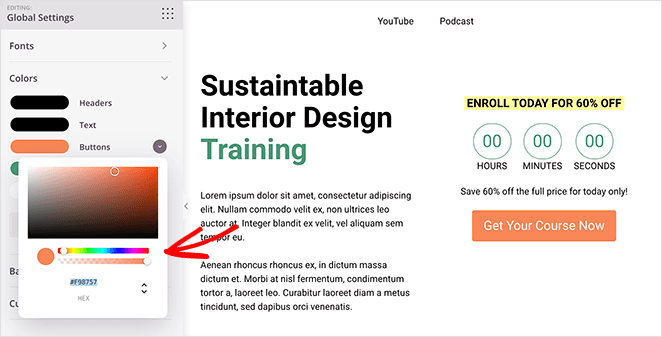
Pro Tip: when choosing a color for your CTA buttons, it’s best to pick a contrasting color so it stands out from the rest of your content.
In the same panel, you can also adjust the fonts, background and even add Custom CSS.
When you’re happy with your online course page, click the Save button and move on to the next step.
Step 5. Configure Your Online Course Landing Page Settings
SeedProd’s WordPress landing page settings are as easy to configure as the pages are to build. So let’s start by looking at the integration settings.
At the top of your screen, click the Connect tab. From there, you can see the different email marketing providers you can connect with.
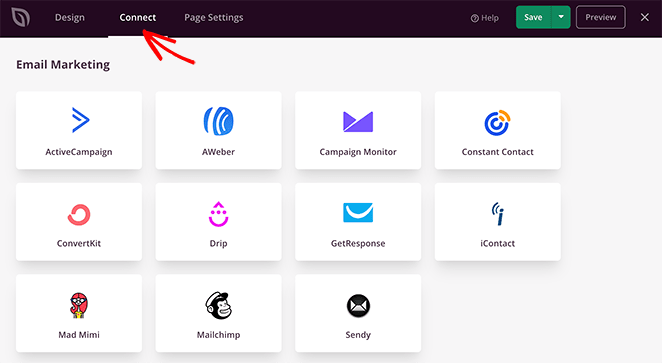
Integrating your email list is important if one of your landing page goals is collecting email addresses and growing your list. And SeedProd integrates with various popular email marketing services so you can connect your list with a few clicks.
Just find your provider in the list, click Connect, and follow the instructions to authorize your account.
You can also link your Google Analytics account, set up Recaptcha, and connect to hundreds of other apps via Zapier on the same screen.
Moving on, click the Page Settings tab, where you can edit your general settings, add your on-page SEO details, configure your analytics, and add custom scripts.

For example, you can install MonsterInsights to track your landing page performance and use the Analytics tab in SeedProd as a shortcut to configuring those settings.
And if you’re a SeedProd Elite user, you can take advantage of the Custom Domain feature. That means you can point any landing page you make with SeedProd to a custom domain name without installing WordPress on each domain.
After configuring your settings, head back to the Design tab and double-check that everything looks the way you want.
Step 6. Publish Your Online Course Landing Page
With your design in place, you can now go ahead and publish your online course page. To do that, click the dropdown arrow next to the save button and select Publish.
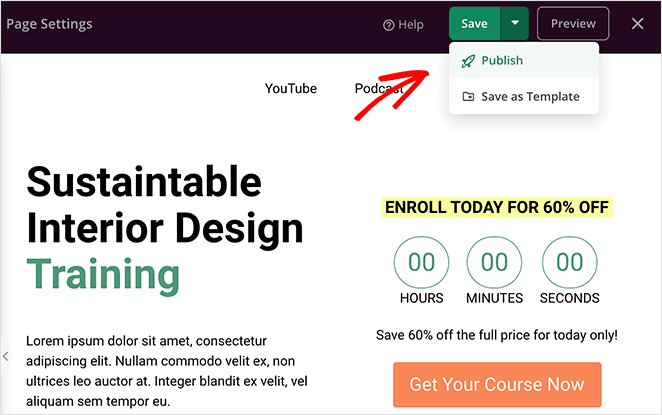
Then you can preview your design to see your online course landing page live on your website.

FAQs About Online Course Landing Pages
You now know how to build an online course landing page in WordPress without coding.
As you can see, creating any page in WordPress with SeedProd is so easy even beginners can do it. And even if you’re an advanced user, there are tons of ways you can make your design unique with SeedProd.
So if you’re ready to create a high-converting online course page…
You might also like this guide on how to create a Google Ads landing page with SeedProd.
Thanks for reading. Please follow us on Twitter, Facebook, and YouTube for more helpful content to grow your business.

