A WordPress service page is a dedicated webpage that explains what your business offers and helps convert visitors into paying clients. To create one, you’ll start by choosing a page builder like SeedProd, which is a drag-and-drop tool for making custom layouts. From there, you’ll design your page, add service descriptions, include social proof, and finish with a clear call-to-action.
When I built my first service page, I knew what I offered but struggled to make it look professional and trustworthy. Once I started using a drag-and-drop builder, everything clicked. I could focus on showing my services clearly instead of fighting with design tools.
To design your WordPress service page, here are the steps I followed:
- Step 1: Install SeedProd for WordPress
- Step 2: Choose a Service Page Template
- Step 3: Customize Your Service Page Layout
- Step 4: Add a Services Section
- Step 5: Publish Your WordPress Service Page
- Alternative: Use Block Editor Instead of SeedProd
Why Service Pages Matter for Conversions
A well-designed service page plays a key role in turning visitors into paying customers. It clearly explains what you offer, shows why your business is trustworthy, and guides users toward taking the next step, like booking a call or filling out a form.
Here’s why a good service page can seriously boost your conversions:
- Clarity: It shows what you do and who it’s for, right away.
- Trust: It gives visitors solid reasons to believe you can help. According to Stanford web credibility research, 75% of users admit to making judgments about a company’s credibility based on their website’s design.
- Direction: It tells them exactly what to do next, such as book a call or complete a form.
If someone lands on your service page and feels unsure about your offer, they’ll leave. But when they instantly understand your services and how you can solve their problem, they’re far more likely to stay, explore, and convert.
Best Practices for High-Converting Service Pages
A strong service page layout not only looks professional but also encourages visitors to take action. Here are the best practices I follow when designing service pages in WordPress:
- Keep the key services above the fold. Visitors should instantly see what you offer without scrolling.
- Use clear headlines and descriptions. Avoid vague terms and explain each service in simple, direct language.
- Show social proof. Add testimonials, client logos, or case studies to build trust.
- Include a contact method on every scroll. Use a call-to-action button or form in each major section so users never have to hunt for it.
- Add visuals for each service. Images or icons help break up text and make services easier to understand.
- Keep the layout uncluttered. Focus on one primary call-to-action (like “Book a Call” or “Get a Quote”) instead of multiple competing links.
How to Create a WordPress Service Page Template with SeedProd
SeedProd is a drag-and-drop WordPress page builder (a tool that lets you create custom layouts visually without writing any code). It’s perfect for building a professional service page because you can easily control every part of the design, from headlines and images to call-to-action buttons, all inside a visual editor.
Unlike the default WordPress block editor, SeedProd gives you total freedom to move, resize, and customize every element in real time. You’ll find pre-built templates, ready-made service sections, and built-in features like mobile previews and form integrations that make the entire process quick and code-free.

I recommend SeedProd because it’s beginner-friendly, powerful, and built specifically for WordPress. You can also create full WordPress themes with it, which makes it ideal for freelancers, agencies, or business owners who offer design or development services.
On top of that, SeedProd integrates with top tools like email marketing platforms and allows you to preview your designs on any device. Everything works together seamlessly, so you don’t need to install extra plugins or touch code.
Now let’s walk through the steps to build your own WordPress service page using SeedProd.
Step 1. Install and Activate SeedProd
First, you’ll need to install and activate the SeedProd plugin on your WordPress website. If you need help with this, you can see our documentation on how to install SeedProd.
The documentation will guide you through the installation process and show you how to activate your SeedProd license key.
Step 2. Choose a Landing Page Template
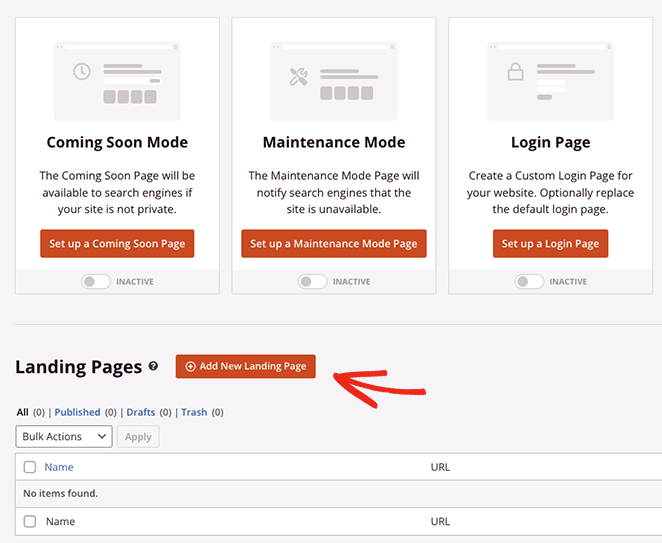
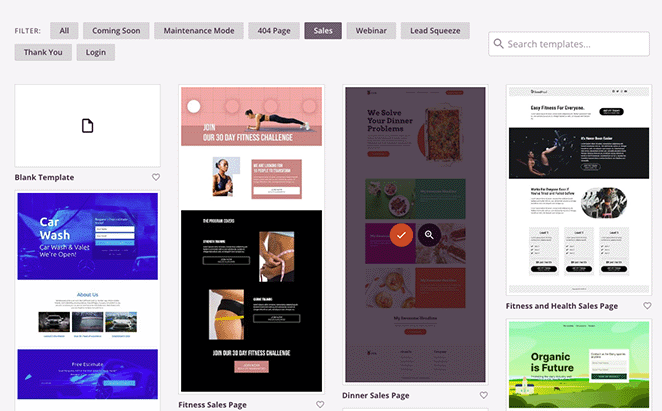
Once the plugin is activated, navigate to SeedProd » Landing Pages from your WordPress admin panel and click the Add New Landing Page button.
Now choose a layout that fits your services page design ideas.
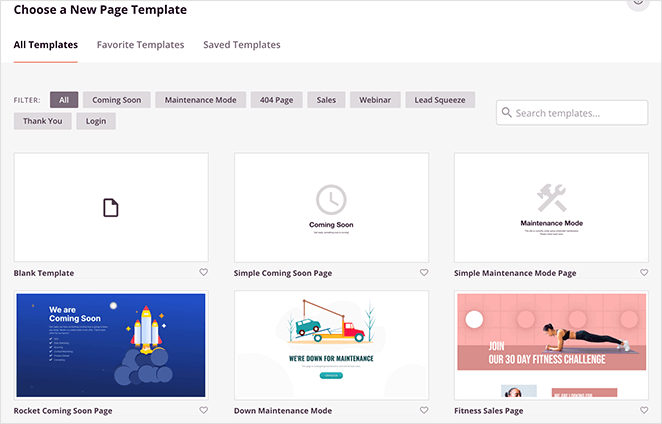
You can use the filters at the top to see templates for various campaign types, like coming soon, lead squeeze, sales page, webinar, and more.
Once you find a template you like, simply click the orange checkmark icon.
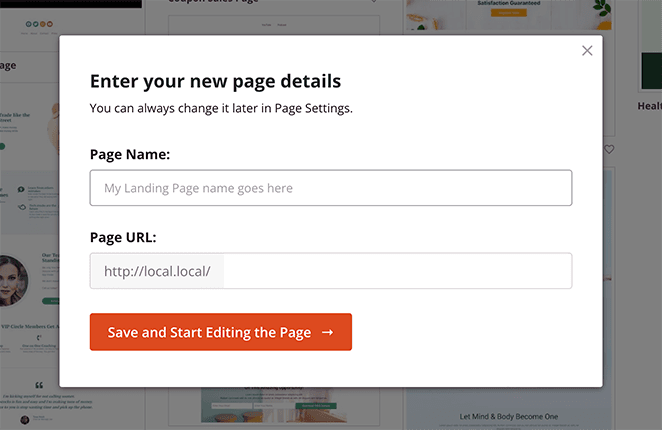
Now you can give your page a name and URL before clicking the Save and Start Editing the Page button.
Step 3. Customize Your WordPress Service Page Layout
On the next screen, your template will load in SeedProd’s visual drag-and-drop page builder. It has a live preview on the right and several SeedProd blocks and settings on the left.
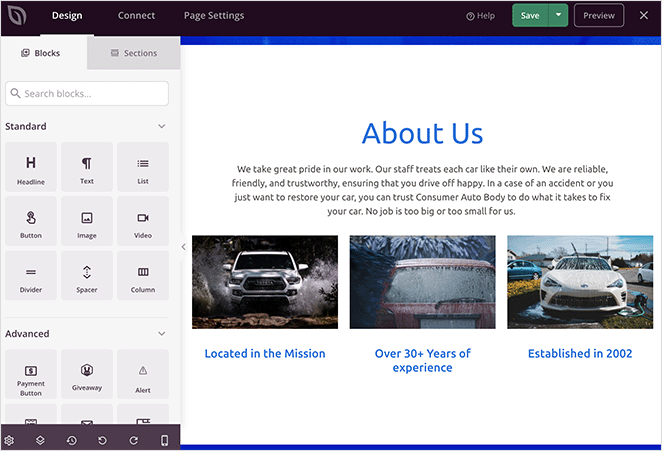
Many of SeedProd’s templates use blocks to make up the overall layout. To customize them, you only need to click one, which will open its settings in the left-hand menu.
For example, clicking a heading or text block will open settings to change the content, font size, style, and more.
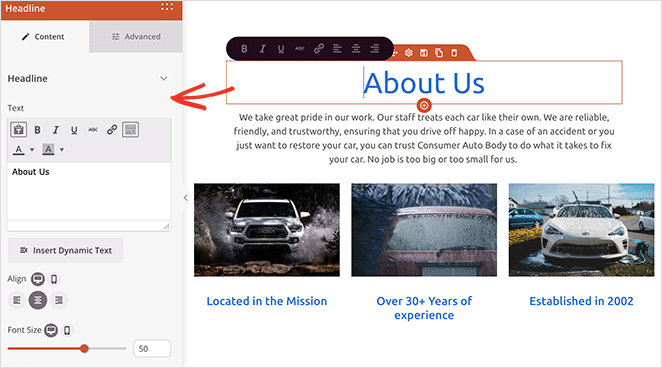
Or, if your our services page template includes a pricing table, you can click to edit each item, change the fonts, or even rearrange columns.
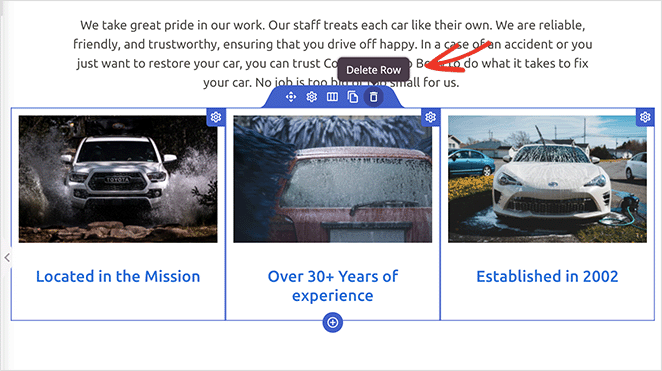
Removing an element you don’t need is as simple as hovering over it and clicking the trashcan icon.
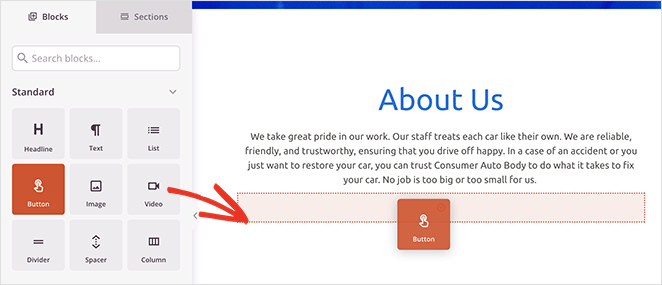
If you want to add new elements to your design, such as a call-to-action button, drag the block from the left-hand panel and drag it into place on your preview.
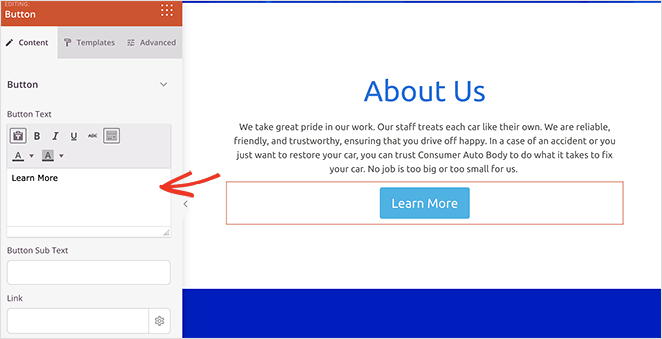
You can then select it to customize its appearance, content, and other settings.
Before you settle on a layout, be sure you’re not falling into WordPress layout mistakes that hurt conversions. Small things like cluttered menus or weak CTAs can make a big difference.
Step 4. Add a Services Section to Your WordPress Page
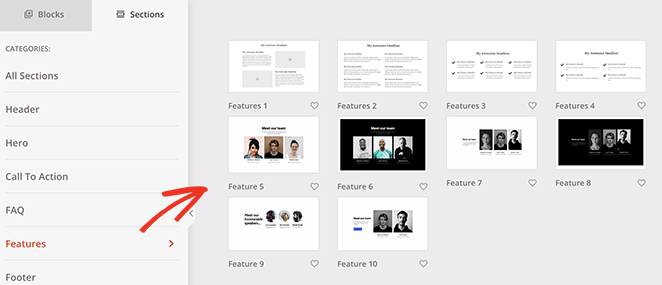
Another helpful SeedProd feature is its premade Sections. The Feature sections are perfect for building a visual services section. You can find them by clicking the Sections tab in the left-hand panel.
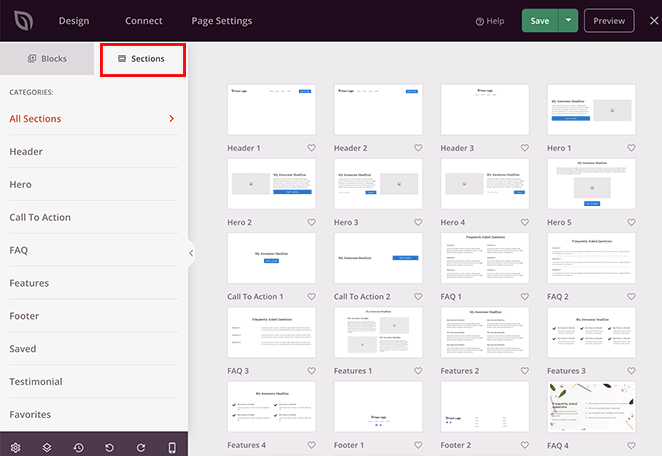
Sections are like mini templates that combine rows, columns, and blocks to make premade designs like FAQs, Hero areas, Headers, and more.
For example, the Feature sections are ideal for adding a services section to your WordPress page. They use a combination of headings, images, paragraphs, and columns to create an attractive layout for your service information.
Look for layouts with a mix of images, text, and buttons. These are ideal for a clean, professional service section design.
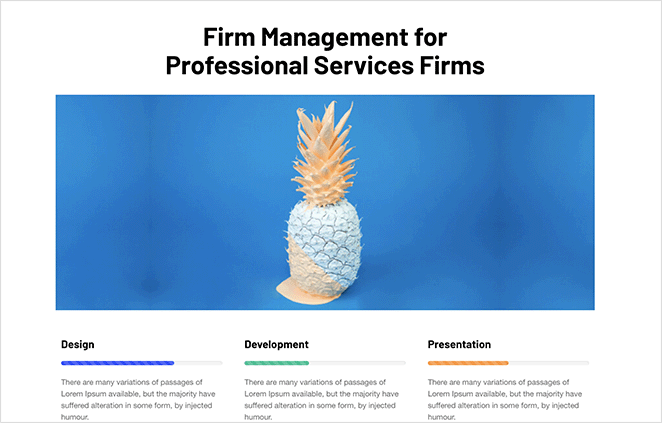
Below you’ll see the Call to Action 6 section, which comes with space for 3 services and a custom hero image.
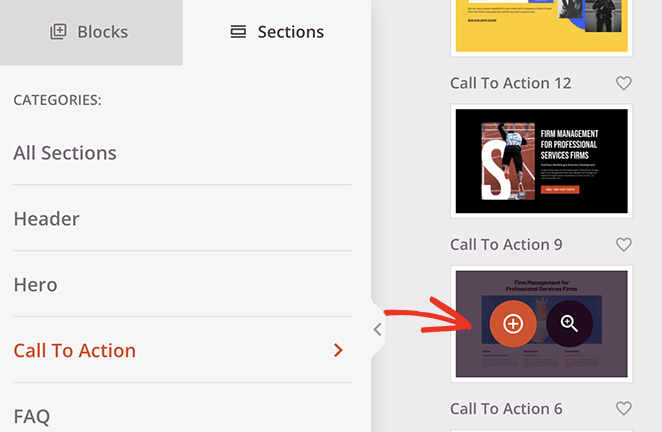
To add the section to your page, just hover over it and click the orange plus icon.
By default, new sections will appear at the bottom of your page. However, you can click, drag, and drop the entire section to move it to the right place.
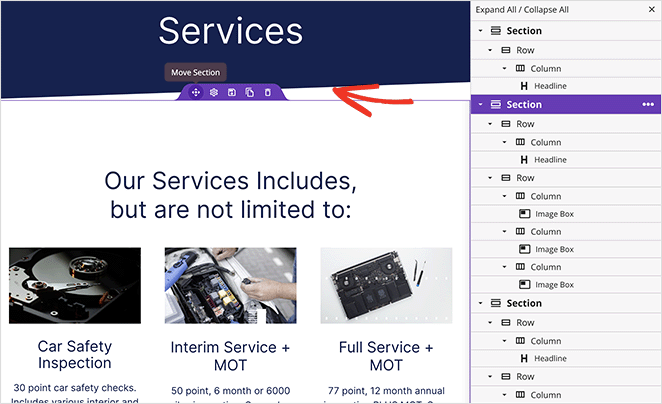
After repositioning your section, you can click any of the elements to customize the content. For instance, to swap out an image, click it and choose the trashcan icon in the left panel to remove it.
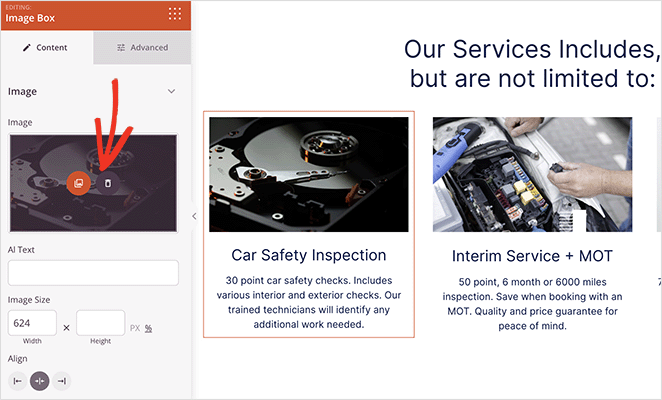
From there, you can upload a new image from your computer or WordPress media library.
Continue customizing your services page until you’re happy with how it looks. You may want to include your phone number to help users get in touch, or even an events calendar for upcoming webinars and conferences.
Step 5. Publish Your Service Page Design in WordPress
When you’re happy with your service section design, click the dropdown arrow on the Save button and choose Publish.
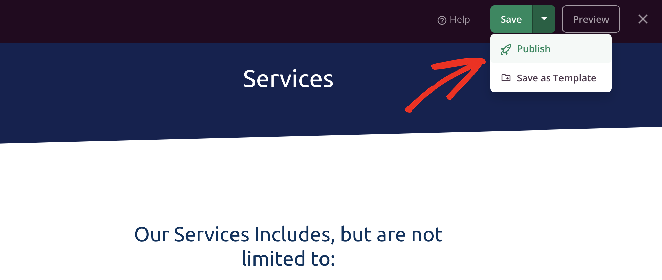
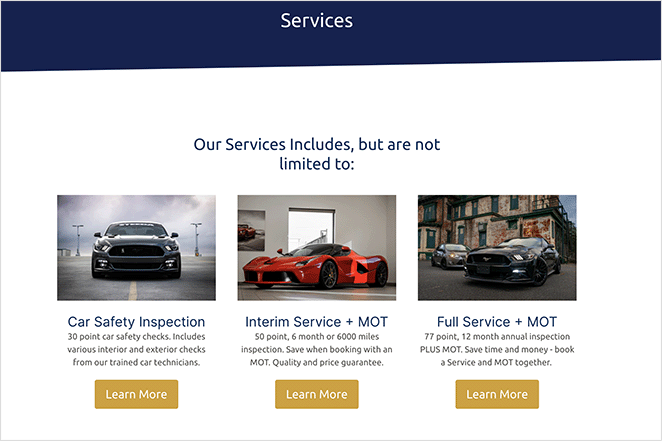
The page will go live on your WordPress site automatically, where any potential customers can see your services at once.
If you’re deciding between the default WordPress block editor and using SeedProd to design your service page, here’s a quick side-by-side comparison to help.
| Feature | Block Editor | SeedProd |
|---|---|---|
| Ease of Use | Basic blocks, not very visual | Drag-and-drop with live preview |
| Templates | Theme-dependent | Dozens of pre-built service page templates |
| Mobile Preview | Requires switching views | Built-in preview for phone, tablet, desktop |
| Design Control | Manual tweaks or custom CSS | Visual controls with no code needed |
| Custom Sections | Manual block setup | Pre-built sections like FAQs, services, CTAs |
Alternative: Creating a Services Section Using Service Box
Another way to add services to your WordPress website is with the Service Box Showcase plugin, a free tool that lets you build a services section using shortcodes. It’s great for showcasing multiple offerings in a simple, structured layout without using a page builder.
While it’s not as flexible as SeedProd, Service Box Showcase still makes it easy to create a clean and organized service page layout right inside the default block editor.
To get started, install and activate the Service Box Showcase plugin on your WordPress site. If you need help, follow this step-by-step plugin installation guide.
Once activated, go to Service Box » Add New Service Box from your WordPress dashboard and enter a title for your new service box.
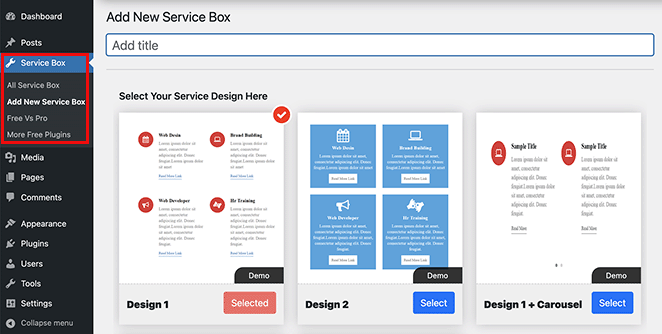
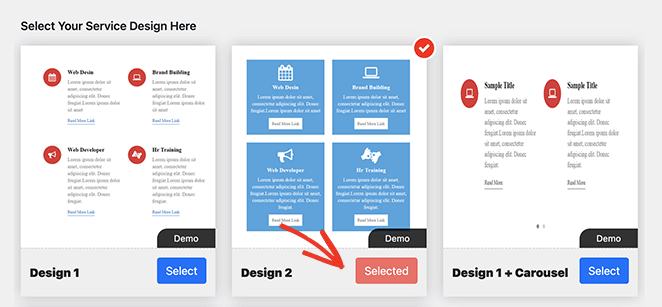
Next, choose a service box design from the premade themes by clicking the Select button.
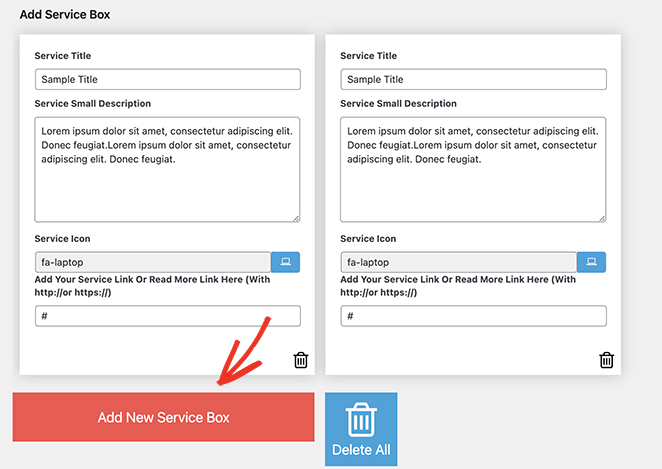
From there, scroll down to the ‘Add Service Box’ section, which has 2 boxes by default. If you need more than that, click the Add New Service Box button.
Now you can add a title and description for each service box. Visitors will see this text when they browse your website, which will help them find the service information they need.
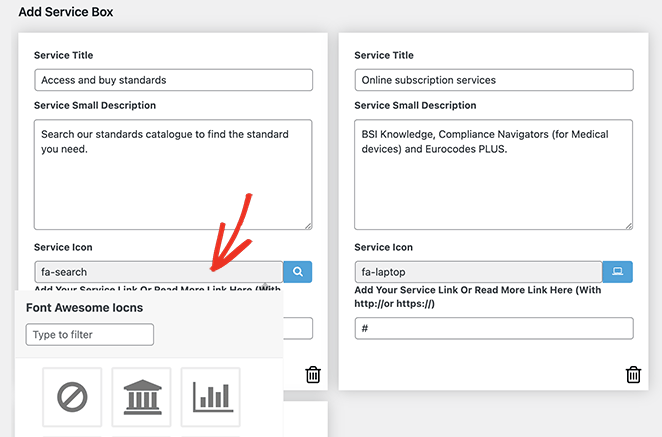
Each box will include the same icon by default. However, you can change the icon on each box to something more suitable by clicking the ‘Service icon’ field.
This will reveal a popup box where you can search for and select from various Font Awesome icons.
Below that, you can add a custom URL for each service. This is a good idea if you want to link to dedicated pages for each service or to a contact form to get in touch with you.
After entering your service information, you can use the Service Box Settings panel to customize the styling. These settings are generally easy to use and include text colors and sizes, font families, column layouts, and more options.
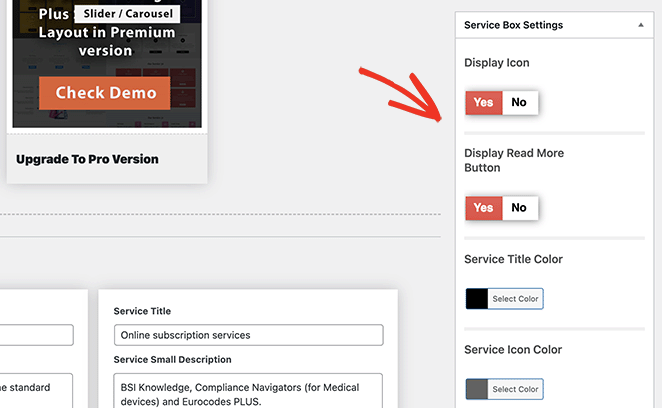
If you prefer to hide icons from your service section, you’ll need to disable the Display Icon switch.
Play around with these settings to get a look that matches your style. You can always return to this page later to change things.
When you’re satisfied with your service boxes, click the Publish button in the top-right corner of the screen.
After, scroll down to the Service Box Shortcode section and copy the shortcode from the first field.
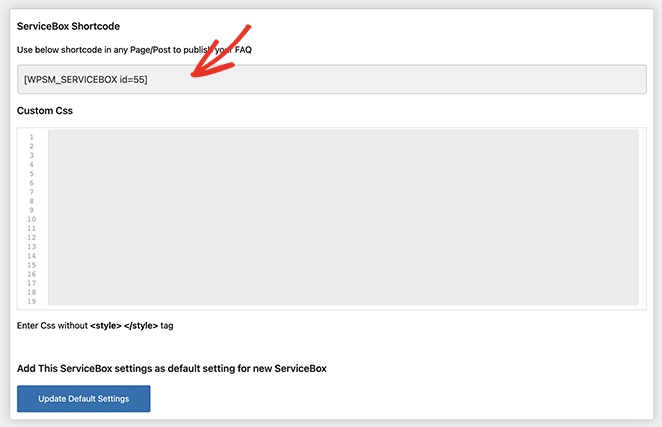
Now you can add this shortcode to any post or page on your WordPress site by pasting it into the content editor. From there, simply publish or update the post or page to make the changes live.

How to Optimize Your WordPress Service Page for SEO
Want your service page to show up higher in search results? Based on my experience optimizing dozens of websites, these are the key SEO steps I always follow to ensure a service page ranks effectively.
- Use your target keyword in the page title, URL, and main headline
- Add a short meta description that clearly explains what you offer
- Use clear subheadings for each individual service you list
- Link to other helpful pages — like blog posts, testimonials, or your contact form
- Mention your location if you offer local services (great for local SEO)
- Add alt text to all images so search engines know what they’re showing
Service Page Design FAQs
Bonus Guides for Creating WordPress Pages
I hope this guide made it easier to build a professional service page in WordPress.
If you’re ready to take the next step, try SeedProd to start designing your own custom services section today, with no code needed.
You might also like these tutorials:
- How to Write a Welcome Page for Your Website
- How to Create an About Us Page in WordPress
- How to Create a Custom WordPress Author Page
- How to Make a 404 Page in WordPress
- How to Add a Meet The Team Page to WordPress
- How to Make a FAQ Page in WordPress
- How to Create a Blog Page on WordPress
- How to Create a Client Login Page in WordPress
Thanks for reading! We’d love to hear your thoughts, so please feel free to join the conversation on YouTube, X and Facebook for more helpful advice and content to grow your business.

