Do you want to add a before and after photo slider to your WordPress website?
An image comparison slider can help showcase how your products or services work before and after customers use them. Doing so gives your brand more credibility and can prompt potential customers to make a purchase.
In this article, we’ll show you how to easily add before and after image sliders to WordPress without code.
How Does the Before and After Photo Effect Work?
The before and after photo effect allows website visitors to click an interactive divider that transitions one image into another.
Let’s say you have 2 versions of the same photo with slight differences: photo A and photo B. A before and after slider places them next to or on top of each other with a central dividing line.
When you move the slider direction, you’ll see more of one image and less of the other.

This is a fantastic way to compare different images side-by-side. For example, dentistry websites can demonstrate a client’s teeth before and after dental work. Or you can compare the before and after effects of a particular beauty treatment.
Alternatively, eCommerce websites can use before and after photo sliders to compare the features of different products.
The question remains, how do you add before and after photo sliders to WordPress? Let’s find out.
How to Add Before and After Photo Sliders in WordPress
Typically, adding photo slider widgets and slideshows to your website will involve using Javascript, Jquery, HTML, CSS, and other coding languages. Many website owners won’t know how to write that code, so they turn to web developers for help, which can be pretty costly.
Luckily, there are cheaper ways to add new features to your WordPress site. With some of the best WordPress plugins, you can easily enhance your website without spending a fortune.
The tutorial below shows you how to add before and after photo sliders with SeedProd.

SeedProd is the best WordPress website builder with drag-and-drop functionality. It lets you use pre-made templates and a visual page builder to create flexible WordPress layouts without code.
With its drag-and-drop WordPress blocks, you can enhance your website with valuable features, including:
- Before and after sliders
- Advanced image galleries
- Pricing tables
- Optin forms
- Call-to-action buttons
- Countdown timers
- Tabbed content
- Giveaways
- Contact forms
- And much more.
You can also use SeedProd to create a coming soon page and put WordPress in maintenance mode. Plus, everything you make is 100% mobile responsive, ensuring your site is easy to use across mobile devices.
Click the button below to download the SeedProd plugin, then follow the steps to embed a before and after photo slider on your website.
Step 1. Install and Activate SeedProd
After downloading the plugin, find the Downloads tab in your SeedProd account, and copy your license key.
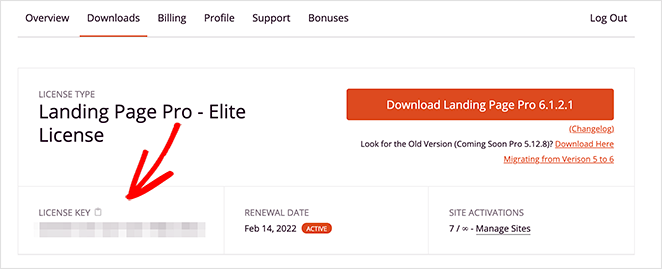
Now, go ahead and upload the plugin to your WordPress site. If you need help, you can follow this step-by-step guide on how to install a WordPress plugin.
Once SeedProd is installed, navigate to SeedProd » Settings from your WordPress admin and paste the license key you copied earlier.
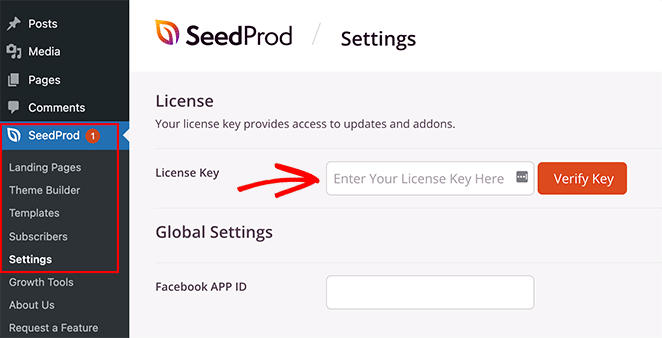
Click the Verify Key button to activate your license, then move on to step 2.
Step 2. Create Your WordPress Layout
After installing SeedProd, you’ll need to decide which type of layout you’d like to create. You can create a custom WordPress theme or build high-converting landing pages with SeedProd’s drop-and-drop editor.
The Theme Builder option is a great way to replace your existing website design with a new WordPress theme tailored to your business needs. It generates all the template files of a typical WordPress theme and lets you customize each part visually with its powerful page builder.
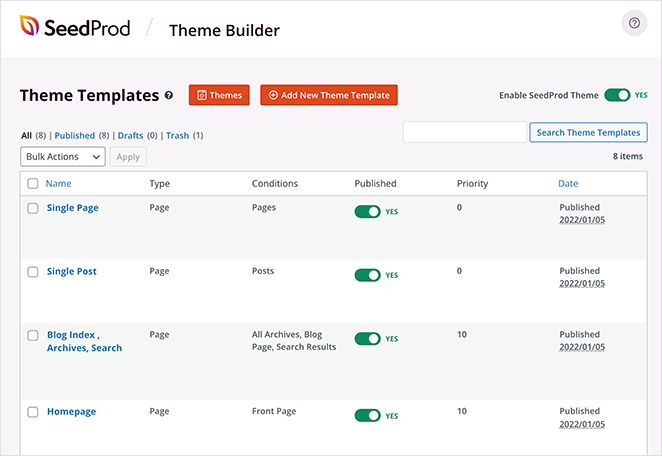
Follow this tutorial to create a custom WordPress theme with SeedProd.
Alternatively, you can use the Landing Page Builder to create standalone landing pages that work seamlessly with your current WordPress theme. It uses the same visual editor as the theme builder and is a fantastic lead-generation tactic for any website.

Here’s a guide on how to create a landing page in WordPress using SeedProd.
Once you’ve created a new layout, you can move to step 3 and add a before and after slider to your design.
Note: for this guide, we’ll create a custom WordPress theme and edit the homepage template.
Step 3. Add the Before and After WordPress Block
After creating your layout, open the page you want to edit with SeedProd’s page builder.
Since we’re editing the homepage of our WordPress theme, we’ll go to SeedProd » Theme Builder and click Edit Design under the Homepage template.

On the following screen, you’ll see a layout similar to the one below:
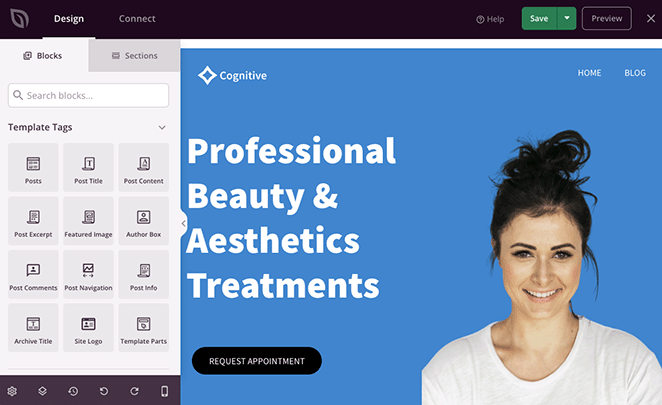
On the right is a live preview of the template you chose in step 2, and on the left are blocks and sections you can drag and drop onto your design.
Customizing any element is super easy.
For example, you can edit headings by clicking on them and typing in your new content directly on the live preview.
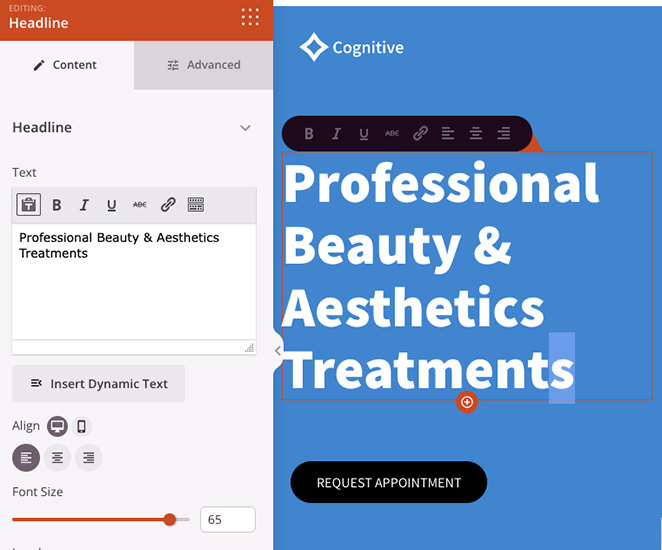
Or, you can edit the text in the settings panel on the left-hand side, which includes countless customization options.
So customize your template until it starts looking the way you want.
Now let’s look at adding features that your template may not automatically include. For example, the Website Kit we chose doesn’t have a before, and after photo slider, so we’ll need to add it ourselves.
To do that, scroll through the WordPress blocks on the left until you find the Before After Toggle. Then drag it into position on your live preview.
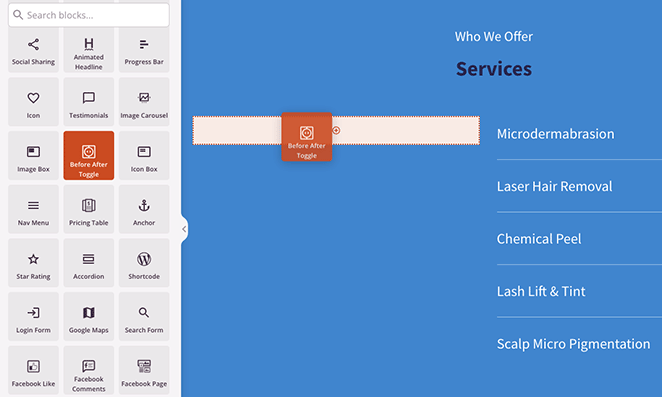
When you click the block, you’ll open its customization options in the left-hand settings panel. This is where you can add your before and after images, change the styling, and more.
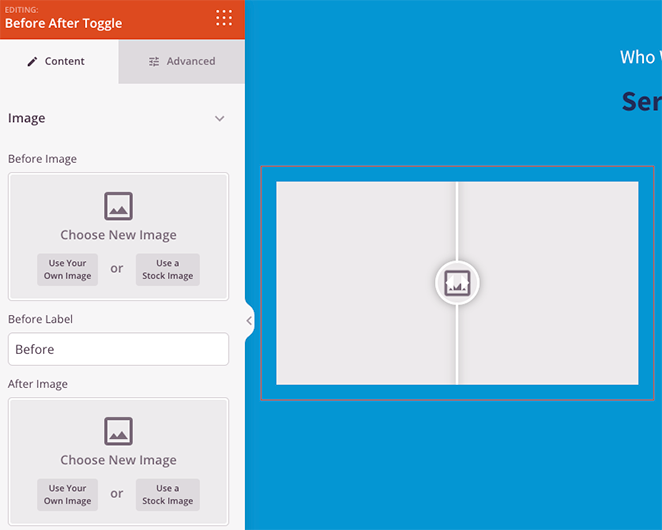
Let’s start by adding the first image, which will typically be your “before” photo. You can do this by clicking the Use Your Own Image option and either uploading a new photo or choosing one from your WordPress media library.
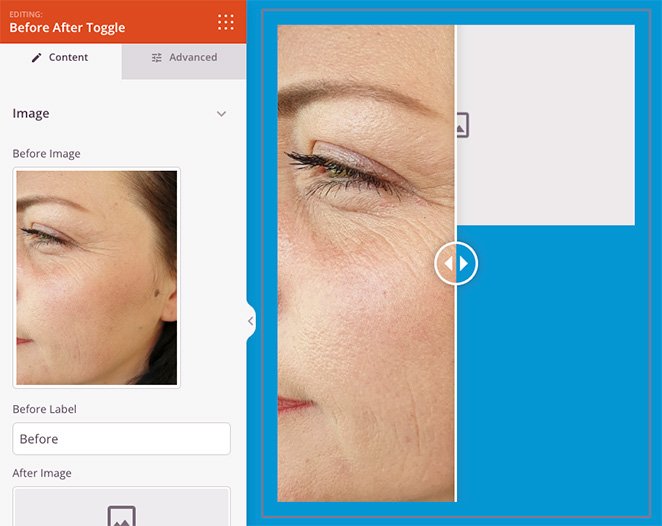
Now repeat this step for the “after” image. You can edit the labels for each image by replacing the names in the text fields.
With your images in place, let’s look at a few more settings.
Under the Orientation heading, you can make the before and after slider vertical instead of horizontal.
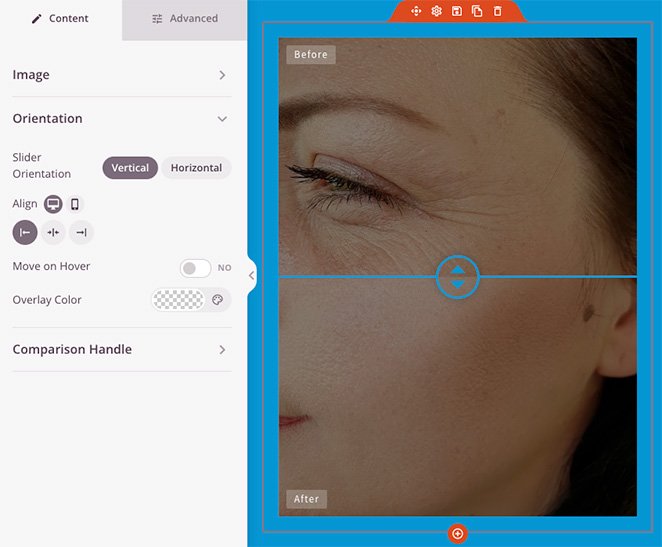
You can also make the slider move when you hover over the image with your cursor and apply a color overlay to the photos.
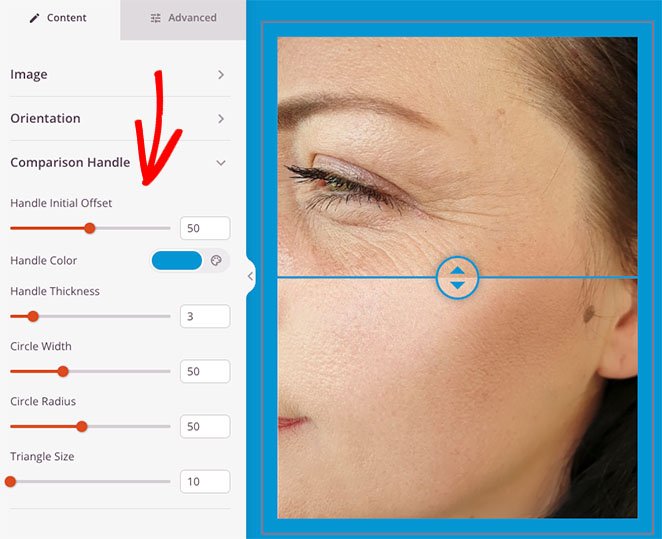
When you open the Comparison Handle heading, you’ll see settings to change the slider color, width, radius pixel size, and more.
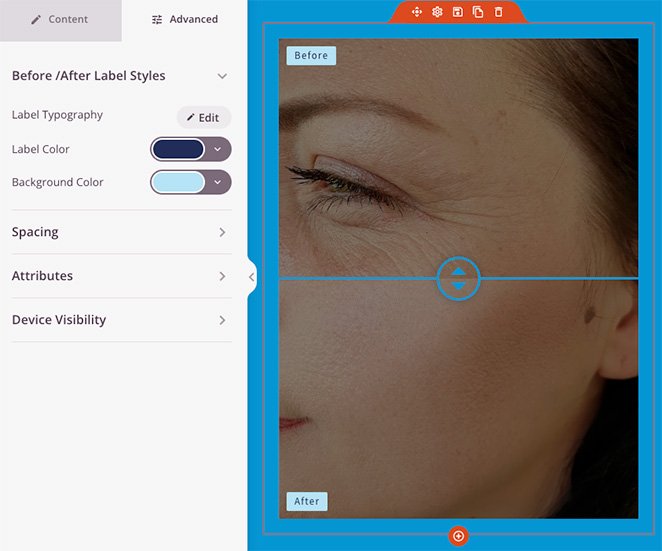
You can find even more settings by clicking the Advanced tab. For example, you can change the label typography and color, adjust the block spacing and attributes, and hide certain elements on mobile screens.
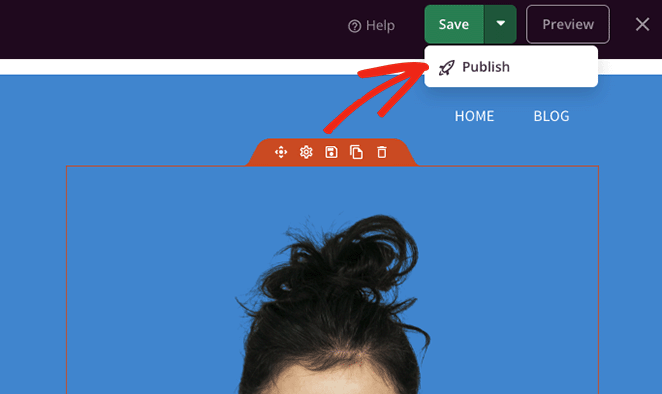
When you’re happy with how the before and after photo slider looks, click the Save button in the top-right corner of your screen, and click Publish.
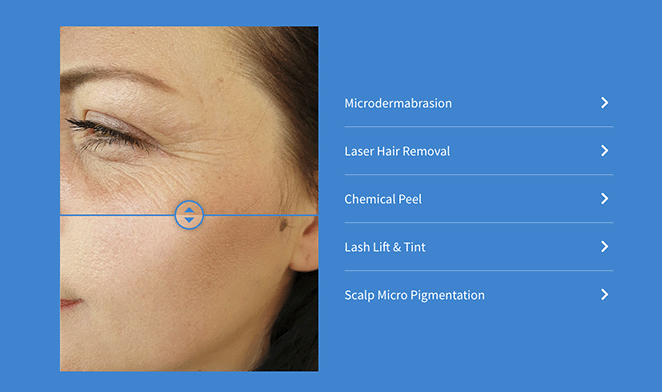
If you’re creating a landing page, you can now preview your page and see your before and after image slider in action. But if you’re making a custom WordPress theme, you’ll need to complete step 4.
Step 4. Enable Your Changes
Even though your changes are saved and published, you still need to make your WordPress theme live. Don’t worry; this step is quick and easy.
Go to SeedProd » Theme Builder from your WordPress dashboard, and turn the Enable SeedProd Theme toggle to the “Yes” position. That’s it!

Now you can head to your website’s front end and take your new image slider for a spin.
Before and After Photo Slider FAQs
No, you typically don’t need any coding skills to use a before and after photo slider plugin in WordPress. These plugins are designed to be user-friendly, and they usually offer a visual interface for uploading images and customizing the slider.
Most before and after photo slider plugins are designed to be mobile responsive. This means that they will automatically adjust to fit the screen size of the device that your website is being viewed on.
You can typically use multiple before and after sliders on the same page. However, the exact process for doing this may vary depending on the specific plugin you are using.
There you have it!
You now know how to add before and after photo sliders to your WordPress website. There are so many ways to make this feature work for your business’s success.
So what are you waiting for?
Thanks for reading! We’d love to hear your thoughts, so please feel free to leave a comment with any questions and feedback.
You can also follow us on YouTube, X (formerly Twitter), and Facebook for more helpful content to grow your business.

