
You set up your WooCommerce store, but shoppers can’t see their cart from the menu. They add a product, then have to hunt for the cart link before they can check out.
A WooCommerce shopping cart icon fixes that. It shows a live item count that updates as shoppers add products, right in your site header, so the path to checkout is always one click away.
In this guide, I’ll show you two no-code ways to add a WooCommerce shopping cart icon to your menu, how to customize the look, and how to fix an icon that won’t show.
What a Menu Cart Icon Is (and Why It Helps)
A menu cart icon is a small shopping cart that sits in your primary WooCommerce navigation menu and shows the number of items in a shopper’s cart. The count updates as they add or remove products, and the icon stays in the menu as they browse different product pages.
You’ve probably seen cart icons like this when shopping at Amazon:
Adding one to your store does two things:
- Shows shoppers what’s in their cart: The item count and subtotal give a running total before they reach the checkout page.
- Makes checkout faster: A one-click path to the cart keeps the process smooth, so visitors are less likely to abandon their carts.
How to Add a WooCommerce Cart Icon in Your WordPress Menu (With Item Count)
WooCommerce doesn’t include a shopping cart icon for menus by default. You either install a WooCommerce plugin or add the code yourself.
Here are two code-free ways to do it. The first uses SeedProd to build the icon into your theme header. The second uses a free plugin if you don’t want to change your current theme.
Method 1: Add a WooCommerce Cart Icon Using SeedProd (No Code)

SeedProd is a drag-and-drop website builder for WordPress that lets you build a custom WooCommerce store without touching code, and its dedicated WooCommerce blocks include a Menu Cart block for adding a cart icon to your header.
I use SeedProd to build my own site, and the Menu Cart block is the part I reach for here because it handles the item count, subtotal, and styling in one place. With 300+ templates to start from, you can have a header built in an afternoon.
Follow the steps below to add a WooCommerce shopping cart icon to your menu with SeedProd.
Step 1. Install SeedProd
First, download a copy of the SeedProd website builder plugin.
After downloading SeedProd, install and activate the plugin on your WordPress website. You can follow this guide to install a WordPress plugin if you need help.
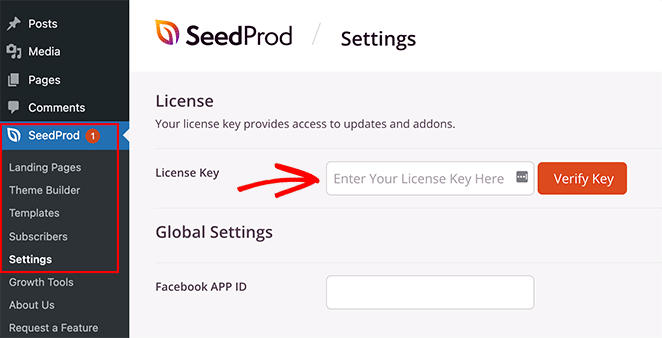
Next, go to SeedProd » Settings from your WordPress admin menu. That’s where you enter your SeedProd license key to unlock the Pro features.
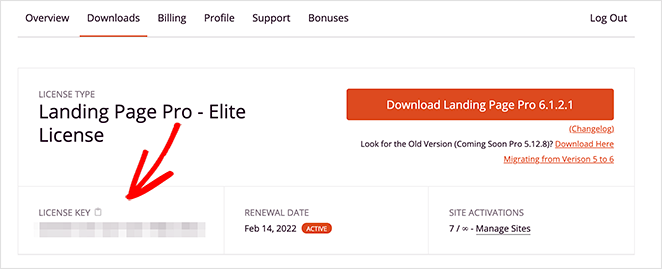
You can find your license key by going to the SeedProd website and logging into your account. From there, copy your license key from the “Downloads” section.
Now paste your key into the text field and click the Verify Key button.
Step 2. Create a New WooCommerce Theme
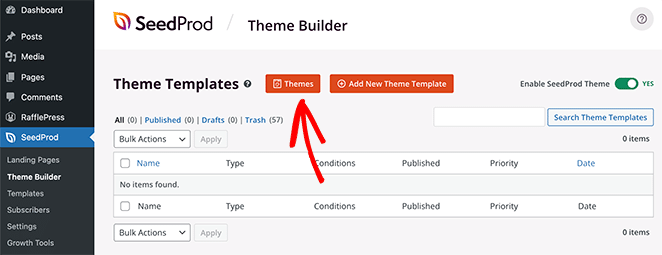
Next, go to the SeedProd » Theme Builder page. This is where you create a custom theme for your WooCommerce website.
I recommend this option because it replaces your existing WordPress theme with a fast, lightweight one you can edit with drag and drop. It also gives you the Menu Cart block you need for the cart icon.
There are two ways to create a theme with SeedProd’s theme builder:
- Pre-built theme: import a ready-made WooCommerce theme that creates all the pages you need for your online store.
- Individual theme parts: build each part of your WooCommerce store one piece at a time.
I’ll use the pre-built theme method here because it does the setup for you. Click the Themes button to see the list of premade WordPress theme kits.
Each theme is mobile-friendly and easy to edit with SeedProd’s drag-and-drop page builder.
Hover over any theme and click the checkmark icon to import it.

I’ll use the Sportswear Store theme for this tutorial.
After importing, you’ll see all the templates that make up your WooCommerce website design. You can edit each one to match your store.
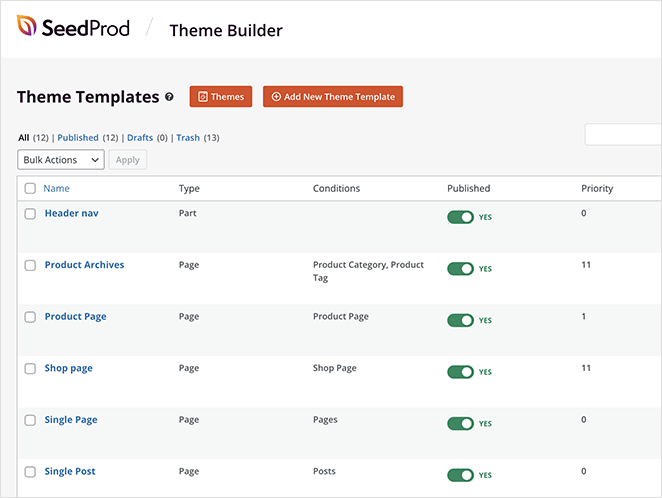
Next, I’ll show you how to customize the “Header nav” template, where the cart icon lives.
Step 3. Customize Your WooCommerce Navigation Menu
Many of SeedProd’s pre-made themes already include a WooCommerce shopping cart icon in the navigation bar. Open the header navigation template to check and adjust it.
Find the “Header nav” template in your template list and click the Edit Design link to open it in the visual builder.
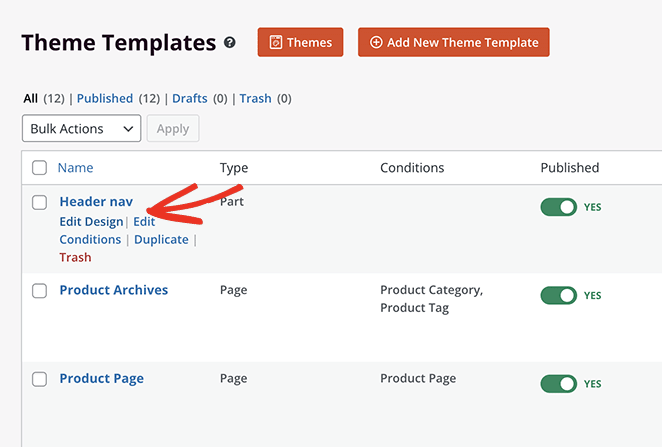
Your header layout shows on the right. On the left are the blocks and sections you can add.
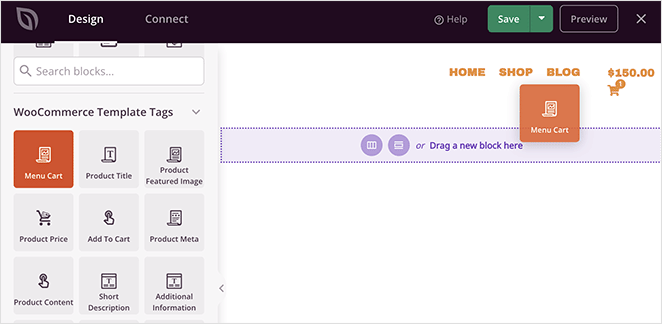
To add a block, drag it from the left and drop it onto your design.
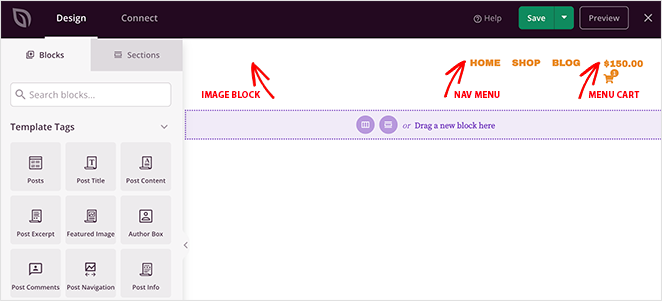
The header already has three blocks:
- Image for the website logo
- WordPress navigation menu
- Menu Cart block
The Menu Cart block displays the cart icon, item count, and subtotal. Click it to open the Menu Cart settings, where you can control how it looks and behaves.
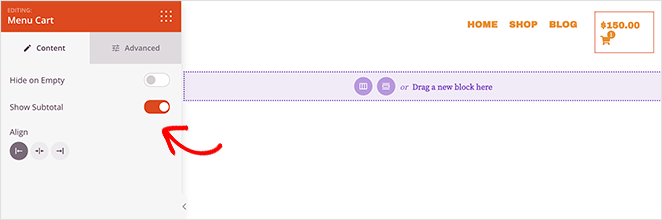
From the settings panel, you can:
- Hide the cart when empty: only show the icon once a shopper adds an item.
- Show or hide the subtotal: display the running total next to the count, or just the count.
- Set the alignment: position the cart left, center, or right in the header.
- Adjust colors, spacing, and mobile display: open the Advanced tab to change the cart and badge color, spacing, and whether the badge shows on mobile.
When you’re happy with how the cart icon looks, click the green Save button.
Step 4. Customize Your WooCommerce Theme
Now you can edit the other templates in your WooCommerce theme. The process is the same as the header. If you need help, here are some guides:
- How to Customize Your WooCommerce Shop Page
- How to Customize WooCommerce Product Category Pages
- How to Display Featured Products in WooCommerce
Step 5. Enable Your SeedProd WooCommerce Theme
After customizing your theme, you’re ready to make it live.
Go to SeedProd » Theme Builder. In the top-right corner, switch the “Enable SeedProd Theme” toggle to the Yes position.
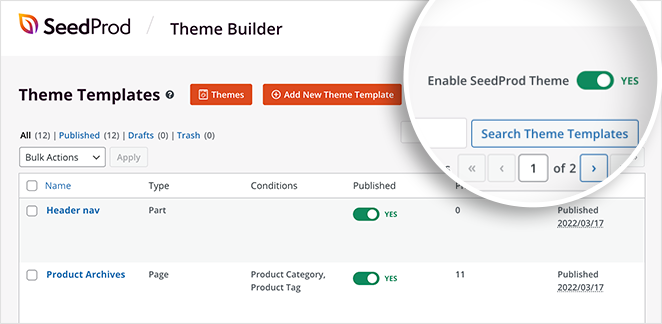
Now preview your menu cart icon to see how it looks on your live store.
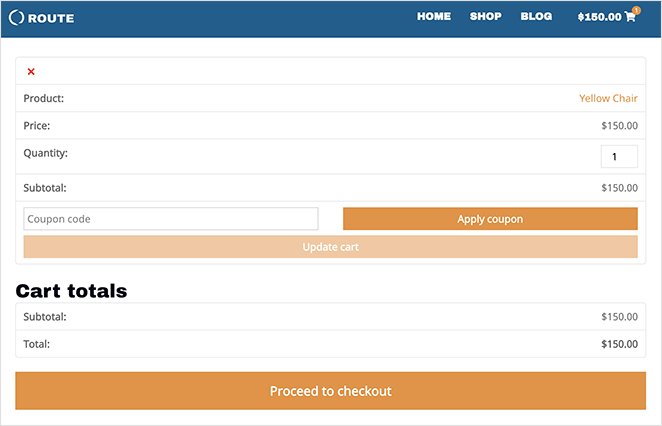
When shoppers click the cart icon, they go straight to the cart page. You can also customize your WooCommerce shopping cart with SeedProd.
Here’s an example of an Amazon-style menu cart we also built with SeedProd:
How to Customize the Cart Icon
A default cart icon works, but most stores want it to match their branding. Here’s what you can change with the SeedProd Menu Cart block’s Advanced settings, and what to do if you’re on a different theme.
- Show or hide the item-count badge: the small number on the icon can stay visible at all times or only appear once the cart has items.
- Change the color and size: match the icon and badge to your brand colors and scale them up or down in the Advanced tab.
- Swap the icon for another theme: if you’re not using SeedProd, most cart-icon plugins let you pick a different icon or replace it with text like “Cart” or “Basket” in their settings.
When I set this up on my own store, hiding the badge until the cart had items kept the header cleaner without losing the count when it mattered.
Method 2: Add a WooCommerce Menu Cart Icon With a Free Plugin
If you don’t want to change your current WordPress theme, use a free plugin instead. It adds a cart icon to your existing menu without touching your theme files.
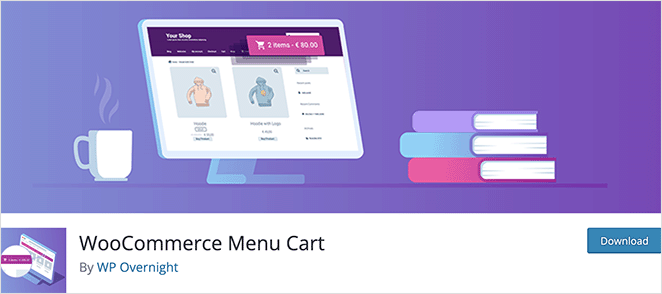
The plugin I’ll use is called WooCommerce Menu Cart. It works with WooCommerce, Easy Digital Downloads, and many other WordPress eCommerce platforms.
Step 1. Install the WooCommerce Menu Cart Plugin
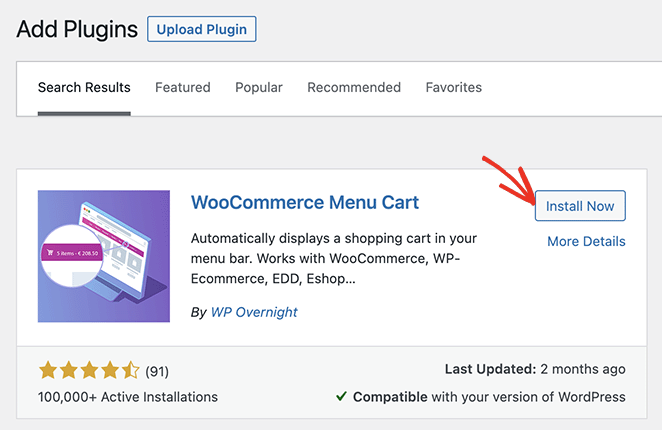
First, go to Plugins » Add New from your WordPress dashboard and type “WooCommerce Menu Cart” into the search box.
Next, click the Install button, then click Activate to make the plugin live.
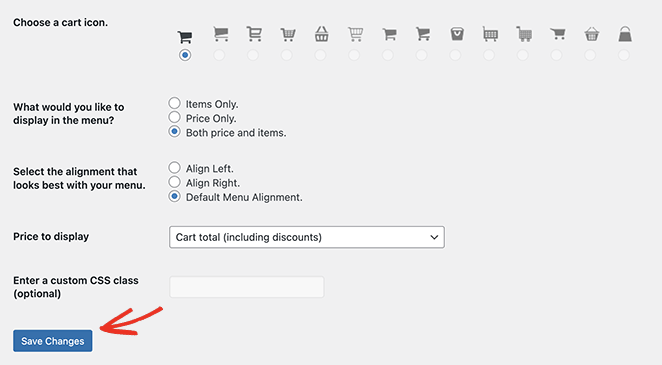
Step 2. Configure the Shopping Cart Icon
After installing the plugin, go to WooCommerce » Menu Cart Setup from your WordPress admin panel. Here you choose your eCommerce platform and select which menu the cart icon appears in.
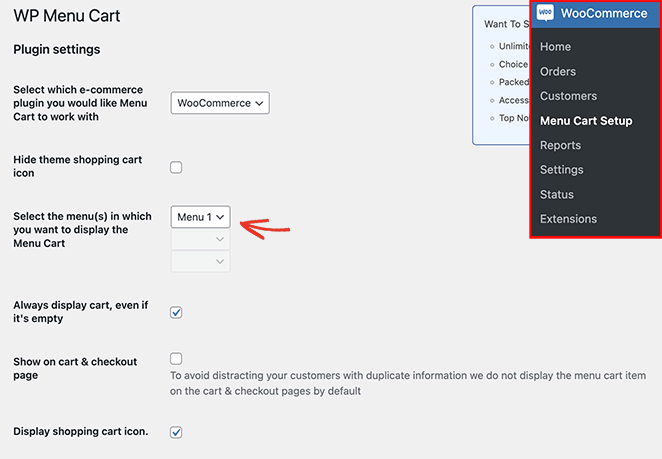
Configure your cart icon settings, then click the Save Changes button.
Now visit your site to see your WooCommerce shopping cart icon in the menu.
Why Your WooCommerce Cart Icon Isn’t Showing
If you added a cart icon but it isn’t appearing in your menu, the cause is usually one of a few common things. Work through these before changing anything else.
- Your theme has no native cart icon: most standard WordPress themes don’t add one for WooCommerce, which is why you need SeedProd or a plugin in the first place.
- The cart is set to hide when empty: if you turned on “hide when empty,” the icon only appears after you add a product to the cart. Add an item and refresh to check.
- Caching is showing an old version: a caching plugin or your host’s cache can serve the page from before you added the icon. Clear your cache and reload.
- You’re on a block theme: if your theme uses the WordPress Site Editor, you can add a native Cart or Mini-Cart block directly in the header template, no plugin needed. Go to Appearance » Editor, open your header template, and add the Mini-Cart block.
If the icon still won’t show after that, it’s worth checking whether the cart link itself is working, since a broken cart page can stop the icon from rendering.
FAQs About WooCommerce Cart Icons in Menus
How do I add a cart icon to the WordPress menu?
You add a cart icon with a plugin or a website builder, because WordPress and WooCommerce don’t include one by default. With SeedProd, you drop the Menu Cart block into your header template.
With a free plugin like WooCommerce Menu Cart, you install it and pick which menu the icon attaches to. Both methods are code-free.
How do I add the cart icon to the header in WooCommerce?
Add the cart icon to your header template, not the page content. In SeedProd’s Theme Builder, edit the “Header nav” template and drop in the Menu Cart block.
If you use a block theme, open the Site Editor, edit your header template, and add the Mini-Cart block in the same spot.
Why isn’t my WooCommerce cart icon showing in the menu?
The most common reason is that the cart is set to hide when empty, so it only appears after a shopper adds an item. Caching can also serve an old version of the page, so clear your cache and reload.
If neither fixes it, your theme may not support a native cart icon, which means you need SeedProd or a plugin to add one.
How do I show the item count on the WooCommerce cart icon?
The item count is the small badge on the cart icon, and most tools show it by default. In SeedProd’s Menu Cart settings, the count updates automatically as shoppers add products.
If you don’t see it, open the Advanced tab and make sure the badge isn’t hidden, including on mobile.
Add Your WooCommerce Cart Icon Today
A cart icon with a live item count gives shoppers a clear path to checkout, which means more completed sales for you. You can build one right now with SeedProd’s drag-and-drop builder, no code required.
Get started with SeedProd and add your WooCommerce shopping cart icon in minutes.
Next, you might want to check out these guides to keep customizing your WooCommerce store:
- How to Customize the WooCommerce Additional Information Tab
- How to Add a View Cart Button in WooCommerce
- How to Change the Shop Page Title in WooCommerce
- How to Create a Stunning Product Image Gallery in WooCommerce
- How to Add Star Ratings to WooCommerce Product Pages
- How to Display Related Products in WooCommerce
- How to Display Product Categories and Tags in WooCommerce
- How to Get and Display Product Descriptions in WooCommerce
- How to Hide Out of Stock Products in WooCommerce
Thanks for reading! We’d love to hear your thoughts, so please feel free to join the conversation on YouTube, X and Facebook for more helpful advice and content to grow your business.


