Looking for an easy guide on how to add a link to your TikTok bio?
Adding a link to your TikTok bio is an excellent way to drive traffic to important pages on your small business website. However, TikTok only allows a single bio link, which limits its traffic-boosting potential.
In this guide, we’ll show you how to add a link to your TikTok bio using custom landing page. That way, TikTok users can access all the links you want to promote in one place from a single link in your bio.
Why Add a Link to Your TikTok Bio?
TikTok is an excellent social media platform for sharing creative content and engaging your target audience. However, adding a link to your TikTok bio can provide many more benefits.
It can help to drive traffic to your other social media platforms, website, or blog. Additionally, it can help to increase your followers by making it easier for them to find your other content.
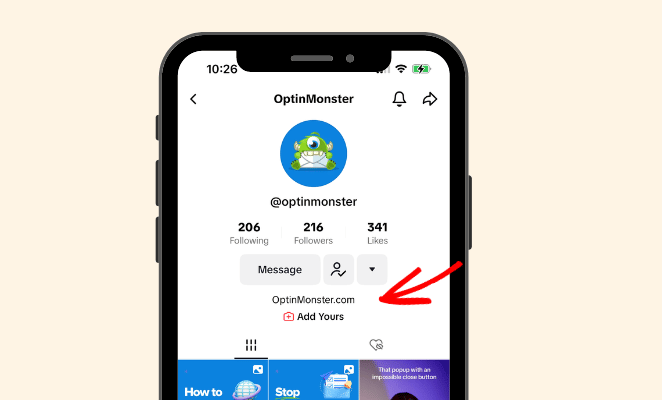
You can also use the link to promote products or services that you offer. Overall, adding a link to your TikTok bio can help to enhance your online presence and increase your reach.
How to Add a Link to Your TikTok Bio
Adding a link to your TikTok bio is similar to Instagram. Whether you have a TikTok business account or a personal account, you can add a clickable link to your profile page by following these steps:
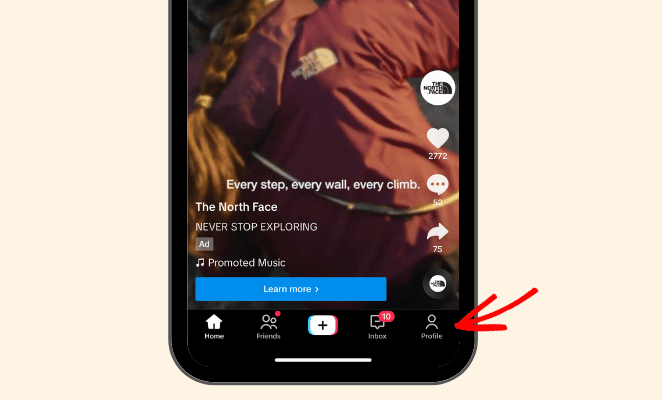
First, download and open the TikTok app, and tap on your profile page.
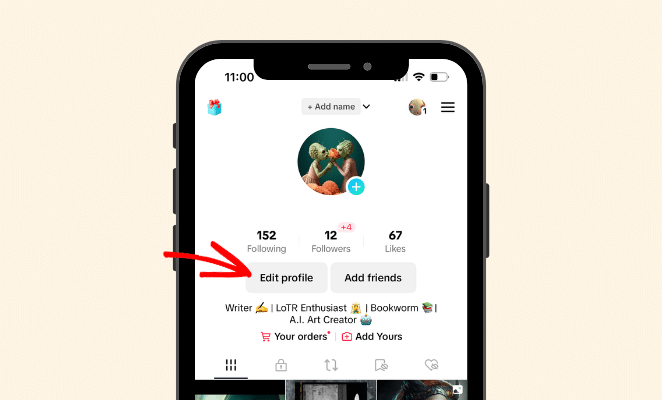
Next, tap the Edit Profile button.
On the next screen, enter the website link you want to display in the Add Your Website field.
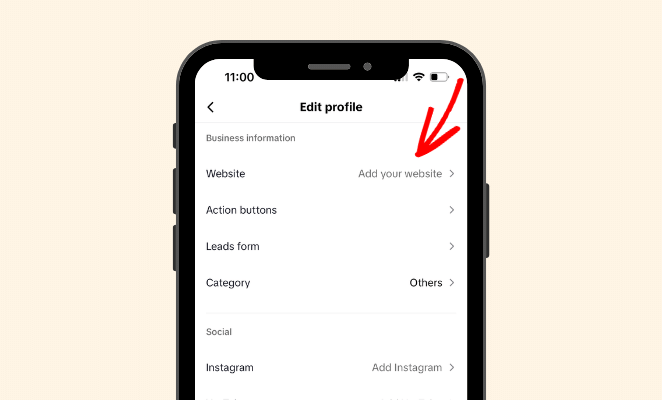
That’s all there is to it. When you return to your TikTok profile, you should see a clickable bio link.
How to Add Multiple Links to a TikTok Bio
TikTok doesn’t allow you to add more than one link to your bio. This can be challenging for businesses that have multiple pages or campaigns they want to promote.
To overcome this, you can use a custom landing page or link in bio page like LinkTree to display many links on one page.
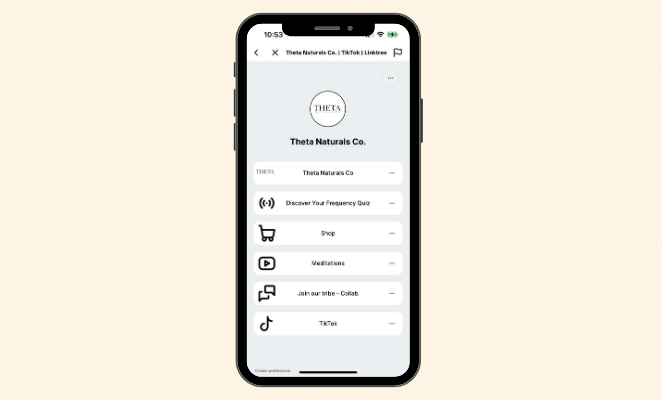
While there are several tools with a link in bio feature available, many of them rely on 3rd party software. That means they control what you can and can’t add to your page, its customization options, and who owns the content.
A better alternative to a link in bio tool is to create a landing page on your website. Not only will you own the content on your page, but you’ll have full control over how it looks, the type of content you display, and how many links to include on the page.
Moreover, the traffic you drive to that page will go to your website, not a 3rd-party platform, ultimately helping your marketing strategy.
If you have a WordPress website, we’ll show you how to create a TikTok link in bio page below.
How to Create a TikTok Link in Bio Page on WordPress
The easiest way to create a TikTok link in bio page on WordPress is with a drag-and-drop page builder. Page builder plugins help you create flexible WordPress layouts without writing code.

SeedProd is one of the best tools for this because it’s beginner-friendly and doesn’t require any technical know-how. It even comes with a pre-made social links page which is perfect for setting up a bio page.
All you have to do is add your links, customize the design, and hit publish. Follow the steps below to see how easy it is.
Step 1. Install and Activate SeedProd
First, download the SeedProd plugin and install and activate it on your WordPress website.
For this guide, we’re using SeedProd Pro for its advanced blocks, however, you can build a simple landing page using SeedProd Lite, the free version.
If you need help, please see our documentation on how to install SeedProd.
Step 2. Choose a Landing Page Template
SeedProd has hundreds of pre-made landing page templates that make creating a custom page effortless. But first, you’ll need to create a new landing page.
To do this, navigate to SeedProd » Landing Pages and click the Add New Landing Page button.
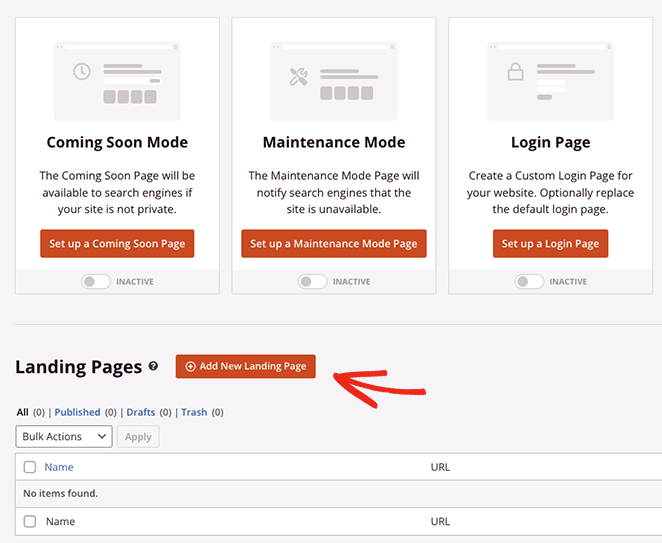
From there, browse through the library of responsive landing page templates until you find a design you like. For easier browsing, click the tabs along the top.
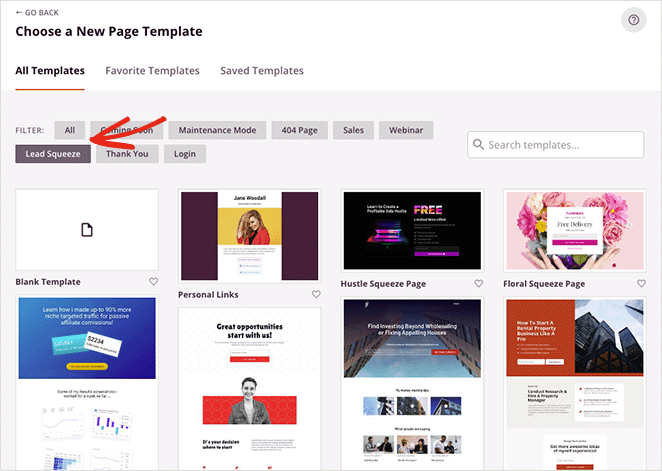
This will filter the landing pages by goal, such as:
- Coming soon
- Maintenance mode
- 404 page
- Sales
- Webinar page
- Lead squeeze
- Thank you
- Login page
The best thing is you can customize any template to look completely different, so you’re not limited to the designs on offer. We’ll go with the Personal Links template for this guide because it’s close to what we want.
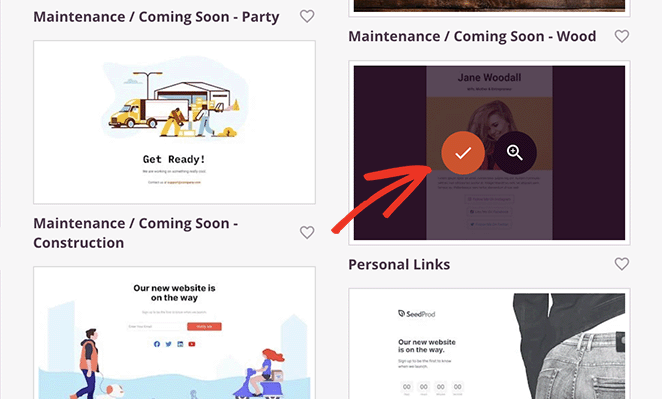
To choose a template, hover over the design and click the checkmark icon.
After, you’ll see a popup where you can give your page a name. SeedProd will automatically generate a URL for the page, but you can change this later if needed.
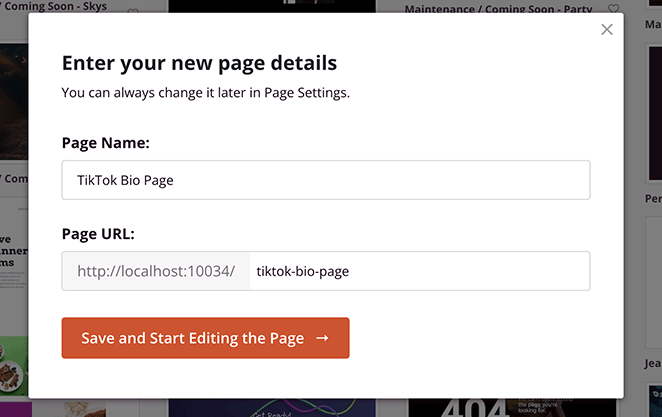
When you’re happy with those details, click the Save and Start Editing the Page button.
Step 3. Customize Your Link in Bio Page
The template you chose will now open in SeedProd’s drag-and-drop page builder. It has a visual layout with blocks and settings on the left and a live preview on the right.
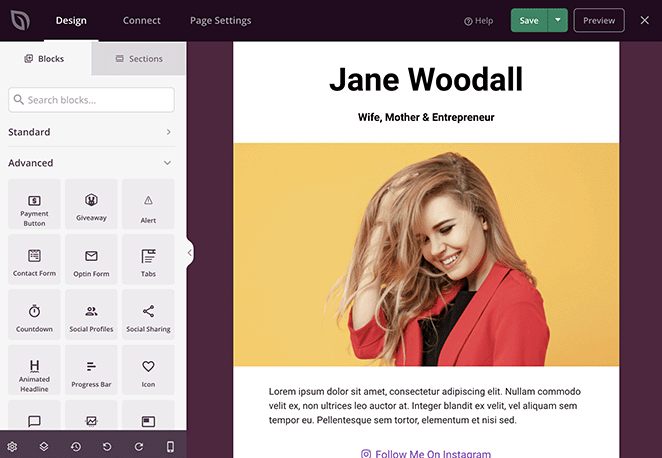
Any changes you make to your page will update in real time so you can see how it looks before publishing. For example, if you click the cog icon in the bottom-left corner of the screen, you’ll see the Global Settings page.
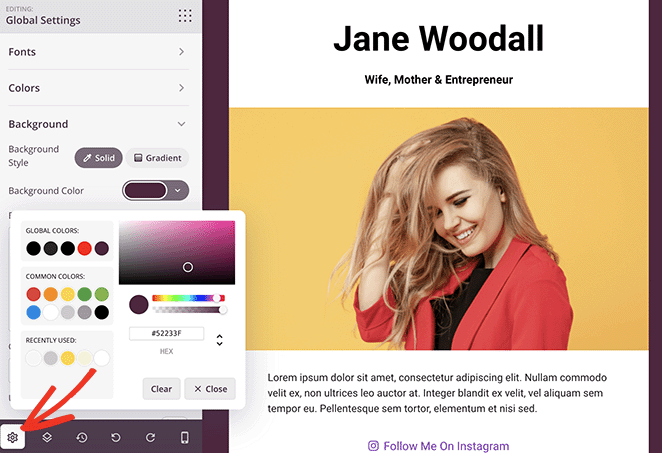
Here you can change the background color, fonts, and default colors for all elements on your page. This gives you a good starting point for your design, making it easier to customize other elements, which we’ll show you how to do next.
Customizing Images
First, we’ll replace the header image with a profile picture, which is a great way to help users recognize your brand. We’ll also add a shape divider to the background to make it stand out.
To do this, find the Column block, drag it onto your page, and select the single-column option.
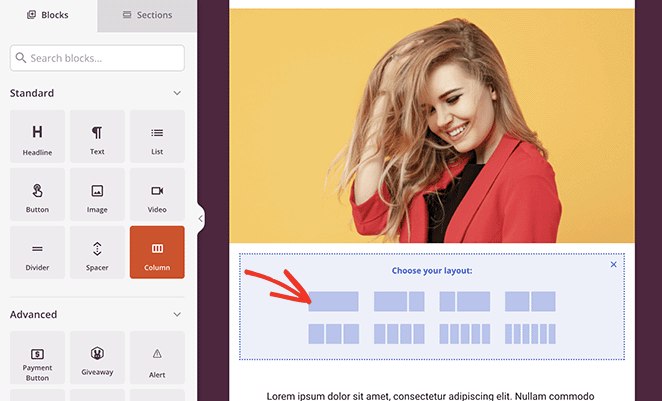
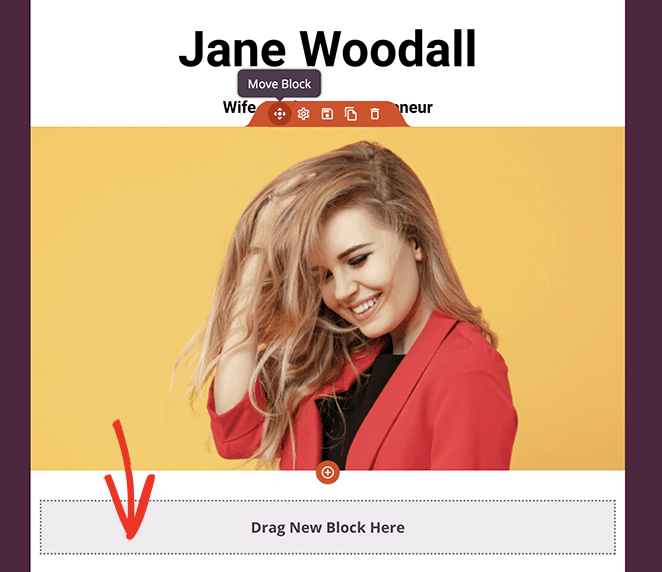
Next, hover over the existing image until you see the Move icon, and drag it into your new column.
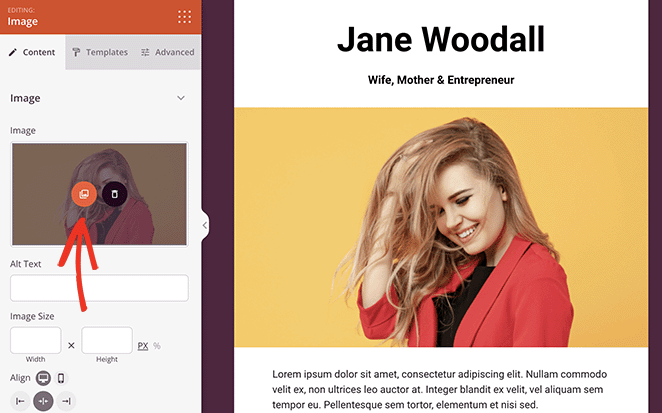
Now, click the existing image, and you’ll see a panel open on the left-hand side. Here, select the image icon, which allows you to choose a new image from your computer or WordPress media library.
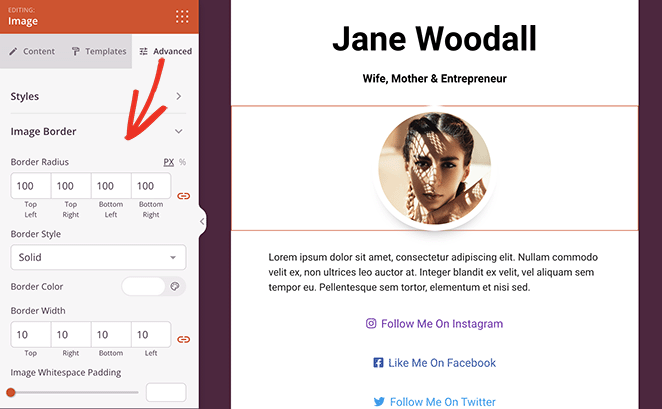
Your new photo may look too big at first. However, you can adjust the size by entering a custom width and height in the block settings.
In the Advanced tab, you can find more customization options. For example, you can add a drop shadow, change the image border radius, and even add a colored border around the entire image.
If you want to make the image stand out more, you use SeedProd’s Shape Divider option. This allows you to add attractive shapes at the top or bottom of rows and sections to draw the eye.
You can find this setting by clicking a Row or Column, selecting the Advanced tab, and scrolling down to the Shape Dividers heading.
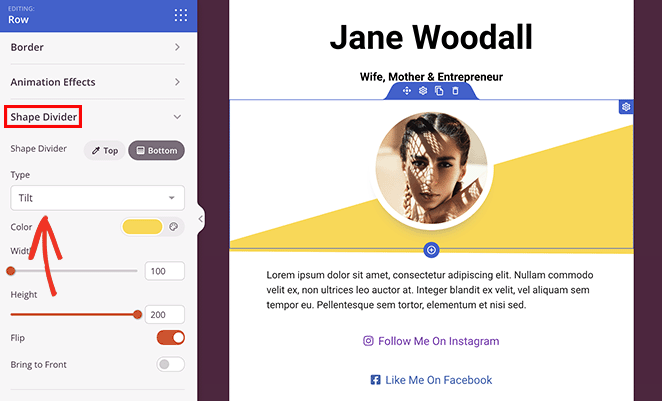
Then scroll through the different shape dividers in the drop-down menu.
Customizing Text and Headings
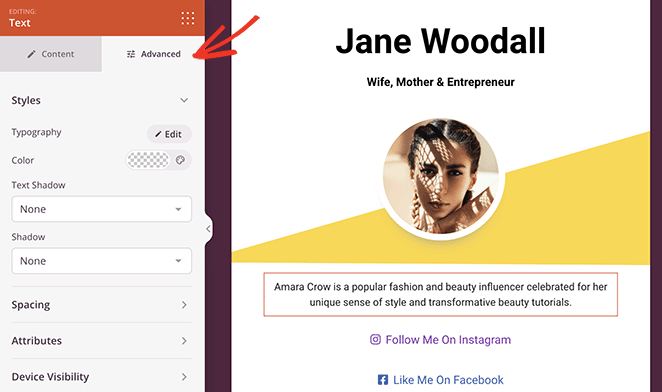
The next thing you’ll want to change is the text on the page, such as the name, subheading, and description. These elements work similarly to the image block.
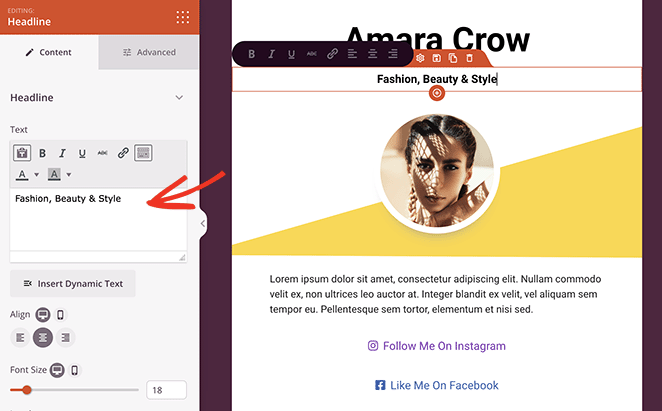
Simply click any text element and add your own custom content. As with the other blocks, you can click the Advanced tab for more styling options, like different fonts, colors, spacing, and more.
Adding Custom Links
The most important part of a link in bio page is the ability to display multiple links. These links are often pages where you want to drive the most traffic and can include the following:
- Other social media profiles
- Your YouTube channel
- Affiliate links on your Amazon storefront for influencers
- Specific product pages on your website
- Popular blog posts and tutorials
The template we’re using in this guide already has a section for adding multiple button links for social media accounts. All you need to do is add your own links and customize their appearance.
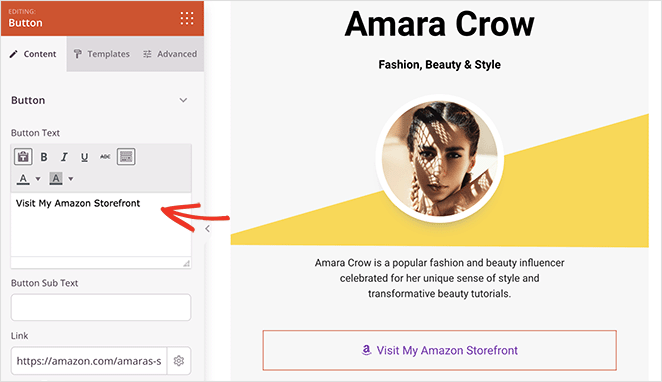
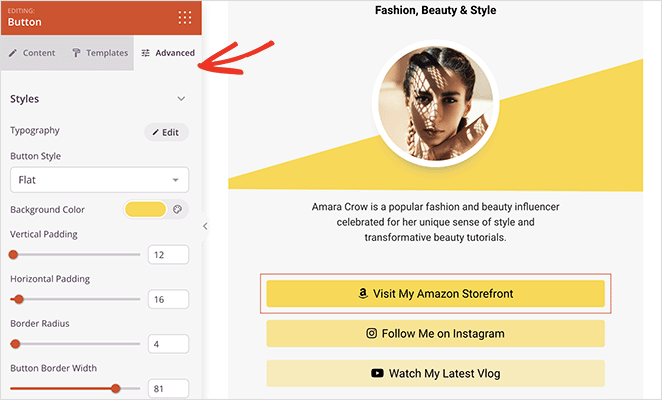
Simply click a button, add your own link text, and paste the URL to the destination page.
In the block settings, you can also choose an icon to help illustrate where the links go.
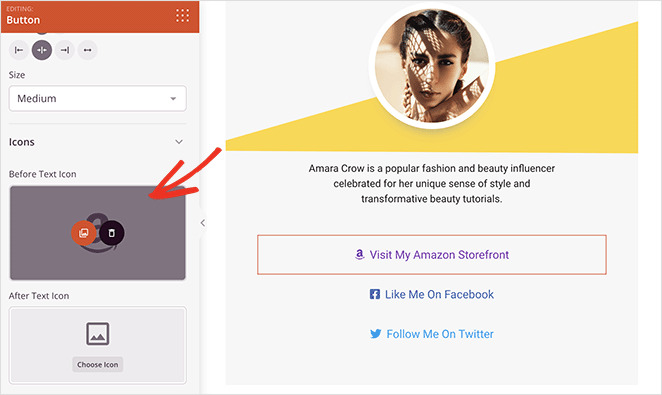
Don’t forget to click the Advanced tab to customize your button colors, borders, and other styling options. For example, you can play with the color options to create interesting effects like this:
Adding Lead Generation Elements
There are many other ways to customize your TikTok bio page with SeedProd. For instance, if you want to grow your email list, you can add the opt-in form block so users can sign up for email updates.
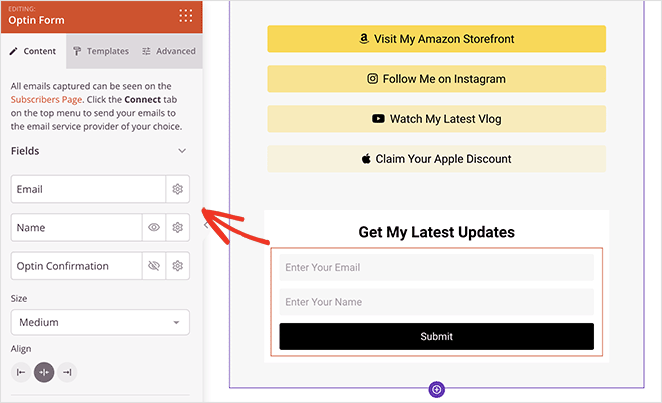
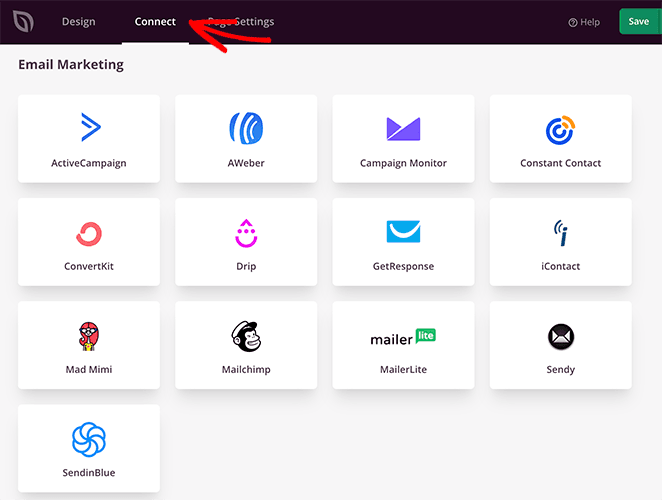
Then in the Connect tab, you can link your email marketing service to update your list when new users subscribe.
Another great feature is the Social Profiles block. It lets you add multiple social media buttons for popular platforms, including LinkedIn, Pinterest, SoundCloud, and more.
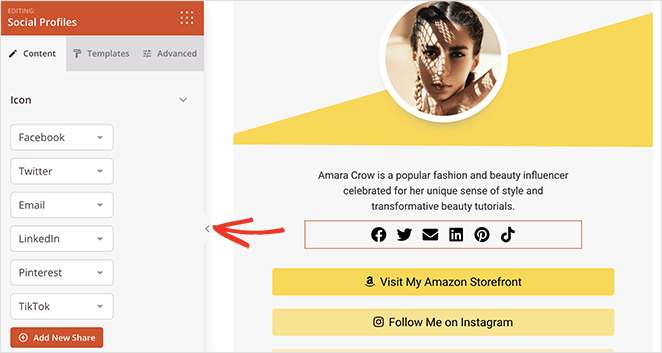
You can even add custom icons for any platforms SeedProd doesn’t offer automatically.
Step 4. Publish Your TikTok Landing Page
Continue customizing your TikTok bio page until you’re happy with how everything looks.
Then click the Save button in the top-right corner and select Publish to make the page live on your website.
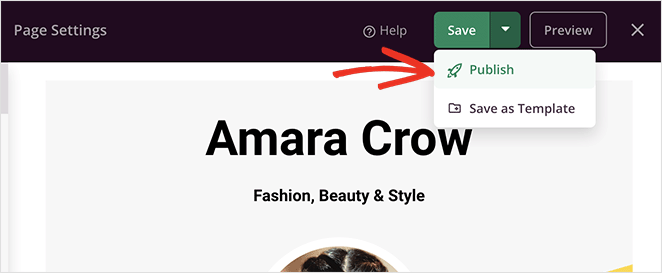
Now all that’s left is to add your new page to your TikTok profile. Just copy the link to your new page, open TikTok, tap Edit Profile, and paste the link into the “Add Your Website” section.
When people click that link on TikTok, they’ll see your shiny new landing page.
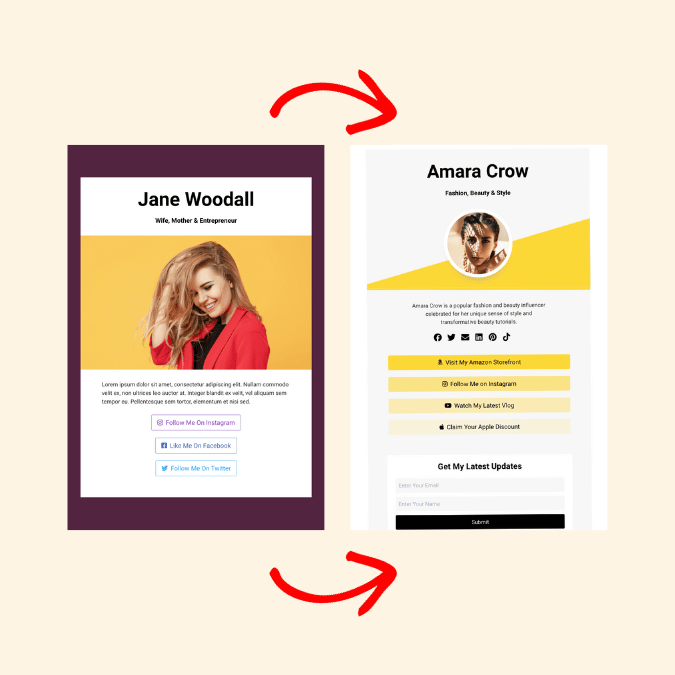
Just think. We went from a simple template to a stunning custom page in no time without coding.
Build Your TikTok Bio Link Page Today
We hope this guide has helped you learn how to add a link to your TikTok bio. By now, you’ll also know how to create a TikTok bio link page in WordPress using SeedProd’s easy and powerful drag-and-drop page builder.
Ready to dive in?
You might also like the following top WordPress tips and guides:
- 25+ Best WordPress Plugins to Revamp Your Site
- 7 Social Media Landing Page Examples to Grow Your Company
- 9+ Social Media Lead Generation Strategies You Need to Try
Thanks for reading! We’d love to hear your thoughts, so please feel free to leave a comment with any questions and feedback.
You can also follow us on YouTube, X (formerly Twitter), and Facebook for more helpful content to grow your business.

