If you run a business or offer client services, a custom login page makes your site look polished and secure while reinforcing your brand identity.
Quick Answer: How to Create a Client Login Page
The easiest way to create a custom client login page in WordPress is by using a page builder plugin like SeedProd. The process involves installing the plugin, selecting a pre-built login page template, customizing it with the drag-and-drop editor to match your brand, and then publishing it to replace the default WordPress login screen.
- Step 1. Install and Activate SeedProd
- Step 2. Choose a Login Page Template
- Step 3. Customize Your Client Login Page Template
- Step 4. Configure Your Page Settings
- Step 5. Publish Your Client Login Page
Why Add A Client Login Page to WordPress?
A custom client login page helps you protect sensitive content while offering a professional and consistent experience for your clients.
The default WordPress login screen works well for personal sites but lacks unique branding and presents a generic user experience. For client-based businesses, this can feel impersonal and unprofessional.
Customizing your login page lets you align it with your logo, colors, and messaging, giving clients a more cohesive brand impression. Studies show that consistent branding across all user touchpoints, including the login page, can improve brand recognition by up to 33% and increase trust with returning users.
Plus, you can hide the default WordPress login screen to reduce spam logins and keep your site more secure while offering a smoother experience for your clients.
For more inspiration, check out these WordPress login page examples.
Want even more control? Explore our best WordPress login plugins to find one that fits your workflow.
How to Create a Custom Client Login Page with SeedProd
For this tutorial, I’ll use SeedProd, which is a drag-and-drop WordPress website builder that allows you to create custom page layouts without writing any code. It includes professionally designed templates for landing pages, maintenance pages, and login screens, so you can easily build a fully branded client portal in minutes.

I chose SeedProd for this guide because it gives me complete control over the design and branding of the login screen. Instead of settling for the default WordPress login form, I can create a custom page that matches my brand colors, includes a logo or background image, and feels professional to clients.
Step 1. Install and Activate SeedProd
The first step is to download the SeedProd plugin and upload and activate it on your WordPress website.
For detailed instructions, follow this guide on how to install a WordPress plugin.
After activating the plugin, you’ll see a welcome screen where you can enter your SeedProd license key. You can find the license key in your SeedProd account under the Downloads heading.
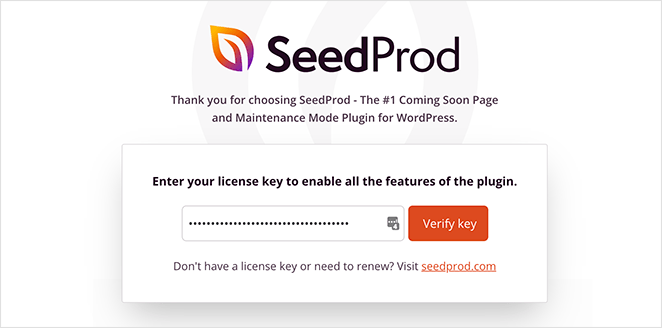
After verifying your license key, scroll down and click the Create Your First Page button.

On the next screen, you’ll see SeedProd’s landing page dashboard, where you can create different types of landing pages. Click the Set Up a Login Page button to get started.
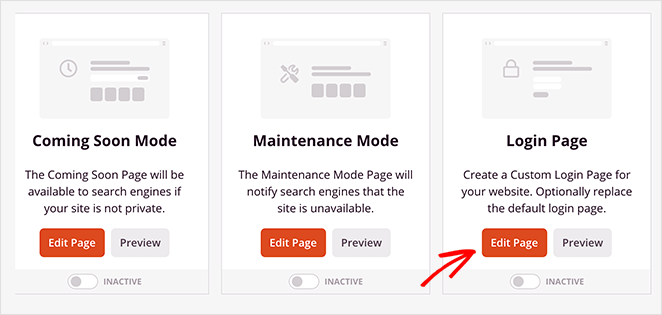
Step 2. Choose a Login Page Template
SeedProd now asks you to choose a template for your client login page. There are tons of templates you can choose from, and even a blank template if you prefer to start from scratch.
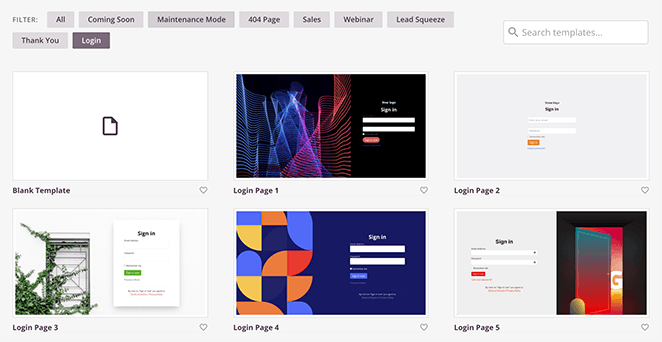
To choose a login page template, hover your mouse over its thumbnail and click the checkmark icon.
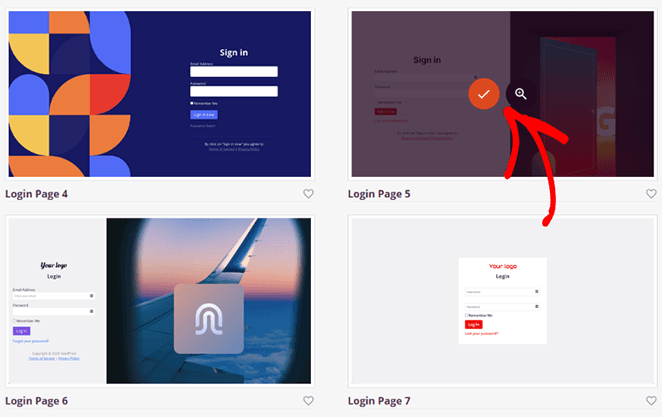
Your template will now open in SeedProd’s visual page builder.
Step 3. Customize Your Client Login Page Template
One of the best things about SeedProd is how easy it is to personalize your client login page using the drag-and-drop builder. You can edit any element just by clicking on it, with no coding or design experience needed.
For example, clicking the “Sign In” heading opens the left panel where you can change text, fonts, alignment, and spacing. Every change updates instantly in the live preview, so you always know how your design looks.
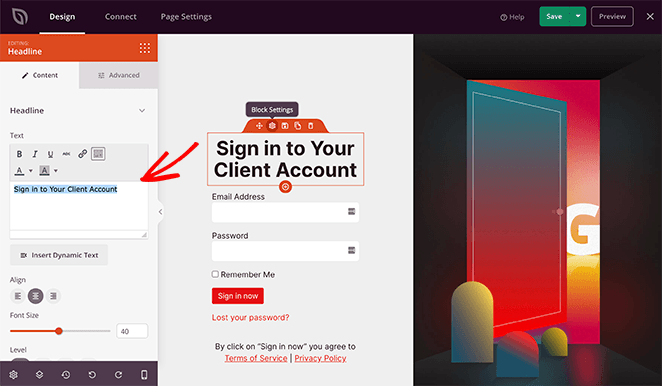
To add new elements, choose from SeedProd’s available content blocks on the left and drag them into your layout. Here’s a quick reference of the most useful ones:
| Block Name | Primary Use Case |
|---|---|
| Images | Show logos, product visuals, or team photos to reinforce brand trust. |
| Buttons | Create call-to-actions like “Log In” or “Contact Support.” |
| Social Profile Buttons | Link clients to your business’s social media pages for easy access. |
| Countdown Timer | Create urgency for time-sensitive client offers or portals. |
| Progress Bars | Show client milestones or onboarding progress visually. |
| Testimonials | Add social proof or quotes from happy clients to build trust. |
| Contact Form | Allow clients to send messages directly from the login page. |
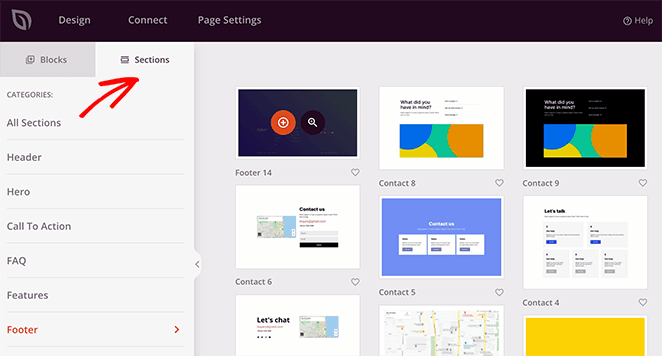
SeedProd also includes pre-made page sections like headers, footers, FAQs, and feature rows. You can insert any section with one click to make your layout look professional faster.
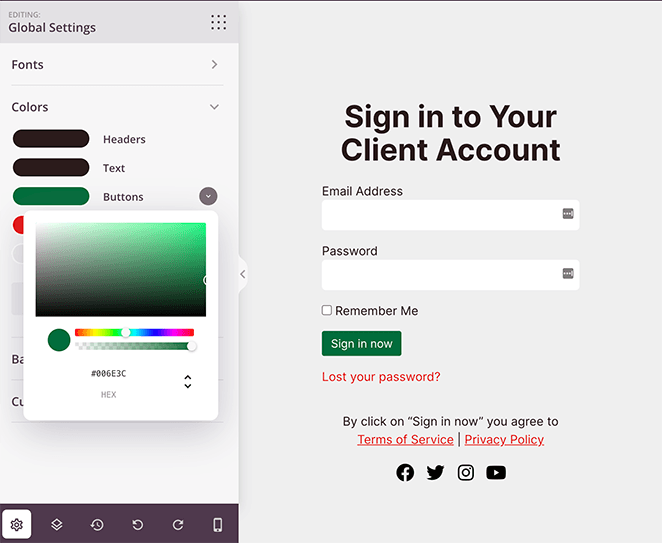
For more control over your design, click the cog icon in the bottom-left corner to open Global Settings. From there, you can change background colors, typography, and overall color palettes without editing each block manually.
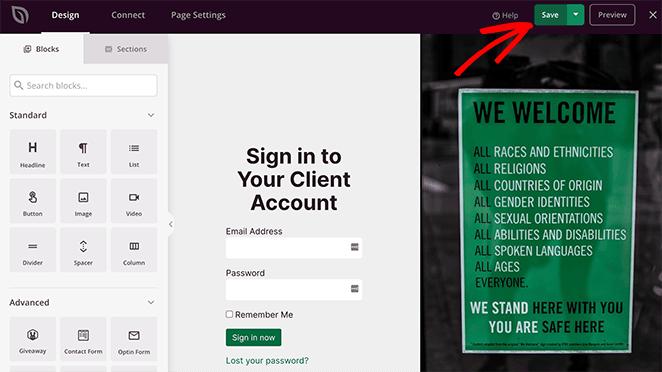
Once you’re happy with your design, click the Save button in the top-right corner to keep your changes.
Step 4. Configure Your Page Settings
If you plan to collect email addresses on your client login screen, you can connect your optin form to your email marketing service by clicking the Connect tab at the top of your screen.
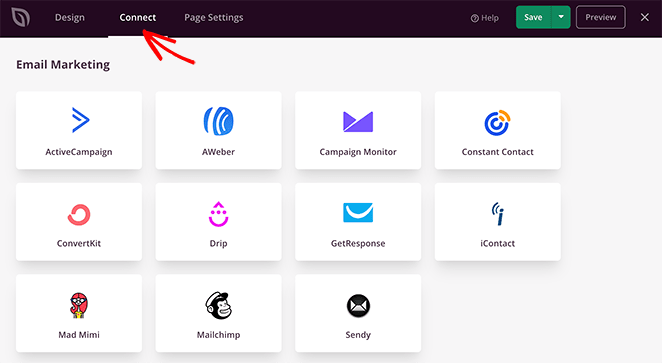
From there, choose your email marketing provider from the list, and follow the instructions to connect and authorize your account. Now, whenever a client subscribes via your optin form, they’re added to your email list automatically.
Additionally, you can head to the Page Settings tab to configure several other settings.
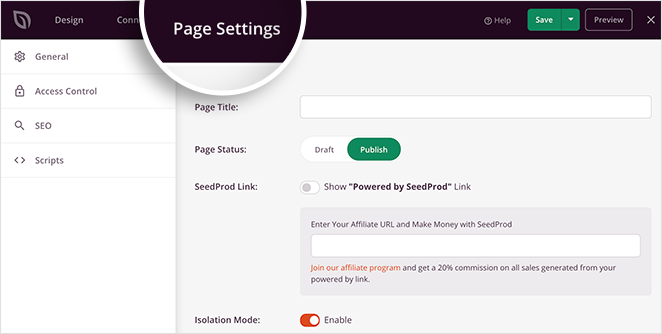
Here are some of the settings you can edit on this screen:
- General – Change your login page name and URL, display a SeedProd affiliate link, and more.
- SEO – If you’re using a WordPress SEO plugin, you can set your page SEO title, meta description, etc.
- Analytics – Track the performance of your login page using an analytics plugin like MonsterInsights.
- Scripts – Paste tracking codes and retargeting scripts like cookies or Facebook tracking pixels.
Remember: click the Save button periodically to save your changes.
Step 5. Publish Your Client Login Page
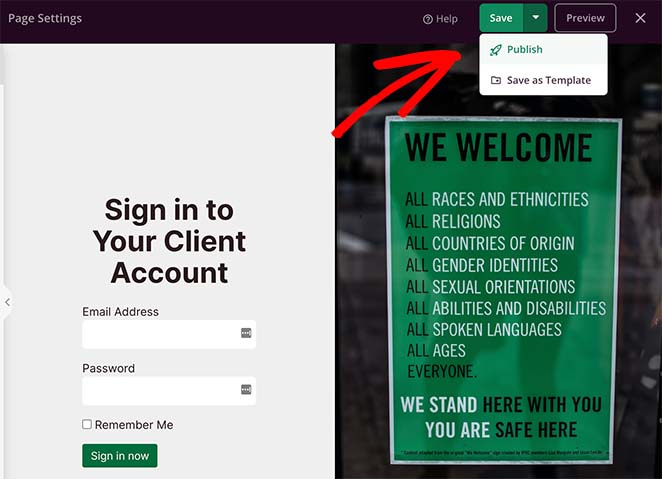
Once you’re happy with your client login screen, you’re ready to publish it and make it live on your website. To do that, click the dropdown arrow next to the Save button and click Publish.
After that, you’ll see a message telling you your page is now live.
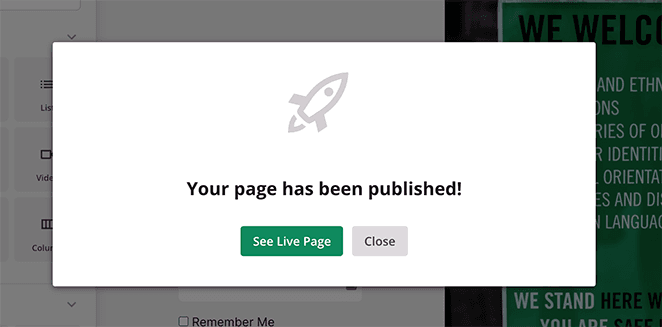
Click the See Live Page button to preview your new client login page.
Here’s the page I created on our test website:
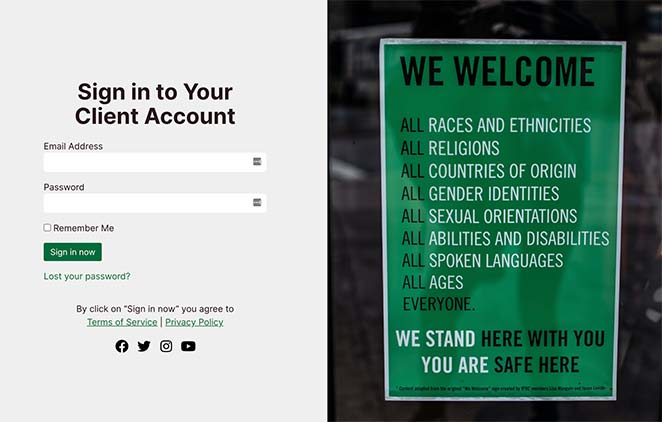
Now, all that’s left is to enable the login page mode in your WordPress admin area, and it’s super easy to do.
Just exit the SeedProd builder, and go back to the main SeedProd dashboard. Then under the Login Page mode, click the toggle from Inactive to Active.
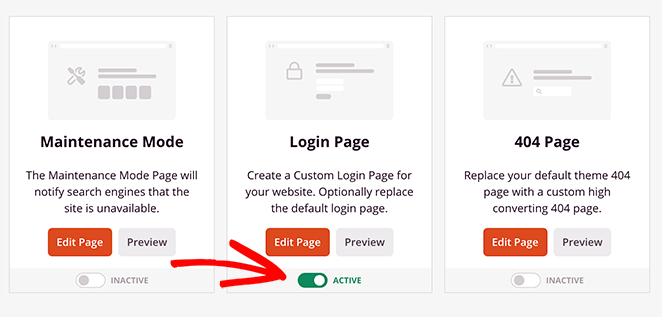
That’s It! Your client login page now has a custom design.
Alternative: Add a Login Form with WPForms (Optional)
If you don’t need a fully branded login page, you can still give clients an easy way to log in by adding a simple login form to your site.
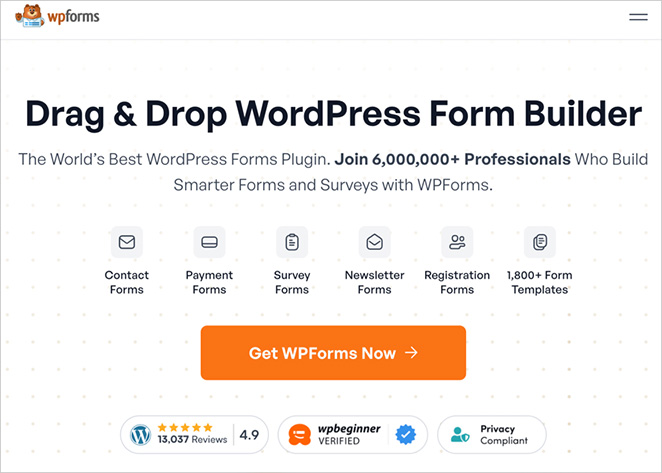
To accomplish this, you can use WPForms, the most beginner-friendly WordPress form plugin with a drag-and-drop builder. You can use it to create contact forms, surveys, payment forms, and, with the User Registration addon, client login forms that connect seamlessly to your WordPress user system.
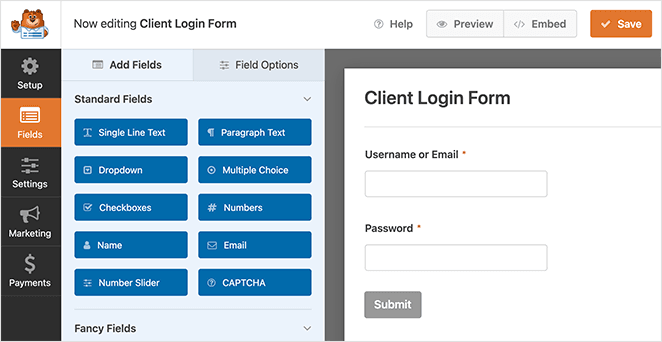
Here’s how to set it up in just a few minutes:
- Install WPForms from Plugins » Add New, then activate the User Registration addon under WPForms » Addons.
- Go to WPForms » Add New and select the User Login Form template.
- Customize the fields if needed, then embed the form on a page using the WPForms block or add it to a sidebar widget.
- Optional: In the form’s Confirmation settings, add a redirect so clients land on a dashboard or welcome page after login.
WPForms is perfect if you just want a lightweight way to let clients log in from any page on your site. But if you’re building a complete, on-brand login page, SeedProd is still the best choice.
Frequently Asked Questions
That’s it!
I hope this article helped you learn how to create a WordPress customer login page for your site. While you’re here, you might also enjoy the following guides:
- How to Create a Gated Content Landing Page in WordPress
- How to Create a Service Page Design in WordPress
- How to Make a 404 Page in WordPress That Generates Leads
- How to Password Protect a WordPress Site: The Ultimate Guide
Thanks for reading! We’d love to hear your thoughts, so please feel free to join the conversation on YouTube, X and Facebook for more helpful advice and content to grow your business.


