A squeeze page is a simple landing page designed to collect a visitor’s email address in return for something valuable. I use them to grow my email list faster and reach people who are already interested in my content.
In this guide, you’ll see what a squeeze page is, how it works, and the steps to make one in WordPress.
What Is a Squeeze Page?
A squeeze page is a short landing page that collects a visitor’s email address by offering something they want in return, such as a free guide, checklist, or discount.
Key traits of a squeeze page:
- Focuses on one goal: getting the visitor’s email
- Uses a short form with only essential fields
- Includes a clear and persuasive call to action
- Offers an incentive that is valuable and relevant
- Avoids distractions like extra links or menus
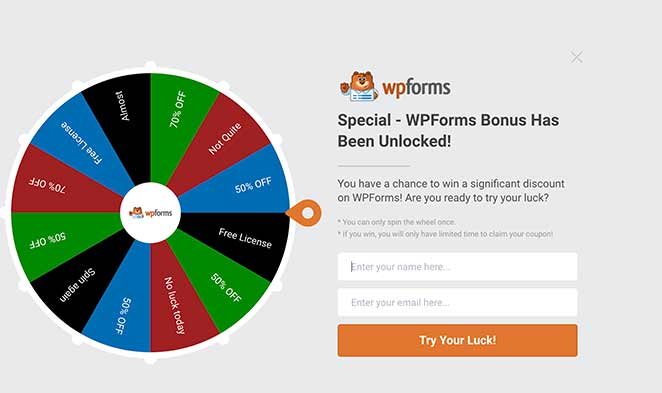
For example, WPForms uses a spin-the-wheel popup on their squeeze page to offer visitors a discount in exchange for their email address. The offer is exclusive, clear, and easy to claim.
Squeeze Page vs Landing Page
While both squeeze pages and landing pages are designed to convert visitors, they serve different purposes and have unique layouts. Here’s a quick comparison to help you see the difference:
| Feature | Squeeze Page | Landing Page |
|---|---|---|
| Main Goal | Collect email addresses | Encourage a specific action (buy, register, download, etc.) |
| Length | Very short and focused | Can be short or long, depending on goal |
| Offer | Usually a free lead magnet | Varies — could be a product, service, or event |
| Navigation | Minimal or none | May include more navigation or extra details |
| Form Fields | Only essential fields (name + email) | Varies by conversion goal |
A squeeze page focuses entirely on capturing emails with as few distractions as possible, while a landing page can cover broader goals like sales, event sign-ups, or product demos. Knowing the difference helps you choose the right page type for your marketing campaign.
Why Use a Squeeze Page?
A squeeze page is one of the fastest ways to grow a targeted email list. By removing distractions and focusing on a single offer, it helps you capture high-quality leads that are more likely to convert. Here are a few reasons to use one:
- Build a targeted email list quickly – Focus on people who are interested in your specific offer.
- Increase conversion rates – Fewer distractions mean more sign-ups.
- Test offers easily – Swap lead magnets without redesigning your whole site.
- Improve lead quality – Attract subscribers who are genuinely interested in your content or product.
- Support other campaigns – Use squeeze pages for ads, social promotions, and special launches.
When done well, a squeeze page can be a powerful tool for building trust and starting long-term relationships with your audience.
What to Include in Your Squeeze Page
A high-converting squeeze page is simple but strategic. Each element works together to grab attention, build trust, and get the sign-up. Here’s what to include:
- Headline: Make the value clear in one short line.
- Lead Magnet: Offer something worth the visitor’s email, like a guide or discount.
- Opt-in Form: Keep it short — usually name and email only.
- Call to Action: Use clear, action-focused text on the button.
- Minimal Distractions: Remove navigation and extra links to keep focus on the form.
When you combine these elements, you create a page that quickly explains the benefit, removes friction, and makes it easy for visitors to say yes.
How to Create a Squeeze Page in WordPress
One of the easiest ways to create a squeeze page for your WordPress site is with a landing page builder.

For this tutorial, I’ll be using SeedProd, the best WordPress landing page builder. SeedProd is a powerful WordPress plugin that makes it easy to create any landing page in WordPress. With the visual drag and drop builder, you can make stunning pages without any design experience, including:
- WordPress squeeze pages
- Custom 404 pages
- WordPress thank you pages
- Sales landing pages
- Webinar registration pages
- Video landing pages
You can also create a coming soon or maintenance mode page and turn them on and off with a single click.
SeedProd also includes various landing page-focused blocks like email optin forms, social buttons, countdown timers, and more to boost conversions and generate leads. Implementing them is as simple as dragging and dropping them onto your page, where you can see changes in real-time.

Not to mention, it includes 100+ landing page templates, powerful access controls, integration with popular email marketing services, and much more.
Best of all, SeedProd is lightning fast. It doesn’t have any of the bloat and unnecessary features you’d expect from a page builder, so it won’t slow down your website. And a faster website means more leads and conversions for your business.
So if you want to create a high-converting squeeze page, here’s how to do it with SeedProd.
Video Tutorial
If you’d prefer to read the written instructions, follow the steps below.
Step 1: Install SeedProd Landing Page Builder
First, click here to get started with SeedProd and download the plugin. Then follow these simple instructions for installing a WordPress plugin.
After installing and activating SeedProd, you’ll see a page asking for your license key. This key is sent to your registered email address after purchasing the plugin.

Copy the key and paste it into the box provided. Then click the Verify Key button to confirm your license key.
After verifying your license key, scroll down the page and click on the Create Your First Page button.
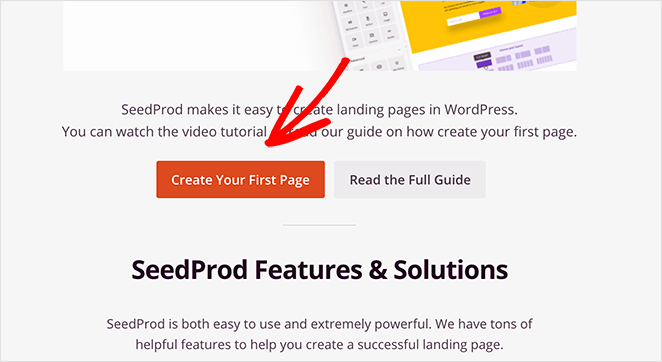
You’ll then be taken to the SeedProd dashboard, where you can begin creating your squeeze page.
Step 2: Create a New Squeeze Landing Page
On the SeedProd dashboard page, you’ll see 3 different modes along the top and the option to create a new landing page beneath it.
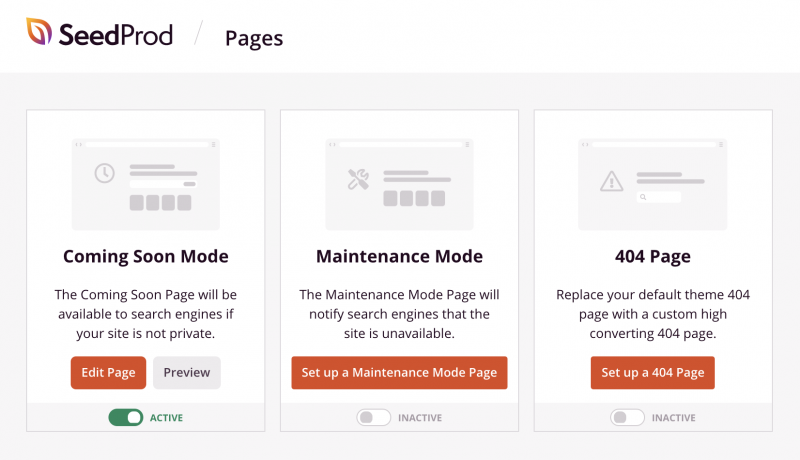
The different page modes allow you to display a coming soon page, 404 error page, or put your website in maintenance mode. We won’t need that section for this tutorial.
Instead, click the + Add New Landing Page button to create a new page.
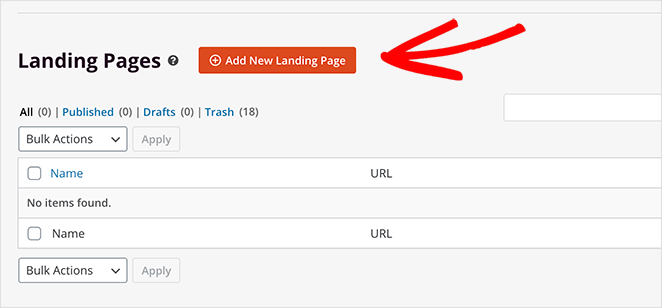
Doing so will show you all the landing page templates available with the SeedProd builder. You can filter the templates based on the type of page you want to create by clicking a category along the top.
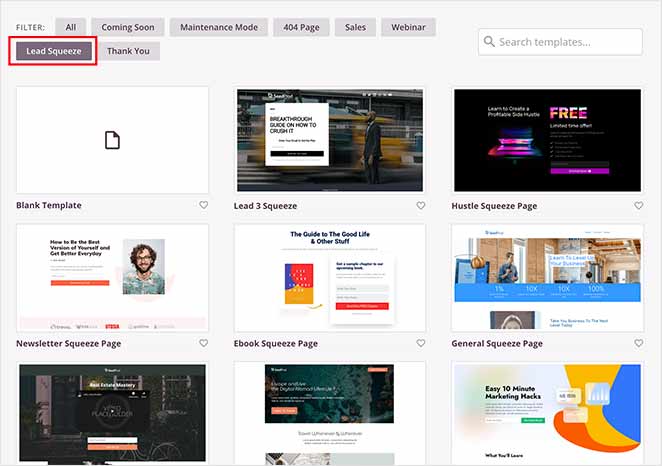
Click the Lead Squeeze category to see all the available squeeze page templates. You can start with any of the pre-made templates or choose the Blank Template to build one from scratch.
To choose a template, just hover your mouse over the template thumbnail and click the tick icon.
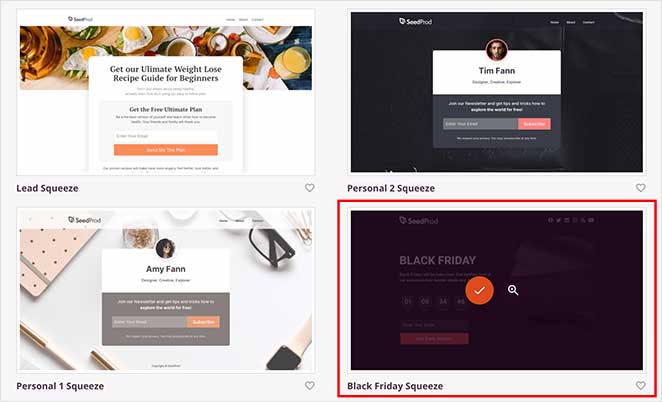
We’ll choose the Black Friday Squeeze template for this tutorial.
After picking a template, you’re asked to enter a name and URL for your squeeze page. Then go ahead and click the Save and Start Editing the Page button.
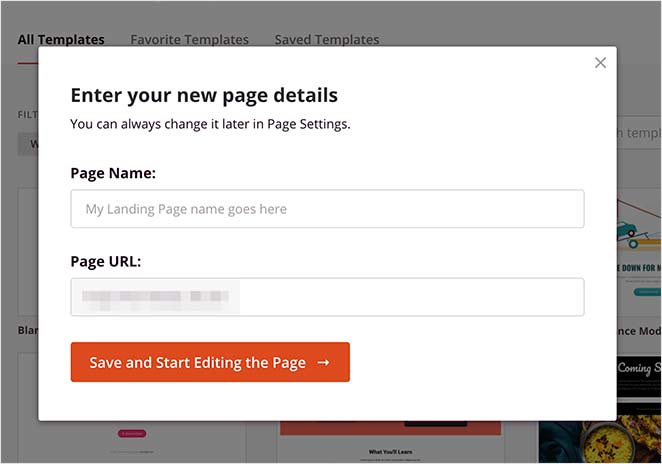
Clicking that button will take you to SeedProd’s visual drag and drop page builder.
Step 3: Add Content to Your Squeeze Page
With the visual drag and drop builder, you can now add content to your squeeze page.
On the left side of your screen, you’ll see all the available landing page blocks you can use to add and edit your page’s content.
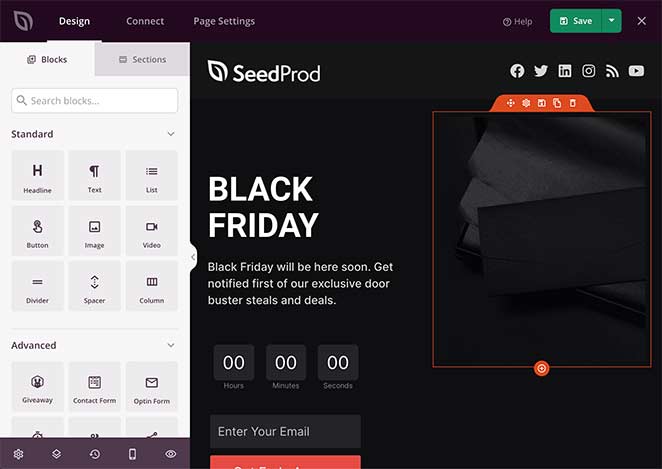
SeedProd’s landing page blocks are divided into 2 sections, Standard and Advanced.
Under the Standard section, you’ll find some widely used landing page blocks, including headline, text, image, button, bullet list, video blocks, etc.
You can also choose from more lead generation-focused blocks in the Advanced section, such as:
- Giveaway
- Contact Form
- Optin Form
- Countdown Timer
- Social Sharing
- Social Profiles
- Star Rating
- Progress Bar
- And more
What’s great about these blocks is that their primary focus is to generate leads for your business. There isn’t a single unnecessary block.
Plus, they integrate with powerful tools such as RafflePress to create an online contest, WPForms to build user-friendly contact forms, and many more without needing a developer.
You can drag and drop any of these blocks to add them to your Squeeze Page.
For example, if you want to create a sense of urgency to drive people to sign up to your list before your offer runs out, you might want to add a countdown timer.
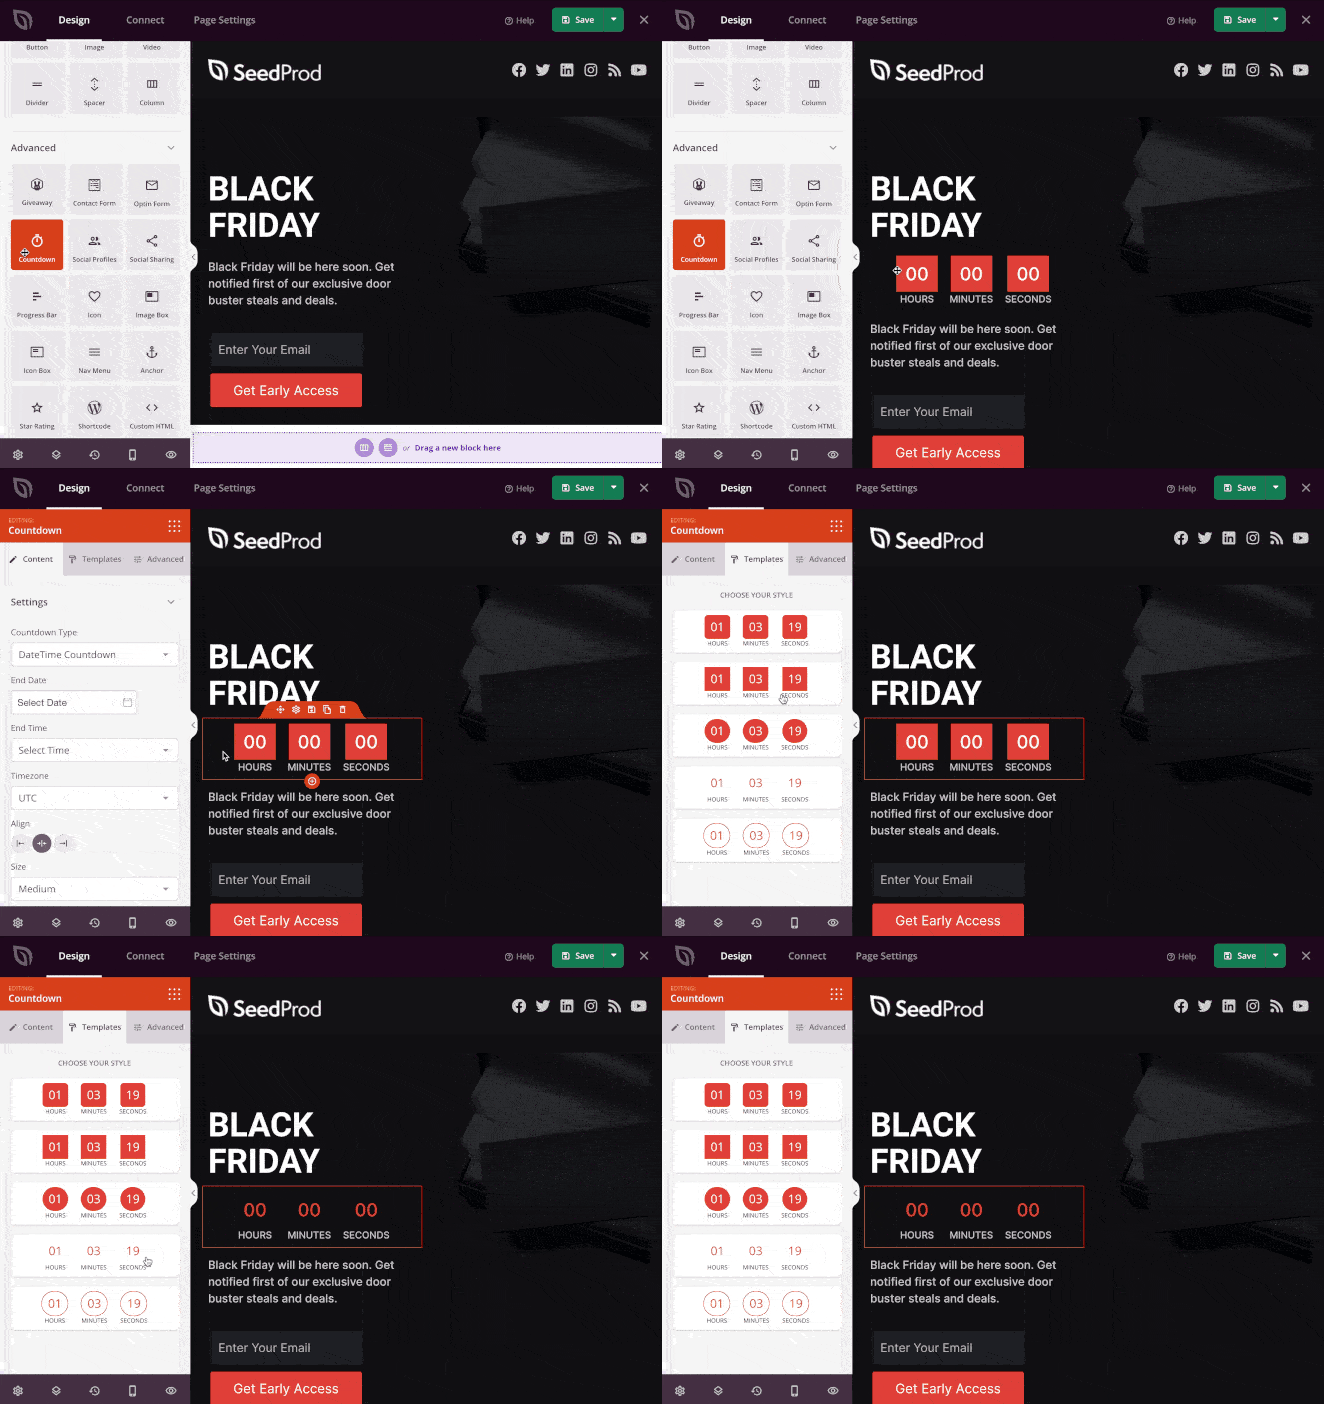
To add the countdown timer to your squeeze page, just drag it from the left-hand panel and drop it into position on your page on the right.
Clicking the block allows you to change its content, alignment, and more. You can also choose a different block style by clicking the Template tab on the left and selecting your favorite.
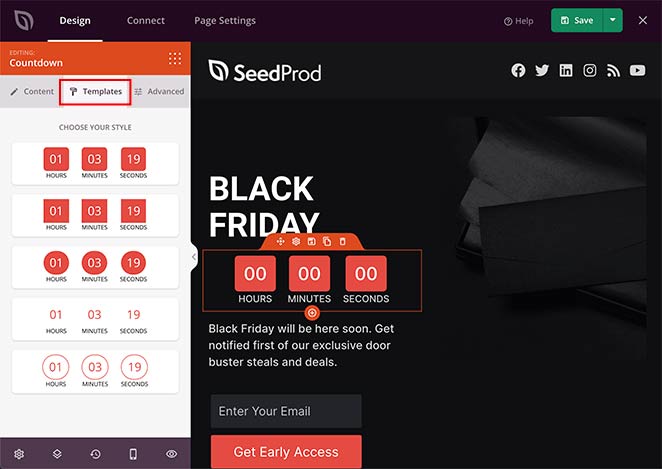
In the Advanced tab, you can change the color, typography, spacing, and more.
As well as blocks, SeedProd comes with several sections that you can find by clicking the Sections tab. Sections are pre-made layouts you can add to your squeeze page without needing to build them from scratch.
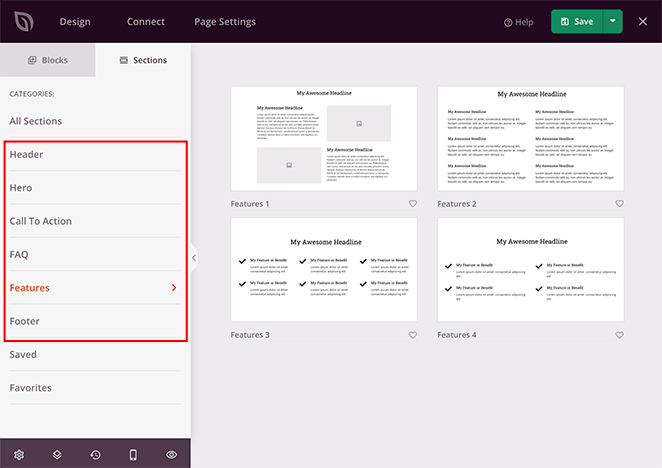
The different sections available include:
- Header
- Hero
- Call to Action
- FAQ
- Features
- Footer
Clicking any pre-made section will automatically add it to your squeeze page.
In the example below, we added a Features section, which is a great way to explain why visitors should sign up for your email list.
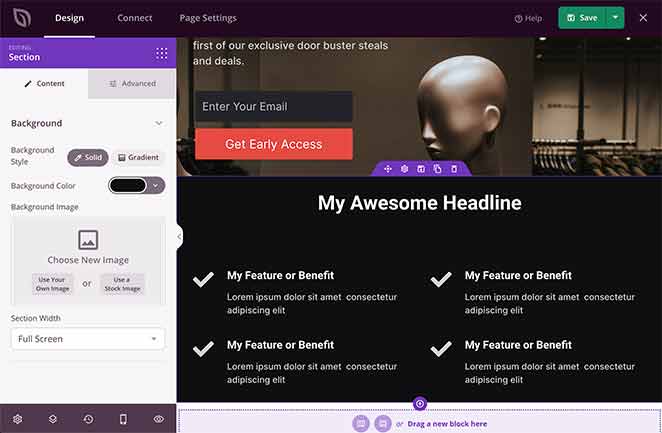
Make sure you click the green Save button in the top right corner to save your progress.
Once you’ve finished adding content to your squeeze page, you can move on to customizing it to fit your brand.
Step 4: Customize Your Squeeze Page
Customizing your squeeze page to match your brand style and colors is easy. Just click the gear icon in the bottom-left corner of your page.
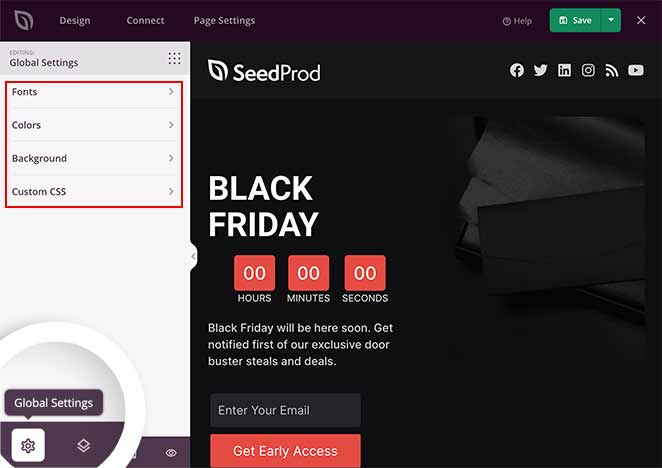
This takes you to the Global Settings page, where you can change your fonts, colors, and background and add custom CSS.
To change your background image, click the Background section, which allows you to change your background style, color, and image, and set the image position. You can even use a background video or background image slideshow.
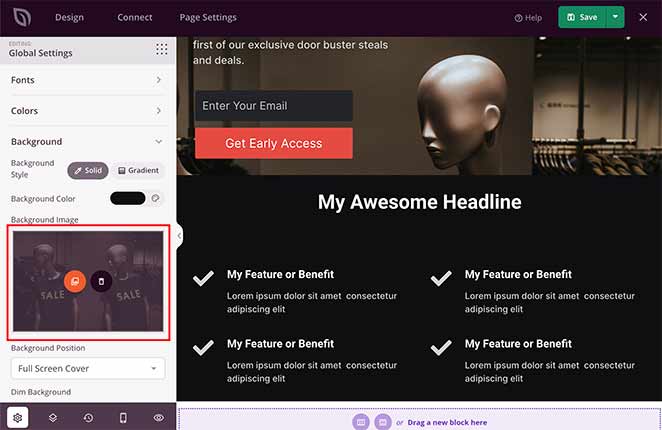
Under the background image heading, click the photo icon to upload a new image from either the WordPress media library or your computer.
To change your squeeze page’s global colors, click the Colors section, where you can customize the colors of your page headers, text, buttons, links, and background.
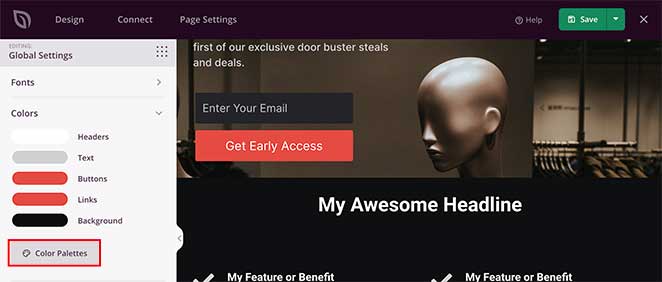
Alternatively, you can click the Color Palettes option to choose from over 20 pre-made color palettes. This helps you create a professional and consistent look across your page.
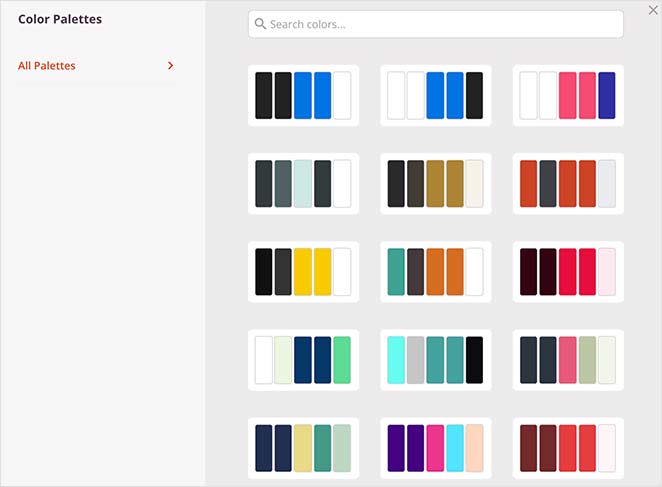
Click Save to preserve your progress, and when you’re happy with your customizations, move on to the next step.
Step 5: Integrate Your Email Marketing Service
Since the primary objective of a squeeze page is to encourage people to subscribe to your email list, you’ll need to connect your page with your email marketing service.
SeedProd makes this super-easy by integrating popular email marketing service providers.
To connect your email service, click the Connect tab at the top of the page. This will take you to an overview of all the different services you can integrate.
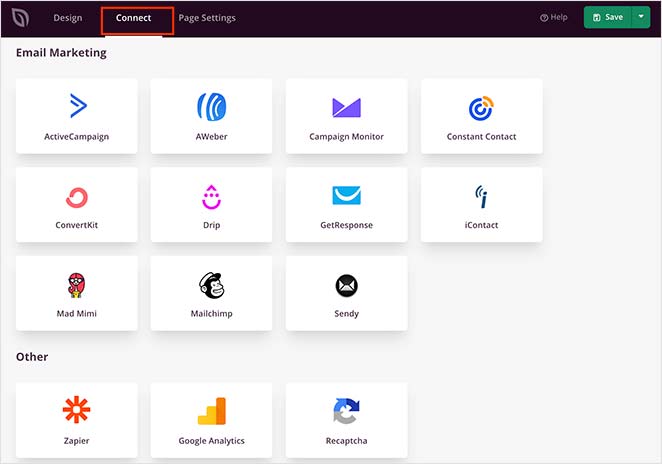
Next, find your preferred service in the list and click the Connect New Account button. Then follow the on-screen prompts to integrate and authorize the connection.
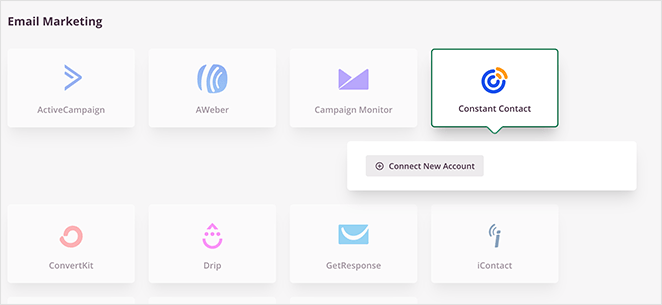
To see the full instructions for integrating specific email providers, see the SeedProd integration documentation.
On this page, you can also integrate with Google Analytics to track your page stats, Recaptcha for spam protection, and Zapier to integrate with thousands of third-party tools and applications.
Step 6: Configure Your Squeeze Page Settings
After connecting your email list, it’s time to configure a few settings. Click the Page Settings tab at the top of your screen. On this page, you will see several sections to configure your squeeze page.

In the General settings, you can change the page name, URL, and status. You can also enable Isolation Mode to prevent any WordPress theme or plugin conflicts.
The Analytics and SEO section offers a shortcut to configuring your squeeze page with tools like All in One SEO and MonsterInsights to monitor and improve your page performance.
Then there’s the Scripts section, where you can enter custom scripts to your header, body, and footer sections, such as your Facebook tracking pixel.
When you’ve finished configuring your settings, click the Save button.
Step 7: Publish Your Squeeze Page
Now it’s time to make your new squeeze page live on your WordPress website. Yet, before that, let’s make sure your page looks fantastic on mobile devices.
To preview your page on different devices, click the Mobile Preview icon in the bottom-left of your screen.
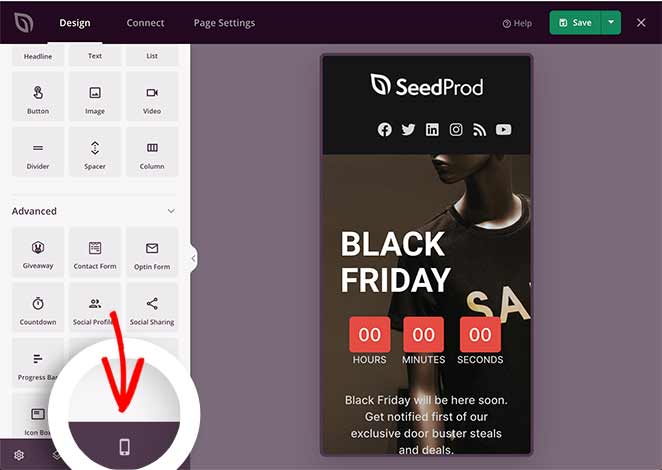
If anything looks odd, you can edit the mobile preview in real-time, just like the desktop preview.
To switch back to the desktop view, click the preview icon again.
When you’re happy with how everything looks, click the downwards arrow next to the Save button and click Publish.
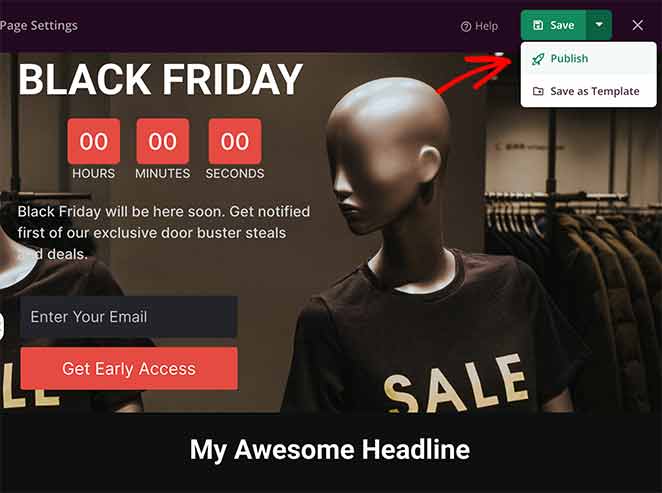
You’ll then see a success message from SeedProd, notifying you that your page is live.
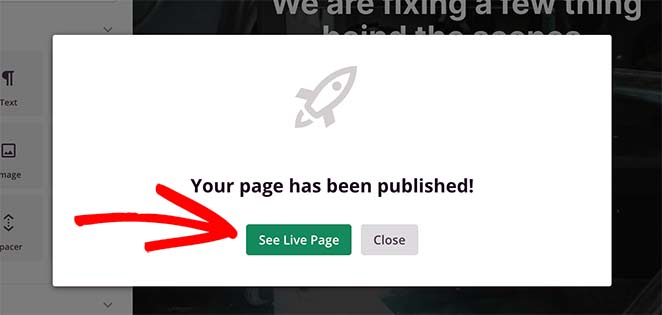
Click the See Live Page button to view your new WordPress squeeze page.

What Is a Squeeze Page: FAQs
I hope this article helped answer the question, “What is a squeeze page” and gave you everything you need to build high-converting squeeze pages in WordPress.
Building high-converting landing pages is easy with SeedProd. With its powerful drag and drop builder, stunning landing page templates, and bloat-free code, you have all the tools you need to grow your business fast.
And if you liked this article, then please follow us on Twitter and Facebook for more useful content to help grow your business.

