Want to get more people to attend your webinar? The fastest way is to create a high-converting webinar registration page in WordPress.
A good webinar page makes signups simple, shows the value of attending, and boosts the number of people who actually show up.
In this guide, I’ll show you how to build a webinar registration page step by step, using SeedProd so you don’t need any code or design skills.
Steps to create a webinar registration page:
- Step 1. Create a New Webinar Registration Page with SeedProd
- Step 2. Select a Webinar Landing Page Template
- Step 3. Customize Your Registration Page
- Step 4. Add a Webinar Registration Form
- Step 5. Integrate Your Email Marketing Service
- Step 6. Configure Your Webinar Landing Page Settings
- Step 7. Publish Your Webinar Registration Page
What Is a Webinar Registration Page?
A webinar registration page is a focused landing page on your site where visitors sign up for your webinar. Its main goal is to drive as many successful registrations as possible so you can grow attendance, keep your audience engaged, and open the door to future offers.
To achieve this, a strong sign-up page design highlights the value of attending and removes any friction from the registration process.
Most webinar registration pages include these core elements:
- Headlines – Bold, clear text that captures attention fast.
- Subheadings – Break content into easy-to-scan sections.
- Persuasive Copy – Explain the benefits of attending in plain language.
- High-Quality Video – Use a simple clip to explain value or process.
- Registration Form – Collect essential details like email and name.
- CTA Buttons – Clear prompts that make signing up the obvious next step.
Next, let’s look at how to build a webinar registration page in WordPress.
How to Create a Webinar Registration Page in 7 Steps
There are several ways to create your webinar page in WordPress. For instance, you could create a regular page using your current WordPress theme. However, the default WordPress page settings won’t provide the flexibility you need to get the results you want without hiring a developer.
The easiest way to create a successful webinar registration page is to use a WordPress page builder plugin like SeedProd, which is specifically designed to create high-converting landing pages. That way, you can get your page looking exactly how you want without any prior design experience.

SeedProd is the best drag-and-drop landing page builder for WordPress.
The visual page builder makes it easy to create any type of WordPress landing page in minutes. Plus, landing page-specific blocks include none of the fluff but all of the essential elements you need to increase conversions.
You also won’t need to start from scratch. With a growing library of landing page templates, you can create your next webinar registration page, thank you page, or even a sales page at the speed of thought.
Not to mention, SeedProd comes with a built-in coming soon, 404, and maintenance mode page, enabling you to work on your site in private with a single click to switch modes on or off.
So if you want to learn how to create a successful webinar registration page in WordPress, here’s how to do it with SeedProd.
Video Tutorial
If you’d prefer to read the written instructions, follow the steps below.
Step 1. Create a New Webinar Registration Page with SeedProd
First, click here to get started with SeedProd. Then if you need some help, follow these step-by-step instructions to install a WordPress plugin.
Once you’ve installed and activated the SeedProd WordPress plugin, click the SeedProd icon from your WordPress admin area. This will take you to your landing page dashboard, where you can switch your coming soon, maintenance mode, and 404 pages on and off.
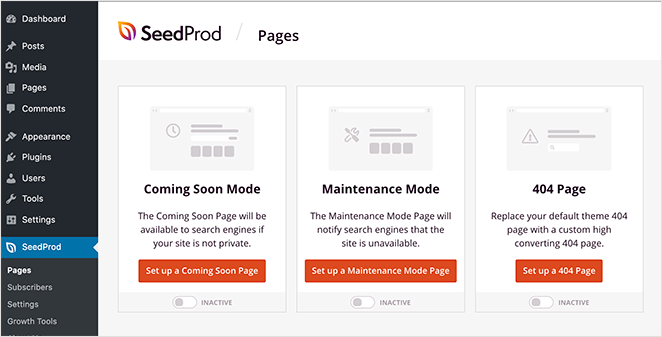
Underneath, you can see all of the landing pages you’ve created with SeedProd. Since we haven’t created a page yet, let’s go ahead and make one for your webinar registration landing page.
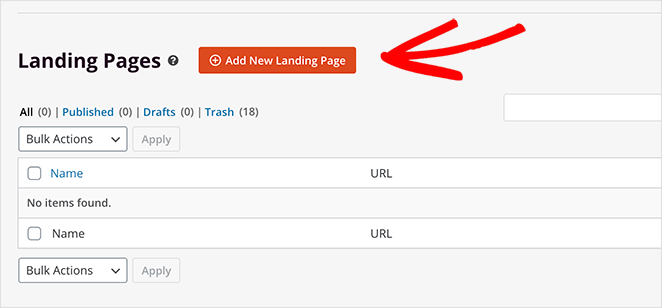
To do that, click the + Add New Landing Page button.
Step 2. Select a Webinar Landing Page Template
After clicking the button to add a new landing page, SeedProd will show you the landing page template library. You can filter the different templates by clicking any of the options at the top of the page.
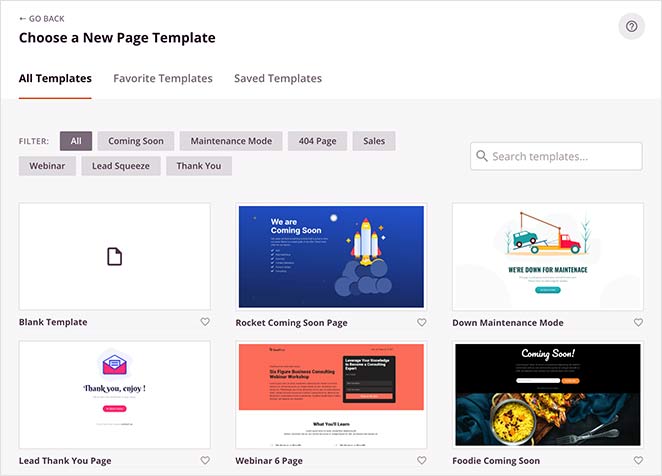
To see the webinar landing page templates, click the Webinar option.
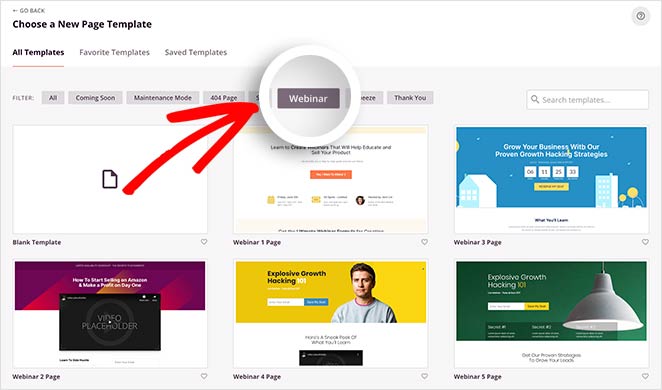
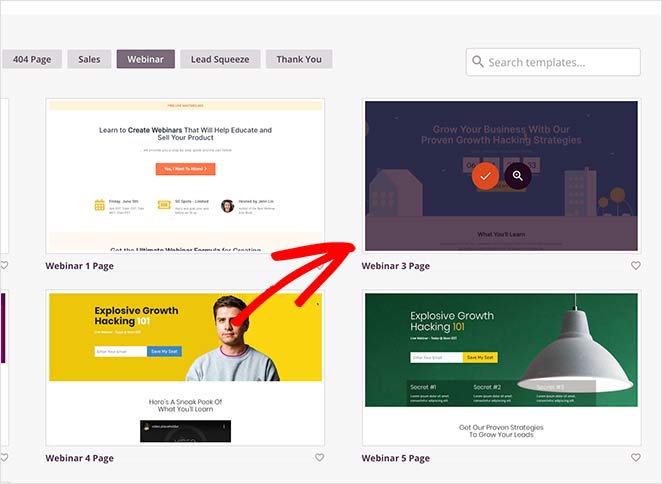
Browse through the webinar templates until you see a landing page design that’s closest to your needs. Then hover your mouse over the template thumbnail and click the tick icon to choose that specific template.
After selecting your preferred template, you’ll be asked to enter the name of your page and the page URL.
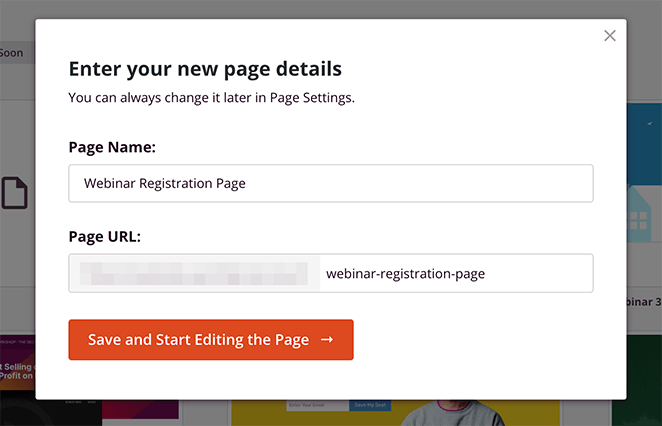
Then click the Save and Start Editing the Page button, which will launch your webinar registration page in SeedProd’s drag-and-drop visual page builder.
Step 3. Customize Your Registration Page
As we mentioned earlier, SeeProd makes it super-easy to customize your webinar page in WordPress. Just click any page element to edit the content to suit your specific needs.
For instance, clicking the headline area will open a panel on the left-hand side where you can edit the headline copy and orientation and change its size.
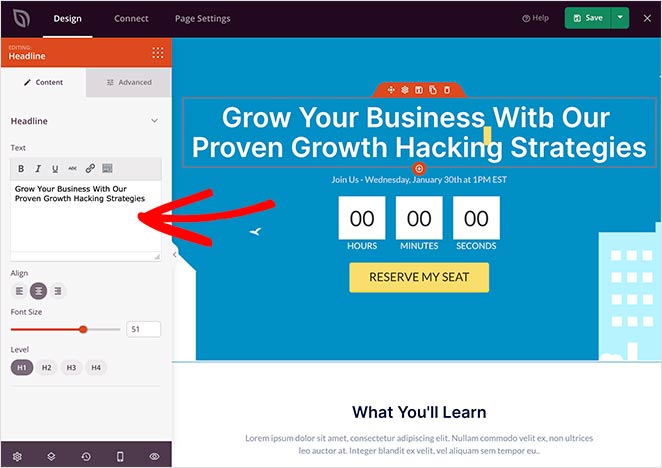
Or you can use the in-line editor to change the content in real-time on your page preview.
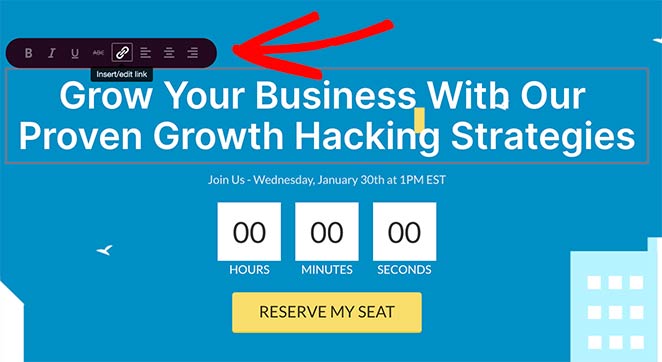
It’s also possible to change the template of individual page elements. Many of the content blocks included in SeedProd have templates that change their look and style.
For example, selecting the countdown timer on the page and clicking the templates tab on the right-hand panel will show several different count-down timer styles.
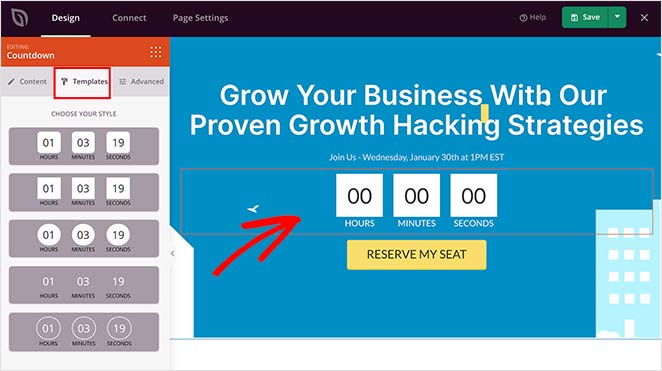
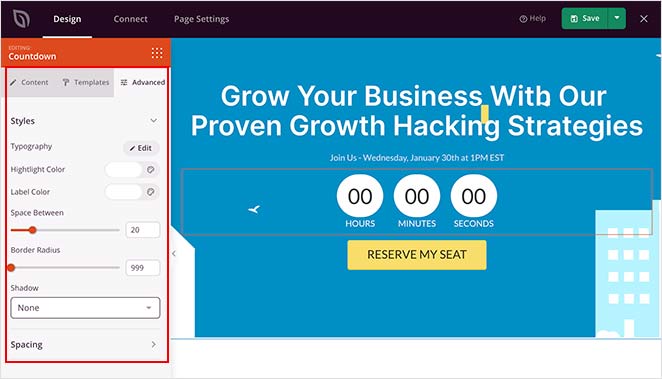
If you click the Advanced tab, you can edit the colors, spacing, borders, and more.
The content blocks that are included with SeedProd are divided into Standard and Advanced Blocks.
Standard Blocks involve widely used page elements like headings, buttons, images, lists, and more. Whereas Advanced Blocks are designed to help boost your landing page conversions.
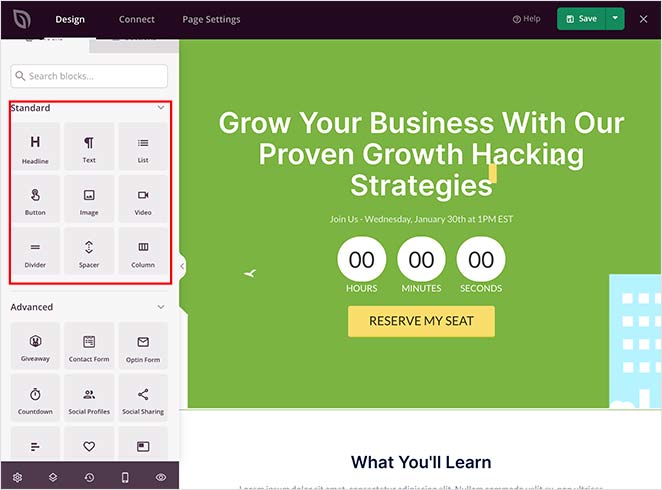
For example, you can use the Social Media Profiles block to encourage users to follow your social channels or use the Optin Form block to get users to sign up for your newsletter.
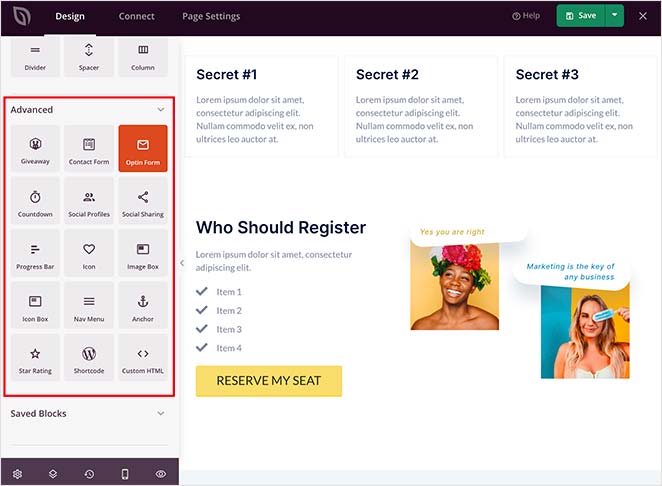
Inserting any block onto your page is pretty simple. Just drag the block from the left-hand panel and drop it onto your live page preview on the right.
If you plan on using any blocks that you’ve customized again, you can save them as templates. Just hover your mouse over that specific block and click the Save icon.
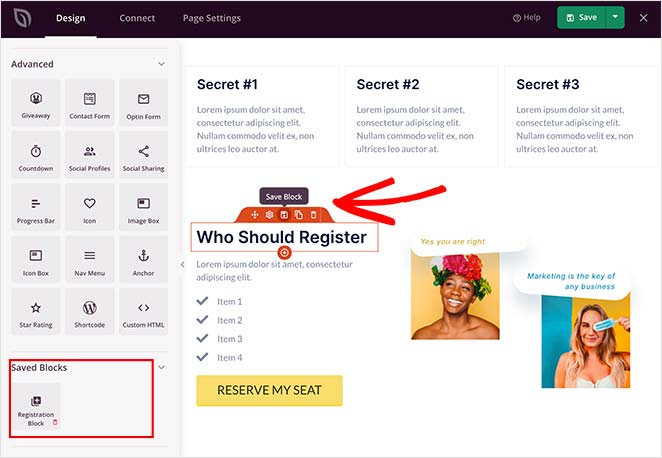
It will then appear under the Saved Blocks section in the left-hand panel.
Step 4. Add a Webinar Registration Form
One of the best things about SeedProd is it integrates seamlessly with the best WordPress plugins on the market to improve your lead-generation efforts.
For instance, you can easily add an OptinMonster sign-up form, a RafflePress giveaway, or use the contact form block to add a WPForms webinar registration form to your landing page.
Just drag the Contact Form block to your page, and select your registration form from the dropdown menu.
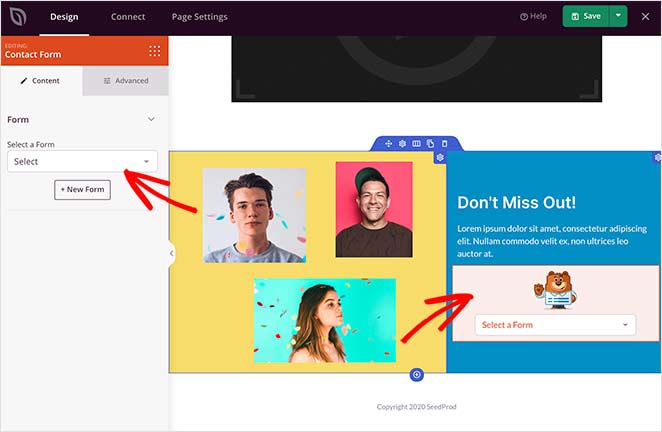
The form is then instantly displayed on your page and is ready to accept webinar registrations right away.
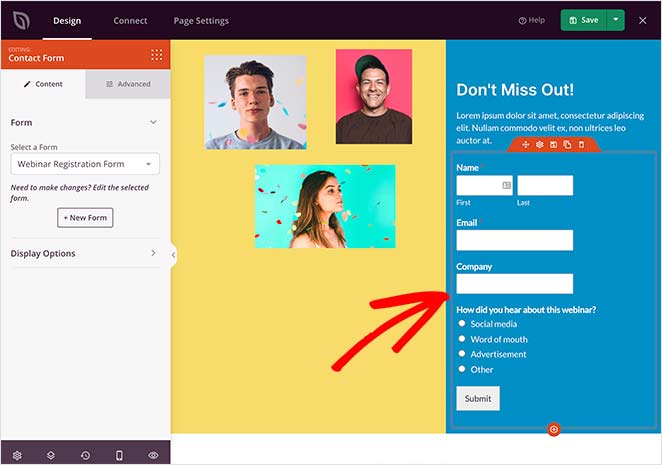
Pro Tip: When creating a webinar registration form, include only the most essential form fields. Otherwise, you could overwhelm visitors, causing them to abandon their registration.
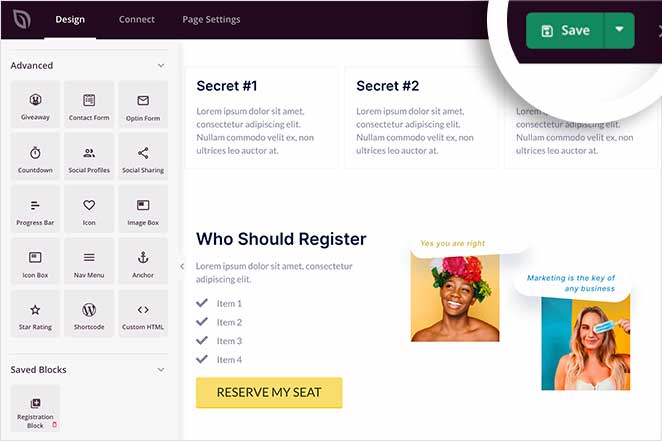
When you’re happy with your landing page customizations, click the Save button in the top-right of your page to store your settings.
Step 5. Integrate Your Email Marketing Service
Many businesses use webinars as a tactic to grow their email lists. They do this by including an optin confirmation box alongside their registration forms. However, it’s hard to grow your list if you cannot connect your forms to your favorite email marketing service.
Don’t worry; SeedProd makes integrating with third-party services easy too. Just click the Connect tab at the top of your screen to see the available integrations, which include:
- ActiveCampaign
- AWeber
- Campaign Monitor
- Constant Contact
- ConvertKit
- Drip
- GetResponse
- iContact
- Mad Mimi
- Mailchimp
- Sendy
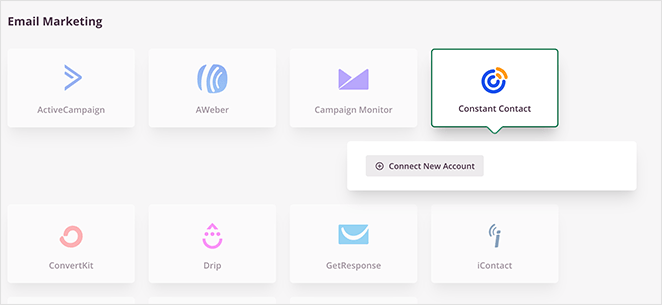
It’s also possible to connect to Google Analytics to track your performance, Recaptcha to reduce spam, and Zapier to connect to thousands of other apps.
To integrate with any of the above options, simply click the integration you want and follow the simple instructions to authorize the connection.
Check out the SeedProd integration documentation to learn how to connect with specific email providers.
Step 6. Configure Your Webinar Landing Page Settings
After integrating your email marketing service, click the Page Settings tab to configure your webinar landing page settings.
In the General section, you can change your landing page title and URL, change the page status from Draft to Publish, and enable Isolation Mode.

Isolation Mode prevents 2 WordPress hooks from running called wp_head and wp_footer, which prevents conflicts with your theme or other plugins. While it prevents conflicts, other plugins won’t run on the page, such as SEO and analytics plugins. You can manually set these under the SEO and Scripts menus on the left.
In the SEO section, you can view your landing page SEO settings; however, you’d need to install an SEO plugin such as All in One SEO to view them.
Similarly, the Analytics section will display any data collected from a WordPress analytics plugin such as MonsterInsights.
Lastly, in the Scripts section, you can add custom header, body, or footer scripts, such as your Facebook retargeting pixel.
When you’ve finished configuring your page settings, click Save.
Step 7. Publish Your Webinar Registration Page
Now that you’ve created your webinar registration page, it’s time to make it live on your WordPress website.
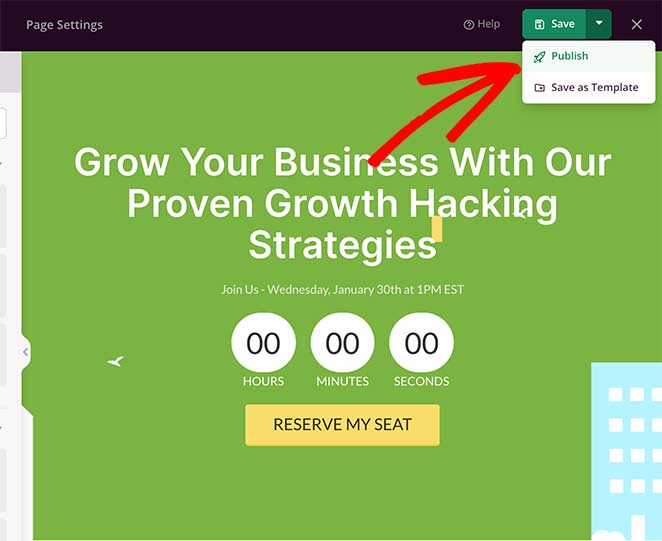
To do that, click the downward arrow next to the green Save button in the top-right corner, and click Publish.
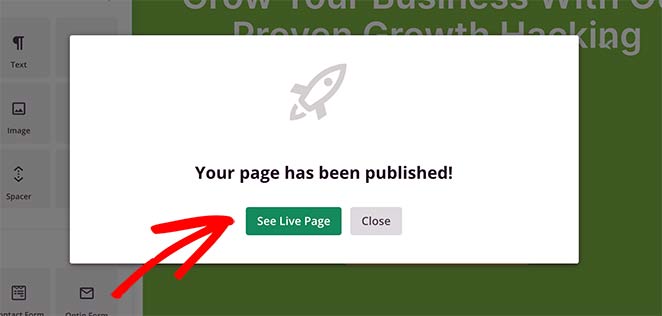
Then a lightbox popup will appear, notifying you that your page is published. To preview your webinar landing page, click the See Live Page button.
Great work! You’ve just successfully created your first webinar registration page!

Webinar Registration Page FAQs
I hope this article helped you learn how to create a webinar registration page in WordPress.
Creating any type of landing page with SeedProd is so easy you won’t need to touch a single line of code. All it takes is a few minutes to create a stunning webinar page ready to turn your site visitors into successful registrations.
So what are you waiting for?
Get started with SeedProd today!
You might also like these landing page best practices for tips on getting started.
And don’t forget to follow us on Facebook and Twitter for more helpful tips and tutorials.

