Want to create a Mailchimp landing page in WordPress? The fastest way to grow your email list is by sending visitors to a focused page designed only to capture signups.
The problem is Mailchimp’s built-in landing pages are limited. They’re hosted on Mailchimp’s servers, don’t use your own domain unless you pay extra, and often result in clunky URLs like:
https://mailchi.mp/6c3044bf2117/your-landing-page/
That’s why the better approach is to build your Mailchimp landing page directly inside WordPress. You’ll have full control over your design, SEO, and domain name while still connecting seamlessly to Mailchimp.
In this tutorial, I’ll show you step by step how to make a Mailchimp landing page in WordPress using SeedProd. It’s a drag-and-drop builder that makes it easy to launch professional, high-converting pages without touching code.
Quick steps to create a Mailchimp landing page in WordPress:
- Step 1. Install and Activate the SeedProd Landing Page Plugin
- Step 2. Create a New Landing Page with SeedProd
- Step 3. Choose a Landing Page Template
- Step 4. Customize Your Landing Page Design
- Step 5. Connect Your Landing Page to Mailchimp
- Step 6. Configure Your Page Settings
- Step 7. Preview Your Page in Mobile
- Step 8. Publish Your Mailchimp Page in WordPress
Why Use SeedProd Instead of Mailchimp’s Builder?

SeedProd lets you host your landing pages on your WordPress site, giving you a clean, branded URL. You also get access to hundreds of templates, drag-and-drop design blocks, and built-in integrations like Mailchimp, so you can start collecting subscribers right away.
With that in mind, let’s dive into the steps.
Step 1. Install and Activate the SeedProd Landing Page Plugin
First, click here to get started with SeedProd and download the plugin to your computer. Then install and activate the plugin on your WordPress website.
If you need help with this step, you can follow these instructions to install a WordPress plugin.
After installing and activating SeedProd, you’ll see a welcome screen asking you to enter your license key.
Log in to your SeedProd Account and click the View License Key, Details, and Downloads link to find your license.
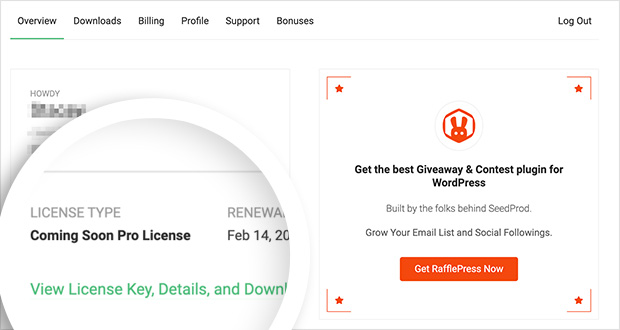
From there, copy your license key.
You can then paste your key in the field provided on your WordPress site.

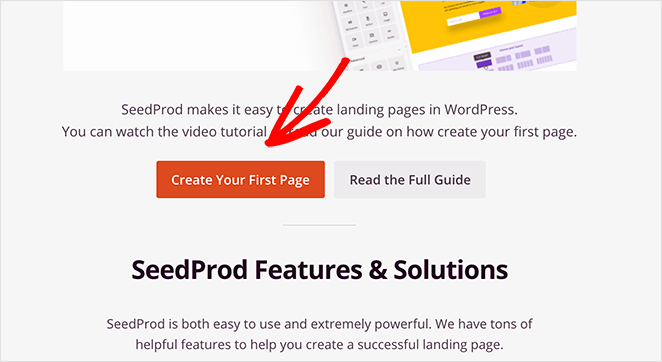
Once you’ve done that, scroll a little way down the screen and click the Create Your First Page button.
Step 2. Create a New Landing Page with SeedProd
The next screen is your SeedProd landing page overview. Along the top of the screen are the different page modes you can activate in SeedProd, which are:
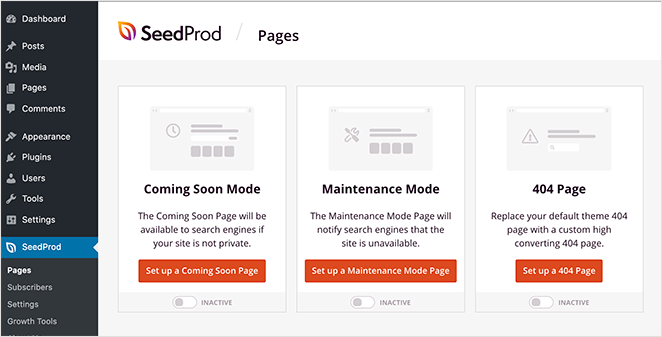
You can turn on each page mode by clicking each toggle from the Inactive to Active position.
Under the page modes section is where your landing pages will appear once you make them.
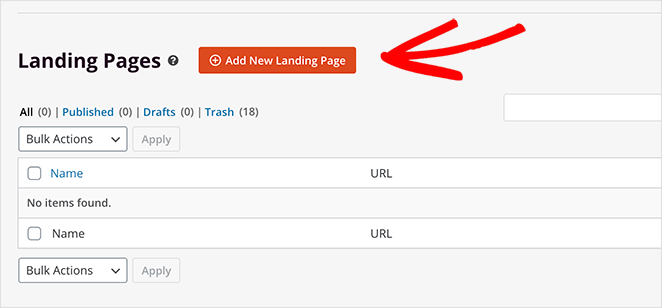
To create your first page, click the Add New Landing Page button.
Step 3. Choose a Landing Page Template
After clicking the button to create your landing page, you’ll see SeedProd’s library of responsive landing page templates. You can customize each template in the drag-and-drop visual editor.
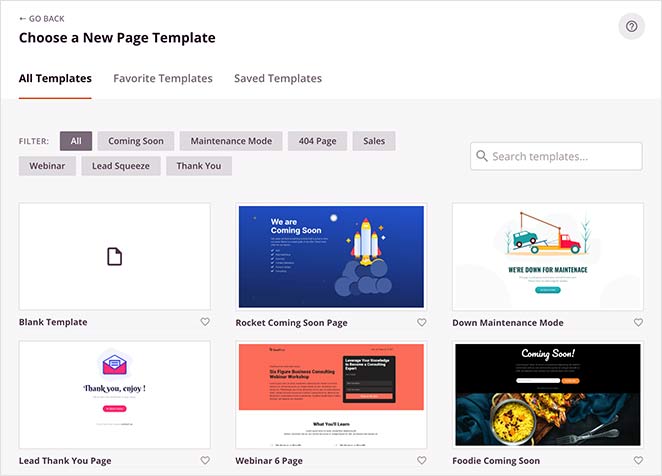
You can filter the templates by clicking any of the following categories at the top of the page:
- All
- Coming Soon
- Maintenance Mode
- 404 Page
- Sales
- Webinar
- Lead Squeeze
- Thank You
Then, it’s merely a case of picking a template that best suits your needs. To launch your template in SeedProd’s visual editor, hover your mouse over the template thumbnail, and click the tick icon.

For this tutorial, we’ll use the Newsletter Squeeze Page template.
Step 4. Customize Your Landing Page Design
After launching your template, you’ll see SeedProd’s drag-and-drop visual editor. The screen is divided into 2 sections.
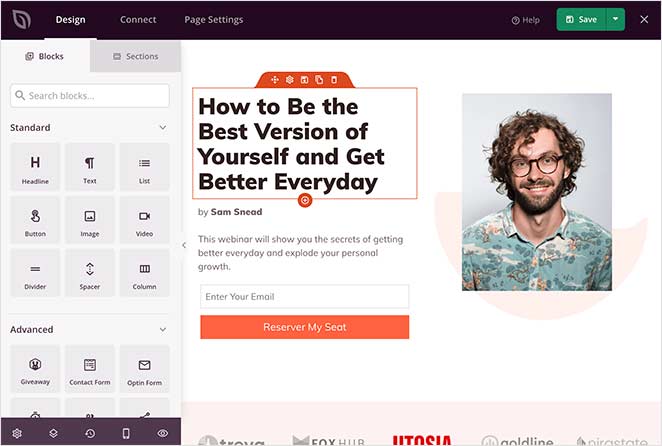
The different elements you can add to your page are on the left-hand side, while on the right is a live preview of your landing page. This allows you to see any changes you make automatically in real-time.
To customize your landing page content, click anywhere on the live preview.
For instance, to change the body copy, click on the existing copy. This opens a settings panel on the left-hand side where you can add your own content. Alternatively, you can use the in-line editing option on the right-hand side.
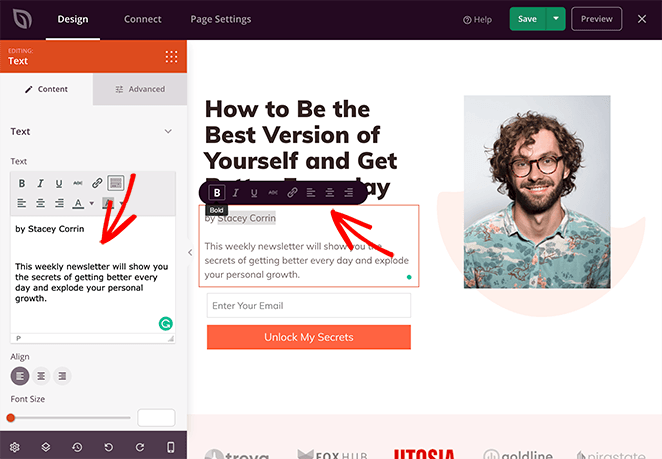
You can also use this approach to change the images on your page. Just click an existing image to open the settings on the left-hand panel.
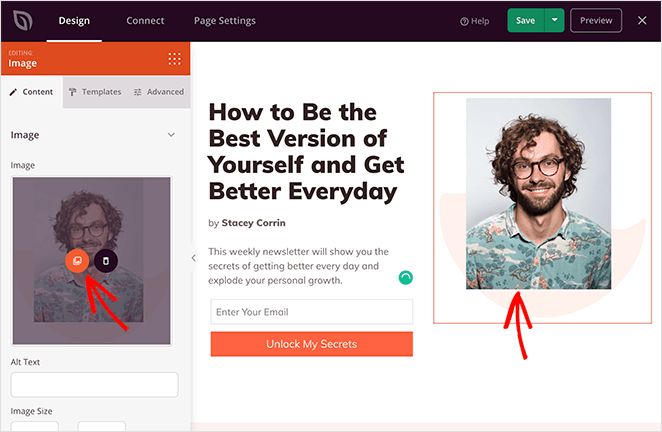
From there, you can delete the default image and replace it with one from your computer or WordPress media library. Alternatively, you can search through thousands of stock images, which are included for free with your SeedProd plan.
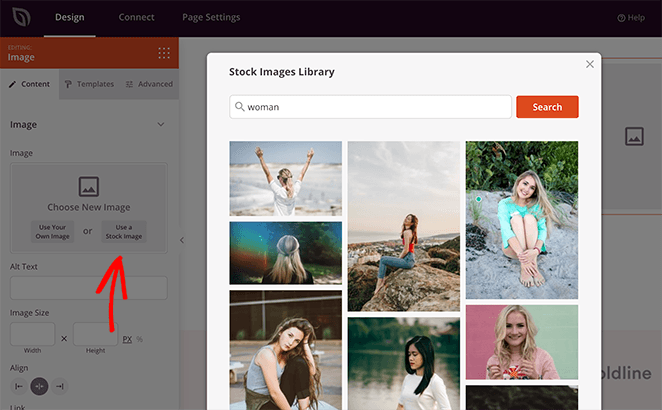
After customizing your landing page content, you can add extra content with SeedProd’s landing page Blocks.
Landing Page Blocks
Landing page blocks are the different elements you can add to your page to make it more engaging for your visitors. They come in 2 different block types: Standard and Advanced,
Standard blocks include all the basic page elements, such as images, buttons, headings, and more.
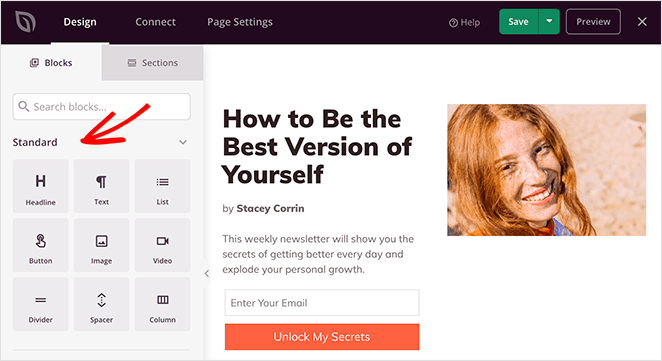
Yet, the Advanced blocks are more focused on generating leads, including:
- Giveaway blocks
- Optin forms
- Contact forms
- Social profiles
- Countdown timers
- Star ratings
- Anchor links
- Progress bars
- And more.
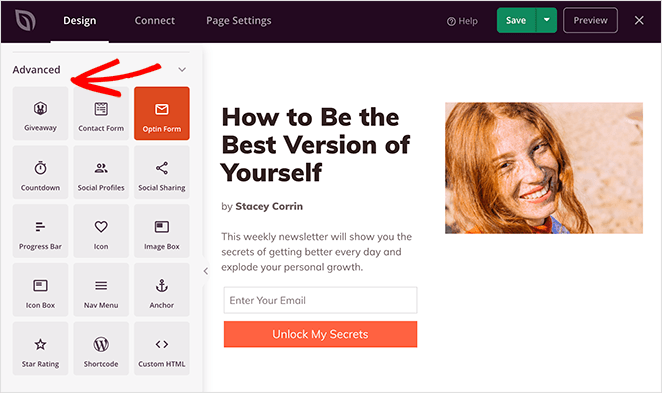
Adding blocks to your landing page is as simple as dragging one from the left-hand panel and dropping it on your page preview. From there, you can customize the content in the settings panel.
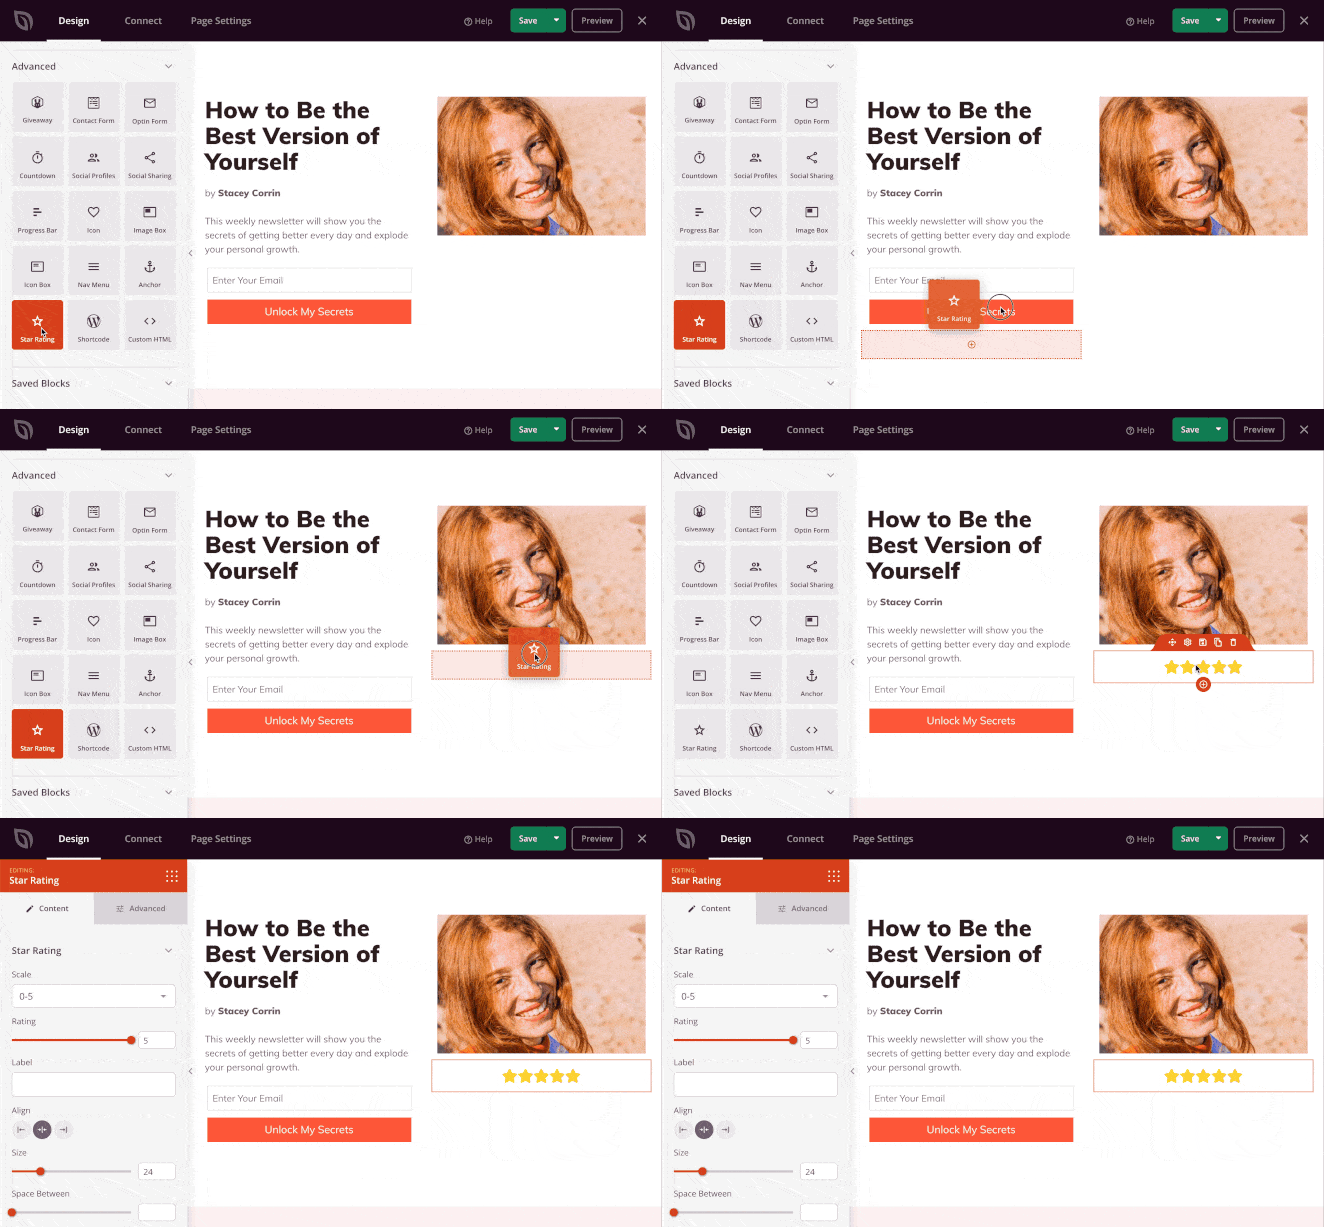
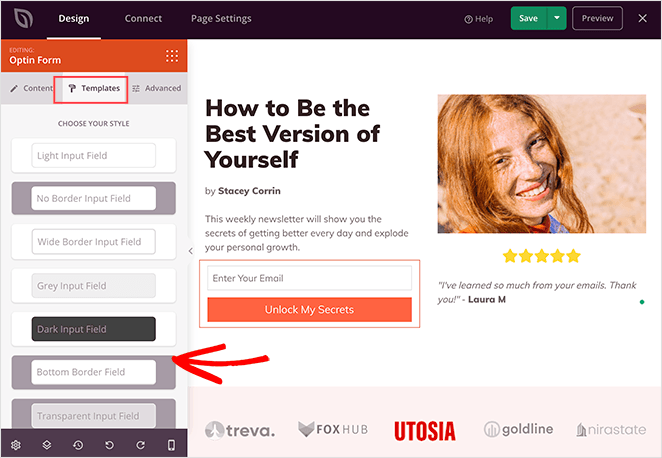
Many of SeedProd’s landing page blocks also come with ready-made templates. These are pre-set block styles you can change with the click of your mouse.
To find them, click any page element and navigate to the Templates tab. Then click the style you like most to apply it to the block.
Landing Page Sections
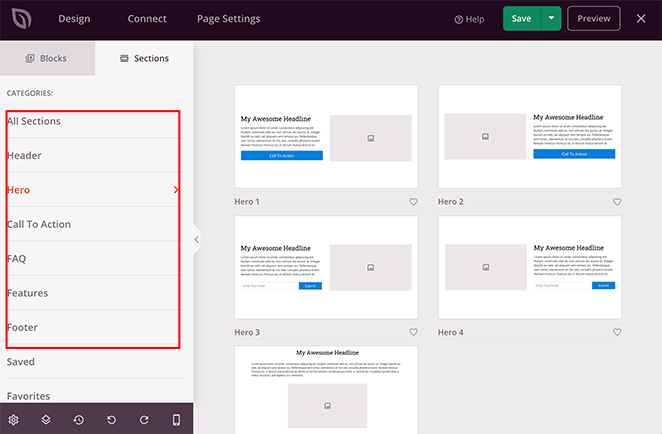
Just like blocks, SeedProd has a variety of landing page sections. These are pre-made block combinations that form entire page areas you can insert with a single click.
To find them, click the Sections tab and choose from several:
- Headers
- Hero sections
- Calls to Action
- FAQ sections
- Feature areas
- Footers
You can customize page sections the same way as any landing page block. Here’s an example of how a FAQ section would look.
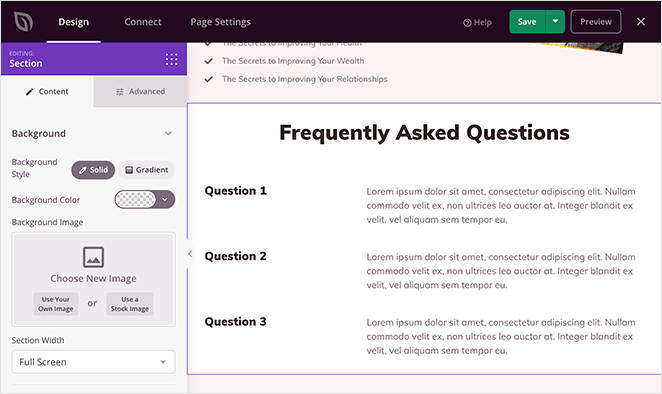
Including FAQs on your page is a great way to ease any concerns users may have before subscribing to your list.
Global Settings
If you need more customization options, click the gear icon in the bottom left of the page builder. This opens your global landing page design settings.
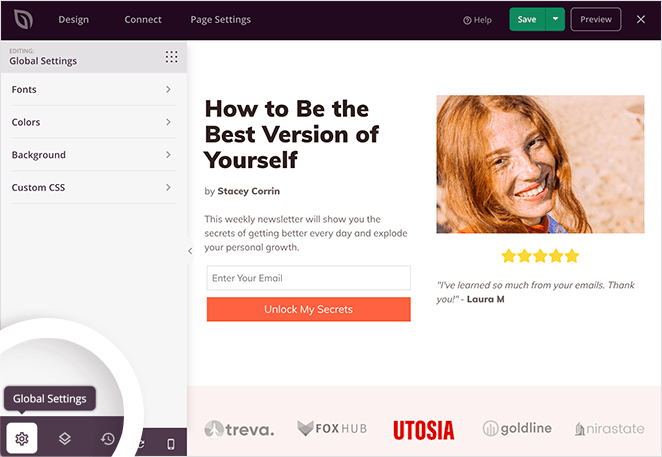
In this area, you can customize your page’s colors, fonts, background, and CSS and apply the changes to your page globally.
For example, to change your landing page color scheme, click the Colors heading. From there, you can select new colors for your headers, links, button text, and more.
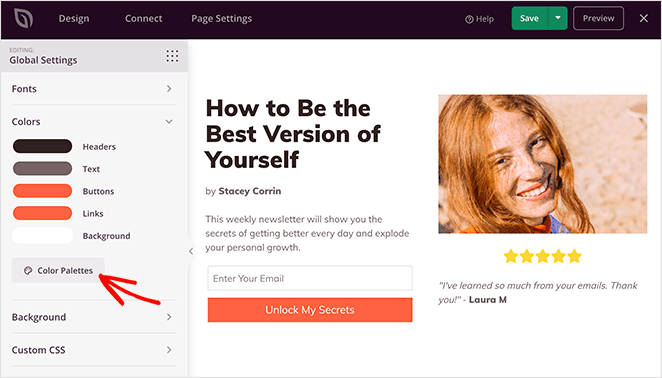
If you’re not sure which colors work well together, you can click the Color Palettes button. This shows a library of over 20+ different color combinations you can add to your page with a click.
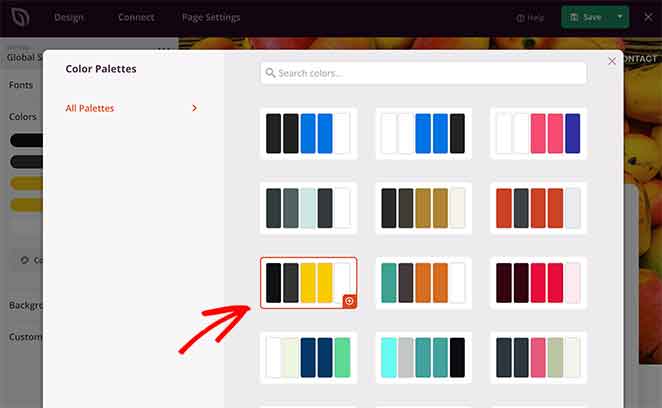
Continue customizing your page until you’re happy with your design. Don’t forget to click the green Save button periodically to store your settings.
Step 5. Connect Your Landing Page to Mailchimp
With your landing page design in place, it’s time to connect your page to your Mailchimp account and email list.
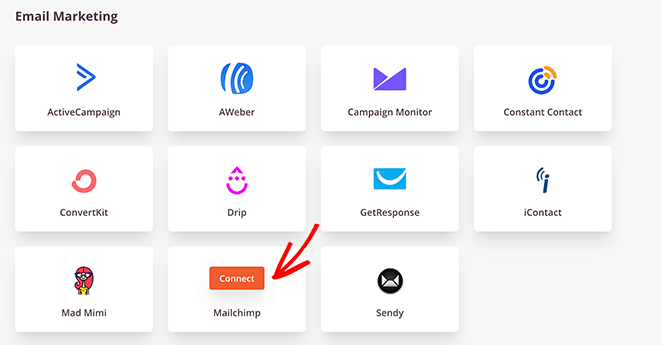
To do this, click the Connect tab at the top of your screen. This will show you all of the available email marketing services you can integrate with SeedProd.
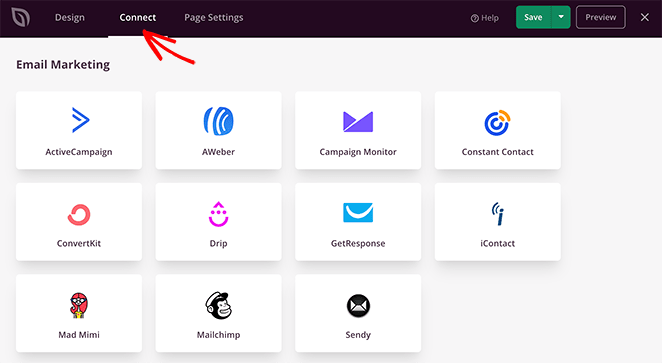
To link your Mailchimp account, hover your mouse over the Mailchimp icon and click Connect.
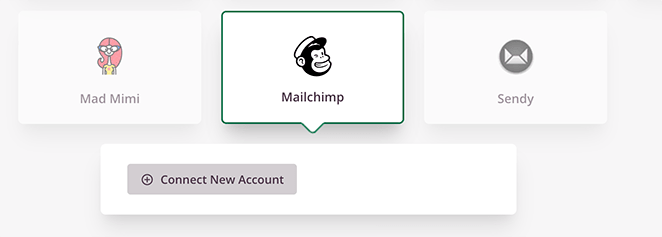
Next, click the Connect a New Account button.
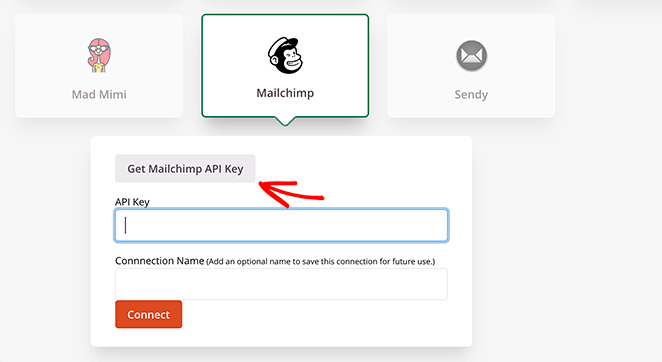
You’ll then be asked to enter your Mailchimp API key and to choose a Connection Name. To find your API key, click the Get Mailchimp API Key button.
This will open a popup window where you should log in to your Mailchimp account. After logging in, the window will redirect you to your API key.
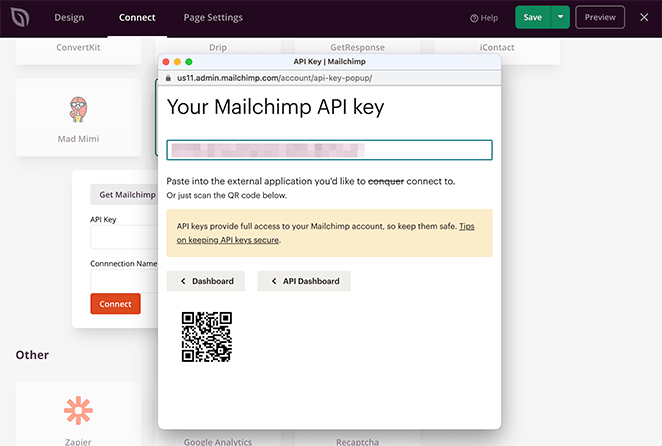
Copy the key and paste it into the field in SeedProd.
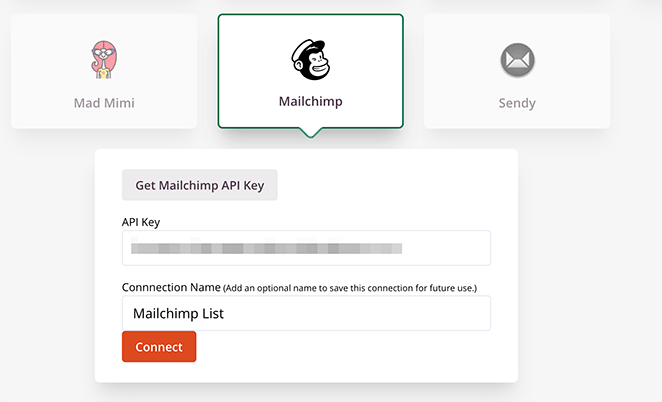
Next, give the connection a name and click the Connect button.
Once you’ve done that, you can choose your preferred list from the drop-down menu and click Save Integration Details.
Now anyone who subscribes to your landing page will be added to your Mailchimp email list automatically.
Step 6. Configure Your Page Settings
Next, open the Page Settings tab to adjust your landing page details. Here you can change the page name and URL, switch between draft or published, and enable Isolation Mode to avoid plugin conflicts.

You’ll also find options for SEO & Analytics (works with plugins like All in One SEO and MonsterInsights), and a Scripts area for things like tracking pixels or custom code.
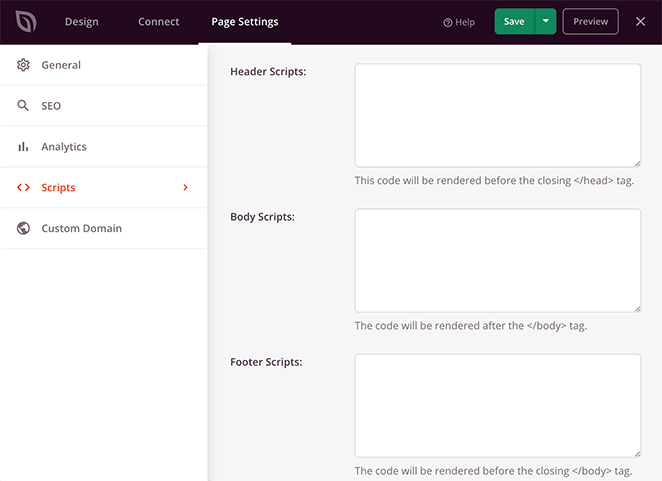
If you’re on the Pro Plan, you can also assign a custom domain to your page. For example, point a coming soon page on oldsite.com to a new domain like newsite.com to start collecting subscribers early.
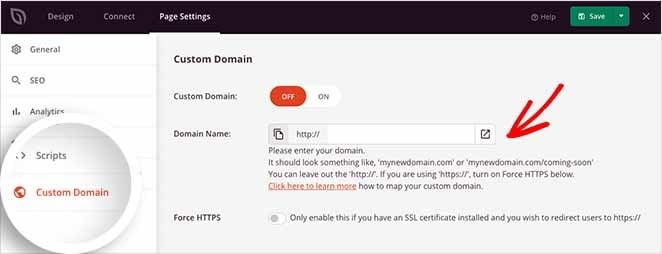
Once you’ve configured these settings, click Save and return to the Design tab.
Step 7. Preview Your Page in Mobile
Before you make your landing page live, you’ll want to make sure it looks good on mobile screens. If it doesn’t look right on mobile devices, you could look unprofessional and lose potential leads.
Luckily, SeedProd has a built-in mobile preview option where you can preview your landing page on mobile devices. Just click the Mobile Preview icon to see how your page looks on mobile vs desktop.
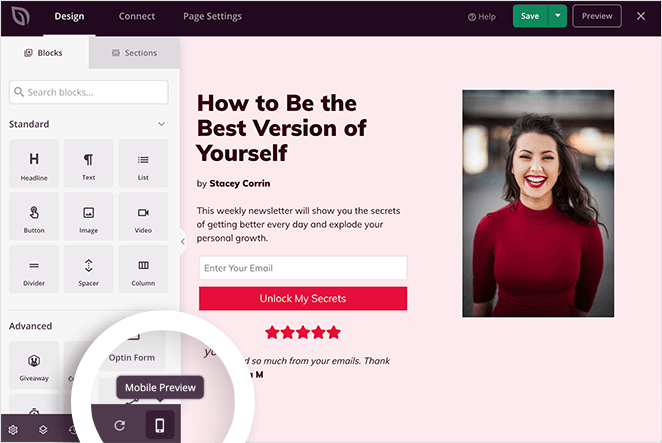
If anything doesn’t look the way it should, you can edit your mobile landing page the same way you would with your desktop view.
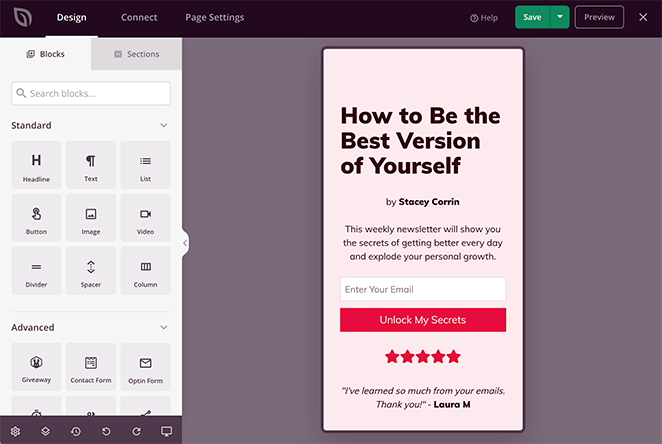
Any changes you make are automatically applied to both versions to keep things looking consistent.
Step 8. Publish Your Mailchimp Page in WordPress
Now the time has come to publish your landing page in WordPress, and this step is just as easy.
To publish your page, click the down arrow next to the Save button in the top-right corner of your screen. Then, click Publish.
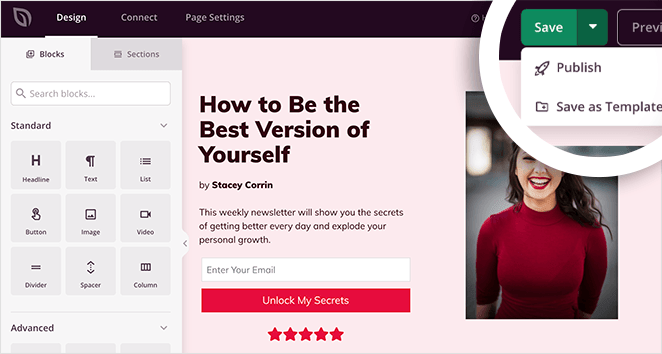
Next, you’ll see a popup telling you that your page has been published.
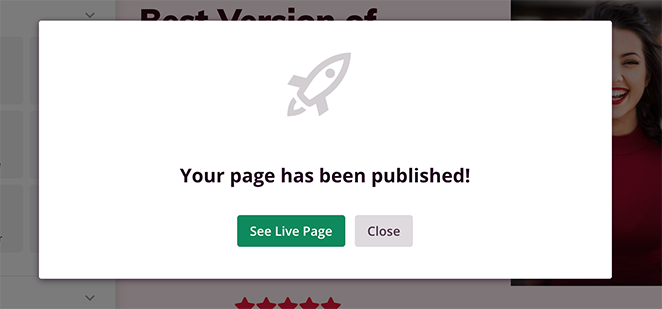
Go ahead and click the See Live Page button to see how your new landing page looks.

FAQs About Creating Mailchimp Landing Pages
You’ve now seen how easy it is to create a Mailchimp landing page in WordPress without coding. By building your page with SeedProd, you stay in full control of your design, domain, and SEO while still connecting directly to your Mailchimp email list.
With ready-made templates, drag-and-drop editing, and fast integrations, you can launch professional pages that capture more subscribers and grow your business faster.
Looking for more tips? Check out our guides on landing page best practices and growing your email list.
Thanks for reading! We’d love to hear your thoughts, so please feel free to join the conversation on YouTube, X and Facebook for more helpful advice and content to grow your business.

