I didn’t start using push notifications right away.
At first, I relied on email and social posts to bring people back to my site. But it didn’t take long to notice a problem. Most of those messages got ignored. Then I tried web push notifications, and the difference was instant. Visitors started coming back more often, clicking more links, and actually reading the updates I sent out.
Push notifications let you reach people even when they’re not on your website. You can send quick updates straight to their browser or phone. That means more return traffic, more engagement, and fewer people forgetting you exist.
In this guide, I’ll show you exactly how to add push notifications to your WordPress site. You don’t need any tech skills. I’ll walk you through my favorite tools, the setup steps, and how I use them to bring traffic back every week.
Quick Summary
In this guide, I’ll show you how to add push notifications to your WordPress site using PushEngage. You’ll learn how to:
- Set up a free PushEngage account
- Connect it to your WordPress site
- Create and send your first push notification
- Set up opt-in prompts so visitors can subscribe
- Automatically notify subscribers when you publish new posts
It takes about 15 minutes to set up, and you don’t need to write any code
What Are Web Push Notifications?
Web push notifications are short, clickable messages that pop up on a user’s device. You’ve probably seen them appear in the top corner of your desktop or as a banner on your phone.
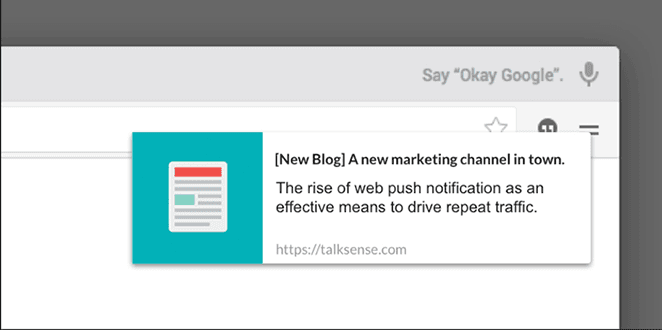
They don’t require an app or even an email address. When someone visits your website, they can choose to subscribe with one click. After that, you can send them updates anytime, even if they’re not on your site.
Here’s why I like them:
- They show up instantly
- People don’t need to open their inbox
- You can send them to specific pages or posts
They’re also way more effective than email. Web push notifications can get click-through rates of up to 28%, compared to only 1 to 2% for email.
It’s one of the fastest ways to reconnect with your visitors and keep them engaged.
Why Add Push Notifications to Your WordPress Site?
I started using push notifications because I wanted a faster way to bring people back to my site.
Emails were hit or miss and social media posts got buried. But people actually clicked push notifications. I could send out a quick update, and within minutes, I’d see a spike in traffic.
Since then, I’ve used push notifications to:
- Get eyes on time-sensitive content
- Send quick reminders during flash sales
- Reconnect with visitors who haven’t returned in a while
They’re part of my regular workflow now. I don’t send one for every post, just when I have something timely to share or a reason to bring people back.
It’s a quick way to reconnect without relying on email or social feeds.
Setting Up Push Notifications Using PushEngage
If you’re ready to try push notifications for yourself, PushEngage is the tool I use and recommend. It makes getting started simple.
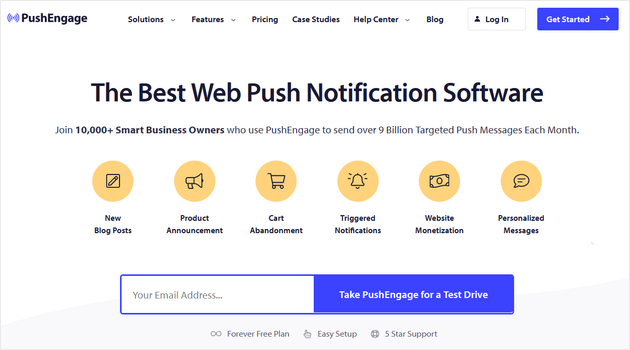
PushEngage lets you send web push notifications from your WordPress site without touching code. It’s built for bloggers, store owners, and anyone who wants an easy way to reach their audience after they leave.
I use it on my own site because it’s quick to set up and just works.
Here’s how to get started.
Step 1: Create Your PushEngage Account
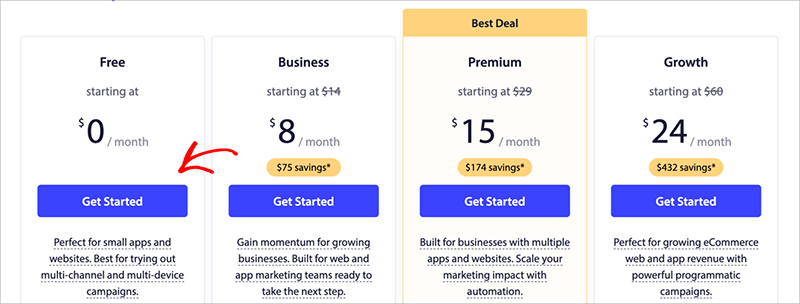
First, go to PushEngage and click the ‘Try Risk Free for 14 Days’ button.
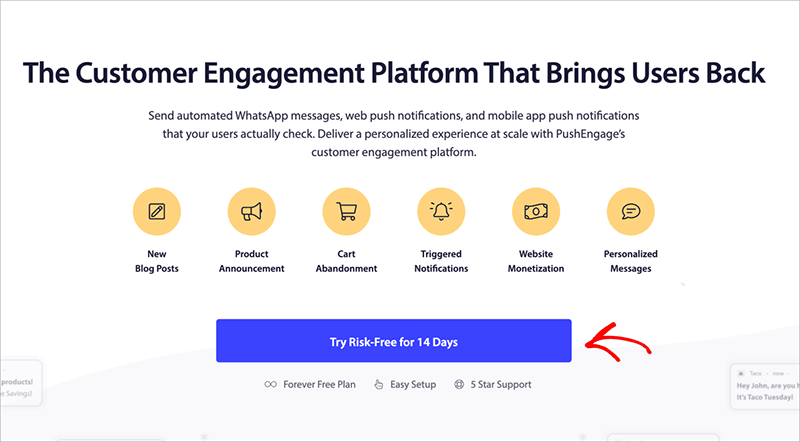
The free plan covers up to 200 subscribers and 30 notifications a month. That’s enough to try things out and see how it works.
Next, create your account. You can sign up with Google or use your email.
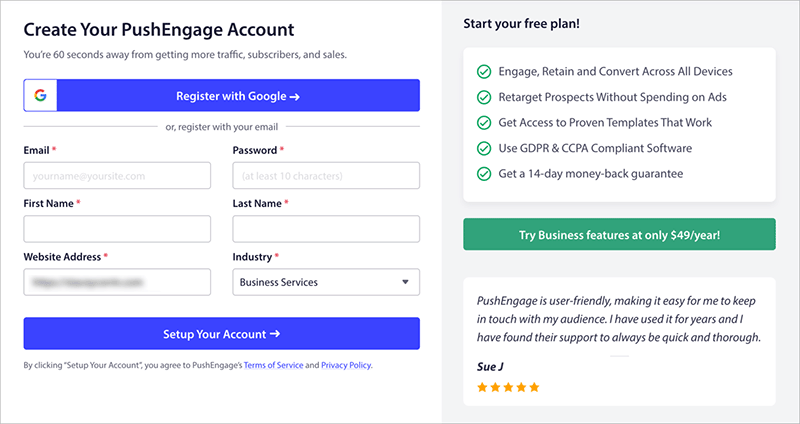
After that, PushEngage will ask for a few details:
- Your website domain
- Industry and company size
- Credit card info
Once you’re in, you’ll land on the PushEngage setup wizard.
This is where you’ll:
- Check your site name and URL
- Upload a site icon for your push messages (192×192 PNG or JPG works best)
- Confirm your time zone
- Click ‘Save and Continue’
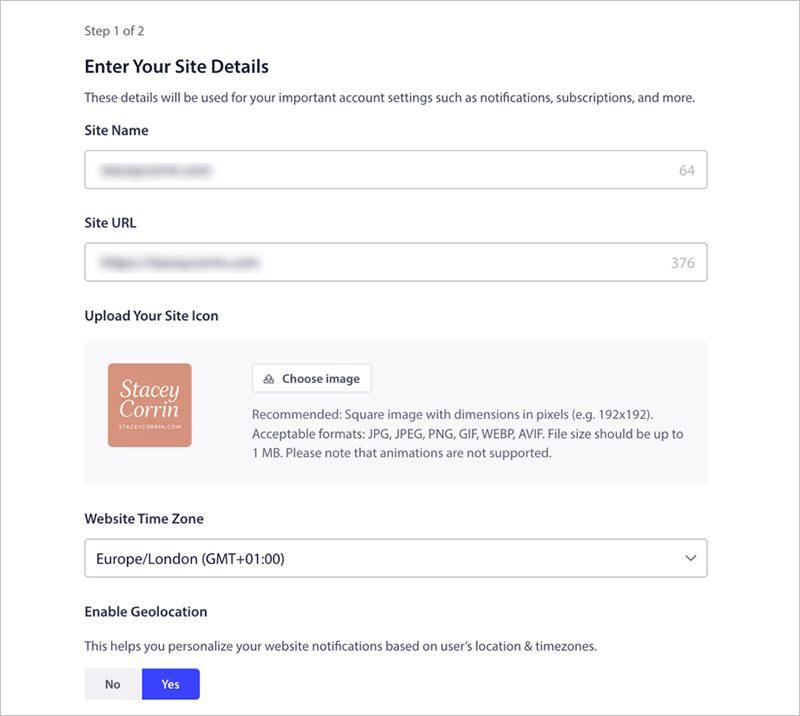
That icon shows up in every notification, so choose something that fits your brand.
Step 2: Connect PushEngage to Your WordPress Site
The next screen helps you connect your account to WordPress.
Simply click the ‘Install PushEngage WordPress Plugin‘ button.
This automatically redirects you to your website where you can login to your WordPress dashboard and install the plugin.
Once it’s active, you’ll see a notification in your dashboard prompting you to finish connecting your site. ‘Connect your site now’ to do this.

Then, on the next screen, click the ‘Connect Your Existing Account’ button.
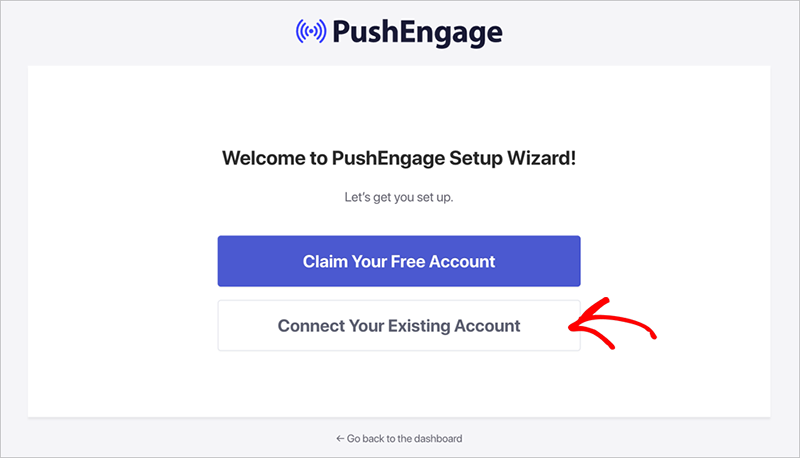
PushEngage will open a new window and prompt you to confirm your site. Make sure the domain listed matches the one you added earlier. Then click ‘Let’s Get Started’.
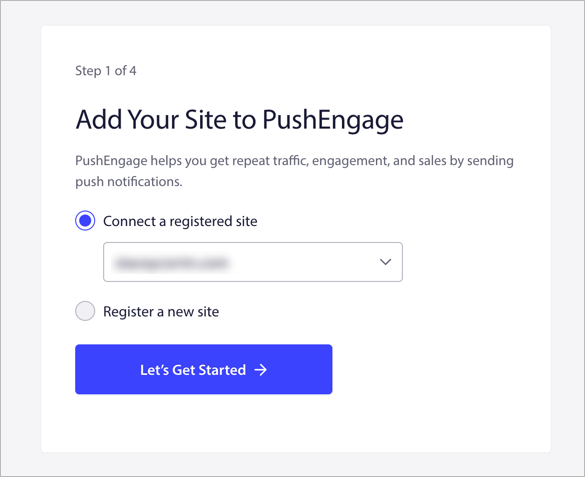
From there, follow the prompts in the wizard. You can keep the default settings or tweak them to fit your preferences. When you’re done, click ‘PushEngage Dashboard’ to head back to WordPress.
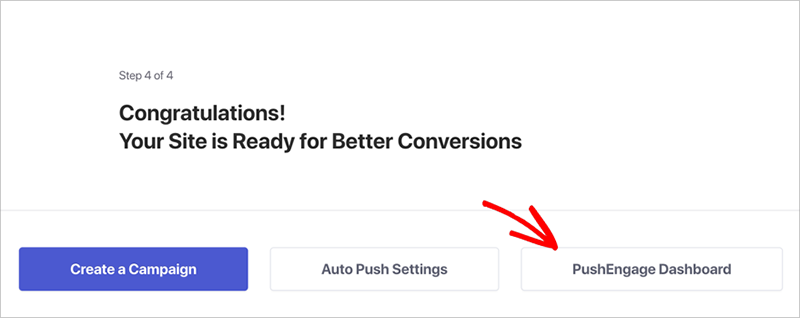
Your site is now connected and ready to send push notifications.
Step 3: Create Your First Push Notification
To send your first message, go to PushEngage in your WordPress dashboard and click ‘Create’. In the dropdown, select the ‘Push Broadcasts‘ option.
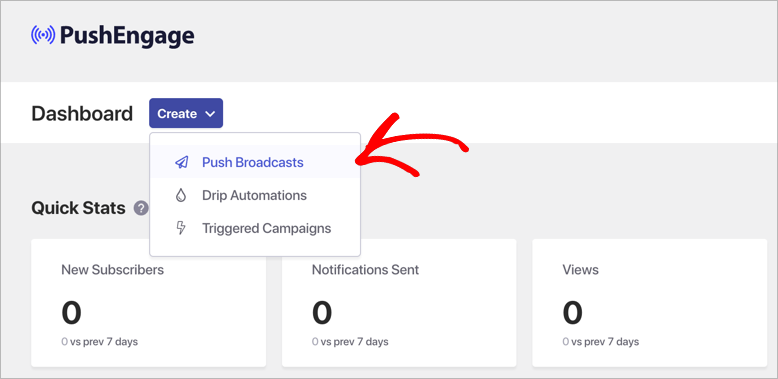
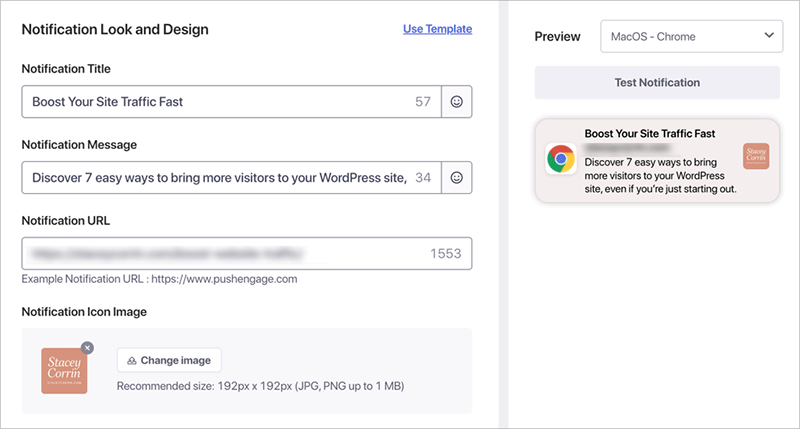
This opens the push notification editor.
Start by filling out the basics:
- Notification Title: This is your headline
- Message: A short sentence to tell people what the update is
- Notification URL: The link you want them to click
You’ll see a live preview on the right as you type.
If you’re on a Business+ plan, you’ll also see options to:
- Show a large image at the top of your notification (works on desktop browsers like Chrome 47 and up)
- Set how long the notification stays visible, or keep it open until the user interacts with it
These extras are optional, but they can help your messages stand out.
When everything looks good, click ‘Save & Select Audience’.
For your first campaign, choose ‘Send to All Subscribers’. Then click ‘Send/Schedule’ at the top.
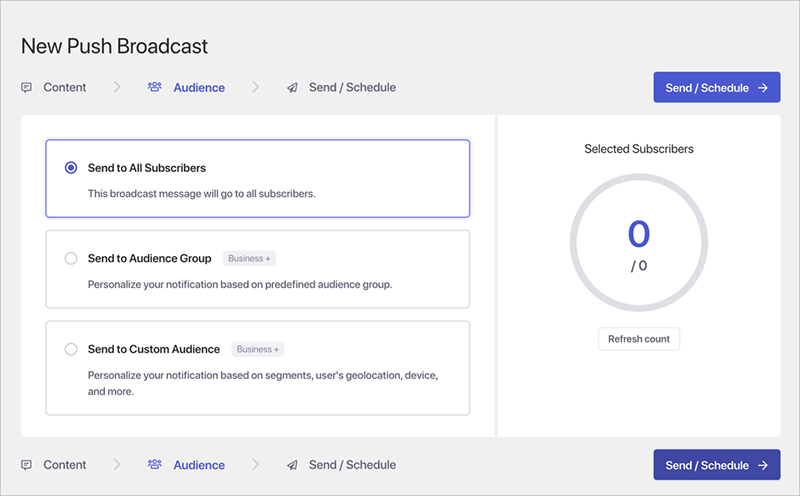
You can send the message right away or schedule it for later. Just keep in mind that scheduling and recurring messages require a paid plan.
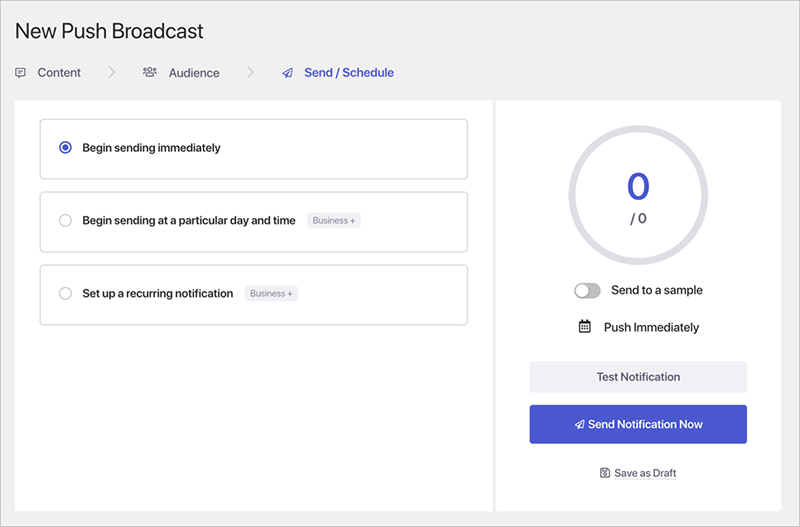
Click ‘Send Notification Now’ to finish.
To make sure it worked, visit your site in a browser where you’ve subscribed. You should see the message pop up within seconds.
Step 4: Set Up Your Subscriber Prompt
Now you need a way for people to subscribe. This is where the opt-in popup comes in.
In your WordPress dashboard, go to PushEngage » Design.
You’ll see several popup templates. Choose one you like and toggle it to Active.
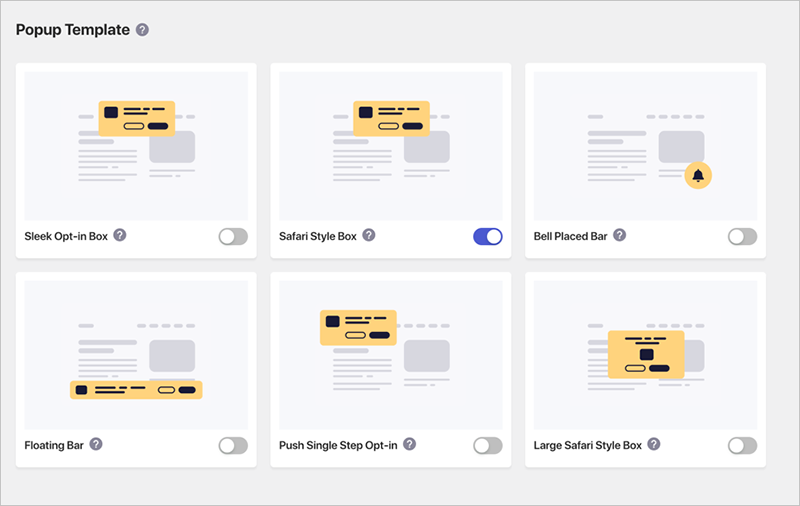
Then click ‘Edit Popup’. This will take you to the PushEngage website where you can customize the layout, text, and behavior.
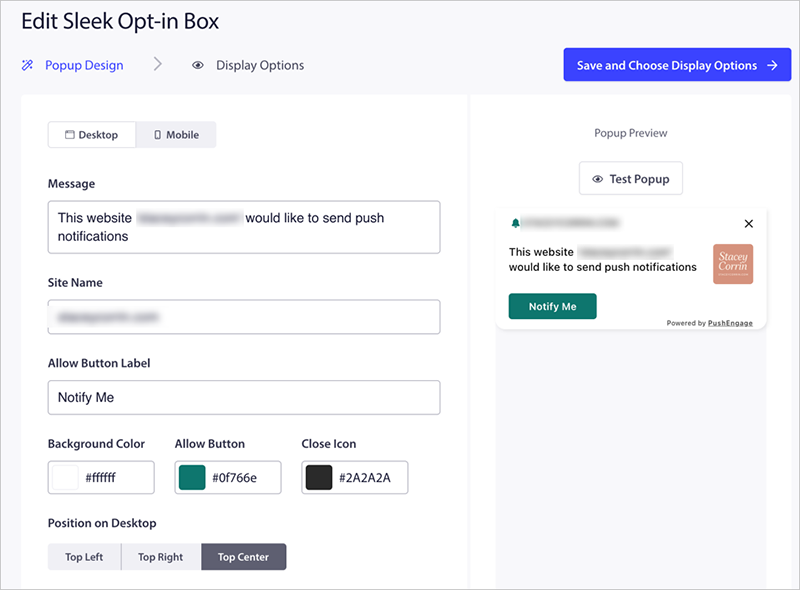
Here’s what I usually update:
- The headline and message
- When the popup should appear (immediately, on scroll, after delay, etc.)
- How long to hide it if someone closes it
Once you’re happy with the design, click ‘Save & Choose Display Options’.
In the next screen, you can tweak the display rules, like cookie duration and trigger options. Then click ‘Save and Enable Popup’.
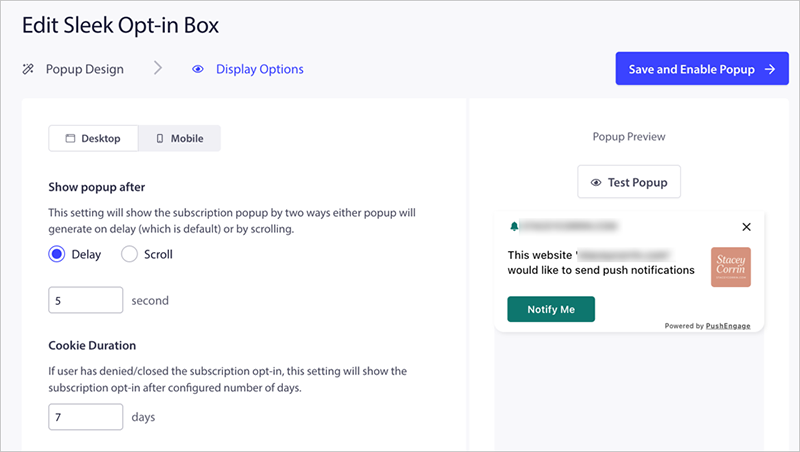
That’s it. Your opt-in prompt is now live.
To test it, visit your site in a private browser or log out and reload the homepage. You should see the prompt appear with your custom design.
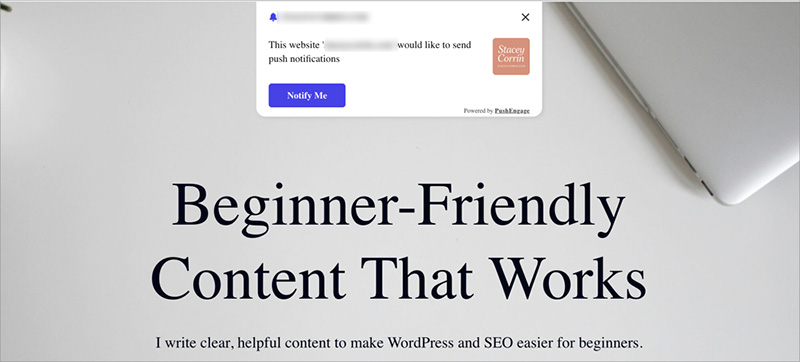
When someone clicks ‘Allow’, they’ll be added to your PushEngage subscriber list automatically.
💡 Pro Tip: Using SeedProd? Add PushEngage from the Builder
If you’re using SeedProd, you can drop in the Push Notification block while editing any page.
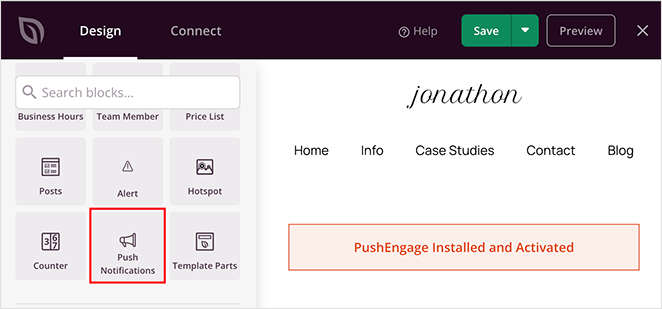
SeedProd will install the PushEngage plugin for you and guide you through the connection. You don’t have to leave the builder or set anything up manually.
It’s a quick way to turn on push notifications while you’re building pages.
Sending Push Notifications Automatically for New Blog Posts
You don’t have to send every push notification by hand. PushEngage can automatically send one every time you publish a new blog post.
To turn this on, go to PushEngage » Settings in your WordPress dashboard and click the ‘Auto Push Settings’ tab.
From here, toggle on Auto Push.
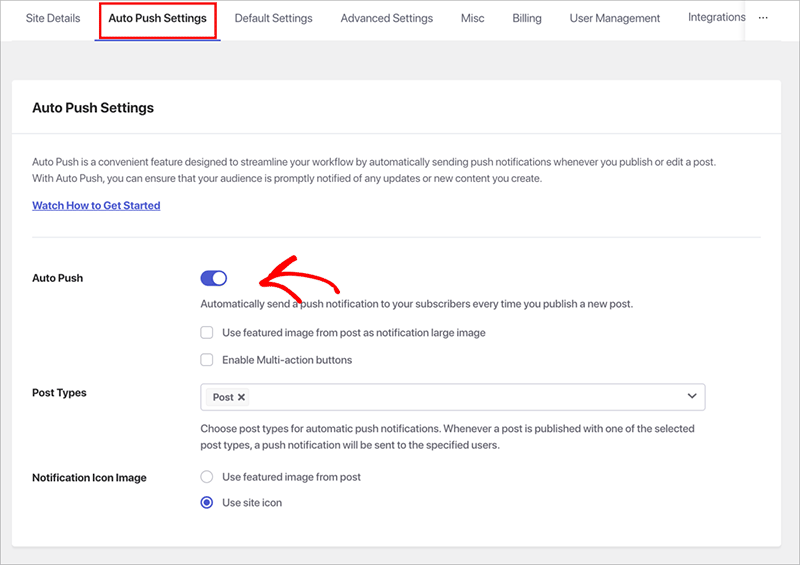
You can also:
- Show your post’s featured image in the notification
- Add multi-action buttons so people can click through to different pages or offers
- Choose a fallback icon if a post doesn’t have a featured image
Once you’ve saved your settings, every new post will trigger a push notification automatically.
If you want to customize the message for a specific post, scroll down in the WordPress editor to the PushEngage Push Notifications Settings section. You can change the title, message, and even choose which audience gets it.
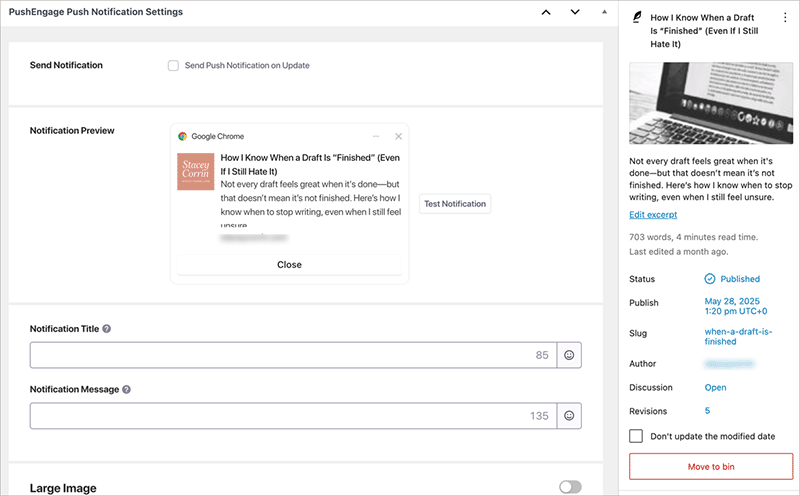
When you hit Publish, your post goes live, and your subscribers get the notification right away.
Bonus: Set Up Drip Notification Campaigns
If you want to go beyond one-off messages, PushEngage also lets you create automated drip campaigns.
These are a series of push notifications that send on a schedule. You can use them to:
- Welcome new subscribers
- Promote a freebie or discount
- Share a multi-part blog series
You’ll need a Business+ plan to set one up. Go to PushEngage » Drip in your WordPress dashboard and click ‘Add New’.
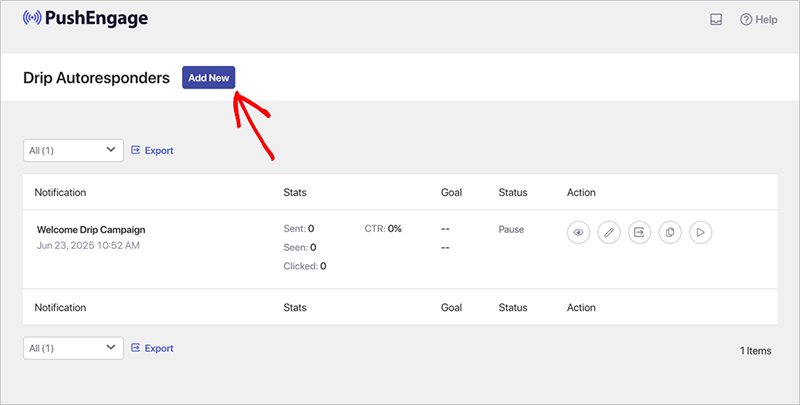
Each message can have its own title, message, link, and image. You decide when it sends. That could be right after someone subscribes or a few days later.
You can also send different messages to different groups if you’ve created audience segments.
When you’re ready, click ‘Activate Autoresponder’. It will keep running in the background and send each message automatically.
Push Notification Best Practices
Push notifications are powerful, but they can backfire if you’re not careful. Here’s what’s worked for me, and a few things I’ve learned the hard way:
- Keep messages short and clear. You only have a few seconds to get someone’s attention. Stick to one goal.
- Don’t over-send. Two or three messages per week is usually enough. Sending more can lead to unsubscribes.
- Make the opt-in prompt work. If it’s not showing up, no one can subscribe. Always test it in a private window.
- Write like a real person. Skip the promo-speak and talk like you would in an email.
- Watch the data. PushEngage shows you what’s getting clicks and what’s getting ignored. Use it.
- Test in different browsers. I’ve missed obvious bugs by only checking Chrome. View your site as a new visitor to catch issues early.
If you’re not sure whether to send something, ask yourself if you’d click it. That question usually tells you everything you need to know.
Questions About WordPress Push Notifications
Should You Use Push Notifications?
Push notifications are one of the easiest ways to keep people coming back to your site. You don’t need to build a full email funnel or rely on social media posts that get lost in the feed. Just a quick message at the right time can bring your readers back.
PushEngage keeps things simple, especially if you’re already using WordPress. If you’re building your pages with SeedProd, the setup fits right into your workflow.
Whether you’re sharing blog posts, launching a product, or trying to stay top of mind, push notifications are worth trying.
Want to do more with your site traffic? Check out our tutorials on building landing pages, growing your email list, and boosting conversions.
Thanks for reading! We’d love to hear your thoughts, so please feel free to join the conversation on YouTube, X and Facebook for more helpful advice and content to grow your business.

