I’ve helped a lot of beginners build their first WordPress websites, and the ones that stand out always have one thing in common, they feel real. The story, the photos, the purpose behind it all. That’s especially true when you’re making a travel website.
Maybe you’re offering tours in your local area. Or maybe you’ve been sharing travel tips on Instagram and want something more official. Either way, having your own site builds trust, helps you get more bookings, and gives you a place to show what you do.
If you’ve been wondering how to make a travel website without hiring a developer, you’re in the right place. With WordPress and SeedProd, you can do it all yourself, with no code needed. I’ll walk you through it step-by-step, even if you’re starting from scratch.
At a Glance: How to Make a Travel Website in WordPress
- Step 1: Set Up WordPress Hosting and Domain
- Step 2: Install and Activate SeedProd
- Step 3: Choose a Travel Theme with SeedProd
- Step 4: Customize Your Homepage and Navigation
- Step 5: Create a Travel Services or Packages Page
- Step 6: Add a Booking Form and Payment Options
- Step 7: Show Destinations with Image Galleries
- Step 8: Add Contact and Testimonials Pages
- Step 9: Improve Travel Website SEO
- Step 10: Preview and Publish Your Travel Website
► Why Use WordPress for Your Travel Website?
WordPress is free, beginner-friendly, and powers over 43% of all websites. It gives you full control over how your site looks and works — without needing to code.
I recommend using WordPress.org (not WordPress.com) because it gives you more freedom and works perfectly with SeedProd.
What You Need to Start Your Travel Site
Before you can build your travel website, you’ll need to set up a few basics first. These are the tools that get WordPress running and ready to customize.
- A domain name
This is your website’s address (like mytravelbrand.com). Try to pick something short, memorable, and relevant to your niche or destination. Avoid dashes or anything hard to spell. - Web hosting
This is where your website lives. I recommend Bluehost because it’s beginner-friendly and works great with WordPress. Plus, you get a free domain name and SSL certificate when you sign up. You can also check out my guide on how to choose the best WordPress hosting. - WordPress installed
Most hosting providers, including Bluehost, install WordPress for you during setup. If not, you can usually do it from your hosting dashboard in just a few clicks. - SeedProd Pro
This is the drag-and-drop builder I use for everything. It comes with full website kits designed for travel businesses, so you can launch faster without writing any code.
Why I Use SeedProd Instead of a Regular Theme
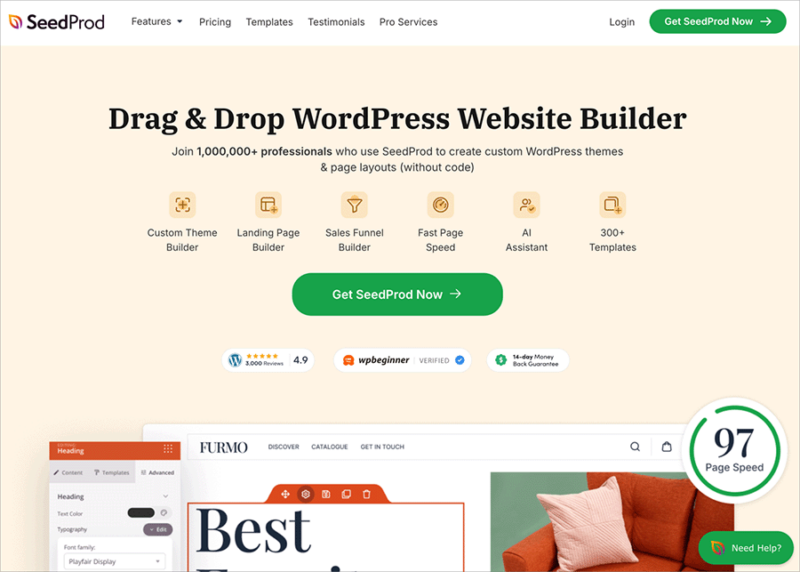
I’ve tested a lot of WordPress themes, and many look great in the demo but end up being hard to work with. Some have layout limits, confusing options, or features that only work if you upgrade or install extra plugins.
SeedProd replaces your theme completely, so you’re not stuck trying to fit your content into someone else’s design. You can build your whole site visually using simple drag-and-drop blocks.
If you’ve ever spent way too long trying to change a font size or move something on the page, SeedProd is the kind of builder that takes that stress away.
How to Make a Travel Website in WordPress (Step-by-Step)
You’ve got everything you need to get started. In the next few steps, I’ll show you how to build your travel website from the ground up. We’ll start with hosting and setup, then move into designing your pages and adding key features like booking forms and photo galleries.
Step 1: Set Up WordPress Hosting and Domain
The first step in creating your travel website is choosing a web host and registering a domain name. If you’ve never done this before, don’t worry — most hosting providers walk you through the setup.
I recommend using Bluehost. It’s beginner-friendly, officially recommended by WordPress, and gives you everything in one place — hosting, a free domain name, a free SSL certificate, and one-click WordPress installation.
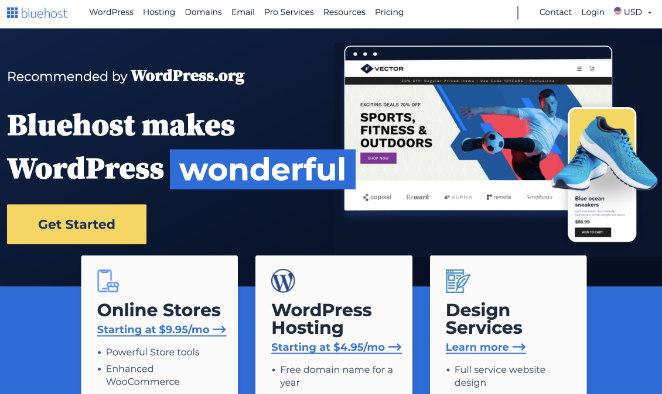
Once you’ve signed up, you’ll have a brand-new WordPress site that’s ready to customize. If you’d like a more detailed walkthrough, here’s my full guide on how to create a WordPress website for beginners.
Step 2: Install and Activate SeedProd
Now that your WordPress site is set up, the next step is installing SeedProd. This is the builder you’ll use to create and customize your travel website.
To begin, go to the SeedProd website and choose the Pro plan. After completing your purchase, log in to your SeedProd account and download the SeedProd Pro ZIP file and copy your license key.
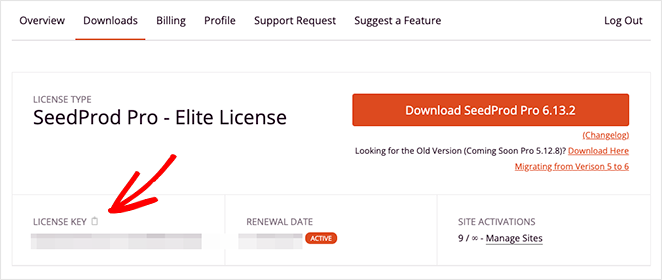
Next, open your WordPress dashboard and go to Plugins » Add New. Click the Upload Plugin button at the top of the page.
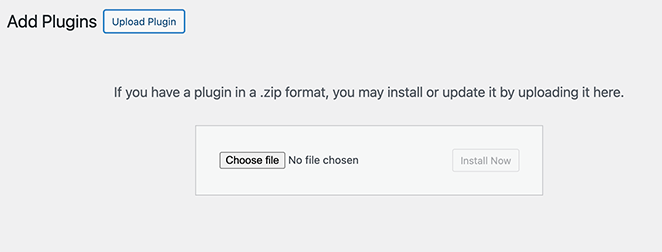
Choose the ZIP file you downloaded earlier, then click Install Now.
When the installation is finished, click Activate to enable the plugin.
After activation, you’ll be prompted to enter your SeedProd license key. You can find this key in your SeedProd account area.

If you need help with this step, here’s a quick guide to installing SeedProd Pro.
Once SeedProd is active, you’ll see a new SeedProd tab in your WordPress dashboard. This is where you’ll pick your travel theme and begin building your pages.
Step 3: Choose a Travel Theme with SeedProd
Now it’s time to design your site using one of SeedProd’s ready-made theme kits.
Each kit includes a homepage, about page, contact page, and more. Some are made specifically for travel websites, with space for large photos, trip details, and booking sections.
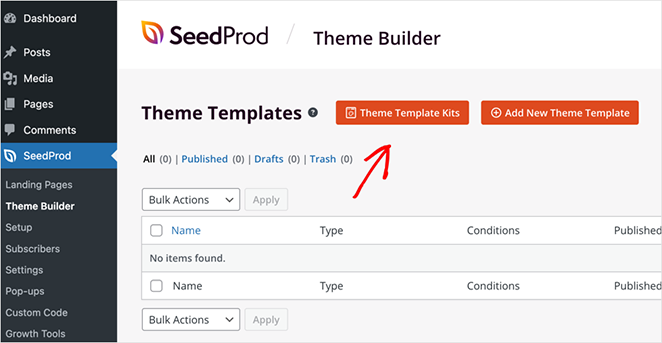
To get started, open your WordPress dashboard and go to SeedProd » Theme Builder. Then click the Theme Template Kits button to browse the library of designs.
You can scroll through the options or search for a travel-related template. When you find one that fits your style, hover over it and click the checkmark to import it.
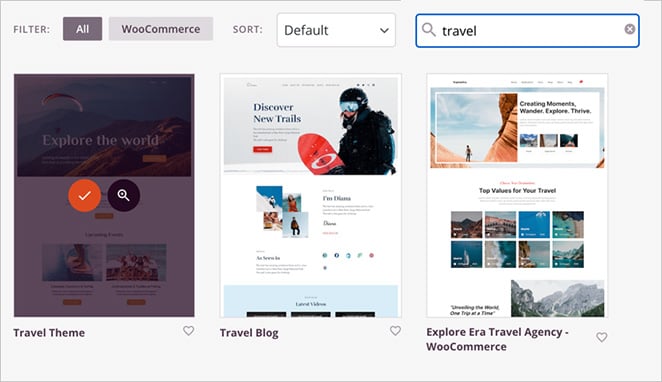
SeedProd will automatically set up your pages based on that kit. From there, you can customize everything using the drag-and-drop builder.
Unlike most WordPress themes, you’re not locked into someone else’s layout. You can change anything you want, like fonts, colors, sections, or structure.
For more inspiration, see this list of the best WordPress themes for beginners.
Once your theme is ready, you can start customizing your homepage.
Step 4: Customize Your Homepage and Navigation
Once your theme kit is in place, it’s time to make the homepage your own. This is the first thing most visitors will see, so it should be clear, inviting, and focused on what you offer.
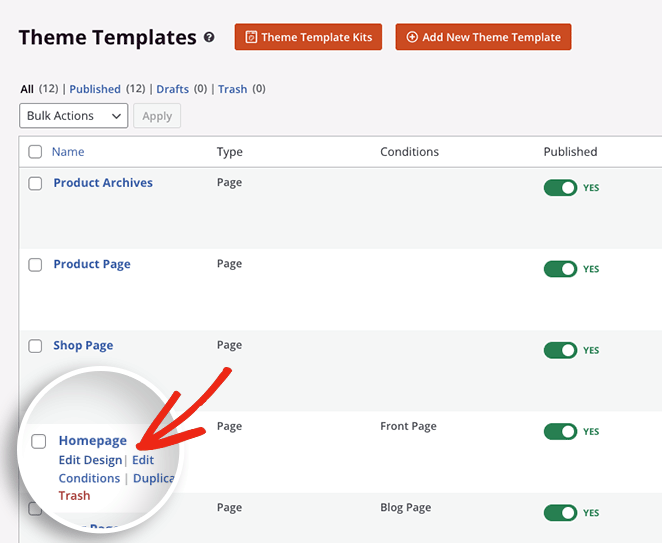
Go to SeedProd » Theme Builder and find the homepage template. Hover over it and click Edit Design to open it in the visual builder.
You’ll see the page layout on the right and all the available blocks on the left. To change any text or image, just click on it.
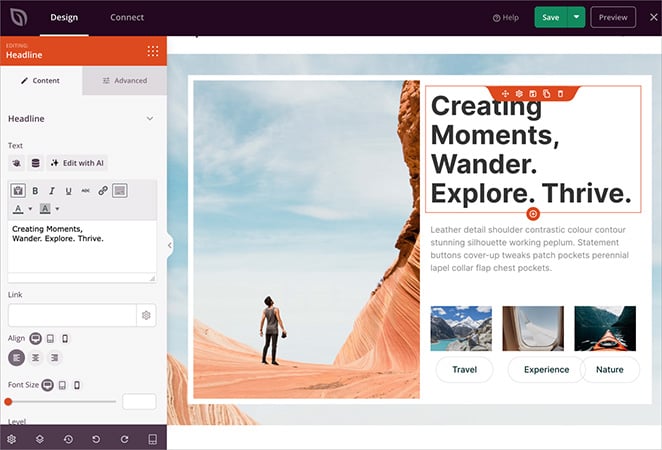
The editing panel will open where you can update the content, choose new photos, adjust fonts, and more.
This is a good time to:
- Add a hero section with a large background photo and a clear headline.
- Highlight a few featured destinations, services, or tours.
- Add a call to action button that links to your booking form or contact page.
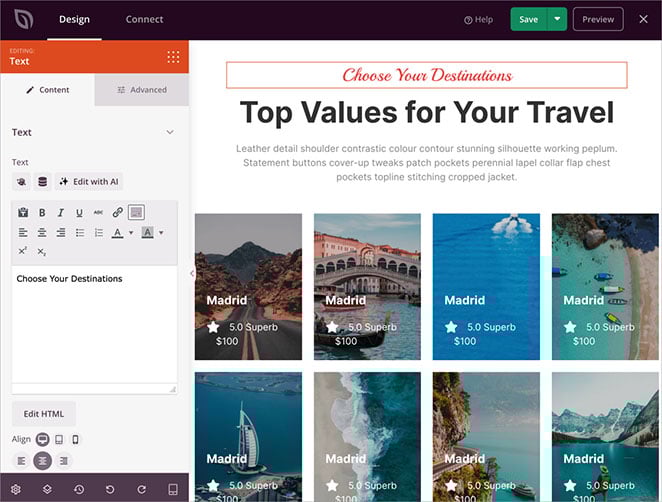
You should also create a navigation menu that links to your most important pages. I recommend keeping it simple with links like Home, About, Destinations, Packages, and Contact.
To edit the header or navigation, open the Header template from the Theme Builder.
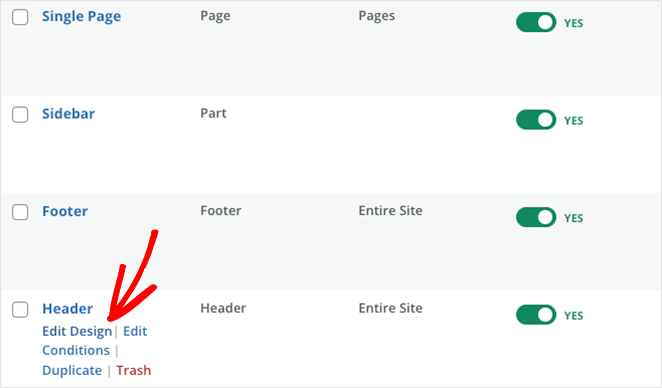
From here, you can add a Nav Menu block, choose which pages to include, and adjust the layout to match your design.
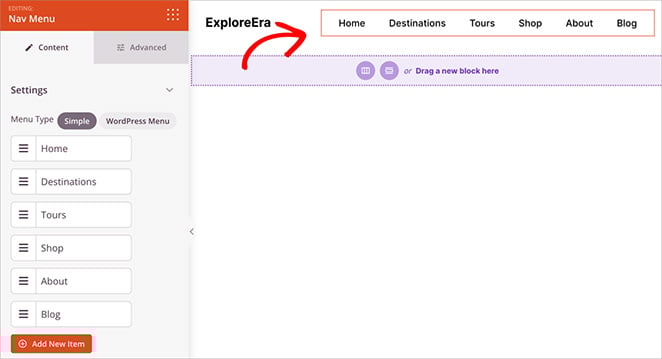
Here’s a step-by-step guide on how to create a custom homepage in WordPress.
Once your homepage and menu are set, your site will already be starting to look like a real travel brand.
Step 5: Create a Travel Services or Packages Page
Your services or packages page is where visitors can see what you offer in more detail. Whether you run guided tours, custom travel planning, or weekend getaways, this is the place to explain it all.
To create this page, go to Pages » Add New in your WordPress dashboard. Give your page a title like “Travel Packages” or “Services,” then click Edit with SeedProd to open the visual builder.
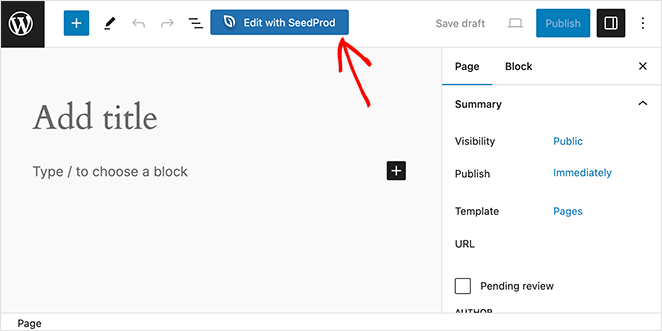
You can design the layout however you like using blocks. I recommend starting with a simple heading and a short introduction. In the example below, I’ve created a single destinations page and linked each destination to a separate page with more detailed information.
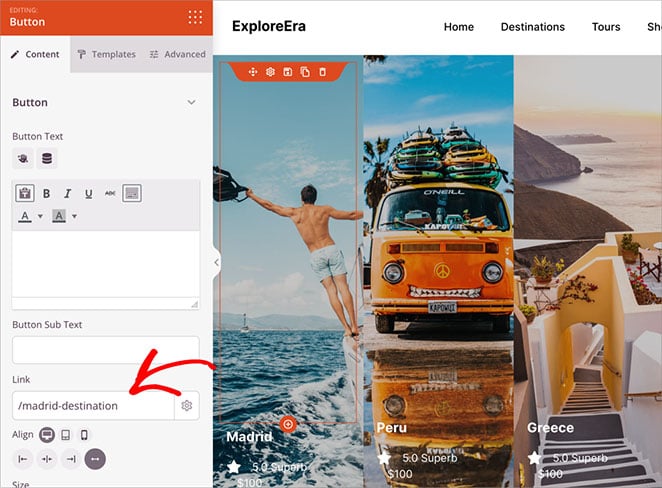
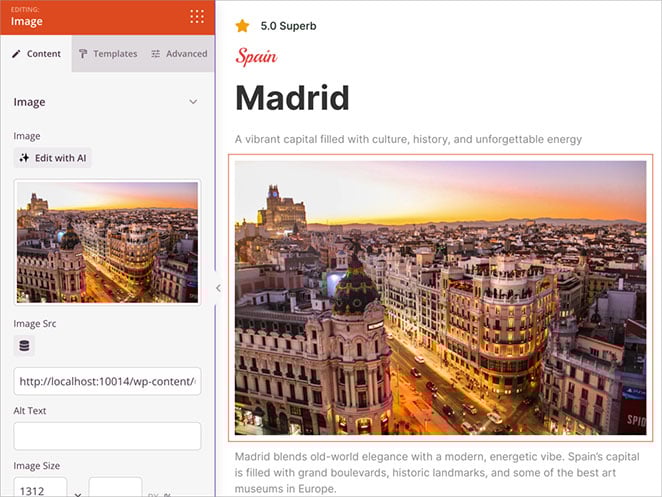
For each destination page, you can include:
- A title and short description
- Pricing or duration details
- A photo or image gallery
- A button that links to your booking form (I’ll cover that next)
If you want more design inspiration, take a look at this guide on how to create a service page in WordPress.
Once your page is ready, add it to your site’s main menu so it’s easy for visitors to find.
Step 6: Add a Booking Form and Payment Options
If you want to accept bookings or payments through your travel website, the easiest way to do it is with SeedProd’s built-in Stripe Payment block.
Start by opening any page in the SeedProd builder, such as your homepage or destinations page. In the left panel, find the Payment Button block and drag it onto the page.
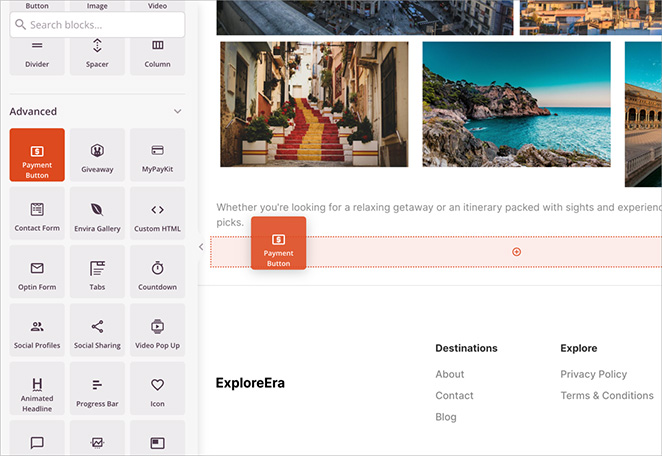
You can set the amount, update the button text, and write a confirmation message, all from the settings panel.
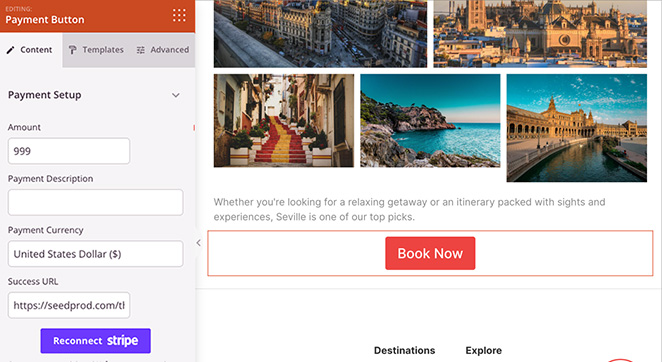
To collect payments, you’ll need to connect your Stripe account.
Once that’s done, visitors can pay directly on your site using their credit or debit card. This works well for deposits, consultation fees, or full payments for travel packages.
If you plan to sell full packages or digital products, you can use WooCommerce to manage your listings. Just keep in mind that SeedProd’s WooCommerce blocks are only available with the Elite plan.
For extra help, check out this guide on how to accept Stripe payments in WordPress.
Step 7: Show Destinations with Image Galleries
Travel is visual, so this is your chance to let your photos do the talking. A gallery can help potential customers picture themselves at the destination, which makes them more likely to book.
To create a gallery, start by opening any page in the SeedProd builder, like your homepage, services page, or a dedicated “Destinations” page. In the left sidebar, find the Gallery or Advanced Gallery block and drag it onto your page.
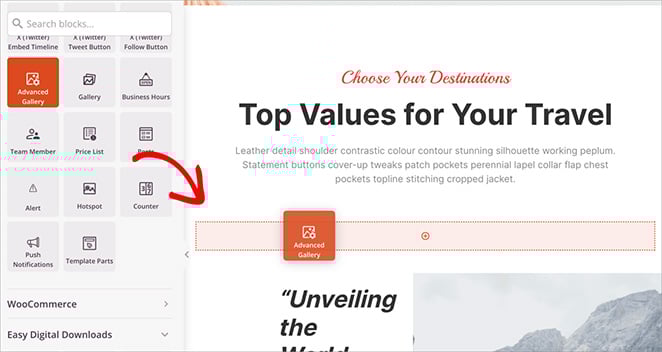
From there, click on the block to upload your images. You can group photos by destination, type of trip, or activity.
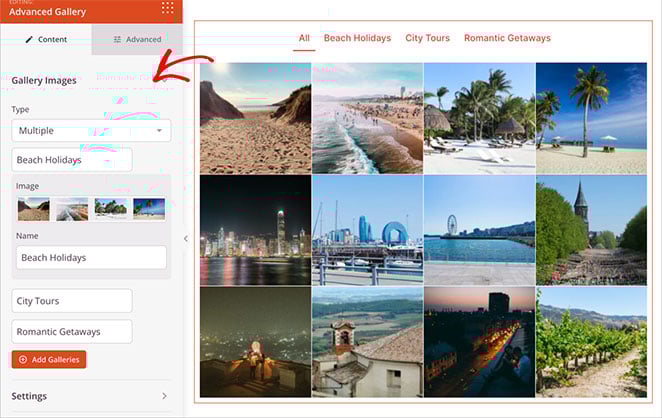
For example, you might create one section for beach holidays, another for cultural tours, and another for adventure travel.
Here are a few tips to make your gallery work harder:
- Use real, high-quality images. Stock photos don’t have the same impact
- Add short captions or location names if it helps give context
- Make sure your images are optimized so they load quickly on mobile
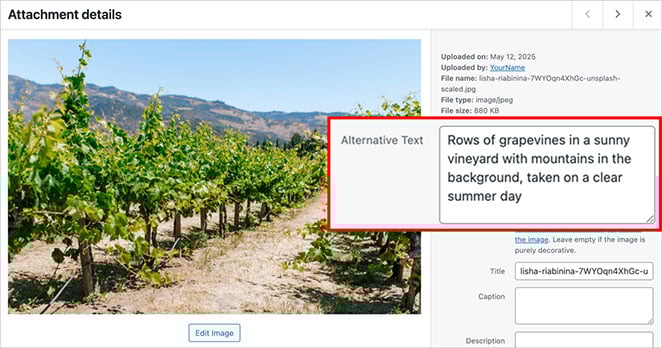
If you want to improve your SEO, don’t forget to add alt text and use descriptive file names when uploading your photos. These small steps can help your images show up in search results.
Need help? Here’s a guide on how to add a gallery in WordPress.
Once your gallery is live, you’ll have a much stronger visual story to share with your visitors.
Step 8: Add Contact and Testimonials Pages
Visitors often have questions before they book, so having a clear and accessible contact page is important. It gives people a way to reach out, ask questions, or make special requests. Testimonials are also a great way to build trust by sharing real feedback from happy customers.
To build your contact form, I recommend using WPForms.
It’s a beginner-friendly plugin that lets you create forms using a simple drag-and-drop builder. Once you’ve created your form, you can display it on any page using SeedProd’s built-in Contact Form block.
To set this up, create a new page called “Contact” and click Edit with SeedProd. Add a heading and a short message inviting people to get in touch. Then drag in the Contact Form block and choose your form from the dropdown list.
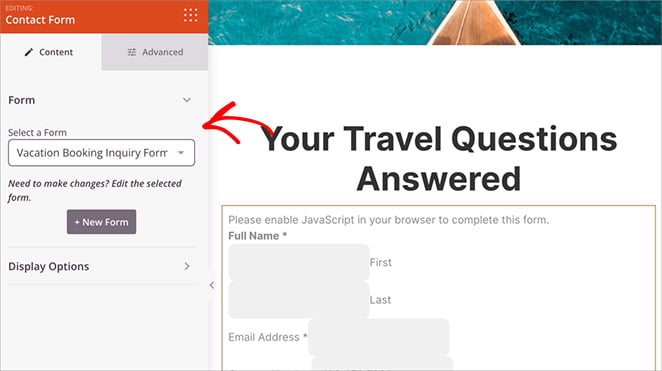
Note: Your form might not display correctly inside the builder preview. This is normal, just save your changes and preview the live page to make sure everything looks right.
For testimonials, you can either create a new page or add a testimonials section to your homepage or services page. In the SeedProd builder, use the Testimonial block to add quotes from happy customers.
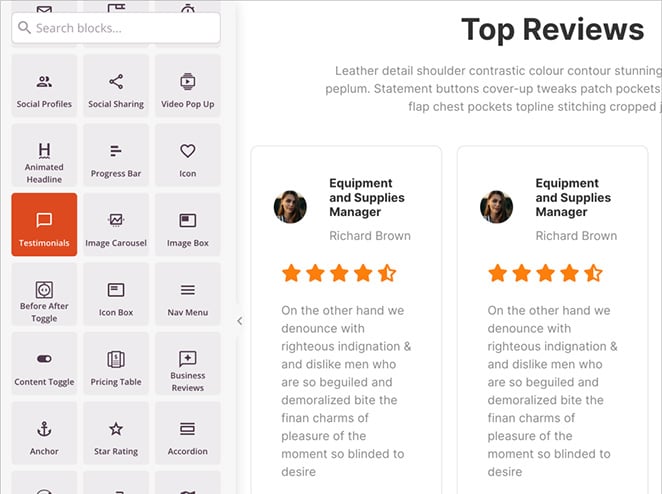
Include their name and a brief note about what they booked and what they enjoyed. You can also add a photo if you have one.
Here are a couple of helpful guides if you need a hand:
Once your contact and testimonial pages are live, make sure they’re linked in your navigation menu so visitors can find them easily.
Step 9: Improve Travel Website SEO
If you want more people to find your travel website through search engines like Google, you’ll need to do some basic SEO (search engine optimization). This helps your pages show up when someone searches for things like “guided tours in Italy” or “weekend getaways near London.”
To start, I recommend installing the All in One SEO (AIOSEO) plugin. It’s beginner-friendly and works great with SeedProd.
Once installed, AIOSEO will walk you through a setup wizard. From there, you can:
- Set custom meta titles and descriptions for each page
- Add a focus keyword so search engines understand what your content is about
- Enable schema markup, so your pages can appear in search results with extra details like star ratings or FAQ sections.
- Generate and submit a sitemap, so search engines can crawl your entire site
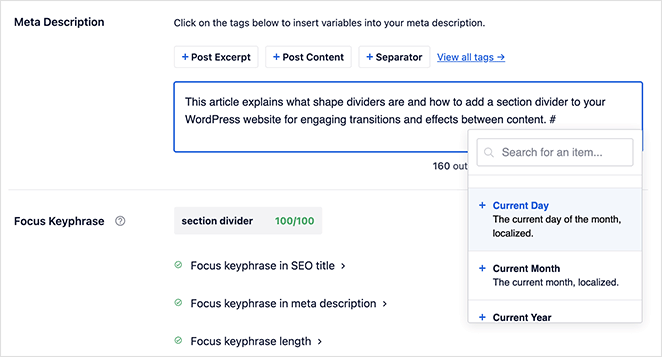
You should also make sure each page has clear headings, relevant keywords, and alt text for all images. This makes your content easier to understand for both people and search engines.
If you plan to share tips or travel stories, I suggest creating a blog page too. It’s a great way to drive traffic and answer common questions that potential customers might be searching for.
For step-by-step help, check out this guide on WordPress SEO made simple.
Even a few small improvements here can help more people discover your business online.
Step 10: Preview and Publish Your Travel Website
Before you launch your site, it’s a good idea to preview everything and make sure it looks good on all devices. Most people will visit from a phone, so mobile design really matters.
Open the SeedProd Theme Builder and choose one of your page templates. your homepage is a good place to start. Click Edit Design to open the visual builder.
In the bottom menu, click the mobile icon to switch to the tablet preview. This lets you see how your page looks on smaller screens.
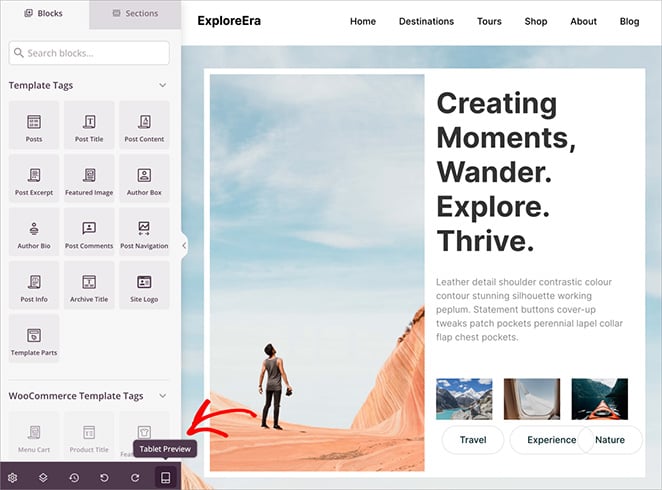
Check your headings, images, spacing, and buttons. If anything looks off, you can adjust it right in the builder.
You can also toggle between desktop, and mobile to test different layouts before going live.
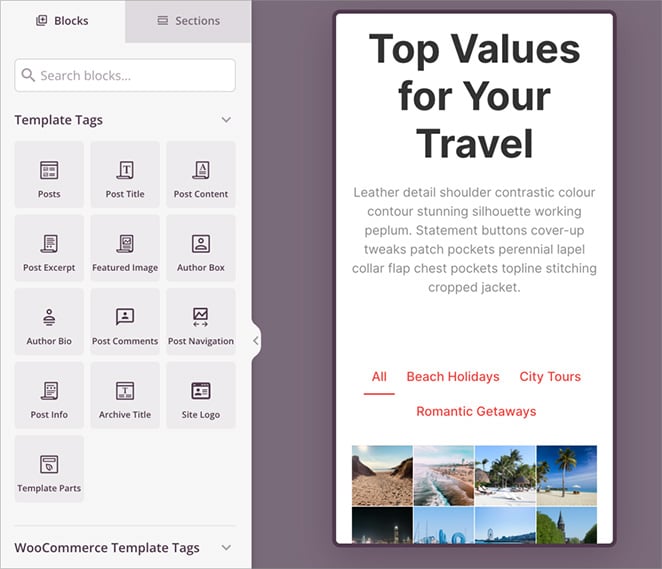
Once everything looks good, go back to SeedProd » Theme Builder and turn on the Enable SeedProd Theme toggle in the top right corner.
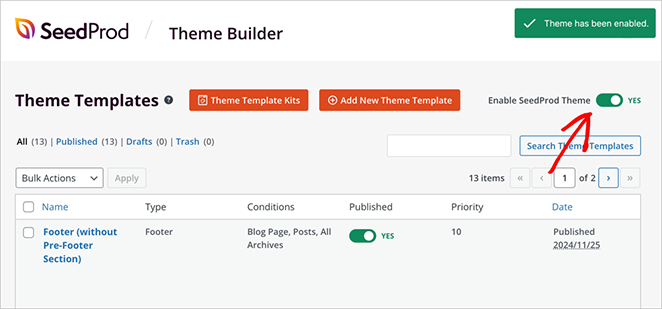
This will publish your custom design and make your travel website live for the world to see.
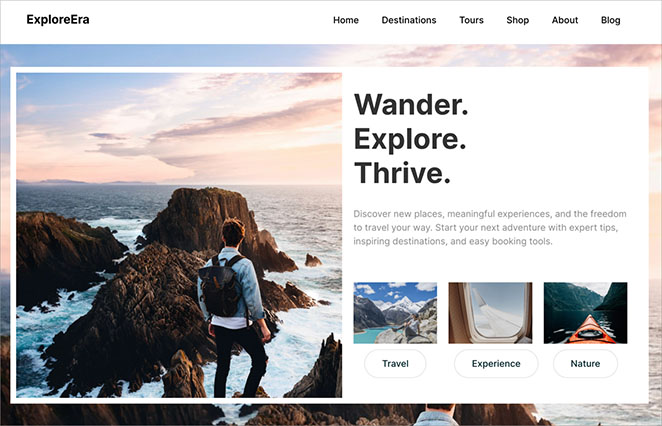
Now you’re officially online and ready to start sharing your business.
Frequently Asked Questions (FAQs)
Looking Ahead
You don’t need to be a developer to build a great travel website. With WordPress and SeedProd, you can launch a professional-looking site that works on any device and grows with your business.
Begin with your homepage, contact form, and a few key pages. Once those are live, you can build out the rest over time.
If you’re ready to begin, SeedProd’s drag-and-drop builder makes the whole process easier.
Want to keep growing your site? These guides can help you take the next step:
- How to Create an About Page in WordPress
- How to Build an Email List in WordPress
- How to Create a Custom WordPress Theme Without Code
- How to Build a Personal Trainer Website in WordPress
- How to Create an Effective Event Landing Page in WordPress
Thanks for reading! We’d love to hear your thoughts, so please feel free to join the conversation on YouTube, X and Facebook for more helpful advice and content to grow your business.

