

TL;DR:
There are three ways to handle a WooCommerce custom add to cart button, and the right one depends on whether you want a visual builder, a free code snippet, or the limited native block options.
- SeedProd method: Edit the button text, color, and icon visually in the Theme Builder (needs the Elite plan for WooCommerce).
- WooCommerce Blocks method: Native blocks place the button and set the quantity selector style, but they won’t change its text, color, or typography on the single product page.
- Code method (free): Use small snippets to change the button text and color on single and shop pages.
- What you can change: The label (like “Buy Now”), the color, and an icon.
- If the text won’t update: Clear your page and object cache, since the filter only affects fresh renders.
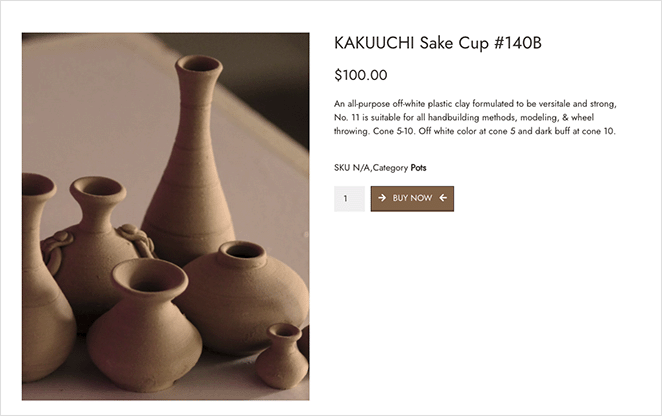
You set up your WooCommerce store, but the default “Add to cart” button is plain grey and blends into the page. You want it to say something clearer, match your brand color, or carry an icon that pulls the eye.
I’ve built WooCommerce shop pages with SeedProd and tweaked button text with WPCode, so I’ll show you the WooCommerce custom add to cart button options I actually reach for. For a full visual redesign I use SeedProd, for a free native change I use WooCommerce Blocks, and for a quick text or color swap I drop in a code snippet.
Which Method Should You Use?
Pick the method that matches how much control you need and what you’re willing to pay for.
- SeedProd (visual, no code): Best when you’re designing your shop and product pages and want full control over text, color, icon, and hover styles. WooCommerce design needs the Elite plan.
- WooCommerce Blocks (free, native): Fine for placing the button and setting the quantity selector style, but it won’t change the button text, color, or typography on the single product page.
- Code snippet (quick tweak): Best for a fast text or color change across single and shop pages when you’re comfortable pasting a snippet into WPCode.
One thing worth saying upfront is that clearer, action-oriented labels like “Buy Now” or “Add to Bag” tend to reduce hesitation for first-time visitors, because they tell people exactly what happens next. That small wording change is often the easiest win here.
Customize the WooCommerce Custom Add to Cart Button With SeedProd
For the first method, I’ll use SeedProd, because it lets you edit the button text, color, and icon visually while you watch the change happen.

SeedProd is a drag-and-drop website builder that lets you customize any part of your store without code. Because it includes WooCommerce support, you can design your shop and product pages, including the add to cart button, with point-and-click.
One honest note before you start: SeedProd’s WooCommerce design features need the Elite plan. If you want a free route, skip ahead to the WooCommerce Blocks method below.
Step 1. Install and Activate SeedProd
Go to the SeedProd pricing page and choose the Elite plan to unlock WooCommerce features. Then, install and activate the plugin.
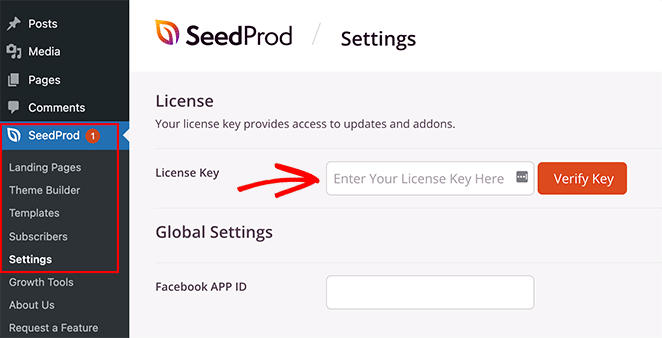
Next, go to SeedProd » Settings, paste your license key, and click Verify Key.
Step 2. Choose a Website Kit
Next, go to SeedProd » Theme Builder and click the Themes button. Here you’ll see a library of Website Kits you can import with one click.
Look for kits marked “WooCommerce,” since these are designed for online stores.
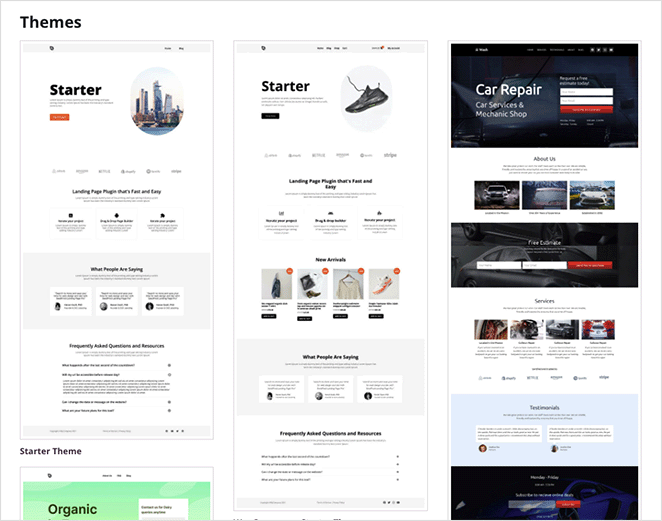
Pick a design you like, and SeedProd will load it into your Theme Builder so you can start customizing right away.
Step 3. Customize Your Add to Cart Button
Now let’s edit the add to cart button where it matters most: your Shop and Product pages.
Customize the Add to Cart Button on the Shop Page
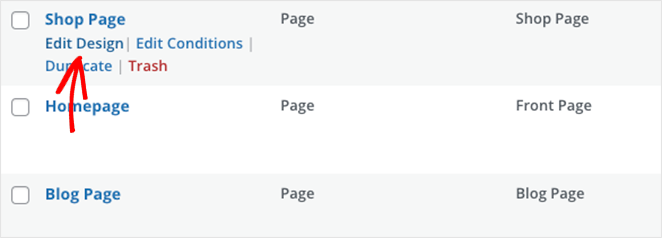
In SeedProd » Theme Builder, open your Shop Page and click Edit Design.
Select the Products Grid block, then open the Buttons settings.
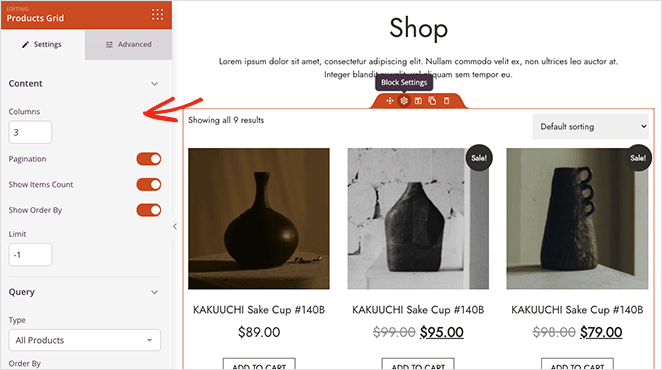
- Style: Choose Flat, 2D, Vintage, Ghost, or Link.
- Text: Change the label to something clearer like “Buy Now.”
- Design: Adjust color, size, border radius, and hover effects under Advanced.
Click Save when you’re happy with the button style.
Customize the Add to Cart Button on the Product Page
Next, open the Product Page template and click Edit Design. Select the add to cart button in the product details area to edit its settings.
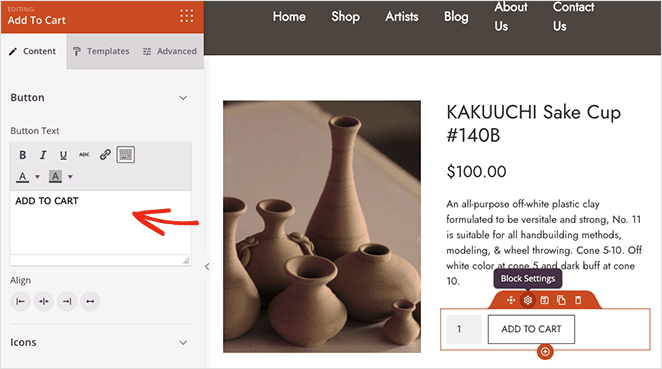
- Text & Alignment: Update the CTA text and position.
- Icon: Add a cart or check icon before/after the text with Font Awesome.
- Advanced: Tweak colors, typography, spacing, and hover styles.
You can also drop the Add to Cart Button block into other templates, like a blog post, and enter a product ID so the button links straight to that item. I do this when I want to promote a single product inside an article.
Step 4. Save and Publish Your Changes
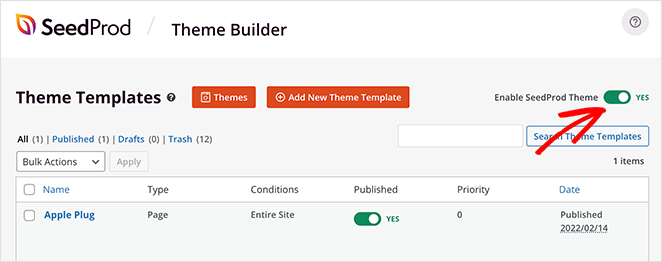
When you’re happy with how your WooCommerce pages look, you’re ready to make your store live. To do that, go back to the Theme Builder, and in the top-right corner, turn the Enable SeedProd Theme toggle to the “On” position.
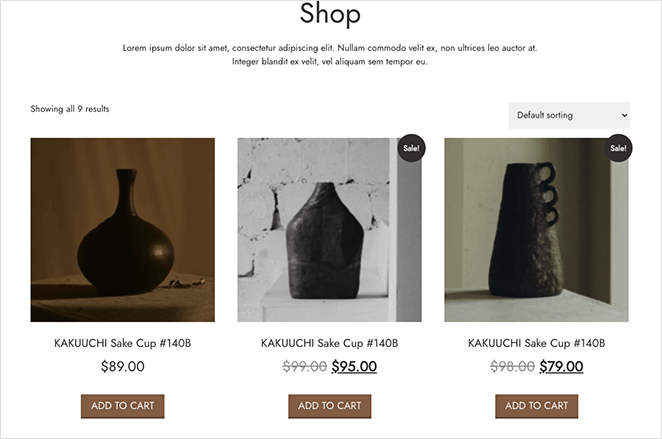
Let’s take a look at some of the pages I customized, starting with the shop page.
Here’s the product page with the new button.
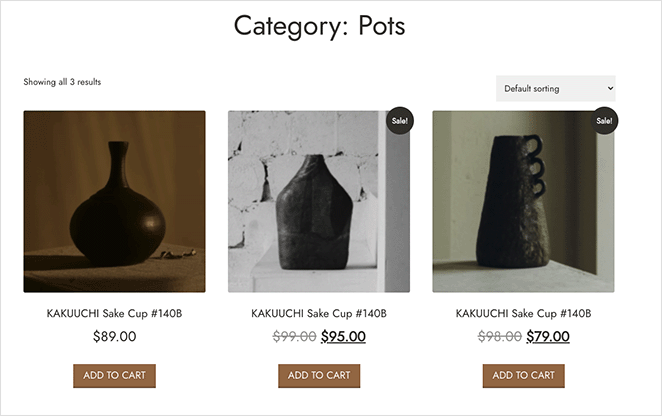
And here’s the product archive page.
You can use the same Add to Cart Button block on a blog page too.

Ready to design yours?
Style your whole WooCommerce store, not just one button
SeedProd’s visual builder lets you change the add to cart button text, color, and icon while you watch it update live, then design the rest of your shop the same way.
I want to design my storeCustomize the Add to Cart Button With WooCommerce Blocks (Free)
If your theme is a block theme, you can open the add to cart button in the Site Editor under Appearance » Editor and edit your single product template.

Then select the Add to Cart block.

Here’s the honest limit I hit: the native single product block doesn’t let you change the button’s text, color, or typography. Its main option is the quantity selector style, which you can switch between a plain input field and a plus/minus stepper.
On shop and archive grids, the Product Button block does expose color and typography settings, but the label still comes from WooCommerce, so you can’t retype it there either. To change the button text for free, use the code snippet method below.
For full control over text, color, icons, and hover styles in one place, the visual builder above gives you the most, and you can customize the WooCommerce shop page in the same editor.
Add a WooCommerce Custom Add to Cart Button With Code
Prefer code? You can change the button text and color with small snippets. For safety, add these using a plugin like WPCode instead of editing theme files directly.
How Do I Change the Add to Cart Button Text in WooCommerce?
You change the button text with a small PHP filter. WooCommerce uses one filter for single product pages and a separate one for the shop and archive pages, so cover both if you want the new label everywhere.
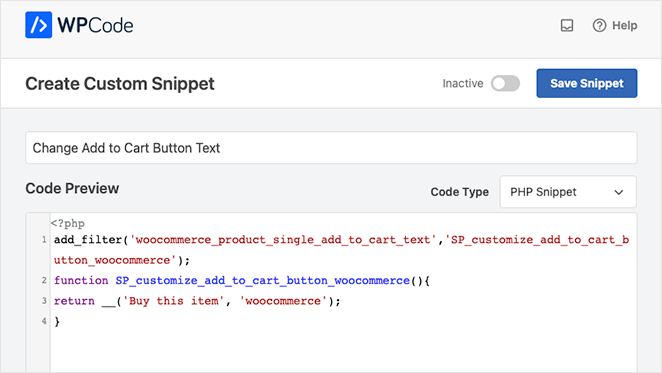
This first snippet changes the label on single product pages. Create a new PHP snippet in WPCode and paste it in.
add_filter('woocommerce_product_single_add_to_cart_text', 'SP_customize_add_to_cart_button_woocommerce');
function SP_customize_add_to_cart_button_woocommerce() {
return __('Buy this item', 'woocommerce');
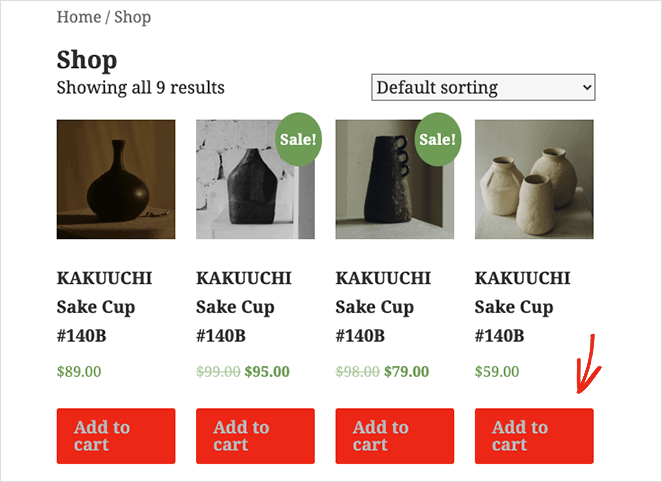
}This second snippet changes the label on the shop and product archive pages, where products show in a grid. Add it as its own snippet alongside the first.
add_filter('woocommerce_product_add_to_cart_text', 'SP_customize_archive_add_to_cart_button_woocommerce');
function SP_customize_archive_add_to_cart_button_woocommerce() {
  return __('Buy this item', 'woocommerce');
}
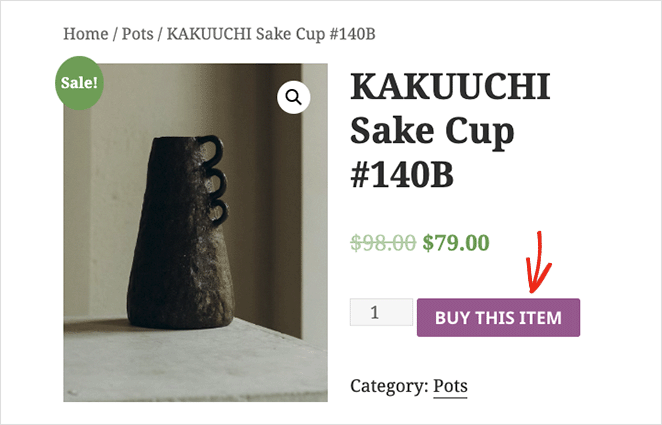
Save the snippets, then view a single product to see your new button text.
How Do I Change the Add to Cart Button Color in WooCommerce?
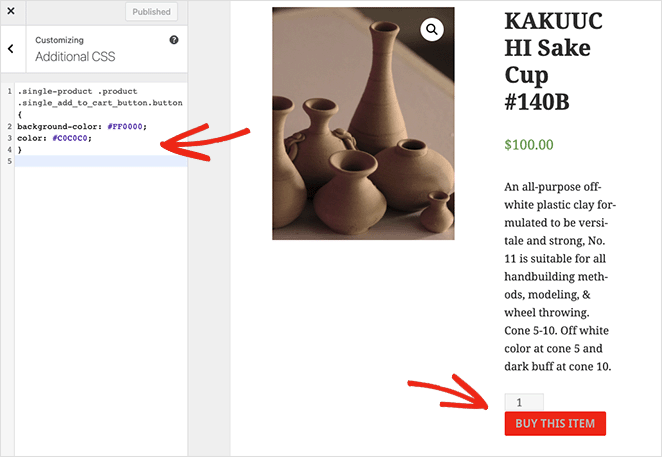
You change the button color with CSS. This first rule targets the button on single product pages.
Go to Appearance » Customize » Additional CSS and add this CSS.
.single-product .product .single_add_to_cart_button.button {
  background-color: #FF0000;
  color: #C0C0C0;
}
This second rule styles the buttons in product archives and the shop grid, so the color matches across the product category (archive) page too.
.woocommerce .product .add_to_cart_button.button {
  background-color: #FF0000;
  color: #C0C0C0;
}
Link a Buy Button From Anywhere With Add-to-Cart URLs
If you want a button that adds a product to the cart from a landing page, pricing table, or blog post, use an add-to-cart URL. Link to ?add-to-cart=ID&quantity=N, swapping ID for the product ID and N for the quantity.
For example, https://yourstore.com/?add-to-cart=99&quantity=1 adds one of product 99 to the cart when clicked. It’s a clean way to send people straight to checkout without an extra step.
More Ways to Customize WooCommerce
Customizing the add-to-cart button is just one of the many ways to tweak your store. For more WooCommerce customizations, please see the following guides:
- How to Customize the WooCommerce Additional Information Tab
- How to Add View Cart Button in WooCommerce
- How to Change Shop Page Title in WooCommerce
- How to Hide Out of Stock Products in WooCommerce
WooCommerce Custom Add to Cart Button FAQs
How do I change the add to cart button text on the shop and archive pages, not just single products?
Single product pages and shop/archive pages use different filters. Use woocommerce_product_single_add_to_cart_text for the single product page and woocommerce_product_add_to_cart_text for the shop and archive grids.
Add both snippets in WPCode to get the new label everywhere. If you’d rather not touch code, change the text visually in SeedProd.
Do I need a plugin to customize the WooCommerce add to cart button, or can I do it for free?
You can do it for free with a code snippet. The free version of WPCode lets you change the button text and color without buying anything.
SeedProd’s visual WooCommerce design needs the Elite plan, but it gives you the most control over text, color, icons, and hover styles in one place.
How do I customize the add to cart button using WooCommerce blocks or the Site Editor?
Open Appearance » Editor on a block theme, edit your single product template, and select the Add to Cart block. The native block is limited: on the single product page its main option is the quantity selector style, a plain input field or a plus/minus stepper.
It won’t change the button text, color, or typography there. For those, use a code snippet or SeedProd’s visual builder instead.
Why isn’t my custom add to cart button text showing up?
The most common cause is caching. A caching plugin, object cache, or CDN can serve an old version of the page, so the filter changes the label only on fresh renders.
Clear your page cache and object cache, then reload. Also check you added the right filter for the page type, since single and archive pages use separate ones.
Customize Your WooCommerce Add to Cart Button Today
That plain grey button is now a clear, on-brand call to action that tells shoppers exactly what to do next. Pick the method that fits your store, whether that’s the free WooCommerce Blocks option, a quick code snippet, or SeedProd for a full visual redesign.
You might also like this post: How to Edit a Menu in WordPress for Custom Navigation.
Get Started with SeedProd Today
Thanks for reading! We’d love to hear your thoughts, so please feel free to join the conversation on YouTube, X and Facebook for more helpful advice and content to grow your business.


