Do you want to create a membership site with WordPress? The fastest way is by using a plugin like MemberPress. With it, you can set up recurring payments, protect premium content, and grow a steady stream of income.
I’ve built WordPress sites for years, and membership models are one of the best ways to turn an audience into a community. In this guide, I’ll walk you through each step of building your own membership site in WordPress, from choosing the right plugin to boosting signups.
Quick steps to create a membership site with WordPress:
What Is a WordPress Membership Site?
A WordPress membership site is a website where only registered members can access certain content or features. Most are subscription-based, meaning people pay monthly or yearly for premium content, online courses, or downloads. With the right plugin, you can restrict access to pages, posts, or entire sections of your site.
Here’s why many website owners build membership sites:
- Recurring Income: Subscriptions create a steady stream of predictable revenue.
- Less Ongoing Work: Create premium content once, then let it generate value long-term.
- High Perceived Value: Paid members feel they’re getting exclusive benefits, which boosts loyalty and referrals.
- Authority Building: Restricting content positions you as a trusted expert in your niche.
- Email Growth: Members added to your list are highly engaged and more likely to respond to your email marketing.
Next, let’s look at the best WordPress plugin to power your membership site.
What Is the Best Membership Plugin for WordPress?
The best membership plugin for WordPress is MemberPress. It’s beginner-friendly, supports unlimited membership levels, and makes it easy to accept payments and restrict content without coding.
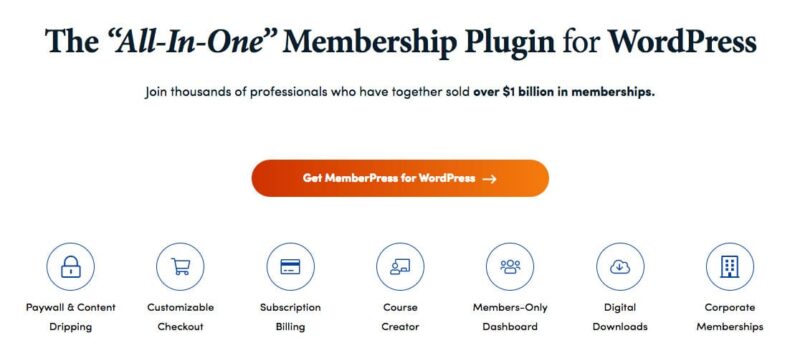
| Pricing: Starts at $179/year |
| Free Plan / Trial: No |
| Standout Features: |
| 🔹 Unlimited membership levels 🔹 Built-in course builder 🔹 Easy payment gateway setup |
| Rating: A |
| Best For: Beginners and businesses wanting recurring income |
MemberPress also integrates seamlessly with other popular WordPress plugins, making it the most trusted choice for building membership sites.
How to Create a Membership Site with WordPress
By now, you’re probably asking, how do I create a membership site?
Let’s jump in and look at how to create a WordPress membership site with MemberPress.
1. Set Up the MemberPress Plugin
To start, install and activate MemberPress on your WordPress site. Here’s a step-by-step guide on how to install a WordPress plugin if you need help.
Once activated, you’ll see a setup notification that links to the options page.

From there you can configure your account, login, and thank-you pages. If you don’t already have them, MemberPress will create these pages for you automatically.
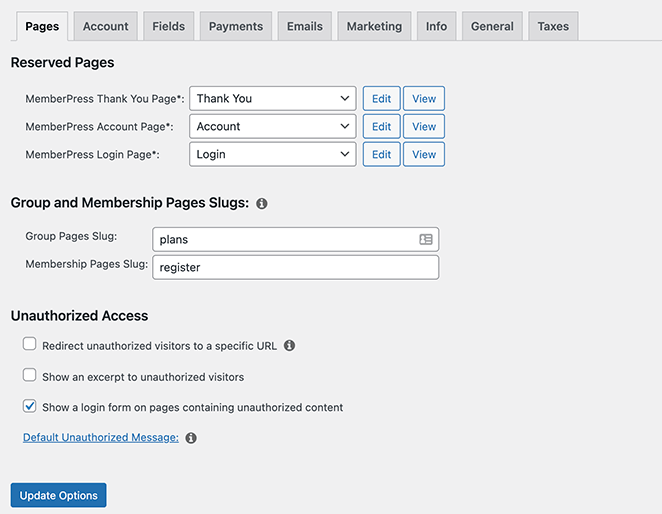
Configure all of these settings in any way you like. If you don’t already have the reserved pages on your website, MemberPress will create them for you automatically.
Click the Update Options button to store your settings.
2. Add Your Payment Methods
Next, connect your preferred payment gateways so members can pay for access.
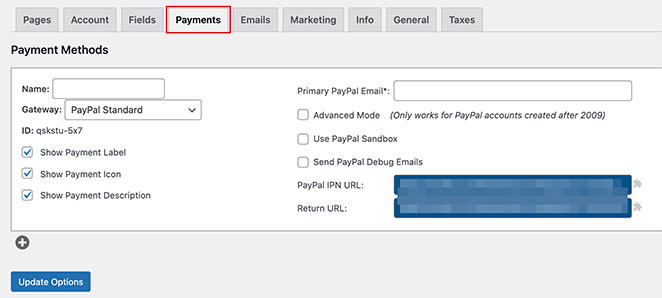
Go to the Payments tab and choose from Stripe, PayPal, Authorize.net, or offline options. You can add multiple gateways if you want to give members more flexibility.
3. Add Different Membership Levels
MemberPress lets you create unlimited membership levels with different pricing and benefits.
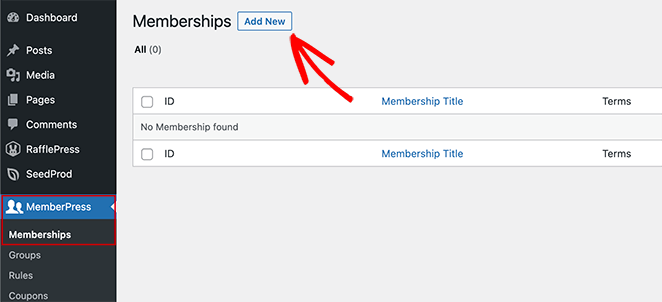
From the “Memberships” menu, click Add New to set up your first plan.
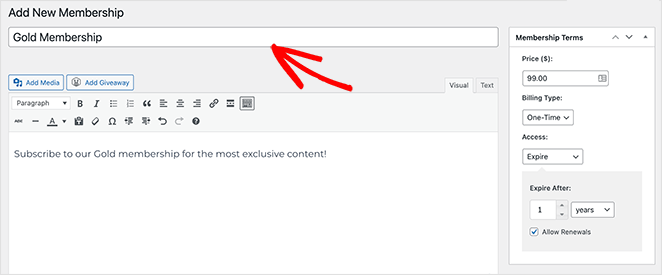
You can set pricing, billing terms, and customize registration options to fit your business model.
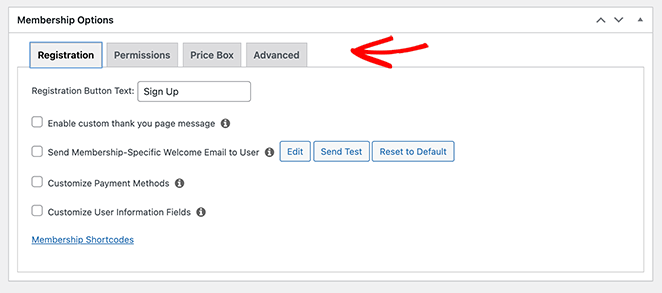
After, scroll down to the Membership Options section and customize it to suit your paid membership needs. Make sure you click the Permissions, Price Box, and Advanced tabs to configure those settings too.
When you’re happy with your settings, click the Publish button.
4. Set Up Access Rules for Membership Plans
Access rules control which members can see which content.
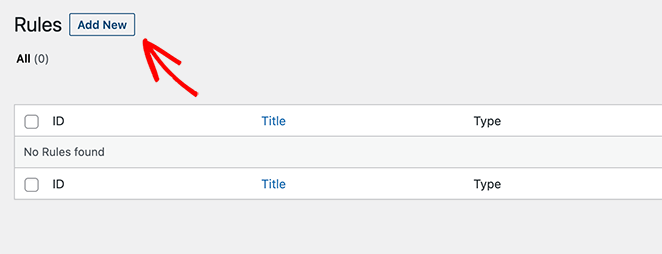
In the Rules section, you can link posts, pages, or entire categories to specific membership levels.
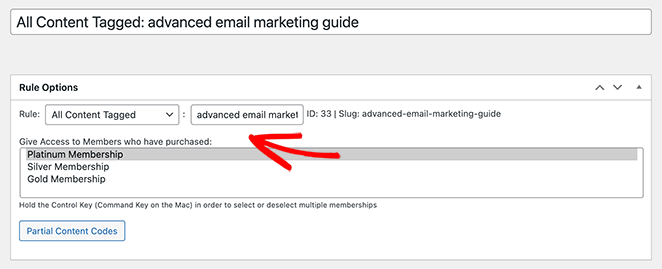
You can also add drip content or expiration dates for time-sensitive materials.

When everything looks how you want, click the Save Rule button. You can then repeat this step to add more rules to your member site.
5. Create Member Only Content
Now add premium content that only registered members can view.
This could be a course, guide, or resource library. Tag your content with the rules you set earlier, then customize what non-members see when they try to access it.
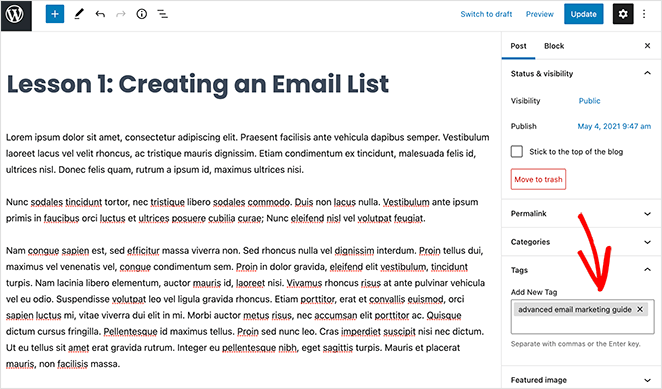
For instance, to link the content to our Advanced Email Marketing rule, we’ll need to enter that tag.
Next, scroll down to the MemberPress Unauthorized Access panel towards the bottom of your screen. In this area, you choose what non-registered users see when they try to view this content.
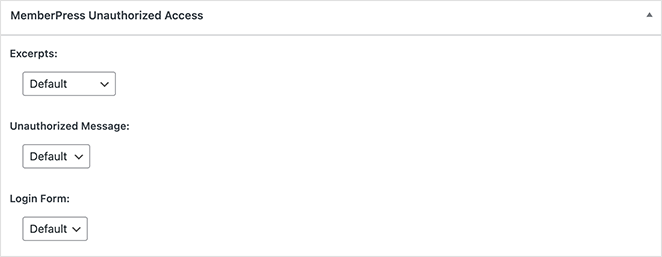
After configuring the settings, go ahead and publish your content.
Now when you head to Posts » All Posts, you can see which content is restricted to paying members.

Besides standard content, you can also create online courses with MemberPress’s built-in Courses addon. You can use a visual builder to create your course curriculum. And the best thing is, It’s built on the WordPress block editor, so the process is similar to the steps above.
6. Create a Pricing Page
A pricing page showcases your membership levels and encourages visitors to subscribe.
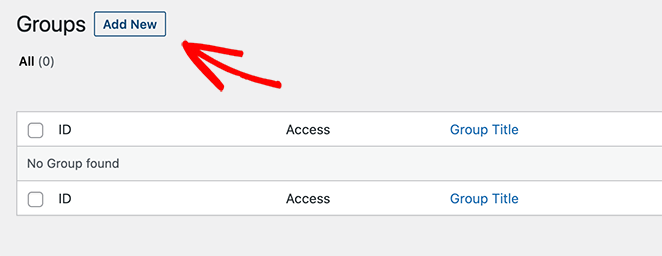
Use the Groups feature in MemberPress to display multiple plans side by side.
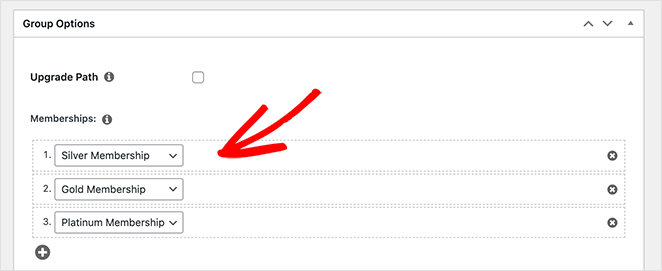
You can style the page, highlight the best option, and link directly to checkout.
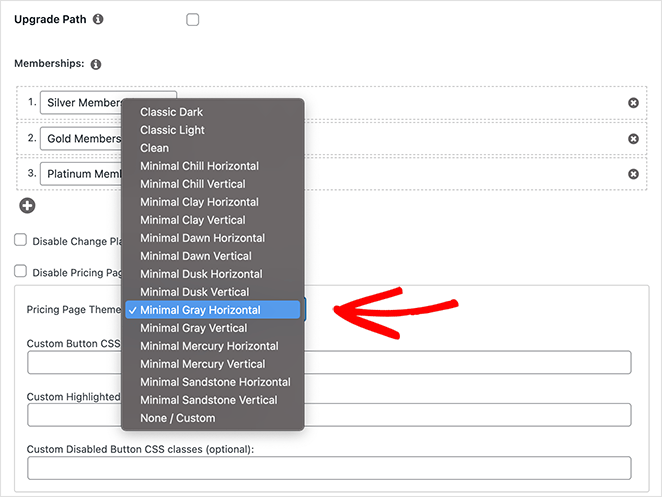
Click Publish when you’re happy with your pricing page. To preview the page, click the View Group link.

When someone tries to access your premium content and is not a member, it’s crucial to send them to your pricing page. That way, you can encourage them to sign up.
To do this, go back to MemberPress » Groups and copy the group’s URL.

Then navigate to MemberPress » Options and scroll down to the Unauthorized Access section. In this area, check the box next to “Redirect unauthorized visitors to a specific URL” and paste the URL in the box beneath it.
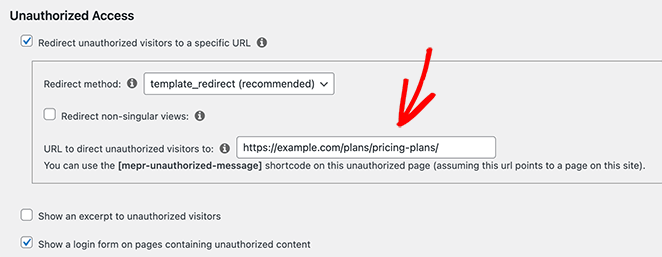
Now click the Update Options button.
7. Add Sign Up and Login Forms
Finally, add signup and login forms so members can register and access their accounts.
You can do this with the MemberPress login widget or by adding links to your navigation menu.
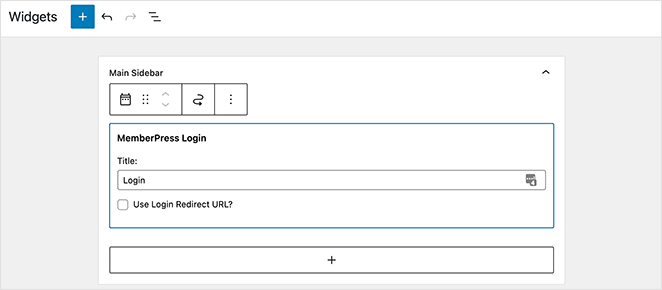
Make sure your pricing page is easy to find from the main site menu.
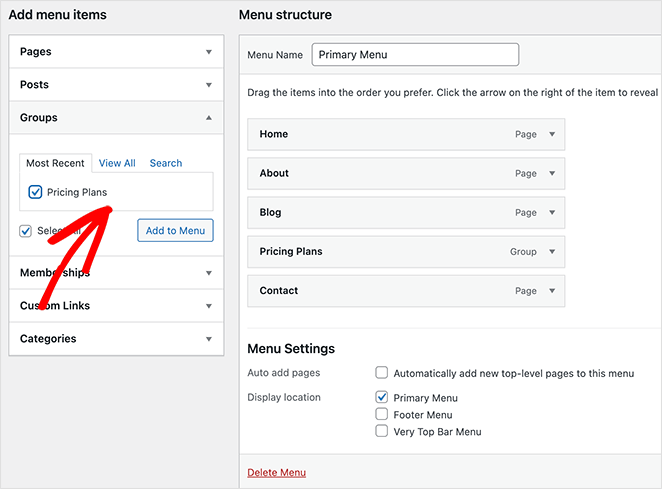
That’s it! You’ve successfully made a membership site in WordPress!
Bonus: Create a Pricing Page with SeedProd
Many membership websites use page builder plugins like SeedProd to create landing pages for their plans. With features like pricing tables, testimonials, and social proof, SeedProd makes it easy to design stunning, high-converting pages for your membership products.
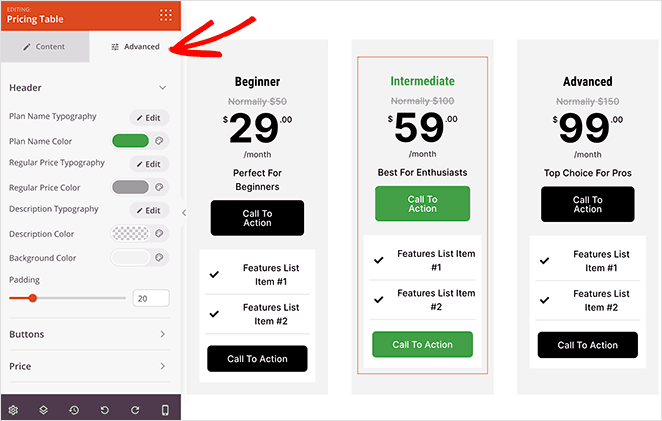
With SeedProd, you’re not limited to a plugin’s default pricing layout. You can fully control the design to match your brand and give potential members a reason to sign up.
For a full walkthrough, see my guide on how to create a pricing page in WordPress.
How to Boost Signups for Your Membership Site
It’s also important to focus on growing your membership signups on your website. With OptinMonster it’s super easy. OptinMonster is the best software to grow your email list and tell people all about your membership site.

Take a look at this case study where one business used OptinMonster to grow their online community by 30,000 members per month!
Another option is to run a WordPress giveaway and award the winner with a free basic membership or free trial to attract more traffic to your membership site from social media. Additionally, you can create a membership landing page to promote your program.
FAQs on Building a Membership Site in WordPress
There you have it! You now know how to create a membership site in WordPress using the easiest membership plugin on the market.
Want to make things even easier for potential members? Why not check out these best live chat plugins for WordPress so you can answer questions right away and improve user experience?
If you found this article useful, follow us on Facebook and Twitter for more helpful tips and tutorials.

