Do you want to create a PPC landing page?
PPC campaigns are an excellent way to promote your product or service, and with a good landing page design, it’s much easier to increase conversions and sales.
In this article, we’ll share proven PPC landing page best practices and show you how to create one in WordPress.
What Is a PPC Landing Page?
A PPC landing page is a web page internet users see after they click your ad. The page is purpose-built to match your pay-per-click ad’s message and convince users to convert to leads or paying customers.
Your landing page can convert users in several ways, such as:
- Signing up for a newsletter
- Registering for an event
- Buying a product
- さらに
Despite the content, your landing page has a single goal: to persuade your target audience to convert.
Why Do You Need a PPC Landing Page?
So why do you need a landing page specifically for your PPC ad campaigns? Wouldn’t a simple web page work?
A dedicated PPC page may take a little more planning than simply directing traffic to your established web pages, but there are numerous benefits, as we’ll explain below.
Higher Conversion Rates
Dedicated landing pages lead to much higher conversions than regular pages. Because they have fewer distractions and targeted messaging, they’re more effective at persuading visitors.
Better Google Ads Quality Score
The more relevant your landing page is, the better your Quality Score. This can lead to paying less for each ad click, providing a better return on investment.
Now that we’ve established the benefits of creating a landing page for your PPC campaigns, what are the best practices? We look at those next.
PPC Landing Page Best Practices
Whether you’re an expert or just starting with PPC marketing, these PPC landing page best practices will help you optimize your page and advertising campaigns and convert more website visitors into leads and customers.
1. Make PPC Landing Pages Unique to Each Campaign
One of the essential best practices for creating high-converting PPC landing pages is to ensure you make unique pages for every campaign. Sending traffic to the same page for different campaigns can lead to confusion and high bounce rates.
For example, if your goal is to grow your email list, sending users to a page asking for social shares won’t help. Instead, you’ll need a landing page with a sign-up form to collect email addresses.
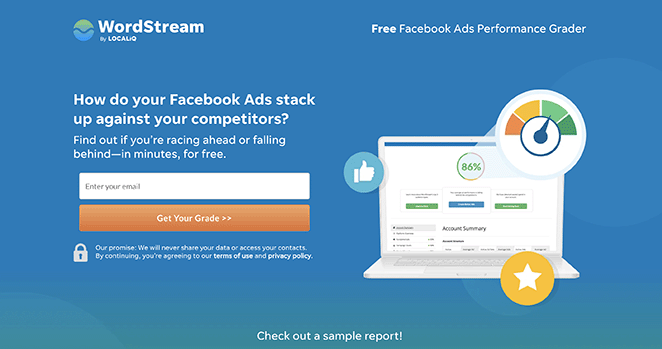
Even though sending traffic to your homepage is tempting, you should avoid doing so because it won’t perform as well as an optimized landing page. Your homepage gives users too many choices, filtering your Google ads‘ intent and weakening your ability to make a conversion.
A landing page is straight-to-the-point and gives users a single choice.
2. Match Your PPC Landing Page Headline, Offer, and CTA
Keeping your headline, offers, and call-to-action (CTA) consistent across all PPC landing pages creates a seamless user experience from the instant users see your ad to the moment they convert.
For example, if you’re running a Black Friday campaign offering 15% off your entire website, your landing page might look like this:
- Headline: 15% Off Everything for Black Friday Week
- Copy/Image: Limited-time discount: 15% Off
- CTA: Get 15% Off
3. Ensure Your PPC Landing Page Copy is Brief and Compelling
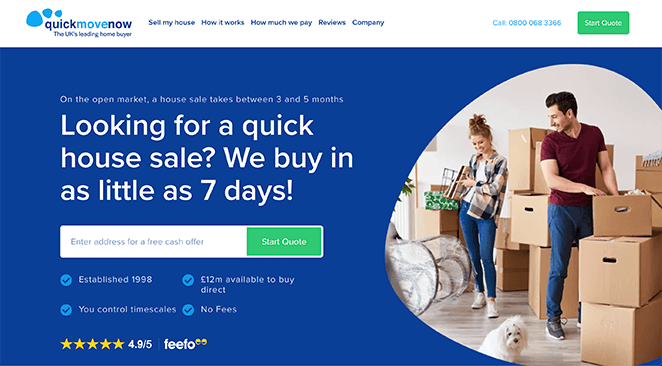
Internet users typically scan content instead of reading each line carefully. They want a quick overview, not an essay, so keep your content brief and include bold headings, bullet points, and short sentences to convey your message.
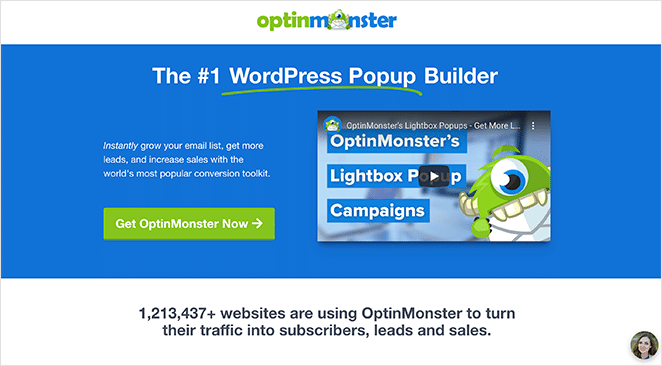
4. Use Engaging Video Content
Video is an excellent way to explain complex concepts quickly. Where possible, include video on your PPC landing page, but keep it relevant to your offer.
For example, if you’re selling products, you can embed a how-to video or demo to increase conversion rates.
5. Include Testimonials and Reviews
Building consumer confidence is just as necessary for your PPC landing page. Users won’t pay for a product or service they don’t trust.
You can combat this by including user-generated content, such as customer reviews and video testimonials, on your page as social proof. Additionally, you can display further assurance with trust badges and seals from payment processors and security companies.
6. Use Minimal Form Fields
If one of your goals is to increase leads by collecting user information, you need to keep your forms short and simple. Potential customers can be “put off” by long, complicated subscription forms and abandon your page altogether.
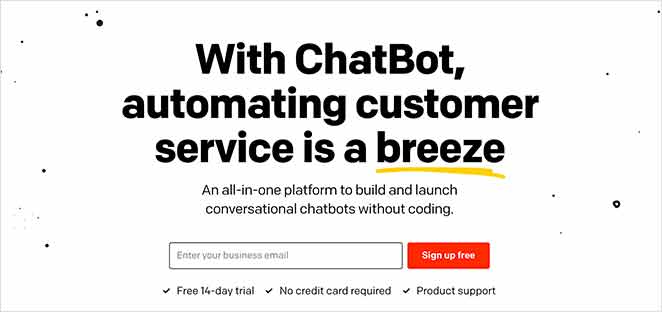
Instead, limit form fields to collect only essential information, like their first name and email address. You can always ask for more details after building a more robust relationship.
7. Remove Unnecessary Distractions
Your PPC landing page aims to convert as many visitors as possible. With that in mind, limit the distractions on your page and include only what you need to convince users to convert.
For example, the best PPC landing pages remove the main navigation menu because it can cause visitors to browse instead of converting. You can also limit the number of links in your footer and remove social media icons and distracting animations.
Additionally, it’s crucial to ensure your landing page loads quickly. Most users will abandon a page that takes more than a few seconds to load.
You can follow these instructions to optimize your landing page for speed and conversions.
8. A/B Test Different Page Elements
A/B testing involves continually testing different elements of your page to improve its performance. Test one element at a time instead of everything all at once.
Some of the most popular landing page elements to test include your headline, CTA, images, buttons, and button colors.
Now that you know what your landing page should include, how do you create one? If you have a WordPress website, follow the step-by-step guide below.
How to Create a PPC Landing Page in WordPress
The easiest way to create a PPC landing page on your WordPress website is with a WordPress landing page builder. For this tutorial, we use SeedProd, the best drag-and-drop website builder for WordPress.
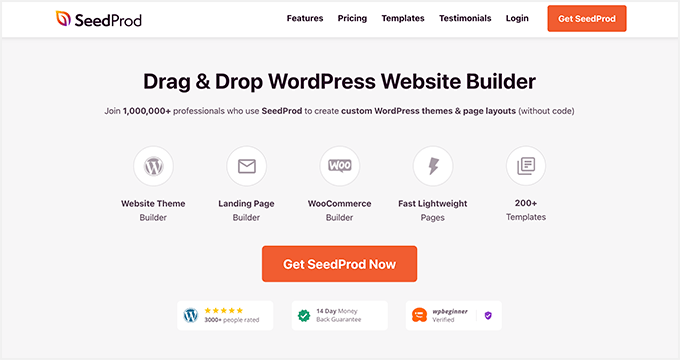
SeedProd’s visual page builder functionality makes it easy to create any type of landing page. You can drag and drop and customize your landing page in real-time without writing code.
This plugin includes everything you need to create a high-converting PPC landing page:
- Responsive landing page templates
- Pre-made sections
- Sign up and contact forms
- Customizable CTA buttons
- カウントダウン・タイマー
- Testimonial and video blocks
- メールマーケティング統合
- ドメインマッピング
- Mobile editing and previews
- 他にもいろいろある。
SeedProd is also made with bloat-free code, ensuring your page loads fast for the best user experience.
Follow the steps below to create a PPC landing page with SeedProd.
ステップ1.SeedProdのインストールとアクティベート
First, go to the SeedProd pricing page and sign up for a SeedProd license. There is a free version available in the WordPress plugin repository, but we’ll use the Pro version for its advanced features.
Next, head to the Downloads tab in your account dashboard and download the plugin .zip file. On the same page, copy your license key to use shortly.
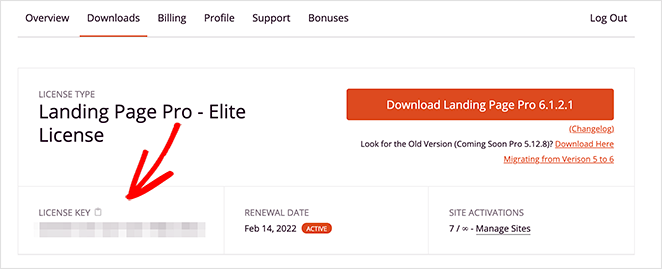
After downloading SeedProd, install and activate the plugin on your WordPress website. If you need help with this step, you can follow these instructions on installing a WordPress plugin.
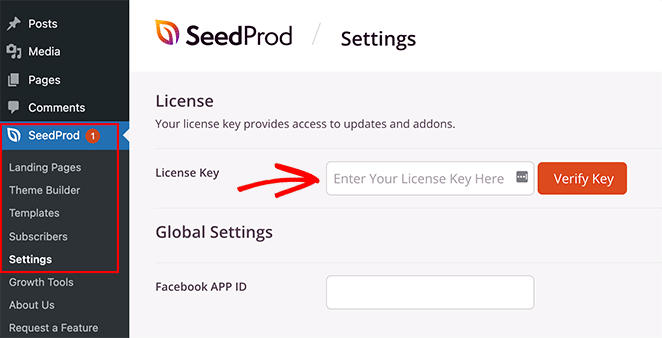
Now you can navigate to SeedProd » Settings and enter your plugin license key to activate your premium features. Make sure you click the Verify Key button before going to the next step.
ステップ2.ランディングページのテンプレートを選ぶ
The next step is to choose a landing page template for your PPC page. To do that, navigate to SeedProd » Settings and click the Add New Landing Page button.
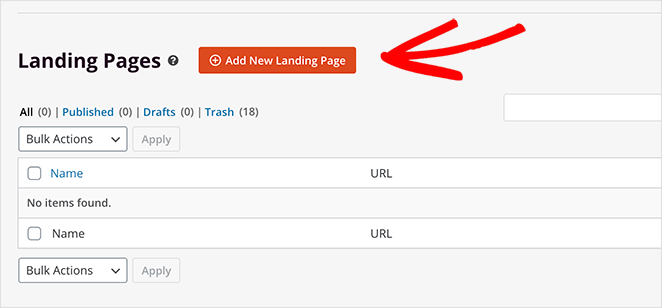
Doing that will open the templates library, where you can choose a premade design for the foundation of your landing page.
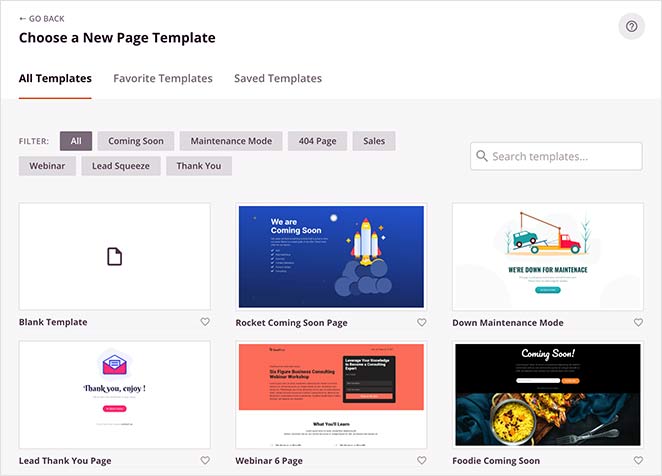
There are over 170+ templates available, and you can filter them by clicking the tabs along the top. When you’ve found an example that fits your needs, hover over it and click the orange checkmark icon.
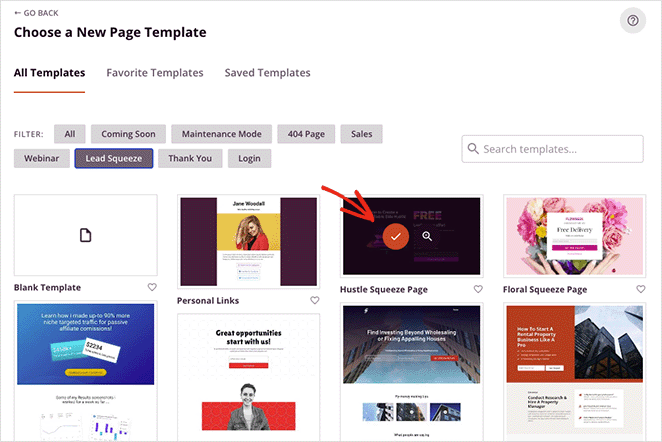
We’ll use the “Access Squeeze Page” template for this tutorial.
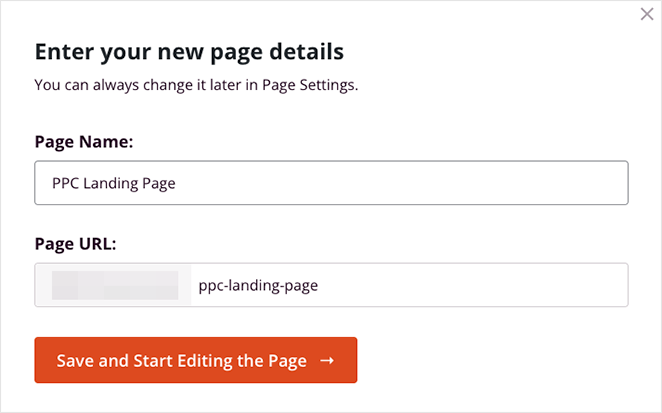
On the next screen, you can give your landing page a name and a custom URL. You can change this later if you need to, so click the Save and Start Editing the Page button to continue.
Step 3. Customize Your PPC Landing Page
You’ll see your template on the next screen inside SeedProd’s drag-and-drop editor. It has blocks and sections on the left that you can add to your page by dragging and dropping.
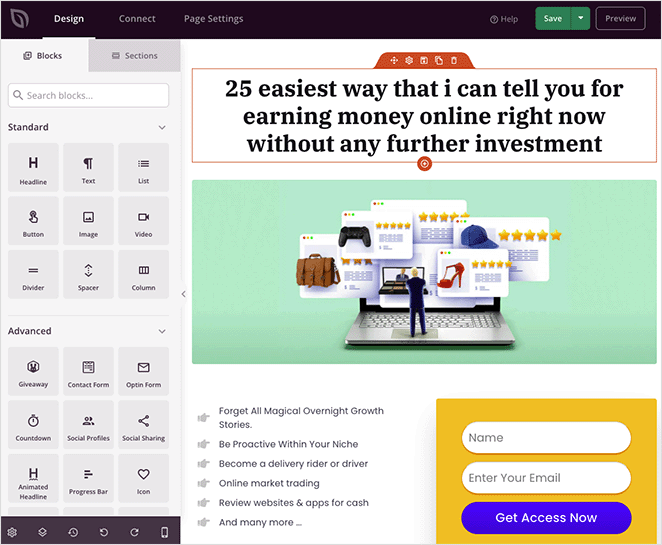
On the right is a preview of how your page looks in real-time. You can click any element on the preview to change its content and customize the settings.
For example, if you click the headline, you’ll see its settings on the left-hand side.
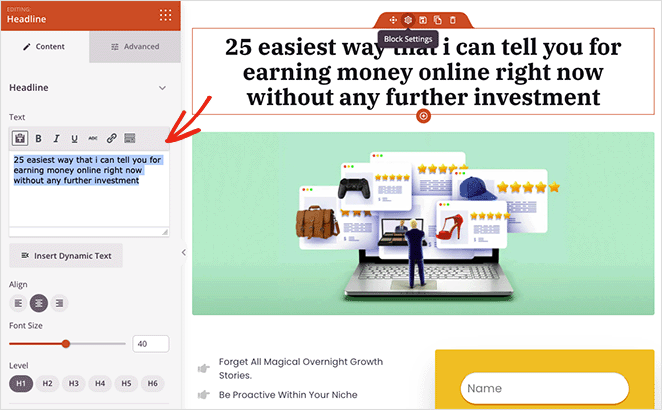
From there, you can add a headline relevant to your PPC campaign and set its alignment, heading level, and size.
In the Advanced tab, you can control the typography, colors, spacing, and attributes. You can also show or hide the headline on mobile devices, desktops, or both.
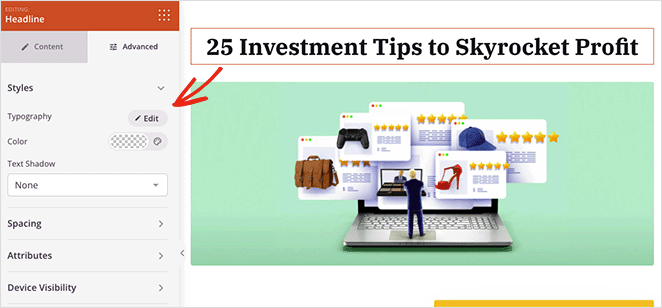
Adding more elements to your page follows similar principles.
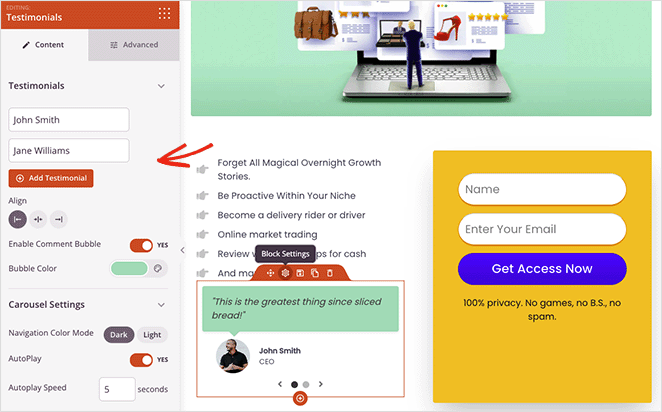
Let’s say you want to add social proof to your PPC page to convince users of your credibility. In that case, you can drag over the Testimonials block and enter positive comments from previous and current customers.
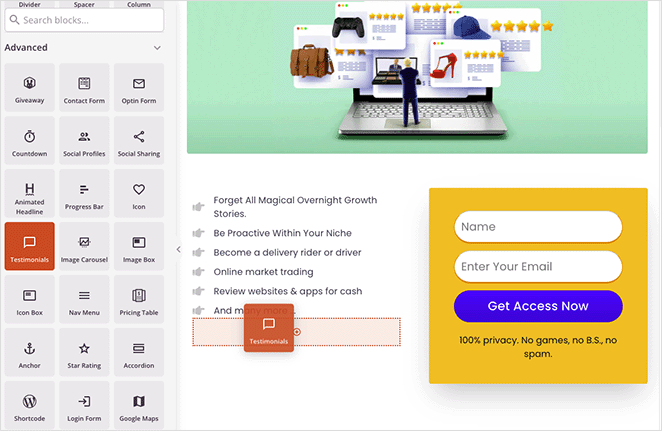
You can add as many testimonials as you like and display them in a sliding carousel with headshots, job titles, custom colors, and more.
Continue customizing your design by editing the following:
- ロゴ
- オプチンフォーム
- 画像
- Footer text
If you’re using an optin form to collect email addresses, you’ll need to click the Connect tab at the top of the screen. This will allow you to integrate your email marketing service provider.
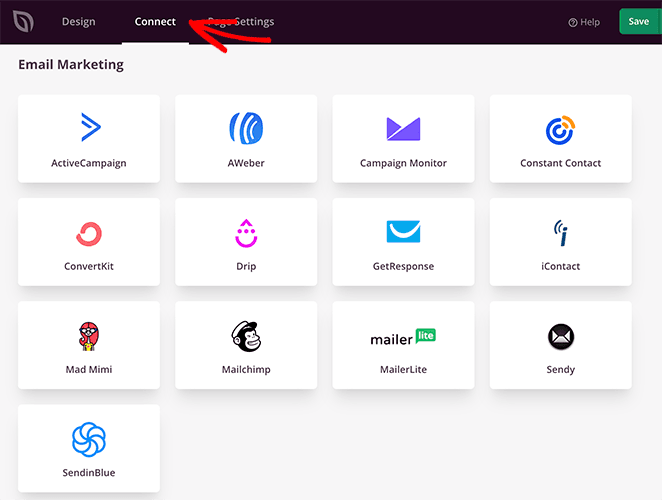
SeedProd includes direct integrations for many popular marketing services, such as Constant Contact, Mailchimp, and ConvertKit. Simply choose a provider and follow the on-screen instructions to connect your email list.
You can also integrate your PPC landing page with Google Analytics, Recaptcha, and other marketing services with Zapier.
When you’re satisfied with how everything looks, click the Save button in the top-right corner of the screen.

ステップ4.設定を行う
The next step is configuring a few settings for your page, so click the Page Settings tab. You can change several things on this page, including your page name, landing page URL, and add your Facebook App ID.

If you have an SEO plugin installed, such as All in One SEO, you can use this setting to configure your on-page SEO settings. This is a great way to optimize your page for search engines and attract organic traffic.
Additionally, you can view your landing page performance with an analytics plugin like MonsterInsights.
As we mentioned earlier, it’s best practice to create unique pages for each PPC campaign. SeedProd makes this much easier with its Domain Mapping feature by allowing you to give each landing page a custom domain name.
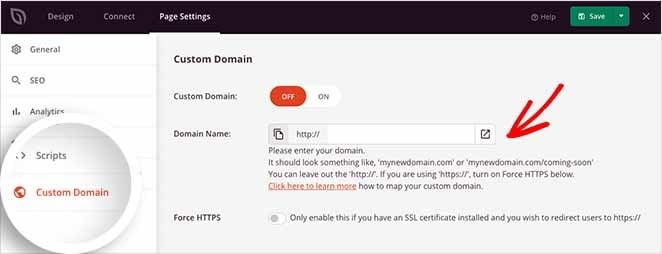
That means you can make as many pages as you like, with custom domains, all on the same WordPress installation. Check out this guide to learn more about how domain mapping works.
With your settings configured, it’s time to move to the last step: publishing your PPC landing page.
Step 5. Launch Your PPC Landing Page
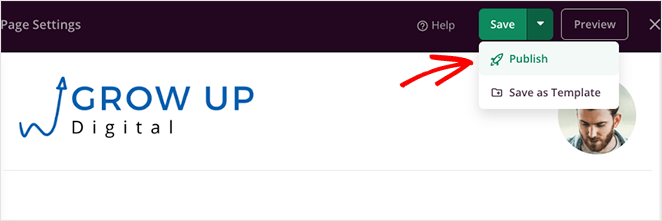
Launching your PPC landing page is fast and straightforward. Click the dropdown arrow on the Save button and select Publish.
You’ll see a notice telling you that your page is now live, like this:

Now all that’s left is to click the See Live Page button to see how it looks.
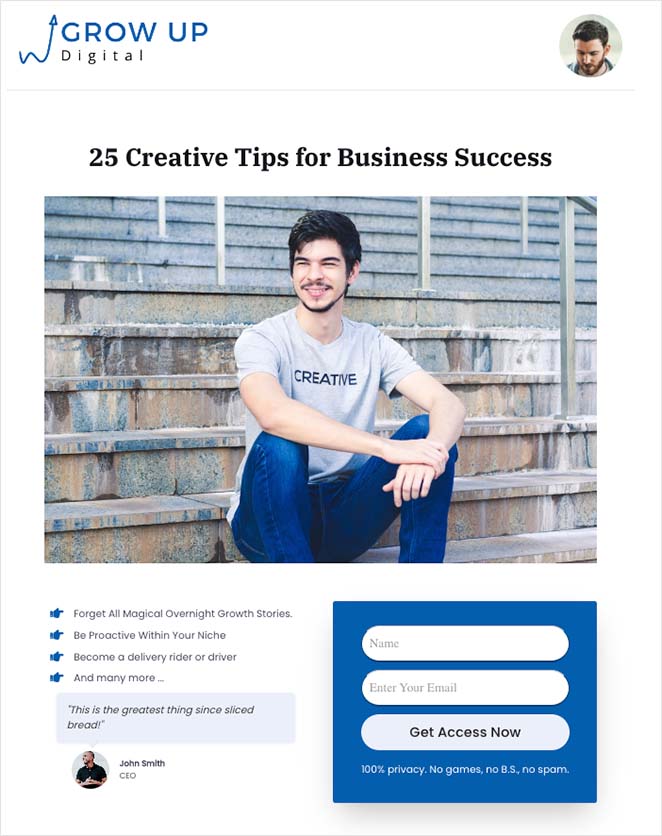
それだけだ!
You now know everything you need to create a PPC landing page in WordPress without hiring a developer.
If you enjoyed this tutorial, you might like this guide on creating fancy section dividers in WordPress.
Are you ready to create a high-converting PPC landing page?
お読みいただきありがとうございました!ご質問やご意見がありましたら、お気軽にコメントをお寄せください。
また、YouTube、X(旧Twitter)、Facebookでも、ビジネスの発展に役立つコンテンツを配信しています。

