Using AI to create images for your WordPress site is a cutting-edge way to make your website more interesting and unique. You can easily add AI-generated pictures to blog posts, landing pages, or anywhere on your site, making it more attractive and engaging for your visitors.
In this guide, I’ll show you how to use AI to generate images in WordPress.
Table of Contents
Why Use AI to Generate Images in WordPress?
AI tools can help you create unique, quality images for your website. Instead of searching for ready-made photos or hiring a designer, describe the image you need, and AI makes it for you.
This makes developing personalized images, infographics, and other visuals easy.
I’ve also found that AI makes content creation faster. When writing blog posts, I’ve used it to create matching images instantly. This saves time compared to the usual process of finding or making visuals.
In fact, one study found that marketing teams spend 91 hours a week looking for creative assets.
With AI, generating a range of images for every post takes a few minutes. It’s a smart choice for busy website managers and content creators.
Plus, AI-generated images give your visitors something new. Stock photos are everywhere, but AI images are one-of-a-kind. This makes your content stand out from others.
What AI Image Generation Tools are Available?
Today, several powerful AI image-generation tools are available. Here’s an overview of the tools available for WordPress websites.
Online AI Image Creation Tools Online
Tools like DALL.E, Midjourney, and Stable Diffusion use text descriptions to create images.
These tools are still under development. But they’re already great at generating realistic or fantastical art for your website.
WordPress AI Image Generation plugins
AI WordPress plugins bring the power of DALL.E and similar tools to your WordPress editor. They allow you to describe an image with text, and the plugin generates unique visuals based on your prompt.
These plugins are a time-saver for bloggers and web designers, helping you create images for content without needing design skills. Some top WordPress AI plugins include AI Engine, Imajinn, and AI Power.
WordPress Page Builder Plugins with AI
AI page builders are website creation tools that include AI for generating images.
This streamlines your workflow by allowing you to create high-quality images directly within the builder rather than using a separate graphic design program. Some popular options include SeedProd, Divi AI, and Elementor AI.
How to Use AI to Generate Images in WordPress
Below, I’ll walk you through how to use AI to generate images from start to finish. I’ll cover using a page builder, a WordPress plugin, and a popular AI image generation tool.
Use SeedProd to Generate AI Images in WordPress

SeedProd is the best drag-and-drop WordPress website builder. It makes creating custom WordPress themes and page layouts easy without coding.
With SeedProd’s AI assistant, you can easily generate images for your website in a few clicks.
First, install and activate the SeedProd plugin. For help, please see our guide on installing the SeedProd plugin.
After installation, you can use SeedProd to:
Then, you can use AI to customize your design with original images.
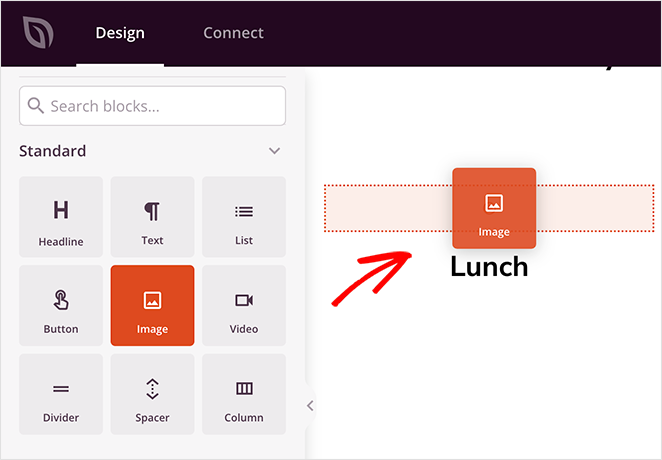
To do this, edit the page to see the drag-and-drop builder. Then, drag an Image block onto the live preview.
After selecting the Image block, look at the content settings panel on the left-hand side. Here, you’ll see a button labeled ‘Add with AI.’
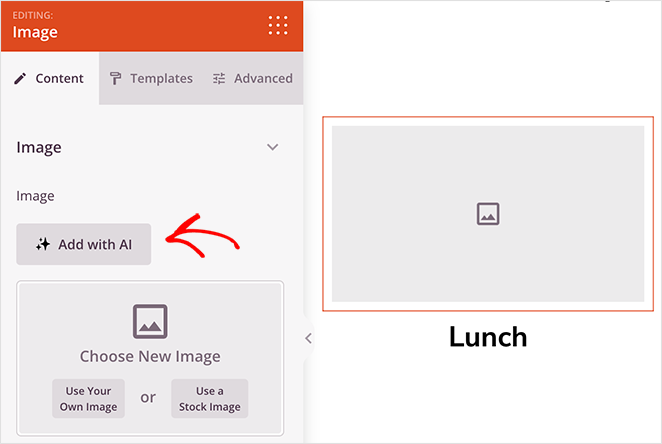
Click the button to open the image prompt panel. This is where you can describe the image you want for your website. Alternatively, click one of the suggested prompts and use it as a starting point for your own.
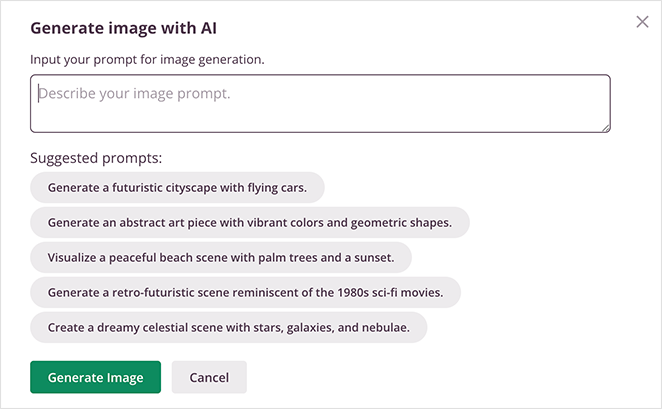
Then, click the Generate Image button.
Typically, it takes a few seconds to generate an image. When it’s complete, you’ll see a preview and can click Insert to add it to your WordPress page.
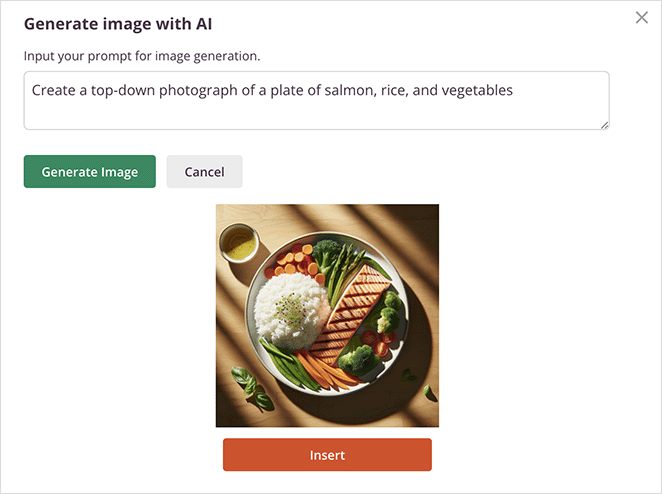
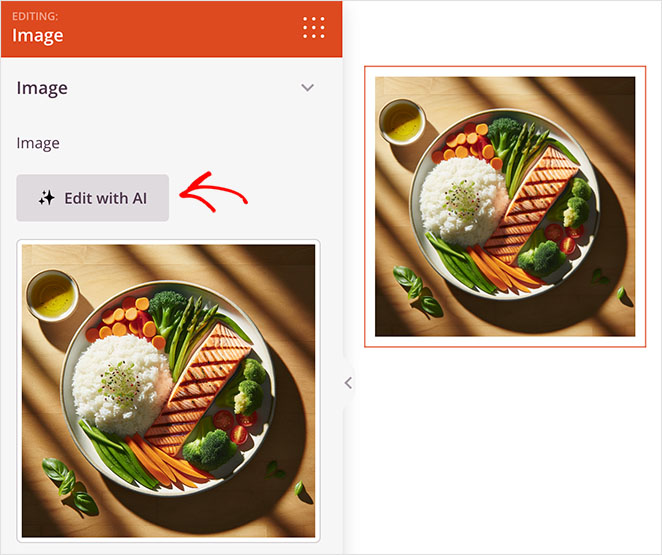
You can also generate several versions of the same image in SeedProd. To do this, click the generated picture and select ‘Edit with AI’ in the block settings.
Now, you’ll see options to create ‘Variations’ or ‘Edit Image’.
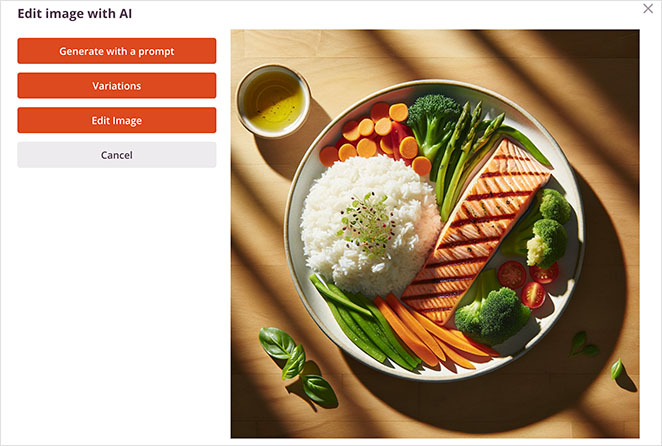
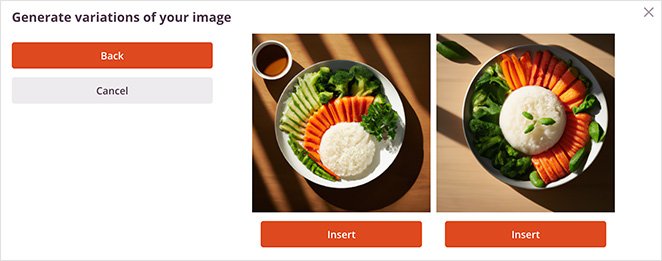
Clicking Variations tells the AI to generate multiple versions of the same image.
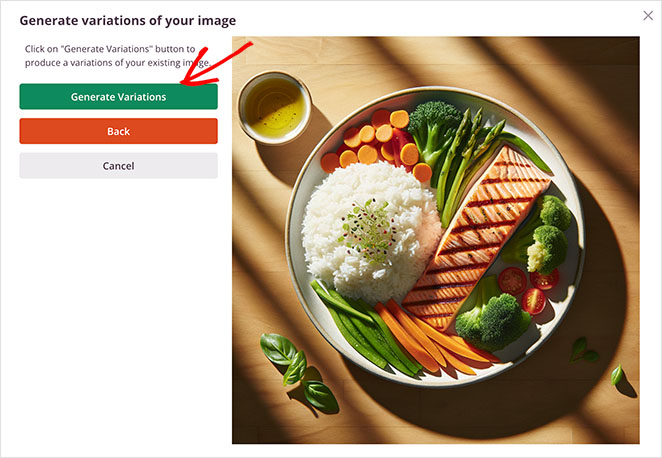
It’s a great way to keep the same theme but get different angles and perspectives.
The Edit Image option lets you use a brush tool to alter the image directly. Select the area you want to change, then alter your original prompt to describe the change you want.
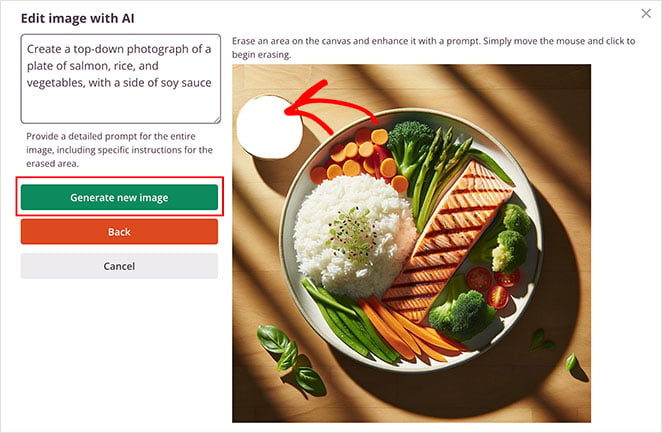
Then, click the Generate New Image button.
After a few seconds, you’ll see a new image with two variations of your described changes. From there, click Insert to add your favorite choice to your page.
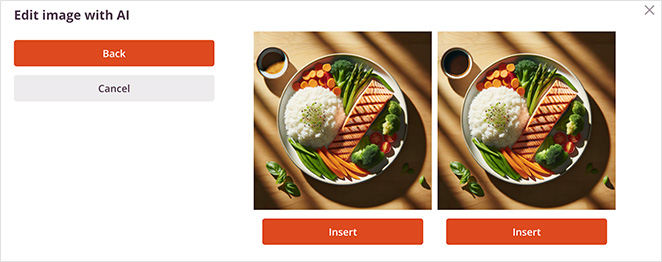
Remember to save and publish your changes when you’re happy with the final result.
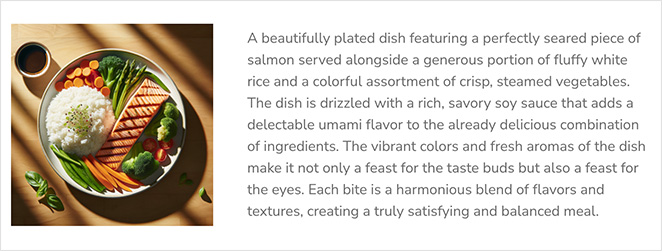
Here’s an image of a simple meal I generated for a restaurant website:
Generate AI Images in WordPress with AI Engine
You can also use WordPress AI plugins to generate high-quality images for your website. For this method, I’ll use AI Engine, a WordPress plugin with various AI features, including AI text and image generation.
First, install and activate AI Engine on your WordPress website. For help, please see this guide on how to install a WordPress plugin.
Next, go to Meow Apps » AI Engine from your WordPress dashboard, and click the Settings tab.
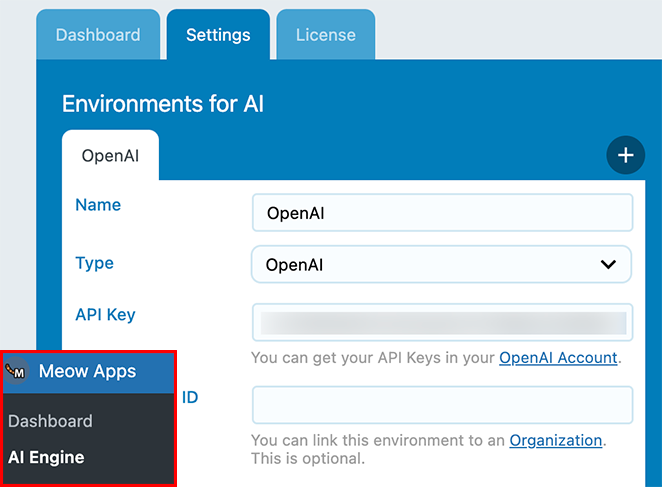
If you don’t already have one, you’ll need to create an OpenAI API key. To do this, head to your OpenAI account, and click API Keys.
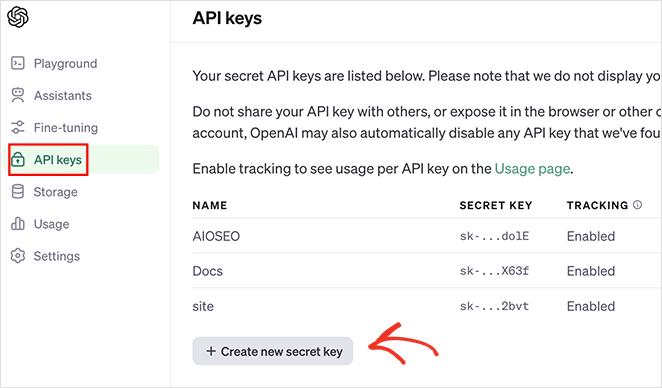
Next, click ‘Create new secret key.’ Now, enter a name for the key, set your permissions, and click the Generate Key button.
Copy the key and return your website.
Now, find the ‘Environments for AI’ panel and paste your API key. The plugin will save your key automatically.
You’ll see an Images option in the top right corner on the same screen. Click it to start creating images with AI.
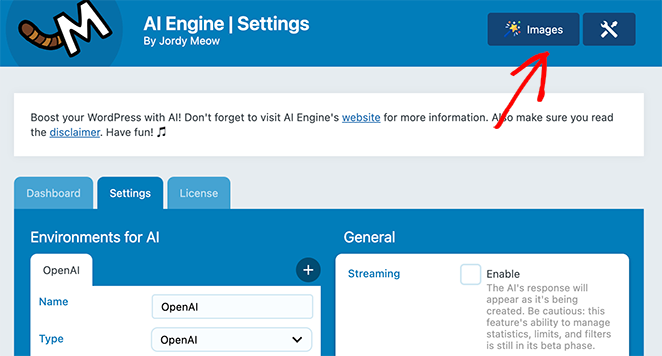
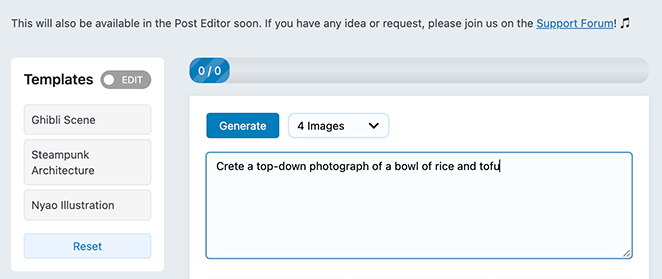
The image generator has several premade prompt templates you can use. Alternatively, you can write your own image prompt in the text box.
Write your prompt, select the number of images you want, then click Generate.
After a few seconds, you’ll see several variations of your image prompt.
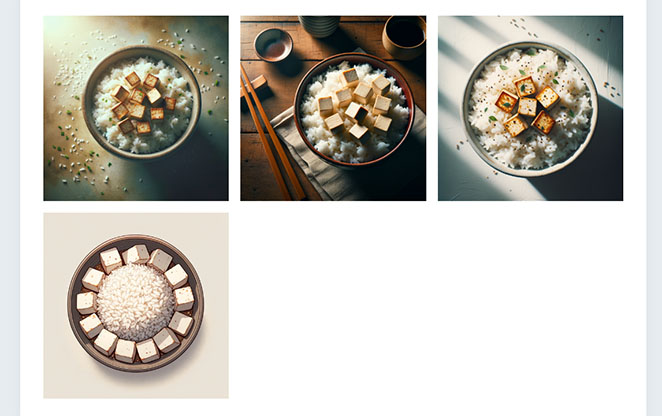
Choose an image you like best to see a larger version. AI engine automatically generates editable alt text, captions, and file names for you.
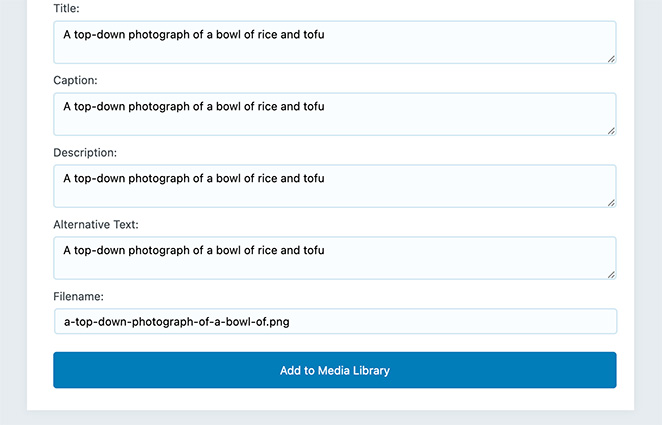
Once you’re happy with the image, click the Add to Media Library option.
You can now use the image anywhere on your WordPress site. To use it in a post, create a new post and add the image block.
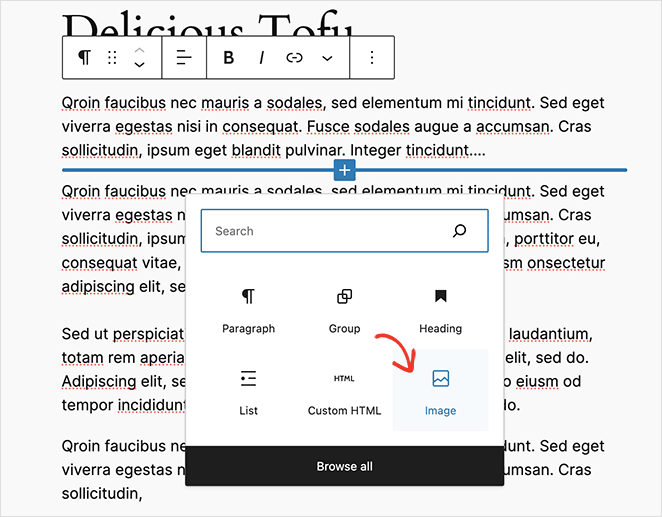
From there, select the AI-generated image from your WordPress Media library. After publishing your changes, you’ll see the image live on your website.
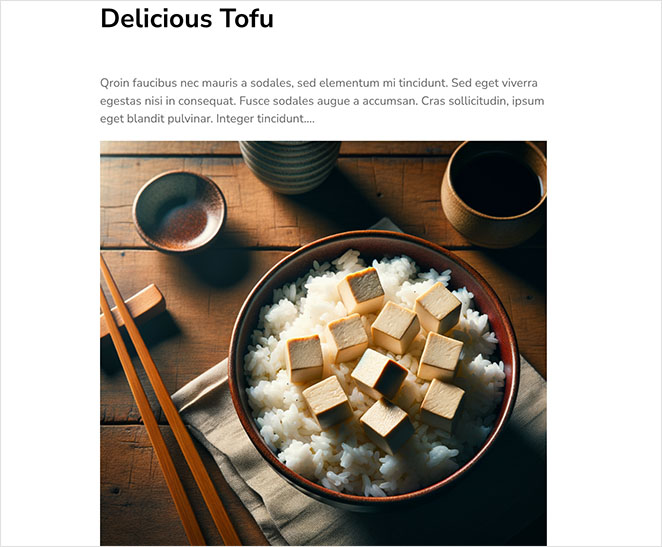
Here’s how my final image looks:
Use Microsoft Copilot to Generate AI Images for WordPress
If you don’t want to use a WordPress plugin, you can use web-based tools to generate images with AI.
One of my favorite tools for this is Microsoft Copilot’s chatbot. Based on a large language model, it can search the internet, answer questions, write content, and create images.
Copilot currently uses the DALL.E 3 model to generate images. All you’ll need to get started is a Microsoft account.
First, go to the Microsoft Copilot website and log into your account.
Next, type your image prompt into the chat box.

The AI will generate 4 versions of the image for you.
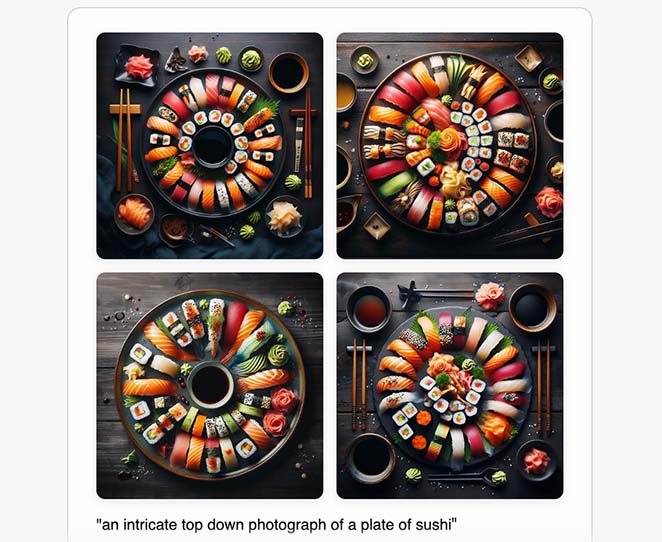
Then, click the version you like best to see a larger version.
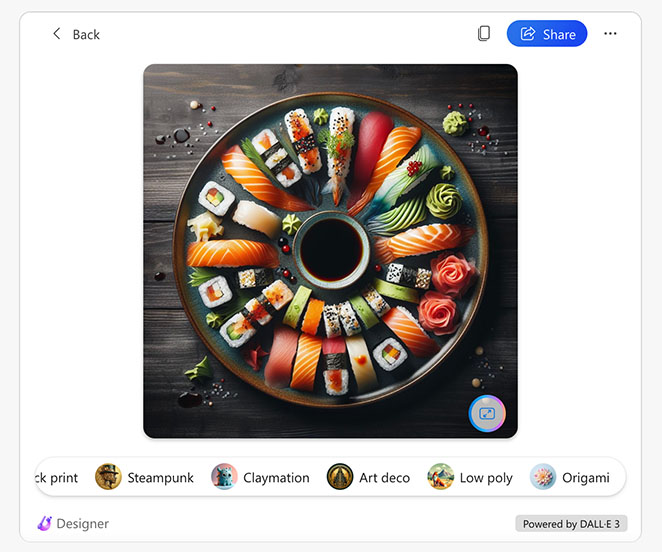
On this screen are options to refine your image further. You can make certain elements pop or blur or add a new style to the image.
In this example, I applied the watercolor effect:
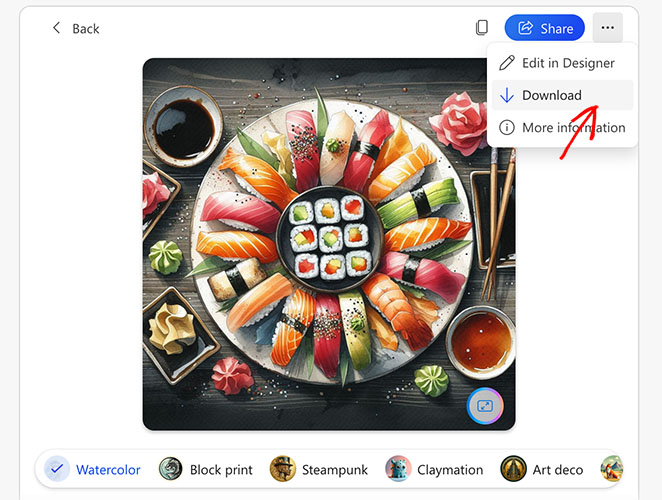
To save the image to your computer, click the 3 dots menu and select Download.
Now, you can upload the image to your WordPress media library and add it to any post using the steps I detailed in the last method.
Are AI-Generated Images Legal to Use?
Although AI can’t hold copyrights under present laws, it’s not against the rules to use these images. You can freely use AI-produced pictures on your WordPress website.
You own the images you create with DALL·E, including the right to reprint, sell, and merchandise. This means you’re covered for all three methods in this guide because they all use DALL·E.
Start Using AI to Create WordPress Images
I hope this guide helped you learn how to use AI to generate images in WordPress.
You may also find the following AI guides helpful:
- Best AI WordPress Builders (+ Content Tools)
- How to Build a WordPress Website with AI
- How to Create an AI Landing Page in WordPress Step-by-Step
- Best ChatGPT WordPress Plugins for Productivity
- How to Use AI for SEO to Increase Your Rankings
Thanks for reading! We’d love to hear your thoughts, so please feel free to leave a comment with any questions and feedback.
You can also follow us on YouTube, X (formerly Twitter), and Facebook for more helpful content to grow your business.

