Do you want to add personalized landing pages to your WordPress website?
With a personalized landing page, you can display information that is personal to each landing page visitor. Not only does this offer a great first impression to potential customers, but it’s also an effective way to boost engagement, lead generation, and conversion rates.
In this guide, we’ll show you how to create a personalized landing page in WordPress step-by-step.
Why Create Personalized Landing Pages?
A personalized landing page is a type of web page catering to specific visitors. Unlike regular homepages, which serve a general audience, personalized pages have a particular target audience or digital marketing campaign in mind.
By customizing content, visuals, and messages to match the interests of a specific group or individual, personalized landing pages can increase conversions, engagement, and user satisfaction.
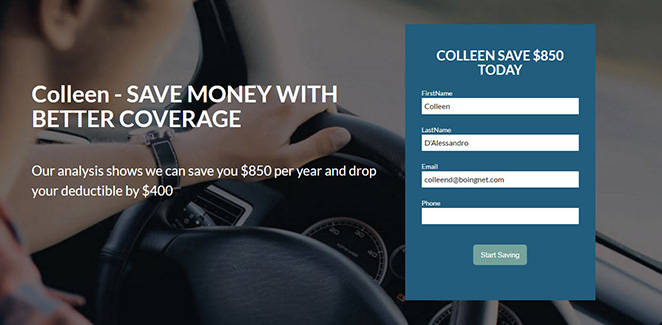
With so much information and many choices available, getting and keeping someone’s attention is challenging.
Personalization helps by showing visitors content that directly addresses their needs. This personalized experience acknowledges their unique situation, making them more likely to stay on the page, interact, and take the desired actions, whether that’s buying something, subscribing to a newsletter, or exploring your work.
When building your personalized or dynamic landing page, you can tailor the user experience to cater to specific attributes, behaviors, interests, and buyer personas.
Here are some different use cases for inspiration:
- Geolocation: Show different products or promotions based on the user’s city or country to improve customer experience.
- Page Content: If someone arrives via a campaign about a specific product, the landing page can immediately reflect that product’s details and benefits.
- Referring Websites: If users click a link on social media, an email, or a partner website, the landing page can acknowledge that source and provide relevant content.
- Dynamic Text Replacement: This technique lets you dynamically change the page text to match the user’s search terms or keywords.
- PPC (Pay-Per-Click) Ads: When users click on specific ads, they can see a customized landing page that aligns with the ad’s messaging.
- Demographics: Knowing a user’s age, gender, or demographics can lead to personalized content recommendations. For example, showing skincare products geared towards a specific gender or age group.
- Purchase History: For returning eCommerce customers, you can display products related to their previous purchases or suggest complementary items.
- Abandoned Carts: If users leave items in their cart without purchasing, personalized landing pages can remind them and offer incentives to complete them.
- Time-sensitive Offers: Customizing content to match ongoing seasons or current events can create a sense of timeliness and relevance.
- Language: Enhance user experience by detecting a user’s preferred language and showing content in that language.
Why Use SeedProd to Create Personalized Landing Pages?

SeedProd is one of the easiest ways to create a personalized landing page experience in WordPress. It’s a drag-and-drop landing page builder that lets you build custom websites and WordPress pages without writing code.
With its easy visual editor, you can personalize different landing pages to accomplish your marketing goals. It also includes dynamic text replacement functionality, which automatically changes the page text to match the visitor’s search terms.
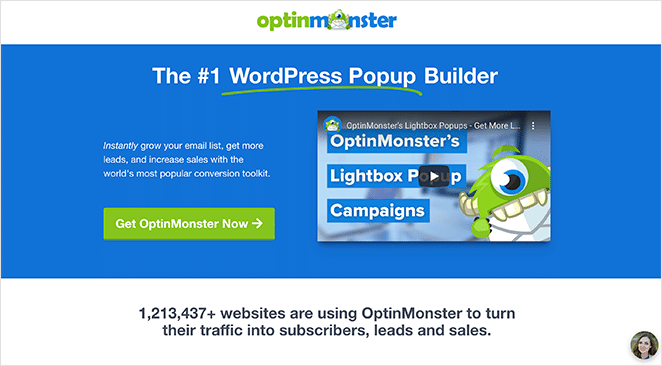
OptinMonster reduced cost per acquisition by 47% using SeedProd in this personalized landing page example.
Other SeedProd features include
- WordPressテーマビルダー
- Pre-made landing page templates
- 近日公開とメンテナンスページ
- Static and dynamic content elements
- アクセス制御
- アニメーション効果
- カスタム・ドメイン・マッピング
- メールマーケティング統合
How to Create Personalized Landing Pages in WordPress
Follow the steps below to make a personalized landing page in WordPress using SeedProd’s powerful page builder.
ステップ1.SeedProdのインストールとアクティベート
To get started, you’ll need to download and install the SeedProd plugin on your WordPress website. For this guide, we’re using SeedProd Pro for its dynamic text replacement feature.
If you need help with this, you can follow our documentation on how to install the SeedProd Pro plugin.
ステップ2.ランディングページのテンプレートを選ぶ
Once you’ve installed SeedProd, navigate to SeedProd » Landing Pages from your WordPress dashboard and click on the Add New Landing Page button.
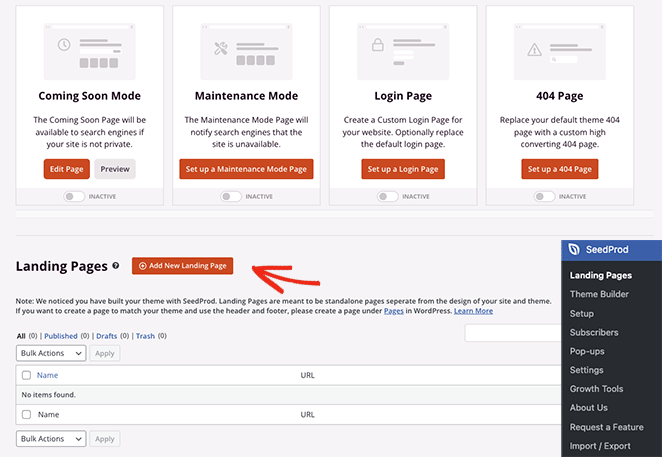
On the next screen, you can choose from hundreds of pre-made landing page templates. You can completely customize each template to meet the needs of your marketing strategy or ad campaign.
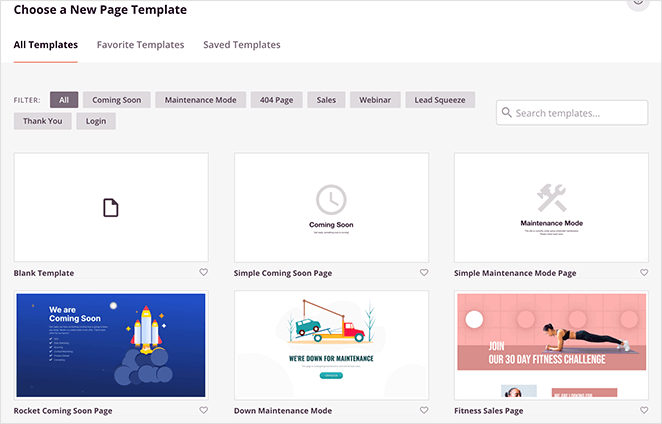
Click the tabs along the top to narrow your search by a specific goal. For instance, if you’re creating a personalized webinar page, you can click the Webinar tab to see templates with those design features.
After finding a template you like, hover over it and click the checkmark icon.

You’ll now see a popup window where you can enter a page name and URL. SeedProd will automatically create a slug for your page, but you can change this later in the page settings.
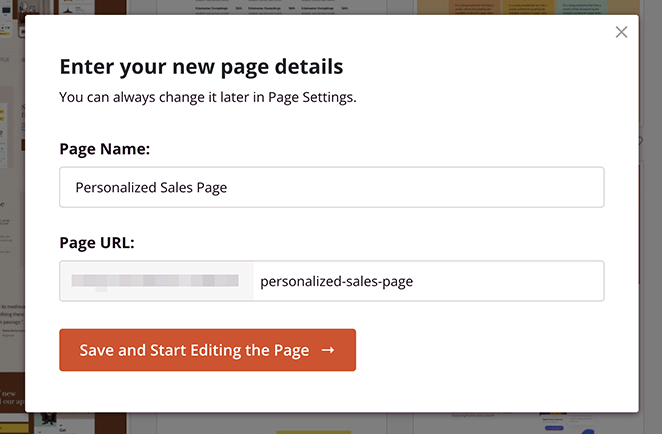
After entering your page details, click the Save and Start Editing the Page button.
ステップ3.ランディングページをカスタマイズする
On the next screen, you’ll see SeedProd’s visual landing page builder. It has blocks and sections to add new elements on the left and a real-time preview on the right.
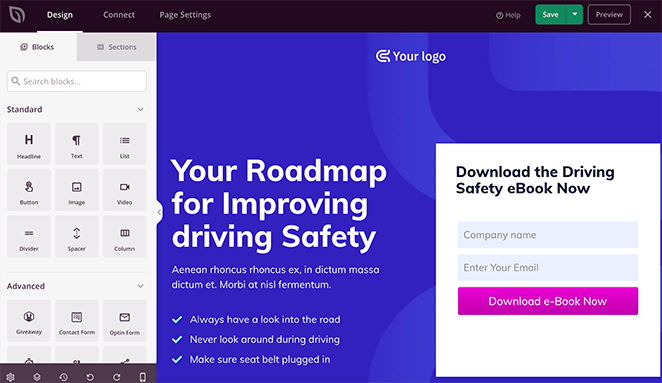
Now you can start customizing the page to suit your needs.
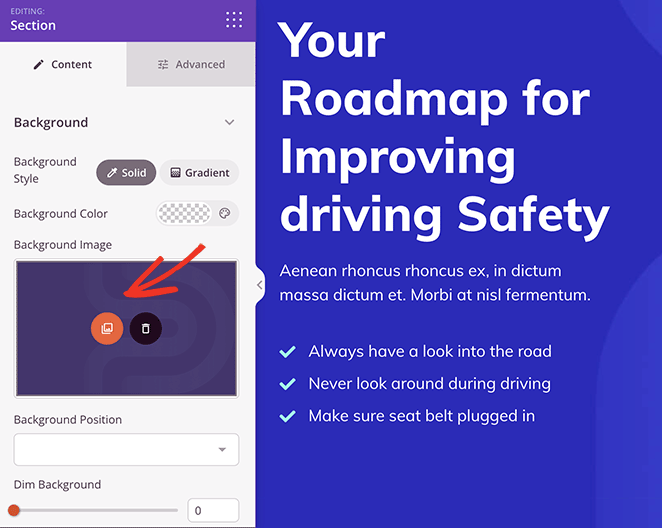
For example, to replace the background image, click it in the left panel and select the gallery icon. This lets you choose a new photo from your computer or WordPress media library.
If you’d like to customize the colors or fonts across your entire landing page, click the cog icon in the bottom corner of your screen.
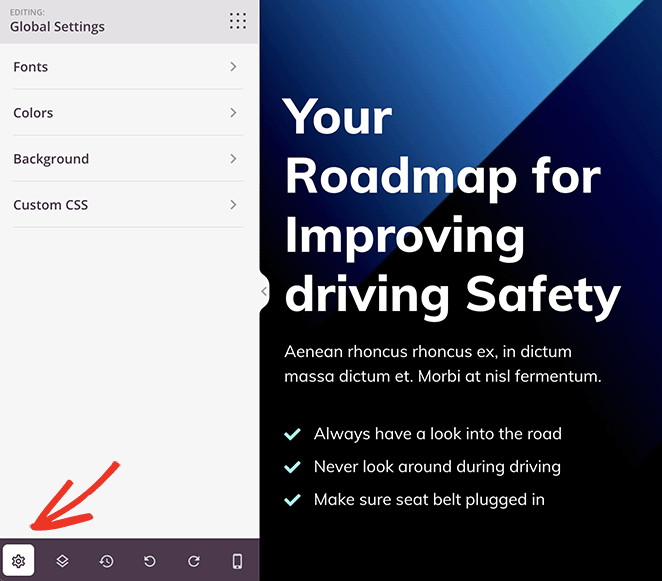
Now expand the different tabs to set your custom color palette for your text, call-to-action buttons, backgrounds, and more.
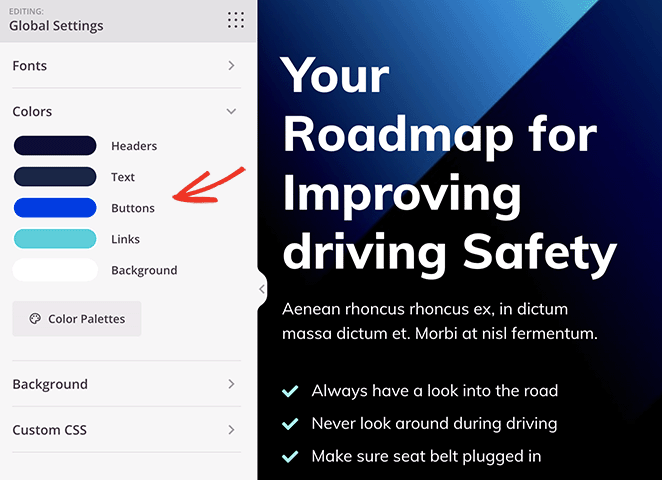
You can even add custom CSS in this section for more tailored customizations.
Once you’re happy with these basic customizations, you can personalize the landing page for different audiences.
Step 4. Add Personalization Elements
One of SeedProd’s most powerful features is the ability to customize virtually any part of your landing page.
Our favorite tool is the Dynamic Text Replacement feature. With this, you can personalize your page based on 2 different scenarios:
1. Date
This lets you dynamically show dates on your page.
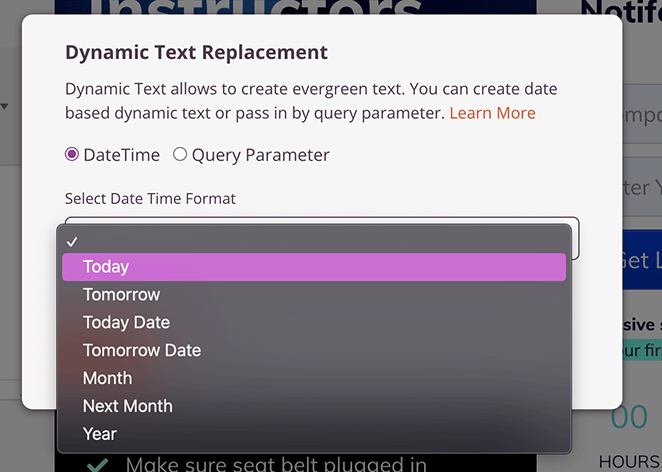
For example, you could create a headline that says, “Our sale ends [#today :%A]” if you’re running a sale. When the dynamic text code is replaced, it will show the current day, like “Our sale ends Tuesday” or whatever day it is for the user.
2. Query
This lets you adapt your content based on the query users are searching for.
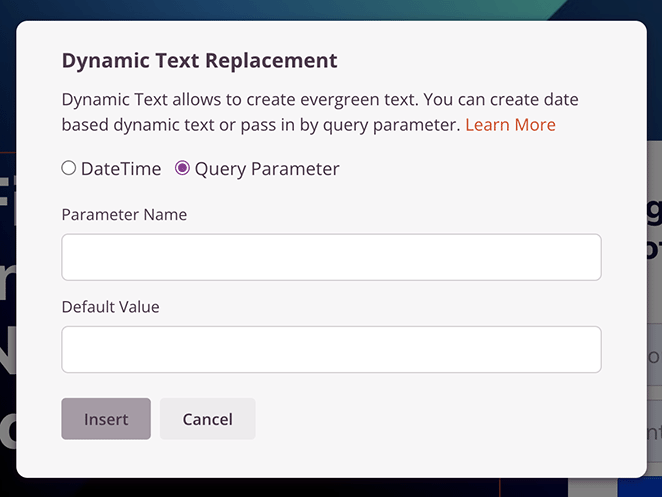
For example, if you have a headline with the query parameter “Hi [q:fname=there]” users would see their name, such as “Hi Stacey.” However, without the parameter, users would see “Hi there.”
To add dynamic text, click the headline you want to personalize and select the Insert Dynamic Text button.
For this example, we’ll choose the Query parameter type. With this option, you can enter a parameter name, like ‘location,’ and add a default value, such as ‘You.’
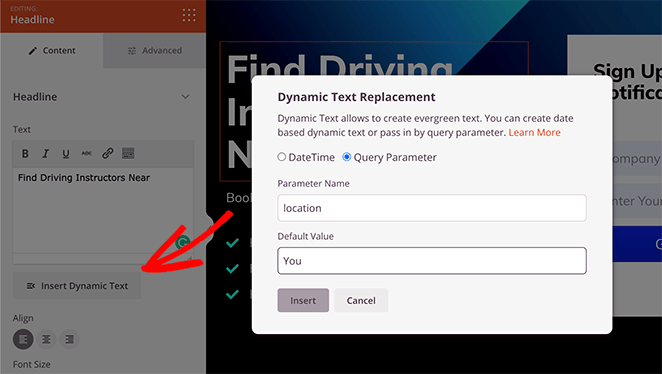
By default, the headline would say ‘Driving Instructors Near You.’ But if the location is included in the URL parameter, such as location=Florida, the headline would change to ‘Driving Instructors Near Florida.’
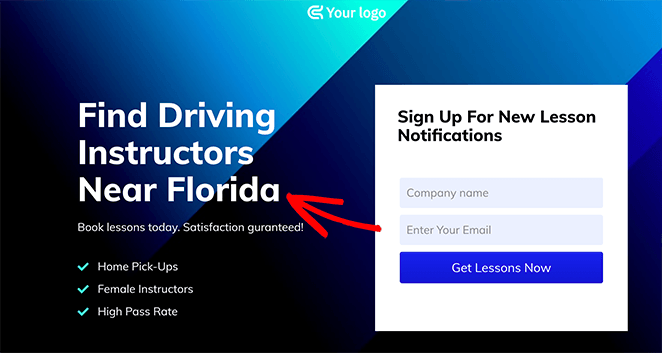
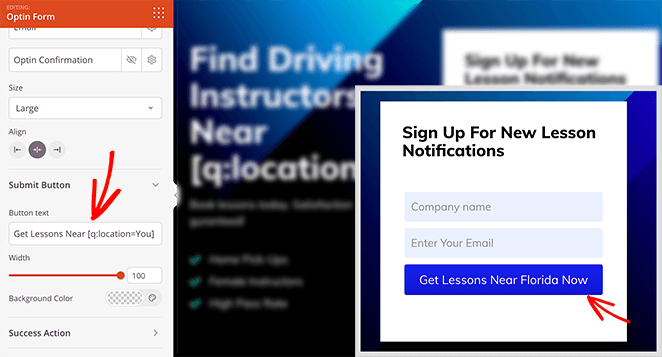
You can even use this feature to personalize call-to-action (CTA) buttons.
Click any CTA button, and in the button settings, paste the dynamic text code like this:
If you want to display a time-sensitive offer dynamically, you can use the Date dynamic text type.
Simply customize any text or headline element with the DateTime option, and choose the date you want to show visitors.
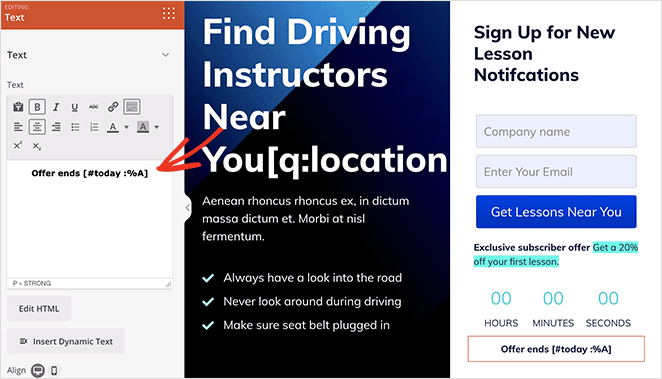
You can even combine this with SeedProd’s Countdown Timer block to create a sense of urgency.
Carry on customizing your landing page until you’re happy with its personalization. Then, make sure you click the Save button to save your changes.
ステップ5.ランディングページの設定
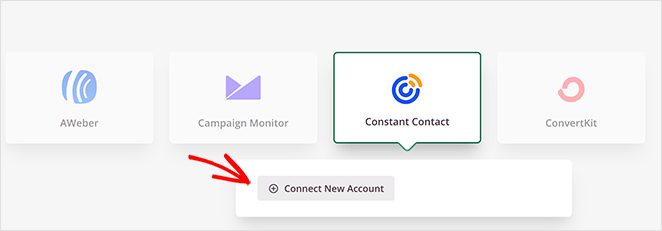
If you want to collect email addresses on your landing page, you’ll want to connect your email marketing automation service. To do this, click on the Connect tab at the top of the page builder.
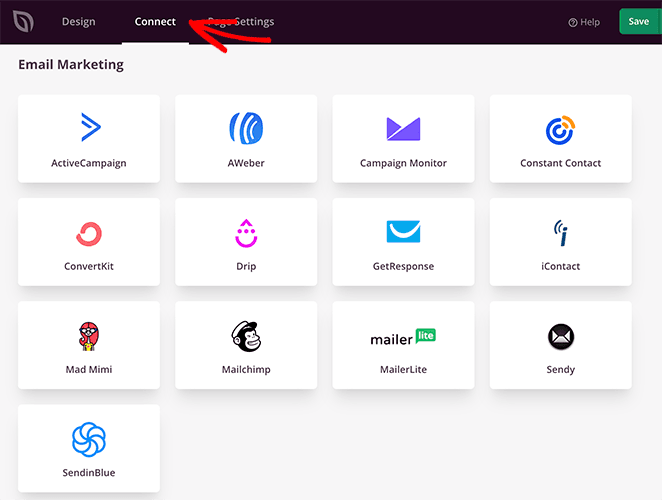
Here, you’ll see a list of direct integrations for SeedProd, including email marketing providers, Google Analytics, and Recaptcha spam protection. You can also use the Zapier connection to integrate with other apps and CRM, such as Hubspot.
Once you find your integration, click the Connect button to link your email list and follow the on-screen instructions.
Now, let’s click the Page Settings tab to configure more settings.
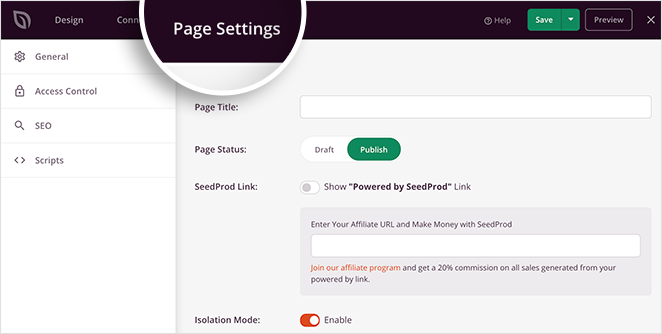
On this page, you can enter a new landing page name and URL, add custom tracking scripts, and even perform on-page search engine optimization by installing AIOSEO, the best WordPress SEO plugin.
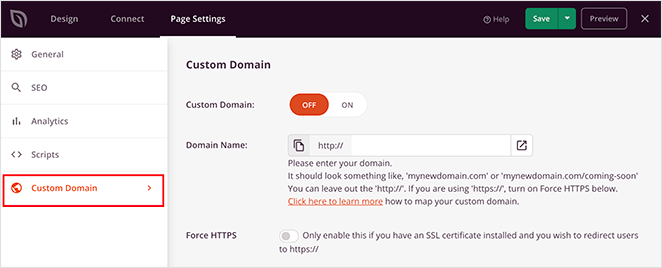
Another of our favorite settings on this page is the Custom Domain option. With this, you can assign a domain name to your landing page entirely different from your main website.
Step 6. Publish Your Personalized Landing Page
Before publishing your landing page, it’s a good idea to test it on mobile devices. If it is mobile-responsive, it will look and perform better on smaller screens like tablets and smartphones, preventing you from losing qualified leads.
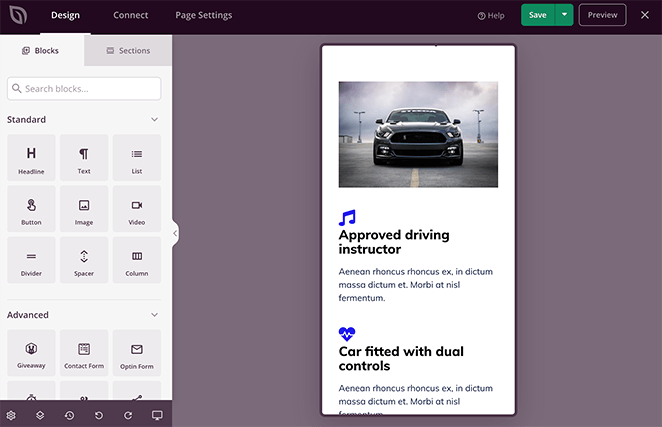
The good news is SeedProd’s mobile preview option allows you to see your page on mobile devices. Just click on the mobile phone icon at the bottom of your screen.
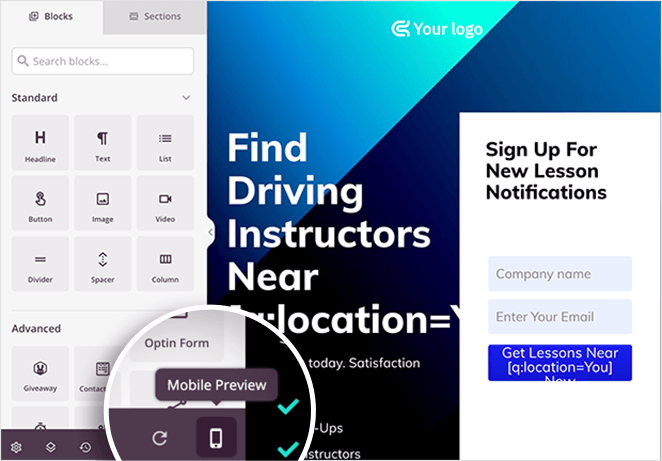
Now you can see how your page displays on mobile and adjust anything that doesn’t look right or work correctly.
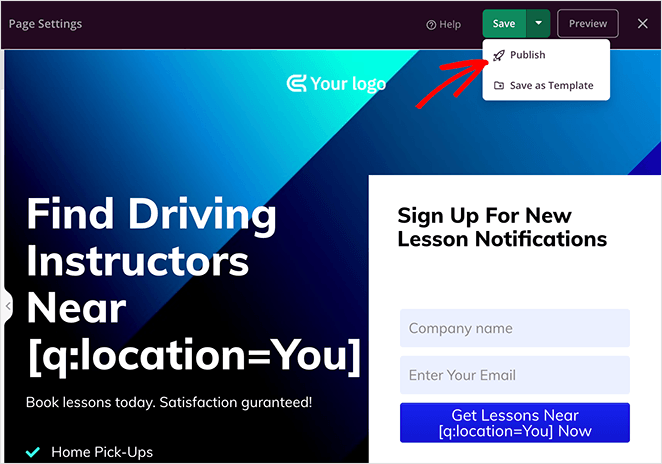
When you’re satisfied with your personalized landing page, select the down arrow on the save button and click Publish.
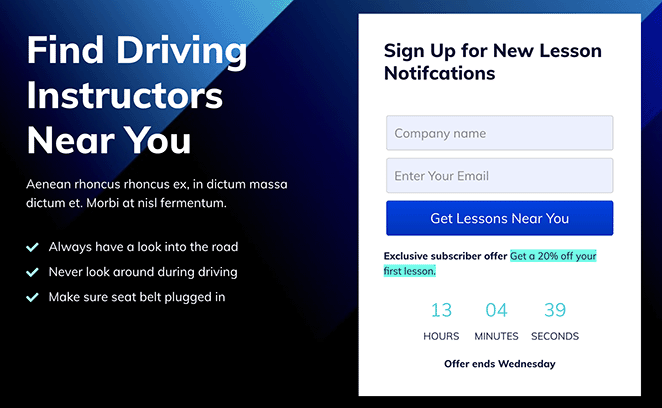
Now you can visit your new page to see how it looks in real-time.
そうだ!
We hope this guide has helped you learn how to create personalized landing pages in WordPress. SeedProd’s user-friendly page builder makes personalizing your landing page effortless without hiring a developer.
So why not try it yourself?
You may also like the following helpful landing page guides:
- WordPressでアンケートのランディングページを作成する方法
- ランディングページとセールスページ:あなたにふさわしいのはどちら?
- アイデアをテストするための簡単なランディングページの作り方
- ランディングページとマイクロサイト:ブランドにとって最適なのはどちらか
- ペイメントゲートウェイを使ったランディングページの作り方
- コンバージョン率を高める23+のランディングページの見出し公式
お読みいただきありがとうございました!ご質問やご意見がありましたら、お気軽にコメントをお寄せください。
また、YouTube、X(旧Twitter)、Facebookでも、ビジネスの発展に役立つコンテンツを配信しています。

