When I first started selling my services online, I wished I could accept payments right from the page I used to attract clients. It was frustrating to send people to a separate checkout page, only to see many of them change their minds before completing the purchase.
Adding a payment gateway page made my life as a freelancer so much easier. Clients could accept payments on the landing page itself without being redirected, keeping the experience simple and smooth.
In this guide, I’ll share two methods I’ve personally used to create a high-converting payment landing page in WordPress. From choosing the right tools to optimizing your payment gateway for better conversions, I’ll cover everything you need to know based on my experience.
In this guide, you’ll learn:
- Why collect payments directly on your landing page
- How to use SeedProd to create a payment page
- How to use WP Simple Pay for payment forms
- Answers to common payment gateway questions
Why Collect Payments on Your Landing Page?
Key Takeaway: Letting users pay directly on your landing page keeps the buying process simple and fast, which means fewer drop-offs and more completed sales.
As I’ve discovered, adding a payment system directly on your landing page makes buying easier for customers and potential clients. Instead of being sent to a separate checkout page—where they might change their minds—they can pay instantly right there. This helps stop them from changing their minds before they buy, and can lead to more sales.
Offering multiple payment methods like credit cards, PayPal, and others can boost sales even more. By providing customers with their preferred way to pay, you make it more convenient for them to complete the transaction. In fact, Ottu found that businesses offering multiple payment choices sometimes see up to a 30% increase in sales.
So what exactly do you need to get started with taking payments on your landing page? Let’s find out.
What You Need to Set Up a Payment Gateway Page
Key Takeaway: To accept payments on your page, you need a payment processor like Stripe or PayPal, an SSL certificate, and basic security compliance — most tools handle this for you.
Based on my experience, you’ll need a few essentials for accepting payments on your page:
- A Payment Processor: Think of services like Stripe, PayPal, or Square as secure payment processors. They handle all the technical details of accepting different payment methods (like credit cards).
- SSL Certificate: This is like a digital lock for your page. It scrambles any information customers share while being sent so it can’t be stolen.
- PCI Compliance: This means following a set of rules to protect customer credit card information. It sounds complicated, but your payment service will help you figure out what you need to do.
So, how do you build a payment gateway landing page? Follow the 2 methods I’ve used on my projects below to learn how.
Method 1. Use a Page Builder to Create a Payment Landing Page
Key Takeaway: SeedProd makes it easy to build a fully customized landing page with built-in Stripe payments, no code or extra plugins needed.
First, I’ll show you how to create a landing page and add payment integration with SeedProd. Essentially, it’s a simple way to create a Stripe landing page.

SeedProd is one of the best website and landing page builders for WordPress. It lets you create any part of your web design without writing code.
In the past, I’ve used SeedProd to build landing pages like:
- High-converting sales pages
- チェックアウトページや商品ページなど、WooCommerceのウェブサイトを完成させます。
- Custom headers, footers, sidebars, and templates
I even made a full website design with its theme builder (you can see how I did it in this guide on creating a custom WordPress theme).
カスタマイズ可能なテンプレート、WordPressブロック、セクションを使えば、サイトに機能を追加するのも簡単です。
例えば、ソーシャルメディアのフォローボタンやシェアボタンを埋め込むことで、ブランドの認知度を高め、フォロワーを増やすことができます。また、オプトインフォーム、カウントダウンタイマー、コールトゥアクションボタンなどのリード生成要素を使用して、リストを増やし、売上を伸ばすこともできます。
One of the elements I’ll use in this method is SeedProd’s Payment Button block, which has payment gateway integration. It lets you start accepting online payments using the Stripe payment processor. It’s quick and easy to set up and requires zero coding.
So follow the steps below to create a payment gateway page with Stripe.
Step 1. Install and Activate SeedProd Landing Page Builder
The first step is to go to the SeedProd pricing page and choose a plan. For this guide, I’ll be using SeedProd Pro for its advanced features, but you can use the Stripe Payment Button on any plan, including the unlimited free trial of SeedProd.
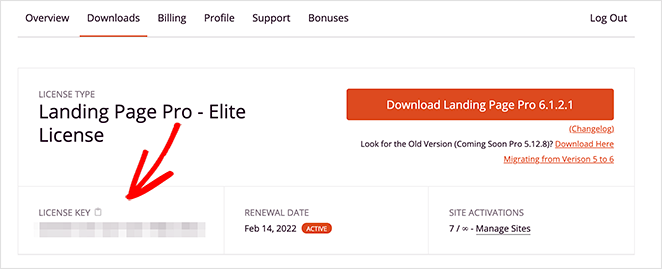
After picking a plan, log into your SeedProd account and download the plugin file. You can also copy your license key on the same page if you’re using the premium version.
WordPressのウェブサイトに行き、SeedProdプラグインをアップロードしてください。ヘルプが必要な場合は、WordPressプラグインのインストールと有効化に関するこちらのガイドに従ってください。
それが完了したら、SeedProd " Settingsページに移動し、ライセンスキーを貼り付けます。
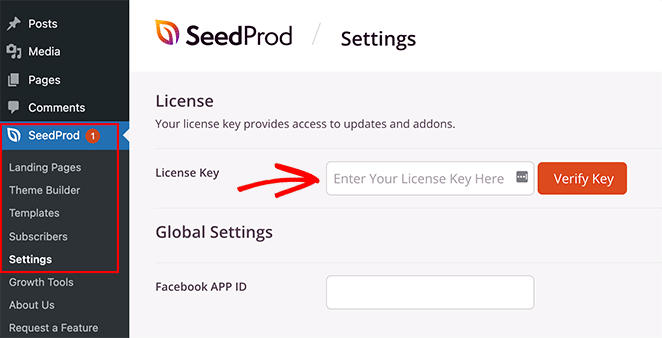
次に、Verify Keyボタンをクリックして、ライセンス設定を保存します。
ステップ2.ランディングページのテンプレートを選ぶ
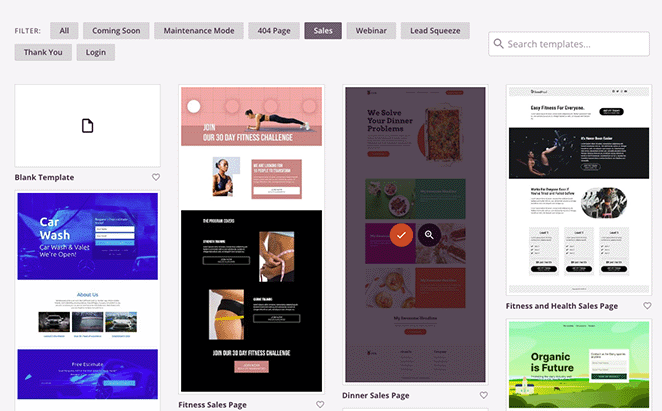
The next step is to select a template design for your page. To do that, you can go to SeedProd » Landing Pages and click on the Add New Landing Page button.
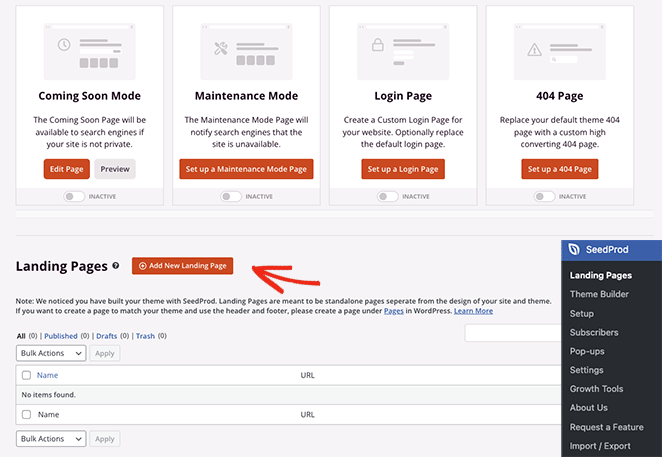
次の画面では、プロがデザインしたランディングページのテンプレートライブラリが表示されます。
You can click any of the filters at the top to narrow down your search. For example, clicking the Sales filter will only show the sales page designs.
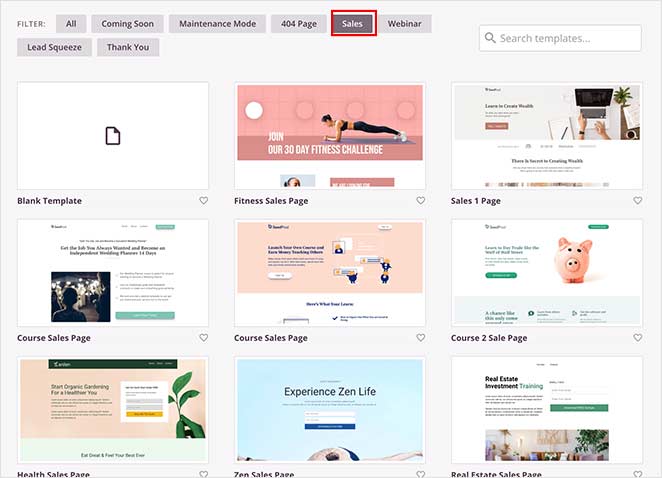
気に入ったデザインが見つかったら、チェックマークのアイコンをクリックします。
After, a popup will open asking you to enter your page name and URL. Don’t worry if you can’t think of a good name; I’ll show you how to edit it later.
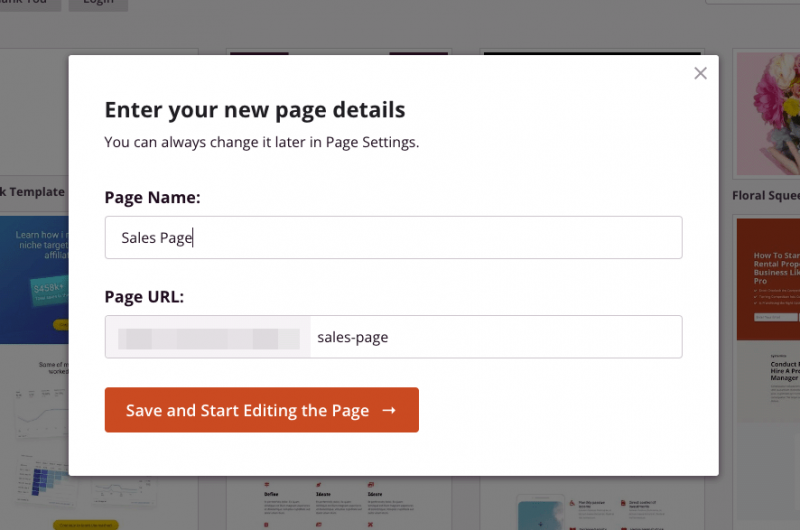
保存してページの編集を開始する」ボタンをクリックしてください。
ステップ3.支払いボタンブロックを追加する
次の画面では、下の例のようなレイアウトが表示されます:
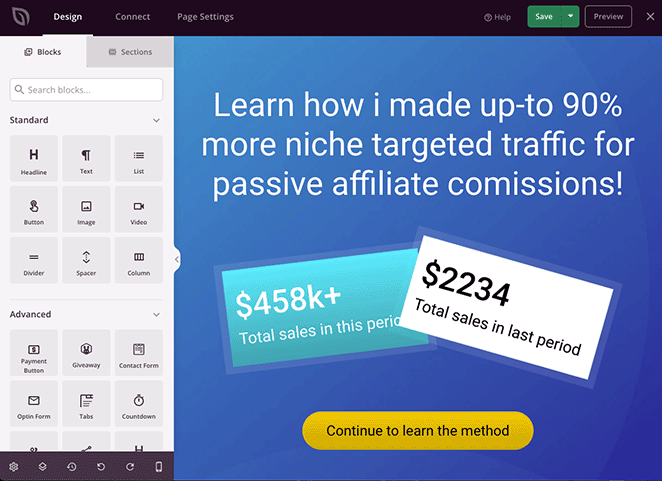
左側には、ランディングページのデザインに追加できるWordPressのブロックとセクションがあります。そして右側にはライブプレビューがあり、リアルタイムで変更をプレビューすることができます。
You can customize any part of your payment gateway landing page by clicking anywhere on the live preview. For example, clicking the headline lets you type directly on the design to change the content.

また、左側に設定パネルが開き、フォント、色、スペーシング、HTMLなどをカスタマイズするための高度な設定にアクセスできます。
この例のように、セクションを編集して背景画像を簡単に変更することもできます。要素をクリックするだけで、思い通りにカスタマイズできます。


“A cluttered landing page design can easily distract users away.
To avoid this, make sure that you keep your landing page layout clean and simple. Using lots of empty space, color contrast, and large fonts can help you easily achieve that simplicity.” How to Increase Your Landing Page Conversions by 300%.
— Syed Balkhi, Founder and CEO of WPBeginner.
Adding an online payment gateway to your page is just as easy. Simply search for the Payment Button WordPress block and drag it onto your page.
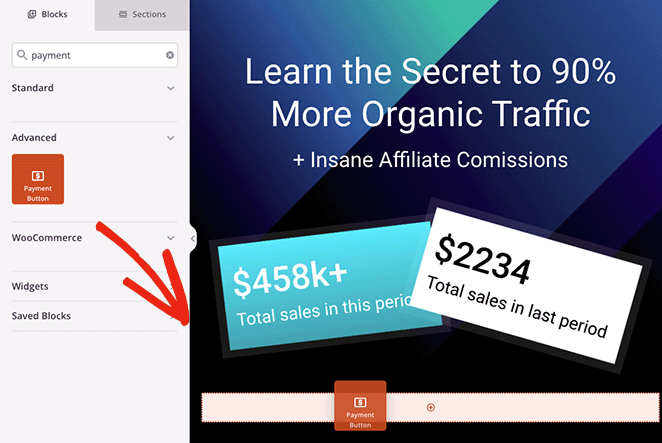
After doing that, the block settings will open, where you can click the Connect with Stripe button to set up a merchant account and link it.
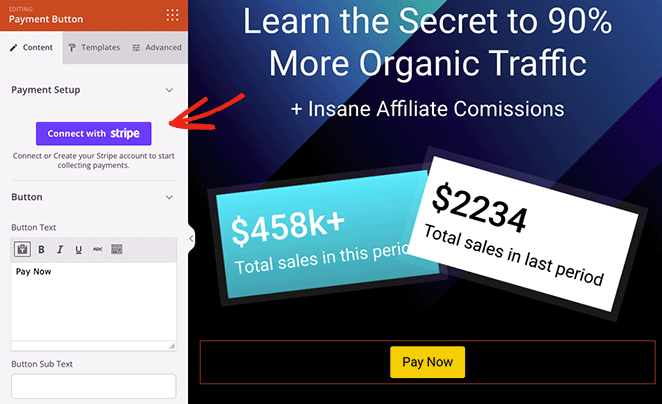
自動的にStripeのログイン画面が表示され、認証コードを入力できますが、接続が完了すると、そのままランディングページのデザインに戻ります。

Stripeの接続を承認したら、支払いボタンの設定をカスタマイズできます。
例えば、以下の設定を編集することができる:
- 支払額
- 支払い内容
- 支払通貨
- 成功URL

サクセスURLは、買い物客が購入を完了した後にリダイレクトさせたいページです。例えば、SeedProdでサンキューページを作成し、チェックアウトに成功した顧客をそのページにリダイレクトすることができます。
In addition to the above settings, you can customize the button text, sub-text, alignment for mobile and desktop, and button size, and even add Font Awesome icons.
より多くのカスタマイズオプションが必要ですか?詳細設定]タブをクリックするだけで、ボタンのスタイル、色、フォント、間隔、余白の設定などを見つけることができます。
With payments set up, you can continue customizing your page until you’re happy with how the design looks.
変更を保存するには、右上の「保存」ボタンを忘れずに押してください。

ステップ4.設定を行う
I mentioned earlier that you can change your page settings before publishing your page. To do that, click the Page Settings button at the top of the page builder screen.
In the General settings, you can edit your page name and URL, publish your page and show your SeedProd affiliate link.

All in One SEOのようなWordPress SEOプラグインをインストールしている場合は、SEOタブをクリックして検索エンジン最適化の設定を入力することができます。
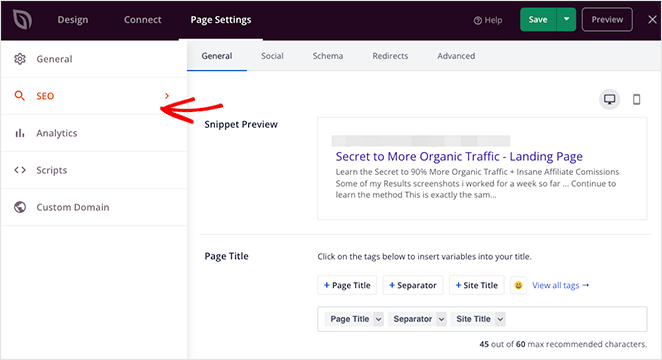
その他にアクセスできる設定には以下のようなものがある:
- Track the performance of your page with MonsterInsights, a powerful Google Analytics plugin for WordPress.
- ウェブページのヘッダー、本文、フッターにカスタムスクリプトを追加して、トラッキングとリターゲティングを行います。
- Give your page a custom domain name separate from your website (Elite plans only).
You can also click the Connect tab at the top of the page to link your page to your email marketing service, Google Analytics, spam protection, and Zapier.
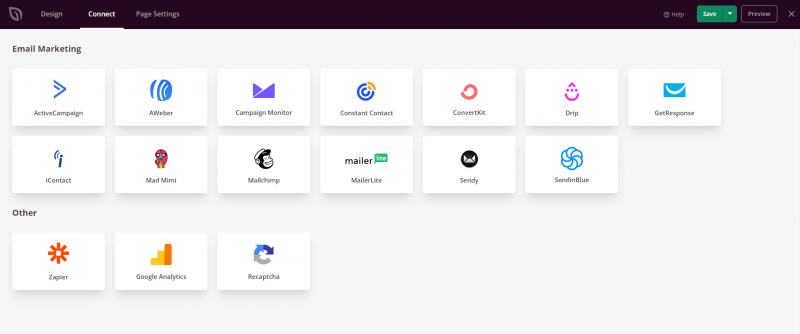
Step 5. Publish Your Payment Gateway Landing Page
When you’re ready to make your page live, click the Save button and select the Publish option.
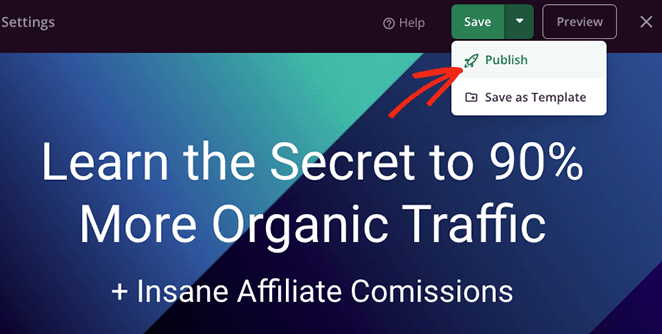
Now, when visitors click your payment button, they’ll be able to check out using Stripe.

At this point, you’ve created a complete online payment landing page that’s ready to start converting visitors into paying customers.
📢 Expert Tip
While Stripe is a powerful payment provider, it’s not your only option. Other popular choices include PayPal, Square, and more.
PayPal is known for its widespread use and buyer protection. Square offers excellent point-of-sale solutions for physical products as well. Consider which gateway aligns best with your target audience and business needs.
For a more in-depth comparison of payment options, check out this guide on the Best WooCommerce Payment Gateways for WordPress.
Method 2. Use a Plugin to Add a Landing Page Payment Gateway
Key Takeaway: WP Simple Pay is a great option if you want to quickly add a Stripe payment button to any WordPress page without building a full landing page layout.
Another way to create a landing page with a payment option is to use a WordPress payment plugin.
WP Simple Pay is one of the best and easiest-to-use WordPress payment plugins. It lets you add Stripe WordPress payment form to any post or page on your WordPress site without code.
So, if you don’t want to create a high-converting landing page and need a more straightforward option, WP Simple Pay is a great alternative to page builders.
注:WP Simple Payを使用して支払いを受け付けるには、有効なSSL証明書が必要です。WordPressにSSLを追加する方法については、こちらをご覧ください。
ステップ1.WPシンプルペイのインストールと有効化
The first step is to get your copy of WP Simple Pay from their website. Then, install and activate the plugin on your website.
プラグインがアクティブになると、自動的にセットアップ・ウィザードが表示され、セットアップ・プロセス全体が自動化されます。
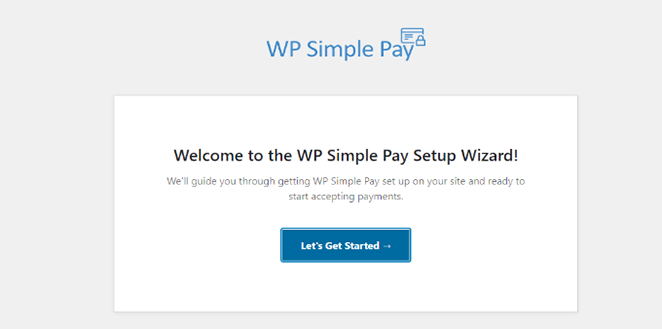
セットアップ・ウィザードを開始するには、「Let's Get Started」ボタンをクリックします。
ステップ2.セットアップウィザードを完了する
The setup process has four steps. First, you’ll be asked to enter your WP Simple Pay license key, which you’ll find in your account dashboard’s Downloads section.
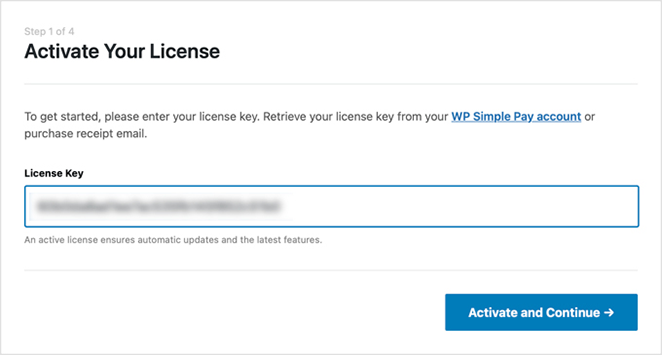
ライセンスキーを入力し、[Activate and Continue]ボタンをクリックします。
次の画面で、Stripeアカウントと接続する必要があるので、Connect with Stripeボタンをクリックします。
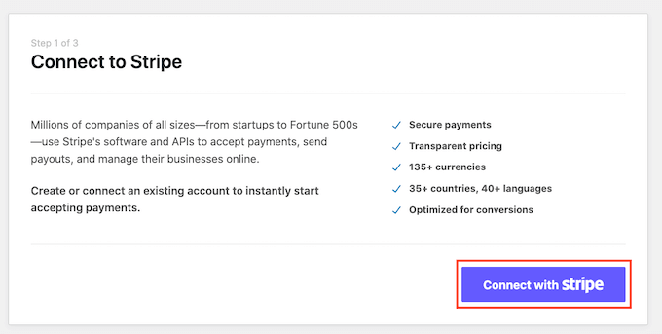
Now, you’ll need to log into your Stripe account and verify the connection.
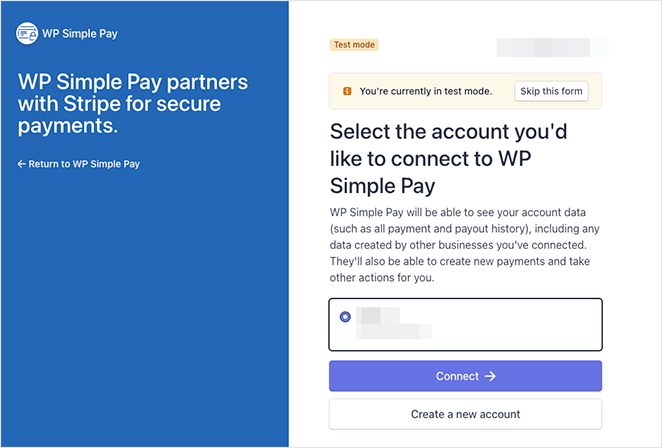
支払いが完了したら、セットアップウィザードに戻り、顧客が受け取るメールを選択できます。
例えば、支払い領収書、支払い通知、請求書領収書、今後の請求書を送信できます。
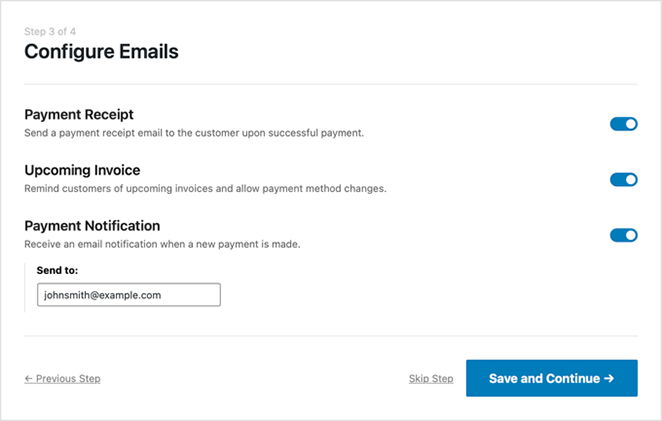
After picking your email notifications, click the Save and Continue button.
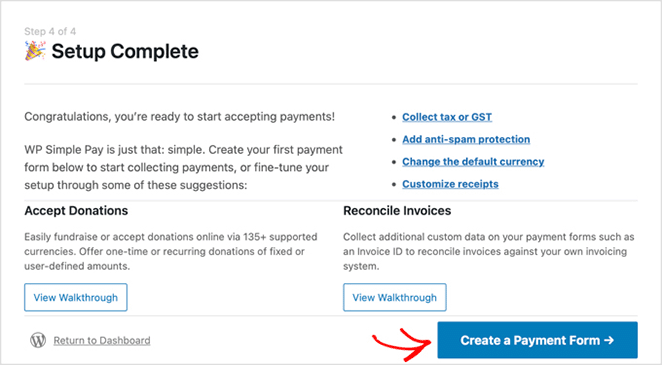
The setup is now complete. The next step is to create a form for shoppers to enter their payment details. To do that, click the Create a Payment Form button.
ステップ3.支払いフォームを作成する
次の画面では、WP Simple Payで利用可能なさまざまな支払いフォームのテンプレートが表示されます。募金、商品とサービス、登録、寄付など様々なフォームタイプから選ぶことができます。
For this tutorial, we’ll select the Payment Button template. To do so, hover over the template and click the Use Template button.
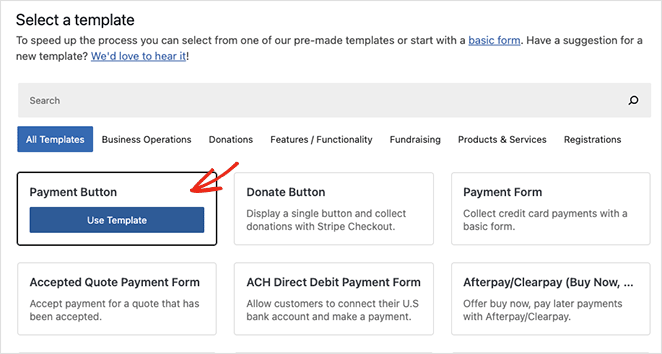
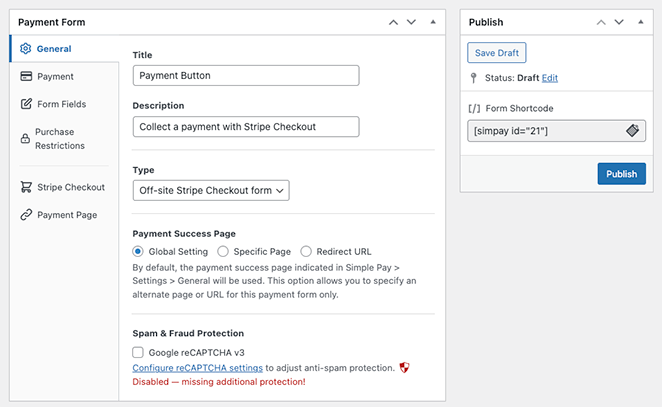
Your payment button settings will now open on the next screen. Here, you can edit general settings, including the button name, description, type, and payment success page.
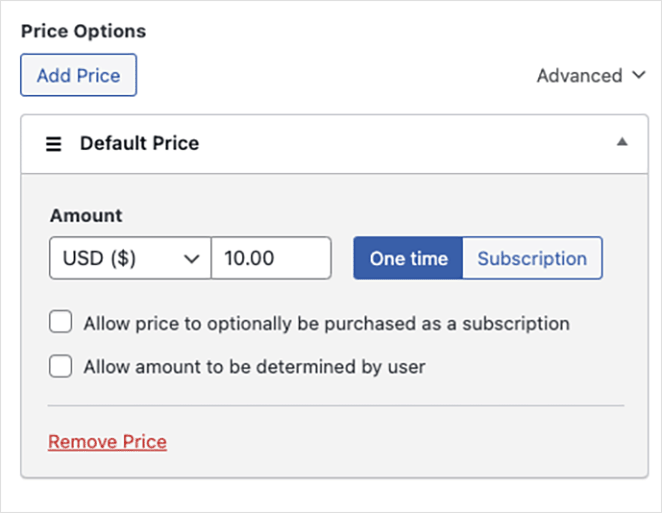
支払いタブでは、支払いボタンのデフォルト価格を設定し、1回払いと定期払いを選択できます。
You can also pick from multiple payment methods, including credit card, direct debit, Alipay, Klarna, and Clearpay.
支払いボタンの設定のカスタマイズが完了したら、「公開」ボタンをクリックします。
Step 4. Add Payment Button to Your Landing Page
The next step is to add the payment button to your page. The WP Simple Pay WordPress block allows you to add it anywhere on your page.
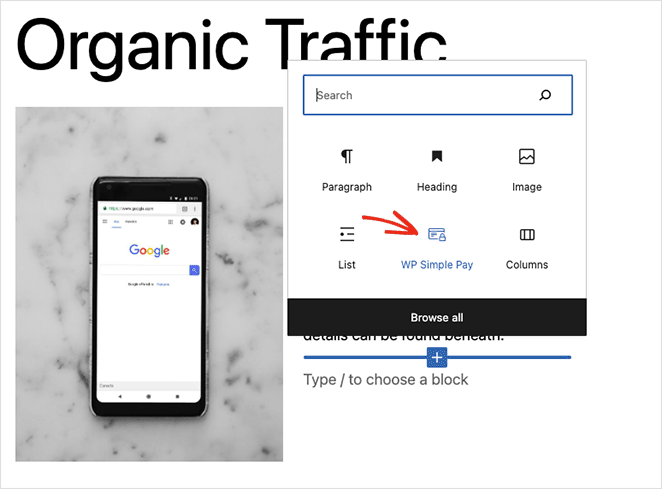
これを行うには、WordPressページを作成または編集し、コンテンツエディタでプラスボタンをクリックし、WP Simple Payブロックを選択します。
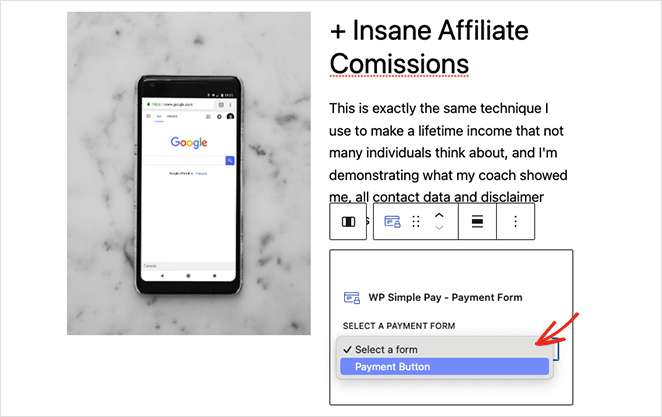
その後、ドロップダウンメニューから支払いボタンを選択できます。
After updating or publishing your payment page, you can preview your payment button and gateway in action.

After you publish the page, you’ll have a fully functional checkout landing page in WordPress, complete with a Stripe-powered payment button.
Which Method Should You Use?
If you want full design control with drag-and-drop ease, go with SeedProd. But if you just need a fast Stripe payment button without building a whole page, WP Simple Pay is a great pick.
よくある質問
Bonus Guides for eCommerce Websites
You now know how to make your landing page with payment gateway functionality.
Eコマース・ストア全体の作成に興味がある方は、こちらのチュートリアルを参考にしてください:
お読みいただきありがとうございました!ご質問やご意見がありましたら、お気軽にコメントをお寄せください。
また、YouTube、X(旧Twitter)、Facebookでも、ビジネスの発展に役立つコンテンツを配信しています。

