Want to know how to display product category in WooCommerce on your shop or homepage?
Showing categories helps organize your products, guide shoppers to the right place, and boost conversions. In this guide, I’ll show you step-by-step how to add and display WooCommerce product categories and tags, no coding needed.
Quick Summary: How to Display WooCommerce Product Categories
- Add categories to your homepage
- Show categories on the shop page
- Display categories in your sidebar
- Add categories to your menu
- Show subcategories on shop pages
ビデオ・チュートリアル
How to Add Product Categories and Tags in WooCommerce
Adding categories and tags in WooCommerce is easy. You can add new categories and tags when you create product listings or from the WooCommerce dashboard.
Adding WooCommerce Product Category
Follow these steps to add product categories or subcategories in WooCommerce:
First, go to Products » Categories from your WordPress admin area. From there, enter your product category information.
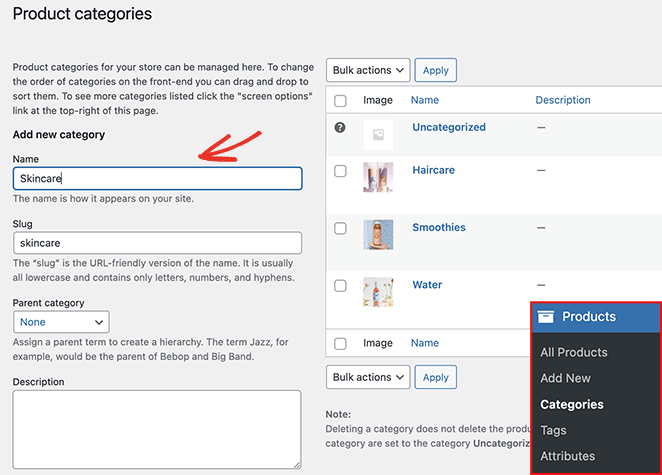
You can include:
- 名称
- スラッグ
- 親カテゴリー
- 説明
- Display type (products/subcategories/both)
- サムネイル
Click the Add new category button to add the category listing to your list.
Adding WooCommerce Product Tags
You can follow these steps to add product tags in WooCommerce:
First, go to Products » Tags from your WordPress admin area. On the next page, you can enter the following tag information:
- 名称
- スラッグ
- 説明
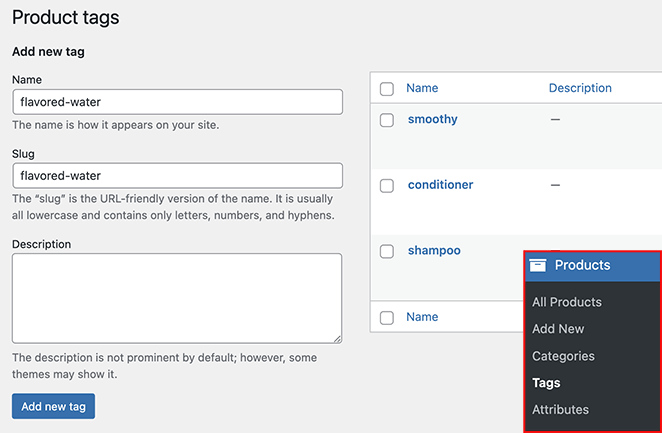
Click the Add new tag button to add the tag to your list.
How to Display Product Categories on Your WooCommerce Site
After learning how to add product categories and tags to WooCommerce, how do you display them in your online store? Follow the methods below to show WooCommerce product categories and tags on different sections of your shop.
Display WooCommerce Product Categories on Homepage
First, let’s look at how to display the category for products on your WooCommerce homepage. WooCommerce doesn’t offer an easy way to show product categories on your homepage.
The current options are:
- Use a WooCommerce compatible WordPress theme that includes WooCommerce homepage sections.
- Edit your theme and add the WooCommerce product categories shortcode.
Both options involve a lot of work, so we recommend using a website builder like SeedProd to customize your WooCommerce store.
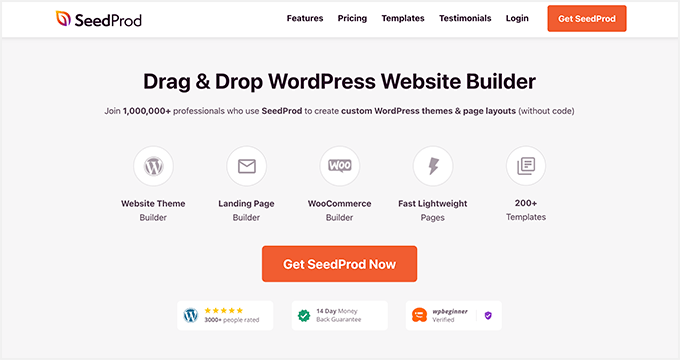
SeedProd is the best website builder for WordPress. It lets you create entire WooCommerce websites, landing pages, and custom WordPress themes without code.
You can choose from hundreds of ready-made templates and customize them easily in the drag-and-drop page builder. SeedProd offers many blocks and sections to add WooCommerce content to your site with a few clicks.
Follow these steps to use SeedProd to add product categories to your homepage.
ステップ1.SeedProdのインストールとアクティベート
To get started, download the SeedProd plugin and install and activate it on your WordPress website. You can follow this guide on installing a WordPress plugin if you need help.
Note: You will need a SeedProd Elite plan to access WooCommerce features.
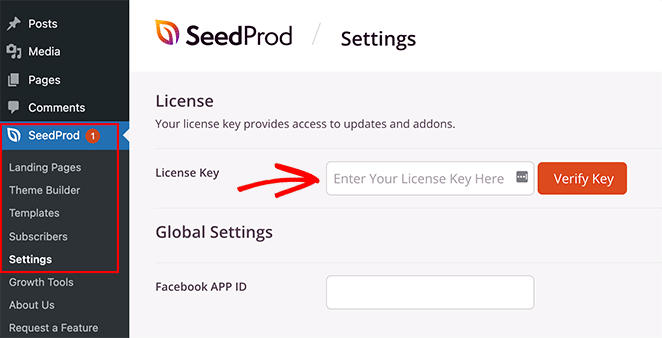
Next, go to SeedProd » Settings, enter your license key, and click Verify Key. Doing so will unlock your chosen plan’s features.
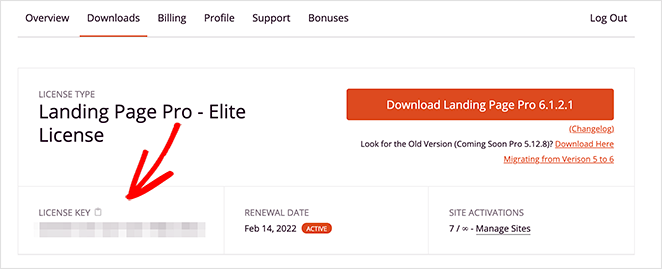
You can find your license key in your SeedProd account area under the Downloads tab.
ステップ2.カスタムWooCommerceテーマを作成する
The next step is to create a custom theme for your WooCommerce site. That will allow you to customize every part of your website with SeedProd’s powerful visual editor.
To do that, go to SeedProd » Theme Builder and click the Themes button.
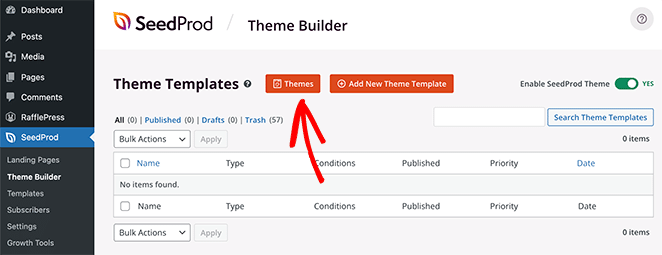
You’ll see a library of professional WordPress themes on this screen. They’re an excellent way to spin up stunning websites without hiring a developer, and you won’t need to start from scratch.
Simply hover your mouse over a theme you like and click the checkmark icon.
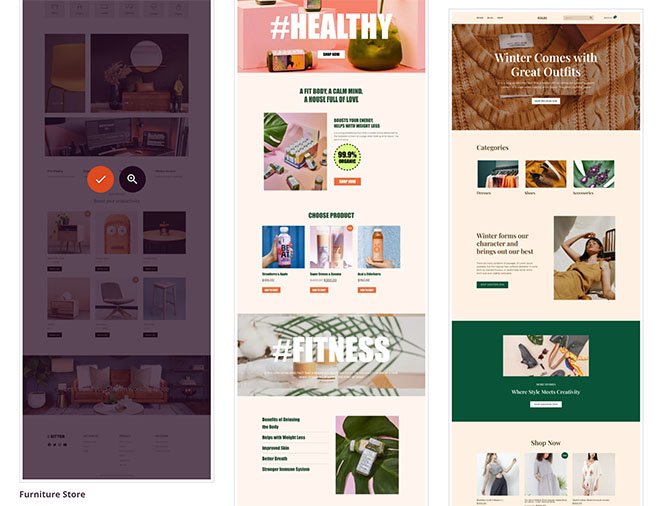
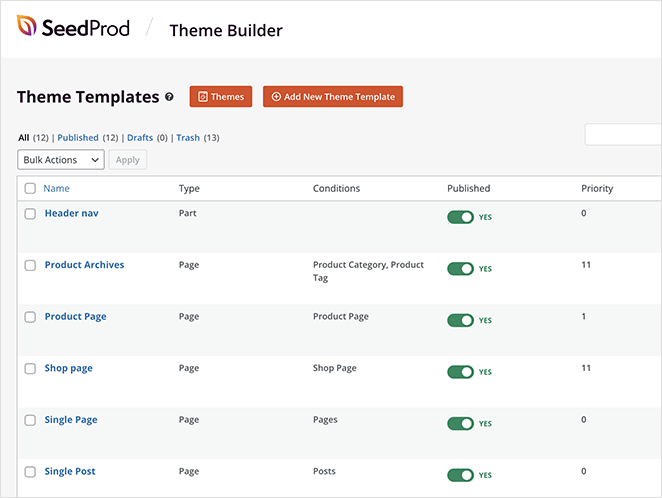
SeedProd will automatically create all the different templates for your theme and list them in the Theme Builder dashboard. From there, you can customize each template in the visual editor.
Step 3. Customize Your WooCommerce Homepage
To display categories on your WooCommerce homepage, you’ll need to edit the Homepage template. Find the template in your list and click the “Edit Design” link to open it in SeedProd’s page builder.

Customizing your homepage with SeedProd is super easy. There are blocks and sections on the left and a live preview on the right.
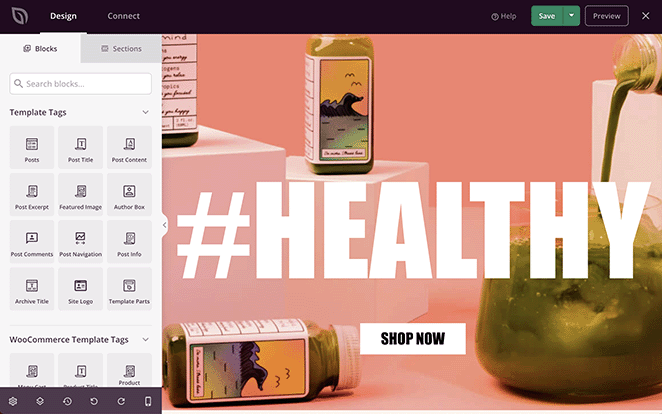
Adding a content block to your page is as simple as dragging and dropping. You can then click any element to edit its content and styling settings.
There are 2 ways to display product categories on your homepage with SeedProd:
- Display products by category
- Add the WooCommerce Product Category widget
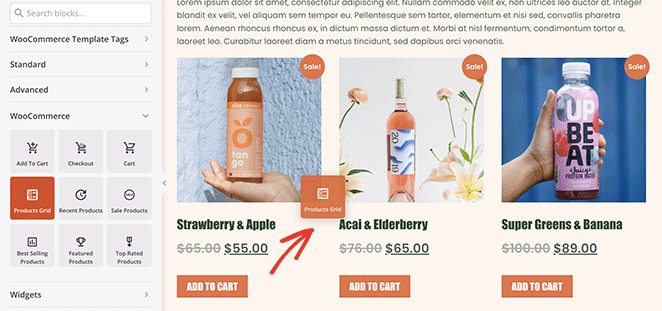
To use the first solution, find the Products Grid block in the WooCommerce blocks section. Then drag the block to a section or row on your homepage.
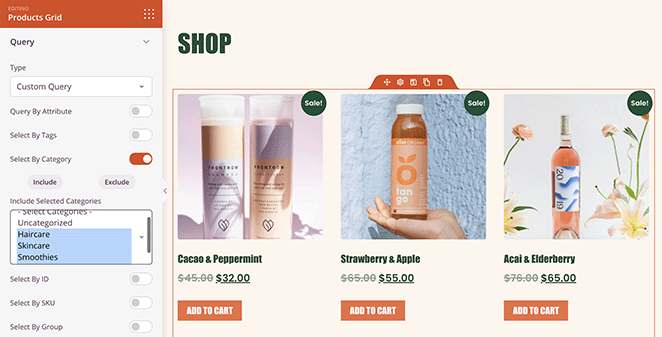
Click the product grid to open the settings panel on the left-hand side. In that panel, select “Custom Query” from the Type dropdown menu and enable the “Select By Category” toggle.
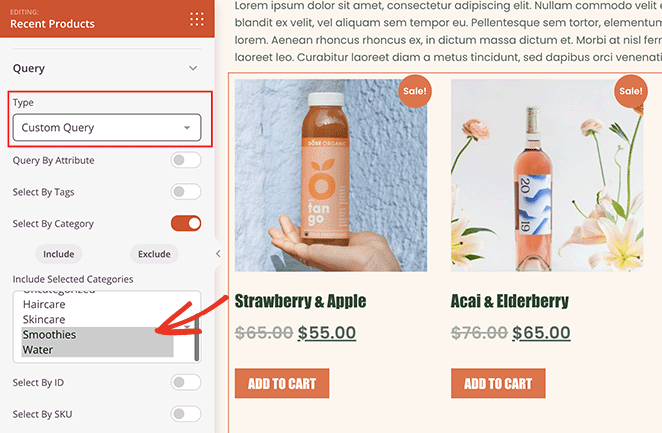
You can choose which category’s products to display in the grid. You can select multiple categories by holding down the shift button.
Now only products from your chosen categories will display on your homepage.
You can follow similar steps to only output the products by tag. Simply toggle the “Select by Tag” option and choose which tags to include from the options.
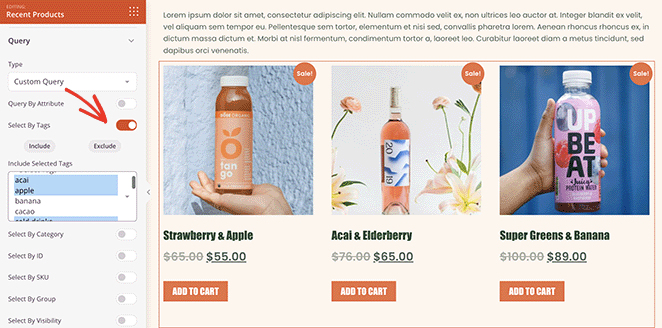
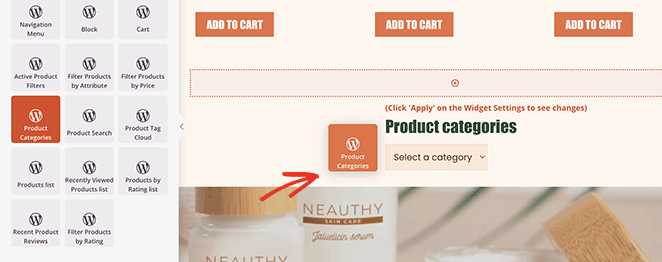
You can also use native WooCommerce widgets in SeedPod’s visual editor, including the product categories widget.
To do that, go to the Widgets block section and find the “Product Categories” widget. Next, drag it into place on your homepage design.
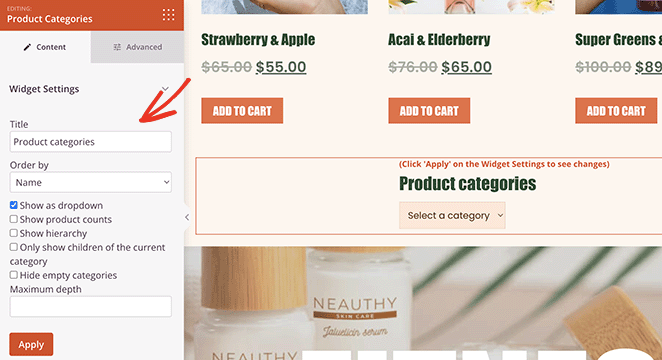
Clicking the widget allows you to:
- Choose a widget title
- Order categories by name
- Show as dropdown
- Show product counts
- Show hierarchy
- さらに
You can also control the widget styling options in the Advanced tab.
Step 4. Customize the Rest of Your WooCommerce Store
Now you can move on to editing the other templates of your WooCommerce theme.
Here are a few guides to help:
- How to customize your WordPress header
- How to create a custom single post template
- How to create a custom WooCommerce checkout page
- ワードプレスにショッピングカートを追加する方法
You can also read the rest of this article to learn how to display product categories in your sidebar and navigation menu.
Step 5. Publish Your WooCommerce theme
When you’re happy with how your theme looks, go to SeedProd » Theme Builder, and in the top-right corner, turn the Enable SeedProd Theme toggle to the “on” position.

You can now preview your homepage to see how it looks.
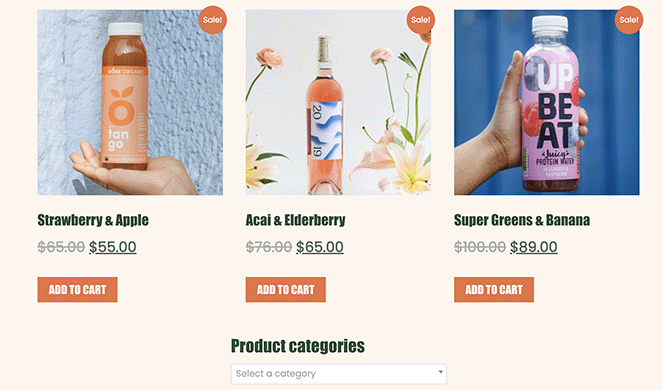
Display Categories on WooCommerce Shop Page
In addition to your homepage, you can use SeedProd to display categories on your WooCommerce shop page.
To do that, go to SeedProd » Theme Builder and click Edit Design on the “Shop Page” template.
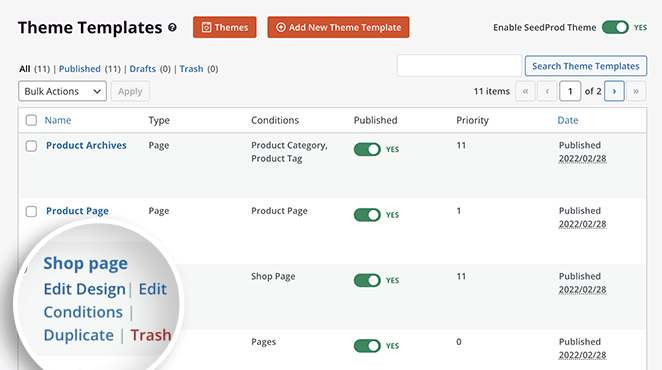
The page will now open in the visual editor, where you can customize your shop page design. Follow the steps in the previous method to display your products by category.
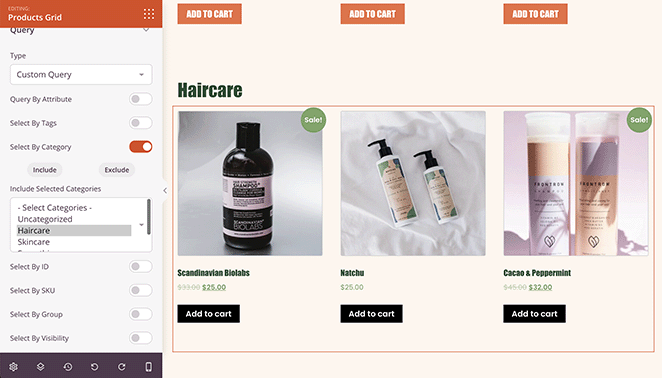
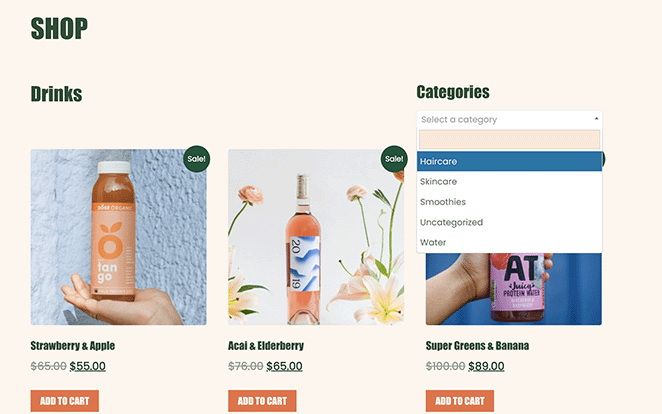
Alternatively, you can create a separate grid for each product category. For example, you can have one grid for drinks, one for haircare, etc.
You can also use the previous method to display your product categories in a list or dropdown menu on your homepage.
Simply add a new column to your shop page and drag over the “Product Categories” widget.
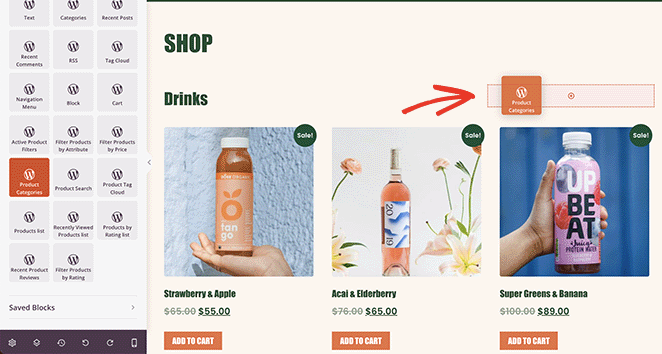
Here is an example of how that would look in real-time:
Show WooCommerce Categories on the Shop Page
Some website owners may not wish to create a new theme to display product tags and categories. In that case, you can use WooCommerce’s default shop settings for outputting the categories.
Head to Appearance » Customize, then click WooCommerce and Product Categories.
Under the heading titled “Shop page display,” select Show categories.
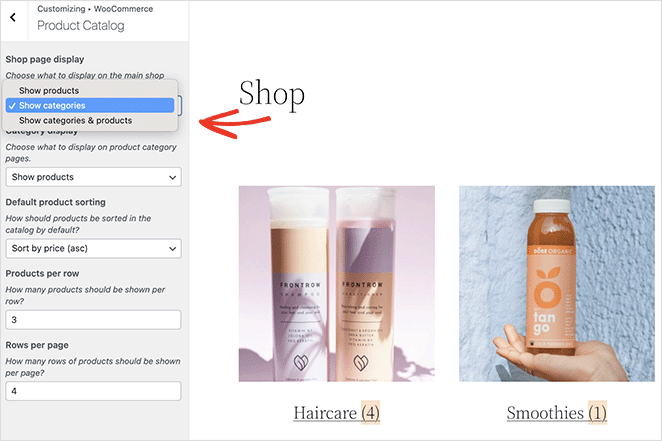
WooCommerce gives you some control over your category layout using built-in settings. You can choose to show subcategories, products, or both, depending on how you want your WooCommerce category layout to appear.
Display WooCommerce Subcategories in Shop Layout
You can also use WooCommerce’s default settings to show subcategories on the shop page.
To do that, go to Appearance » Customize » WooCommerce » Product Catalog, and under the “Category display” heading, select “Show subcategories” from the dropdown menu.
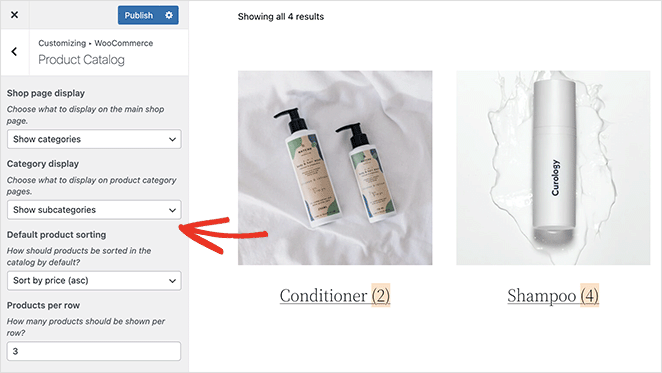
Remember to click the Publish button to save your changes.
Add WooCommerce Product Categories to Sidebar
Adding product categories to your website sidebar is an excellent way to help shoppers find what they need quickly. Luckily SeedProd lets you add custom sidebars to WordPress easily.
To customize a sidebar with SeedProd and display your product categories, go to SeedProd » Theme Builder and open the Sidebar template.

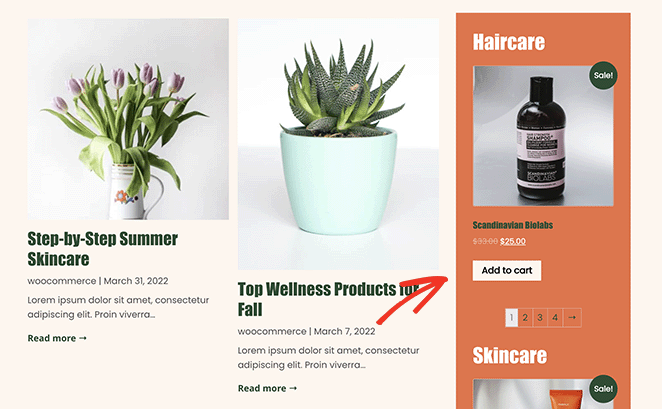
You can drag over the Product Grid block and customize the query display options to show products from one category or tag.
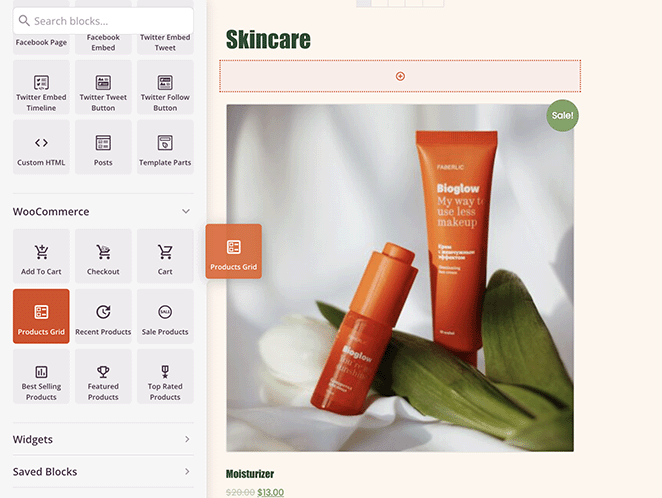
We used 2 Product Grid blocks to display 2 different categories in our blog sidebar in this example.
Display WooCommerce Product Category in Navigation Menu
Adding product categories to your WooCommerce menu is just as easy. Go to Appearance » Menus, then click the Screen Options tab in the top-right corner.
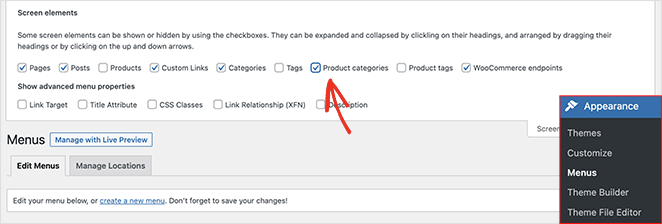
In that panel, click the “Product categories” checkbox. That will display all of your WooCommerce categories on the menu screen.
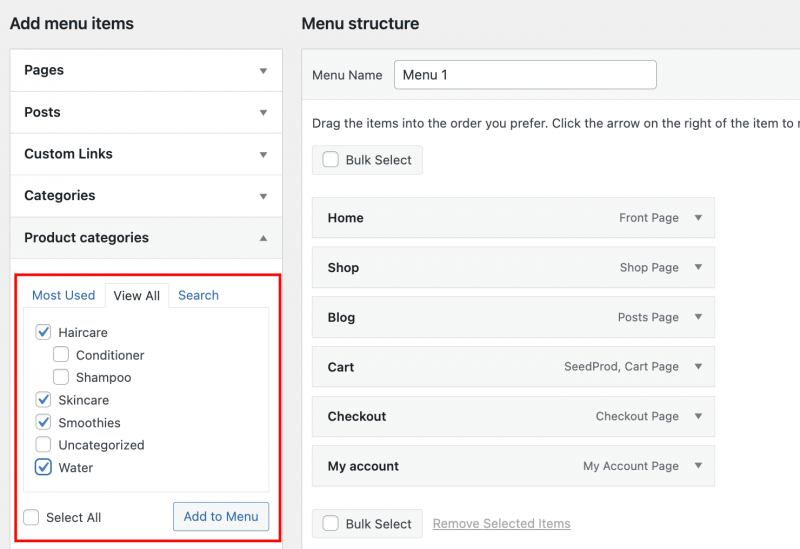
Next, open the “Product categories” tab, select all of the categories you wish to add to your menu, and click the Add to Menu button.
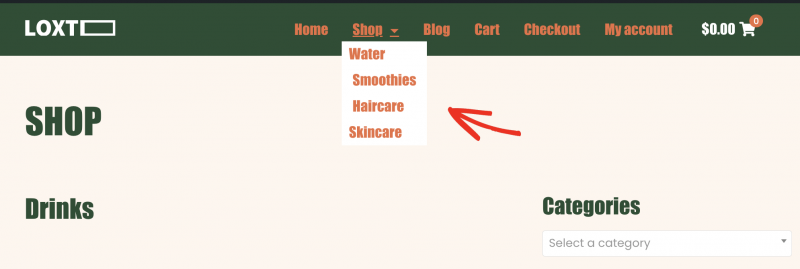
You can then drag them to change their position on the menu. For example, you can nestle them under your Shop Page to show a drop-down menu of categories.
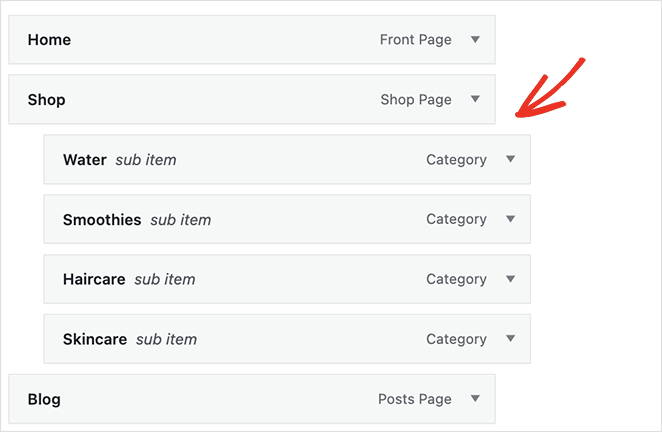
Remember to save your menu before moving on. This creates a clean WooCommerce category menu that helps shoppers quickly browse by section.
Now, you can visit your website’s homepage and see the product categories in your WooCommerce navigation menu.
More Ways to Customize WooCommerce
Displaying product categories and tags is just one of the many ways to tweak your store. For more WooCommerce customizations, please see the following guides:
- How to Customize the WooCommerce Additional Information Tab
- How to Add View Cart Button in WooCommerce
- WooCommerceでショップページのタイトルを変更する方法
- WooCommerceで美しい商品画像ギャラリーを作成する方法
- How to Add Star Rating to WooCommerce Product Pages
- How to Display Related Products in WooCommerce
- WooCommerceで商品説明を取得して表示する方法
- How to Display Featured Products in WooCommerce
- How to Hide Out of Stock Products in WooCommerce
よくある質問
I hope this guide helped you learn how to display product category in WooCommerce the easy way. Whether you’re organizing your homepage, shop page, or menu, the steps above should help you keep things clean and user-friendly.
If you’re building your store with SeedProd, you can take full control of how your products appear — no coding required.
If you’re still working on your site, you may like this guide on how to add a coming soon page to WooCommerce.
お読みいただきありがとうございました!ご質問やご意見がありましたら、お気軽にコメントをお寄せください。
また、YouTube、X(旧Twitter)、Facebookでも、ビジネスの発展に役立つコンテンツを配信しています。

