Running Facebook ads but not seeing the results you want? The problem often isn’t your ad—it’s where you send people after they click. That’s why creating a dedicated Facebook landing page in WordPress is the easiest way to turn ad clicks into signups and sales.
In this step-by-step guide, I’ll show you how to build a Facebook landing page that matches your ad design, loads fast on mobile, and gives visitors one clear action to take.
By the end, you’ll have a fully published page you can connect to your campaign, so every Facebook ad dollar works harder for you.
Quick steps to create a Facebook landing page in WordPress:
What Is a Facebook Landing Page?
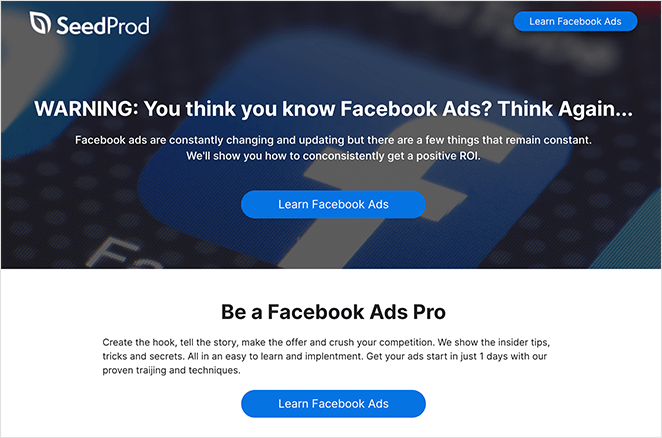
A Facebook landing page is a dedicated page on your website designed to convert visitors who click on your Facebook ads or posts. Unlike a homepage, it removes distractions and focuses on one clear action—such as signing up, claiming an offer, or starting a free trial.
These pages work hand-in-hand with your PPC ad campaigns by matching the message and visuals in your Facebook ads. That consistency builds trust and makes people far more likely to convert.
For example, a regular business page might talk broadly about your brand. A Facebook ad landing page, however, is laser-focused on one offer created just for ad traffic.
Take this example from Craftsy. Their Facebook ad uses a bold call-to-action (CTA) button that leads directly to a coupon and product details. It makes the journey from ad click to conversion seamless.
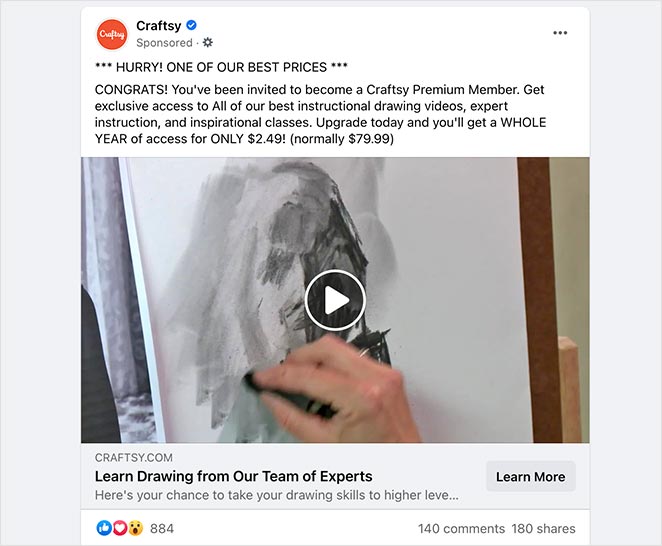
Clicking that ad takes users to a dedicated landing page with the same design style, consistent messaging, and a clear offer, which helps boost conversions.

Why Should I Make a Facebook Landing Page?
Because sending Facebook ad traffic to your homepage wastes clicks. A dedicated Facebook landing page keeps visitors focused on one action, which means higher conversions and better ROI.
- No homepage distractions—just one clear offer
- Optimized for mobile users who make up most Facebook traffic
- Easier to track and measure ad campaign results
- Consistent design and messaging builds trust
Bottom line: A Facebook landing page turns casual scrollers into leads and customers.
How to Create a Facebook Landing Page in WordPress
Building a Facebook landing page in WordPress doesn’t have to be complicated. With SeedProd, you can design and publish one in under 30 minutes—no coding or extra plugins required.
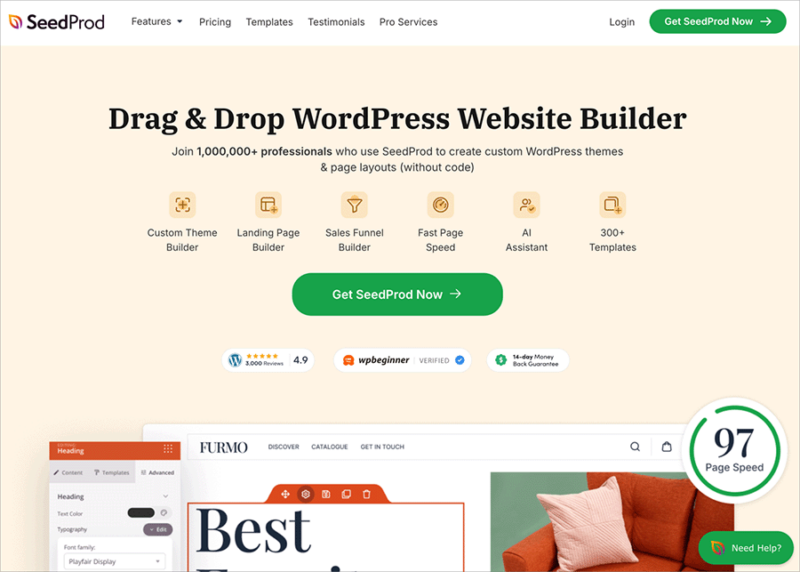
SeedProd is a drag-and-drop WordPress landing page builder with 300+ templates you can customize for Facebook ads. It’s the same tool I use to create high-converting pages, because it’s fast, mobile-friendly, and built for marketers—not developers.
Beyond landing pages, SeedProd can also handle coming soon notices, maintenance pages, custom logins, and 404s. But for this guide, we’ll focus on using it to build your Facebook landing page step-by-step.
Step 1. Install and Activate SeedProd
To start, go to the SeedProd pricing page, download the plugin, and install it on your WordPress site.
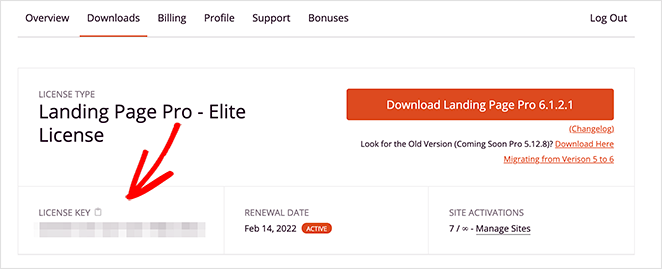
Once activated, you’ll see a welcome screen asking for your license key.
Copy your license key from your SeedProd account, paste it into the field, and click Verify Key. After that, click Create Your First Page to open the landing page dashboard.
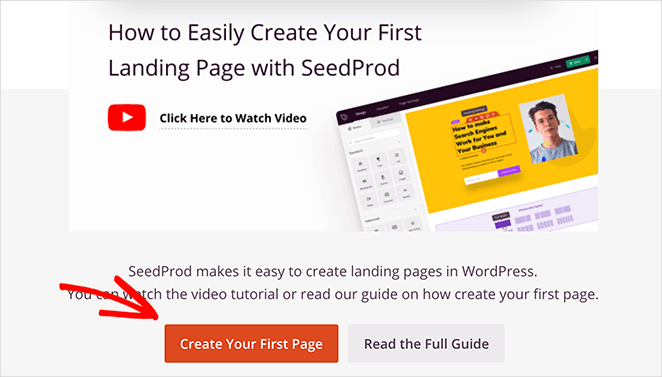
This is where you’ll manage all your landing pages. SeedProd also lets you set global page modes (like Coming Soon or Maintenance), but for now we’ll focus on creating your Facebook landing page.
Step 2. Create a New WordPress Landing Page
To start creating your landing page, click the Create New Landing Page button under the Landing Pages section.

Clicking the button directs you to SeedProd’s selection of versatile landing page template, including options ideal for a Facebook landing page.
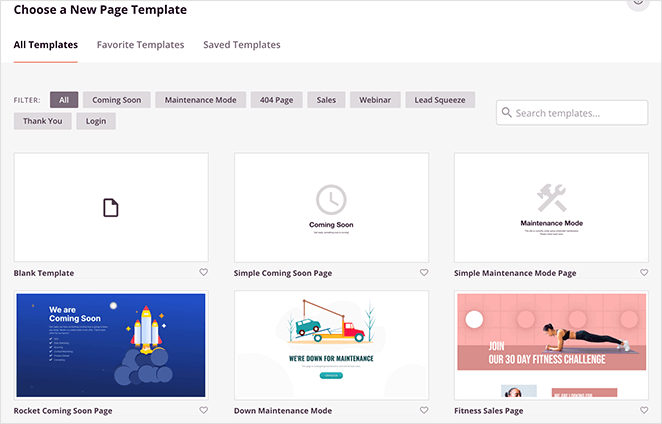
You can filter templates by clicking the tabs along the top of the screen.
While SeedProd may not have any specific Facebook landing page templates, you can customize any design to match the look you want to achieve.
For this guide, we’ll use the Masterclass 2 Sales Page, which you can find under the Sales tab. Hover your mouse over the template thumbnail and click the tick icon to choose a template.
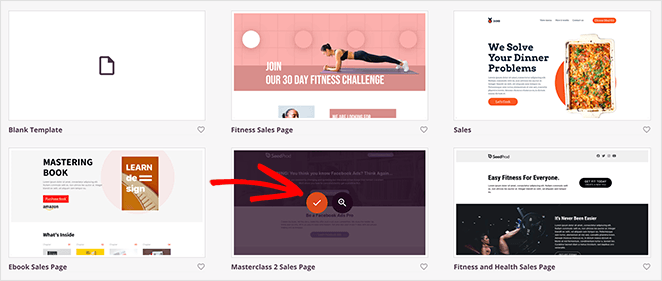
After, you’ll see a popup asking you to enter your landing page name and URL. Once you enter this information, click the Save and Start Editing the Page button.
Step 3. Customize Your Landing Page for Facebook
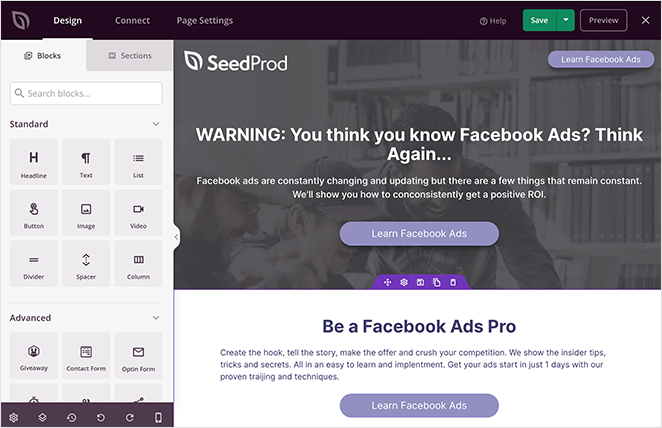
Once you launch a template, it opens in SeedProd’s drag-and-drop builder. On the left are your blocks and sections. On the right is the live preview where you can click and edit anything instantly.
What to Include on Your Facebook Landing Page
Your landing page should make a strong first impression and push visitors toward one action. Include:
- A short brand or offer introduction
- A clear call-to-action (sign up, claim, buy)
- Social proof like reviews or testimonials
- Key product or service benefits
- Easy contact info or links to your socials
Using SeedProd Blocks & Sections
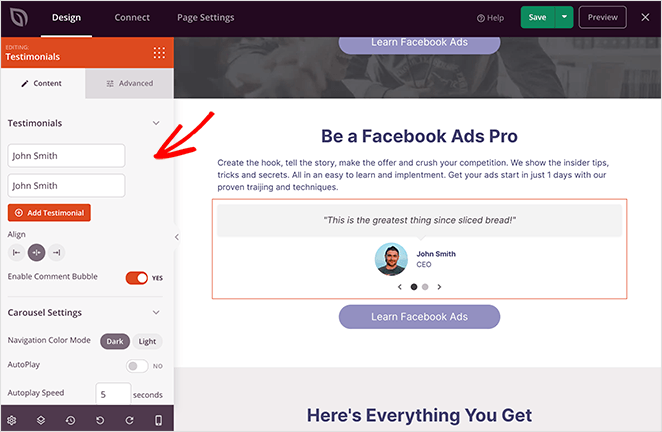
SeedProd includes ready-made blocks for buttons, forms, testimonials, and more. You can also drop in full sections like headers, heroes, CTAs, or FAQs with one click.
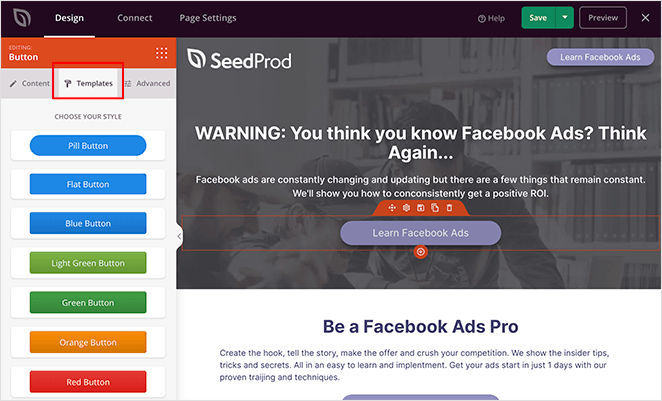
Want to grow your list? Use the Optin Form block. Need trust signals? Add a testimonial section in seconds.
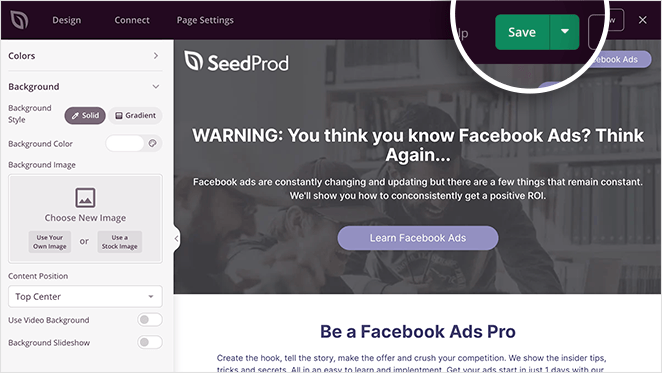
When you’re happy with the design, click the green Save button in the top-right corner.
Step 4. Configure Your Landing Page Settings
If part of your marketing strategy is to collect email addresses, you’ll need to link your landing page to your email marketing and automation service. This makes it easier to manage all the new leads joining your email list.
Fortunately, integrating your email marketing provider with SeedProd is straightforward. Just click the Connect tab at the top of your screen.
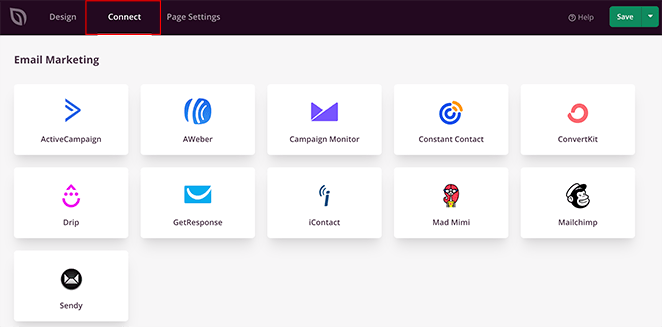
On this page, you’ll see all the popular email marketing services that integrate with SeedProd. So go ahead and choose your preferred service, click Connect and follow the steps to authorize your account.
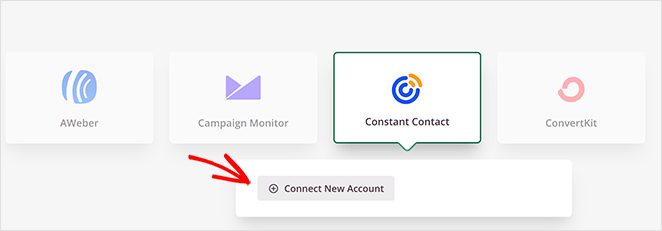
You can find instructions for each email marketing provider in SeedProd’s email integration documentation.
Besides connecting your email provider, you can also collect emails right inside SeedProd. The details of anyone who signs up on your landing page are shown in SeedProd’s subscriber overview.
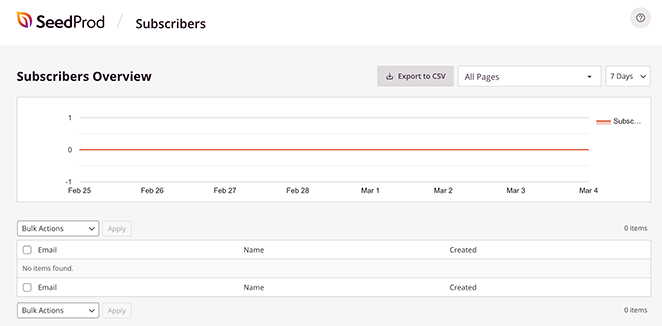
You can view this dashboard by navigating to SeedProd » Subscribers from your WordPress admin area.
After connecting your email service to SeedProd, there are a few more settings to configure before publishing your page. To find them, click the Page Settings tab along the top of your screen.

On this page, you can edit the following settings:
- General – Change your page name and URL, publish or set your page to draft, and put your landing page in isolation mode.
- SEO – Click to see the SEO settings of your landing page in a WordPress SEO plugin like All in One SEO.
- Analytics – View the Google Analytics metrics of your landing page in an Analytics plugin like MonsterInsights.
- Scripts – Enter crucial scripts to your landing pages, such as your Facebook tracking pixel and retargeting scripts.
- Custom Domain – Give your landing page a different domain name from your existing website.
You can learn more about each of these in the Page Settings documentation.
Step 5. Publish Your Landing Page in WordPress
Before publishing, ensure your Facebook landing page is mobile-friendly. If your landing page content doesn’t show properly on mobile screens, you could lose potential leads.
The good news is that you can preview your landing page on mobile easily in SeedProd.
From the Design screen, click the mobile icon at the bottom of the page builder.
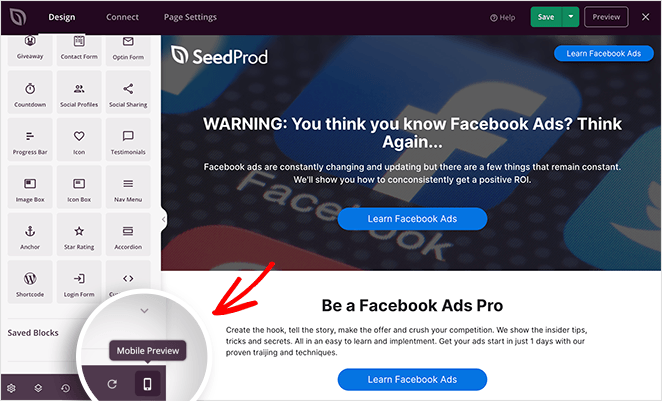
This opens your landing page in a mobile preview so you can check that every element displays correctly.
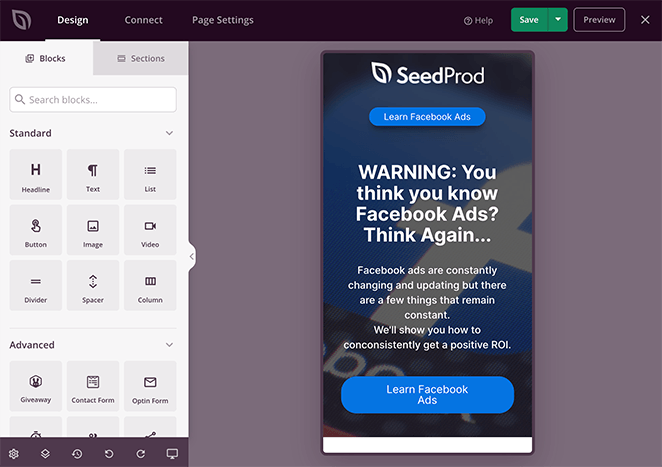
Scroll through your mobile preview and click to edit any page block that doesn’t look right. When you’re happy with how your page looks, you’re ready to make it live.
To do that, click the down arrow next to the green Save button and click Publish.
Setting Up Redirects for Your Facebook Landing Page
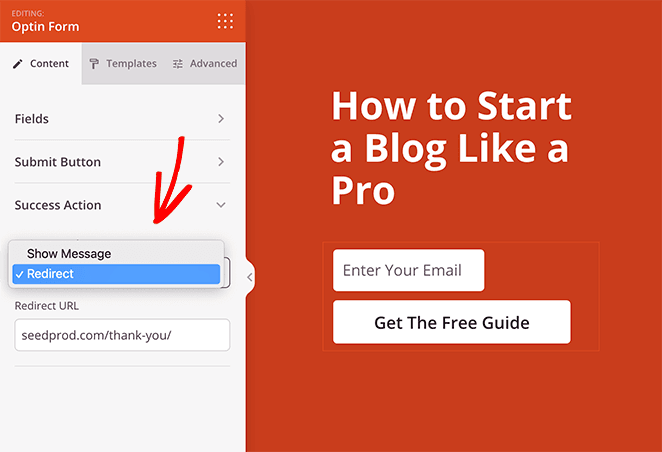
Redirects let you control where visitors go after they complete an action on your landing page, uch as showing a thank-you page, sending them to a product offer, or moving them into a sales funnel.
In SeedProd, setting up a redirect is simple:
- Edit your landing page and select the action element (for example, the opt-in form block).
- Open the block settings, expand Success Action, and choose Redirect.
- Enter the URL you want users to visit after they complete the form.
Inspiring Facebook Landing Page Examples
Looking for inspiration? Here are three Facebook landing page examples that stand out for their design, consistency, and conversion strategy.
Sakuraco
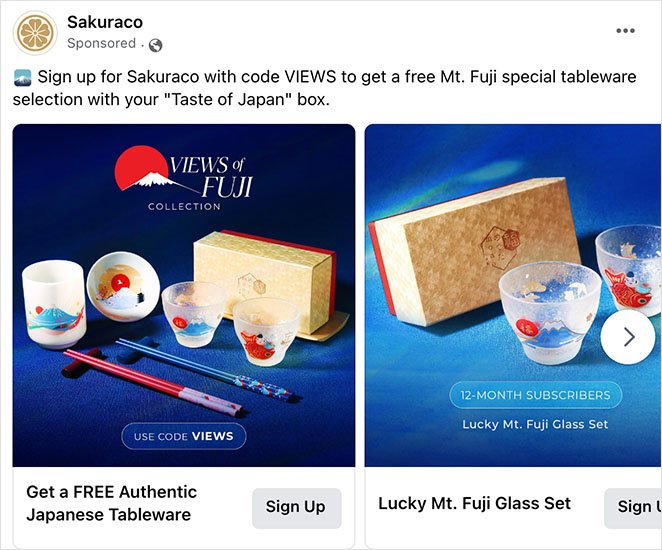
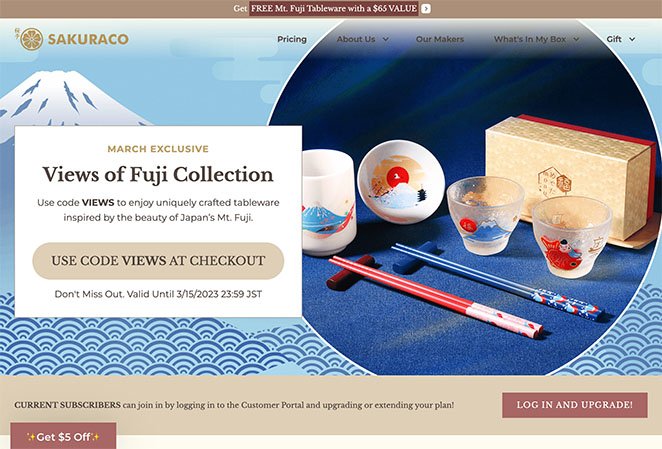
Sakuraco keeps ad and landing page design perfectly aligned. The consistent visuals reassure visitors they’re in the right place and reduce bounce.
To seal the deal, the page includes a discount code for a free gift—an instant incentive to convert.
Craft Gin Club

Craft Gin Club uses video to capture attention in the ad, then continues the story on a bold, simple landing page.
Offering 50% off the first box is a strong conversion hook, while clear buttons make it easy for users to claim the deal.

Smol

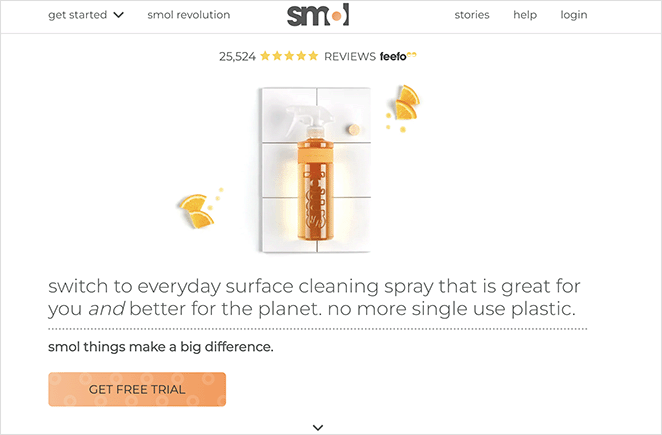
Smol relies on user-generated content and testimonials to build trust before the click. The landing page doubles down with star ratings and a free trial offer—making it almost risk-free for new customers to try.
Facebook Landing Page FAQs
You’ve now seen how to create a Facebook landing page in WordPress step-by-step. The key is keeping your page simple, consistent with your ad, and focused on one clear action. That’s what turns clicks into real customers.
With SeedProd, you don’t need coding skills or multiple plugins. You can design a professional, mobile-friendly Facebook landing page in minutes, connect it to your campaign, and start getting more leads from every ad you run.
You may also find the following guides helpful:
- How to Add a Facebook Page to WordPress
- How to Embed Facebook Videos in WordPress
- How to Add a Facebook Like Button to Your WordPress Site
- How to Embed Facebook Events on WordPress
Thanks for reading! We’d love to hear your thoughts, so please feel free to join the conversation on YouTube, X and Facebook for more helpful advice and content to grow your business.

