I started selling Canva templates after getting the same client request over and over: “Can you make me something I can reuse?” Turns out, people are happy to pay for done-for-you designs, especially when they don’t have time to learn design tools.
In this guide, I’ll show you exactly how I sell Canva templates in WordPress to earn passive income. You’ll learn how to create templates, set up your site, and add buy buttons, no coding needed.
Quick Answer:
To sell Canva templates in WordPress, create your design in Canva, save the share link, and upload it using a plugin like Easy Digital Downloads. Add a title, price, and image, then publish your product page. Visitors can pay and download it instantly.
Table of Contents
What Is Canva?
Canva is a drag-and-drop graphic design tool that makes it easy for anyone to create social media posts, flyers, resumes, and more, without needing Photoshop skills.
It’s especially popular with bloggers, content creators, and small business owners who need quick designs.
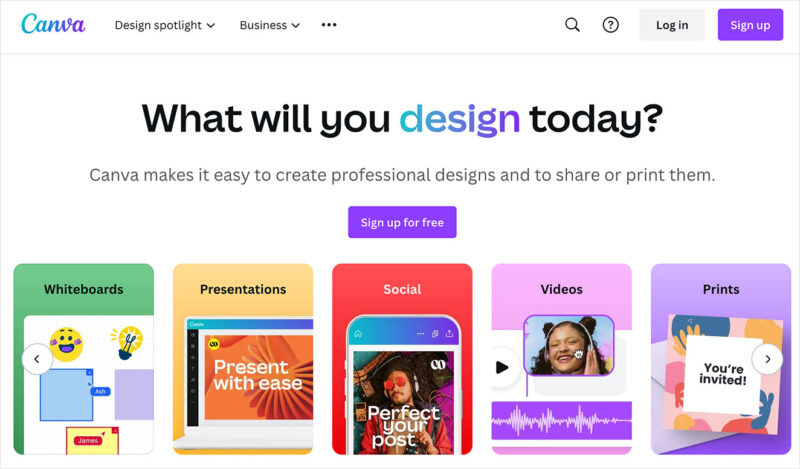
You can use Canva’s free account. However, Canva Pro accounts offer more advanced features like royalty-free stock photos, videos, fonts, and templates for $14.99 per month.
Why Sell Canva Templates?
Here’s why Canva templates are worth selling:
- Low startup cost: You only need a Canva account and a WordPress site.
- Passive income: Once listed, your templates can keep selling without extra work.
- Built-in demand: Canva users constantly need new, quality templates.
- Quick to create: You can turn one idea into a bundle and sell it at a premium.
I’ve used this exact setup to create recurring income from designs I only made once.
What Templates Can You Make and Sell in Canva?
You can sell almost any type of digital design you can make in Canva. Start with what your audience needs most, then make it easy for them to reuse your designs.
Here are high-demand Canva template types:
- Instagram posts, stories, thumbnails
- Blog graphics like featured images and infographics
- Printables: planners, workbooks, flyers
- Resumes, menus, media kits
- Website wireframes, pitch decks, and more
💡 Check marketplaces like Etsy to see which template styles are selling well.
Before we dive into the steps, get started with a Canva account. We’ll then guide you through creating and selling your templates in WordPress.
How to Create and Sell Canva Templates in WordPress
If you don’t already have one, you’ll need a WordPress website first. This involves choosing a web hosting provider, a domain name, installing WordPress, and customizing your website.
Don’t worry if this sounds overwhelming. You can follow our step-by-step guide on how to create a WordPress website, where we explain it all.
Once your website is ready, you can move on to the first step, creating templates to sell on your site.
Step 1. Create Canva Templates to Sell
To get started, go to the Canva website and log into your account. Then, from the homepage, click the Templates tab on the left-hand sidebar.
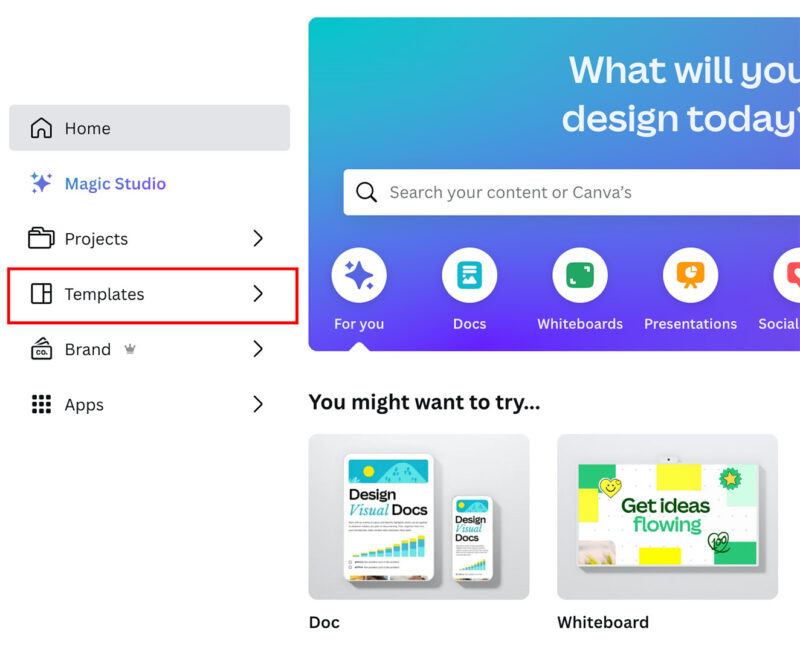
Now, you can look through the templates and find one that fits your initial idea. For this guide, we’ll use the Instagram post template, which you can find under All Templates » Social Media » Instagram Posts.
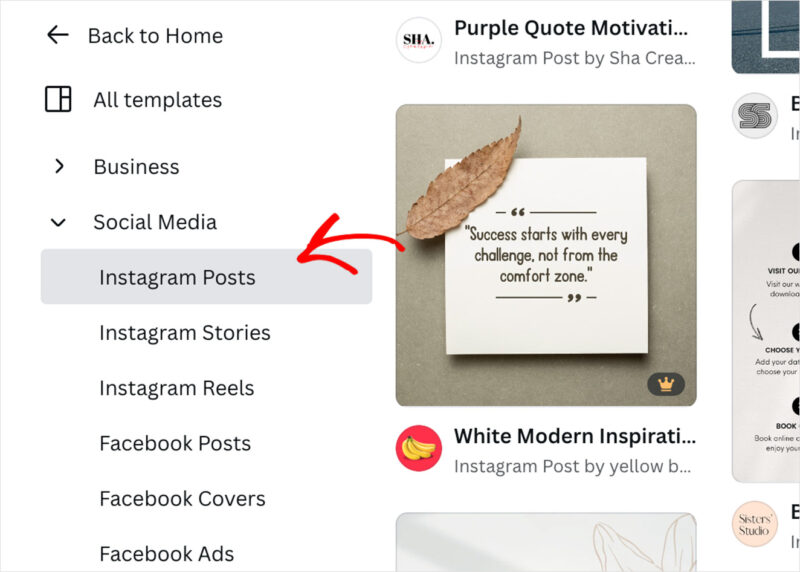
To choose a template, click it and select the Customize this template button in the popup that appears.

You’ll now see the Canva creator, which lets you customize the template any way you like with drag-and-drop.
On the left are various elements, including shapes, text, uploads, and AI features to generate text automatically.
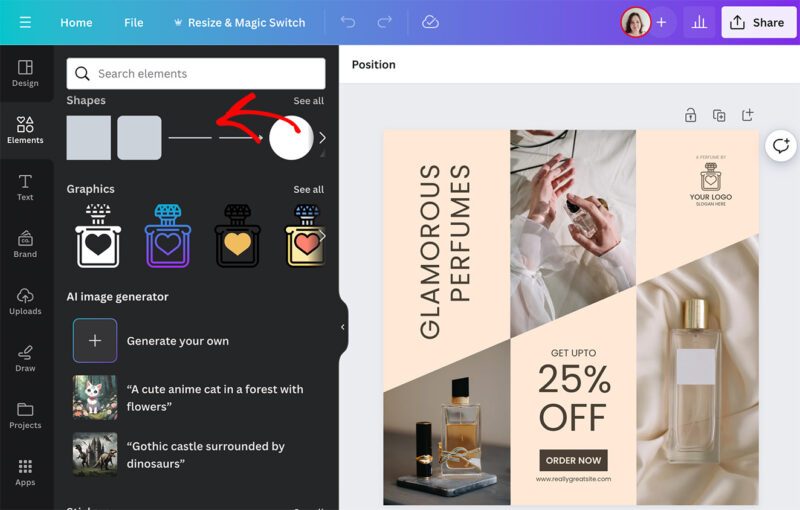
The editor is on the right, where you can click any part of your template to customize it.
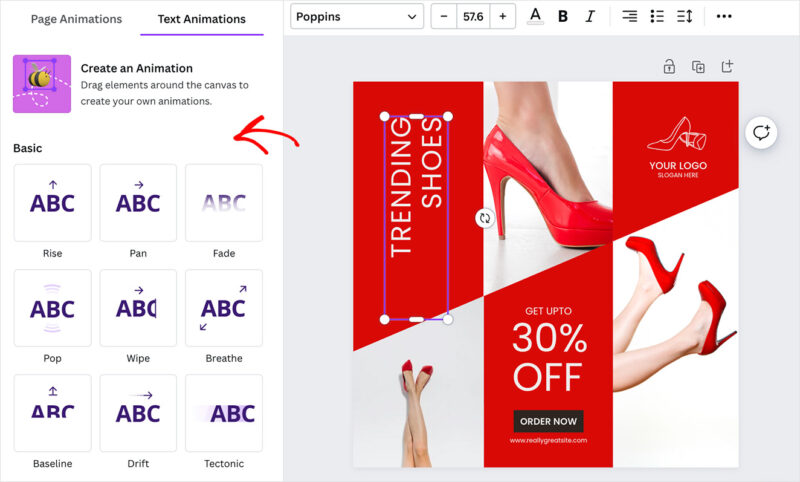
Some customizations involve changing colors and fonts and deleting and duplicating elements. You can even animate parts of your design to make it more eye-catching.
One neat thing about Canva is that you can easily add multiple pages. This allows you to create several templates at once and bundle them as a package to sell on your website.
For example, you could design a bundle of social media templates and sell them for a higher price than a single template.
To do this, click the + Add Page button beneath your design.

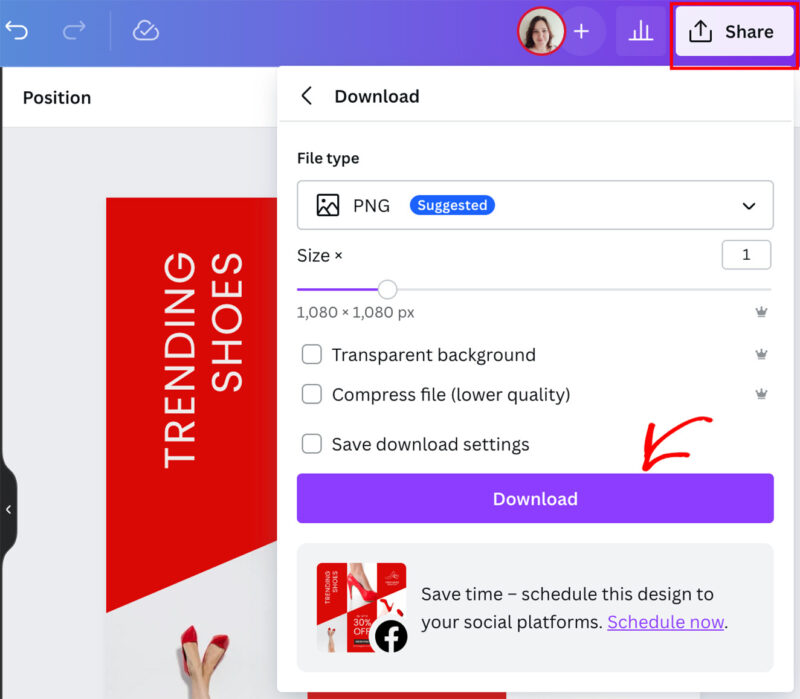
When you’ve finished creating your templates, click the Share button in the top-right corner of your screen. In this panel, you can set your template’s size and file type, then click the Download button to save it to your computer.
Step 2. Install Easy Digital Downloads
You’re now ready to add your template to your online store so you can sell it. We recommend Easy Digital Downloads because it’s one of the easiest ways to sell digital products on a WordPress site.
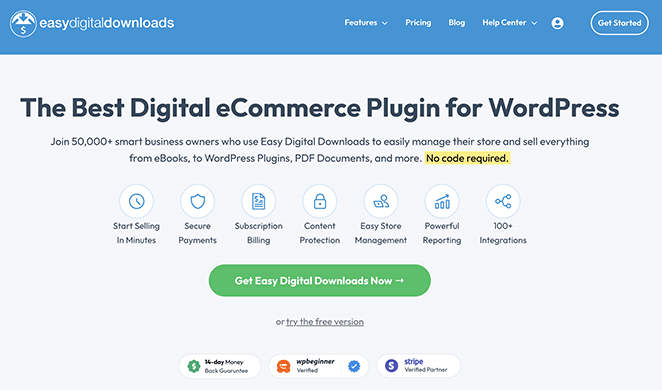
You can use the free version of Easy Digital Downloads for this. However, the Pro version is excellent for extra features, such as more payment gateways, recommended products, and multi-currency add-ons.
After installing and activating EDD’s eCommerce plugin, you’ll see a setup wizard that walks you through personalizing the plugin for your needs. All you need to do is go through each screen and fill in the information.
Step 3. Set Up Your Business Information
Once the setup wizard is complete, navigate to Downloads » Settings and select Store under the General tab. This is where you can set up your online business details, including its location.
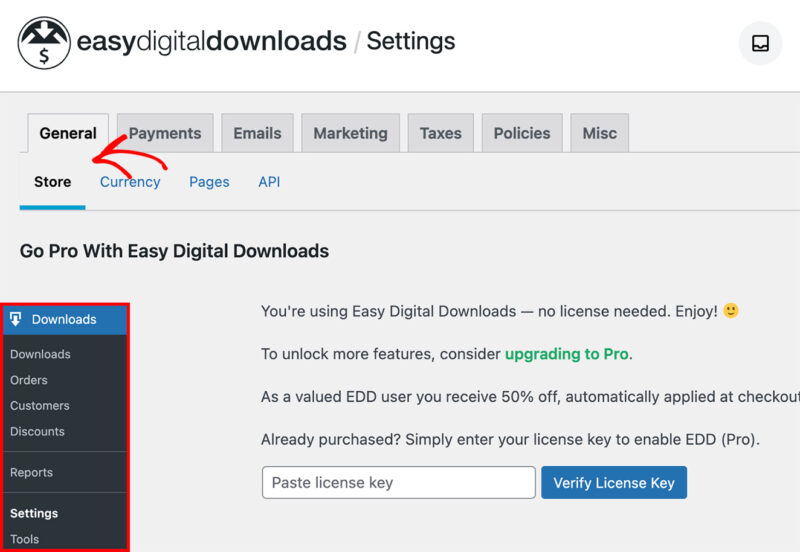
It’s important to fill this out, even if you’re not selling physical products. That’s because the plugin uses a customer’s country, state, and province to autofill their details during purchase to calculate sales tax.
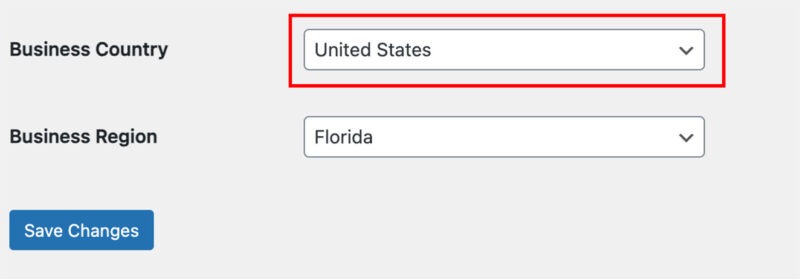
Scroll to the bottom of the page and enter your business country and region before clicking Save Changes.
Step 4. Connect a Payment Gateway
Next, you need to set up a way to accept payments for your templates.
Go to the Payments tab and click the General option to do this. Here, tick the boxes beside each payment option you plan to accept.
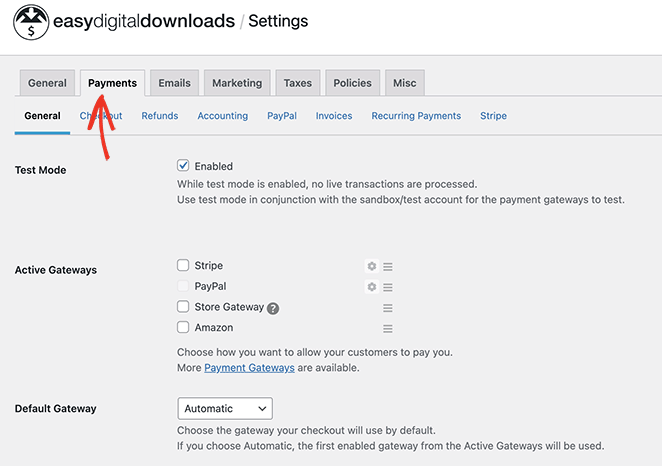
You can choose Stripe, PayPal, and Amazon out-of-the-box with the free version of EDD. This allows customers to use their credit cards and Amazon accounts to check out.
With EDD add-ons, however, you can connect other options, including Braintree and Authorize.net.
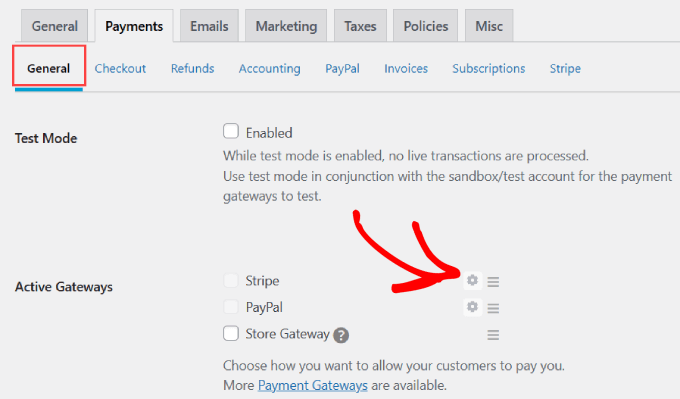
To configure your payment options, click the gear icon, then follow the steps to authorize and connect your account.
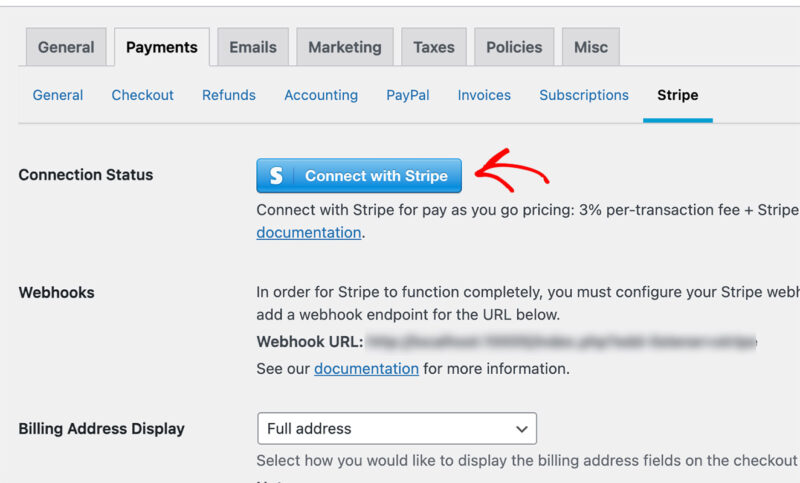
For example, with the Stripe option, you’ll have to click the Connect with Stripe button and log into your Stripe account.
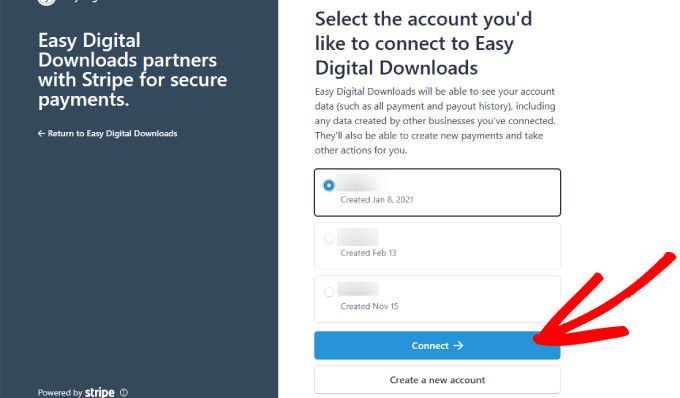
You’ll see the accounts connected to your email address in a list, so choose the account you want to link and click the Connect button.
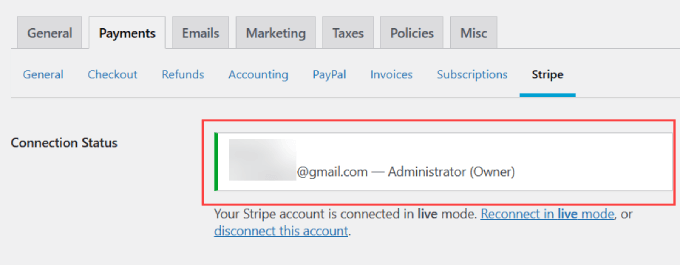
Once connected, you’ll return to your WordPress dashboard, where you should see a positive connection status.
Step 5. Add Your Canva Template as a Download
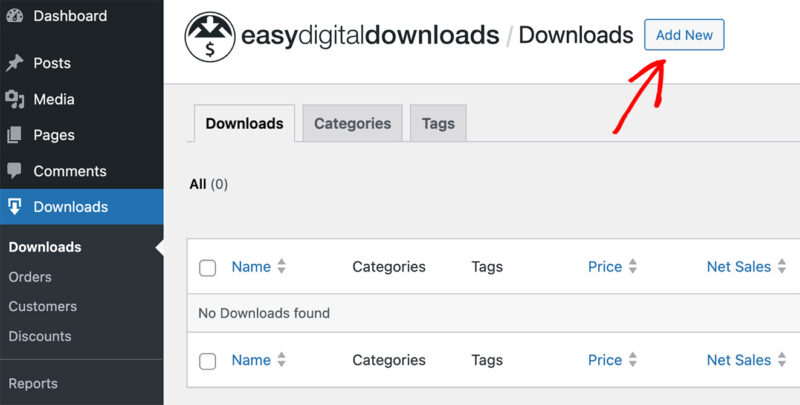
With the settings configured, you can upload your Canva template to WordPress. To do this, navigate to Downloads » Downloads in your WordPress admin and click the Add New button.
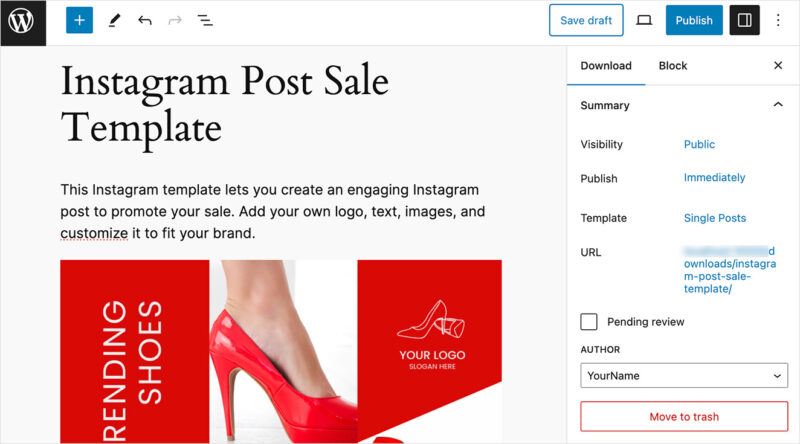
On the following screen, give your template a name, then write a description explaining what it includes, along with an image.
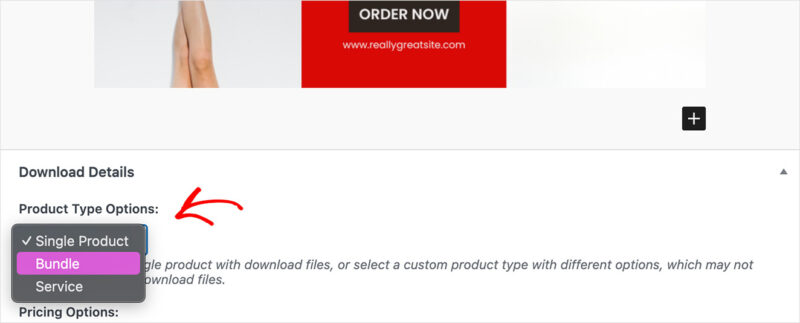
Next, scroll to the Download section and choose a product type from the dropdown menu, such as a single product, bundle, or service.
You can then enter a price for your template.

After setting the price, go to the Download Files section and click the link icon to upload your Canva template.
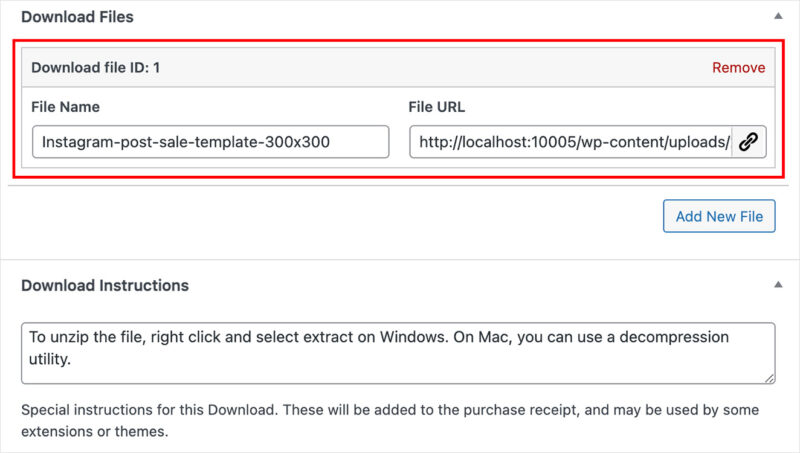
It’s also a good idea to enter any special instructions you may have for users, such as how to unzip a bundle. You can add this information in the Download Instructions box.
Now, let’s look at the right-hand panel. Here, you can set the download category and tags and add a featured image to encourage users to buy.
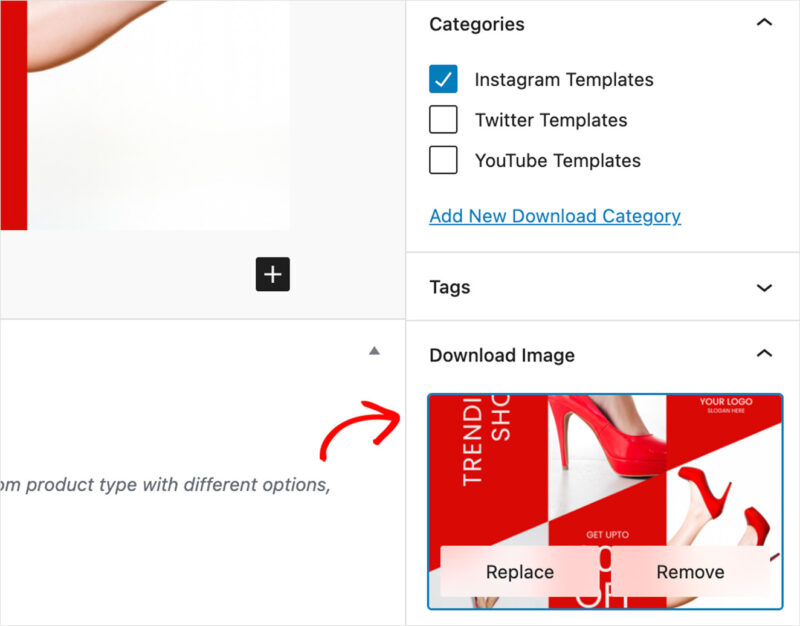
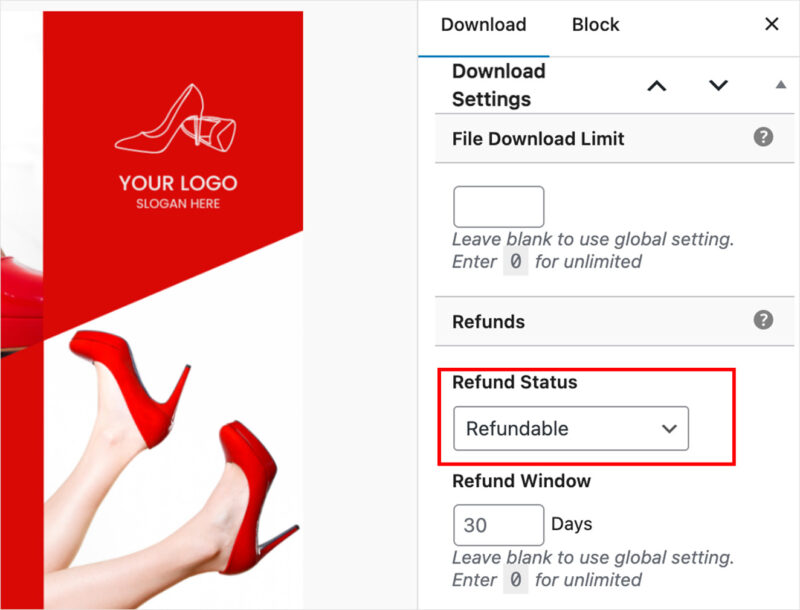
There’s also the option to limit the number of downloads and set the product’s refund status.
When you’re happy with your template listing details, you can preview it and click the Publish button.
Here is an example of how our product page looks on our test website:
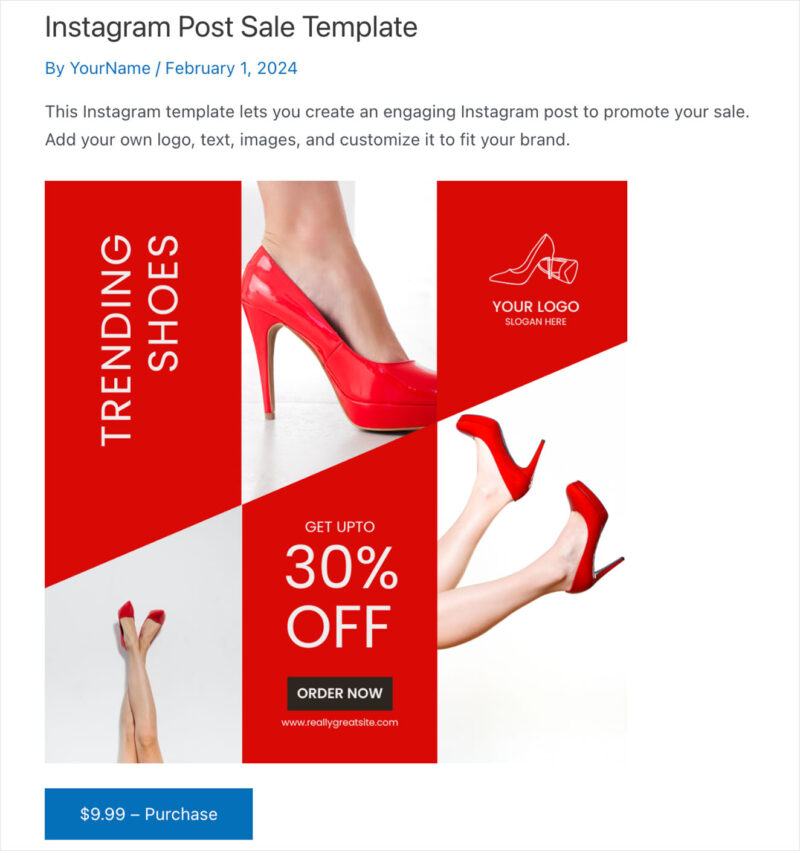
Test Your Download Works
Before you continue, it’s important to see if your download works as expected. This means reviewing your checkout process and ensuring customers can download your template.
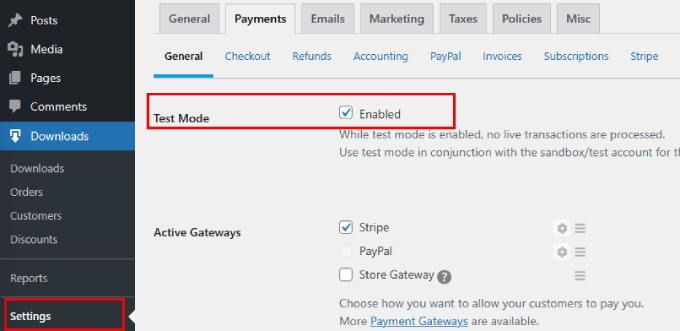
You can do this by enabling the Test Mode on the EDD Payments settings page.
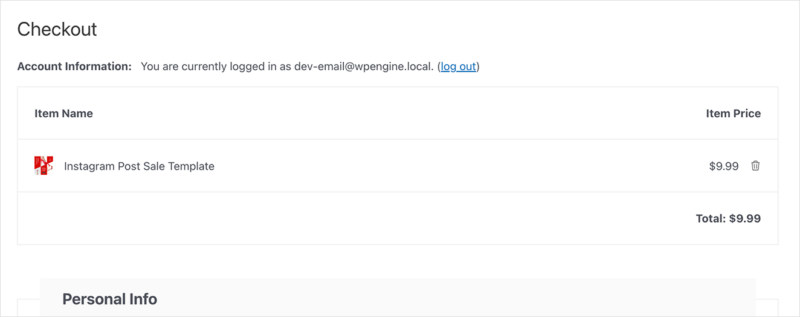
From there, add the product to your cart, enter your payment details (you won’t be charged), and complete the purchase.
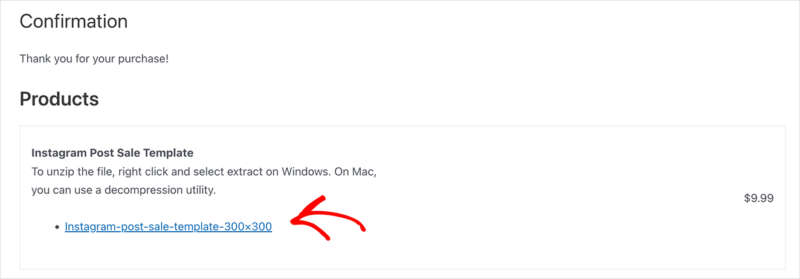
On the following screen, you should see details of the purchase along with a template link to download it.
If everything works as expected, you can go ahead and turn off test mode.
Step 6. Customize The Product Page (Optional)
Now, let’s look at an optional step to enhance the download page’s design.
Depending on your WordPress theme, your product page can look simple and uninspiring. You might want to add more features to spread the word and encourage more people to buy.
However, adding those features can be time-consuming and challenging if you don’t have the technical know-how. That’s why we suggest using a WordPress page builder like SeedProd.

It lets you build and customize any page without writing code. You can even create a WordPress theme from scratch without breaking a sweat.
Even better, SeedProd integrates seamlessly with WooCommerce and Easy Digital Downloads. As a result, you can customize your product pages, add EDD buy now buttons, and create custom checkout pages.
Here’s an example of a product page we made for our Canva template using SeedProd.
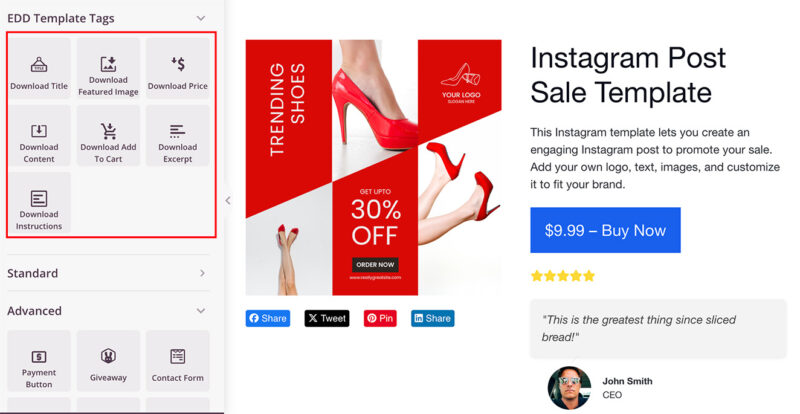
We simply used the drag-and-drop builder to add a product image, description, and an add to cart button so shoppers can purchase with a few clicks.
On top of that, we added social sharing buttons to raise brand awareness and customer testimonials to boost trust.
Essentially, you can build a complete digital downloads store with EDD and SeedProd.
For all the steps, please see our guide on how to sell digital downloads in WordPress.
Step 7. Promote Your Canva Templates
Creating and listing your Canva templates on WordPress is only half the job. The other half lies in promoting your products.
Here are the best ways to get traffic to your Canva template store:
- Post on social media: Share examples on Pinterest, Instagram, and Facebook groups.
- Build an email list: Send new product announcements and bundle deals to subscribers.
- Improve SEO: Use keywords like “Instagram templates for realtors” or “fitness planner Canva template.”
- Run bundle promotions: Offer limited-time discounts or upsell packs.

🎯 Tip: The more people see your templates in use, the more sales you’ll get, so encourage buyers to tag you.
Get Started Selling Canva Templates
We hope this guide has helped you learn how to sell Canva templates in WordPress.
For more tricks to grow your business, please see our recommended tutorials:
- How to Sell Videos Online in WordPress
- How to Sell Workout Programs Online
- Best Web Analytics Tools for Your Website
Thanks for reading! We’d love to hear your thoughts, so please feel free to join the conversation on YouTube, X and Facebook for more helpful advice and content to grow your business.

