
Do you want to change the WordPress admin login URL without a plugin?
Changing your WordPress login URL is an excellent way to protect your WordPress website from brute-force attacks. But figuring out how to do that without hiring a developer is challenging.
That’s why in this article, we’ll share 2 ways to change your login URL in WordPress step by step.
Table of Contents
Why Change Your WordPress Login URL?
WordPress is one of the most popular content management systems. And because of that, it’s also popular among hackers.
Moreover, anyone can find your default login page by adding “wp-admin” or “wp-login.php” to your site’s URL. So it makes your login URL the primary way for hackers to carry out their attacks.
One of the easiest ways to secure your WordPress site from hackers is to create a custom login URL. That way, you can hide your login page from malicious activity and only grant access to people you trust.
Today we’ll share 2 ways to change your WordPress admin login URL.
The first method should only be used by advanced WordPress users because it involves changing your core WordPress files. For that reason, we recommend using method 2, which doesn’t involve changing any code if you don’t know what you’re doing.
Takeaway: The easiest and safest way to change your WordPress login URL is by using a plugin like SeedProd. It doesn’t require code and lets you set a custom URL in just a few clicks.
How to Change the WordPress Admin Login URL With a Plugin
We’ll use a WordPress plugin to change WordPress admin login URLs in this method. And the best plugin for the job is SeedProd.
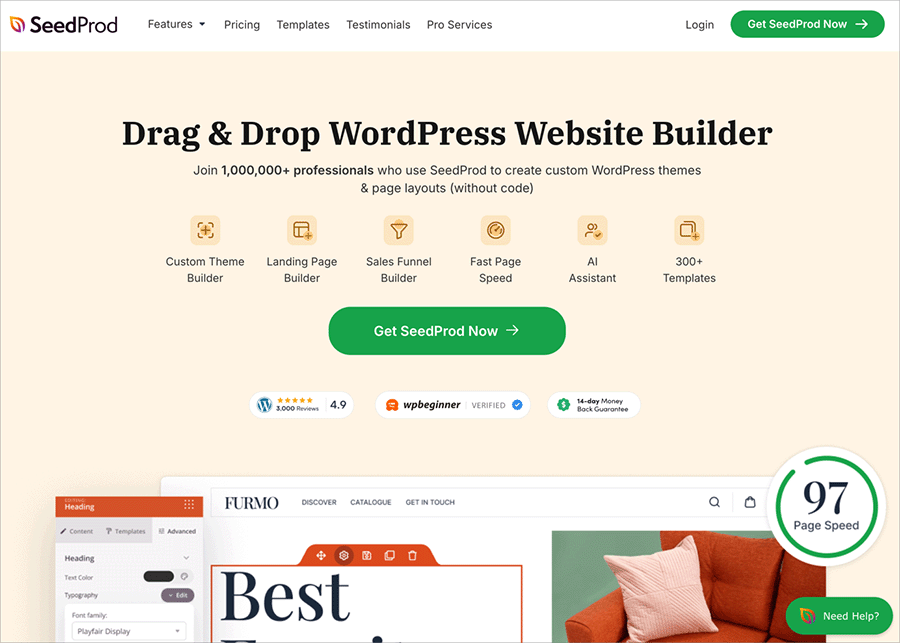
SeedProd is the best WordPress page builder, with over 1+ million users. It’s a powerful WordPress plugin that lets you build and customize any page without writing code.
And because it has a built-in login page mode, you can create a custom WordPress login page without editing a single file. So follow the steps below to change your WordPress admin login URL easily with SeedProd.
Step 1. Install and Activate SeedProd
The first step is to download a copy of the SeedProd plugin.
You’ll then need to install and activate the plugin on your WordPress website. For help with this step, see this guide on how to install a WordPress plugin.
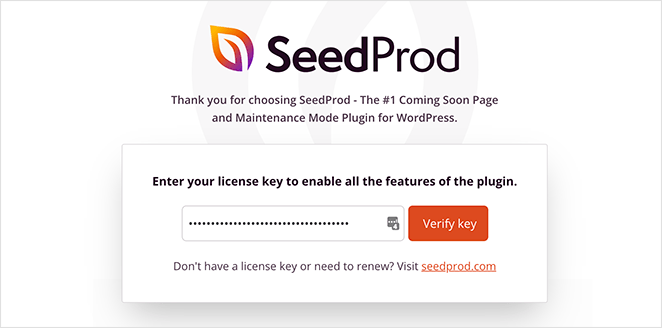
Once SeedProd is live on your website, you’ll see a welcome screen that asks for your license key. You can find your SeedProd license key in the downloads section of your SeedProd account area.
So copy your key, paste it into the license field, and click the Activate Key button.
Next, scroll down and click the Create Your First Page button.
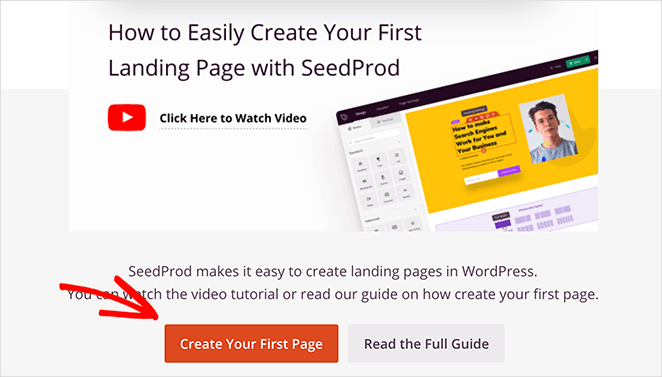
Doing that will take you to SeedProd’s landing page dashboard, where you can create new pages and set up different page modes.
Step 2. Set Up a Login Page
At the top of the next page are 4 different pages you can set up in WordPress:
- Coming Soon Mode
- Maintenance Mode
- Login Page
- 404 Page
You can turn those pages on and off with a single click without creating a new page each time.
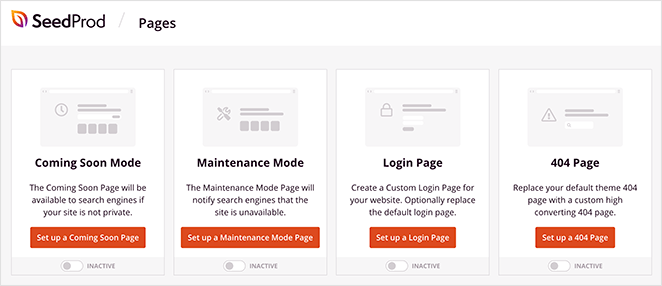
We’ll use the Login Page mode for this guide, so click on the Set up a Login Page button to get started.
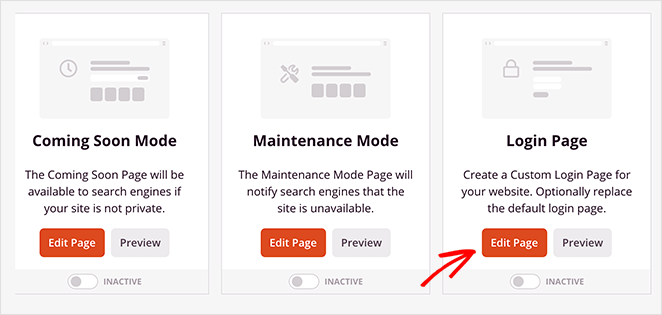
After clicking that button, you’ll go to SeedProd’s template library, where you can choose a responsive design to start with.
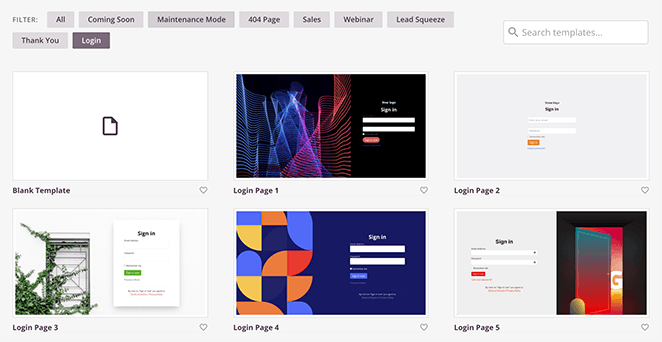
Since the plugin filters to the login page templates by default, you won’t need to hunt for a design that fits your needs.
To choose a template, hover your mouse over a design and click the checkmark icon.
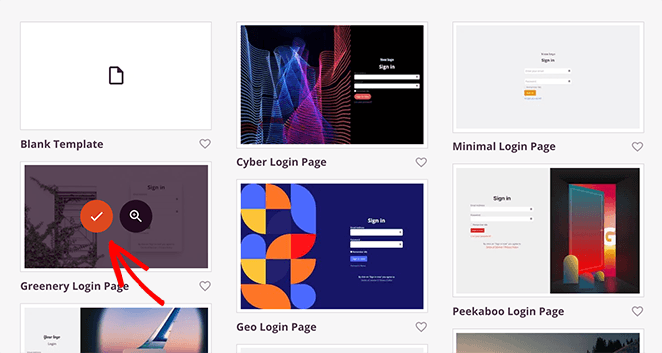
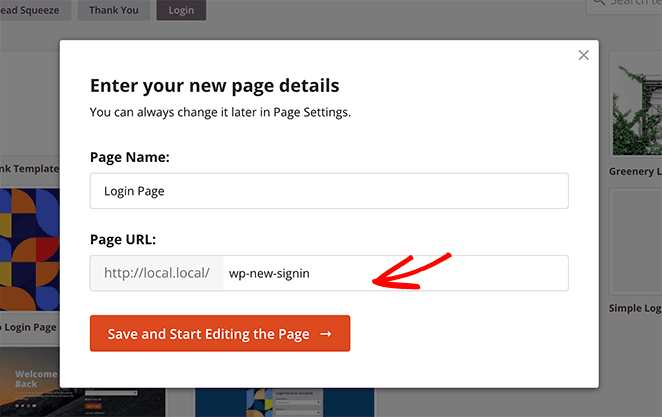
You’ll now see a popup asking for your login page name and URL. You can name your page anything you like and enter a completely different URL to something hackers won’t search for.
From there, click the Save and Start Editing the Page button to open your template in SeedProd’s visual editor.
Step 3. Customize Your Login Page
SeedProd’s drag-and-drop page builder is super easy to use, even for beginners.
It has blocks and sections on the left and a preview on the right. That means you can drag new content blocks onto your page and see the changes in real time.
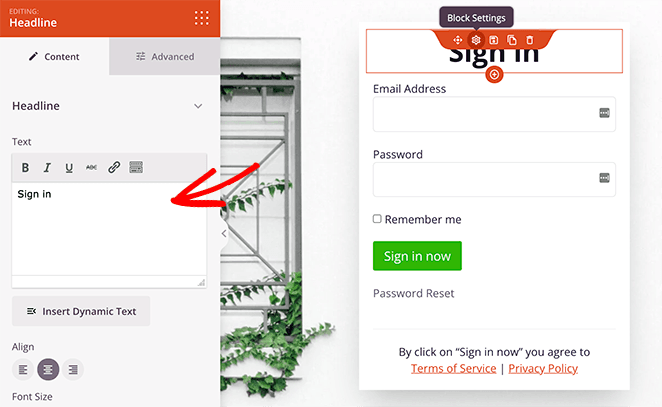
You can also click an element on your design to view its settings in the left-hand panel. For example, clicking the headline block opens the content settings where you can change your headline, font, text size, and more.
Adding content to your login page is just as easy.
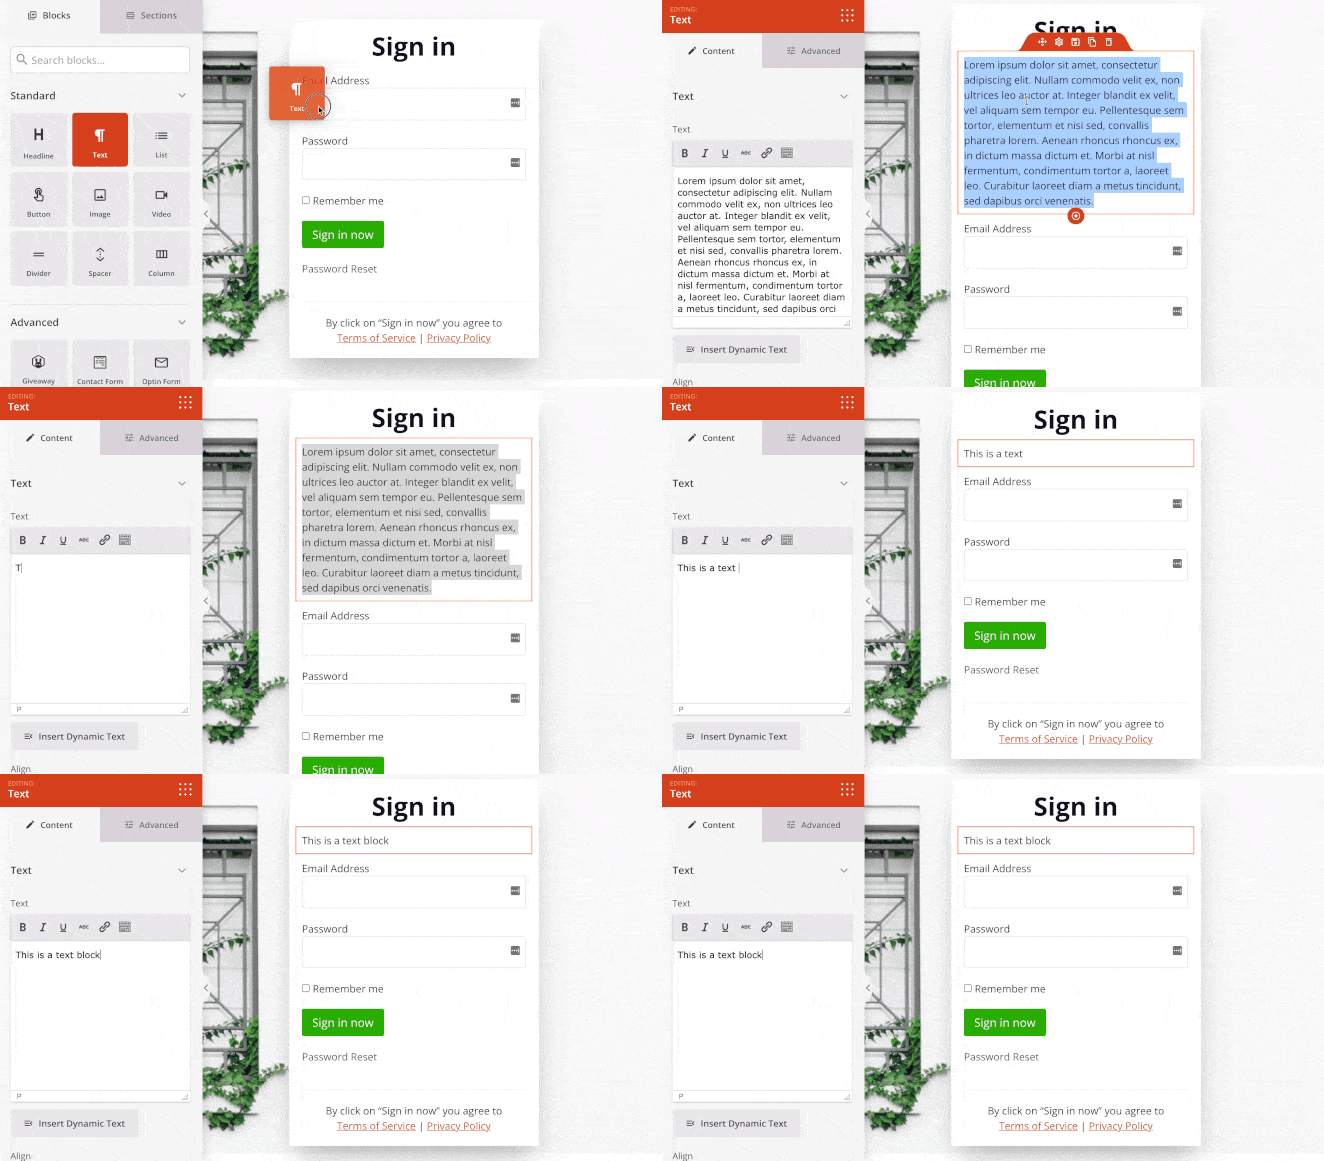
For example, to add some text below the headline, simply drag the Text block from the left and drop it onto your preview. Then you can enter instructions for logging in to your site.
And in SeedProd’s Global Settings panel, you can customize many parts of your design all at once. To find that panel, click the cog icon in the bottom-left navigation bar.
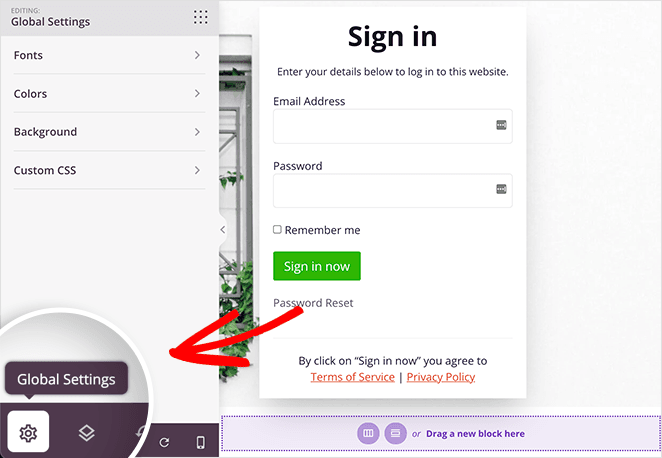
From there, you can change fonts, colors, your background and even add custom CSS. The great thing about that is you can change multiple design elements at once without manually customizing each block.
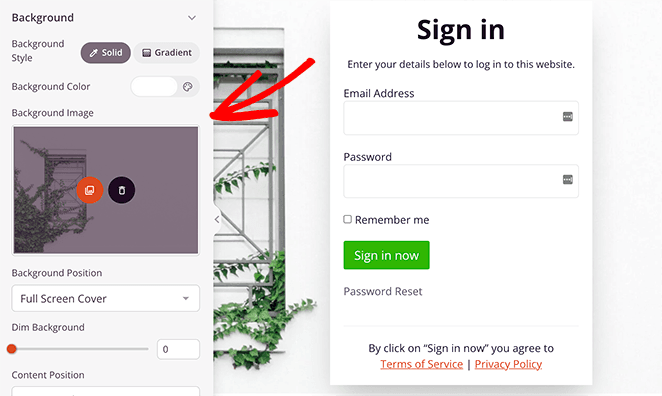
For example, you can remove the default background image in the background tab and replace it with a design from your computer or media library.
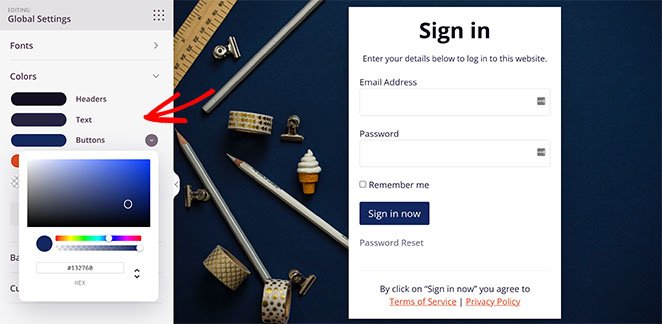
And in the Colors tab, you can select a new color palette for links, text, buttons, and headlines.
When you’re happy with how your new WordPress login page looks, click Save in the top right corner.
Step 4. Publish Your Login Page
With all your changes saved, you’re ready to publish your new login page on your website. To do that, click the dropdown menu on the Save button and click Publish.
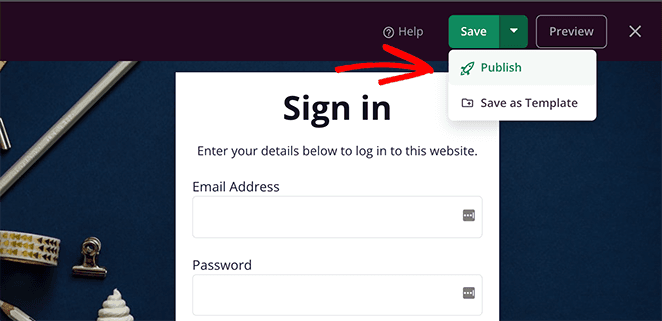
Next, you’ll see a confirmation box allowing you to preview your design.
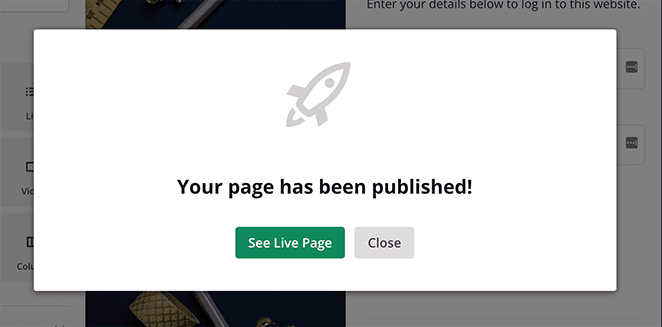
Step 5. Enable Your New WordPress Login Page URL
The last step is to turn on your new login page, replacing your default WordPress admin login screen with your new one. So head to the SeedProd dashboard, and under the Login Page mode, turn the toggle from Inactive to Active.
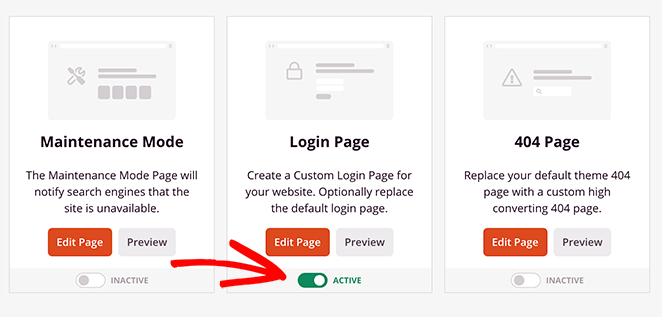
You’ve now hidden the default WordPress login page and put your new page in its place. Let’s see how it looks:
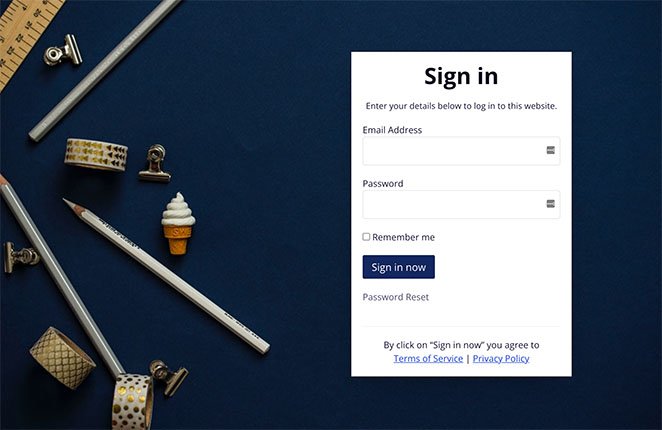
As you can see in the address bar, your WordPress admin login URL has changed to your custom URL.
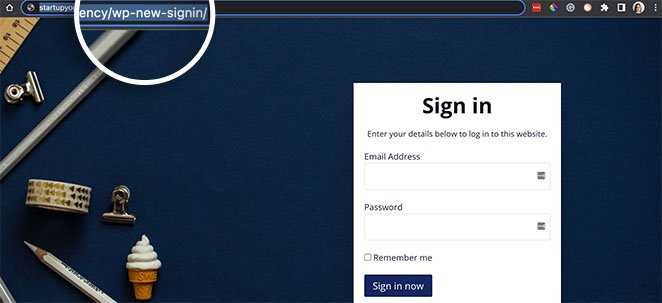
And it didn’t involve writing any code at all!
How to Change WordPress Login URL Without Plugin
You can change your login URL without a plugin by editing your WordPress core files. This method is more advanced and should only be used if you’re comfortable with file managers and PHP code.
Before you do anything else, it’s good practice to back up your current instance of wp.
See this guide for a list of top WordPress backup plugins.
Alternatively, you can back up your site with your website hosting provider. We’ll be using Bluehost in this tutorial.

Bluehost is not only a trusted and influential WordPress hosting provider, but it also includes a file manager that makes it easy to download, edit and upload core WordPress files.
You’ll also need to download a text editor to follow this guide. We’re using Sublime Text, but plenty of other text editors are available, like Notepad++, Atom, and more.
After gathering the tools you need, you can jump to step 1.
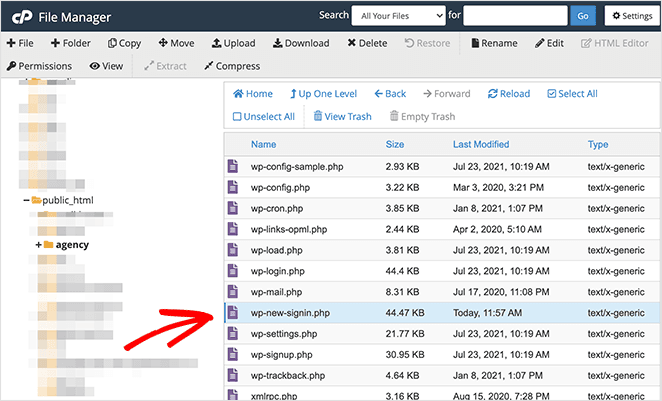
Step 1. Download Your wp-login.php File
Your wp-login.php file contains the code that generates your website’s login page. So you’ll need to edit that file to change the login URL.
The first step is to open your website’s file manager and find the folder called “public_html.”
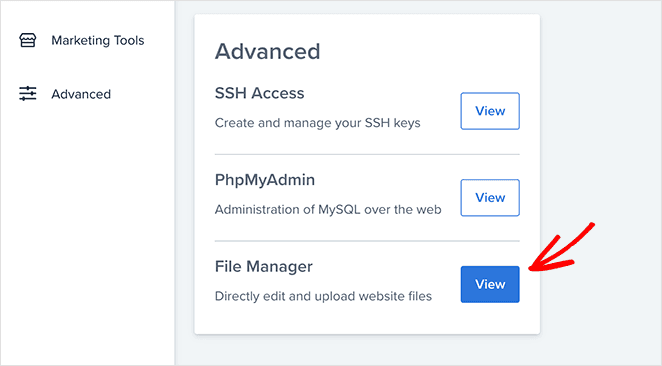
In Bluehost, you can find that area by opening your site, clicking the Settings tab, and selecting the File Manager button.
Then, in the file manager’s left sidebar, click the public_html folder.
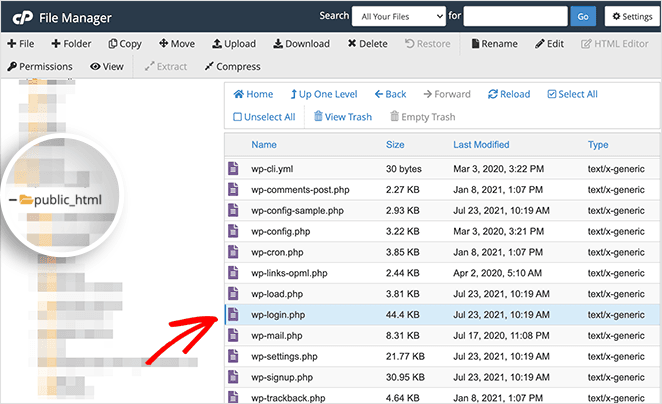
From there, find the wp-login.php file and download it to your computer.
Step 2. Find and Replace the Old Login URL
After downloading the wp-login.php file, open it in your text editor to view the code.
Then, search through the file for every instance of “wp-login” and replace it with a new login URL. For example, our new URL is “wp-new-signin,” but you should use a term that’s unique to your site and that you can remember easily.
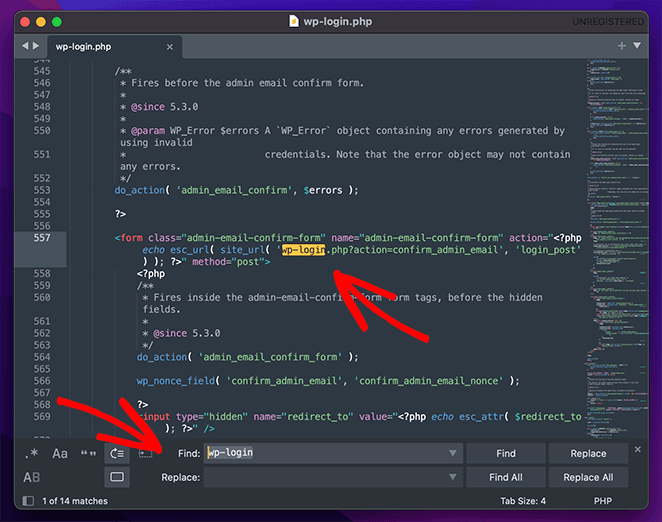
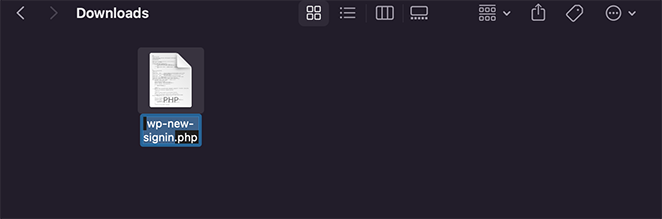
When you’ve made those changes, save your file. From there, rename the file to the new URL you used, which is wp-new-signin in our case.
Step 3. Upload Your New Login File
Now that your login file has a new login URL, you’re ready to re-upload it to your WordPress website.
So head back to your file manager, upload a new file, and choose the login file you personalized in the previous step.
Step 4. Register a New Login File URL using the Login URL Filter Hook
After uploading your new login file, the next step is to register your new login file URL using the “login_url” filter hook.
This is a function that will allow you to use any type of page as your login page if it includes a login form. For example, you might create a coming soon page and use a login form to allow registered users to log in.
To do this, open your theme functions file and paste the following code:
/*
 * Change WP Login file URL using "login_url" filter hook
 * https://developer.wordpress.org/reference/hooks/login_url/
 */
add_filter( 'login_url', 'custom_login_url', PHP_INT_MAX );
function custom_login_url( $login_url ) {
	$login_url = site_url( 'wp-new-signin.php', 'login' );
    return $login_url;
}
Then save the file and move on to the next step.
Step 5. Test Your New Login URL
Before removing the default login file from your WordPress site, you should first test your new file. To do that, type in your website’s URL in your browser’s address bar, and add your new login URL to the end.
For example, our full login URL would look like this:
startupyourwpsite.com/agency/wp-new-signin.php
And navigating to that page shows our WordPress login form.
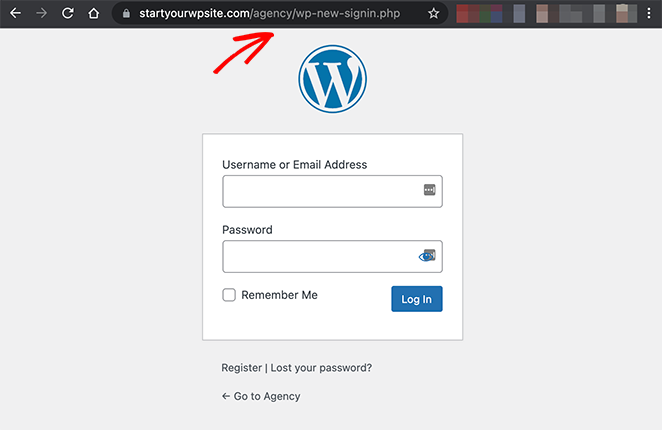
If you see the same thing, your new WordPress admin login URL works, and you can move on to the next step.
Step 6. Delete the Original Login File
The final step for this method is to delete the existing wp-login.php file from your website files. Doing that removes the default login page from your website, and if anyone tries to log in using that URL, they’ll see a 404 not found page.
Before removing the file, you can always download the original as a backup should anything go wrong in the future. When you’ve done that, simply delete the file in your file manager.
Again, anyone trying to find your original login page will see a 404 error.
Why You Should Use a Plugin to Change the WordPress Login URL
By now, you may be wondering which method is the best way to change your WordPress admin login URL. Both methods have their pros and cons, but if you’re anything but a seasoned WordPress expert, our advice is to use a WordPress plugin to change your login page URL.
The reason for suggesting that is changing your login URL manually involves messing with the WordPress core files. And if you don’t know what you’re doing, you could seriously mess up your website.
Besides, there are tons of high-quality WordPress login plugins that can do the job instantly. And many of them are surprisingly lightweight and won’t impact your page loading speed.
So when it comes to your login page, it’s plugins all the way.
WordPress Admin Login URL FAQs
Pick something unique but memorable. Avoid common terms like “admin” or “login.” Use a phrase only you’d know, like “my-access-page” or “bluecar-door.”
No, it won’t affect how your site works. Just test the new URL before removing the old login file.
Yes. It helps block automated attacks by hiding the default login page from bots.
Not at all. WordPress admin pages aren’t indexed by Google, so this won’t impact your rankings.
Absolutely. Always back up your site before editing files or code — just in case something breaks.
There you have it!
We hope this article helped you learn how to change WordPress admin login URL without plugins (and with one).
Please see the following guides for more login and registration page advice:
- 14 Stunning Login Page Examples to Inspire Your Next Design
- How to Create a Client Login Page in WordPress (2 Methods)
- 11 Best Content Locker WordPress Plugins
- How to Password Protect a WordPress Page (Step by Step)
- How to Create a WordPress User Registration Form With Custom Fields
Thanks for reading. Please follow us on Twitter, Facebook, and YouTube for more helpful content to grow your business.