
TL;DR: How to Make a Wedding Website in WordPress
You have two routes: a dedicated platform like Zola, or your own WordPress site that stays fully yours. Below I compare the 9 best wedding website builders, then walk through building your own in WordPress step by step.
- Get hosting and install WordPress – Sign up with a host like Bluehost (starting at around $3/month), register a domain name, and install WordPress in a few clicks.
- Install SeedProd and pick a wedding template – Choose from SeedProd’s library of wedding website kits and import it in one click.
- Customize with your photos, fonts, and colors – Swap in your own images and content using SeedProd’s visual editor. No coding needed.
- Add pages for RSVP, event details, and your story – Build out the essential pages guests need using SeedProd’s built-in blocks.
- Launch and share the URL with guests – Enable your SeedProd theme, then share the link via email, save-the-dates, and social media.
When my sister got engaged, she had never built a website, and every tool she found claimed to be “the best.” I helped her work through the real options, so the comparison below comes from actually using these builders, not reading their feature lists.
Most free wedding platforms like Zola and The Knot are convenient, but they lock you into their templates, their branding, and their guest system. You get a nice-looking site that never quite feels like yours.
So I’ll do two things here. First, compare the top wedding website builders side by side, then show you how to build your own in WordPress with SeedProd, from picking a template to sharing the link with guests.
Best Wedding Website Builders Compared
Before you build anything, it helps to know what your options are. I looked at the platforms couples actually use, from all-in-one wedding services to full website builders, and leaned on real feedback from wedding communities like this Reddit thread where people share what worked for them.
When comparing wedding website builders, these are the things that matter most:
- RSVP management: Collecting and tracking guest replies without a spreadsheet.
- Event details: A clear place for date, venue, timeline, and travel info.
- Design flexibility: Templates you can shape to match your wedding, not the other way around.
- Easy updates: Quick changes as plans shift, because they always do.
- Gift registry: A simple way to link or host your registry.
1. WordPress.org
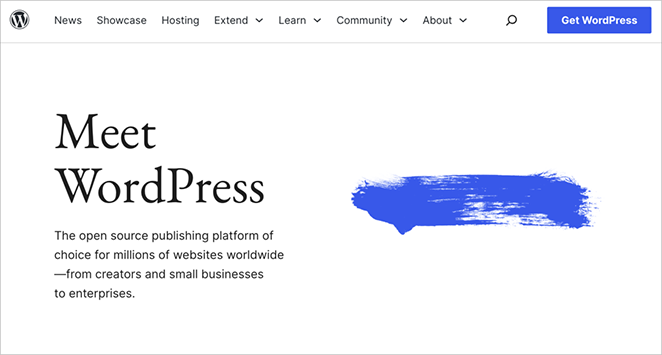
Of everything my sister and I tried, self-hosted WordPress.org gave her the most freedom. She could shape the site to match her wedding theme exactly, and add features like RSVP forms, photo galleries, and a gift registry through plugins.
The trade-off is setup. You arrange your own hosting and domain, and you handle backups and updates yourself. There is a small learning curve, but for a site that is genuinely yours, it was worth it.
Pricing: The software is free. You pay for hosting (around $3 to $15/month) and a domain (around $10 to $15/year).
2. SeedProd
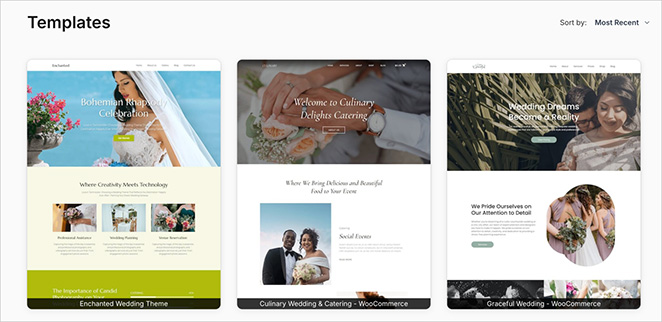
SeedProd is what turns WordPress from “powerful but fiddly” into something you can actually design yourself. It is a drag-and-drop website builder with pre-built wedding site kits, so you get a polished starting point and change it without touching code.
My sister used it to build her homepage, RSVP page, and event details in an afternoon. It runs on WordPress.org, so you do need a WordPress site first, which is exactly what the step-by-step guide below covers.
Pricing: From $39.50/year. The wedding site kits and Theme Builder used in this guide are part of the Plus plan and higher (normally $199/year).
3. Web.com
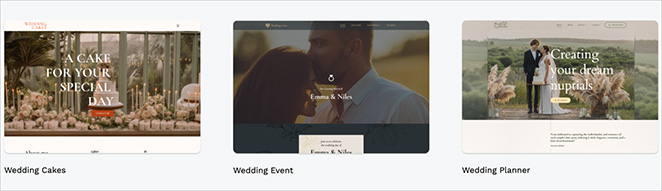
Web.com is a good pick if you want something simple and quick. Its drag-and-drop builder and wedding templates get you a decent site fast, with photo galleries and social links built in.
It does hit limits as your needs grow, and the blogging and eCommerce tools are lighter than bigger platforms. For a straightforward wedding site, though, that is rarely a problem.
Pricing: Starts at around $4.99/month.
4. Wix
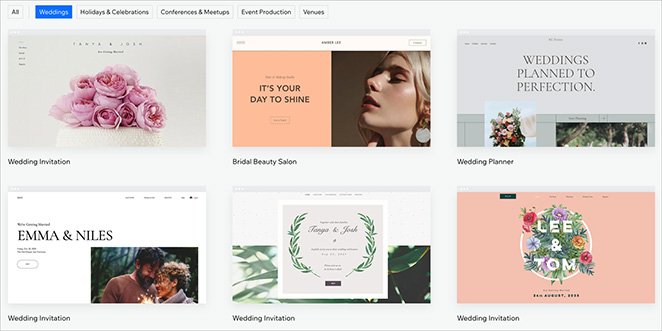
Wix is beginner-friendly and has a free plan, plus a big template library with plenty of wedding designs. My sister liked how freely she could drag elements around the page.
Two things to know: the free and cheaper plans show Wix ads, and once you pick a template you cannot swap it without rebuilding. Moving a Wix site to another platform later is also difficult.
Pricing: Free plan available. Paid plans start at around $17/month.
5. WordPress.com
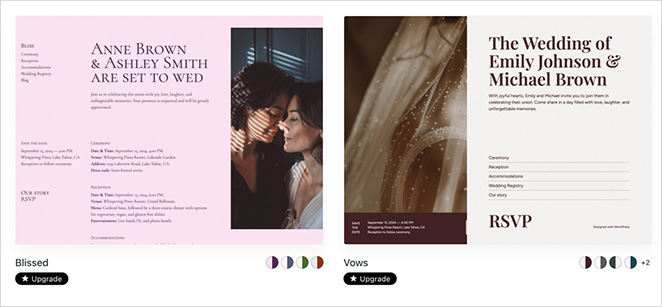
WordPress.com runs on the same core software as WordPress.org, but handles hosting, backups, and updates for you. That makes it a gentler starting point if you want less to manage.
The catch is control. Customization is more limited than the self-hosted version, and the free plan carries ads and storage limits. You can move to WordPress.org later if you outgrow it.
Pricing: Free plan available. Paid plans start at around $4/month.
6. Joy
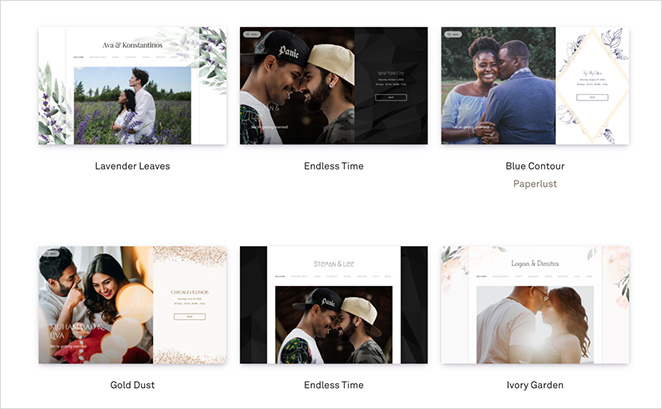
Joy is a free, wedding-specific builder with genuinely useful extras: guest FAQs, travel info, guest bios, and a companion app your guests can use.
The designs are simpler than a full website builder, and customization is limited. As with most dedicated platforms, you cannot take your site elsewhere later.
Pricing: Free. A custom domain costs extra (from around $20/year).
7. Squarespace
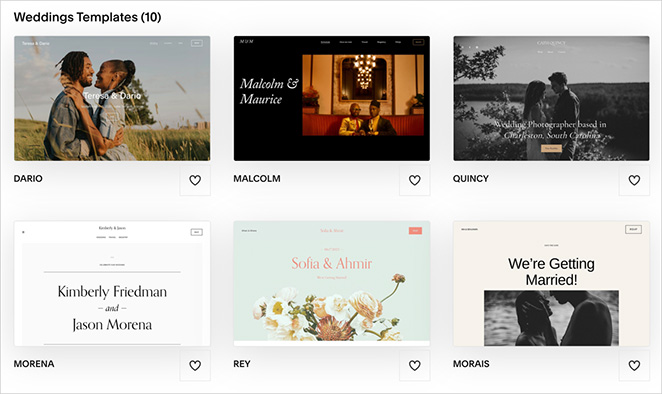
Squarespace is the design-led choice. Its templates are sleek and mobile-responsive, which makes it great for showing off engagement photos, and it includes RSVP forms and social integrations.
It offers fewer third-party integrations than some builders, and if you want to collect cash gifts you may need a higher plan. For couples who care most about how the site looks, it is hard to beat.
Pricing: Starts at around $16/month.
8. The Knot
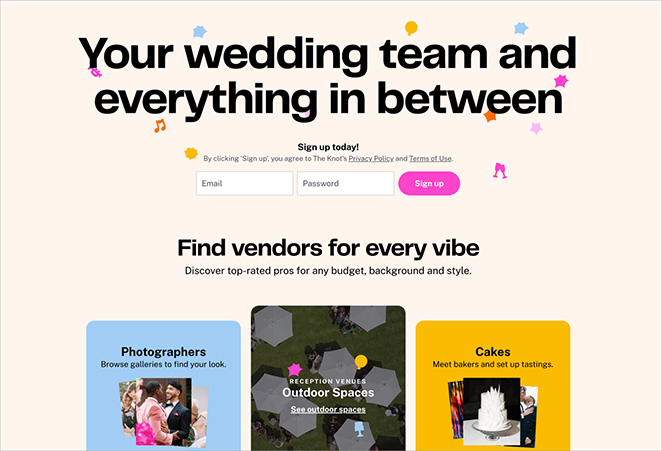
The Knot puts planning and your website in one free place. You get RSVP management, an event timeline, registry links, and even live chat and streaming options.
The designs are basic and there is little room to customize them. If you want everything handled for you and do not mind a template look, it delivers.
Pricing: Free. A custom domain costs extra (from around $20/year).
9. Zola
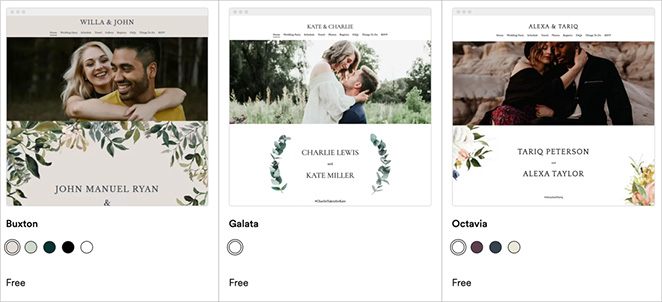
Zola is another all-in-one wedding platform, with a built-in gift registry and guest list management alongside a simple drag-and-drop editor.
It keeps things uncomplicated, which is the appeal, but you get fewer customization options and advanced features than a dedicated website builder. Good for couples who want simple and organized over custom.
Pricing: Free. A custom domain costs extra.
Wedding Website Builders at a Glance
| Builder | Best for | Starting price |
|---|---|---|
| WordPress.org | Full control and flexibility | Free (plus hosting + domain) |
| SeedProd | Custom design on WordPress, no code | From $39.50/yr |
| Web.com | A simple site, fast | From ~$4.99/mo |
| Wix | Beginners who want a free plan | Free, paid from ~$17/mo |
| WordPress.com | Managed hosting, less to manage | Free, paid from ~$4/mo |
| Joy | A free, wedding-focused site | Free (domain extra) |
| Squarespace | Design-led, stylish templates | From ~$16/mo |
| The Knot | All-in-one planning tools | Free (domain extra) |
| Zola | Registry + planning in one place | Free (domain extra) |
After helping my sister through all of these, we kept landing in the same place. The dedicated platforms are quick, but you are renting space inside someone else’s template and branding. For a site that looks like you and stays yours, WordPress with SeedProd won out, and here is why.
Why WordPress Instead of Zola or The Knot?
Free platforms are a reasonable starting point, but they come with real limits. Your site URL will include their brand name unless you pay extra for a custom domain. You’re stuck with their templates and their RSVP tools.
WordPress gives you full control from the start. You own the domain, you own the content, and you can build whatever pages you need.
WordPress wedding websites can include:
- Custom countdown timers
- Guestbook pages
- Honeymoon fund pages
- RSVP forms with any fields you want
These are things Zola and The Knot don’t allow you to customize. SeedProd has 90+ blocks you can use, so you’re not limited to what the template includes.
If you already have a WordPress site (a blog, a small business site, anything), you can add your wedding website there without paying for a second hosting account. That’s a practical advantage free platforms can’t match.
How to Make a Wedding Website with WordPress
Building a wedding website might feel daunting with so many builders to choose from, but I compared the main ones above and keep coming back to SeedProd because it’s surprisingly easy to use.
Here’s a step-by-step breakdown to get you started:
Step 1: Set Up Your WordPress Site
The first step is finding a home for your wedding website. You’ll need two things: a domain name (your website address, like sarahandjamie2026.com) and a hosting provider (the server that stores your site files).
WordPress hosting starts at around $3-10/month, and most hosts include a free domain for your first year. That’s often less than what paid plans on Zola or Minted cost. If you want zero upfront cost, WordPress.com has a free tier, though you’ll get limited customization options.
For the domain name, keep it simple and memorable. Something like [names]wedding.com or [names]2026.com works well. Your guests are going to type this by hand from a save-the-date card, so shorter is better.
My favorite solution for beginners is Bluehost. It’s easy to use, has competitive pricing, and is officially recommended by WordPress. You can also explore other top hosting providers to find the perfect fit.

Sign up for a plan, choose your domain name, and complete the account setup. Bluehost will install WordPress automatically after you finish checkout.
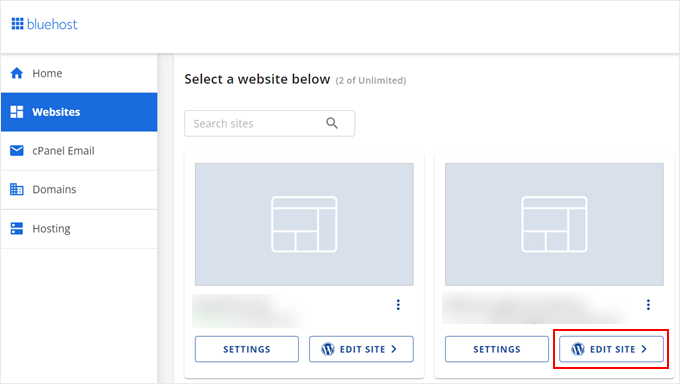
Once that’s done, click the “Edit Site” button in your Bluehost dashboard to open your WordPress admin.
Step 2: Install and Activate SeedProd Pro
Now that your WordPress site is ready, it’s time to add SeedProd Pro, the visual website builder that will transform your site into a complete wedding website. SeedProd Pro’s drag-and-drop editor lets you create and customize every aspect of your website without touching code.
SeedProd starts at $39.50/year, but the wedding site kits and Theme Builder used in this guide are part of the Plus plan and higher (normally $199/year). Head to SeedProd’s website to pick the plan that fits.
Here’s how to install and activate SeedProd Pro on your WordPress site:
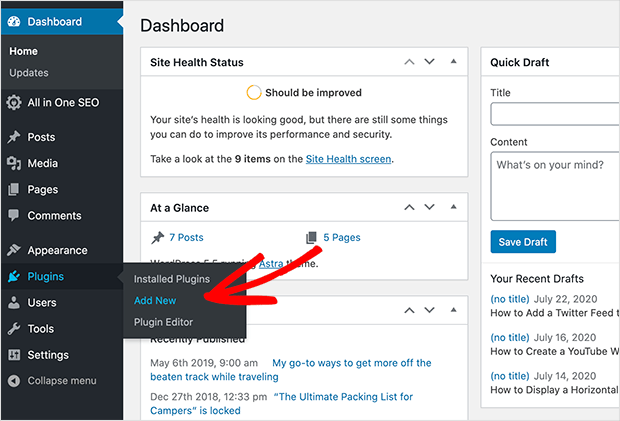
Go to your WordPress dashboard and navigate to Plugins » Add New. Click “Upload Plugin,” select the SeedProd Pro installation file, then click “Install Now” and activate when prompted.
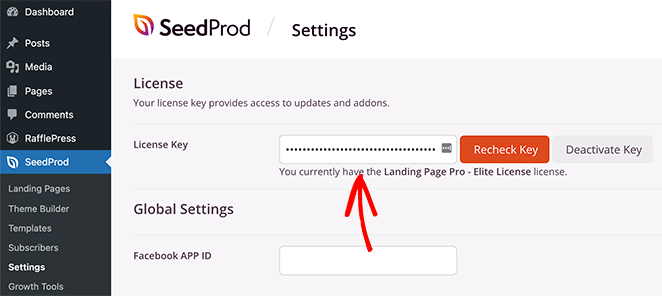
Finally, navigate to SeedProd » Settings and enter the license key you received when purchasing the plugin to unlock SeedProd Pro’s theme builder and all wedding website features.
Step 3: Choose a Wedding Website Template
With SeedProd installed, you’re ready to pick the perfect look for your wedding website. From your WordPress dashboard, navigate to SeedProd » Theme Builder and click the “Theme Template Kits” button.
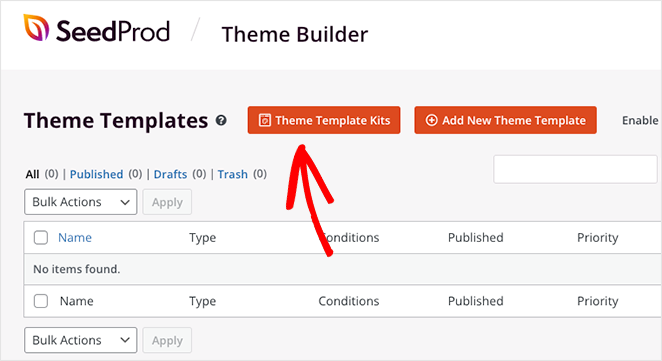
Here, you’ll see a library with hundreds of pre-made website kits you can import and customize to fit your style. Browse them or type a keyword like “wedding” into the search box to see wedding website templates for various niches.
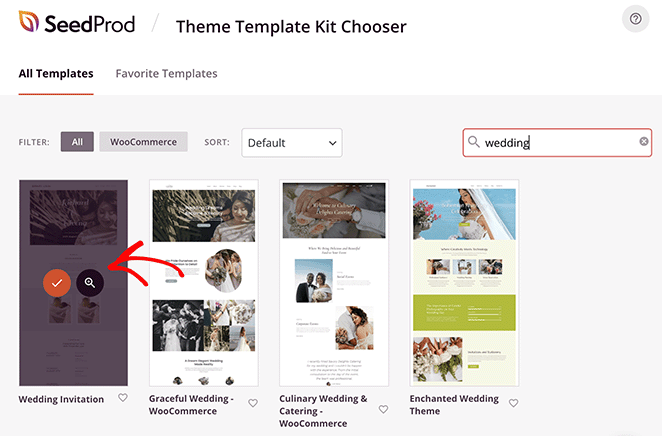
Many of the wedding themes include special features like pre-built sections for engagement photos, wedding party introductions, accommodation suggestions, and more. This makes it easy to create a site that covers all the important details for your guests.
Once you find a template you like, hover over it and click the checkmark icon to import it. For this guide, I’ll choose the “Wedding Invitation” website kit.
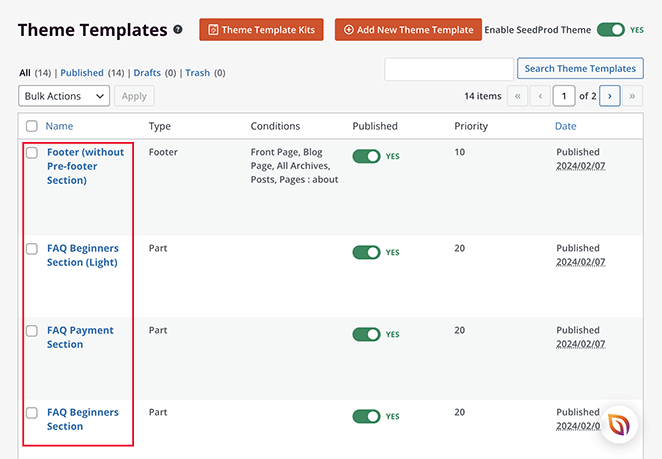
SeedProd should only take a few seconds to add the template files to your WordPress site. After that, you’ll see them in a list, where you can click to edit them with the drag-and-drop editor.
Step 4: Customize Your Wedding Website
Now, let’s make this wedding website truly yours. We’ll start with your homepage, which is like the welcome mat for your guests.
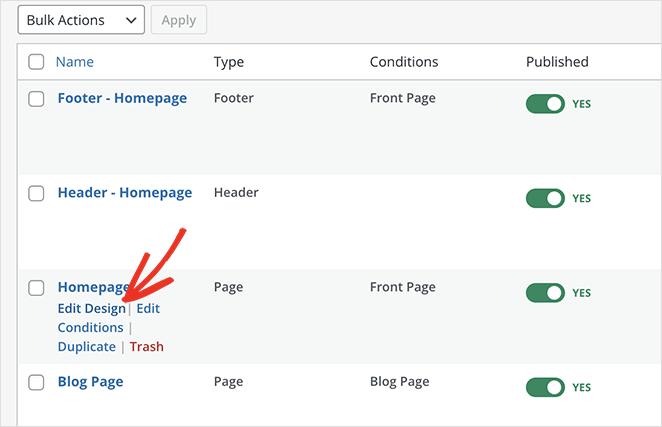
Look for the homepage in your template list, hover over it, and click “Edit Design.” The template will launch in SeedProd’s visual editor.
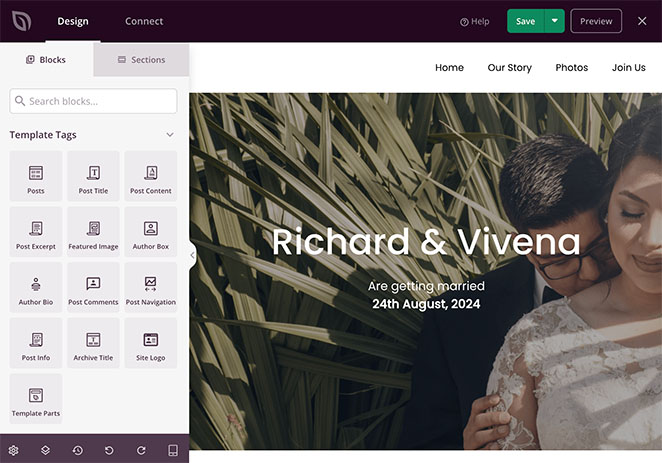
You can click on any element to change things like fonts, colors, and text. You can also add extra design elements from the left panel.
For instance, you might pair a script font like Great Vibes for headers with a clean sans-serif like Montserrat for body text. This ensures readability on mobile devices.
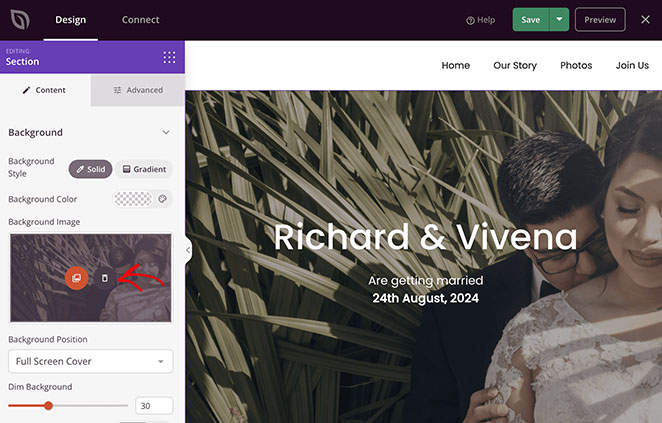
To change the main image, select the section and click the trashcan icon in the left-hand sidebar. From there, you can upload a new photo to your WordPress media library to replace it.
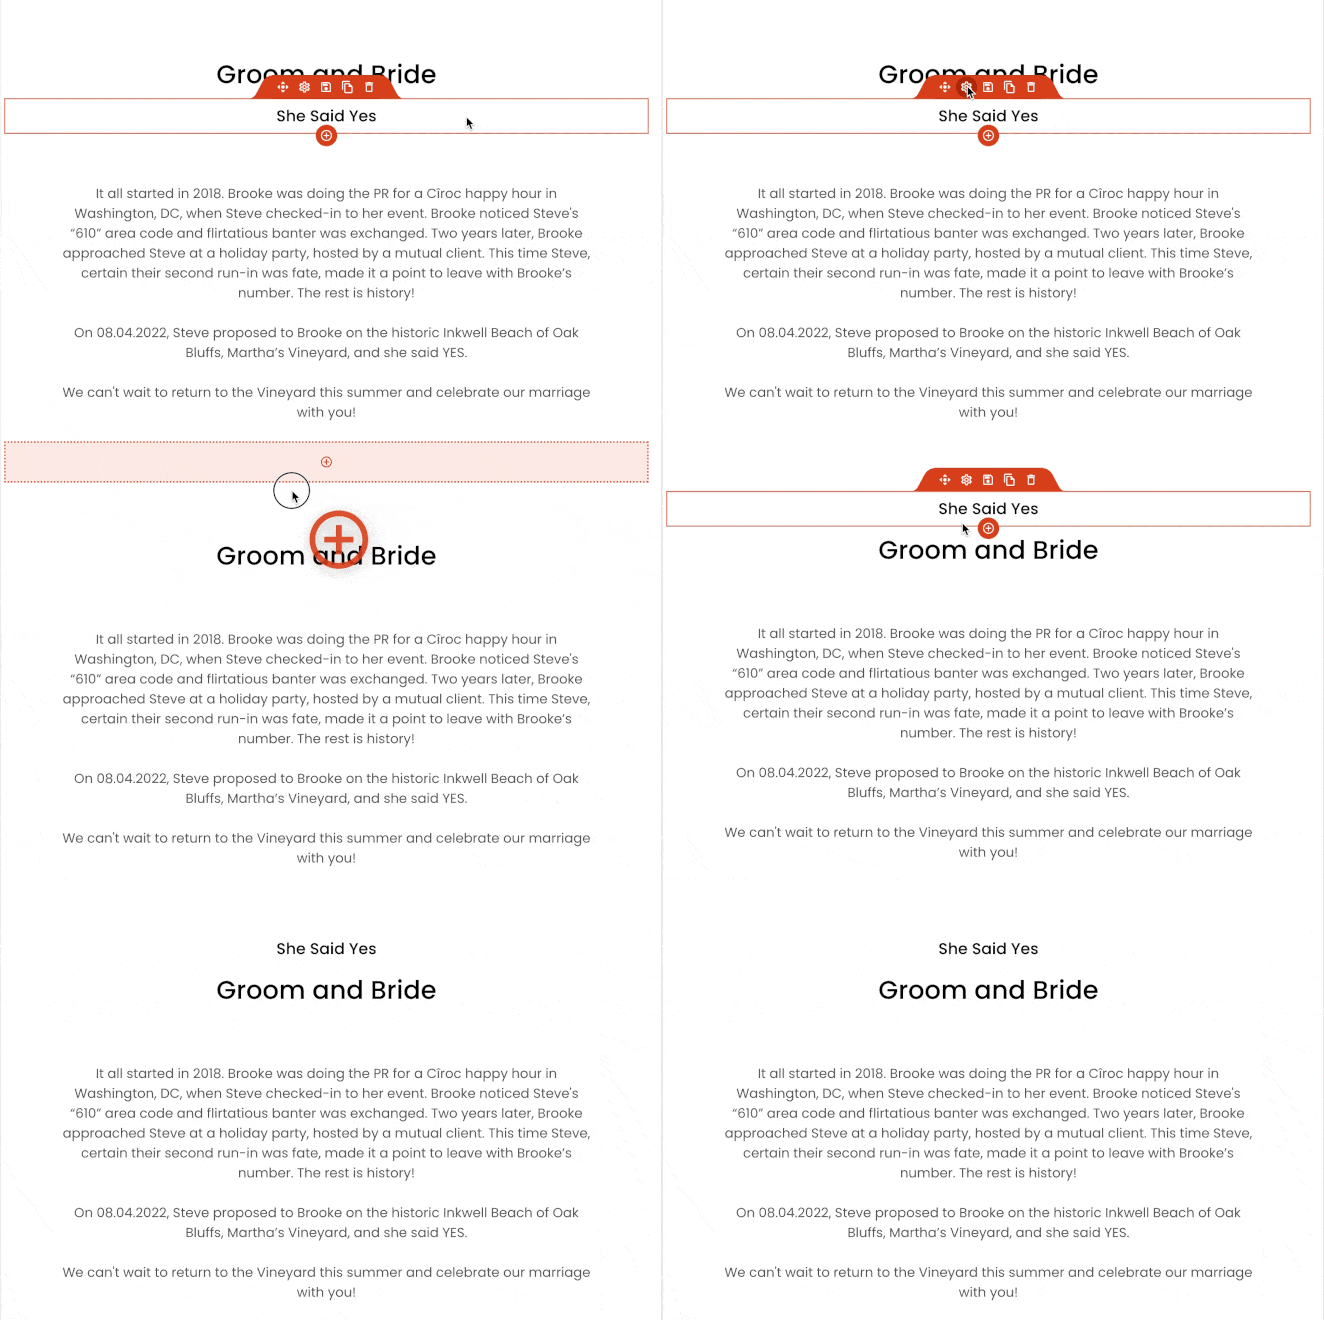
If you want to move things around, just drag and drop them where you want them to go.
Think about what your guests need to know.
You’ll likely want sections like:
- About Us: Share your love story and photos here.
- Event Details: Include the date, time, location, and special instructions for your guests.
- Photo Gallery: Use the wedding website builder to add a personal touch with photos.
- Social Profiles: Encourage friends and family to follow your celebration updates on social media.
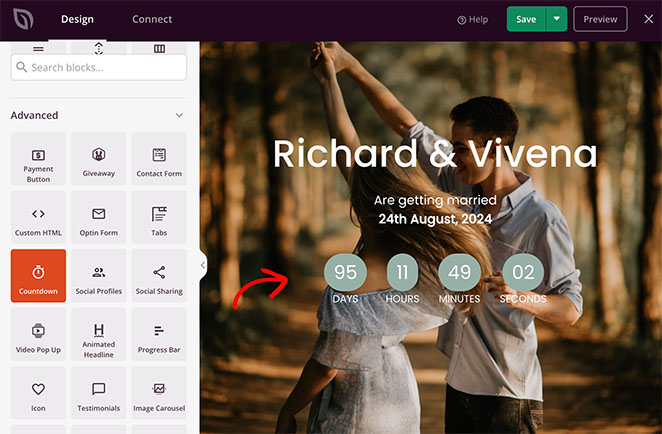
Many of these details are already included in the template. However, you can select a block from the left-hand panel and drag it onto your page to add more.
For example, you can add a countdown timer. This will get your guests excited by showing them how many days are left until your wedding.
When you’re happy with your homepage, don’t forget to click “Save” to save your changes.
Step 5: Add Essential Wedding Website Pages
While the homepage is the heart of your wedding website, several other pages are important for giving guests all the information they need. Let’s take a look at some of these essential pages and how you can create them using SeedProd.
Our Story
This page is your chance to share the unique story of your love. You can create one easily if the template you chose doesn’t include it automatically.
Navigate to Pages » Add New Page from your WordPress dashboard and give the page a title. Then, click the “Edit with SeedProd” button.
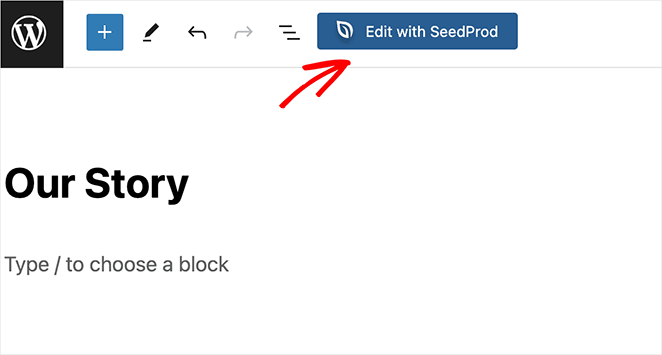
You’ll now see the same visual editor you used for the homepage.
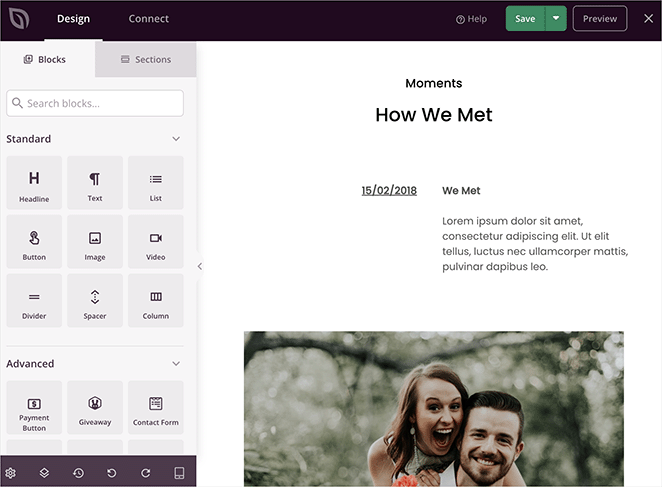
Use SeedProd’s text and image blocks to weave together personal anecdotes, cherished photos, and a timeline showcasing key milestones in your relationship.
Event Details
This page should give guests all the logistical information they need to attend your wedding.
Be sure to include:
- Venue: Name and address of the ceremony and reception locations
- Date and Time: Specify the date and time of the wedding events
- Itinerary: Outline the schedule for the day, including the ceremony, cocktail hour, reception, and any other planned activities
- Accommodation: If applicable, provide details about recommended hotels or accommodations for out-of-town guests
- Parking and Transportation: Offer guidance on parking options or transportation arrangements
- Dress Code: Let guests know if there’s a specific dress code for the wedding
- Playlist: Consider adding a section for your wedding playlist, showcasing your wedding style
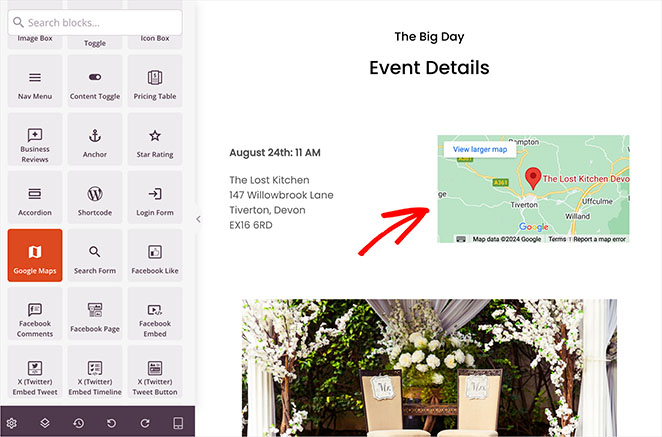
You can use SeedProd’s Google Maps block to help guests quickly locate the venue.
RSVP Form
This page is where you can collect guest responses, manage your guest list, and track plus-ones. SeedProd makes creating and adding an RSVP form easy through its integration with WPForms, the best WordPress form builder plugin.
To get started, install and activate the WPForms plugin on your WordPress site. Once that’s done, create a new form for RSVPs, including fields for the guest’s name, email address, and whether they can attend.
If you need help, see this guide on how to create an RSVP form in WordPress.
SeedProd’s drag-and-drop interface makes adding this form to your RSVP page easy. Drag the Contact Form block onto the page and select your newly created RSVP form from the dropdown menu.
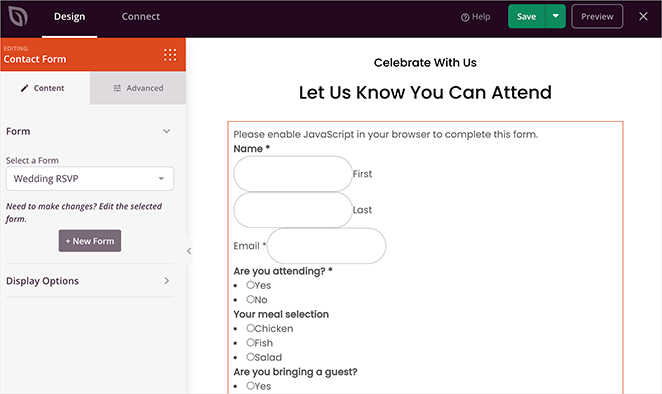
Remember to customize your RSVP form to collect any additional information you might need from guests. This could include dietary restrictions, song requests, or other preferences to help personalize their experience.
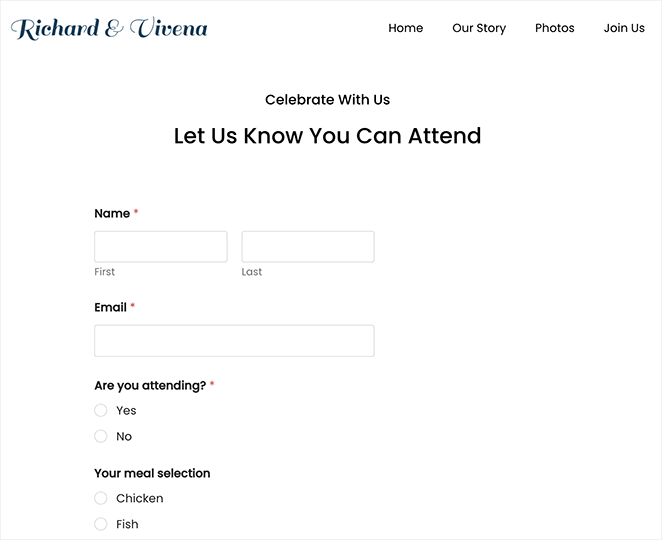
Important Note: While you can create an RSVP form using SeedProd and WPForms, many couples also use popular wedding platforms like The Knot, which offer built-in wedding registries and RSVP management tools.
Consider linking your SeedProd website to your The Knot registry for a more complete guest experience.
Other pages you may want to add to your site include:
- Gift Registry: Share links to your registries or create a custom wishlist.
- Wedding Party: Introduce your bridesmaids, groomsmen, and other important wedding party members.
- Guestbook: Provide a space for guests to leave well wishes and messages.
- FAQs: Answer common questions guests might have about your wedding.
- Travel Information: Offer details about airports, transportation, and local attractions for out-of-town guests.
- Things to Do: Suggest activities and attractions for guests in the wedding location.
- Blog or Updates Section: Share updates about your wedding planning or offer glimpses behind the scenes.
- Honeymoon Fund: Create a page where guests can contribute to your honeymoon fund.
Step 6: Launch Your Wedding Website
Your wedding website is nearly ready for its grand debut. Before going live, take a few minutes to set things up properly so guests have the best experience.
Before you go live, check these:
- Set your title tags and meta descriptions: Install All in One SEO to set the title and description for each page. For your homepage, use a format like: [Names] Wedding | [Date] | [City, State]. This helps guests confirm they’ve found the right site.
- Preview your website: Click the “Preview” button in the SeedProd builder to see how your website will look to guests.
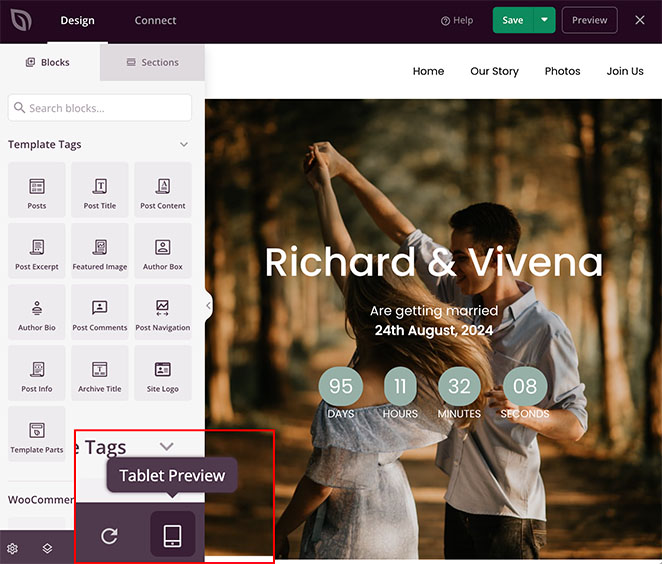
- Check mobile layout: Click the mobile icon in the bottom toolbar to preview your site on phones and tablets. SeedProd themes are responsive, but it’s worth a quick check.
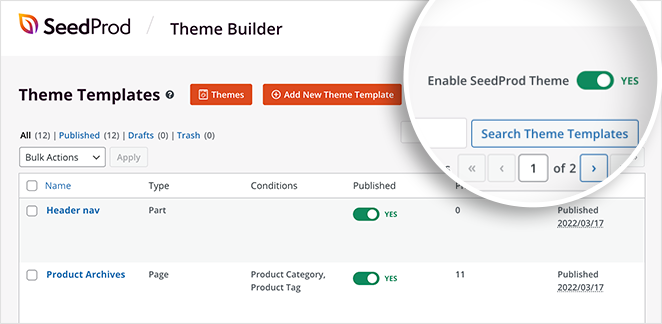
If you’re happy with how everything looks, head to SeedProd » Theme Builder and click the “Enable SeedProd Theme” toggle. This activates your theme and makes your website live for everyone to see.
Here’s a quick look at the wedding website I created for this guide:

How to Share Your Wedding Website
Now that your site is live, it’s time to spread the word.
Here are the most effective ways to share it:
- Email: Send the URL directly to guests when you send save-the-dates or invitations. A short personal note works better than a bulk blast.
- Printed invitations and save-the-dates: Include your website URL on all printed materials. Add a QR code so guests can scan it directly from the card.
- Social media: Share the URL on Instagram, Facebook, or wherever your guests are most active. A post with an engagement photo makes this feel personal rather than transactional.
- Wedding hashtag: Include your wedding hashtag alongside the URL so guests can find and share photos easily.
Pro Tip: Share this step-by-step guide with your wedding planner to keep them in the loop.
Wedding Website FAQ
Is it worth making a wedding website?
Yes. A wedding website keeps your details in one place, so guests can find the date, venue, RSVP, and registry without messaging you. It cuts down the repeat questions and saves you time in the busiest stretch of planning.
How much does it cost to make a wedding website in WordPress?
WordPress hosting typically costs $3-10/month, and most hosts include a free domain name for the first year. SeedProd starts at $39.50/year, with the wedding site kits and Theme Builder on the Plus plan and up (normally $199/year).
If you want zero upfront cost, WordPress.com has a free tier, though you’ll have limited customization options and your URL will include “wordpress.com” unless you upgrade.
How far in advance should I create my wedding website?
Most couples launch their wedding website 6-12 months before the wedding, around the time they send save-the-dates. You want it live before guests start asking about logistics.
If you’re planning a destination wedding or expecting a lot of out-of-town guests, launching earlier gives people more time to book travel and accommodations.
Can I make my WordPress wedding website private or password-protected?
Yes. If you want to keep your wedding details accessible only to invited guests, you can add password protection to your WordPress site. SeedProd makes this straightforward with its built-in WordPress password protection features.
You can also prevent search engines from indexing your site by checking the “Discourage search engines from indexing this site” option under Settings » Reading in your WordPress dashboard. This is a good middle-ground if you want to share the URL freely but keep it off Google.
Do I need a custom domain name for my wedding website?
You don’t need one, but it makes a difference. A custom domain like sarahandjamie2026.com is easier for guests to remember and type from a printed invitation. It also keeps your URL clean instead of having your host’s branding in it.
Most hosting plans include a free domain for the first year, so the extra cost is usually nothing. Keep it short, use your names or wedding year, and make sure it’s easy to spell.
Happily Ever After Starts Here
There you have it. I compared the main wedding website builders and walked through building your own in WordPress, and the same pick keeps coming out on top for a site that stays truly yours.
With SeedProd’s visual website builder, you can create a wedding website that shares your joy, connects with loved ones, and makes your special day even more memorable, without touching code.
Ready to build your dream wedding website?
You might also find the following guides helpful:
- How to Make a Calendar in WordPress to Display Events
- How to Backup a WordPress Site: A Beginner’s Guide
- How to Create a New Website Launch Marketing Plan
Thanks for reading! We’d love to hear your thoughts, so please feel free to join the conversation on YouTube, X and Facebook for more helpful advice and content to grow your business.