


TL;DR: How to Add Font Awesome to WordPress
There are three ways in, and the right one depends on whether you want icons inside your posts or inside your site’s design.
- The official plugin: free, and it adds a Font Awesome Icon block to the editor. Easiest route for icons inside posts and pages.
- Shortcodes:
[icon name="rocket"]still works, and it’s the route the plugin’s own docs point classic editor users to. - SeedProd: 2,420 icons built in, for headers, footers, menus and landing pages, with no code.
- Manual code: load the stylesheet yourself, but only if you’re comfortable in theme files.
- Worth knowing: SeedProd’s Icon and Icon Box blocks are on every paid plan, so you don’t need the Pro tier for them.
You upload a social icon as a PNG, it looks fine on your laptop, and then you open the site on your phone and the edges have gone soft. Change your brand color six months later and you’re back in an image editor re-exporting the whole set.
Font Awesome solves both problems, because its icons are vector shapes you restyle with a color picker instead of a graphics app.
There are three ways to get it into WordPress, and I had them in the wrong order on this page for a long time. The official free plugin is the easiest route for most people, so that’s where I’ll start.
Methods to Add Font Awesome to WordPress:
- What Is Font Awesome and Why Use It?
- 1. Add Font Awesome With the Official Plugin
- 2. Add Font Awesome Anywhere in Your Design With SeedProd
- 3. Add Font Awesome Manually With Code
- Which Method Should You Use?
- FAQs About Adding Font Awesome to WordPress
What Is Font Awesome and Why Use It?
Font Awesome is an icon library, so instead of uploading an image for every arrow, phone symbol and social logo, you pick one from a list and drop it into your page.
The icons are vectors rather than images, so they stay sharp at any size and you restyle them the way you’d style text.
They’re also far lighter than the PNGs they replace, which helps if you’re working on making your WordPress site faster.
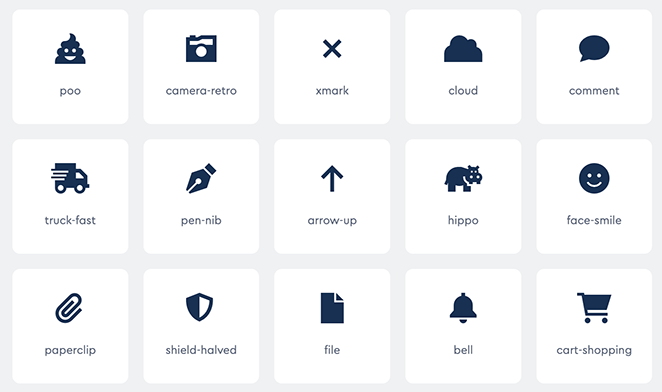
How many icons you get depends on which route you take, and the numbers get quoted loosely, so here’s one I can actually point at. I opened up SeedProd 6.20.9 on my own test site and counted the icon library it ships with: 2,420 icons, from Font Awesome Free 6.6.0.
They also render consistently across modern browsers and devices, and you can change color, size and alignment without touching an image file. That last part is the real win, because it’s the difference between a color tweak taking ten seconds and taking an afternoon.
Next, let’s get it onto your site.
1. Add Font Awesome With the Official Plugin (Easiest)
If you just want icons inside your posts and pages, start here. The official Font Awesome plugin is free, it’s built by the Font Awesome team, and it saves you from managing stylesheets yourself.
I’d check it’s still being looked after before installing any icon plugin, because plenty get abandoned. When I looked at its WordPress.org listing it was on version 5.2.1, updated in August 2026 and tested against WordPress 7.1, which is about as current as plugin listings get.
Install it from Plugins › Add New the way you would any other plugin, then activate it. If you haven’t done that before, there’s a beginner’s guide to installing a WordPress plugin that walks through it.
Add an Icon With the Font Awesome Block
Once the plugin’s active, open any post or page and add the Font Awesome Icon block.
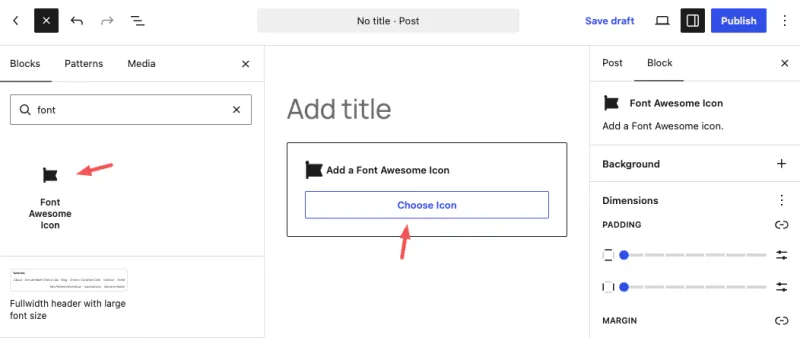
Click Choose Icon and the Icon Chooser opens.
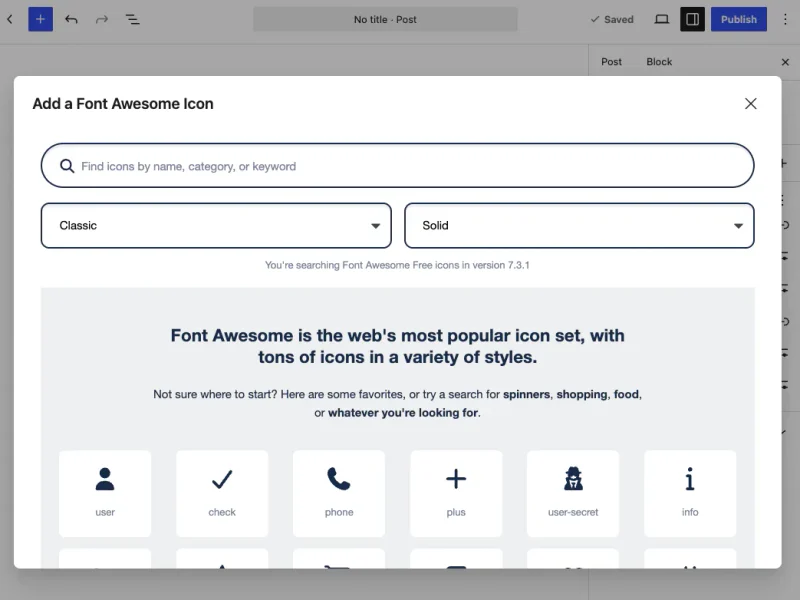
From there you can search by icon name, by category, or by keyword, and switch the Family and Style with the dropdowns if you want a lighter or heavier version of the same shape. Click the icon you want and it drops into your content.
If you’d rather put an icon in the middle of a sentence than on its own line, highlight the text and pick Font Awesome from the formatting toolbar instead. That opens the same Icon Chooser, and it needs WordPress 6.3 or newer.
Add Font Awesome Icons With a Shortcode
This page used to teach the shortcode as the main way in, pasted into a Shortcode block. That was the wrong advice for anyone on the block editor, and the block above is what you want instead.
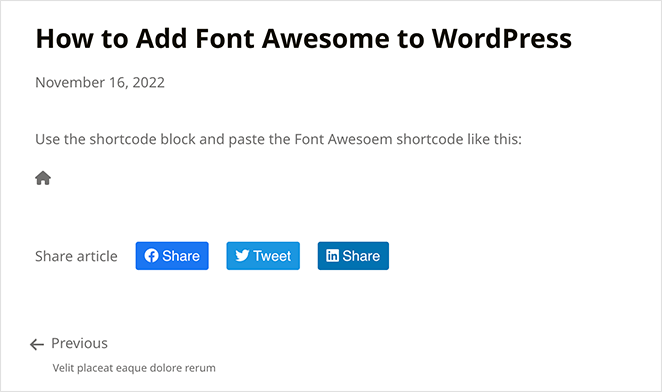
Shortcodes do still work though, and they’re what the plugin’s own documentation points you to if you’re in the classic editor. Add the name of the icon you want:
[icon name="rocket"]Swap “rocket” for whatever you need, and leave off the fa- prefix on the name. With no style specified you’ll get the Classic Solid version of the icon.
To ask for a particular weight, add a prefix:
[icon name="rocket" prefix="fa-sharp fa-light"]To find an icon’s name, browse the gallery at fontawesome.com/icons and click the one you want.
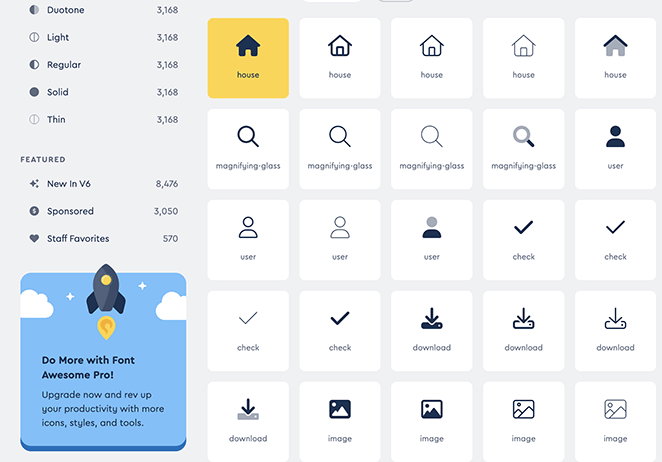
Copy the name, paste it into your shortcode, and publish.
Check which source the plugin is using: its CDN option serves version 5 icons only, so if you want the newer sets you’ll need to point the plugin at a Font Awesome Kit instead.
This method has one real limit. It puts icons in your content, which is fine until you want one in your site header, in a menu, or on a landing page you’ve designed yourself. For that you need something that edits the design rather than the post.
2. Add Font Awesome Anywhere in Your Design With SeedProd
SeedProd is a drag-and-drop website builder for WordPress, so you design pages and templates visually instead of editing theme files. I build with it on my own site, and icons are one of the things it makes genuinely quick.

The reason to use it here is placement. Because you’re editing the design, you can put a Font Awesome icon into a header, a footer, a sidebar or a landing page, and none of it needs HTML or CSS classes.
Here’s how I add them.
Step 1. Install and Activate SeedProd
Install and activate SeedProd on your site. There’s a free version, and the Icon and Icon Box blocks I use below are available on every paid plan, so Basic covers you if that’s where you start.
After activating, you’ll be taken to the license screen. Paste your license key in and click Verify Key. You can get back to it any time from SeedProd › Settings › License Key.
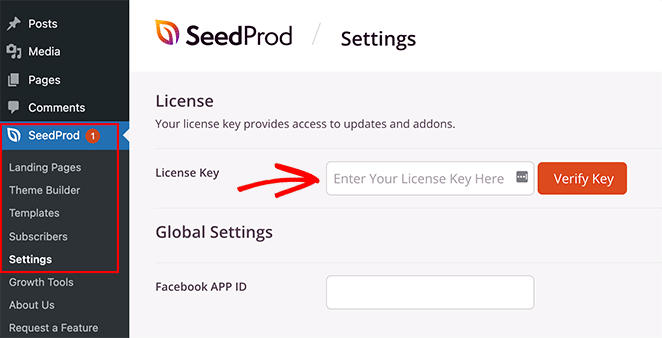
Your key lives in your account on the SeedProd website, in the Downloads section.
Step 2. Name Your Page and Choose a Template
Go to SeedProd › Landing Pages and click Add New Landing Page.
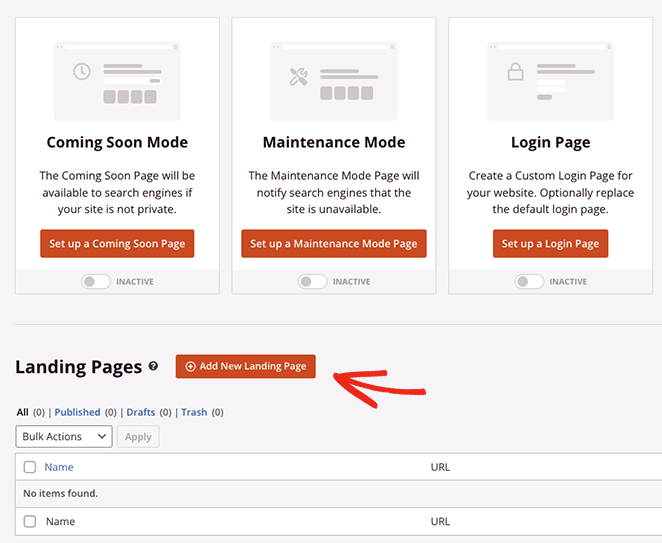
Name your page first. SeedProd builds a URL from the name as you type, and you can change that later in the page settings.
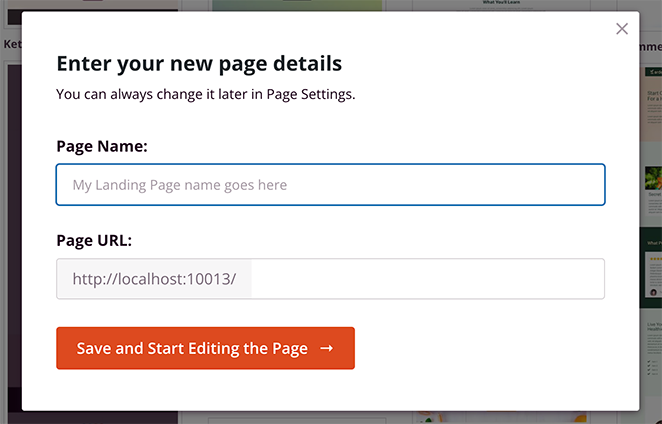
Then click Next: Choose Template and pick a design to start from.
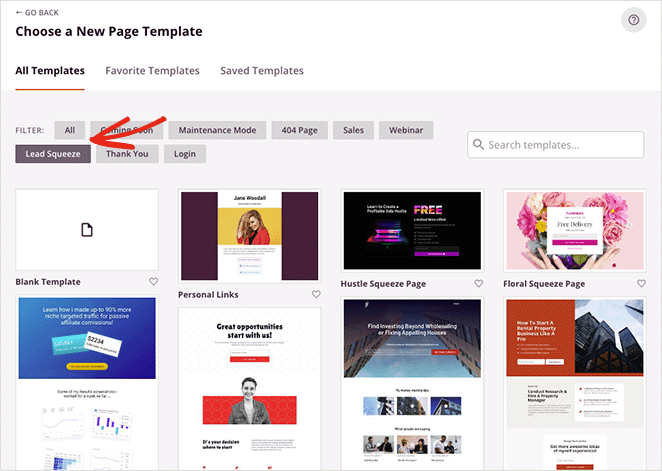
Any template can be customized from top to bottom, so pick whichever is closest to what you’re after rather than agonizing over it. There’s a Blank option if you’d rather start from nothing.
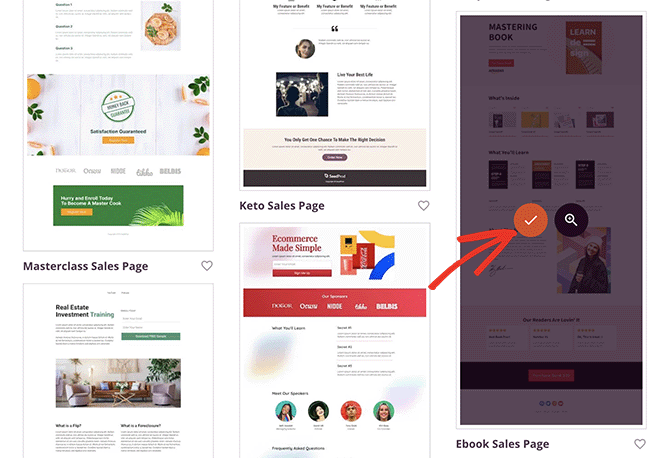
SeedProd then opens the page in the visual editor.
Want icons in your theme, not just one page? The same builder can make a custom WordPress theme, which is where you’d put an icon into a header or footer that every page shares.
Step 3. Add Font Awesome Icons
The editor shows a live preview of your page on the right, with blocks and settings on the left.
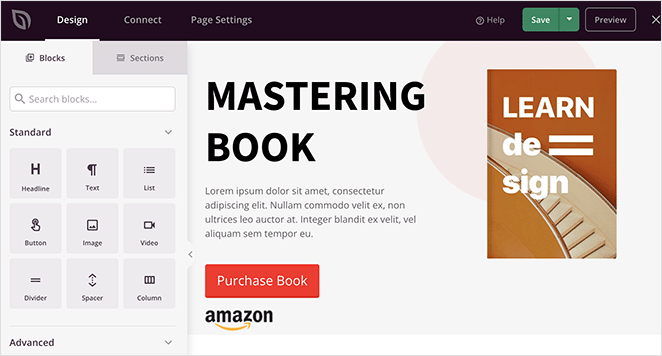
Click any block already on the page and its settings open in that left sidebar, where you can change content, colors, backgrounds and fonts.
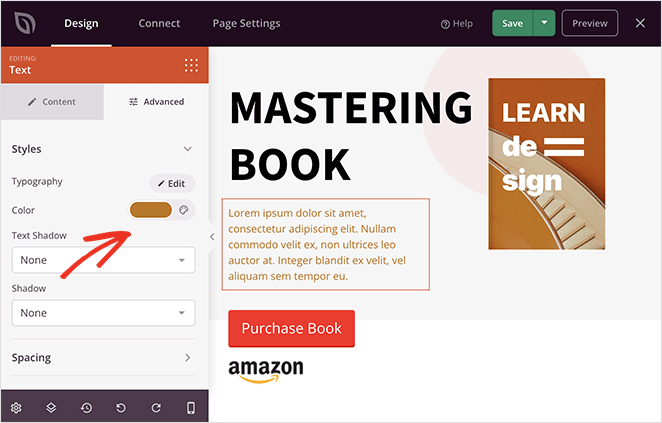
To add an icon, find the Icon block under Design and drag it onto your layout.
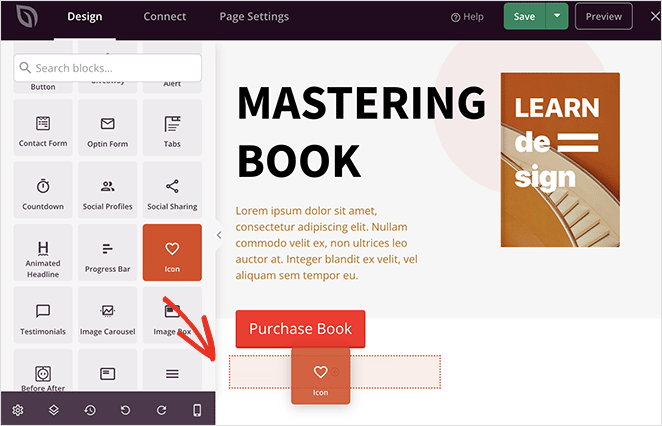
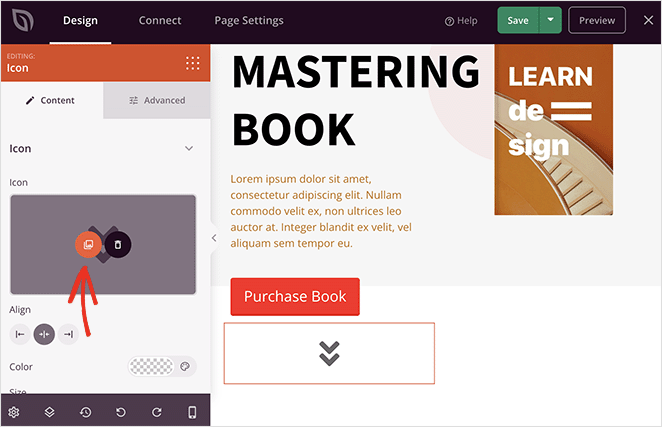
It drops in with an arrow by default. With the block selected, click the Icon Library button in the settings panel to swap it.
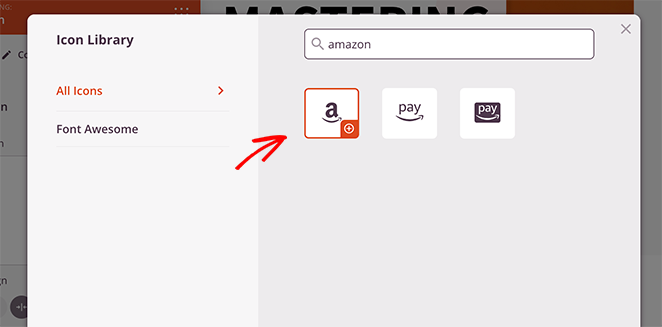
That opens the picker with all 2,420 icons in it. Scroll, or type what you’re after into the search box, which is faster once you know roughly what the icon is called.
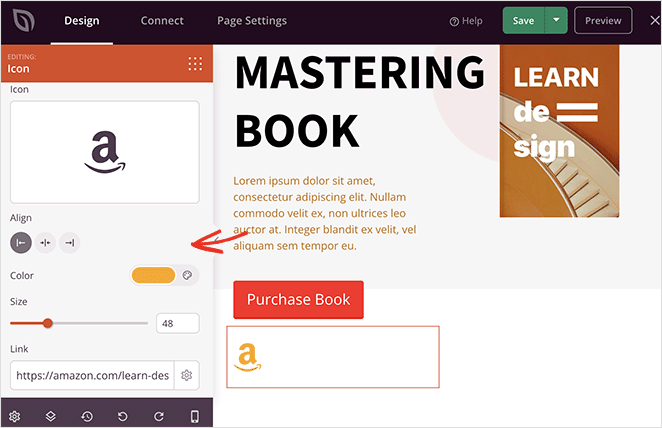
Click it and it lands on your layout. You can then set its color, size, alignment and link.
If you want the icon to carry a heading and a line of text with it, use the Icon Box block instead. It behaves the same way, with room for the extra copy. I reach for this one on feature sections, where a bare icon doesn’t say enough on its own.
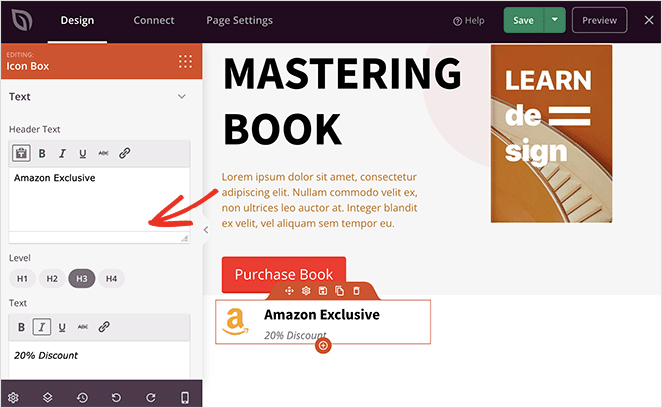
Two other blocks pull from the same icon set, and they’re worth knowing about because they save you placing icons by hand.
The Social Profiles block handles custom social media icons as a set, so you’re not dragging in one icon per network.
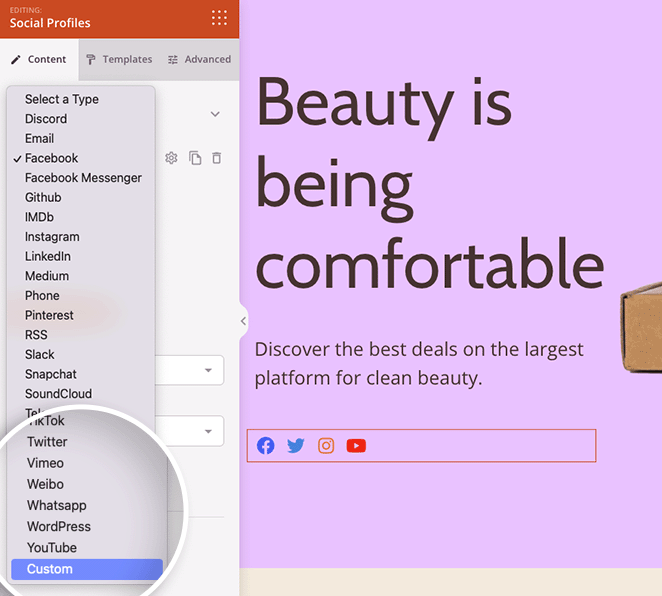
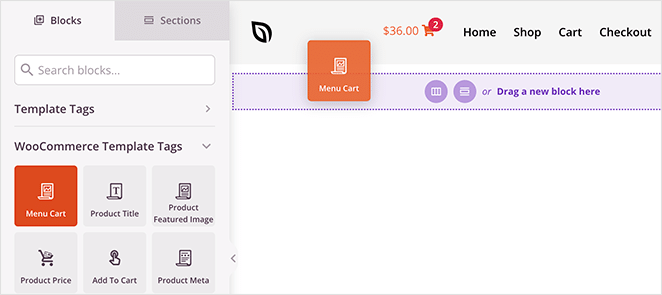
And if you run a store, the Menu Cart block puts a shopping cart icon in your menu.
Step 4. Publish Your Changes
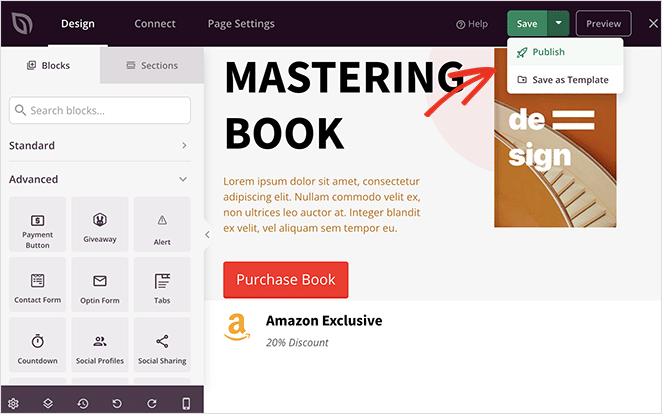
Click Save, then Publish to put the page live.
Visit the page and check the icons at a couple of screen sizes before you move on.

3. Add Font Awesome Manually With Code
You can also load Font Awesome yourself and skip the plugin entirely. I’d only do this if you’re comfortable editing theme files, because a typo here takes the whole site down rather than just breaking an icon.
The snippet below loads the stylesheet from a CDN. It belongs in a child theme’s functions.php, never the parent theme, or the next theme update will wipe it.
function my_theme_font_awesome() {
    wp_enqueue_style(
        'font-awesome',
        'https://cdnjs.cloudflare.com/ajax/libs/font-awesome/6.6.0/css/all.min.css',
        array(),
        '6.6.0'
    );
}
add_action( 'wp_enqueue_scripts', 'my_theme_font_awesome' );
With that in place, you write icons as HTML wherever you can add HTML:
<i class="fa-solid fa-rocket"></i>Honestly though, I don’t edit functions.php for this any more. I keep snippets like it in WPCode, because the code then survives a theme switch and I can toggle it off without opening a file editor.
Back up before you touch a theme file: if you can’t get back into your dashboard after saving, you’ll need FTP or your host’s file manager to undo it.
Which Method Should You Use?
The question that actually separates these three is where you want the icon to appear, not how easy each one is to set up.
| Method | Where the icons can go | Needs code? | Cost |
|---|---|---|---|
| Official Font Awesome plugin | Inside posts and pages, including mid-sentence | No | Free |
| SeedProd | Anywhere in the design: headers, footers, menus, landing pages | No | Icon and Icon Box on any paid plan |
| Manual code | Anywhere you can write HTML | Yes | Free |
For most people writing posts, the official plugin is the right answer and I’d stop there. It’s free, it’s maintained by the people who make the icons, and the Icon Chooser is quicker than hunting for a class name.
Where it runs out is anything outside your content. If the icon needs to sit in a header, a footer, a menu or a page you’ve laid out yourself, SeedProd is what I use, because I’m editing the design at that point rather than the post.
The manual route is worth it in one case: you want a specific Font Awesome version pinned and you’d rather not add a plugin for it. Otherwise you’re taking on a maintenance job for no real gain.
FAQs About Adding Font Awesome to WordPress
Is Font Awesome Free to Use on a WordPress Site?
Yes, the free set covers most sites, and it’s what both the official plugin and SeedProd give you out of the box. Font Awesome sells a Pro subscription for the larger icon library and extra styles, but you don’t need it to put icons on a page.
Why Are My Font Awesome Icons Showing as Empty Squares?
Usually the stylesheet isn’t loading, or two different versions of Font Awesome are loading and fighting each other, which happens when your theme includes one and a plugin includes another. The official plugin has a conflict scanner built in that finds the other copies for you.
Does Font Awesome Slow Down My Site?
It adds one stylesheet request, so the honest answer is a little, but far less than the image files it replaces. The version that can hurt is loading the whole library twice, which is the same conflict problem as above.
Can I Put a Font Awesome Icon in My WordPress Menu?
Not through the standard Appearance and Menus screen, which only takes plain text. You’d either build the menu in a tool that supports icons, like SeedProd’s header templates, or add the icon markup by hand once Font Awesome is loading.
How Do I Change the Size and Color of an Icon?
In SeedProd you set both in the block’s settings panel with a slider and a color picker. In HTML you style it like text, or use Font Awesome’s own sizing classes such as fa-2x.
Do I Need SeedProd Pro for the Icon Blocks?
No. SeedProd’s documentation lists both the Icon block and the Icon Box block as available on all its license plans, so Basic includes them. This page used to say you needed Pro for the Icon Box, which was wrong.
Ready to Add Icons to Your WordPress Site?
Pick based on where the icon needs to live. Posts and pages, use the official plugin and you’re done in about two minutes.
If it’s your header, footer or a page you’ve designed, that’s what SeedProd’s Icon and Icon Box blocks are for, and they’re on every paid plan rather than locked behind the top tier.
Either way, swapping a color later takes a click instead of a re-export, which is the whole reason I stopped using image files for this.
Next up, you might want to edit a menu in WordPress to tidy up your navigation, or take a look at the best WordPress themes if you’re still choosing a design.
Thanks for reading! We’d love to hear your thoughts, so please feel free to join the conversation on YouTube, X and Facebook for more helpful advice and content to grow your business.