One of my favorite ways to make a WordPress site feel smarter is by tailoring the content on each page. You always want to show your visitors the most relevant information possible.
A fantastic way to do this is to add a different sidebar for different pages in WordPress.
This simply means the sidebar on your “About” page can serve a completely different purpose than the one on your blog.
It’s a small adjustment that makes your site look incredibly professional and work better for your visitors.
In this guide, I’ll show you how to set it up without writing any code.
Quick Steps:
Why Use Different Sidebars for Different Pages in WordPress
Before we jump into the steps, let’s talk about why this small change can make a big difference. A one-size-fits-all sidebar might work technically, but it often feels out of place on the wrong page.
When you customize your sidebars, you unlock all kinds of useful upgrades.
Here are some of the biggest benefits I’ve seen:
- Boosts Relevance
You can show content that matches the page’s purpose. For example, related posts on your blog or your business hours and map on the contact page.
- Improves User Experience
When visitors can quickly find what they need, they stick around longer and have a better experience. In fact, intuitive design can boost user retention by up to 60%, showing just how much a well-organized layout (like a targeted sidebar) can impact engagement.
- Looks More Professional
A site that adapts its layout based on the page just feels smarter. It tells your visitors you’ve put care into the details.
- Guides Your Visitors
Your sidebar is prime space for action. You can add a newsletter signup to your blog or a “Book Now” button on your services page right when users are most interested.
Making this one change really sharpens both the design and performance of your site.
How to Add a WordPress Sidebar for Different Pages with SeedProd
The easiest way to create and assign custom sidebars in WordPress is by using SeedProd, the best drag-and-drop website builder for WordPress.

With SeedProd, you can build completely custom themes, pages, and layouts, without writing a single line of code. It includes a powerful Theme Builder that lets you design headers, footers, sidebars, and more using simple visual blocks.
This means you can create a different sidebar for each page on your site, control exactly where it appears, and make changes anytime without touching your theme files.
Let me show you how it works step-by-step.
Step 1: Install and Activate SeedProd
To get started, go to the SeedProd website and log in to your account.
Click on the Downloads tab and download the plugin file to your computer. It will save as a ZIP file.
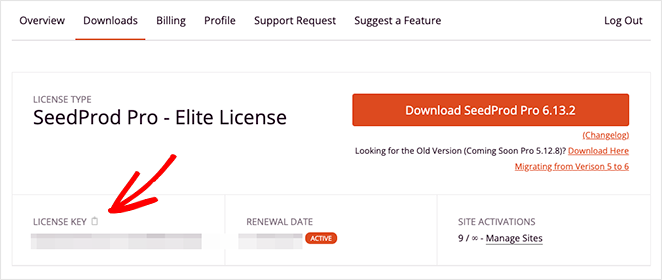
Note: There’s a free version of SeedProd, but I’m using the Pro version in this tutorial so we can use the Theme Builder.
Next, go to your WordPress dashboard and install and activate the plugin. For more details, please see our documentation on how to install SeedProd Pro.
Step 2: Create a Custom Theme
Now that SeedProd is installed, you can start building your custom WordPress theme.
In your WordPress dashboard, go to SeedProd » Theme Builder. At the top of the page, click the Theme Template Kits button.
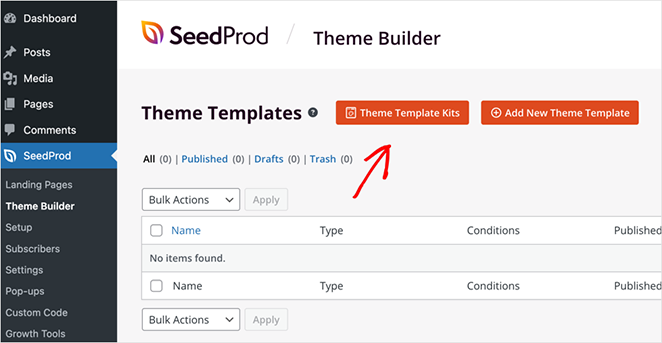
You’ll see a library of professionally designed Starter Themes.
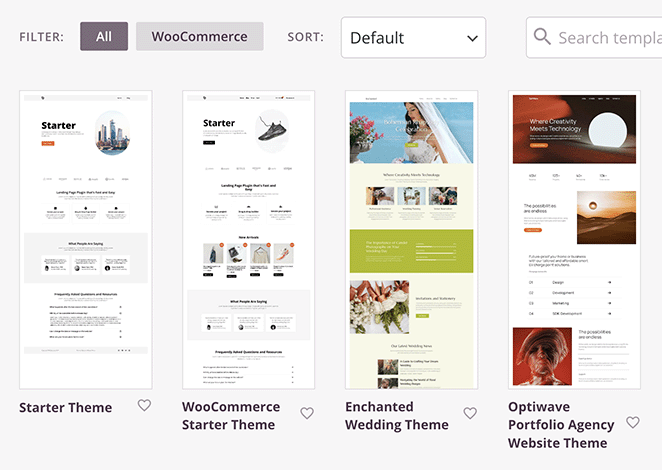
Pick a template that fits your brand. You’ll be able to change everything later in the drag-and-drop builder.
When you select a kit, SeedProd will automatically create all the core theme parts for you which include:
- Header
- Footer
- Single Post
- Page
- Sidebar
- And more
You can edit each part in SeedProd’s visual editor, so you can customize the layout without touching any code.
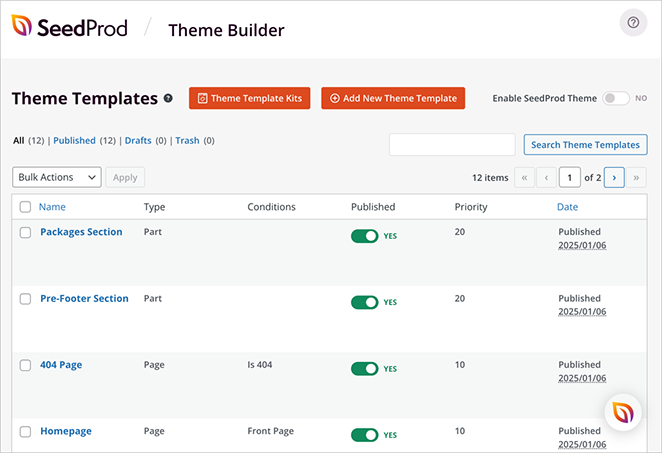
If you want a full walkthrough of how this works, check out our guide on how to create a custom WordPress theme.
Step 3: Create a Custom Sidebar Template
To show different sidebar content on different pages, you’ll want to create a new sidebar template based on your existing design so everything stays consistent.
First, find the Sidebar template part in your kit. This is the default sidebar that your theme uses whenever a page calls for one.
For this tutorial, we’re going to duplicate that sidebar and make a few changes so it’s tailored specifically for the Archives page instead of the blog page.
To do that, hover over the Sidebar template in the Theme Builder and click Duplicate.
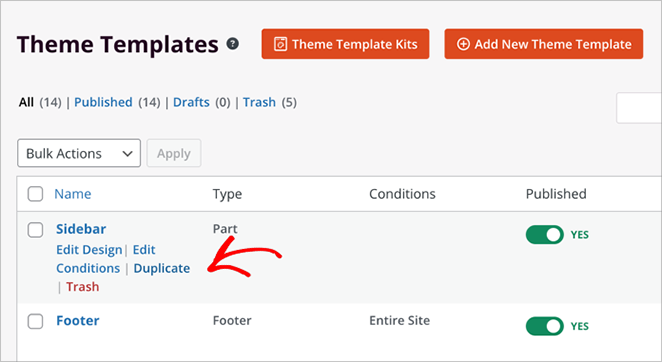
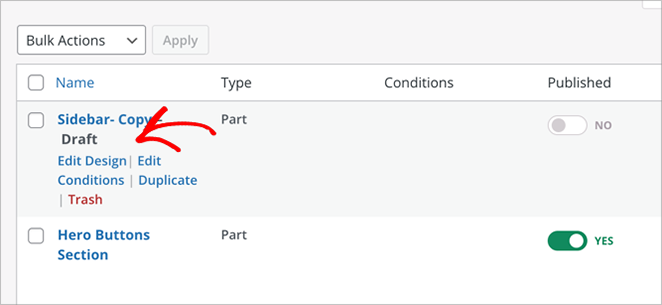
You’ll now see a copy appear in your list of theme parts.
Click Edit Design on the duplicated version to open it in the visual builder.
Inside the editor, you can customize the layout however you want.
For my Archives page sidebar, I removed the opt-in form block, and replaced it with a recent posts block and some testimonials to highlight social proof.
To do this yourself, simply hover over a block and select the trashcan icon.
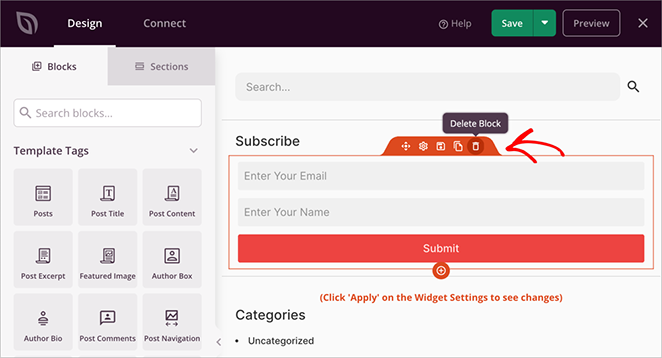
Then, go ahead and drag over the blocks you want to display in your custom sidebar.
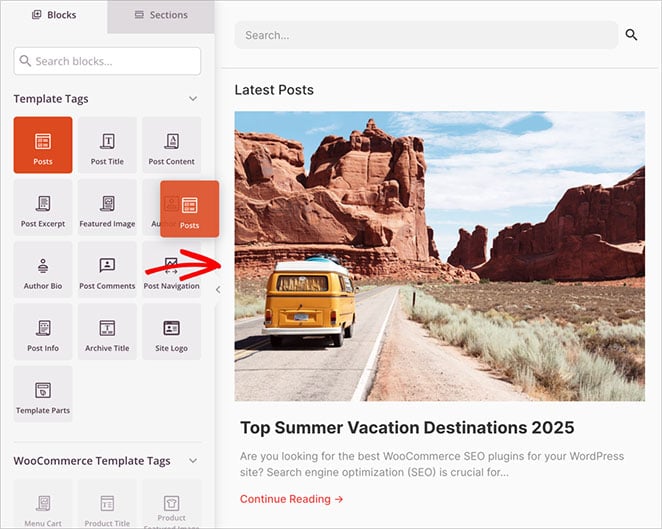
This keeps the overall sidebar design consistent. It has the same fonts, spacing, and structure, but makes the content match the intent of the page.
For a more detailed walkthrough, see our guide on how to add a custom sidebar in WordPress.
Step 4: Add the Sidebar to a Page Layout
Now let’s go ahead and add your new sidebar to the right template.
The theme kit I’m using includes two templates that feature a sidebar:
- Single Post — used for regular blog posts
- Archives, Search Results — used for archive pages like category listings and search results
Right now, both of these templates are using the same default sidebar.
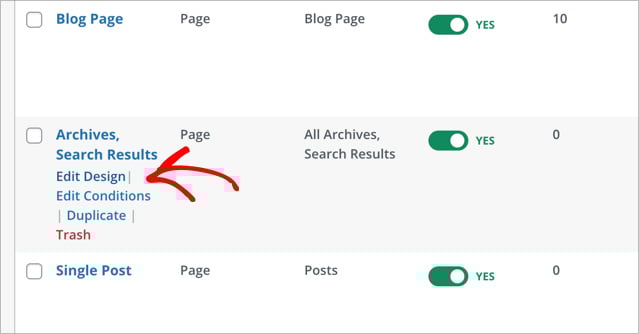
In this case, I want the Archives, Search Results template to use the new sidebar I just created. The one tailored for archive content.
To do that, find the Archives, Search Results template in the list and click Edit Design.
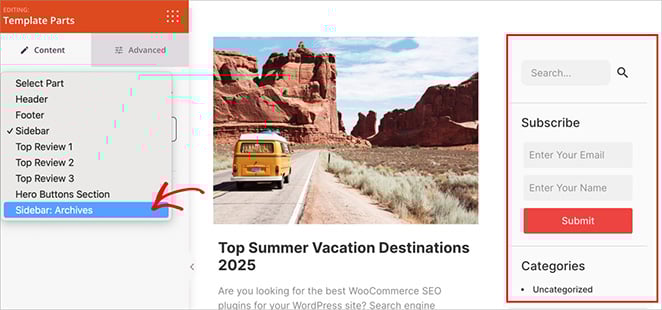
Inside the SeedProd editor, hover over the sidebar area until you see an orange toolbar appear. Click on that section to select it.
In the left-hand settings panel, you’ll see it say Editing: Template Parts.
From the Template Part dropdown, select the new sidebar template you created earlier.
You’ll see the layout update immediately, showing your custom sidebar in place.
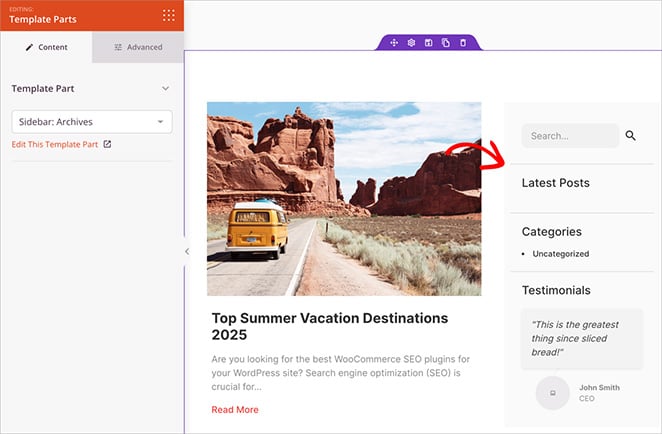
When you’re happy with it, just click Save in the top-right corner.
That’s it! You’ve now assigned a different sidebar to your archive pages without changing what’s shown on blog posts.
Step 5: Save, Publish, and Enable Your Theme
Once your custom sidebar is in place, the last step is to make sure your theme is live on your site.
Go to SeedProd » Theme Builder in your WordPress dashboard.
At the top of the page, click the toggle that says Enable SeedProd Theme.
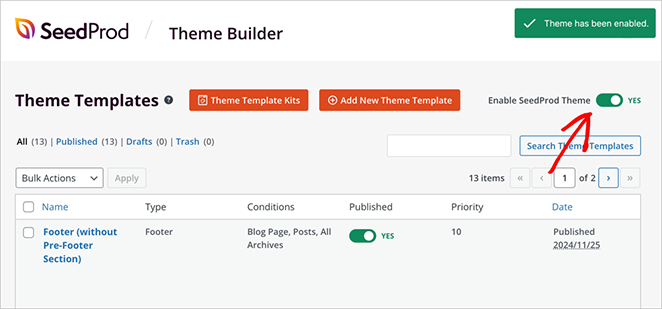
This will replace your current WordPress theme with the one you just built including your custom layout and sidebar assignments.
Now visit your site and navigate to an archive page (like a blog category or search results). You should see your new sidebar appear exactly where you placed it.
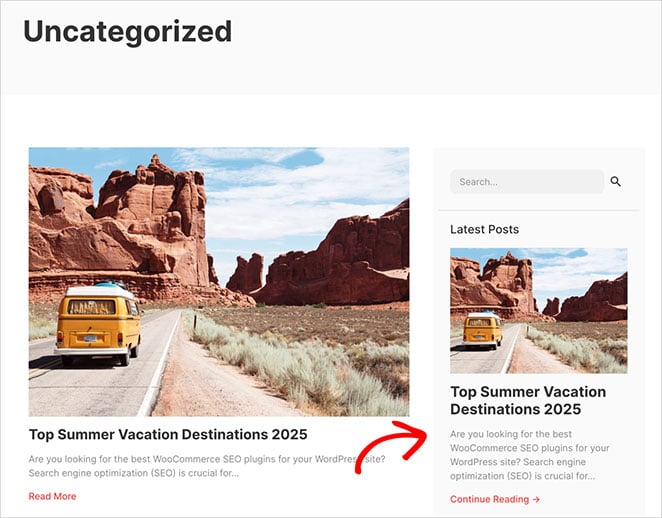
If you ever want to create more custom sidebars for other templates, just repeat the same steps.
Other Ways to Show Different Sidebars in WordPress
If you’re not using SeedProd, there are still a few other ways to show different sidebars across your WordPress site. These methods don’t offer the same drag-and-drop experience, but they can still work depending on your setup.
Use a Dynamic Sidebar Plugin
One option is to install a plugin like Custom Sidebars – Dynamic Widget Area Manager.
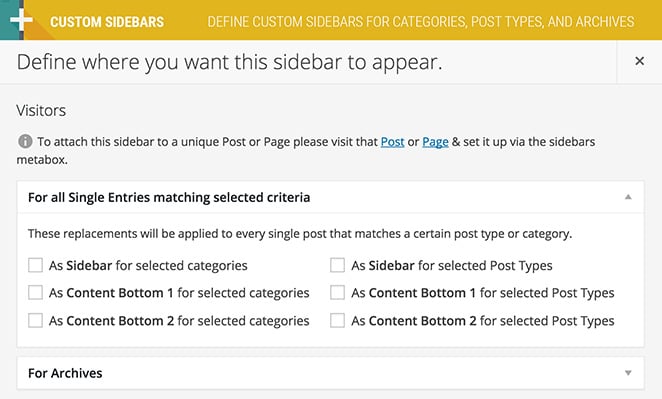
This lets you create multiple sidebars and assign them to different pages, posts, or categories using a simple dropdown interface.
- Pros: No code required, works with most themes
- Cons: You’re limited to widget-based layouts and don’t get full visual control like you do with SeedProd
Edit Theme Files (Code Method)
If you’re comfortable editing code, you can register custom sidebars and display them using conditional logic in your theme templates. However I don’t recommend this if you’re unfamiliar with coding.
- Pros: Total control over where and how sidebars appear
- Cons: Risky for beginners; changes can be lost if you update your theme without a child theme
Personally, I choose SeedProd every time. It’s the easiest option I’ve found, especially when you want full control over how your sidebars look and where they appear without touching a single line of code. Plus, it’s flexible enough to match whatever layout or design style you’re going for.
FAQs About Custom Sidebars in WordPress
Make Your Sidebars Fit Every Page
Using a different sidebar for different pages in WordPress is one of those small changes that makes a big impact. It gives your site a cleaner design, improves the user experience, and helps guide visitors exactly where you want them to go.
Personally, I use SeedProd for this because it makes the entire process quick and code-free. Plus, I can match the layout perfectly to each page’s purpose.
You can build custom page layouts and sidebars with SeedProd in just a few clicks, no developer needed.
You may also find the following guides helpful in customizing you WordPress site:
- How to Create a Custom Page in WordPress
- How to Change Blog Layout in WordPress
- How to Change Margins in WordPress
- How to Hide Page Titles in WordPress
- How to Add a Gallery to WordPress
- How to Add Custom CSS in WordPress
Thanks for reading! We’d love to hear your thoughts, so please feel free to join the conversation on YouTube, X and Facebook for more helpful advice and content to grow your business.

