TL;DR: WordPressでAIを使ってランディングページを作成する方法
はい、約30〜45分でWordPressのランディングページをAIで作成できます。コピー、画像、レイアウトも含まれます。同じページを手作業で作成した場合、約3時間かかりましたので、AIで作成時間は約75%短縮されました。
- ChatGPTで計画を立てる: ページのセクション、見出し、CTAの概要を尋ねましょう。
- テンプレートを選択する: 空白ページではなく、SeedProdのテンプレートから始めましょう。
- AIでコピーを作成する: SeedProdエディター内で見出しや本文を生成し、編集します。
- AI画像を追加する: 同じビルダー内でカスタムビジュアルを作成します。ストックフォトは不要です。
- 最適化して公開する: AIOSEOにタイトルとメタを記述させ、公開ボタンを押します。
数日後にローンチ予定なのに、目の前には空白のテンプレート。デザイナーもコピーライターも不在で、ページを埋めるのはあなた次第です。
まさにその時にAIを活用します。このガイドでは、WordPress内で動作するツールを使ってAIでランディングページを作成する方法を紹介します。これにより、ページはあなたのものとなり、管理下に置かれます。
まず、1つ明確にしておくことがあります。「AIランディングページ」に関するアドバイスの多くは、AIがページ全体を自動で構築・公開すると示唆していますが、現時点ではそうではありません。以下の方法は、いくつかのAIツールとビルダーを組み合わせるもので、実際にページを公開する部分です。
AIランディングページとは何か(AIはページ全体を作成できるのか)?
WordPressのAIランディングページとは、AIがコピー、画像、レイアウトを担当し、あなたがビルダーで組み立てて公開するスタンドアロンページのことです。 AIがコンテンツの重労働を行い、あなたは最終結果を管理下に置きます。
では、AIはランディングページを単独で作成・公開できるのでしょうか?標準的なWordPressセットアップでは、単独ではできません。コピーを作成したり、レイアウトを提案したり、画像を生成したりできますが、最終結果を組み立てて公開するには、依然としてWordPressビルダーが必要です。
しかし、その状況は変化しています。AIエージェントは現在、会話形式でビルダーを操作できるようになっており、その方法については、終盤のWPVibeセクションで説明します。メインのワークフローとしては、ツールを組み合わせるのが最も実用的なアプローチです。
私のテストでは、ChatGPTでページのコンテンツをアウトライン化し、DALL-Eでカスタム画像を生成し、AIOSEOでOpenAIを使ってSEOタイトルとメタディスクリプションを作成しました。各ツールが仕事の一部を担当します。
欠けているのは、WordPress内ですべてを接続するビルダーです。SeedProdは、AIライティングと画像生成機能をページエディター内に直接配置することでこれを解決し、1つのページを作成するためにアプリ間を移動する必要がなくなります。
AIが私の作成時間を3時間から45分に短縮した方法
WordPressで手作業でランディングページを作成するには、ワイヤーフレームから公開まで約3時間かかりました。SeedProdのAIライティングと画像ツールを使用すると、同じページが45分未満で完了し、作成時間は約75%短縮されました。
その時間の節約のほとんどは、ゼロから始める必要がないことから来ています。AIウェブサイトジェネレーターは、時間のかかる部分を処理し、以下のようなサポートを提供します。
- 数秒でヘッドライン、CTA、コンテンツセクションをドラフト
- ブランドの画像やイラストを生成
- 調整可能なセクションレイアウトを提案
- SEOと可読性のためにコピーを調整
- A/Bテストのバリエーションとして実行できる代替コピーを作成します
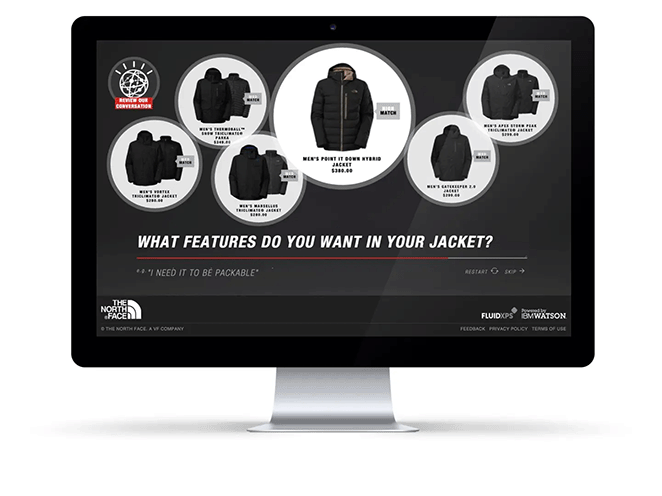
大手ブランドでさえ、顧客体験を向上させるためにAIを活用しています。The North FaceはAIを使用してパーソナライズされた製品レコメンデーションを行い、売上の顕著な増加を記録しました。
私自身のワークフローでも同じ利点を実感しています。AIが登場する前は、ランディングページを手作業で作成していました。今では、デザイン、ライティング、公開まで、すべて半分の時間以下で完了します。
| 特徴 | 手動ビルダー | AIジェネレーター |
|---|---|---|
| ページ構造 | ゼロから作成 | AIによって数秒でアウトライン作成 |
| コンテンツ作成 | すべてのテキストを自分で書く | プロンプトでコピーを生成 |
| 画像デザイン | ストック写真のアップロードまたは使用 | ビルダー内でビジュアルを作成する |
| スピード | 完了までの時間 | 数分で完了 |
WordPressでAIを使ってランディングページを作成する方法
AIの助けを借りて、SeedProdでページ全体を構築する方法をご紹介します。

SeedProdは、ドラッグ&ドロップで操作できるWordPressウェブサイトビルダーです。コードに触れることなく、ランディングページを組み立てて公開できます。AIライティング&イメージアシスタントは、数回のクリックでヘッドライン、コピー、カスタム画像を生成します。
私の経験では、計画から公開まで、プロセス全体で約30分から45分かかります。
必要なもの
開始する前に、以下があることを確認してください。
- 自己ホスト型WordPressサイト
- SeedProdプラグイン(Basicプラン以上)
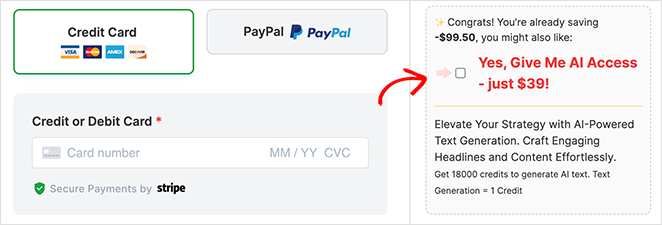
- SeedProd AIアドオン(チェックアウト時に利用可能)
- 明確なページ目標:誰のためのページで、訪問者に取ってほしい唯一のアクションは何か
AIランディングページを無料で作成できますか?
ほとんどの部分は無料で作成できます。無料のSeedProdテンプレートから始め、無料のChatGPTでコピーを作成し、手作業でページに貼り付けます。
それでも、最も時間のかかる部分、つまり空白のページからのライティングを節約できます。有料のSeedProd AIアドオンは、タブ間でのコピー&ペーストなしでエディター内で直接コピーと画像を生成するため、より迅速な方法です。
1. AIでランディングページを計画する
最初のステップは、ChatGPTのようなAIチャットボットを使用して、ランディングページの詳細な構造アウトラインを作成することです。
開始するには、ChatGPTにアクセスし、プロンプトを入力します。
この例では、AIにウェビナーを宣伝するランディングページの概要を作成するように依頼しました。「ウェビナー向けの、わかりやすい4セクションのランディングページの概要を作成してください。」
私のページの概要はこちらです。
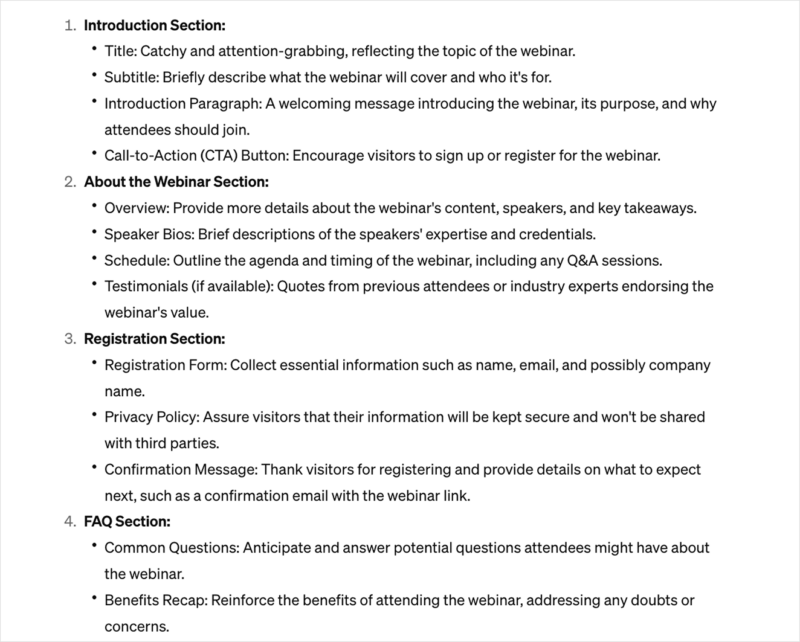
ChatGPTは、ヘッドライン、CTA(コールトゥアクション)、ランディングページコピー、フォーム、FAQの簡単なガイドを提供してくれました。これにより、デザインプロセス中に作業するための確かなフレームワークが得られます。
2. SeedProdのインストール
次に、ウェブサイトにSeedProdをインストールして有効化します。AI機能を使用するには、プレミアムSeedProdプランが必要であり、チェックアウト時にAIアドオンを追加できます。
ヘルプが必要な場合は、SeedProdのインストール方法を示すこれらの手順に従ってください。
3. ランディングページの作成
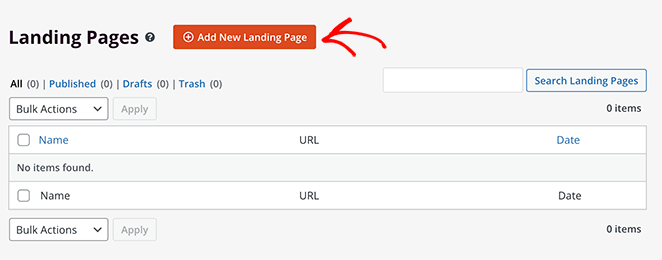
SeedProdをインストールしたら、WordPress管理画面の「SeedProd » Landing Pages」に移動し、「Add New Landing Page」ボタンをクリックします。
次に、SeedProdのレスポンシブランディングページテンプレートのライブラリが表示されます。上部のタブをクリックして、目的別にデザインをフィルタリングします。
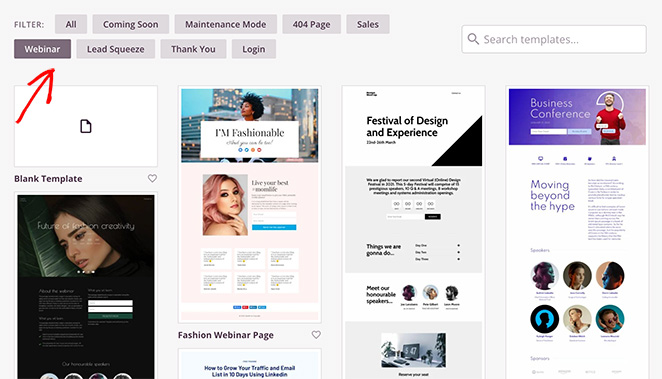
ウェビナーランディングページを作成するため、「Webinar」タブをクリックします。テンプレートから開始すると、必須セクションがすでに配置されているため、コンテンツとブランディングのみをカスタマイズします。
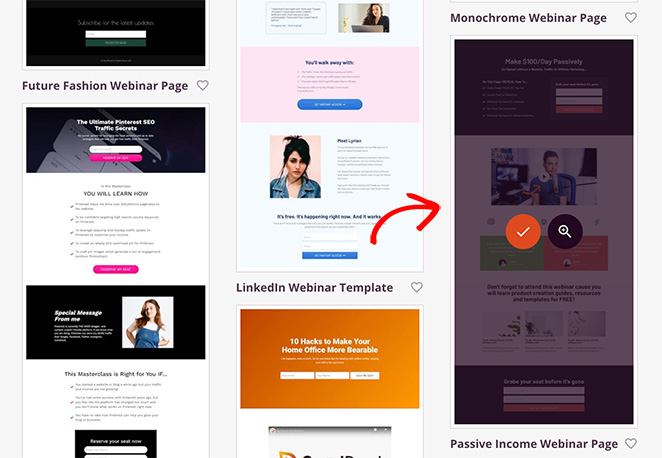
テンプレートを選択するには、好みのデザインにカーソルを合わせ、「チェックマーク」アイコンをクリックします。
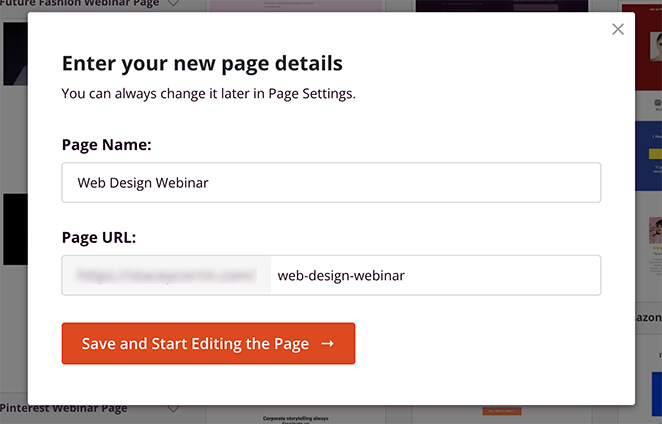
次に、ページに名前を付け、「Save and Start Editing the Page」ボタンをクリックします。
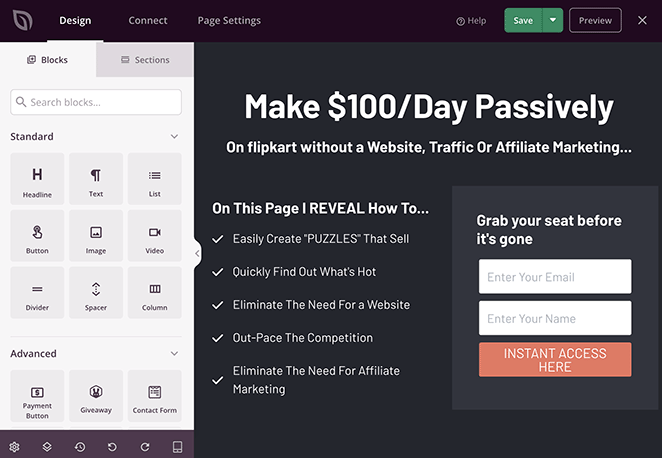
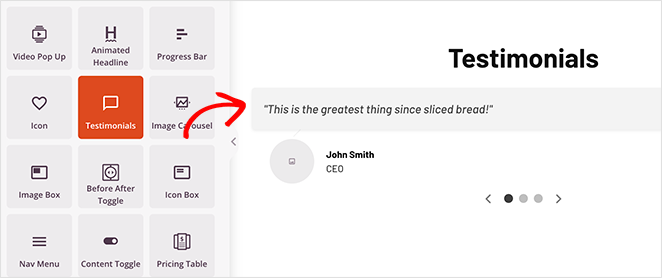
テンプレートがSeedProdのビジュアルエディターで開きます。左側にはページに追加できるブロックが表示され、右側には作業中に更新されるライブプレビューが表示されます。
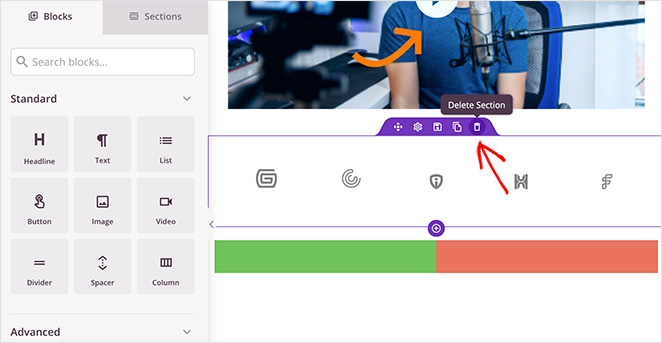
まず、不要な要素を削除します。それらにカーソルを合わせ、ゴミ箱アイコンをクリックします。
次に、ChatGPTのアウトラインに合わせてページを整形します。今のところ、このように提案をコピー&ペーストできます。
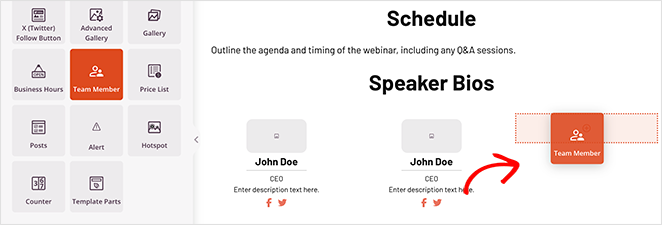
アウトラインにスピーカーが含まれているため、「Team Members」ブロックを使用してプレースホルダーを追加します。左側のサイドバーで見つけて、ページにドラッグします。
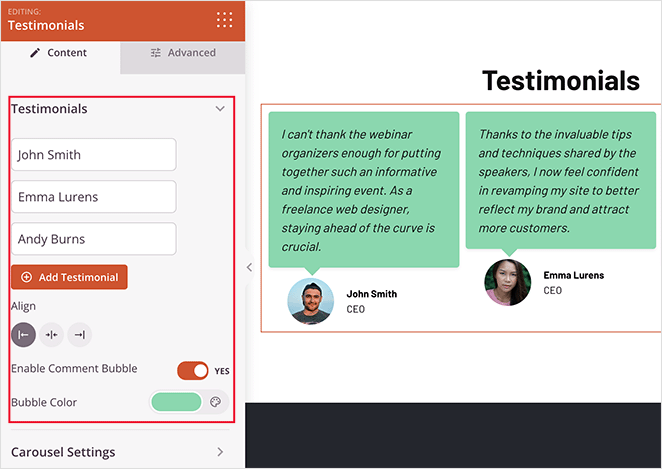
ソーシャルプルーフセクションにも、お客様の声ブロックを使用して同様のことを行います。
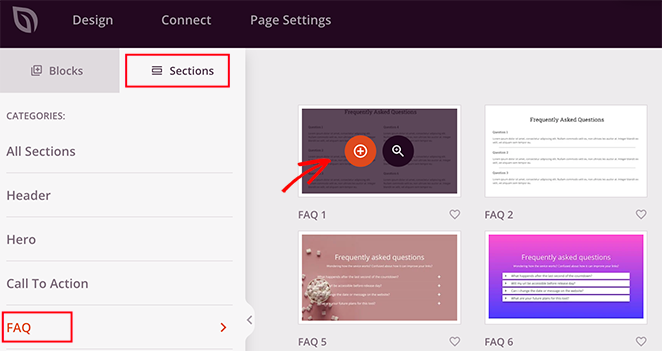
最後に必要なセクションはFAQです。SeedProdには、ワンクリックで追加できる既製のFAQセクションがあります。
それらを見つけるには、左側のサイドバーにある「セクション」タブをクリックし、「FAQ」の見出しをクリックします。
次に、お好みの既製FAQセクションを選択し、プラスアイコンをクリックしてランディングページの最下部に追加します。
これらの新しい要素のいずれかをカスタマイズするのは簡単です。クリックすると、サイドバーに設定が表示されます。
たとえば、お客様の声ブロックでは、スライディングカルーセルを有効にしたり、写真を追加したり、CSSやHTMLなしでフォントや色を調整したりできます。
4. SeedProd AIでコンテンツを作成
ページの構造ができたら、SeedProdに組み込まれているAIライティングアシスタントを使用して、見出しと本文のコピーを作成します。
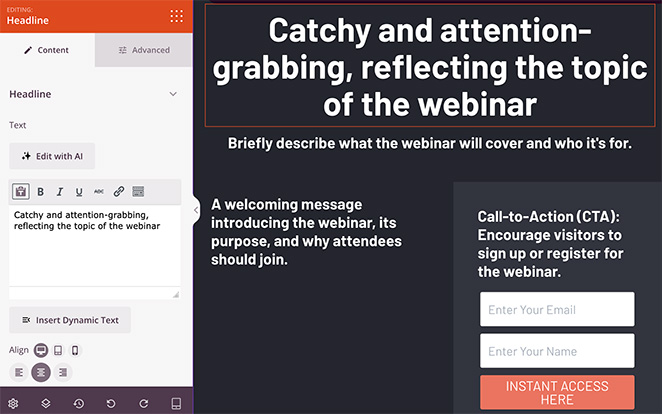
SeedProd AIとそのコピーライティングアシスタントがこのステップを処理します。見出しブロックを選択し、AIで編集をクリックすると、アシスタントが数秒で見出しを作成します。
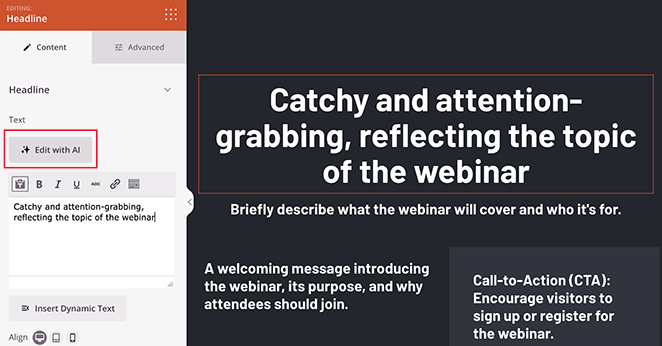
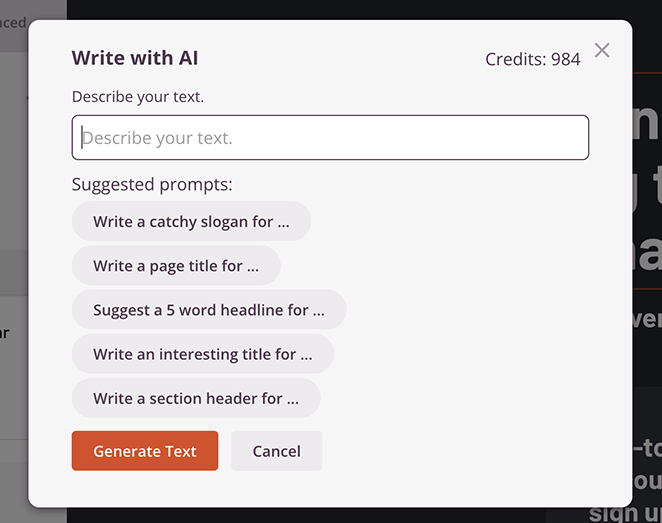
「AIで書く」ポップアップで、プロンプトを入力し、テキストを生成をクリックします。私はこのプロンプトを使用しました:「ウェブデザインウェビナーへの参加を促す、エキサイティングなページタイトルを作成してください。」
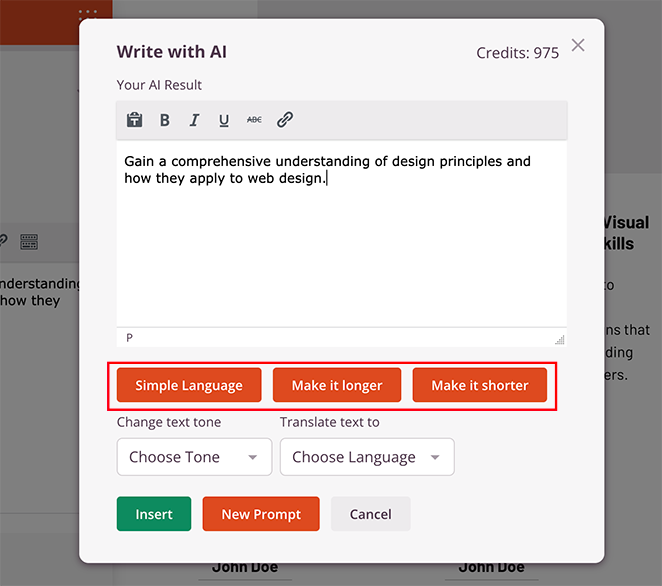
数秒後、AI生成の見出しが表示されます。そのまま使用することも、ボタンをクリックして短くしたり、長くしたり、言語を簡略化したりすることもできます。
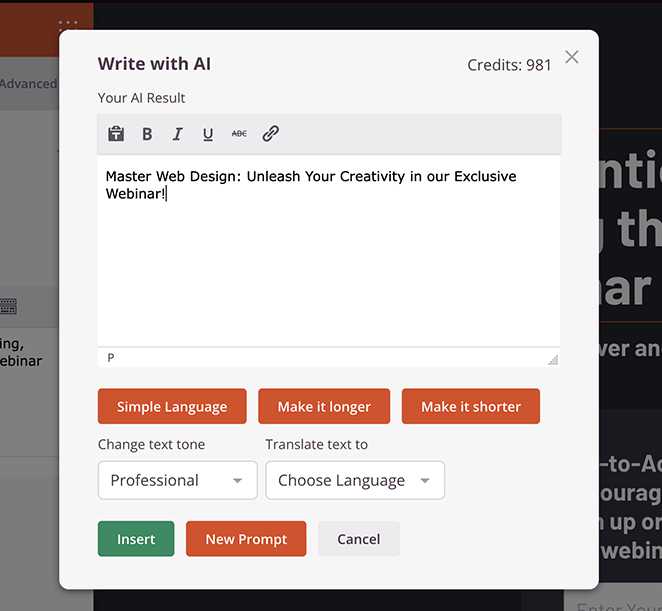
見出しに満足したら、挿入をクリックしてページに追加します。AI生成テキストは強力な出発点ですが、常にブランドの声に合わせてレビューし、パーソナライズしてください。
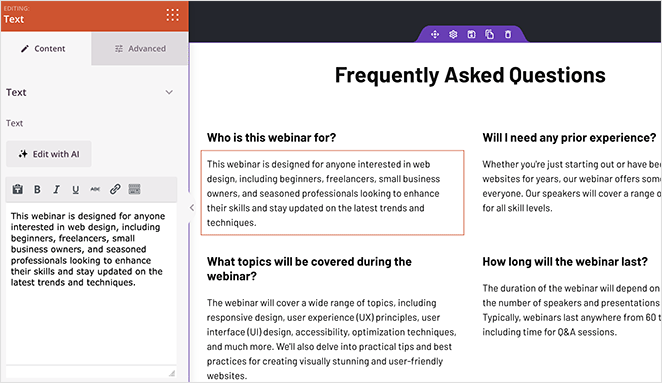
この手順を繰り返して、デザインのあらゆる部分のランディングページコンテンツを生成します。テキストブロックの「書く」または「AIで編集」ボタンをクリックし、関連するプロンプトを入力します。
私はこのアプローチを使用してFAQの回答を作成しました。
詳細については、AIを使用してコンテンツを作成する方法に関するガイドを参照してください。
5. AIでランディングページ画像を生成する
次に、訪問者が何を得られるかを視覚化するのに役立つ画像を追加しましょう。このために、AI画像作成が組み込まれているSeedProdの画像ブロックを使用します。
AIを使用して画像を生成するには、画像ブロックをページにドラッグし、ブロック設定の「AIで追加」ボタンをクリックします。
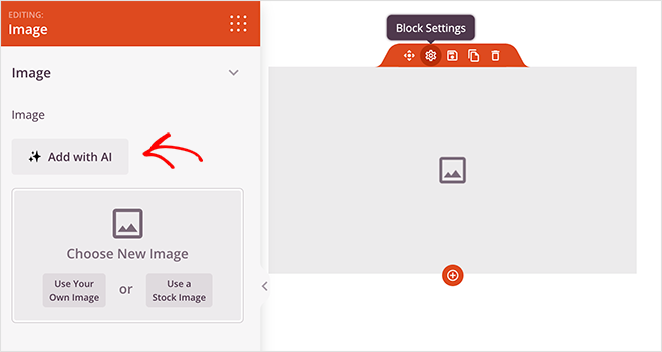
チャットインターフェイスでプロンプトを入力し、「画像を生成」をクリックします。
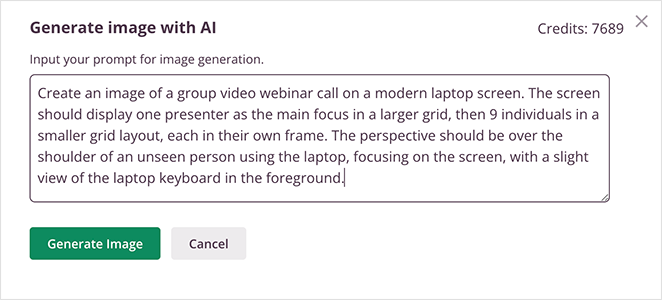
私はこのプロンプトを使用しました:
「モダンなラップトップ画面でのグループビデオウェビナー通話の画像を作成してください。画面には、大きなグリッドでプレゼンターをメインフォーカスとして表示し、次に小さなグリッドレイアウトで9人の個人をそれぞれのフレームに表示してください。視点は、ラップトップを使用している見えない人物の肩越しで、画面に焦点を当て、手前にはラップトップのキーボードがわずかに見えるようにしてください。」
画像が生成されたら、「AIで編集」オプションをクリックして微調整できます。
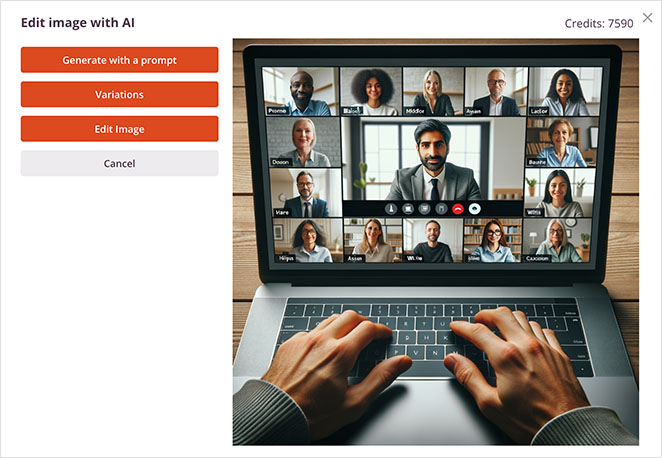
ここでは、より多くのバリエーションを生成したり、ブラシツールで画像のパーツを編集したり、新しいプロンプトで再生成したりできます。
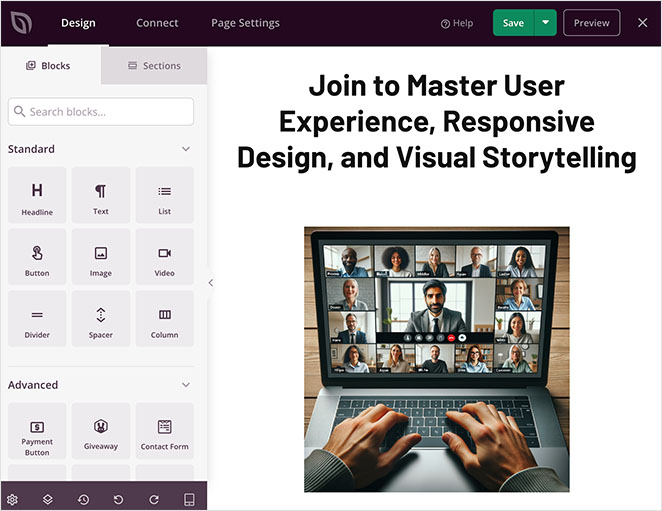
最終バージョンに満足したら、挿入をクリックしてページに追加します。
6. AIでランディングページを最適化
ページが構築されたら、SEOとコンバージョンを最適化する時期です。All in One SEOを使用すると、AIを使用して新しいページのSEOタイトルとメタディスクリプションを作成できます。
方法は次のとおりです。
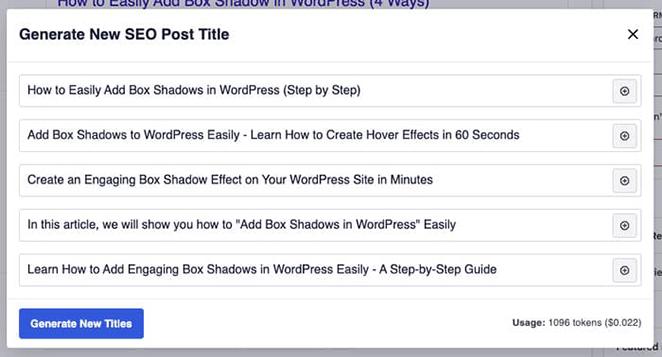
- 画面右上のAIOSEOボタンをクリックして、SEO設定を開きます。
- 「フォーカスキーフレーズ」フィールドにメインキーワードを入力します。
- 「新しいタイトルを生成」ボタンをクリックして、SEOタイトルのAI提案を取得します。
- 魅力的な検索概要を作成するために、メタディスクリプションについても同様のことを行います。
これにより、読者と検索エンジンの両方に対応するページが作成され、可視性とクリック率が向上します。
AI検索やAI駆動のソーシャルメディアでページが表示されるようにページを作成することも価値があります。ChatGPTやPerplexityのようなツールが、人々があなたのトピックについて尋ねたときにソースとしてページを取得できるように、明確な回答スタイルのコピーと構造化された見出しを使用してください。
スピードも重要です。2026年の基準は、LCPが2.5秒未満、INPが200ミリ秒未満であり、高速なビルダーがあればそれを達成しやすくなります。私のGTmetrixテストでは、SeedProdページは556ミリ秒で読み込まれ、これらのターゲットに対して十分な余裕があります。
ページの微調整に役立つその他のAIツールには、次のようなものがあります。
- WPForms:AIパーソナライズされたフォームの確認またはフォローアップを送信します。
- Uncanny Automator:ChatGPTとWordPressを接続してソーシャル投稿を自動化します。
A/BテストでAIランディングページをテストする
AIで構築されたページは強力な下書きであり、コンバージョンに関する最終的な言葉ではありません。それを改善する最も速い方法は、一度に1つの要素をテストし、勝者を選ぶことです。
コンバージョンを最も動かす3つの要素から始めます。
- 見出し:訪問者が最初に読むものであり、滞在するかどうかを最も大きく左右します。
- CTA:アクションを求めるボタンのコピーと色。
- ヒーロー画像:ファーストビューでトーンを設定するビジュアル。
一度に1つの要素を変更して、実際に結果を動かしたものを把握できるようにします。AIもここで役立ちます。SeedProd AIに代替の見出しまたはCTAをいくつかドラフトするように依頼し、元のものと比較してテストしてください。
実際のテスト設定については、WordPressでのランディングページのA/Bテストに関するガイドに従ってください。
7. WordPressでAIランディングページを公開
ランディングページの最適化が完了したら、公開の準備が整います。ページの上部にある保存ボタンをクリックし、公開を選択します。
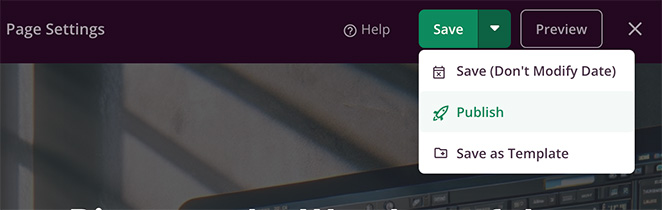
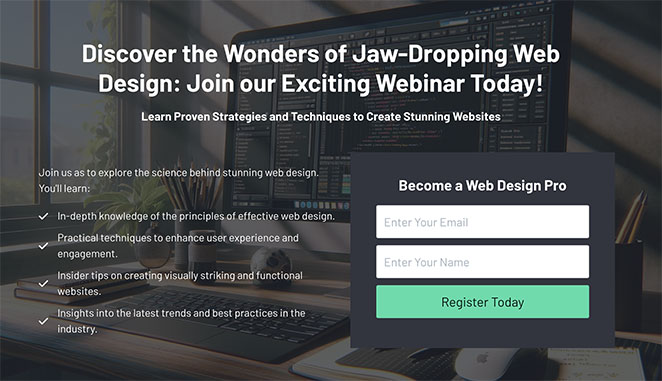
これで、ページにアクセスしてライブで確認できます。これは、テストWebサイトで作成したAIランディングページの最終的な外観です。
あなたも作成しませんか?
45分以内にAIランディングページを構築する
SeedProdは、AIコピー、AI画像、300以上のテンプレートを1つのドラッグアンドドロップエディターにまとめているため、これらの手順を今日ご自身のサイトで実行できます。
今すぐ構築を開始WPVibeでプロンプトからランディングページを構築する
上記のワークフローでは、SeedProdエディター内で作業します。代わりにプレーンな英語で指示を入力して構築したい場合は、現在、より高速なAIルートがあります。
WPVibeは、WordPressサイトをChatGPT、Claude、またはCursorに接続するAIプラグインです。必要なページをチャットで説明すると、AIエージェントがその接続を通じて直接サイトを編集します。

これは「AIがページを構築してくれる」というものに最も近いですが、魔法のボタンではなく、依然として構築とレビューのフローです。エージェントがページを組み立てて編集し、結果を確認して公開します。
フローは短いです:
- サイトを接続: WPVibe を介して WordPress を AI ツールにリンクします。
- ページに指示: セクションと目標を含め、必要なランディングページを説明します。
- 結果を確認: エージェントが生成したコピー、レイアウト、リンクを確認します。
- 公開: 問題がなければ、ページを公開します。
これは依然としてメインのルートではなく、ボーナスルートとして扱うべきです。SeedProd のワークフローは各セクションをより直接的に制御でき、完成したページは後で A/B テストにかけることができます。
比較:WordPress AIランディングページジェネレーターのベスト
どの WordPress AI ランディングページジェネレーター がサイトに適しているか比較検討しているなら、私がテストしたトップオプションを並べて比較してみましょう。
| ツール | 開始価格 | AI機能 | 最適 |
|---|---|---|---|
| SeedProd | 年額$39 | AIライティング + AI画像生成 | 迅速でノーコードの設定をしたい初心者 |
| Elementor AI | 年間 $168 より (Elementor One 経由) | ページビルダー内でのAIテキスト生成 | より深いカスタマイズをしたいデザイナー |
| Divi AI | $277/年 (Divi Pro) | AIコピーライティング+画像生成 | 複数のクライアントサイトを管理する代理店 |
私は自分のサイトで SeedProd を使用しています。なぜなら、最も初心者向けで、WordPress 内で完全に動作するからです。Elementor AI と Divi AI は、すでにこれらのビルダーを使用しており、より高度なデザインの柔軟性を求めている場合に適しています。
AIでランディングページを作成するFAQ
AI ランディングページを構築するために、デザインやコーディングのスキルが必要ですか?
いいえ。SeedProd のテンプレートから始めて、ドラッグ&ドロップでカスタマイズするため、CSS や HTML を書く必要はありません。AI ライティングアシスタントがコピーを作成し、AI 画像ツールがビジュアルを作成するため、ゼロから構築するのではなく編集することになります。
AI ランディングページジェネレーターは実際にどのように機能しますか?
ページの説明をプロンプトとして入力すると、AI がそのプロンプトに基づいてコピーを作成したり、レイアウトを提案したり、画像を生成したりします。SeedProd では、これがページエディター内で直接行われるため、AI の出力がそのままページにドロップされます。AI は完成したページではなく開始点を作成するため、その後編集して公開します。
AIでランディングページを作成するにはどのくらい時間がかかりますか?
SeedProd を使用すると、ChatGPT での計画、ページの構築、SeedProd AI でのコピー作成といった一連のプロセスが約 30 分から 45 分で完了します。AI を使用しない場合、同じページは通常 2 ~ 3 時間かかります。これは、私が自分の構築で確認している約 75% の時間短縮です。
AIランディングページはうまくコンバージョンしますか?
はい、ページが単一の目標に焦点を当てている場合です。AI は作成をスピードアップしますが、コンバージョンは明確な CTA、トラフィックソースに一致するメッセージ、そして高速読み込みページに依存します。SeedProd ページは設計上軽量であり、これがスピードに役立ちます。
ランディングページ用のSeedProd AIとElementor AIの違いは何ですか?
SeedProd は初心者向けで、AI ライティングと画像生成が $39/年から組み込まれており、追加のプラグインは不要です。Elementor AI は現在 Elementor One に含まれており、$168/年から利用でき、デザイナーにさらに多くのカスタマイズの深みを提供します。WordPress 初心者であれば、SeedProd がより速い道です。
WordPressで無料のAIランディングページを作成できますか?
完全ではありません。SeedProd の AI 機能は有料プランに含まれていますが、無料の SeedProd テンプレートを使用して、ChatGPT のような無料ツールで手動で AI 生成コンテンツを追加し、貼り付けることができます。有料 AI アドオンがなくても、コピーの時間を節約できます。
ボーナスランディングページガイド
ランディングページの作成についてさらに詳しく知りたい場合は、これらのガイドに役立つヒントが満載です。
- SEOのためにAIを使用してランキングを向上させる方法
- コンバージョン率を高めるランディングページの見出しの公式
- 中小企業向けの最高の自動化マーケティングツール
- AIでWordPressウェブサイトを構築する方法
- 売上を伸ばすためのトップeコマースランディングページ例
- ランディングページURLの例と初心者向けのベストプラクティス
今日AIでランディングページを作成する
あなたの次のランディングページは、WordPress サイト内で AI を使用してコピー、画像、レイアウトを処理し、今日の午後に公開できます。SeedProd を開き、テンプレートから始めて、AI アシスタントに最初の見出しを作成させましょう。
お読みいただきありがとうございます!皆様のご意見をお聞かせいただければ幸いです。お気軽に会話にご参加ください YouTube, X および Facebook で、ビジネスを成長させるための役立つアドバイスやコンテンツをさらにご覧ください。