
TL;DR: How to Create a Real Estate Website in WordPress
A real estate site needs two things working together: a plugin that pulls in property listings, and a design that turns the people browsing them into inquiries.
- Sort hosting and a domain: register a domain and set up WordPress hosting before anything else.
- Pick a builder over a theme: a theme fixes your layout for you, while a builder lets you design property pages and lead forms yourself.
- Start from a website kit: a real estate kit gives you every template up front, so you are editing rather than starting from a blank page.
- Design for inquiries: put search, photo galleries, and a contact form on every property page.
- Add an IDX feed: an IDX plugin pulls live listings from your MLS, which usually needs approval from your local board first.
- Publish and test: turn on your theme, then click through the listings and forms yourself.
A real estate website has to do two jobs, show property listings that stay current and turn the people browsing them into inquiries.
In this guide, I’ll show you how to create a real estate website step by step, including the IDX and MLS piece, essential pages for agents, and how to design everything with SeedProd.
What Should a Real Estate Website Include?
A real estate website should help people find properties, trust the agent behind the listings, and contact you without friction.
| Page or Feature | What it should do |
| Homepage | Explain what you do, where you work, and guide visitors to listings or a viewing request |
| Property listings | Show all available properties with search and filters, ideally powered by a listings or IDX plugin |
| Individual property pages | Show photos, key details, location info, and a clear inquiry or viewing CTA |
| Agent or brokerage profile | Build trust with photos, credentials, service areas, and any memberships or licensing info |
| Contact and lead capture | Make it easy to inquire, request viewings, and contact you on mobile |
| Optional support pages | Add blogs, neighborhood guides, testimonials, mortgage calculators, and seller landing pages |
If you already have these basics in place, you can expand into local SEO content and targeted landing pages to capture more buyer and seller leads.
How Do IDX and MLS Property Feeds Work?
An Internet Data Exchange (IDX) feed is a live connection between your website and your local Multiple Listing Service (MLS), the database your regional real estate board uses to share listings between agents. Instead of adding properties by hand, the feed pulls them in and keeps them updated as they change.
The board sets rules on how its listings can be displayed, which is why almost every real estate website runs a dedicated plugin rather than treating properties as ordinary pages.
Three separate things end up doing the work, and it helps to keep them straight before you start buying anything:
- WordPress: runs your site and pages
- IDX or listings plugin: pulls and updates property data
- SeedProd: controls layout, design, and lead capture
This split is the same pattern I’ve run into on every client site where a plugin owns the data. Let the plugin handle the data it was built for, and use the builder for everything the visitor actually sees.
How to Create a Real Estate Website Step-by-Step
Step 1. Choose a Domain Name and Hosting
To get started, you’ll first need to choose the best platform for your website. WordPress is the most popular website builder in the world, and tens of thousands of real estate websites use it for their website development.
When discussing WordPress, we’re referring to WordPress.org, the free software you install on your own hosting, not WordPress.com, the hosted service.
The 2 different versions are often confusing for beginners because they share the same name. If you need a little help, you can see this side-by-side comparison of WordPress.org vs. WordPress.com.
In general, we recommend self-hosted WordPress.org because you can access all its features immediately. However, to get started with a self-hosted website, you’ll need to register a domain name and purchase web hosting.
A domain name costs anywhere from $14.99 per year, while website hosting costs $7.99 per month.

To keep your costs low, we’ve partnered with Bluehost to offer you a discount on hosting, a free domain name, and an SSL certificate. Essentially, it reduces your costs for starting a real estate website to as low as $2.75 per month.
Plus, Bluehost is an officially recommended hosting provider of WordPress.
Click here to get started with Bluehost.
After signing up for your hosting account, you’ll receive an email linking to your web hosting dashboard. Since Bluehost will automatically install WordPress for you, you can log into your WordPress site directly from your hosting dashboard.
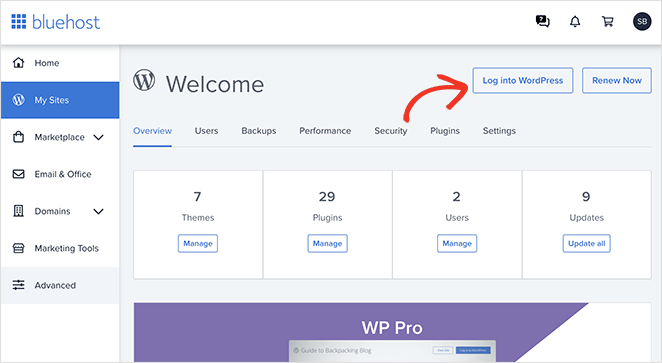
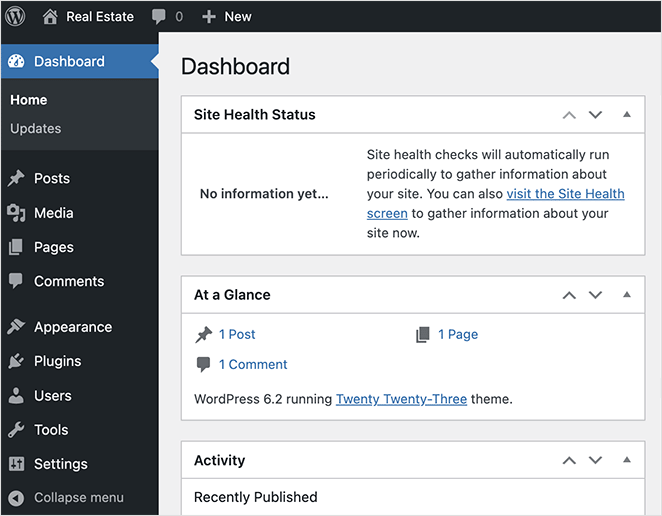
After logging in, you’ll see the WordPress admin area. It’s here where you can manage your website, change its settings, and add new content.
Step 2. Pick a Way to Design Your Real Estate Website
There are two common ways to design a real estate website in WordPress, using a dedicated real estate theme or using a visual website builder.
Both approaches work, but they offer different levels of flexibility depending on how much control you want over your design and lead generation.
| Option | Best for | Trade-off |
| Real estate theme | Fast setup with a standard layout | Less flexibility for custom pages and lead funnels |
| SeedProd builder | Custom branding, landing pages, and lead capture | Requires building your layout, even with a kit |
WordPress gives you access to thousands of website templates, known as WordPress themes. Many real estate agents start with a pre-built theme because it’s quick to set up.
If you don’t need a custom layout, this roundup of the best real estate WordPress themes is a good place to begin.
A theme decides your layout for you, though, and that is the trade-off you are accepting. If you want to control how property pages and lead forms are put together, you need a builder rather than a theme.
SeedProd is a visual website builder for WordPress. It lets you design your entire site by dragging blocks around, without writing code.
You can start with a ready-made website kit, then customize each page with drag-and-drop blocks. This makes it easier to design custom property pages, lead capture forms, and landing pages for buyers and sellers.
SeedProd works alongside your real estate or IDX plugin. The plugin manages your listings, and SeedProd controls how those listings are presented to visitors.
We’ll be using SeedProd to build a custom real estate website in this guide.
Note: SeedProd has a free version of its landing page builder. The Theme Builder and the full website kits used in this guide start on the Plus plan, so you don’t need one of the higher tiers for anything here.
Go ahead and install and activate SeedProd on your WordPress website. For more details, you can see our documentation on installing SeedProd Pro, which will walk you through activating your plugin license key.
If you’d rather not start from a kit at all, SeedProd’s AI website builder is free to use. You describe the site you want and it generates a full theme, though it runs at ai.seedprod.com and asks you to connect a SeedProd.com account first.
Step 3. Choose a Real Estate Website Template Kit
A website template kit gives you a complete starting point, so you can launch faster without designing every page from scratch.
Starting from a kit also gets around the thing I’ve seen stop people more often than any missing feature, which is opening a blank page and not knowing what goes where.
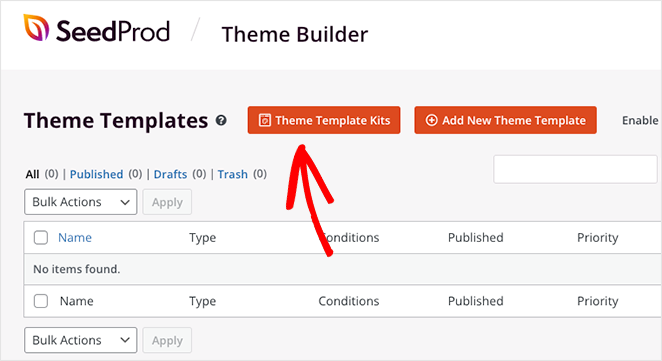
To get started, go to SeedProd » Theme Builder in your WordPress dashboard and click the Theme Template Kits button.
On the next screen, you’ll see a library of premade website kits. Each kit includes all the templates you need to build a full WordPress site.
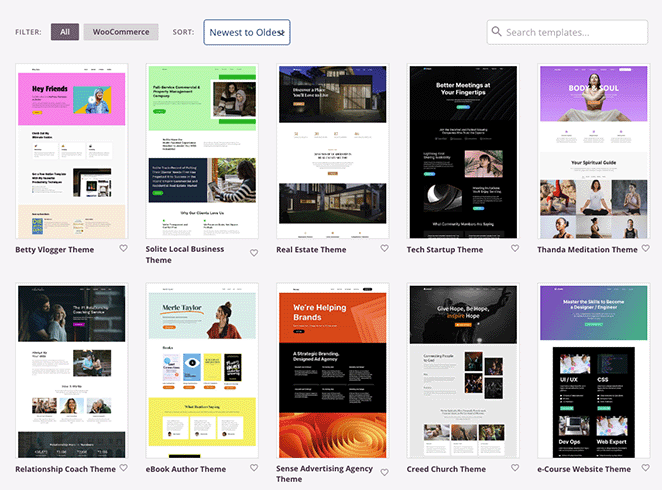
You can use the search box to find templates designed for specific industries. For example, searching for “real estate” will show kits built for property websites.
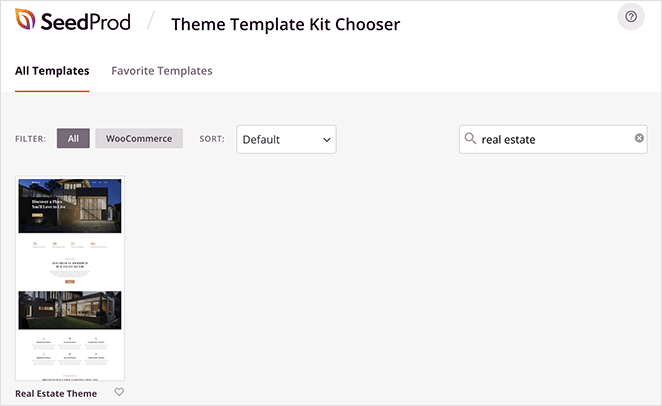
To import a kit, click the checkmark icon. SeedProd will add all the templates to your site automatically.
After importing, you’ll see a list of template parts that make up your new custom WordPress theme.
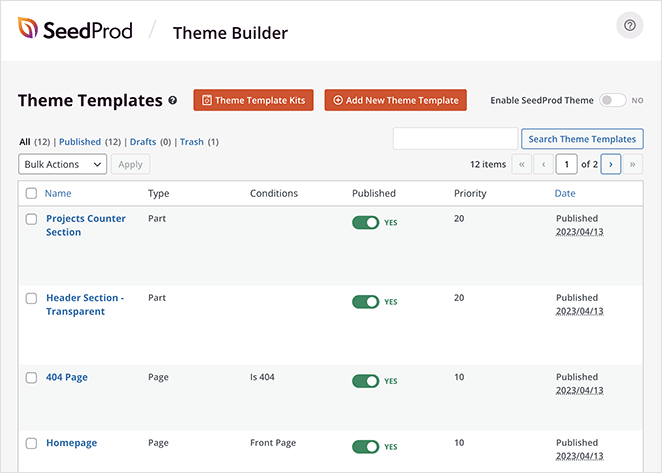
Next, you’ll customize each part to match your brand and property listings.
Step 4. Customize Your Real Estate Website
Customizing your real estate website is where you tailor the design to your brand and make it easy for visitors to take action.
To start editing a template, hover over any part in the Theme Builder dashboard and click Edit Design.
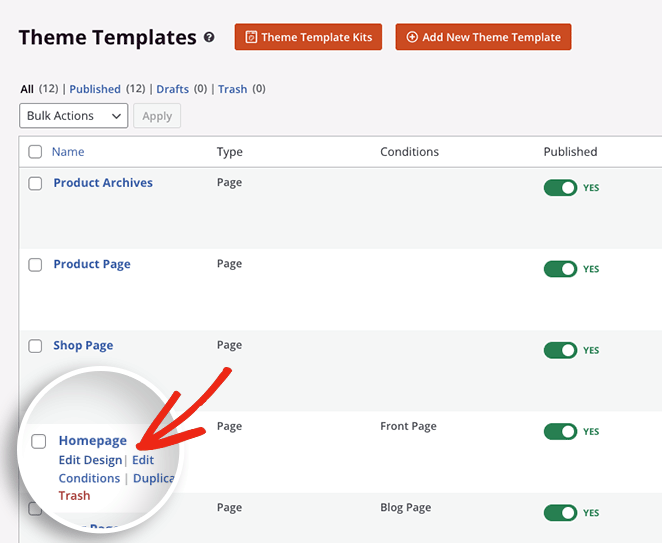
We’ll begin with the homepage, since it’s often the first page potential buyers and sellers see.
Customizing Your Homepage
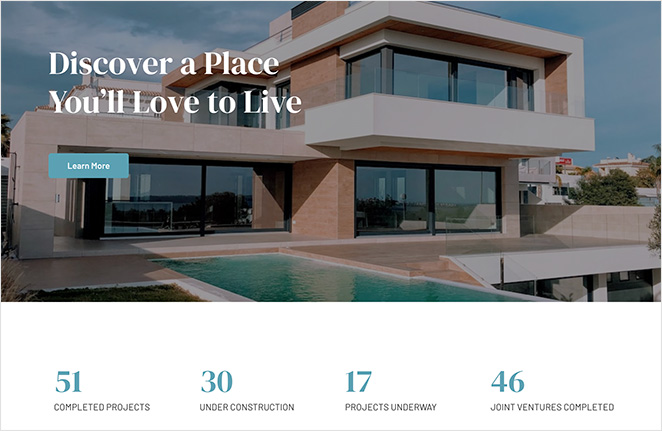
Your homepage should clearly communicate what you offer and guide visitors toward viewing properties or contacting you.
When you open a page in SeedProd, you’ll see the page builder with blocks and settings on the left, and a live preview on the right.
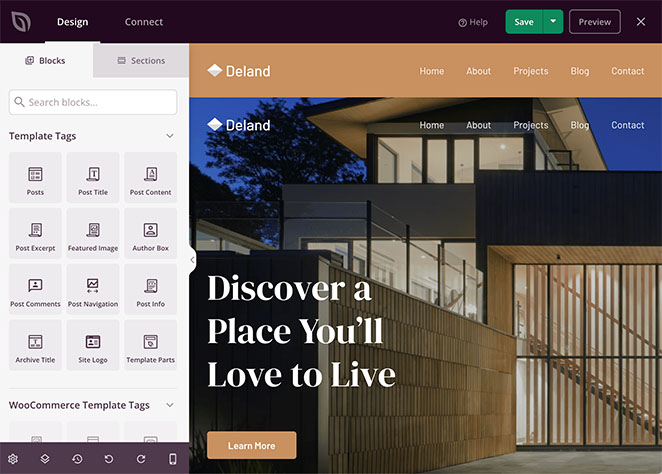
On a real estate homepage, focus on:
- Featured properties and social proof
- Clear headline and service area
- Calls to action that drive inquiries
You can also add social proof, such as testimonials, to build trust with new visitors.
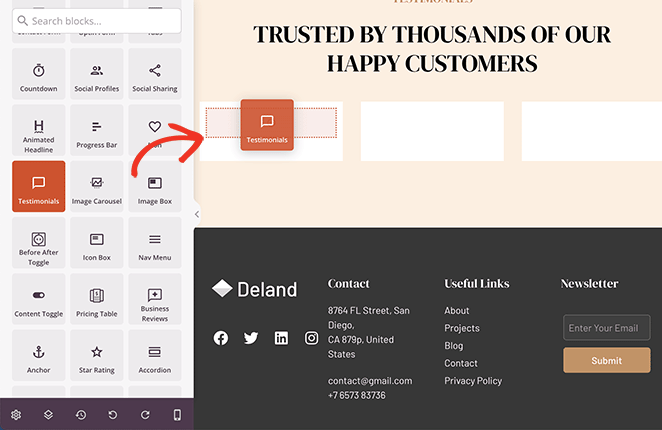
In this example, the Testimonials block displays customer reviews directly on the homepage.
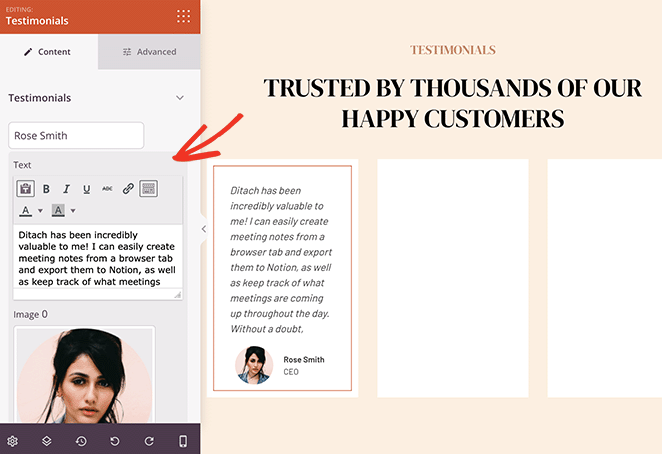
You can also use the Business Reviews block to pull reviews from Google and Yelp.
When you’re happy with your homepage, click Save and return to the Theme Builder dashboard.
Customizing Your Property Listings Page
Your property listings page is where visitors browse all available properties, so clarity and ease of use matter.
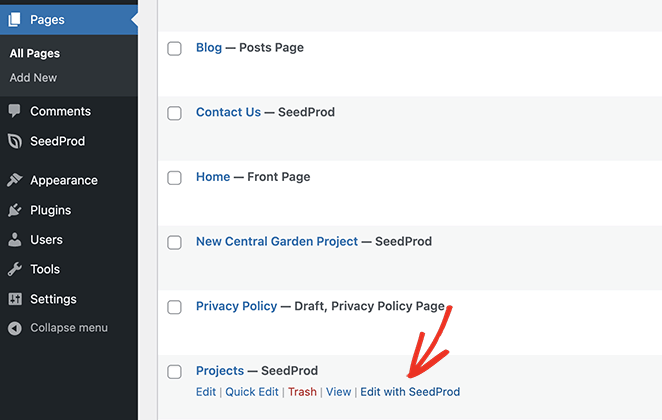
In the template kit, this page may be labeled differently, such as “Projects.” You can find it by going to Pages » All Pages in your WordPress dashboard.
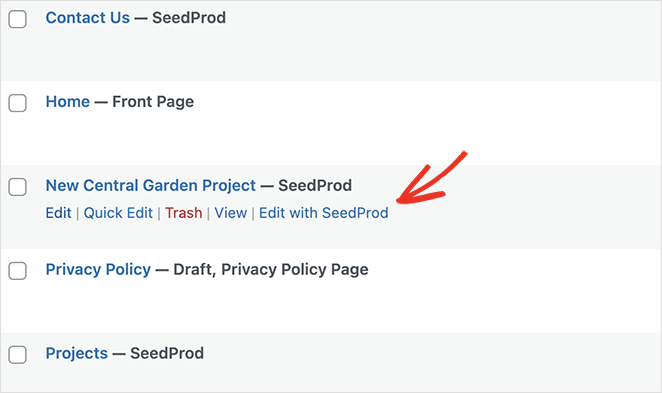
Hover over the page and click Edit with SeedProd to open it in the visual editor.
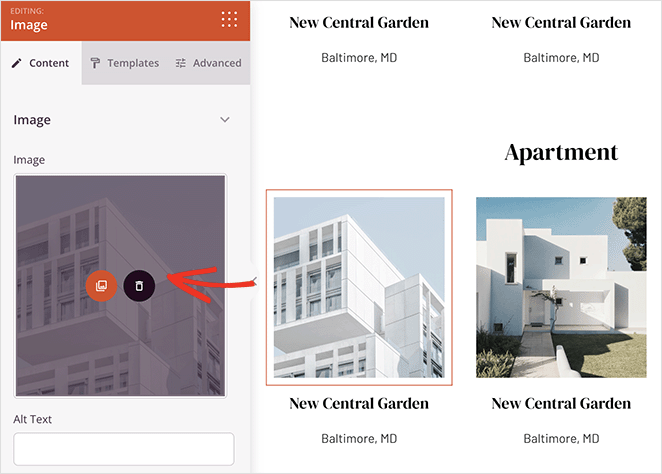
The page will open in SeedProd’s drag-and-drop builder, where you can customize the layout just like your homepage.
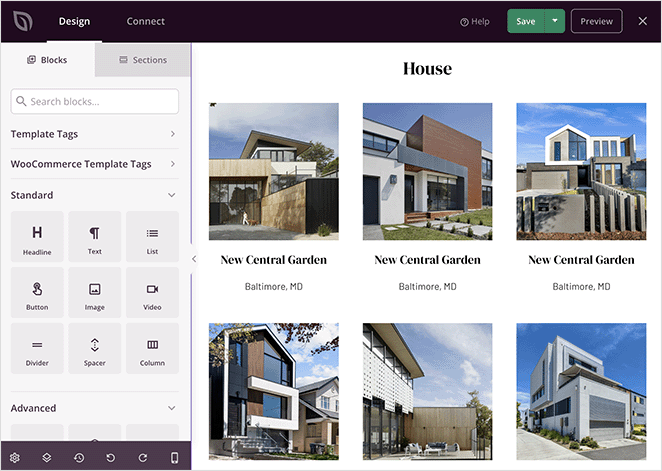
You can replace demo content with your own properties or connect this page to a real estate or IDX plugin that manages listings automatically.
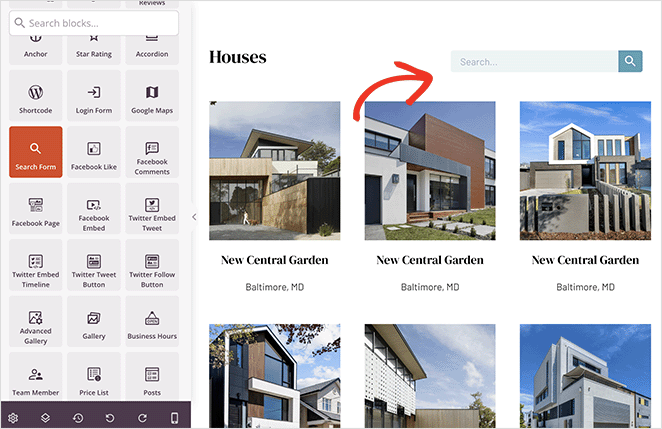
You can add a search box to make it easier for users to find the right listing.
Customizing Individual Real Estate Listings
Each individual property page should give visitors all the information they need to decide whether to inquire or book a viewing.
The template kit includes a sample property page that you can rename and reuse for your own listings. You’ll find it under Pages » All Pages.
Click Edit with SeedProd to open the page in the visual builder.
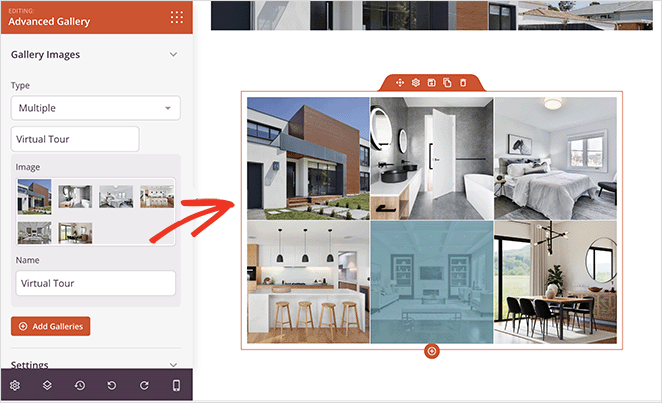
This page already includes a gallery, which is ideal for showing multiple photos of a property.
You can add your own images by opening the gallery block and clicking Add to Gallery.
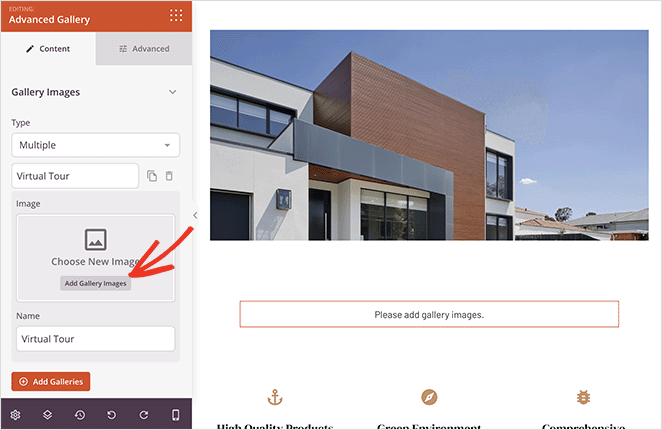
From there, upload images from your computer or the WordPress Media Library.
You can also add a frequently asked questions section to address common questions about the property.
SeedProd includes ready-made FAQ sections, which you can find under the Sections tab.
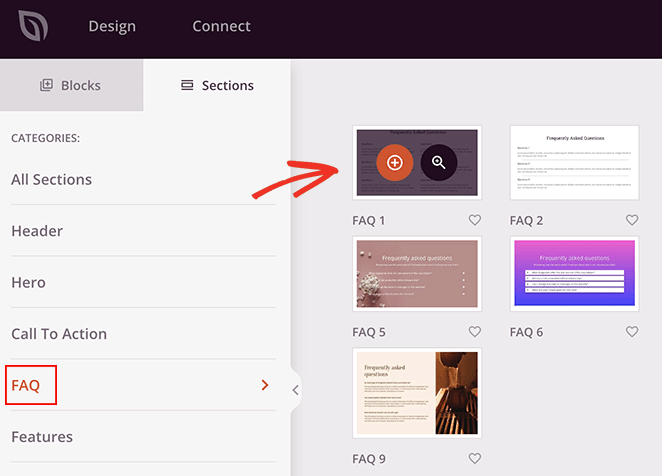
Click the plus icon to add a FAQ section to your page.
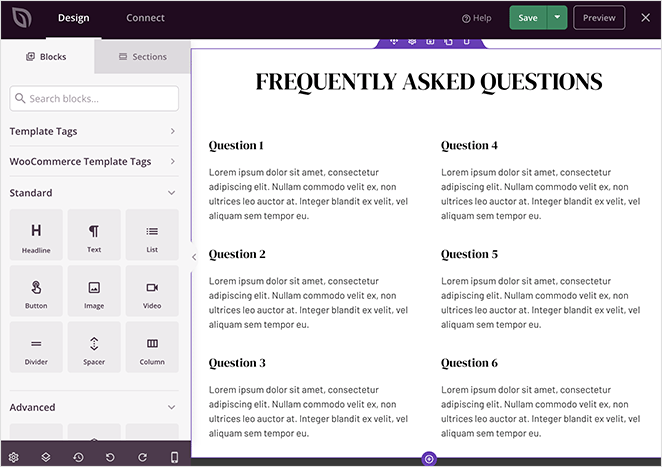
When you’re finished editing, click Save and repeat these steps for your About, Contact, and Blog pages.
SeedProd helps you keep your design consistent across pages, while still tailoring content for listings, blog posts, and lead capture.
You can also build a custom sidebar for search, social links, and forms.
SeedProd does not replace your IDX plugin. It controls how listing pages, search results, and property layouts appear to visitors.
Step 5. Connect Your IDX Property Feed
Setting up a property feed is less of a plugin job than people expect, because most of the work happens before you install anything.
- Get IDX access from your MLS. You generally need to be a member of the board that runs your MLS, and then apply separately for permission to display its listings on your own site.
- Ask which vendors are already approved. Most boards keep a list of IDX providers they have signed off on, so it is worth asking before you pay for a plugin that turns out not to be on it.
- Connect the feed. Your provider gives you credentials, and the plugin uses them to sync listings into your site on a schedule.
- Give the feed a page to live on. Most IDX plugins hand you a shortcode or a block that outputs search results and listing grids wherever you place it.
- Design that page properly. This is where a builder earns its place, because the default output from an IDX plugin is functional and rarely persuasive.
SeedProd runs shortcodes inside its own templates, so if your IDX plugin gives you one, you can drop it into a SeedProd page or template and the listings render inside your design instead of the plugin’s.
Some IDX plugins skip the shortcode and build their property pages through their own template files instead. Those pages keep the plugin’s layout unless you build a matching SeedProd template to take them over.
So check which of the two your plugin does before you plan your design around it, because that one question can save you rebuilding a listings page twice.
Step 6. Publish Your Real Estate Website
Once you’ve finished customizing your real estate website, publish it by enabling your SeedProd theme across WordPress.
To do this, return to the Theme Builder dashboard and find the Enable SeedProd Theme toggle.
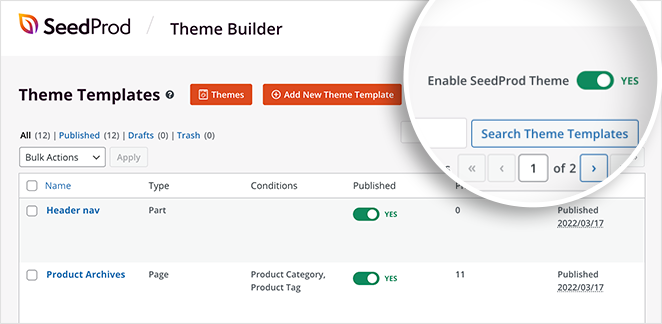
Switch the toggle to Yes to publish your theme.
Your real estate website is now live, and visitors will see your custom design instead of the default WordPress theme.
At this point, it’s a good idea to click through your pages, test contact forms, and make sure property listings and searches work as expected.
I’d do that on a phone as well as a desktop, because a lot of property browsing happens there and it’s where a broken form is easiest to miss.
What to Do After Creating a Real Estate Website
After you create a real estate website, the next step is getting the right people to find it and take action.
- Promote property viewings and open houses
- Add an events calendar for bookings
- Create landing pages for buyers and sellers
- Publish local content to support SEO
To set this up, see our guide on how to make an events calendar in WordPress.
FAQs About Creating a Real Estate Website
Do I need an IDX plugin to create a real estate website in WordPress?
You don’t always need an IDX plugin, but most real estate websites use one to display live property listings from an MLS. If you want automatic updates and searchable listings, an IDX or real estate listings plugin is usually required.
How do I set up a property feed on my real estate website?
Apply to your MLS for permission to display its listings, then install an IDX plugin your board has approved and connect it with the credentials your provider gives you. The plugin syncs listings on a schedule and outputs them through a shortcode or block you place on a page.
Do I need MLS access to use an IDX plugin?
For live MLS listings, yes. IDX access normally depends on being a member of the board that runs your local MLS, and display permission is a separate application. Without it, you can still build property pages and add listings manually, they just won’t update on their own.
What pages are essential for a real estate website?
A real estate website should include a homepage, a property listings page, individual property pages, an agent or brokerage profile, and clear contact or inquiry pages. Many sites also add blogs and landing pages for buyers and sellers.
How much does it cost to create a real estate website in WordPress?
The cost depends on your hosting, domain name, and plugins. Many real estate websites start with low monthly hosting costs, then add paid tools like IDX plugins or premium builders as the business grows.
Can I add lead capture forms to property listings?
Yes. Most real estate websites include inquiry forms on property pages so visitors can request more information or book viewings. These forms help turn listing traffic into qualified leads.
You don’t have to design any of this from a blank page. Start from a real estate kit, let your IDX plugin handle the listings, and you can have a working site in an afternoon.
Thanks for reading! We’d love to hear your thoughts, so please feel free to join the conversation on YouTube, X and Facebook for more helpful advice and content to grow your business.