Have you ever tried to change a color or hide something on your WordPress site, only to find there’s no option for it? I’ve been there too. I remember spending way too long looking through my theme settings for a simple font tweak that just wasn’t possible.
That’s when I learned about custom CSS. It’s a quick way to fix small visual issues on your site, without editing theme files or hiring a developer.
If you’re new to this, don’t worry. You don’t need to know how to code or understand how websites work under the hood.
In this guide, I’ll show you beginner-friendly ways to add custom CSS to WordPress. I’ll also walk you through my favorite tool for the job, SeedProd, which makes the whole process much easier.
Methods to Add Custom CSS in WordPress:
What Is Custom CSS?
CSS stands for Cascading Style Sheets. It’s a simple language that controls how your WordPress site looks.
For example, this bit of CSS changes a heading color to red:
h1 {
  color: red;
}
And this one hides an element on the page:
.hidden {
  display: none;
}
You don’t need to write code like this from scratch. Most of the time, you’ll just copy and paste it into the right place.
The key is knowing where to put your custom CSS, and that’s exactly what I’ll show you next.
Why Add Custom CSS in WordPress?
Sometimes you want to change a button color, center a heading, or remove a bit of extra spacing, and your theme doesn’t give you a way to do it.
That’s where custom CSS comes in. It gives you control over the small design details that make your site look and feel just right.
With CSS, you’re not stuck with the default WordPress theme settings. You can fine-tune your layout, style, and spacing without switching themes or installing extra WordPress plugins.
Just remember: CSS helps tweak your design, but it won’t fix bigger visual mistakes that custom CSS can’t fix, like cluttered layouts or poor navigation.
So, how do you actually add custom CSS in WordPress?
There are a few different ways, but I’ll start with the one I use most often, and the one I recommend if you want full control without the hassle.
1. Add Custom CSS with SeedProd (My Favorite Way)

If you’ve never used SeedProd before, it’s a drag-and-drop WordPress builder that makes customizing your site super easy, even if you’re not a developer.
I use it all the time because I can build full themes or landing pages without touching any code. And when I do want to add a bit of CSS, SeedProd gives me a simple place to do it.
Before we get into the steps, it helps to have SeedProd set up on your site. If you haven’t used it yet, here are a couple of beginner-friendly tutorials to help you get started:
Once you’ve built a landing page or theme with SeedProd, you’re ready to add your own custom CSS. Let’s start with how to do that on a single landing page.
How to Add CSS to a Landing Page in SeedProd
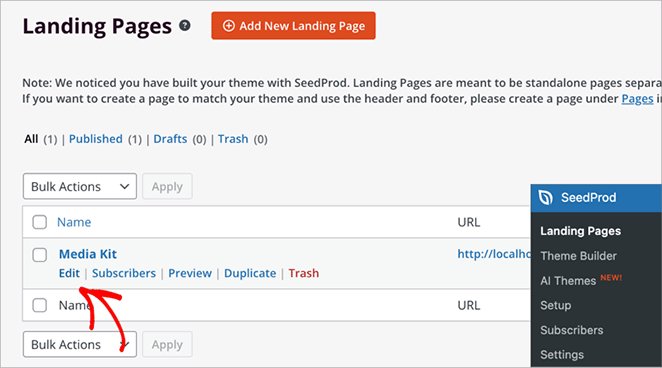
To get started, open your WordPress dashboard and go to SeedProd » Landing Pages.
Find the landing page you want to edit and click the Edit link next to it.
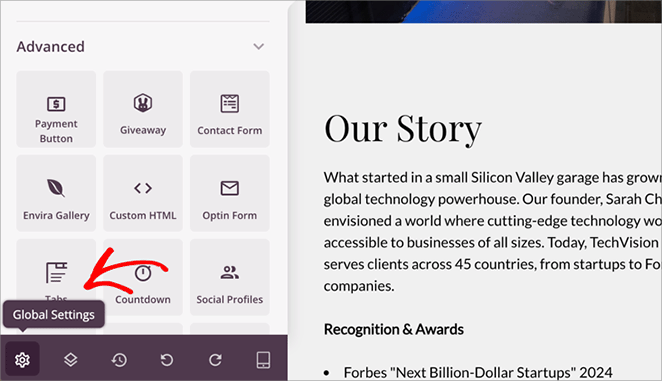
This will open the SeedProd page builder. In the bottom-left corner, click the gear icon to open your Global Settings.
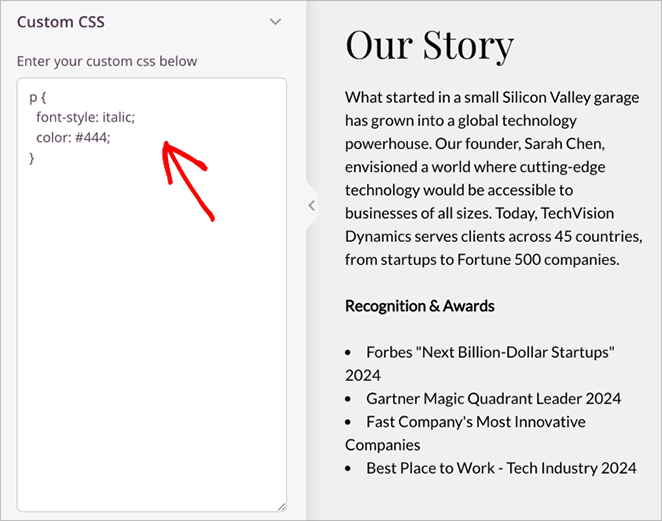
From the left-hand sidebar, click on the Custom CSS tab.
Now paste in your CSS. For example, here’s one that styles your paragraph text:
p {
  font-style: italic;
  color: #444;
}
Click the Save button in the top-right corner.
You can then preview your page to see the saved changes live on your website.

How to Add Global CSS with SeedProd’s Theme Builder
If you’re using SeedProd’s Theme Builder to design your entire site, you can apply custom CSS that works across every page.
To get started, open your WordPress dashboard and go to SeedProd » Theme Builder.
Find the template called Global CSS and click Edit Design.
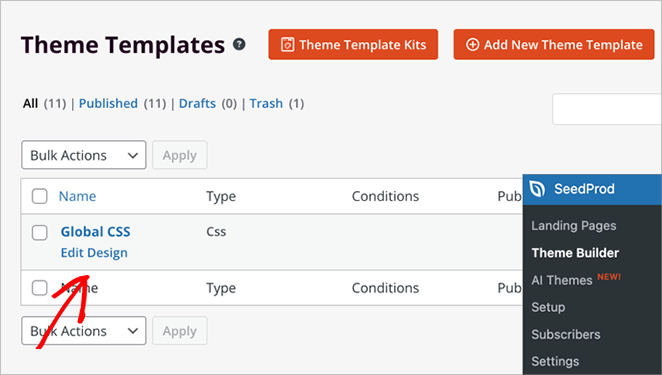
Inside the builder, click the gear icon in the bottom-left corner to open Global Settings.
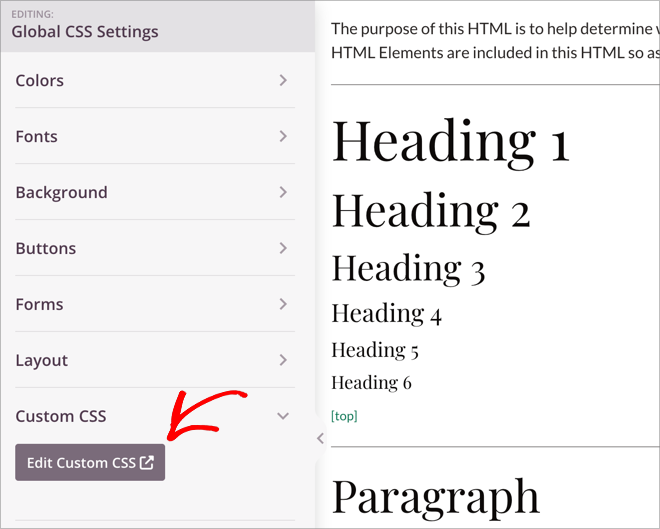
From the left-hand sidebar, click the Custom CSS tab.
Click the Edit Custom CSS button. This opens the WordPress Customizer in a new window.
In the Customizer, click Additional CSS, then paste in your code.
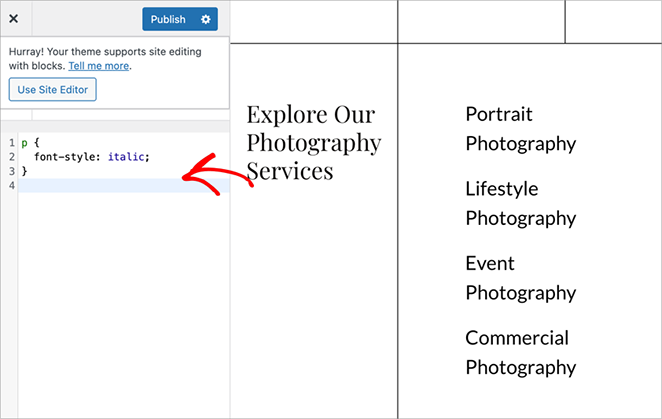
For example:
p {
  font-style: italic;
}
This will make all paragraph text across your site appear italic.
Click Publish to save your changes and apply them sitewide.
You can now refresh your page to see the update live.

This method is helpful for making global style changes like font adjustments, spacing, and color tweaks.
2. Add Custom CSS in WordPress Without a Page Builder
If you’re not using a page builder like SeedProd, you can still add custom CSS directly in WordPress. The steps depend on the type of theme you’re using, either a classic theme or a block theme.
Classic themes use the older Customizer tool and often rely on widgets and page templates. Block themes, on the other hand, use the newer Site Editor, which lets you design your whole site with blocks.
Let’s start with classic themes.
Use the WordPress Customizer (Classic Themes)
In your WordPress dashboard, go to Appearance » Customize.
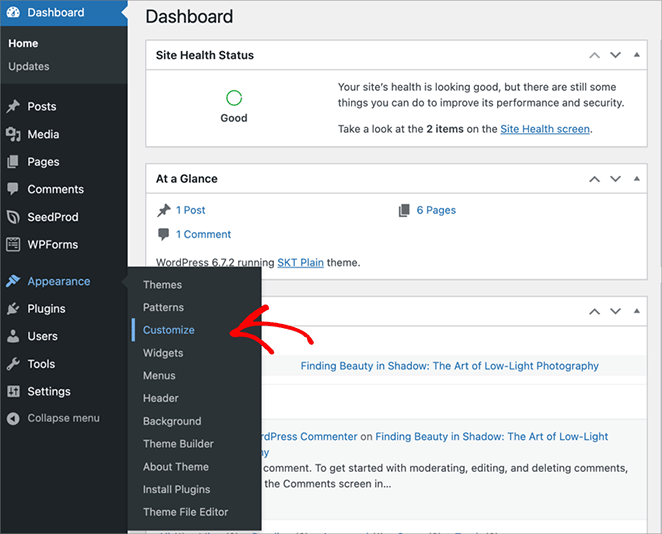
From the Customizer menu, click on Additional CSS.
A text box will appear where you can paste your custom code. For example:
p {
  color: #0073aa;
}
This changes all paragraph text on your site to a shade of blue.
You’ll see a live preview of your changes on the right as you type.
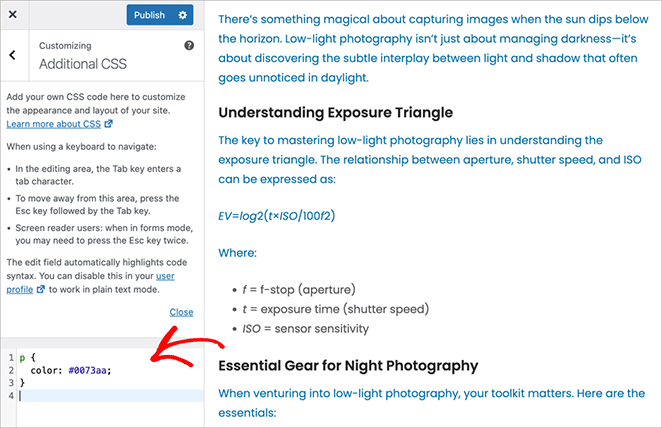
When you’re happy with how it looks, click the Publish button to save your changes.
This method works well with older themes that support the Customizer, and it doesn’t require any WordPress plugins.
Use the Site Editor (Block Themes)
If your WordPress site uses a block theme, you’ll manage your design using the full Site Editor instead of the Customizer.
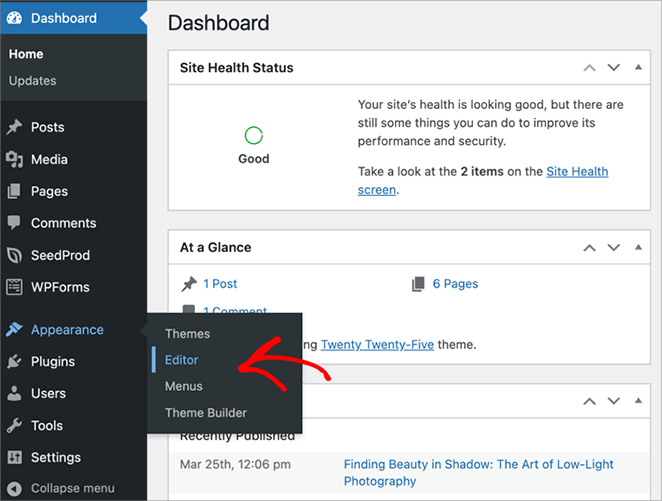
To begin, go to Appearance » Editor in your WordPress dashboard.
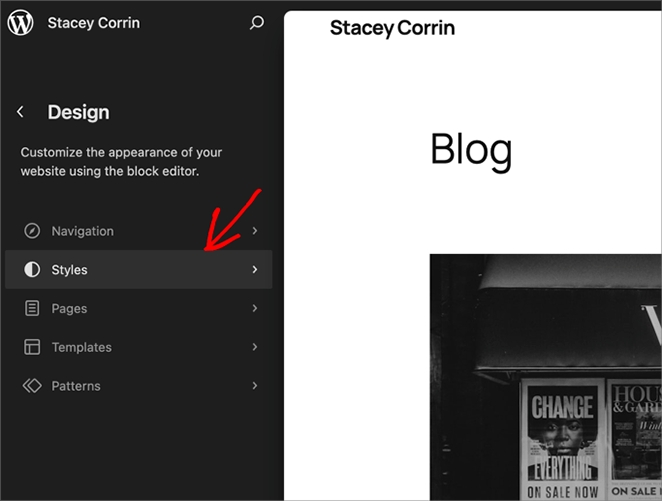
In the left-hand sidebar, click the Styles icon. It looks like a half-moon or a paint palette.
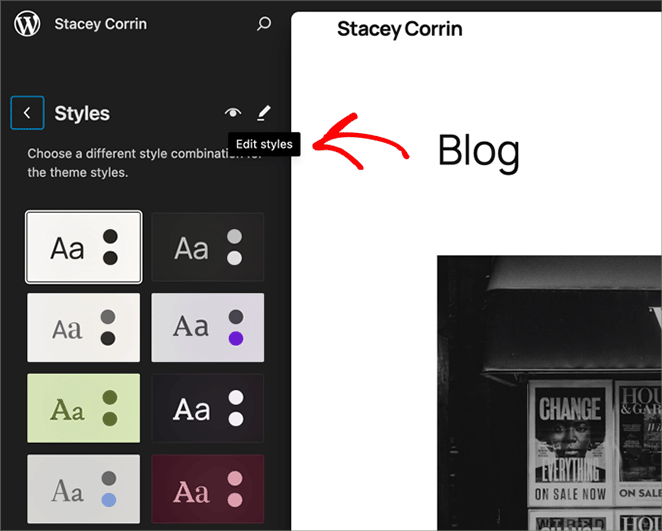
Then click the small pencil icon labeled Edit Styles.
You’ll now see the WordPress editor. In the top-right corner of the screen, click the three-dot menu (⋮) and select Additional CSS from the dropdown.
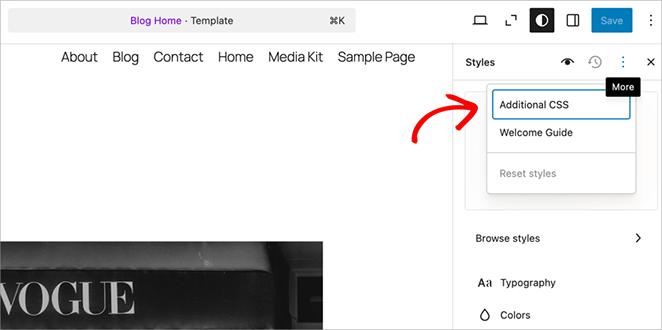
Paste your custom code into the box. For example:
p {
  color: #0073aa;
}
This will change the paragraph text color across your entire site.
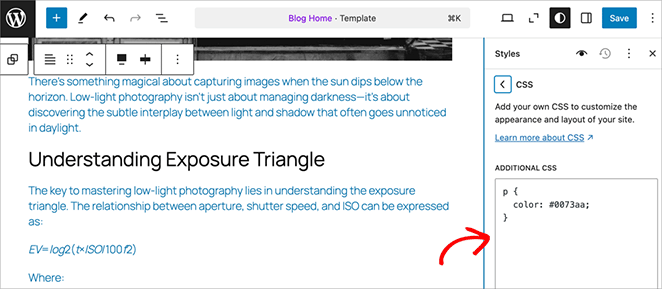
Click Save in the top-right corner to apply the changes.
⚠️ If you don’t see the Additional CSS panel, your block theme may not support it. In that case, you can use a plugin like WPCode or switch to a builder like SeedProd.
3. Use a Custom CSS Plugin
If your theme doesn’t support the Customizer or Site Editor, or if you just want a clean way to manage your CSS in one place, I recommend using a plugin like WPCode.
WPCode is a lightweight WordPress plugin that lets you safely add custom code snippets, like CSS, HTML, JavaScript, or PHP, without editing your theme files.
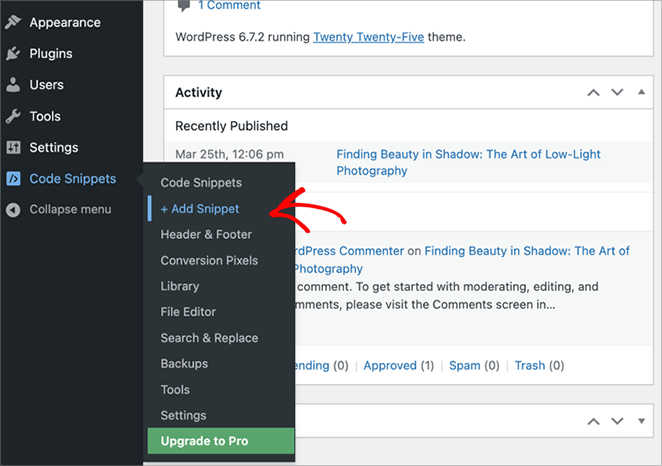
Once you’ve installed and activated WPCode, go to Code Snippets » + Add Snippet in your WordPress dashboard.
Click the box that says Add Your Custom Code (New Snippet) and give your snippet a name, like Custom CSS Styles.
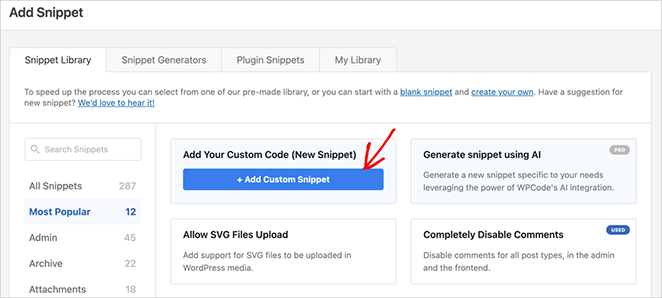
Under Code Type, select CSS Snippet from the dropdown.
Now paste your CSS into the code box. For example:
p {
  color: #0073aa;
}
Scroll down and choose Auto Insert to apply the CSS across your entire site.
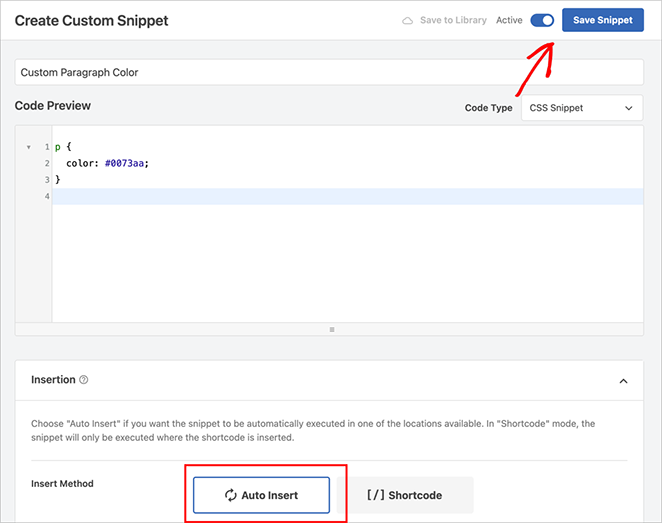
Then click Save Snippet and toggle the switch at the top to Active.
That’s it! Your custom styles are now live across your site, and you can come back to this snippet anytime to make changes.
4. Edit Your Theme Files (Not Recommended)
This method only works if you’re using a classic theme. Block themes don’t include access to the Theme File Editor in the WordPress dashboard.
If you’re using a classic theme, and you’re comfortable editing code, you can add custom CSS directly to your theme’s style.css file. But I don’t recommend this unless you know what you’re doing.
When you edit theme files directly, your changes can be lost during updates. You also won’t see a live preview, and even a small typo can break your layout.
That said, if you’re using a child theme or know how to restore your site if something goes wrong, here’s how to do it.
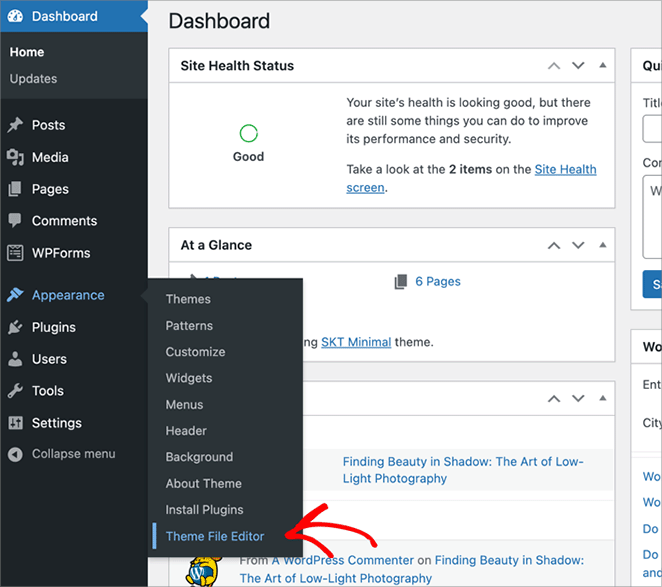
Go to Appearance » Theme File Editor in your WordPress dashboard.
From the list of files on the right, click on style.css.
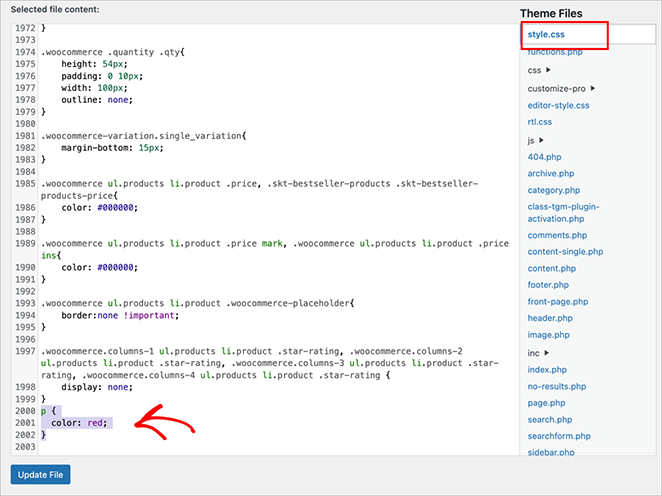
Scroll to the bottom of the file and paste your CSS. For example:
p {
  color: #0073aa;
}
Click Update File to save your changes.
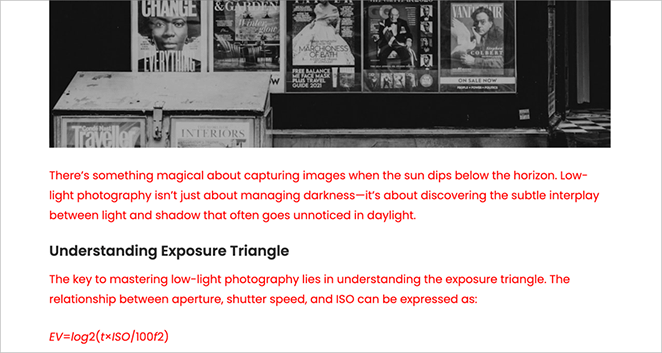
⚠️ Only do this if you’re using a child theme or know how to safely restore your site. For most users, tools like SeedProd or WPCode are much safer options.
Bonus: Target Custom CSS to Pages or Blocks
Sometimes you don’t want your CSS to affect the whole site, you just want it to apply to one page or a single block. You can do that by using page IDs or custom CSS classes.
Using Page IDs in WordPress
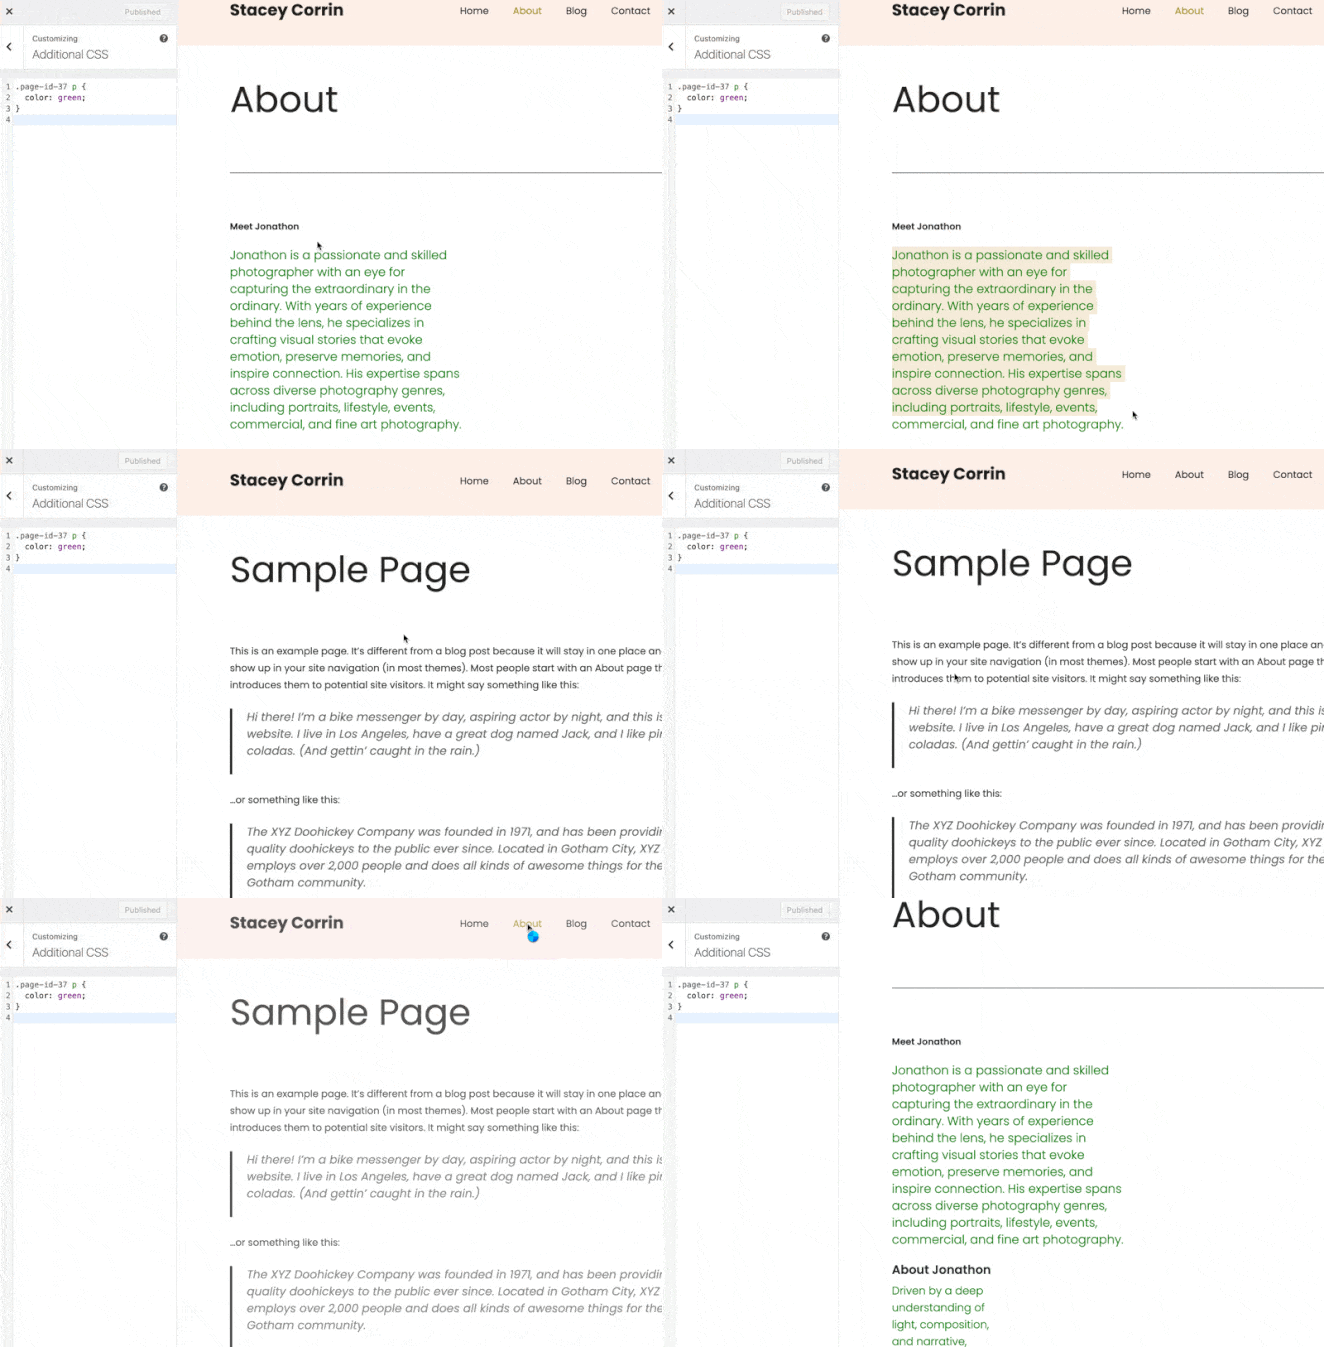
Every page in WordPress has a unique ID, and you can use that to target styles for just that page.
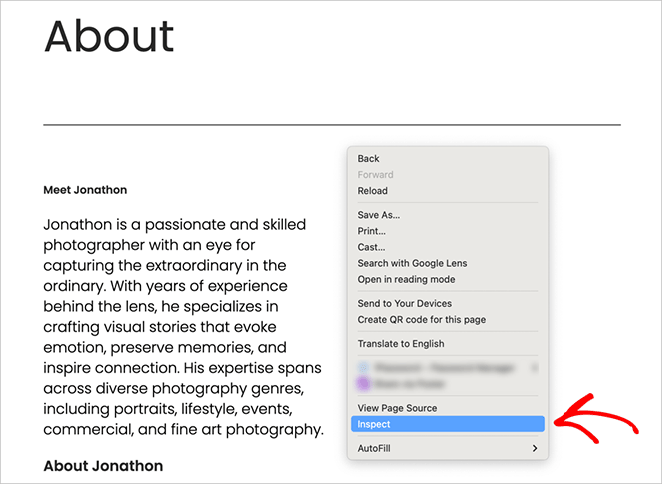
To find the page ID, visit the page in your browser, right-click anywhere, and choose Inspect.
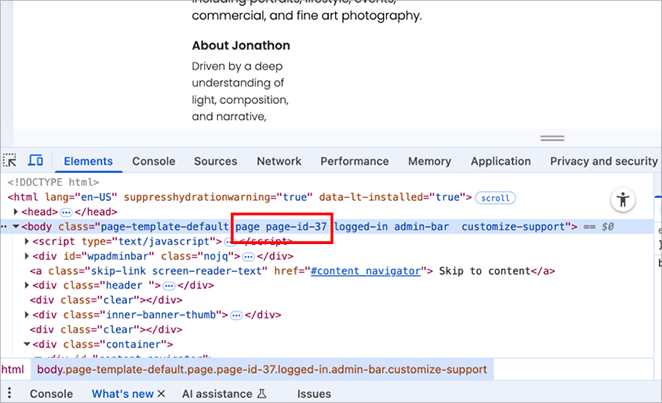
In the code, look for the <body> tag. It will include a class like page-id-37.
You can then use that in your CSS like this:
.page-id-37 p {
  color: green;
}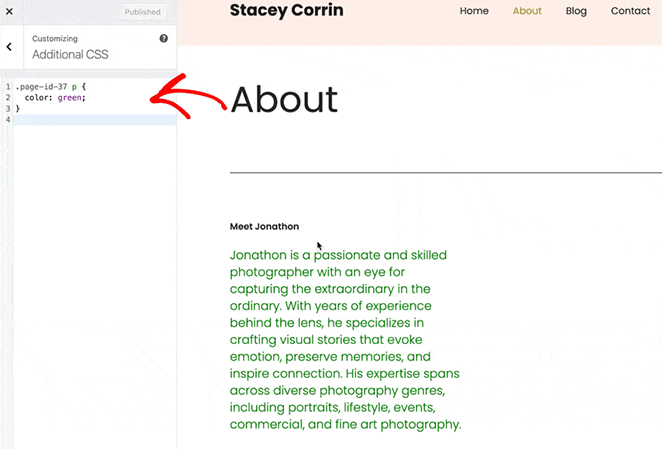
This will only change the paragraph text color on that specific page.
Using SeedProd’s Block Settings
If you’re using SeedProd, you can target specific blocks by adding a custom class name.
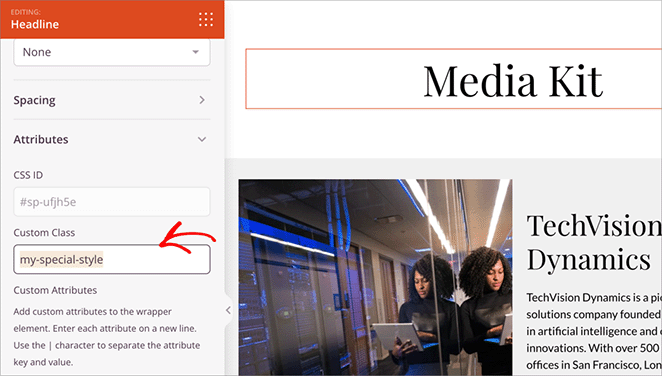
Open your page in the SeedProd builder and click on the block you want to style. In my case, I want to style a specific heading block.
In the left-hand panel, go to the Advanced tab, look for the Attributes option, and expand it.

Find the field labeled CSS Class and add a class name like my-special-style.
Then, in your global or page-level Custom CSS box, add something like this:
.my-special-style {
  background-color: #fff7e6;
  border-radius: 10px;
}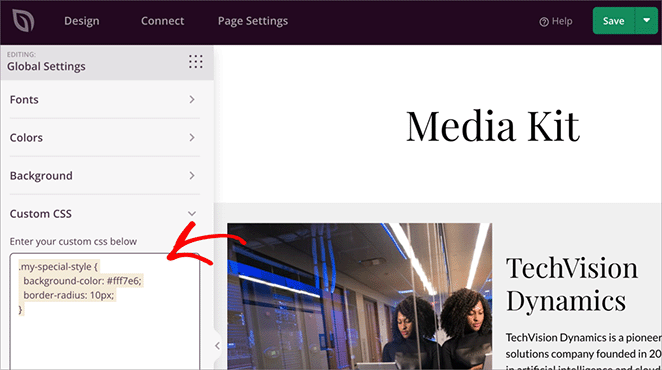
After saving and previewing the page, you’ll see your changes on that specific block without affecting the rest of your site.

FAQs About Adding Custom CSS in WordPress
.page-id-123 p {color: red; }Or, if you’re using SeedProd or WPCode, you can create a custom CSS class and apply it to a block or section manually.
Ready to Customize Your WordPress Site?
As you’ve seen, there are several easy ways to add custom CSS in WordPress, even if you’re not a developer.
You can style individual blocks, tweak your whole theme, or make small changes that help your site look exactly the way you want. Whether you prefer using SeedProd, WPCode, or one of the built-in WordPress tools, the important thing is that you don’t need to feel stuck with your theme’s defaults.
If you want more control without editing theme files, SeedProd is the easiest way to build and style your pages, no code required.
Want to keep customizing your WordPress site? Here are some guides I recommend next:

