Ever wondered how to create a landing page with forms for your WordPress website?
Creating a landing page with a contact form is one of the easiest ways to turn your website’s traffic into leads and customers. I use this tactic on my own website to build relationships with new clients.
I’ve tested dozens of tools over the years, and SeedProd + WPForms is the combo I always come back to , especially when I need to launch a form landing page fast for a client or campaign.
But how do you actually make one? Do you need to know HTML, and how do you ensure your form converts?
Luckily, you don’t need coding skills or a developer to quickly launch a contact form landing page. With the right WordPress plugins, you can launch one in minutes. And in this guide, I’ll show you how step-by-step.
📌 Quick Navigation: Jump to any section below
- Should Landing Pages Have a Contact Form?
- What Type of Form Does Your Landing Page Need?
- Step 1: Install SeedProd
- Step 2: Choose a Template
- Step 3: Customize the Page
- Step 4: Add Your WordPress Form
- Step 5: Connect Email Marketing
- Paso 6: Publique su página de destino
- Preguntas frecuentes
Should Landing Pages Have a Contact Form?
Yes, landing pages should definitely have a contact form. It’s a big part of what marketers do to get new customers.
A well-designed landing page with a contact form is one of the easiest ways to build trust and boost conversions.
In fact, 67% of B2B marketers say forms are one of their top three lead-generation tools (Demand Gen Report, 2023). A contact form can help you get more leads, make your website show up better in search results, and make people trust your site more.
What Type of Form Does Your Landing Page Need?
The type of form you need depends on your goals. Here’s a quick guide to common form types and when to use them:
| Form Type | When to Use It |
|---|---|
| Generación de clientes potenciales | To collect contact info from potential customers |
| Póngase en contacto con | For general inquiries on any business website |
| Inscripción | When hosting events, webinars, or workshops |
| Survey | To gather customer feedback and opinions |
| Job Application | When hiring new employees |
| Appointment Booking | For scheduling client meetings or appointments |
| Contest Entry | When running giveaways or competitions |
| Product Pre-order | To gauge interest in upcoming product launches |
| Subscription | For newsletter sign-ups or content updates |
| Quiz or Assessment | To engage visitors and learn about your audience |
| Support Request | For managing customer support inquiries |
| Donation | Essential for non-profits collecting online donations |
| Account Creation | When users need to sign up for an account |
| Demo Request | For setting up product demonstrations |
| Referral | To encourage customers to refer friends or colleagues |
Remember, the best form for your landing page is one that matches your specific goal. Keep it simple and only ask for the information you really need.
Steps to Create a Landing Page with Form in WordPress
Now that we’ve covered the basics, let’s dive into the actual process of creating a landing page with a form in WordPress. In this step-by-step guide, I’ll walk you through the entire process using two powerful tools: SeedProd and WPForms.

Why these tools? Well, in my experience, SeedProd offers the easiest way to build stunning landing pages, while WPForms is the most user-friendly form builder for WordPress. They’re a powerhouse combination that lets you create professional-looking landing pages with forms in no time.
| Fácil de usar | Create beautiful landing pages without coding. Just drag and drop elements. |
| Works with WPForms | Integrates with WPForms, a beginner-friendly form builder. Add any form type to your landing page in a few clicks. |
| Versatile Forms | Create various forms with WPForms: • Survey forms • Subscription forms • Order forms • Booking forms • And many more |
| Built-in Forms | SeedProd has its own opt-in forms. No need for extra plugins. |
| Time-Saving | Create landing pages with forms in minutes. Great for those not comfortable with coding. |
By the end of this guide, you’ll have a fully functional landing page with a form, all without writing a single line of code. Let’s get started.
Paso 1. Instalar y activar SeedProd Instale y active SeedProd
First, visit the official SeedProd website and download the plugin to your computer.
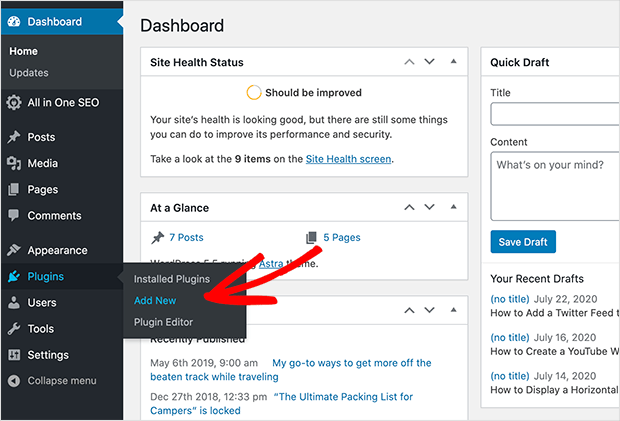
Once you have the plugin file, log in to your WordPress dashboard. Then, go to the “Plugins” section in the left-hand menu and click “Add New.”
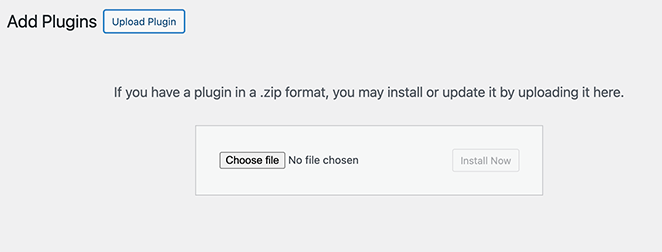
At the top of the page, you’ll see an “Upload Plugin” button. Click this, then choose the SeedProd file you just downloaded. After uploading, click “Install Now.”
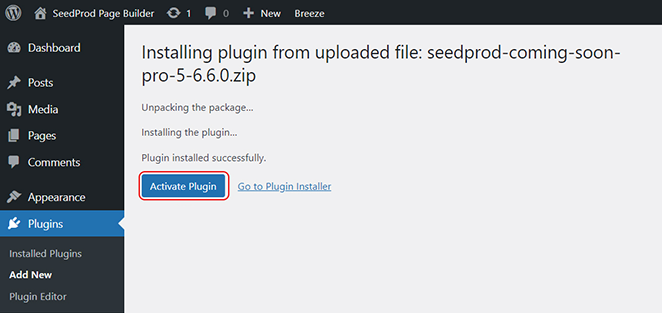
WordPress will take a moment to install the plugin. Once it’s done, you’ll see an “Activate” button. Click this to turn on SeedProd.
Pro Tip: Make sure you’re using the latest version of SeedProd to access all the newest features and ensure compatibility with your WordPress setup. In this guide, I’m using the latest version of SeedProd Pro for the extra blocks and templates. There’s also a free version of SeedProd you can use.
Paso 2. Elija una plantilla de página de destino
Now that SeedProd is installed, it’s time to pick a template for your landing page. SeedProd has hundreds of pre-designed templates, making it easy to create a professional-looking page quickly.
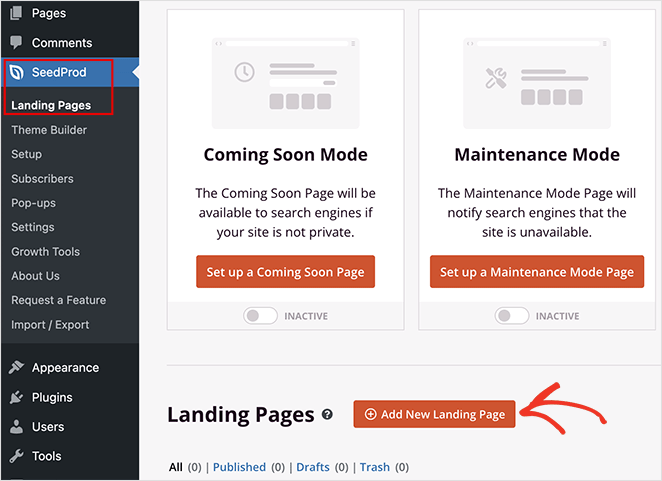
To select a template, go to SeedProd » Landing Page from your WordPress dashboard. Then, click the “Add New Landing Page” button.
You’ll see a gallery of landing page templates. Browse through them or use the filter options to find one that fits your needs.
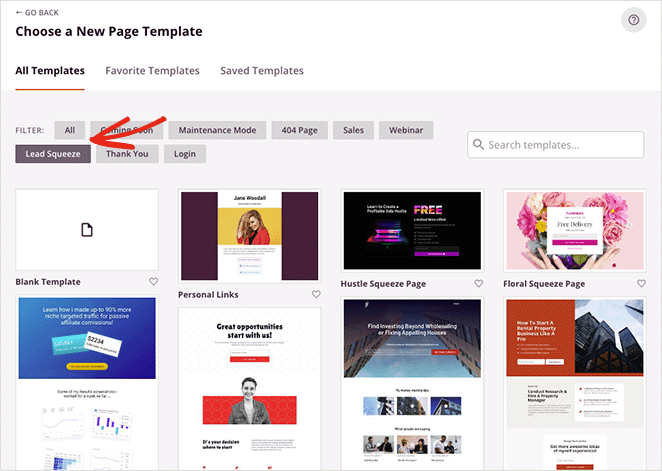
Cuando encuentres una plantilla que te guste, pasa el ratón por encima y haz clic en el icono de la marca de verificación.
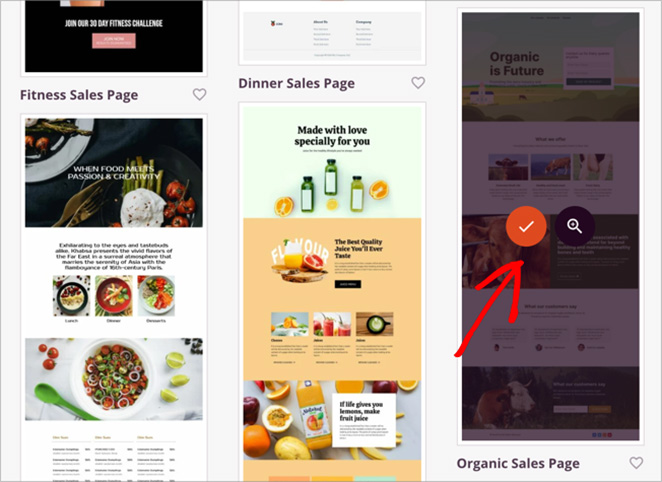
After selecting your template, a popup box will appear. In this box, you’ll need to enter a name for your landing page and choose a URL.
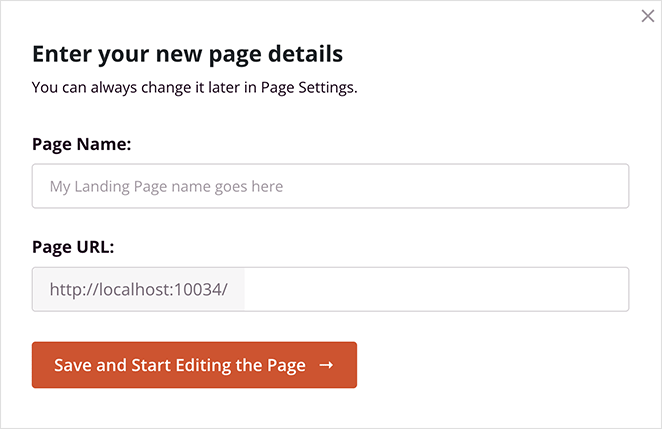
Once you’ve filled in these details, click the “Save and Start Editing the Page” button.
Here’s the best part: all of SeedProd’s templates are mobile responsive. This means your landing page will look great on any device – whether it’s a desktop computer, tablet, or smartphone.
This is crucial for providing a good user experience and maximizing conversions.
You don’t need to create separate designs for different screen sizes. SeedProd automatically adjusts your layout to fit any screen, ensuring that your forms, images, and text are always easy to read and interact with.
If you can’t find a template that’s exactly right for your needs, don’t worry. You can always start with a blank template and build your page from scratch, or choose a template close to what you want and customize it.
Paso 3. Personalice la plantilla de su página de destino
Once you’ve chosen your template, you’ll enter the page builder, where you’ll notice it’s split into two main areas:
- On the left side, you’ll see a sidebar with various blocks and sections you can add to your page.
- On the right side, there’s a live preview of your landing page.
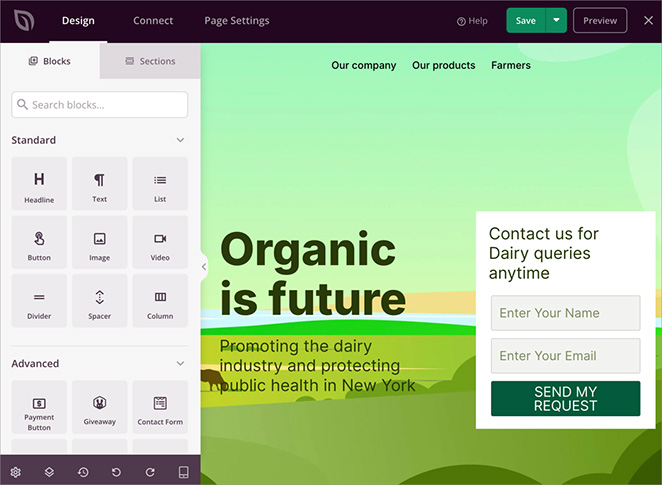
This setup makes it easy to see your changes in real time as you build your page.
To edit any element on your page, simply click on it in the preview area. When you do this, options for customizing that element will appear in the left sidebar.
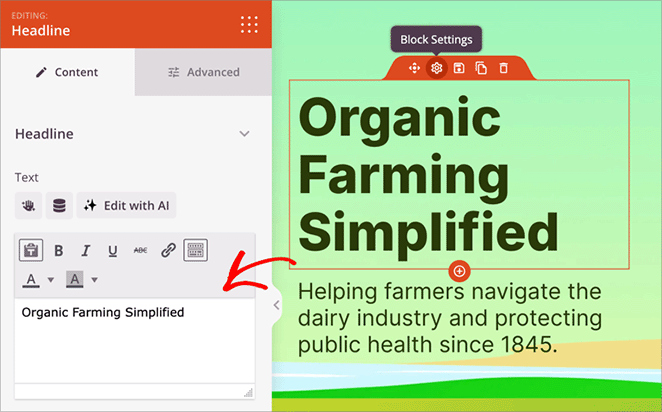
This is where you can change things like text, colors, fonts, and more.
Want to add new elements to your page? It’s as easy as drag and drop.
Browse through the blocks in the left sidebar, find one you like, and drag it onto your page. You can add headlines, images, buttons, countdown timers, and more.
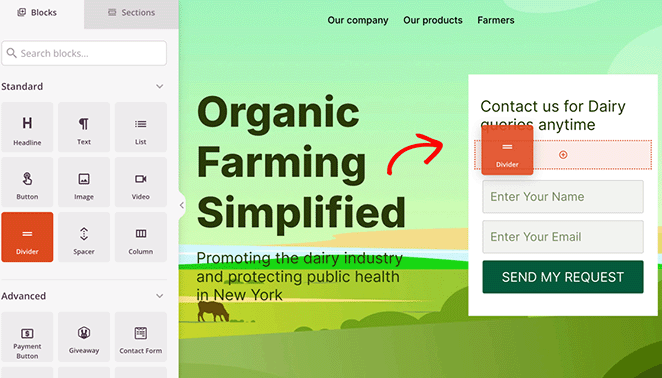
To rearrange elements on your page, click and drag them to a new position. SeedProd will show you where to drop the element and provide helpful guidelines.
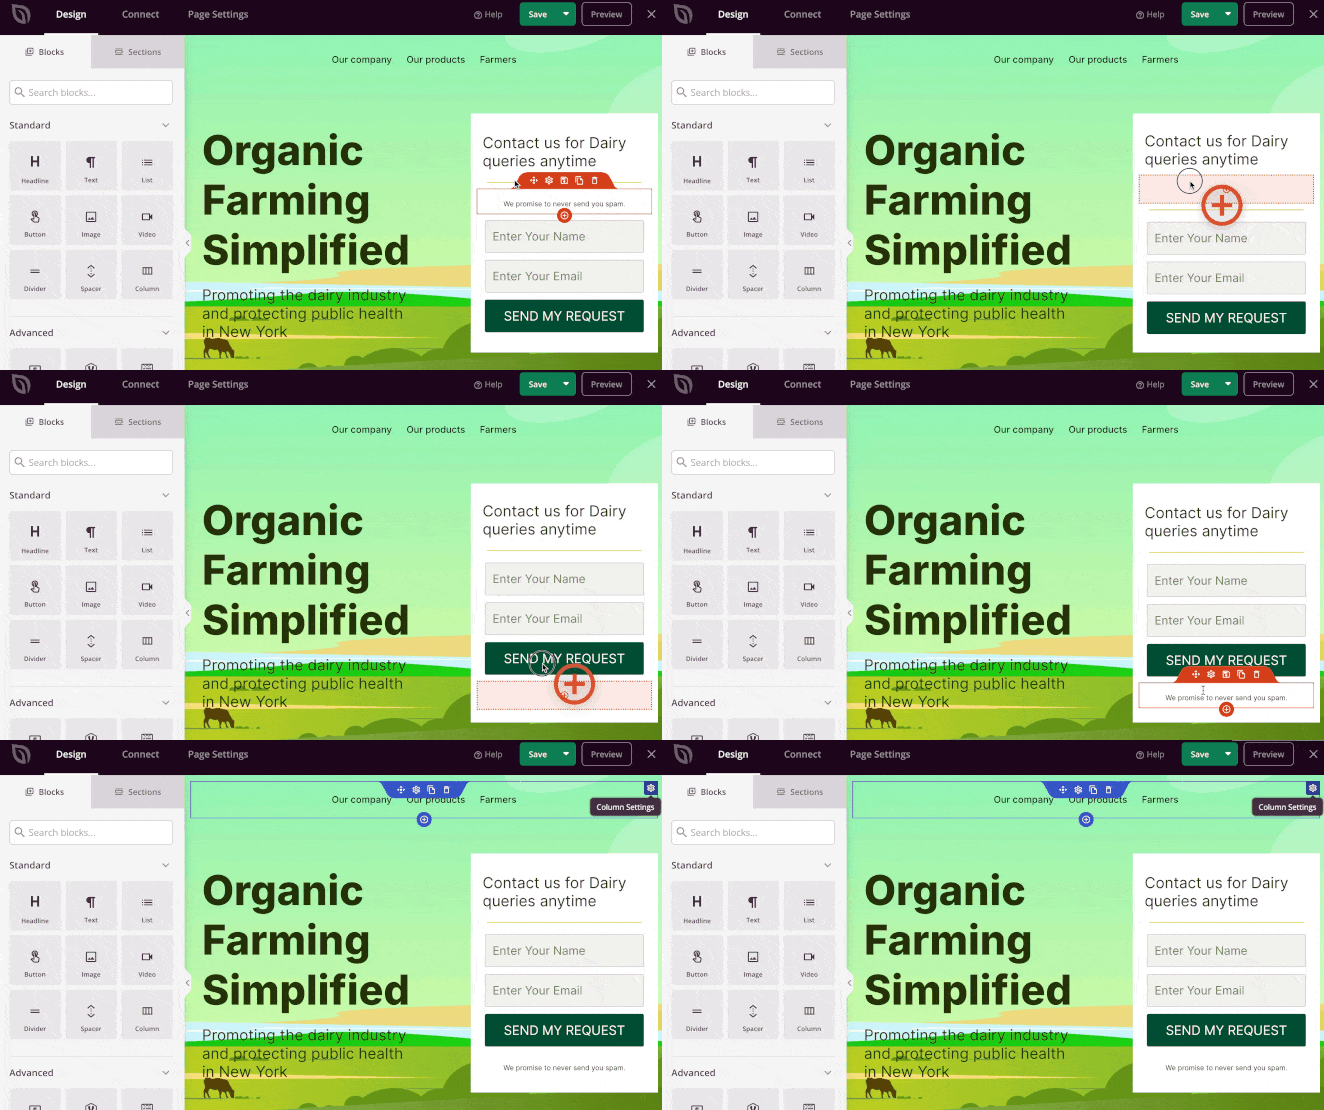
Remember, you’re not limited to what’s in the template. Feel free to delete elements you don’t need, add new ones, or completely rearrange the layout.
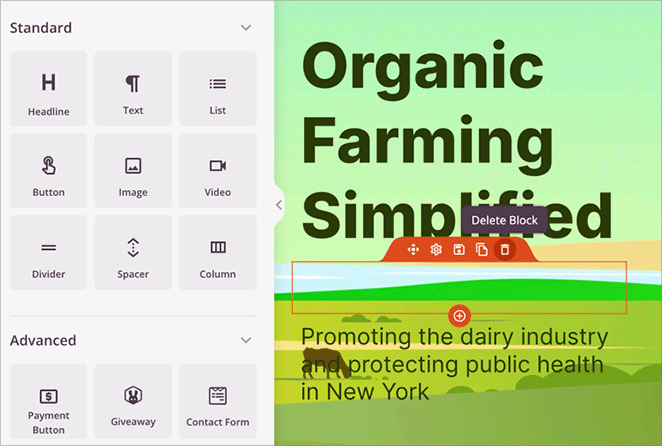
The goal is to create a landing page that fits your specific needs.
Step 4. Add Your WordPress Form
Now that you’ve customized your layout, it’s time to add the most important part of your form landing page in WordPress: the actual form.
SeedProd makes this incredibly easy with its “Contact Form” block.
Look for the “Contact Form” block in the left sidebar of the page builder. This is how you’ll add a form to your landing page in WordPress with just a few clicks. Then, drag and drop this block onto your landing page where you want your form to appear.
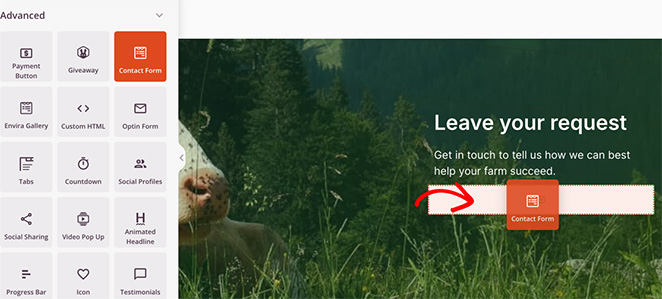
If you don’t have WPForms installed yet, don’t worry. SeedProd will prompt you to install the plugin. Just follow the on-screen instructions to get it set up.
Once the WPForms block is on your page, you’ll see an option to select a form. If you’re new to WPForms and haven’t created any forms, click the “+New Form” button.
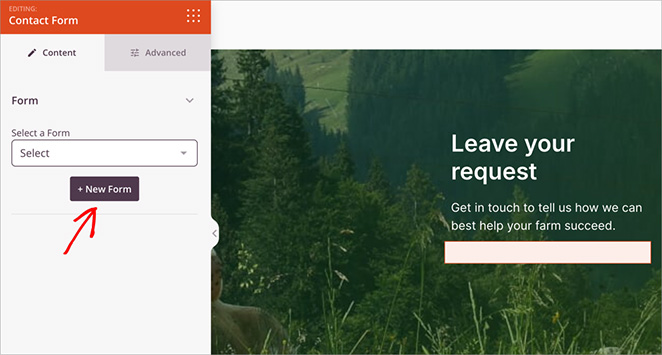
This will open the WPForms builder in a popup window within the page builder. It’s like magic – you can create your form without leaving your landing page.
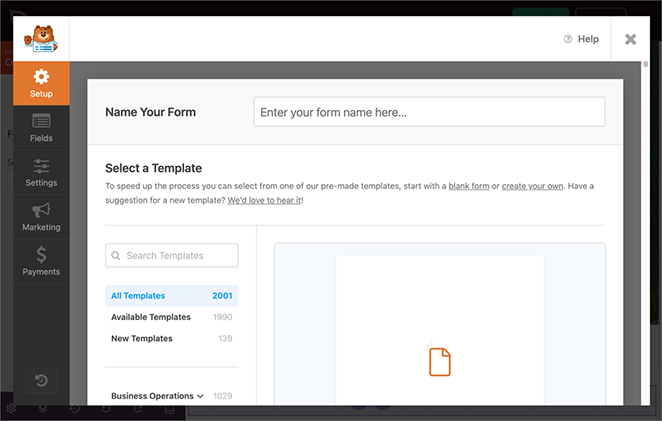
Not sure how to make one? Check out this guide on how to add a contact form in WordPress. It’ll walk you through the process step by step.
After you’ve created or selected your form, you can customize how it looks on your landing page. Click on the form block in your page preview, and in the “Content” and “Advanced” tabs, you’ll see options to :
- Adjust the form’s spacing
- Show or hide the form’s labels
- Customize the text color and style
- Add animation effects
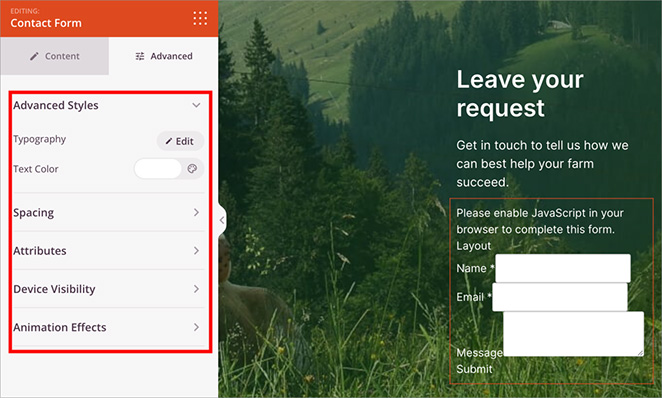
Pro Tip: Don’t be alarmed if your form doesn’t display correctly in the builder. This is normal and doesn’t reflect how it will look on your live page. Rest assured, once you publish your landing page, the form will display correctly with all its fields and styling intact.
Step 5. Connect Your Email Marketing Service (Optional)
If you’re creating a WordPress lead capture landing page, SeedProd’s built-in opt-in forms make it easy to grow your list right on the page.
Look for the “Optin Form” block in the left sidebar. Then, drag and drop it onto your landing page, where you want your opt-in form to appear.
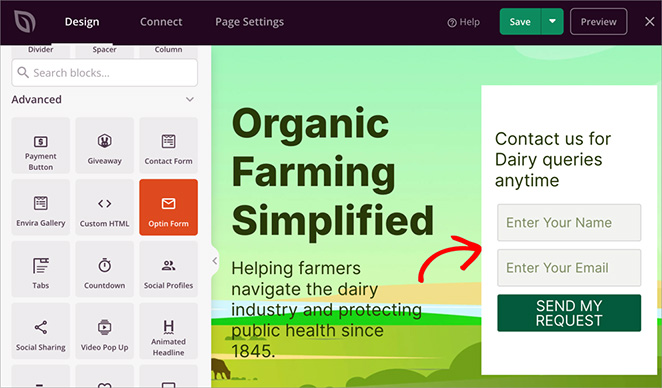
To make the most of this feature, you’ll want to connect SeedProd to your email marketing service. This ensures that email addresses collected through your opt-in form are automatically added to your email list.
To do this, click on the “Connect” tab in the top menu of the page builder. Here, you’ll see a list of supported email marketing services.
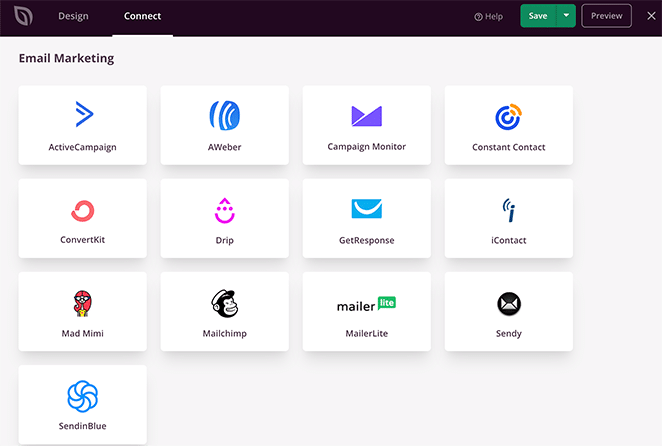
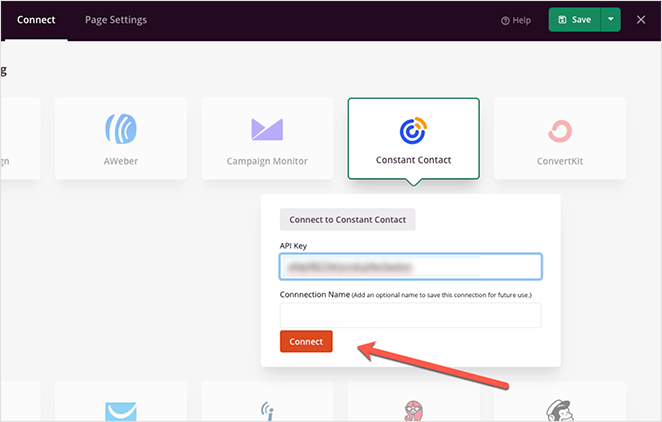
Find yours and click on it. Then, follow the prompts to enter your API key or authorize the connection. (You can usually find your API key in your email marketing service’s account settings.)
Pro Tip: Even if you use a WPForms contact form, you might still want to add a separate opt-in form. This gives visitors a quick and easy way to join your mailing list without filling out a longer contact form.
Step 6. Publish Your Landing Page with Form
Before you publish your landing page, it’s best to make sure it looks good on all devices. Start by finding the preview icon in the bottom toolbar of the SeedProd page builder and click it to open the preview mode.
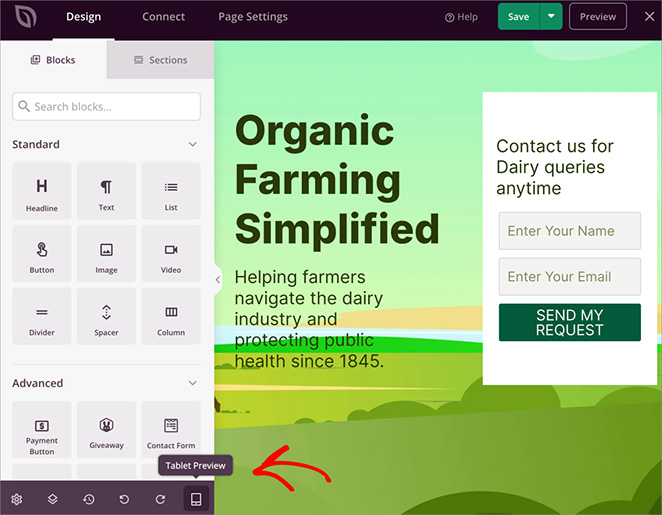
You can also click the device icons to cycle through mobile, tablet, and desktop views.
Take your time to carefully check how your page looks on each device type. If you notice any issues, don’t hesitate to make any necessary changes in the editor.
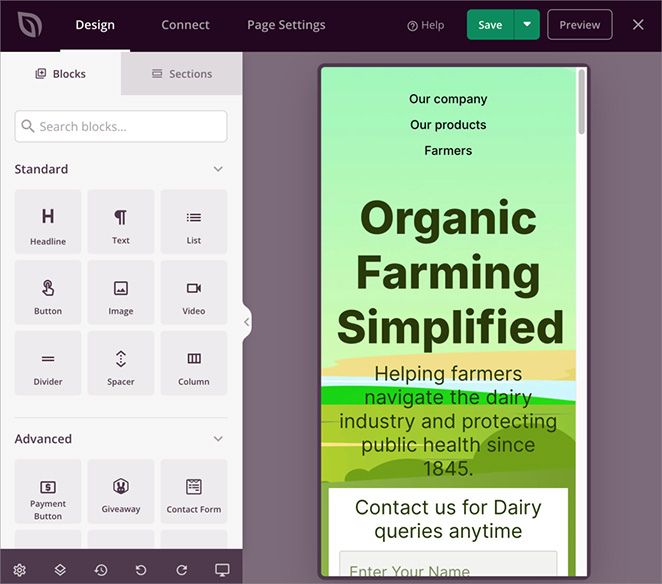
When you’re satisfied with how your page looks, it’s time to publish. Look for the “Save” button in the top-right corner and click the dropdown arrow next to it. From there, select “Publish”.

Once published, you can preview your live page to see exactly how it looks to your visitors.

Congratulations! Your landing page with a form is now live and ready to start collecting leads or responses.
Here is a preview of the contact form I added to my landing page:
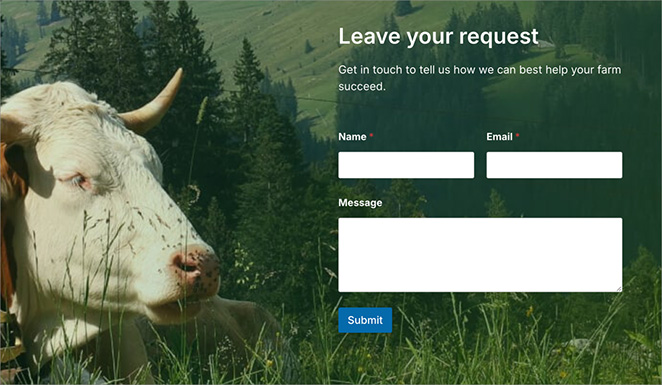
Remember, you can always return to the SeedProd editor to make changes or updates to your page as needed. This allows you to continue optimizing your landing page for better performance.
Preguntas frecuentes
Can I use conditional logic in my WordPress landing page forms?
Yes, you can use conditional logic in your WordPress forms using a form plugin that supports this feature, such as WPForms. Conditional logic allows you to show or hide form fields based on user input, creating a more personalized and efficient form-filling experience.
How do I add a thank you page after form submission in WordPress?
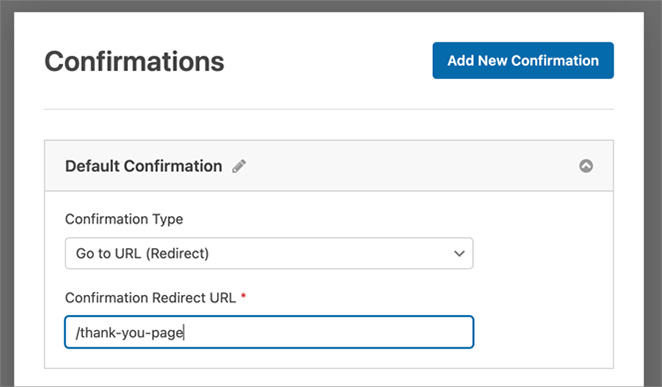
Most form plugins allow you to set up a custom confirmation message or redirect to a thank you page after form submission. In WPForms, for example, you can easily configure this in the form settings by selecting “Go-to URL (Redirect)” as the confirmation type and entering your thank you page link.
How can I keep my WordPress forms secure?
To keep your WordPress forms secure, use a reputable form plugin with security features like CAPTCHA or honeypot fields to prevent spam submissions. Additionally, ensure your WordPress site is up-to-date, use strong passwords, and consider installing a WordPress security plugin for overall website protection.
What’s the best way to build a landing page with a form in WordPress?
The easiest way is to use SeedProd and WPForms. SeedProd lets you create landing pages visually, and WPForms makes it easy to add contact or signup forms without code.
Build a Landing Page with Form Today
Want to create a WordPress landing page with a form? It’s easier than most people think, and with the right tools, you can do it in minutes.
With tools like SeedProd and WPForms, you can easily design professional-looking pages that capture leads and grow your business.
For more insights on creating effective landing pages and forms, check out these helpful articles:
- How to Design Mobile-Friendly Landing Pages That Convert
- Mejores prácticas de página de destino para aumentar las conversiones
- How to Create a High-Converting Lead Capture Page
- Cómo crear una página de agradecimiento en WordPress
- The Ultimate Guide to A/B Testing Your Landing Pages
Gracias por leernos. Nos encantaría conocer tu opinión, así que no dudes en dejarnos un comentario con tus preguntas y comentarios.
También puede seguirnos en YouTube, X (antes Twitter) y Facebook para obtener más contenidos útiles para hacer crecer su negocio.


