

TL;DR: How to Add a WordPress Before and After Slider (No Code)
A before and after slider lets visitors drag a handle to reveal a transformation, and you can add one to WordPress without touching code using SeedProd’s Before After Toggle block.
- Install SeedProd: Download the plugin, copy your license key, and activate it in WordPress.
- Create your layout: Open the Theme Builder or Landing Page Builder and choose a template to edit.
- Add the block: Find the Before After Toggle block in SeedProd’s block panel and drag it into your design.
- Enable your changes: Save and publish, then turn on the SeedProd theme toggle to make your layout live.
You’ve done the work, you have the photos, and you want visitors to feel the transformation. But two images sitting side by side just don’t land the way you hoped, and people scroll past without stopping.
A WordPress before and after slider changes that. Visitors drag a handle across a single image to reveal the transformation themselves, and that moment of interaction makes the result feel real in a way static photos never do.
I’ll show you exactly how to add one to WordPress without touching a line of code, using SeedProd’s built-in Before After Toggle block.
How Does the Before and After Photo Effect Work?
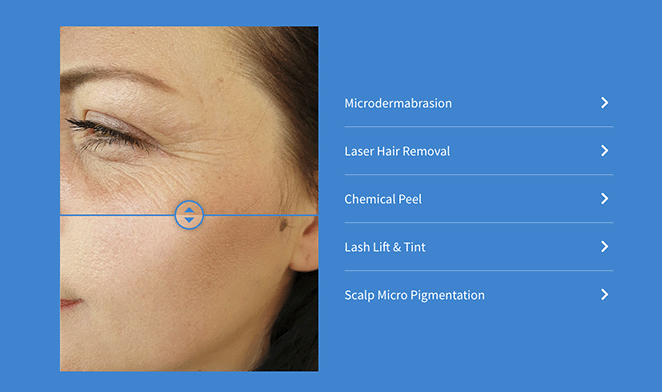
A before and after photo slider stacks two images and adds a draggable handle. Visitors slide to control how much of each version they see, which makes the transformation feel participatory rather than passive.
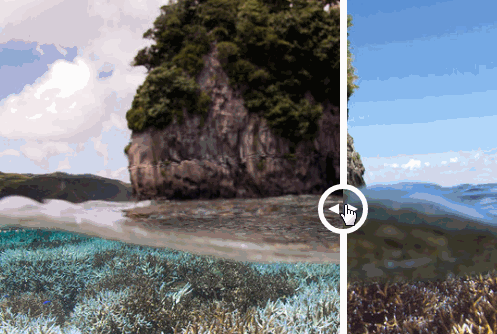
A dentist showing whitening results, a salon showing a haircut transformation, or a contractor showing a renovation — the slider lets visitors drag to see the change themselves rather than trust a static photo.
It’s a straightforward way to showcase changes directly on your site. Next, I’ll show you how to add this effect in WordPress.
How to Add Before and After Photo Sliders in WordPress
Most WordPress sites need a plugin to add this effect. The tutorial below shows you how to do it with SeedProd.

SeedProd is a drag-and-drop website builder that lets you build WordPress pages, themes, and landing pages without code. It includes a native Before After Toggle block, which means you don’t need a separate slider plugin. SeedProd handles everything in one place.
You can also use SeedProd to create a coming soon page and put WordPress in maintenance mode. Everything you make is 100% mobile responsive, ensuring your site is easy to use across mobile devices.
Click the button below to download the SeedProd plugin, then follow the steps to embed a before and after photo slider on your website.
Step 1. Install and Activate SeedProd
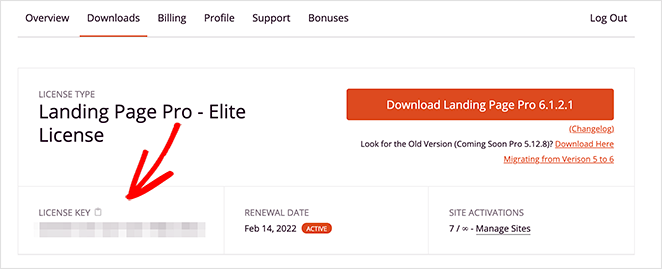
After downloading the plugin, find the Downloads tab in your SeedProd account, and copy your license key.
Now, go ahead and upload the plugin to your WordPress site. If you need help, you can follow this step-by-step guide on how to install a WordPress plugin.
Once SeedProd is installed, navigate to SeedProd » Settings from your WordPress admin and paste the license key you copied earlier.
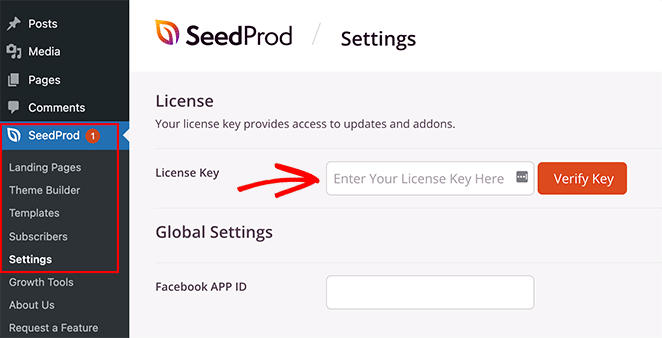
Click the Verify Key button to activate your license, then move on to step 2.
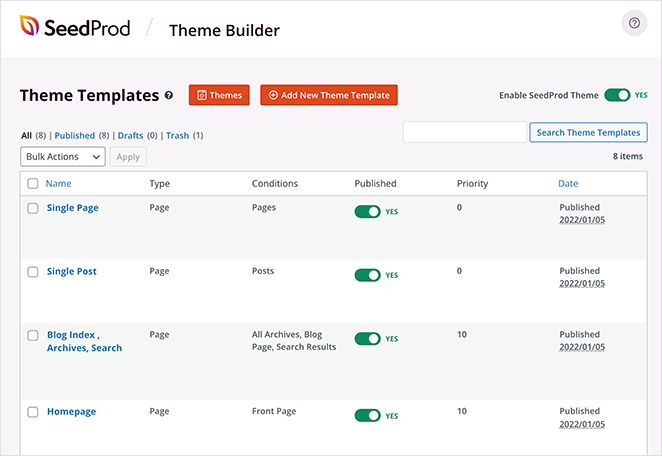
Step 2. Create Your WordPress Layout
SeedProd gives you two options for where to place your slider: the Theme Builder, which replaces your entire WordPress theme with a custom design, or the Landing Page Builder, which creates standalone pages alongside your existing theme.
This guide uses the Theme Builder to create a custom WordPress theme and edit the homepage template, but the steps for adding the slider block are the same either way.
Once you’ve created a new layout, move to step 3 and add the slider to your design.
Step 3. Add the Before and After WordPress Block
After creating your layout, open the page you want to edit with SeedProd’s page builder.
Since we’re editing the homepage of our WordPress theme, we’ll go to SeedProd » Theme Builder and click Edit Design under the Homepage template.

On the following screen, you’ll see a layout similar to the one below:
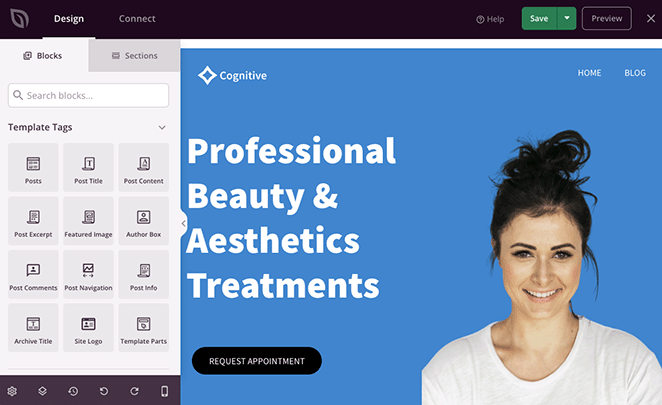
On the right is a live preview of the template you chose in step 2, and on the left are blocks and sections you can drag and drop onto your design.
For example, you can edit headings by clicking on them and typing in your new content directly on the live preview.
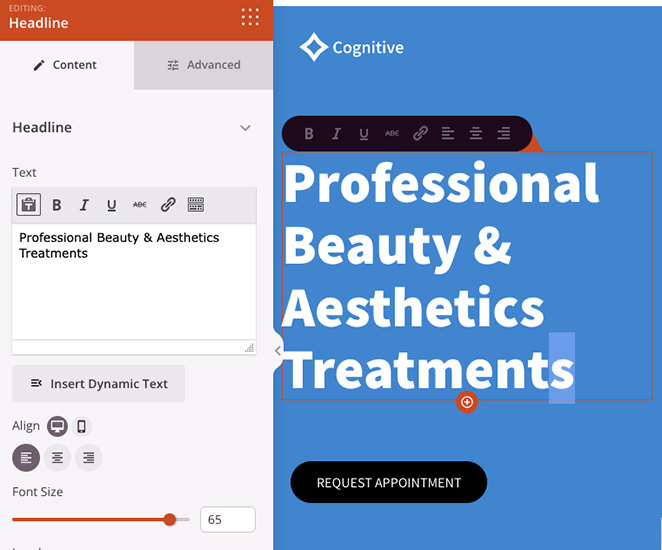
Or, you can edit the text in the settings panel on the left-hand side, which includes countless customization options.
Customize your template until it starts looking the way you want.
Now let’s look at adding features that your template may not automatically include. For example, the Website Kit we chose doesn’t have a before and after photo slider, so we’ll need to add it ourselves.
To do that, scroll through the WordPress blocks on the left until you find the Before After Toggle. Then drag it into position on your live preview.
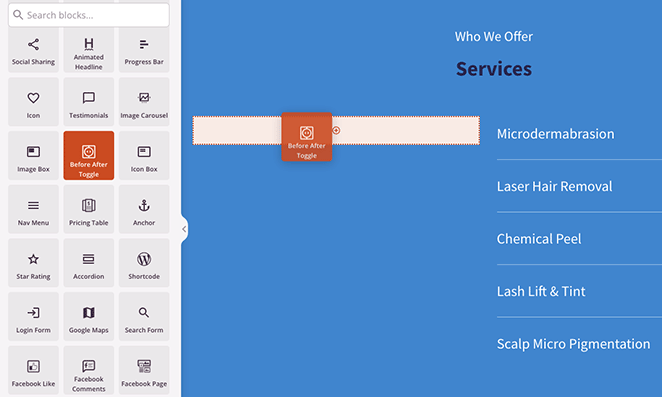
When you click the block, you’ll open its customization options in the left-hand settings panel. This is where you can add your before and after images, change the styling, and more.
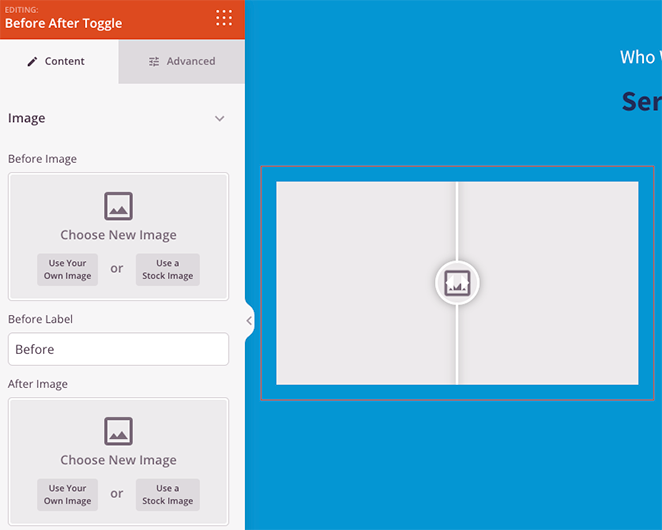
Let’s start by adding the first image, which will typically be your “before” photo. You can do this by clicking the Use Your Own Image option and either uploading a new photo or choosing one from your WordPress media library.
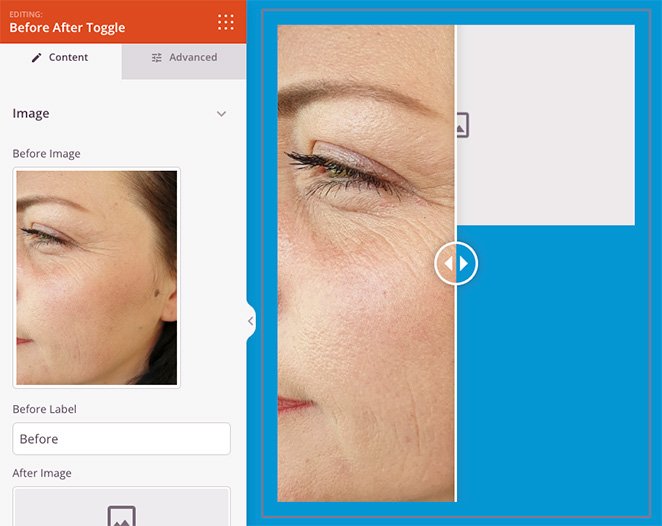
Now repeat this step for the “after” image. You can edit the labels for each image by replacing the names in the text fields.
With your images in place, let’s look at a few more settings.
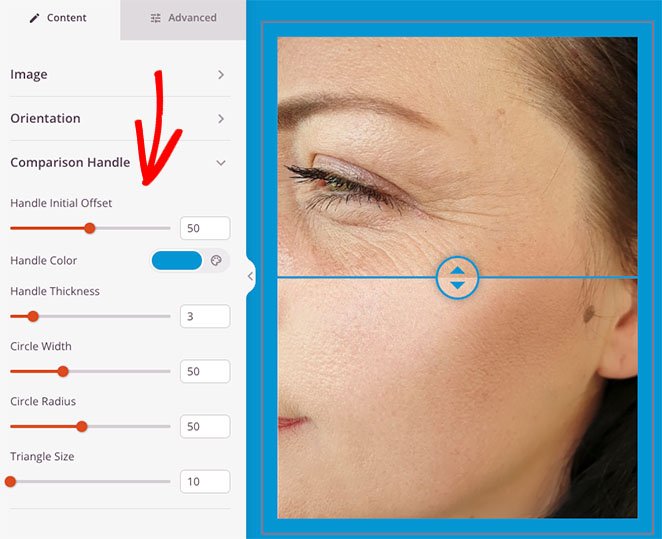
Under the Orientation heading, you can make the before and after slider vertical instead of horizontal.

You can also make the slider move when you hover over the image with your cursor and apply a color overlay to the photos.
When you open the Comparison Handle heading, you’ll see settings to change the slider color, width, radius pixel size, and more.
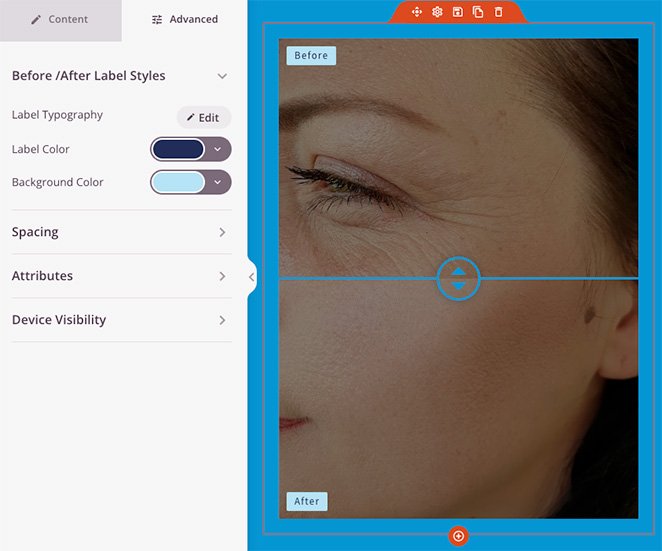
You can find even more settings by clicking the Advanced tab. For example, you can change the label typography and color, adjust the block spacing and attributes, and hide certain elements on mobile screens.
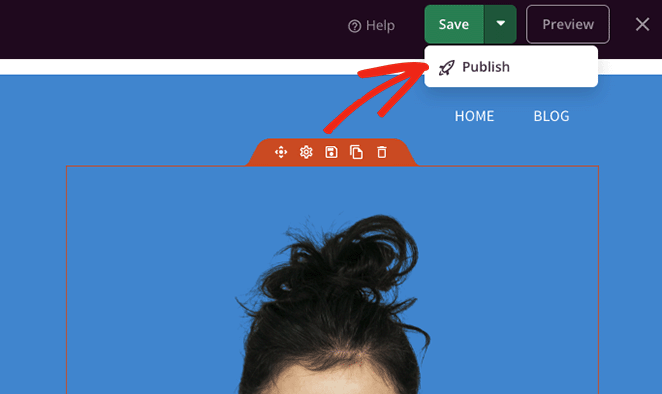
When you’re happy with how the before and after photo slider looks, click the Save button in the top-right corner of your screen, and click Publish.
If you’re creating a landing page, you can now preview your page and see your before and after image slider in action. But if you’re making a custom WordPress theme, you’ll need to complete step 4.
Step 4. Enable Your Changes
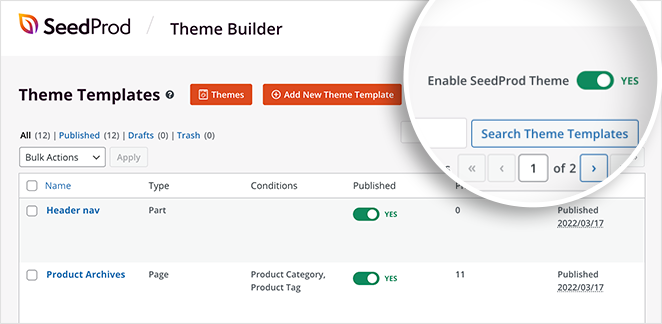
Even though your changes are saved and published, you still need to make your WordPress theme live. Don’t worry, this step is quick.
Go to SeedProd » Theme Builder from your WordPress dashboard, and turn the Enable SeedProd Theme toggle to the “Yes” position. That’s it!
Now you can head to your website’s front end and take your new WordPress before and after slider for a spin.
Before and After Photo Slider FAQs
Can I add multiple before and after sliders on one page in WordPress?
Yes. SeedProd’s Before After Toggle block can be added anywhere in your layout, so you can place multiple sliders on a single page. Each block is independent and holds its own images and settings.
There’s no limit to how many you can use, though more sliders on one page can slow load times if the images aren’t optimized.
Does the before and after slider work on mobile devices?
Yes. SeedProd’s Before After Toggle block is fully responsive, so the slider works on touch screens as well as desktop. Visitors swipe rather than drag on mobile, and the experience translates naturally.
For best results, use images that are at least 800px wide and keep the slider in a single-column layout on mobile. You can use SeedProd’s Advanced tab to adjust visibility and spacing for different screen sizes.
How do I switch the slider from horizontal to vertical in WordPress?
In SeedProd’s Before After Toggle block settings, find the Orientation option. Clicking it switches the drag direction from left-right (horizontal) to top-bottom (vertical).
Vertical orientation works well for comparisons where the change is more noticeable along a vertical axis, like haircuts or height-based renovations.
What image size should I use for a before and after slider?
Both images should be the same dimensions. If they’re different sizes, the slider may display inconsistently. A width of 800-1200px works well for most layouts.
Keep file sizes under 150KB each by saving JPEGs at 70-80% quality. Mismatched image dimensions are the most common cause of a lopsided or jumpy slider.
Can I add a before and after slider to WordPress without a plugin?
Technically yes, but it requires custom JavaScript and CSS that most WordPress site owners can’t write themselves. You’d also need to maintain that code through every WordPress update.
A plugin like SeedProd handles the technical side for you, and the drag-and-drop interface means no code at any point in the process.
You’ve added a WordPress before and after slider that shows your work in the most compelling way possible. Visitors get to discover the transformation themselves instead of just looking at static images, which is exactly the point.
Thanks for reading! We’d love to hear your thoughts, so please feel free to join the conversation on YouTube, X and Facebook for more helpful advice and content to grow your business.


